Release highlights
General
Manage article price indexing within Recreatex
The new Article price indexing processing tool in Recreatex allows users to adjust article prices in bulk directly within the application. It replaces the previous workflow that required access to the external SyDelCo application and manual Excel-based processing. Price indexing can now be completed entirely within Recreatex through a guided, form-based workflow.
The new tool is located under General > Basic data > Articles > Processing > Article price indexing
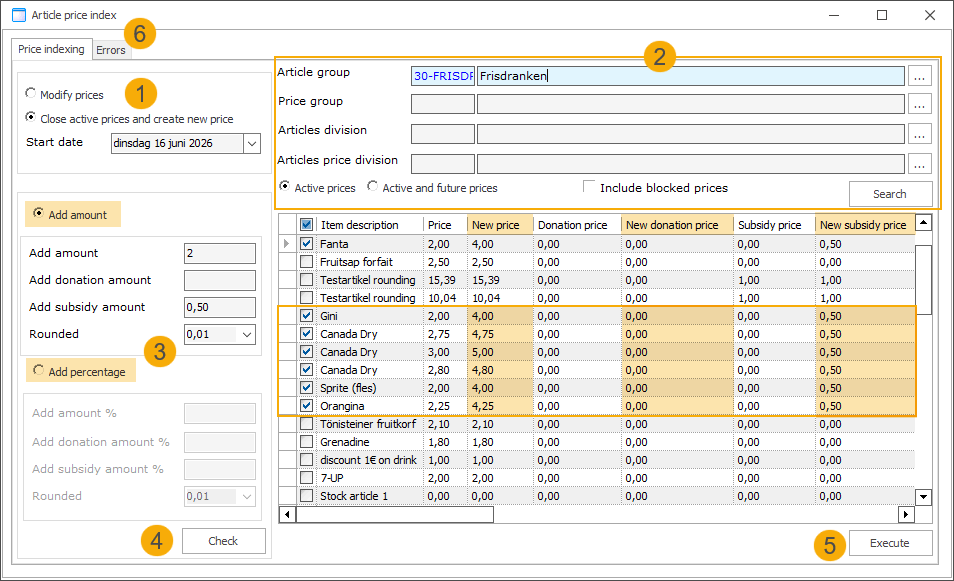
Choose how the prices should be updated:
Modify prices: Adjusts the existing price records.
Close active prices and create new price: Closes the current active prices by setting an end date and creates a new price record.
Start date: Set the date on which the new price should become active.
Use the criteria below to narrow down the selection of article prices you want to adjust. Then click Search to display the results in the overview section.
Select one or more of the following:
Article group
Price group
Article division
Article price division
Choose which prices to include based on their status:
Active prices: Only the currently active prices based on today's date or the specified start date.
Active and future prices: Includes active prices and prices with a future start date.
How active prices are determined
For Modify prices, active prices are determined based on today's date.
For Close active prices and create new price, active prices are determined based on the specified start date.
Blocked (checkbox): Select this option if blocked articles should be included in the selection.
Specify how you want to adjust the price.
Add amount: Enter a fixed amount to add to the article's sales price, donation price, and/or subsidy price.
Add percentage: Enter a percentage to add to the article's sales price, donation price, and/or subsidy price.
Rounding options: 0.01 (default), 0.05, 0.10, 0.50
Note
Negative values are supported for price decreases.
Select the price lines you want to modify and click Check. The updated prices are displayed in the overview, allowing you to review the changes before applying them permanently.
Click Execute to process the price modifications.
Any errors that occur during processing are displayed in the separate Errors tab. Review these records and process them manually.