Divide into participant groups
Warning
Dividing participants into participant groups is only useful if the registration was made by means of a method that makes sure that each participant of the registration is a known customer in Recreatex. If you use thus Registrations (comprehensive) and link several participants (that are not known by the system) to one registration customer, you will NOT be able to divide these participants into participant groups, since only the registration customer is considered a participant by Recreatex.
Dividing participants/employees into participant groups is possible in the tab Participant groups on activity level, but is however also possible in the activity planning. If required you can also link the employees to which the activity has been assigned to the participant groups.
In order to consult/modify the participant groups of a certain activity, you have to select the desired activity in the planning overview and then click on  .
.
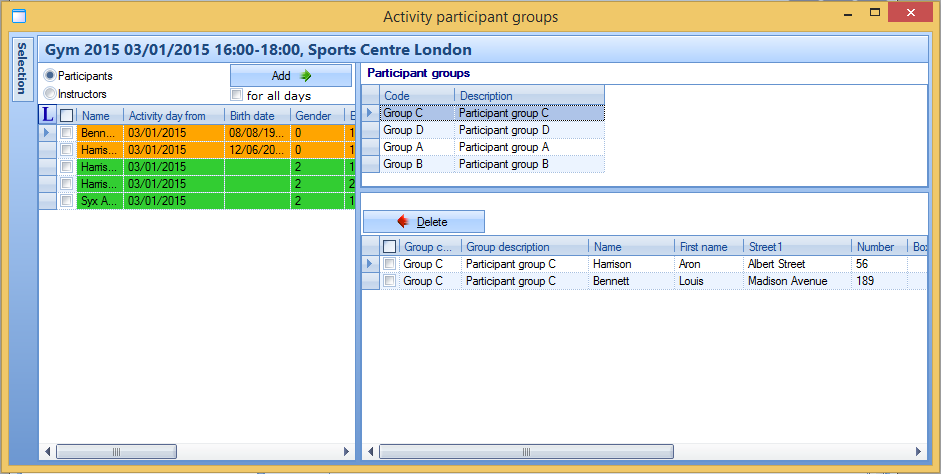
The window below will appear:
 |
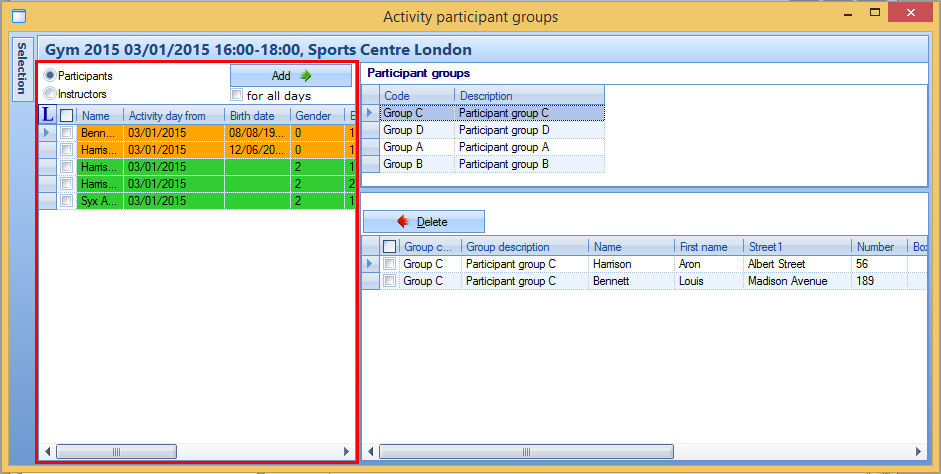
The window is divided into different partial windows. In the selection window you will see - dependent on your selection - an overview of all registered participants for the current activity or of all employees (instructors) that are linked to the activity.
Participants/monitors that are already in a participant group, are marked in orange and participants/monitors that are not yet in a participant group are marked in green.
 |
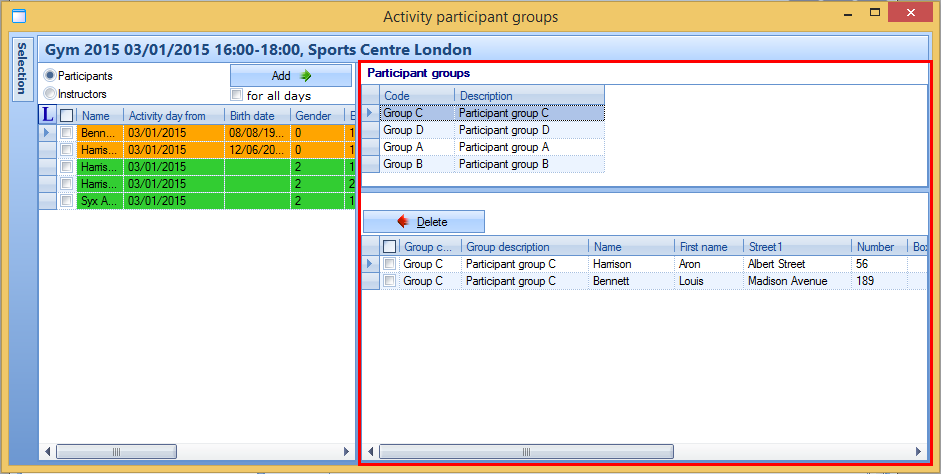
In the partial window Participant groups you can see the possible participant groups on top (created under Registrations > Settings > Participant groups) and below you can see an overview of the participants/instructors that are currently in the selected participant group.
 |
In order to put participants/instructors in the selected participant group, you first have to determine if you want to do the action for all activity days or not.
 |
Afterwards, you select the desired participants/monitors and click on Add. The ticked off participants/instructors are immediately put in the selected participant group and this result can be seen in the lower part of the partial window Participant groups. Use this method to link all participants/instructors to the desired participant groups.
If required you can delete participants/instructors again from the selected participant group by ticking them off and clicking on Delete. The selected participants/instructors will be deleted from the participant group and will reappear in the selection list.
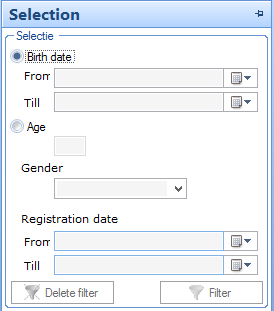
On the left of the window there is also the button  , which allows to reopen the hidden window Selection. This window allows you to filter the available participants/instructors in different ways, for example to see the desired participants/instructors that meet specific selection criteria faster.
 |
If you have filled in the selection criteria, you have to click on Filter.
In the overview a filter icon will appear, which indicates that the currently listed participants/instructors are shown on the basis of an active filter.
In order to delete the active filter, you have to click on Delete filter in the window Selection.
Note
If you want to you can (automatically) hide or pin the partial window Selection by clicking on  /
/ .
.
Another way to divide a participant into a participant group is by means of Registrations > Processing > Link to participant group in batch.