Settings
Go to General > Settings.
Note
General settings are lists of options, types or templates that are used across the whole Recreatex application, called up by the user when filling in the different forms. Well-maintained and complete lists promote consistency and efficient use of the system.
The following settings are available:
Finances
Go to General > Settings > Finances to access all finances-related settings.
The following financial settings are available:
Ledger accounts
A ledger account is a collection of similar expenses or receipts that allow you to gain insight into the financial flows of the company.
Go to General > Settings > Finances > Ledger accounts to open the list of all ledger accounts.
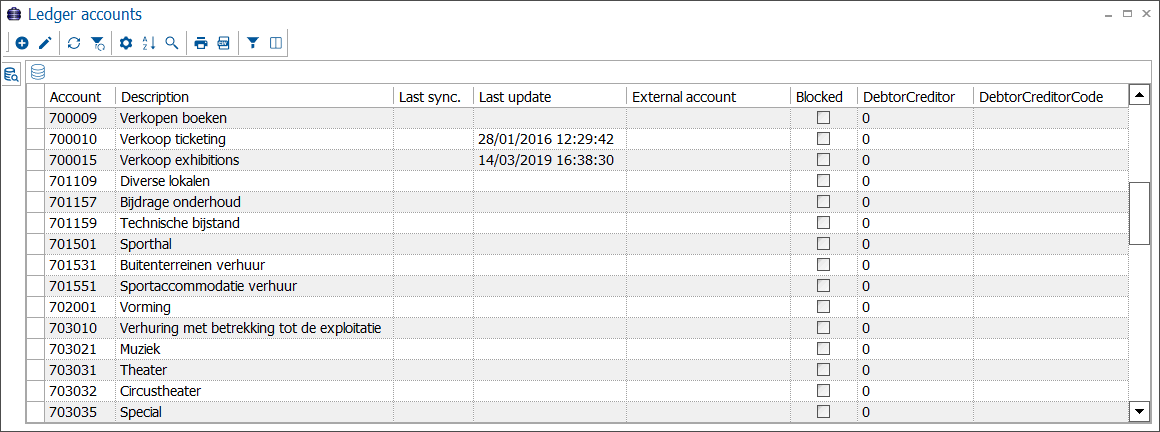 |
To create, modify or delete ledger accounts use the available framework functionality:
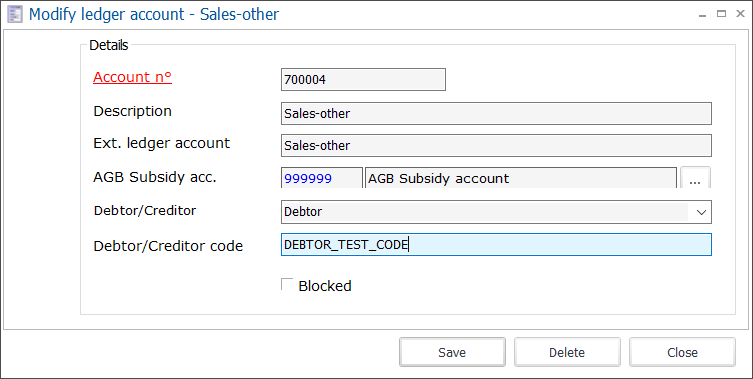 |
Account n° | A unique ledger account number within Recreatex (not to be confused with a bank account number or a giro account number) |
Description | A description of the ledger account. |
AGB Subsidy acc. | Link an AGB subsidy account to your ledger account. See AGB price subsidy system for detailed information. |
Debtor/Creditor | You can specify the type of ledger account which may be necessary for some types of financial exports.
|
Debtor/Creditor code | When the ledger account type is Debtor or Creditor, you can fill in the code here. If the ledger account type is not set*, this code field will remain read-only. |
External ledger account | Possibility to link an external ledger account number. |
Blocked | Check this option to block a ledger account number. The account will no longer appear in the different overviews within Recreatex. |
Analytical accounts
Analytical accounts allow you to split up purchases and sales into well-considered account types in order to be able to follow up on the profitability of a product.
Go to General > Settings > Finances > Analytical accounts to open the list of analytical accounts.
 |
To create, modify or delete analytical accounts use the available framework functionality:
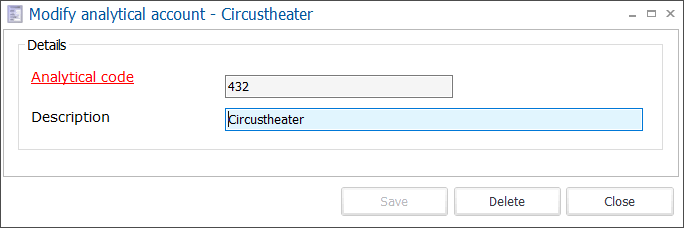 |
Analytical code | A unique analytical account number. |
Description | A description of the analytical account. |
Payment methods
A payment method is a way customers use to pay for a product or service. The most common payment methods are e.g. cash, invoice, Enviso Pay, direct debit and so on.
Go to General > Settings > Finances > Payment methods to open the list of payment methods.
 |
To create, modify or delete payment methods use the available framework functionality.
Important
The payment method configuration is done on multiple tabs. First, fill in the tab General and click Save. Then continue with the configuration on the remaining tabs.
General
In the tab General, fill in all basic data of the payment method.
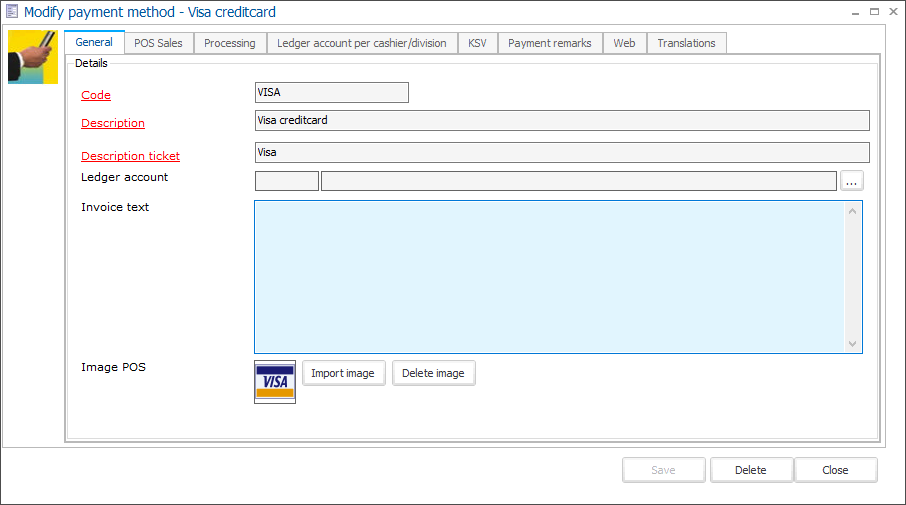 |
Code | The mandatory code must be unique and preferably descriptive enough so that you can identify the payment method easily. |
Description | This description is only shown on the screen within Recreatex. |
Description ticket | This description is printed on the receipt. |
Ledger account | Ledger account linked to the payment method. |
Invoice text | This text will appear on each invoice that is generated in Recreatex and is only relevant for payment methods with invoice processing. |
Image POS | It is possible to import an image for each payment method. The image is shown on the POS menu. |
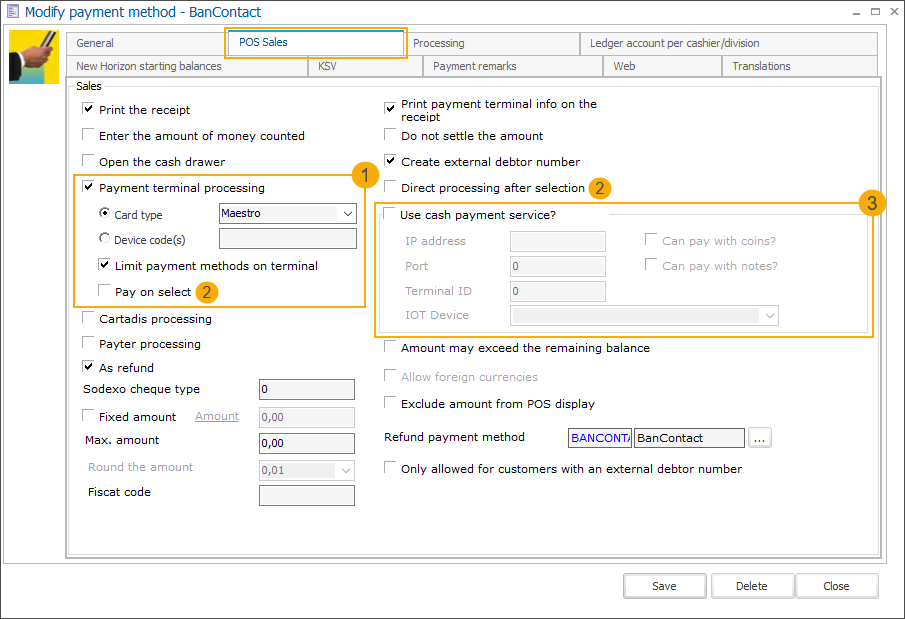
POS sales
In the tab POS Sales, specify the payment method settings for use in the Recreatex POS module.
 |
Print the receipt | Option to print the receipt if this payment method has been used to pay for a sale. | |||
Enter the amount of money counted | If selected, the payment method will appear in the window Enter money counted and allow the cashier to enter the amount received with this method, when closing the POS shift. | |||
Open the cash drawer | If selected, the cash drawer will automatically open when a sale has been paid for using this payment method. | |||
Payment terminal processing (1) | Required module license: Integration with payment terminal - nr. 051 This option applies if there is a physical link between the computer and the payment terminal. The link assures that the payment data is automatically transferred to the payment terminal. When you select this option, additional settings become available:
| |||
Cartadis processing | This option indicates that payment with this payment method is processed through a Cartadis terminal. | |||
Payter processing | This option indicates that payment with this payment method is processed through a Payter terminal. | |||
As refund | Select this option to allow the use of this payment method as a refund payment method. You can refund money e.g. in cash or as a credit note. Some payment methods cannot be used for refunds (e.g. electronic payment methods, payment methods with direct debit processing and so on). | |||
Sodexo cheque type | Depending on the type of voucher, fill in the respective number.
| |||
Fixed amount | This option allows you to link a fixed amount to the payment method. An example is the use of luncheon vouchers with a fixed amount. Each time the payment method is chosen, the predefined fixed amount is added to the payment. ImportantNote that it is not possible to change this amount afterwards at the cash register. | |||
Max. amount | Here you can define the maximum amount that can be paid with this payment method. | |||
Round the amount | Possibility to round the total amount in case of cash payments to 1 or 5 cents. For additional explanation, see Round cash payments. | |||
Print payment terminal info on the receipt | If this setting is active and a customer utilizes this payment method at a payment terminal, the payment terminal information will be printed on the receipt, including both, the payment terminal information intended for the cardholder and the merchant. NoteFor Edge payment terminals only the payment terminal info intended for the cardholder is included on the receipt by default. Printing the payment terminal info intended for the cardholder and/or for the merchant separately is possible but must be configured on the payment terminal level (Edge Agent). | |||
Do not settle the amount | If this option is NOT selected and if various payment methods are used, the system will, if necessary, adjust the amounts in the function of the total amount to be paid. In other words, if you select a second payment method with an amount that is higher than the amount still due, the amount of the first payment method will be automatically adjusted. If this option is configured, this kind of settlement will not be applied and the amounts entered by the cashier will be registered. WarningThe functioning of the parameter Do not settle the amount depends on the (umbrella) parameter on POS level (module Sales) - Do not settle payment method amounts. If this parameter is configured on the POS level (and a settlement is thus not allowed), the amounts on the cash register will never be settled, regardless of the setting on the payment method level. For additional information, see Point of sales settings in the tab Various. | |||
Create external debtor number | If you select this option on a payment method which is used as a default payment method for new customers, an external debtor number will automatically be assigned when a new customer is created (at the POS, backoffice or through import). To activate the automatic creation of an external debtor number, go to General > Parameters > tab Addresses > sub-tab Finances and select a payment method with the option Create external debtor number configured (1). Then check the option Automatically add external debtor number (2). 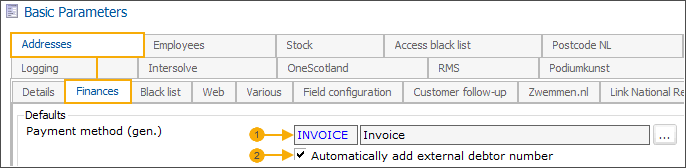 This option would typically be used for payment methods such as Invoice, which requires an external debtor number. | |||
Direct processing after selection | When selected, the cashier cannot fill in an amount and the payment is directly registered and closed. ImportantEnabling the setting Direct processing after selection will automatically disable the setting Pay on select. (2) | |||
Use cash payment service? (3) | Set up a cash payment service (Antenor) in Recreatex for cash payment terminals.
| |||
Amount may exceed the remaining balance | If configured, it allows the cashier to add an amount on top of the actual sale amount in case the customer is asking for additional cash. The customer pays the sale amount and the additional amount with this payment method and receives the requested amount in cash. | |||
Allow foreign currencies | Configuration possibility for cash payment methods. For complete information on how to configure the use of foreign currencies, see Multi-currency. | |||
Exclude amount from POS display | If selected, the amount paid with this payment method will not be shown on the POS display. | |||
Refund payment method | Here you can link the actual payment method that should be used for refunds of sales paid with the current payment method. E.g. you can configure that for sales paid with payment method VISA, a consumption voucher should be used in case of refund. ImportantIt is also possible to link a default refund payment method on POS level which will override the refund payment method configured on the payment method level. To configure refund payment method on POS, go to Sales > Settings > Points of sale > open your POS > tab General. | |||
Only allowed for customers with an external debtor number | If selected, the payment method will only be allowed when a customer has an external debtor number registered in the system. E.g. customers without a registered external debtor number will not be allowed to pay by invoice payment method. |
Processing
In the tab Processing, you determine how the payment method is processed.
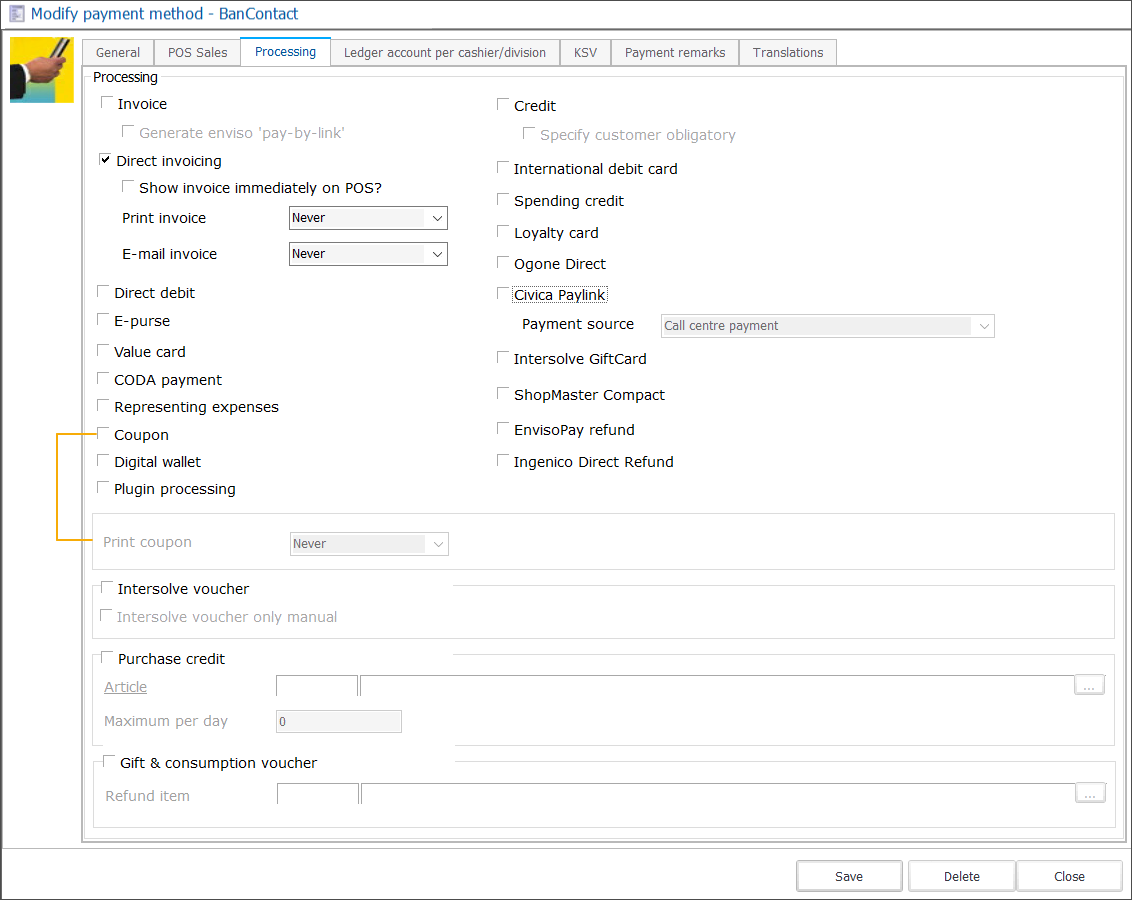 |
Invoice | Invoice processing assures that if a sale is registered on this payment method you will be able to generate an invoice afterwards (under Sales > Invoicing).
|
Direct invoicing | If a sale is registered with this payment method an invoice is generated immediately and can be printed or sent by email.
|
Direct debit | If a sale is registered with this payment method a direct debit contract will be created. |
E-purse | If a sale is registered with this payment method the amount to be paid will be deducted from the (digital) e-purse of the customer. |
Value card | If a sale is registered with this payment method an underlying extra record is created to allow exports to external (accounting) applications. E.g. VISA or Mastercard are often considered to be value cards since the payments are not received until the end of the month. |
CODA payment | This type of payment method processing is used to manually check off payments in the CODA lines. You set this payment method under Sales > Parameters > CODA payments. If this payment method is selected at the cash register, an extra selection screen appears with an overview of all CODA payments that have not yet been checked off and have the amount corresponding to the charged amount. In case the amount is debited at the cash register, this line will be marked as manually checked off in the CODA lines. For more information, see CODA payments. |
Representing expenses | If a sale is registered with this payment method, a list of employees will be shown and an employee on which the sale should be registered has to be selected. |
Coupon | If a customer returns a purchased article, it is possible to give him a coupon instead of cash money by registering a negative sale on a payment method with this processing. ImportantTo be able to make negative sales with a payment method of the type Coupon, the option As refund has to be activated in the tab POS sales of the concerned payment method.
|
Digital wallet | When configuring the digital wallet cashless payment system, you need to set up a separate payment method of type digital wallet. For detailed information about the digital wallet payment system and how to configure it, go to Digital wallet. |
Plugin processing | Option required for payment methods where additional steps that need to be performed are configured via counter plugin (e.g. NetPay integration). |
Credit | If a sale is registered on a payment method with credit processing configured, the amount to be paid is linked as a credit to a card.
|
International debit card | Payments processed with this option are registered in column 19 of the cashbook. This is necessary for payments with international payment cards (e.g. MAESTRO). |
Spending credit | Is similar to E-purse processing. In this case, however, all sales with this payment method are registered without VAT since the VAT has already been charged when the spending credit of the customer was reloaded. This is not the case when the e-purse is reloaded. ImportantA payment method with spending credit processing can currently only be used in the modules POS and Files. |
Loyalty card | If a sale is registered with this payment method the amount to be paid is settled by applying possible discounts of an Intersolve pass (e.g. Rotterdampas - module Rotterdampas required). |
Ogone Direct | A payment method with this option is needed if you use the Ogone DirectLink integration. |
Civica Paylink | A payment method with this processing option is a part of the Civica Paylink configuration. This functionality supports multiple payment sources.
To configure a payment method, there are 2 possibilities:
|
Intersolve GiftCard | A payment method with this option is needed as a part of the Intersolve Gift card configuration. It allows triggering the flow to scan the card and deduct the amount to pay. |
ShopMaster Compact | If a sale is registered with this payment method, a barcode is printed on the receipt. The customer then goes with the receipt to the ShopMaster Compact terminal (Antenor), scans the barcode and pays with cash money in the machine. Once the payment is done, the customer goes back with the proof of payment and collects the purchased goods. |
EnvisoPay refund | A payment method with this option is needed as a part of the Enviso Pay refund functionality configuration. |
Ingenico Direct refund | To activate the use of Ingenico Direct API for refund in backoffice, you need to select this option on the payment method created for Ogone Direct processing. |
Intersolve voucher | A payment method with this option is needed as a part of the Intersolve voucher functionality configuration.
|
Purchase credit | If a sale is registered with this payment method, the full value of the purchase credit article is deducted from the outstanding credit balance of the given customer. If the purchase of the customer, however, exceeds the available credit amount, the extra amount will have to be paid with another payment method.
|
Gift & consumption voucher | If a sale is registered with this payment method the amount to be paid will be deducted from the amount available on the gift card or consumption voucher offered by the customer.
|
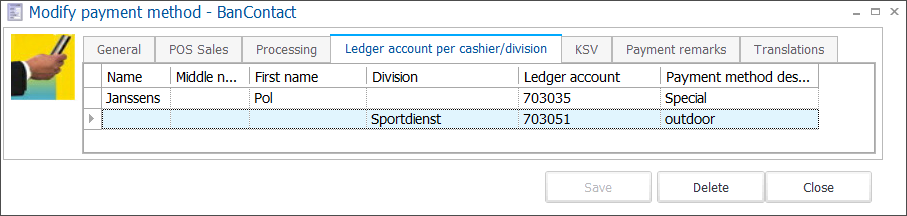
Ledger account per cashier/division
The tab Ledger account per cashier/division allows you to link ledger accounts to a cashier or a division, per payment method.
 |
To create, modify or delete ledger accounts for payment methods per cashier/division use the available framework functionality:
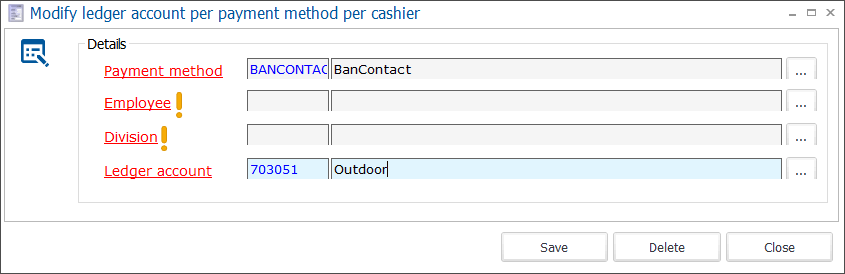 |
Payment method | The payment method to which you want to link a ledger account. |
Employee | Select the employee to which you want to link a ledger account. The field Division (!) becomes disabled. |
Division | Select the division to which you want to link a ledger account. The field Employee (!) becomes disabled. |
Ledger account | Select the ledger account you want to link to the selected employee or division, for this payment method. |
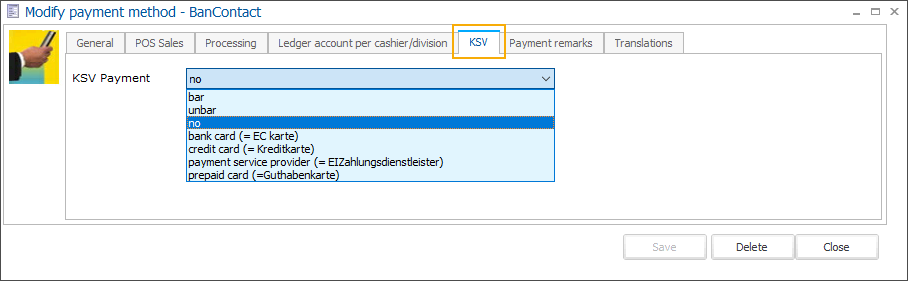
KSV
Integration of the Kassensicherungsverordnung (Germany-only).
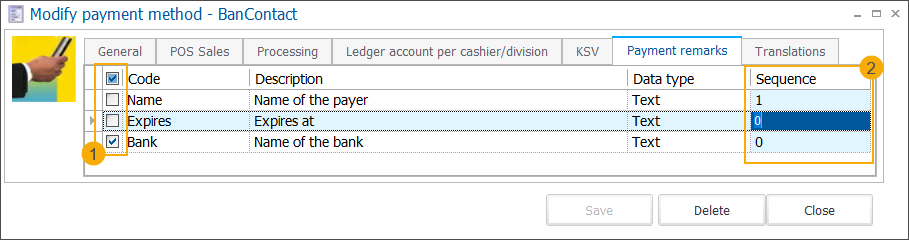
Payment remarks
In the tab Payment remarks, you can select one or more remarks that should be answered whenever this payment method is used.
You can add new payment remarks on the fly while editing a payment method or you can go to General > Settings > Finances > Payment remarks to create a list.
To create, modify or delete payment remarks use the available framework functionality.
The same list of payment remarks is automatically available for all payment methods. To specify which remarks you want to apply for a particular payment method, mark the related checkboxes (1). You can also specify in which order the remarks should be presented (2).
The selection and sequence of the payment remarks are saved automatically for each payment method.
Web
In the tab Web, you have the possibility to provide the WorldLine payment product ID for each payment method supported by Ingenico Direct service.
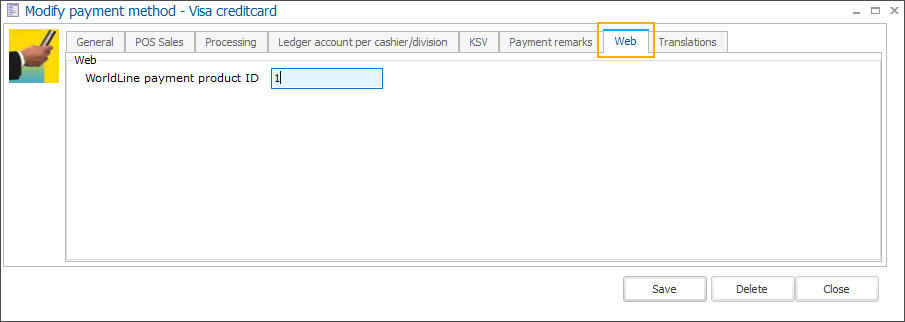
When a customer selects one of the payment methods provided by Ingenico Direct (Worldline) to pay on the Webshop, Recreatex will map the sales to the exact payment method based on the provided WorldLine payment product ID.
If no WorldLine payment product ID has been provided, the sales will be mapped to the default payment method specified in the Ingenico Direct configuration (Webshop Manager).
Translations
In the tab Translations, you can add translations of the payment method name in all available languages. These translations will be visualized on the receipt in the language of the customer.
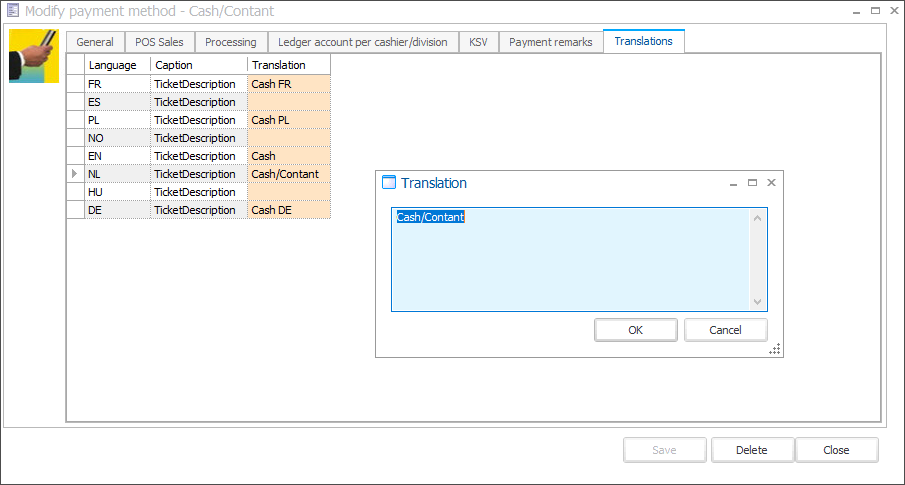
Double-click the language where you want to add the translation. In the window Translation, type the description and click OK. The translated descriptions are saved automatically and separately for each payment method.
Export parameters
Note
The tab Export parameters is only available if the financial export type Exact (3) has been set up in Recreatex.
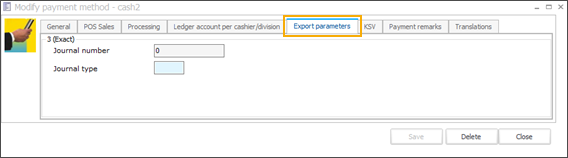 |
If required, these settings allow you to link a specific journal number and type per payment method, which will be taken into account in case of financial export.
Payment remarks
Use payment remarks to gather additional information each time a particular payment method has been used.
Go to General > Settings > Finances > Payment remarks to open the list overview of payment remarks.
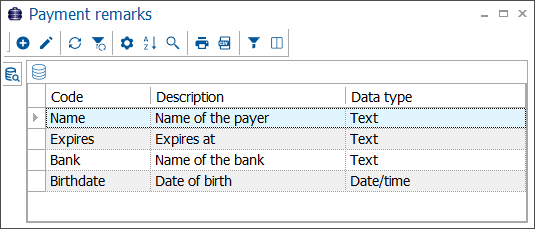
To create, modify or delete payment remarks use the available framework functionality.
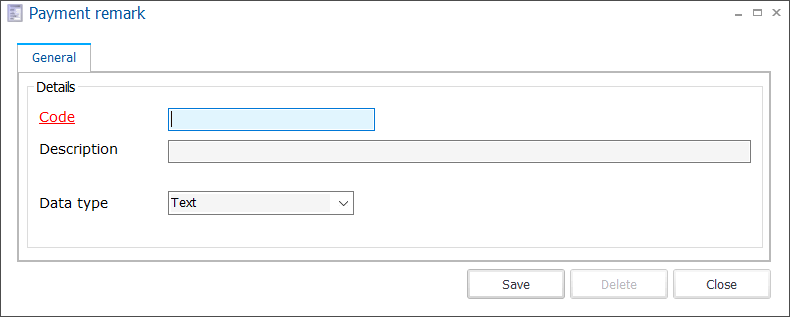
Code | The code must be unique. |
Description | Description of the payment remark that will be visualized. |
Data type | You can choose Text or Date/time. |
The list of payment remarks is automatically available for all payment methods. Per payment method, you can then specify which remarks should be applied.
VAT types
VAT (Value Added Tax), also called a turnover tax, is a tax levied by the government on the sale of products and services. Possible VAT tariffs are defined as VAT types in Recreatex.
Go to General > Settings > Finances > VAT types to open the list of all VAT types.
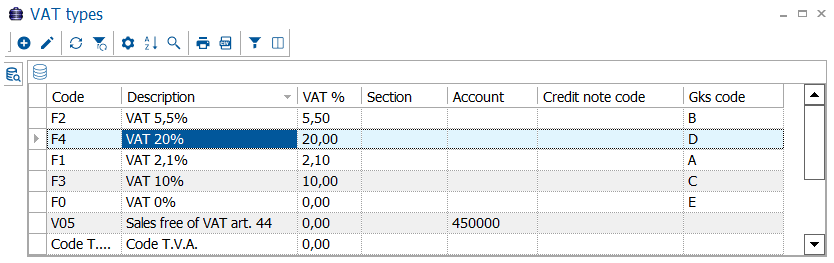 |
To create, modify or delete VAT types use the existing framework functionality.
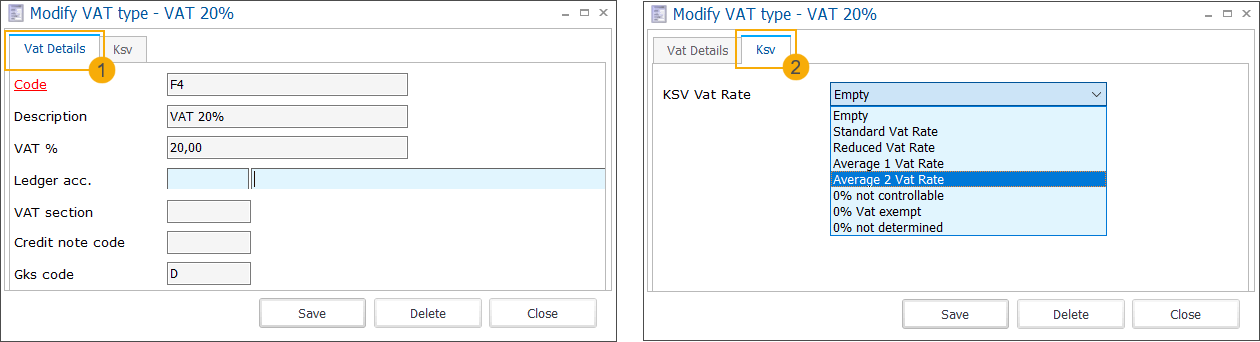 |
In tab Vat details (1), fill in the following parameters.
Code | The mandatory code must be unique and preferably descriptive enough so that you can identify the VAT type easily. |
Description | A description of the selected VAT type. |
VAT % | The VAT percentage that will be applied. |
Ledger acc. | Link a ledger account to this VAT type. |
VAT section | Provide reference to the section in which the amounts of this VAT type have to be filled in on the VAT declaration. |
Credit note code | The code that should be used in case an amount is credited. |
Gks code | For the GKS cash register system (Belgium only) the following VAT codes apply: A (21%), B (12%), C (6%), D (0%) NoteThis field is used for other certified cash register systems too. The VAT codes may differ, and are specified in the requirements of each certification, e.g. NF525 (France). |
In tab Ksv (2), select the KSV VAT Rate (Germany only).
VAT rates
VAT rate indicates whether a customer is liable to pay VAT or not.
Go to General > Settings > Finances > VAT rates to open the list of all VAT rates.
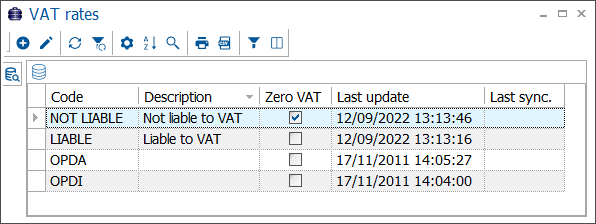 |
To create, modify or delete VAT rates use the existing framework functionality.
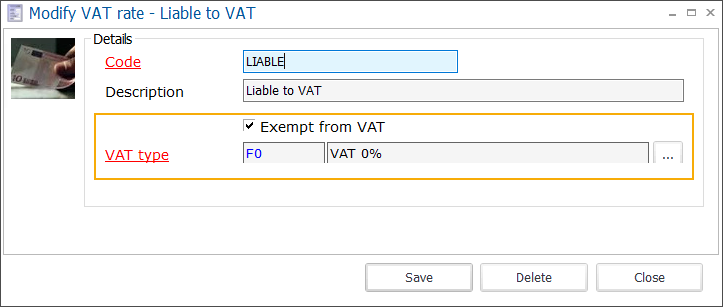 |
Code | The mandatory code must be unique and preferably descriptive enough so that you can identify the VAT rate easily. |
Description | A description of the selected VAT rate. |
Exempt from VAT | Indicate whether a customer with the selected VAT rate is liable to pay VAT or not. |
VAT type | If the option Exempt from VAT is selected, you must select a VAT type that is linked if the sale is exempt from VAT. |
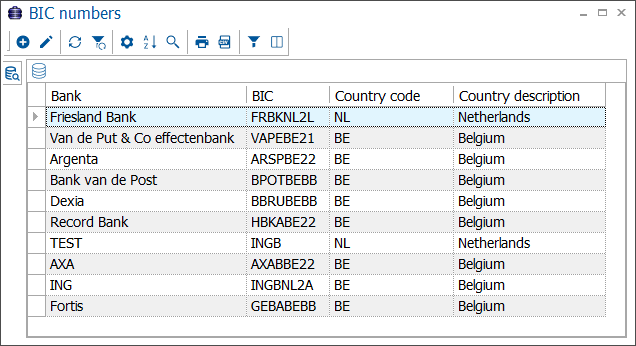
BIC
The Bank Identifier Code, BIC in short, is a code that is used for international payments in order to identify the bank.
Go to General > Settings > Finances > BIC to open the list of all BIC codes.
 |
To create, modify or delete BIC numbers use the existing framework functionality.
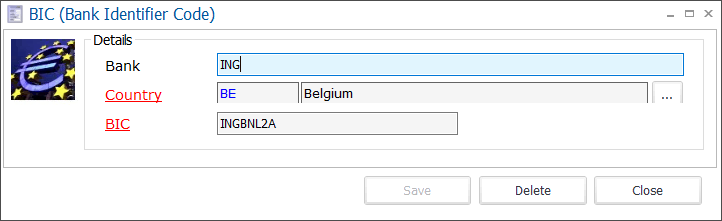 |
Bank | The name of the bank. |
Country | The country in which the bank is located. |
BIC | The Bank Identifier Code of the selected bank. |
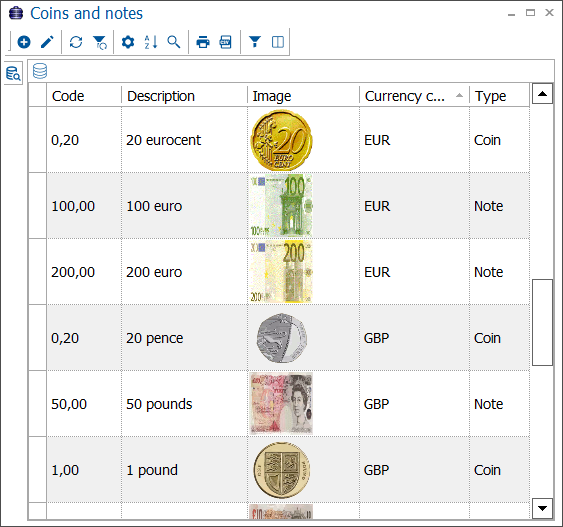
Coins and notes
The coins and notes accompanied by linked images are used on the screen Enter money counted in the POS module (module POS required). When entering the amount of money counted, Recreatex automatically visualises the correct currency and linked images in the POS module based on the currency selected on the computer on which Recreatex is used.
Go to General > Settings > Finances > Coins and notes to open the list of all coins and notes.
 |
To create, modify or delete coins and notes use the available framework functionality.
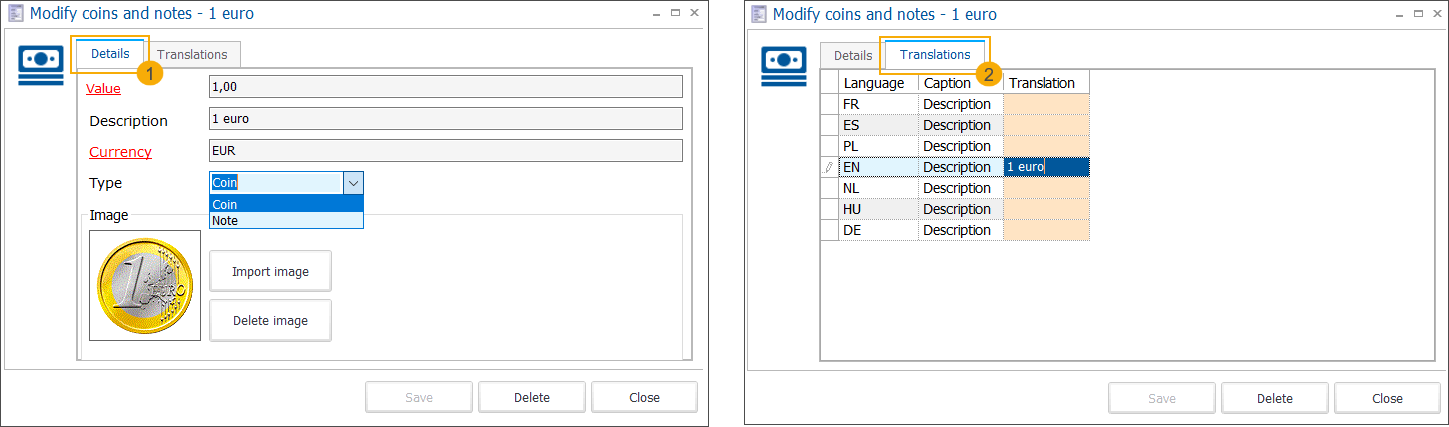 |
In tab Details (1), specify the following parameters:
Value | The value of the coin or note. |
Description | A description of the given coin or note. |
Currency | The code of the given currency. E.g.: EUR or GBP |
Type | The type of money (coin or note). |
Image | Link an image of the coin or note. |
In tab Translations (2), add translations of the coin/note descriptions in all relevant languages. The fields in the column Translation are editable. Click in the field next to the relevant language to directly enter the translation.
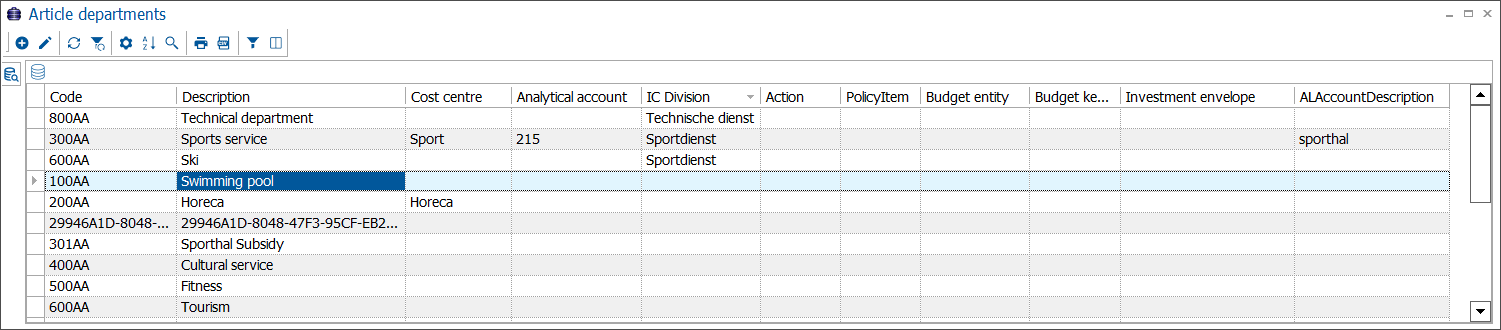
Departments
For accounting purposes, it may be required to subdivide articles into article departments.
Go to General > Settings > Finances > Departments to open the list of all article departments.
 |
To create, modify or delete article departments use the existing framework functionality.
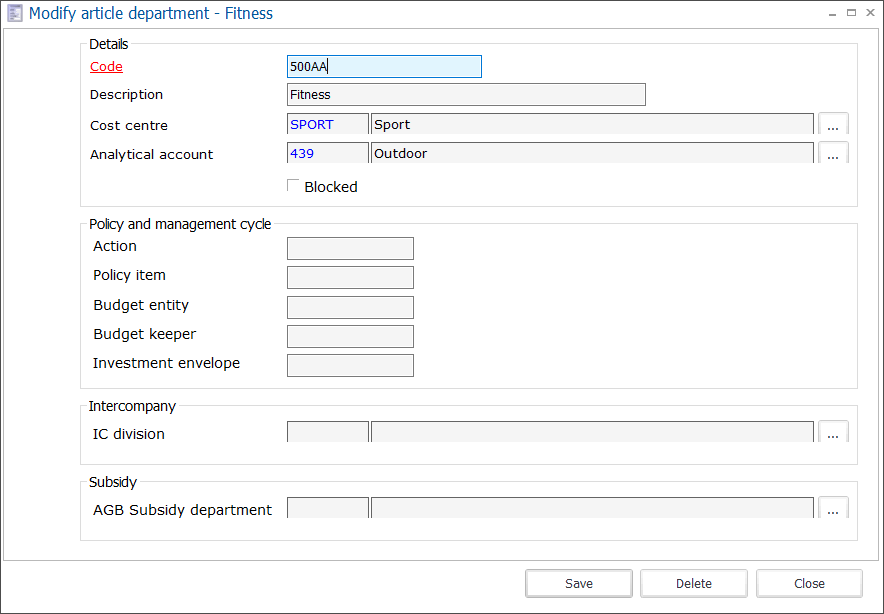 |
Code | The mandatory code must be unique and preferably descriptive enough so that you can identify the article department easily. |
Description | A description of the article department. |
Cost centre | An accounting cost centre, linked to the selected article department. |
Analytical account | An analytical account, linked to the selected article department. |
Blocked | Possibility to block an article department. The department will no longer be available in the list but can be visualized using the right-click function and selecting the option Incl. blocked. |
Policy and management cycle | If you work with e.g. the financial export link Alfa (module Financial export link required), you can fill in the Policy and management cycle data per article department. |
IC division | If you work with Intercompany invoicing (module required), you can link the Intercompany division to the article department here. |
AGB Subsidy department | Link AGB Subsidy department here. |
Cost centres
For accounting purposes, it may be required that an article is recorded on a cost centre. For some external accounting services, the cost centre has to be specified.
Go to General > Settings > Finances > Cost centres to open the list of all cost centres.
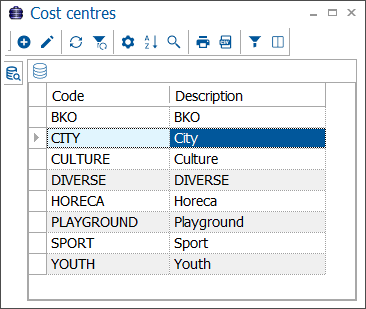 |
To create, modify or delete cost centres use the existing framework functionality.
 |
Code | The mandatory code must be unique and preferably descriptive enough so that you can identify the cost centre easily. |
Description | A description of the selected cost centre. |
Cost locations
An article can be recorded on a cost location. For some external accounting services, the cost location has to be specified.
Go to General > Settings > Finances > Cost locations to open the list of all cost locations.
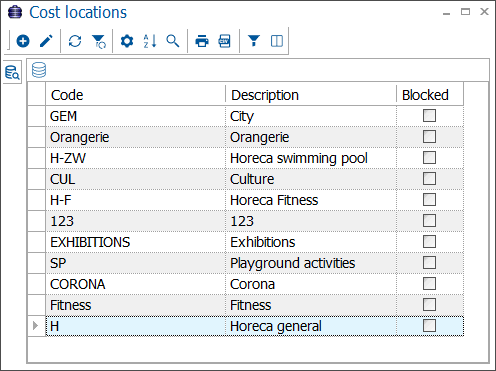 |
To create, modify or delete cost locations use the existing framework functionality.
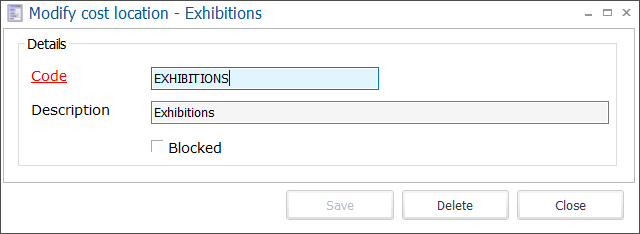 |
Code | The mandatory code must be unique and preferably descriptive enough so that you can identify the cost location easily. |
Description | A description of the selected cost location. |
Blocked | Possibility to block a cost location. The cost location will no longer be available in the list but can be visualized using the right-click function and selecting the option Incl. blocked. |
Advance systems
Advance payment is a type of payment made ahead of its normal schedule. Here you can define multiple systems of advance payments that can be used in different Recreatex modules.
Go to General > Settings > Finances > Advance systems to open the list of all advance payment systems.
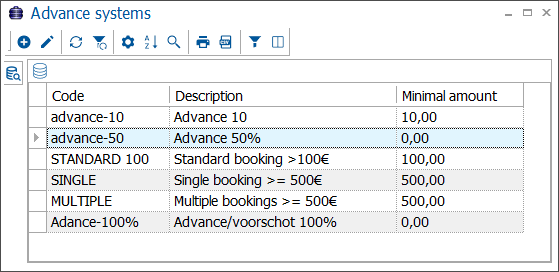
To create, modify or delete advance systems use the existing framework functionality.
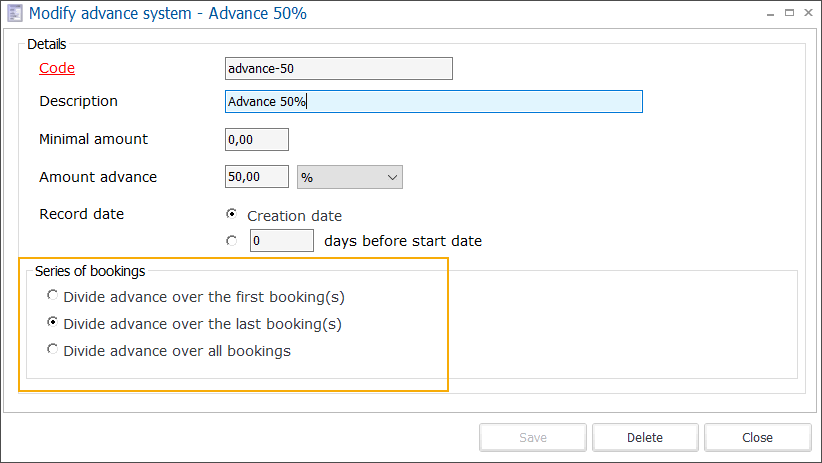
Code | The mandatory code must be unique and preferably descriptive enough so that you can identify the advance system easily. |
Description | A description of the selected advance payment system. |
Minimal amount | Specify the minimum amount* that must be paid in advance. This option can be combined with the Amount advance field. *Currency of the logged-in user. |
Amount advance | Specify the advance payment as amount*, amount per ticket* or percentage (%). *Shows the currency of the logged-in user. |
Record date | This is the date on which the advance payment should be booked (recorded).
|
Series of bookings | For bookings that belong to a booking series, you have the possibility to choose how the advance payment should be divided.
* The number of "first bookings" and "last bookings" is based on the advance amount compared to the amount per booking. |
Financial years
For taxing and accounting purposes a year does not always correspond to a calendar year. With this setting, you can define financial years in general or per division.
Go to General > Settings > Finances > Financial years to open the list of all financial years.
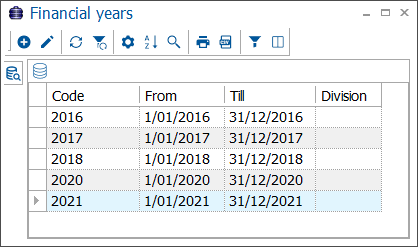
To create, modify or delete financial years use the existing framework functionality.
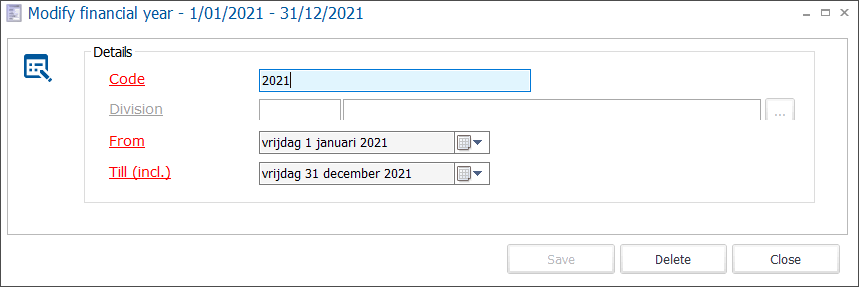
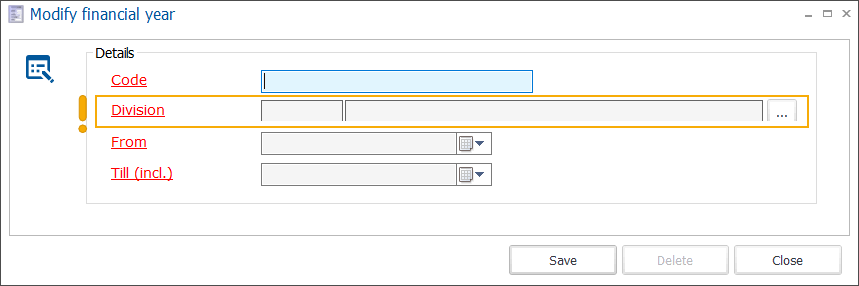
Code | The mandatory code must be unique and preferably descriptive enough so that you can identify the financial year easily. |
Division | Filling in a division allows you to split financial years per division. To enable this field you need to activate the setting Allow to set up financial years per division, in the module General > Parameters > tab Finances. When the setting is active, the field Division (!) is mandatory. |
From Till (incl.) | The start and end dates of the financial year are mandatory. |
Languages
One or several (spoken) languages can be linked to different data in Recreatex.
Go to General > Settings > Languages to open the list of all languages.
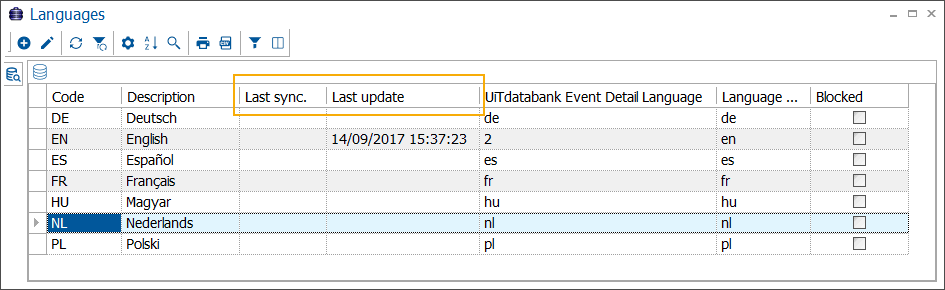 |
Last sync. | (no longer used) |
Last update | Date/time of the last update. |
To create, modify or delete languages use the existing framework functionality.
 |
Code | The mandatory code must be unique and preferably descriptive enough so that you can identify the language easily. |
Description | A description of the selected language code. |
Lang. code | If you use online templates, this language will be used to visualise the correct translation of a template on the website. |
Blocked | Possibility to block a language. The language will no longer be available in the list but can be visualized using the right-click function and selecting the option Incl. blocked. |
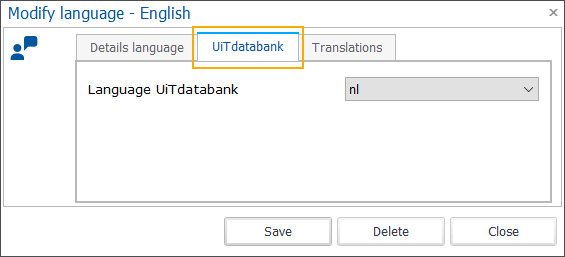 |
UiT databank | The corresponding language in the cultural database (UiTdatabank). This is only applicable to Flemish users (Belgium) that work with the UiTdatabank database link. |
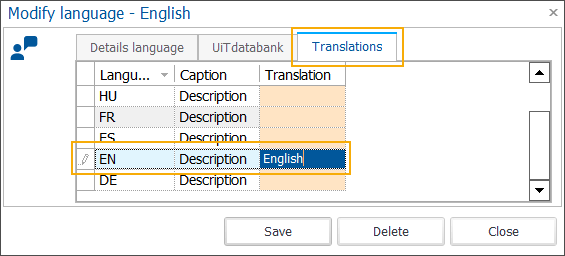
In the tab Translations (2), add translations of the language descriptions in all relevant languages. The fields in the column Translation are editable. Click in the field next to the relevant language to directly enter the translation.
Postcodes
Here you can manage all postal codes available in the system.
Go to General > Settings > Postcodes to open the list of all postal codes.
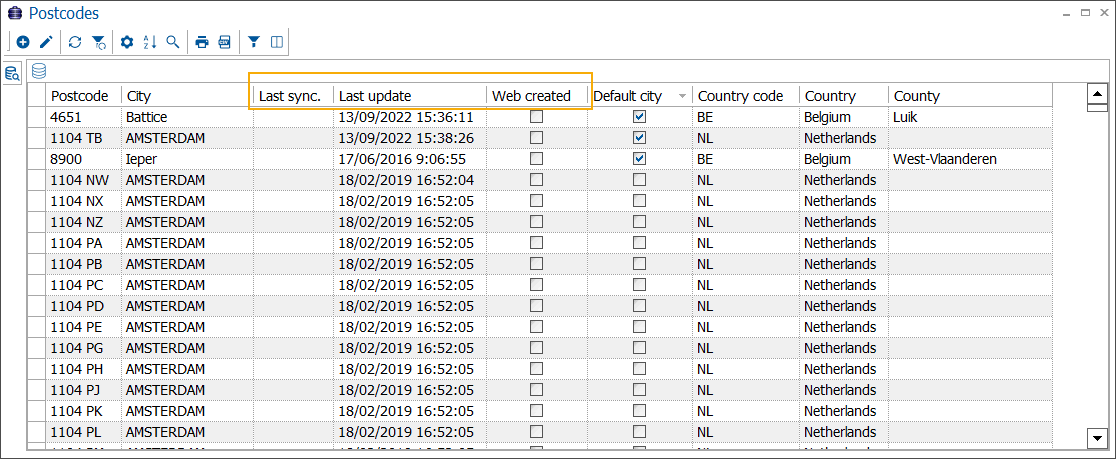 |
Last sync. | (no longer used) |
Last update | Date/time of the last update. |
Web created | If it is allowed for Webshop users to create postcodes (Webshop Manager setting), such postcodes will be marked as web-created. |
To create, modify or delete postal codes use the existing framework functionality.
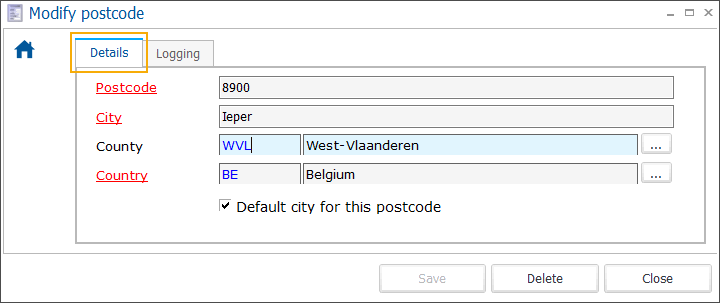 |
Postcode | The actual postcode. |
City | The city (town) to which the postcode belongs. |
County | The county in which the given city is located. |
Country | The country in which the given city is located. |
Default city for this postcode | If multiple cities are linked to the same postal code, here you can specify which city should be used as default and shown as first when selecting this postcode. Only 1 default is allowed per postcode. |
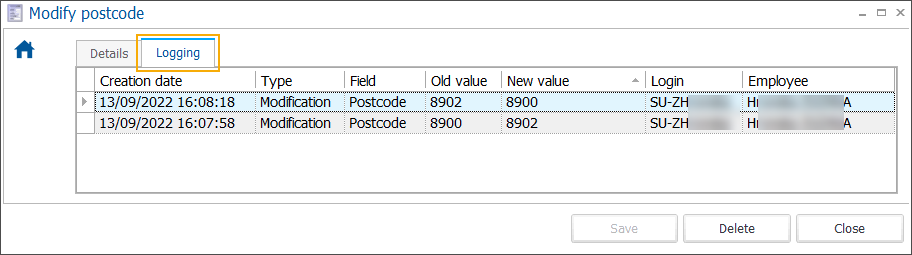
In the tab Logging, you can trace chronologically all changes per postal code. The date/time of the last update is also visualized in the overview of all postal codes.
Counties
Here you can manage all counties available in the system.
Go to General > Settings > Counties to open the list of all counties.
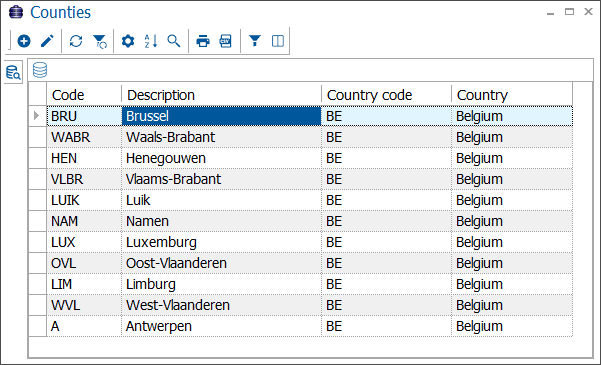 |
To create, modify or delete counties use the available framework functionality.
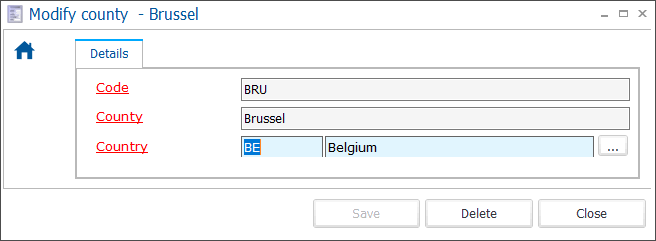 |
Code | The mandatory code must be unique and preferably descriptive enough so that you can identify the county easily. |
County | The name of the county is mandatory. |
Country | The country in which the county is located is mandatory. |
Countries
Here you can manage all countries available in the system.
Go to General > Settings > Countries to open the list of all countries.
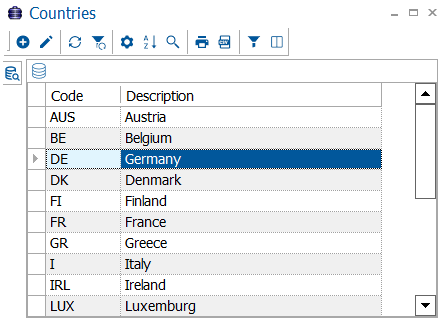 |
To create, modify or delete countries use the available framework functionality.
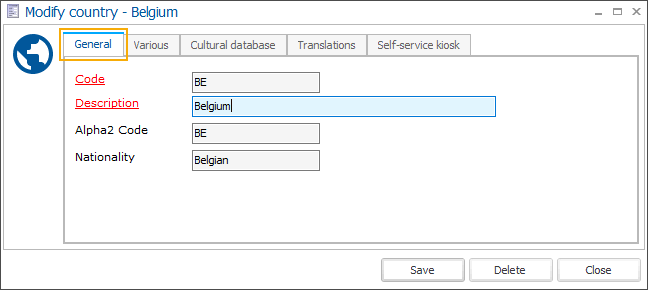 |
Code | The mandatory code must be unique and preferably descriptive enough so that you can identify the country easily. |
Description | A description (name) of the country is mandatory. |
Alpha-2 Code | Standardized two-letter country code as defined in ISO 3166-1. |
Nationality | The nationality of the specified country, will be displayed in Recreatex on the customer address card (tab Details) when you select a country in the field Nationality and on the Webshop in the customer profile. ImportantWhen a customer specifies the Belgian nationality and fills in the National register number on the customer card or on the Webshop, the following checks (if configured on tab Various) will automatically be performed to verify the National register number:
|
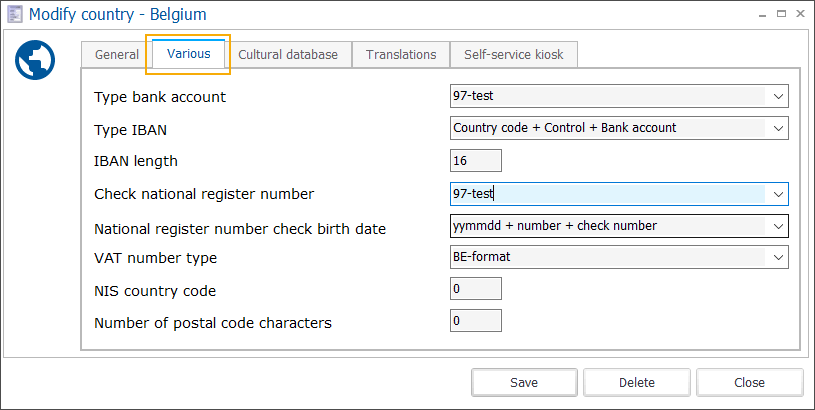 |
Type bank account | Specify the bank account number check you want to apply. Currently implemented checks are:
If defined, IBAN will automatically be generated on the customer address card (tab Finances) after entering the account number. NoteTo perform a check on account numbers of other countries, leave this field empty and use the combination of fields Type IBAN and IBAN length. |
Type IBAN | The structure of the International Bank Account Number. |
IBAN length | Specify the IBAN length as defined per country (max. 34 alphanumeric characters). Depending on the Alpha-2 Code, the IBAN lengths for Belgium (BE) - 16 and Netherlands (NL) - 18 are set automatically. For other countries, the values must be filled in manually. NoteWhen validating the IBAN, the country code is extracted from the string (the first 2 characters identify the country). This allows the user to fill in an IBAN number from a different country than the country of the customer's address. |
Check national register number | The way in which the national register number is set up (Belgium only) - the check of the control number
|
National register number check birth date | The check of the whole national register number (Belgium only).
|
VAT number type | Configure check of the VAT number format:
|
NIS country code | Alphanumeric code for geographical areas (Belgium only). |
Number of postal code characters | Check if the postal code has the correct length. |
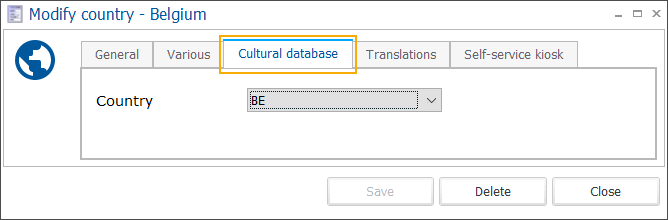 |
Country | The corresponding country code in the cultural database (UiTdatabank), is only applicable to Flemish users that work with the UiTdatabank database link. |
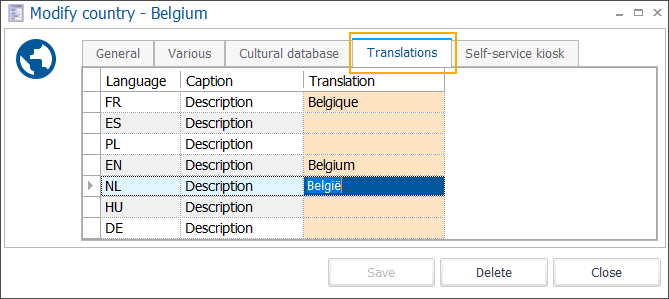
In the tab Translations (2), add translations of the country descriptions in all relevant languages. The fields in the column Translation are editable. Click in the field next to the relevant language to directly enter the translation.
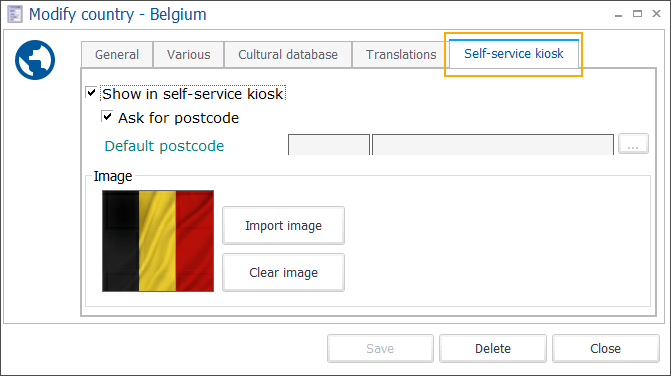
Show in self-service kiosk | When selected, the country will be shown as an option on the kiosk screen. |
Ask for postcode | This option allows the customer to type the postal code on the kiosk screen, using a keyboard. |
Default postcode | This option is mandatory if you prefer not to use the option "Ask for postcode". ImportantIf the selected default postal code has been linked to multiple cities, you will have to specify one of the cities as default for this particular postal code. |
Image | Add an image to show the country as a clickable image on the kiosk screen. |
Reasons
For certain actions in Recreatex, a specific reason has to be filled in. Specifying a reason is generally required when cancelling a booking (facility booking, rental booking, registration and so on) or when activating/deactivating a membership, but reasons are also used for more general purposes.
Go to General > Settings > Reasons to open a list of all reasons.
 |
To create, modify or delete reasons use the available framework functionality.
 |
Code | The mandatory code must be unique and preferably descriptive enough so that you can identify the reason easily. | |||
Description | A description of the reason. | |||
Type |
The available reason types correspond to all Recreatex modules where you can use reasons. If you do not select a type, you will be able to use the reason in all Recreatex modules. | |||
Cust type | Specify for which type of customer this reason should be available: Individual, Group, Company, Location, Doctor, or School. If no customer type is specified, the reason will be available for all customer types. If you need the same reason for several customer types, you will have to create it separately for each customer type. | |||
Blocked | Possibility to block a reason. The reason will no longer be available in the list but can be visualized using the right-click function and selecting the option Incl. blocked. | |||
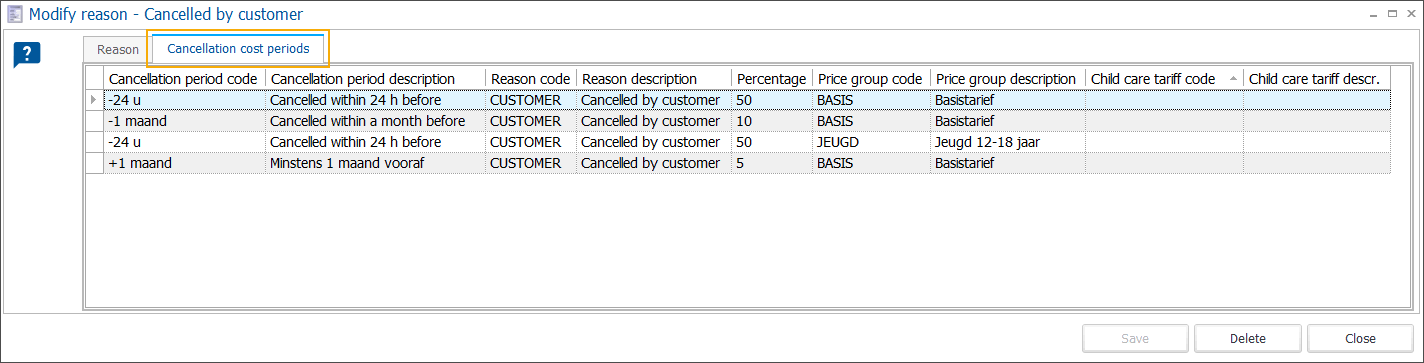
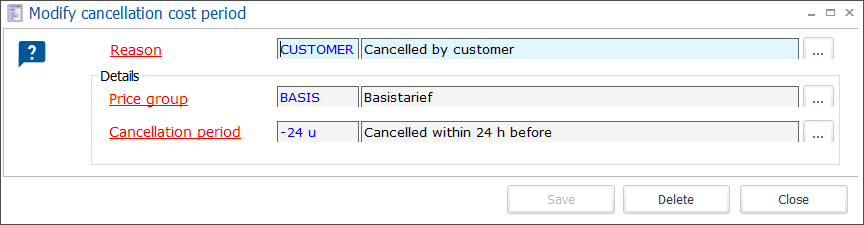
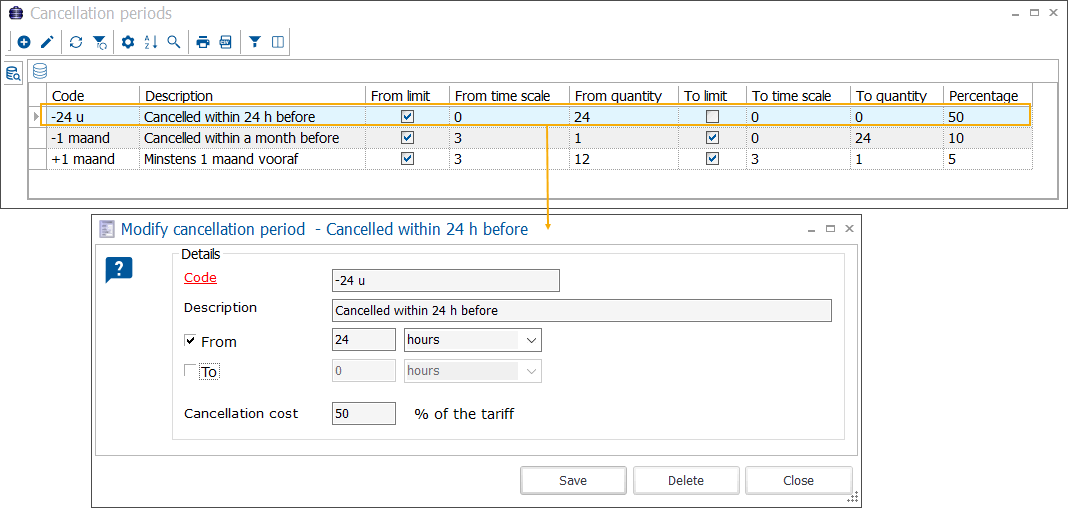
Subject to cancellation cost | For the reason types Bookings, Registrations, Files, Rental, Childcare and Fitness you can select an option Subject to cancellation cost (1). The cancellation cost will be calculated, based on the initial amount to be paid and charged when this type of reason is selected. You can define the calculation in the tab Cancellation cost periods. Each cancellation cost period must be linked to a price group and to a particular cancellation period.
The list of cancellation periods is common and thus available for any cancellation cost period.
| |||
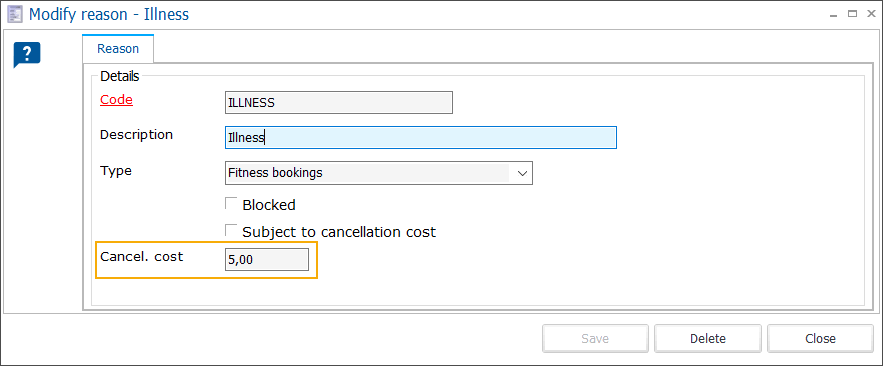
Cancel. cost | This option allows you to define a fixed cancellation cost for registrations/bookings and can only be selected for reason types Registrations, Childcare and Fitness. This cancellation cost is then suggested in case of cancellation but can still be changed if needed before the cancellation has been finalized.
|

Word documents
Word documents are used to generate a variety of documents within Recreatex. The advantage of using this specific type of document is the possibility to use relevant database fields which guarantees correct and up-to-date information when generating the final document.
Examples of such documents are tenders, confirmations, day schedules (module Files), registration certificates (module Registrations), purchase orders (module Purchase) and so on.
Note
The required Word documents are generally created and configured by your GANTNER consultant during the implementation of the relevant Recreatex modules and in collaboration with the end user(s)/administrator(s) of the module.
Go to General > Settings > Word documents to open the list of all documents.
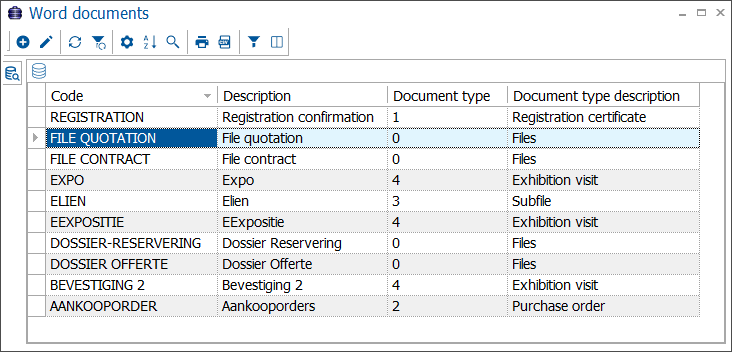 |
To create, modify or delete Word documents use the available framework functionality.
 |
Code | The mandatory code must be unique and preferably descriptive enough so that you can identify the Word document easily. | |
Description | A description of the document. | |
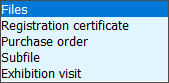
Document type | Select the document type from the drop-down list.
| |
Subdocuments | Specify 1 or multiple parts for this document. | |
Export / Import | The possibility to import and export a subdocument allows you to easily reuse the document components in multiple documents. |
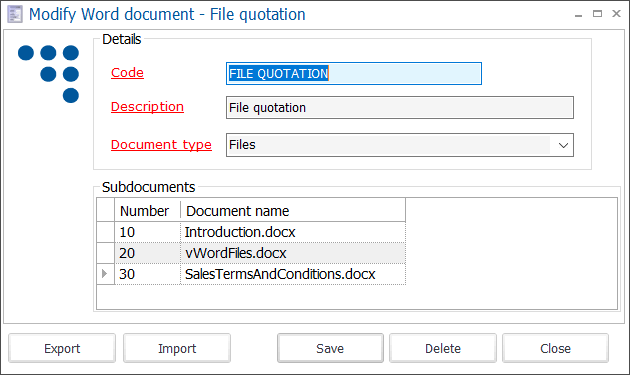
When creating a new Word document, first fill in the mandatory fields and click Save. Now you can start adding the subdocuments.
To add subdocuments use the available framework functionality or import existing subdocuments.
 |
Number | The number of this subdocument, generated automatically. |
Name | Select and add the subdocument here. |
Mailmerge with | From the available drop-down list select the document type with which you want to merge this subdocument. |
Sort by | Define the sort order of the fields when generating the Word document. 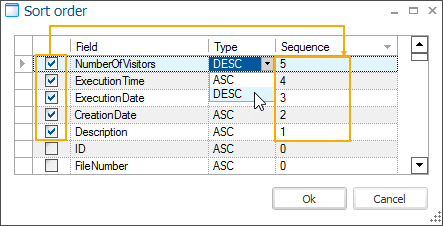 |
Filter | Define a filter that will be applied on the query to order or pre-filter data that you want to include in your document (subreport). |
Bookmarks | Bookmarks are documents that you add as parts of the subdocument. |
Modify document | Click this button to modify the selected subdocument. |
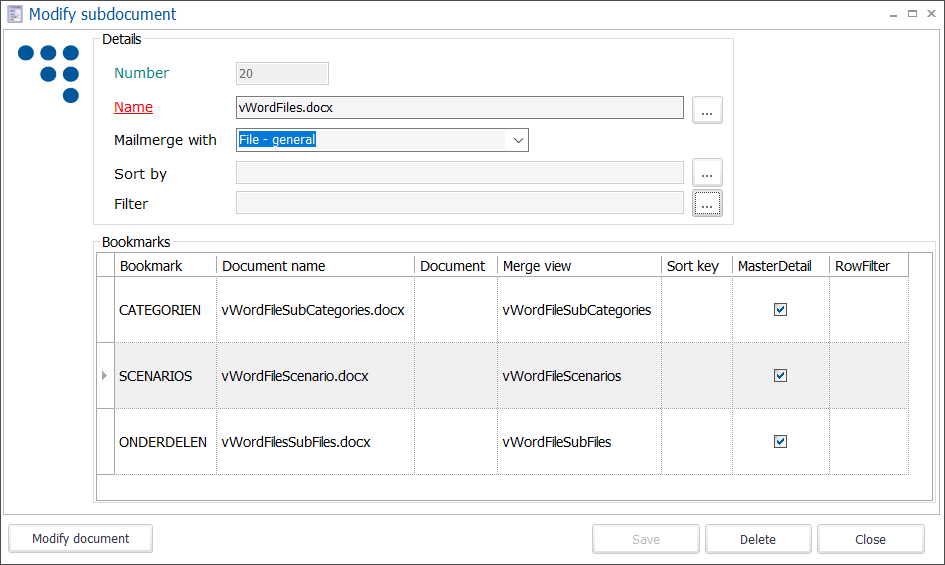
When creating a new subdocument, first fill in the mandatory fields and click Save. Now you can start adding the bookmark documents.
To create, modify or delete bookmarks use the available framework functionality.
 |
Bookmark | The name or description of the bookmark document. |
Name | Select and add the bookmark document here. |
Mailmerge with | From the available drop-down list select the document type with which you want to merge this bookmark. |
Sort by | Define the sort order of the fields when generating the Word document. |
Filter | Define a filter that will be applied on the query to order or pre-filter data that you want to see in your document. |
Relation type | Determine the type of relation between the subdocument and the bookmark(s). |
Modify document | Click this button to modify the selected bookmark document. |
Calendars
In many Recreatex modules, you can work with (exclusion) calendars. These calendars are used e.g. to determine the validity of membership articles or to determine the days in case of a series of bookings.
Go to General > Settings > Calendars to open a list of all calendars.
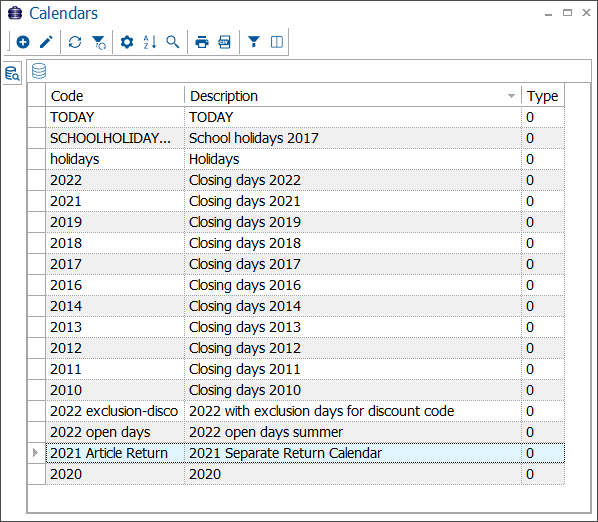 |
To create, modify or delete calendars use the available framework functionality.
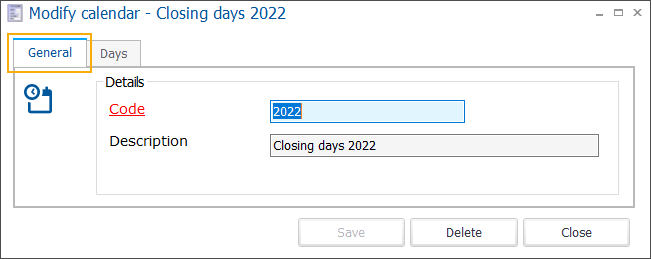 |
Code | The mandatory code must be unique and preferably descriptive enough so that you can identify the calendar easily. |
Description | A description of the calendar. |
Click Save. The tab Days becomes active and you can specify the days to include in the calendar.
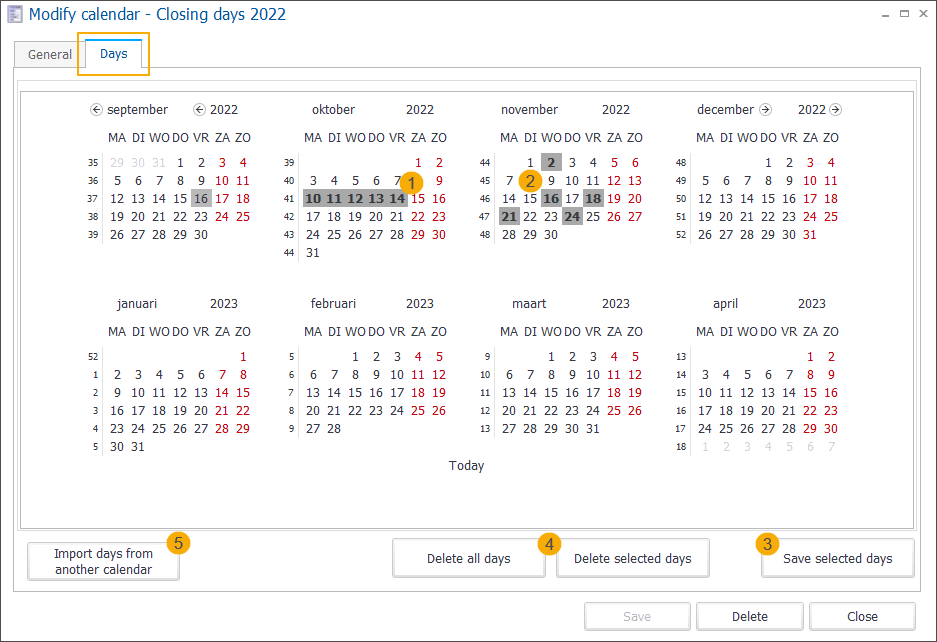 |
Press the <Shift> key while selecting 2 non-successive days, the 2 days and the period between the days will be selected. (1)
You can achieve the same by clicking on the left mouse button and dragging the cursor over several days.
Press the <Ctrl> key and select several non-successive days by clicking on these days. (2)
Save your selection by clicking the button Save selected days in the bottom-right corner of the screen.
To delete days (4) from your calendar, click the button Delete all days to remove all days at once or select days/periods from your saved days and click the button Delete selected days.
If you are creating the same calendar on regular basis, e.g. yearly bank holidays calendar, you can use the button Import days from another calendar (5) to simply copy the days from the previously created calendar. Double-click the calendar you want to copy and then click Yes to confirm. Note that the imported calendar will overwrite the previous selection in your current calendar.
Time tables
This setting gives you the possibility to create timetables (e.g. opening hours) that can further be linked to article groups with the idea to restrict the availability of articles, based on the predefined schedule.
Note
Currently, timetables are used as a part of Recreatex QR ordering app configuration. When selling articles via the app it is necessary to make sure that the customer can only order articles that are actually available (e.g. if the kitchen is closed, it should not be possible for the customer to order warm meals). Timetables linked to article groups make it possible to inform the customer that it is not possible to order some articles outside of the set hours.
Go to General > Settings > Time tables to open the list of all timetables

To create, modify or delete timetables use the available framework functionality.
Code | The mandatory code must be unique and preferably descriptive enough so that you can identify the timetable easily. |
Description | A description of the timetable (optional). |
Blocked | Possibility to (temporarily) block a timetable. The timetable will no longer be available in the list but can be visualized using the right-click function and selecting the option Incl. blocked. |
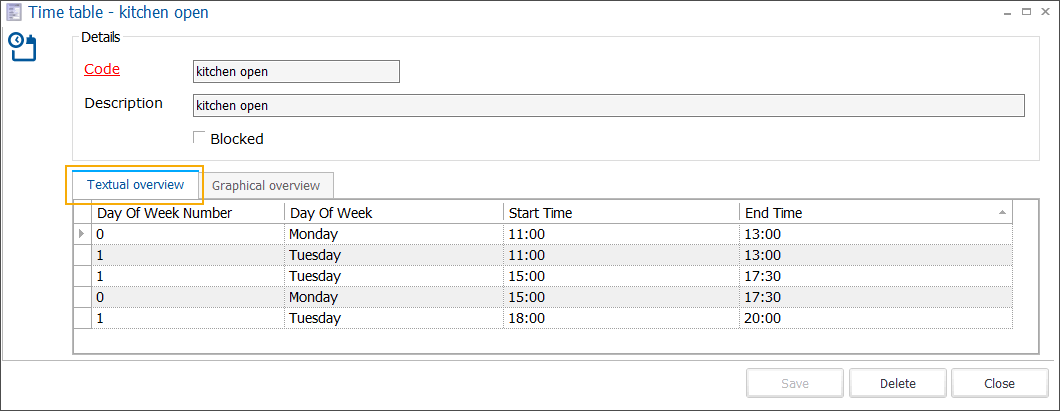
There are 2 ways to create timetable entries (a combination of day and time slot):
In the Time table window, go to the tab Textual (1). Then right-click and select New from the context menu to open a new Time table entry window (2).
Select a day and specify the time slot (3), then click Save (4).
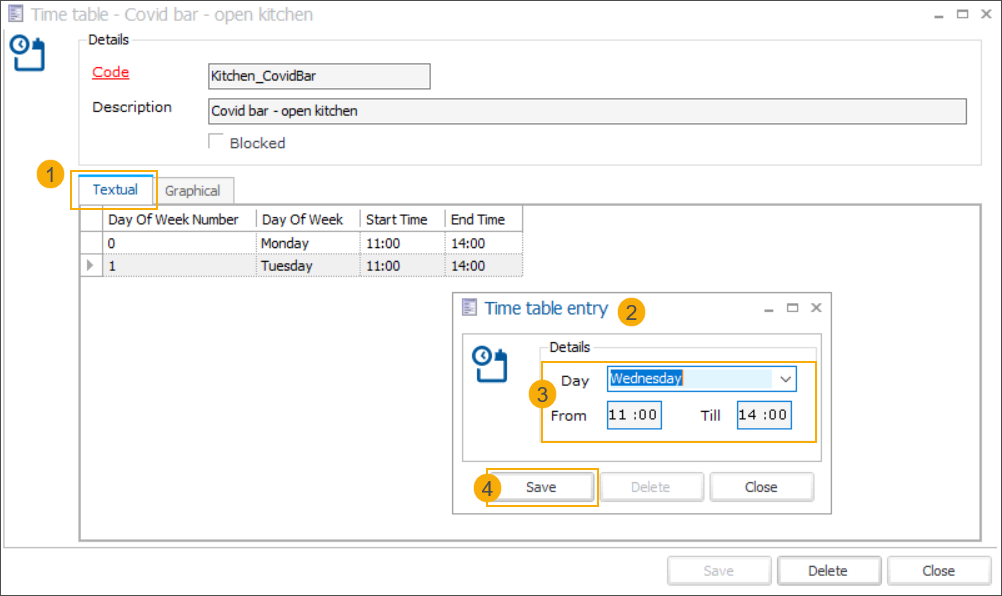
Repeat the above steps to complete your timetable.
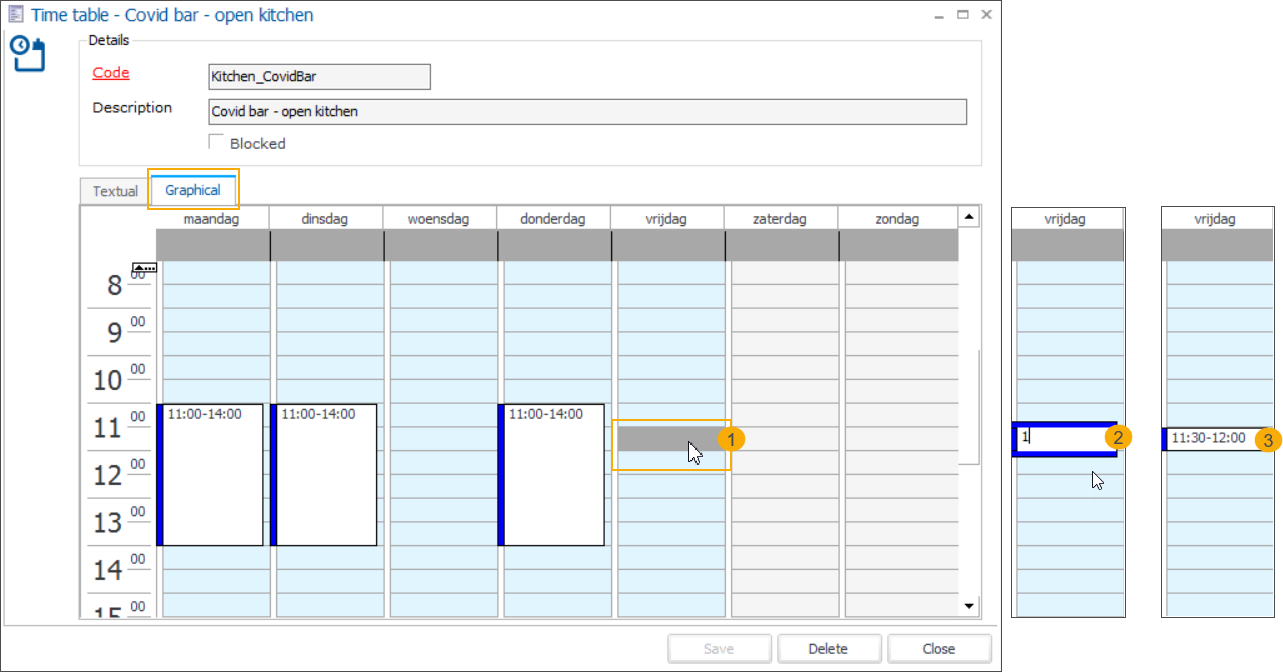
In the Time table window, go to the tab Graphical. Any changes done in this view are saved automatically. You can create and manipulate the entries as follows:
Create: In the graphical overview click on the desired time slot (1) and type at least 1 character (2). Then press Enter. The time range of the selected time slot is filled in automatically (3).
Expand/narrow: Left-click and drag the top or bottom border of the entry up or down. Releasing the border will update the time slot automatically, based on its new position.
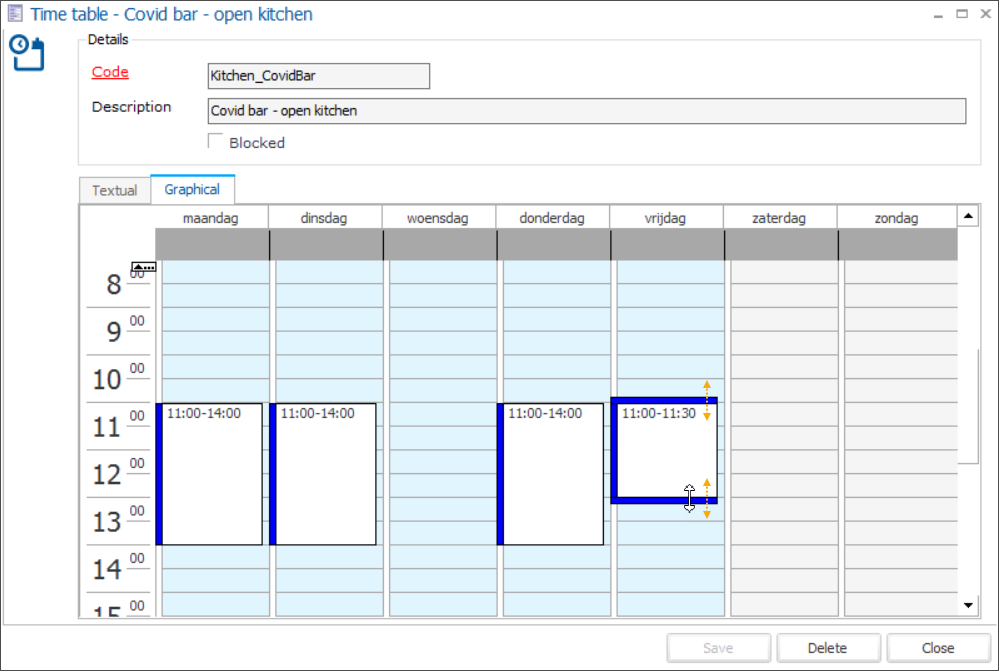
Move: Left-click and hold to select the entry, then drag up/down or left/right to move the entry (1). Releasing the entry will update the time slot automatically, based on its new position.
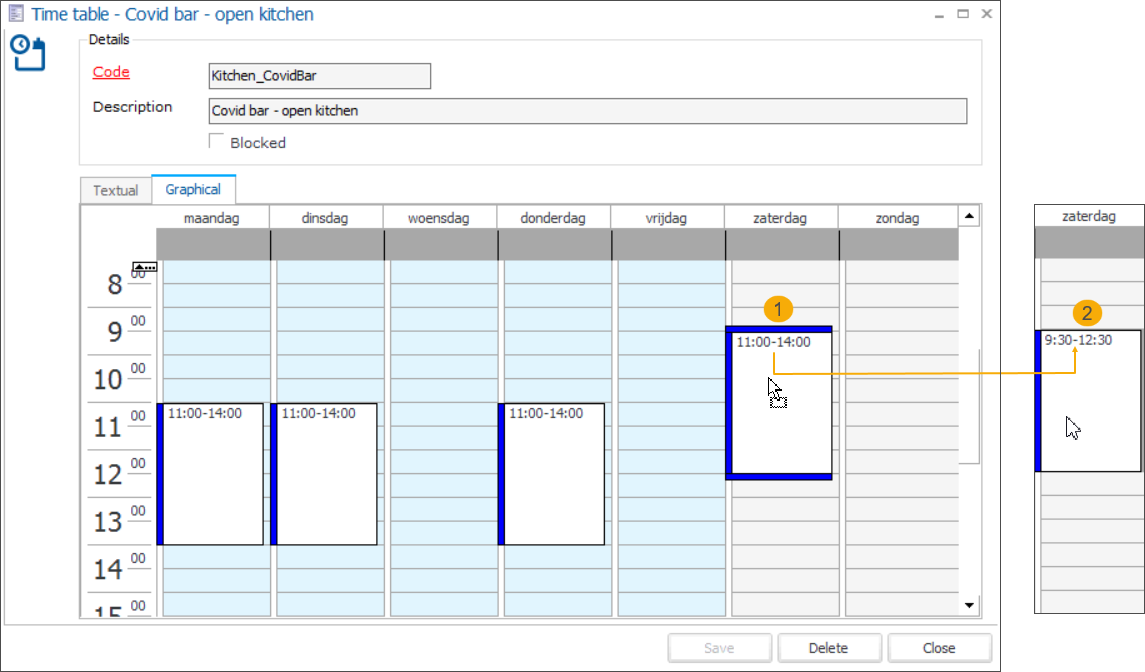
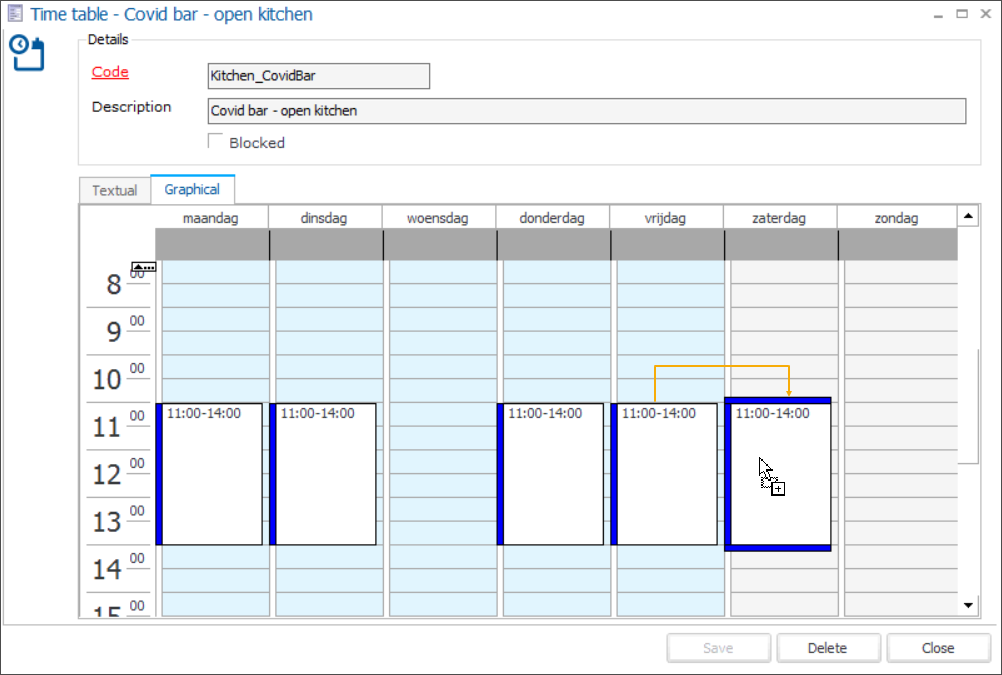
Copy: Left-click and hold to select the entry, then hold the CTRL key while dragging the entry to another position. Releasing the entry will update the time slot automatically, based on its new position.
Delete: Select the entry and press Delete.
Source codes
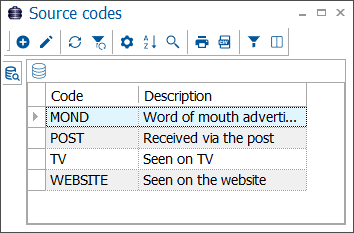
When booking tickets for a particular event in the module Ticketing, it is possible to specify how the customer has learned about the ticketing event. The setting source codes allows you to create and manage the list of possible information sources.
Go to General > Settings > Source codes to open the list of all source codes.
 |
To create, modify or delete source codes use the available framework functionality.
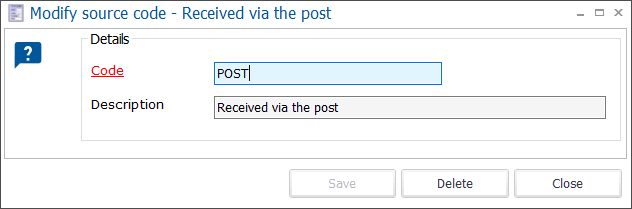 |
Code | The mandatory code must be unique and preferably descriptive enough so that you can identify the source code easily. |
Description | A description of the source code. |
Number series
This setting allows you to manage number series for Recreatex. A predefined number series structure takes care of automatic and consistent numbering which can be applied when creating e.g. bookings, tickets, files and so on).
Important
In order to avoid irregularities on the accounting level, the number series for invoices and test invoices can not be configured in Recreatex. These number series have to be configured by the system administrator, using the SydAdmin application.
Go to General > Settings > Number series to open a list of all number series.
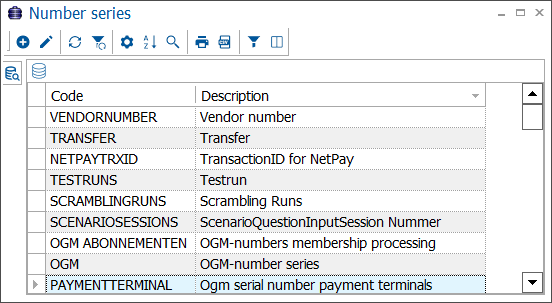 |
To create, modify or delete number series use the available framework functionality.
Code* | The mandatory code must be unique and preferably descriptive enough so that you can identify the number series easily. |
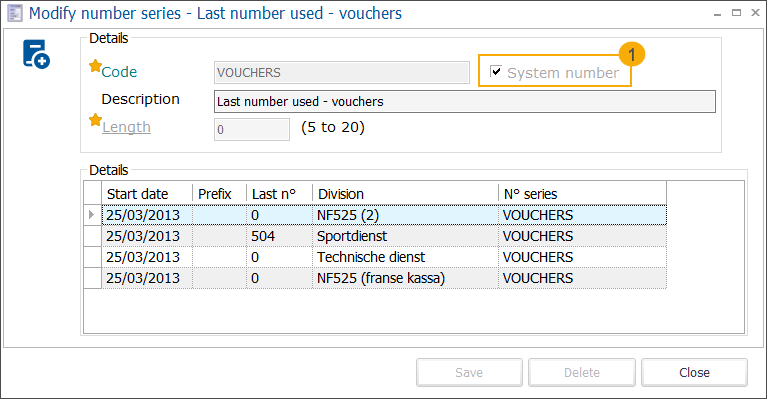
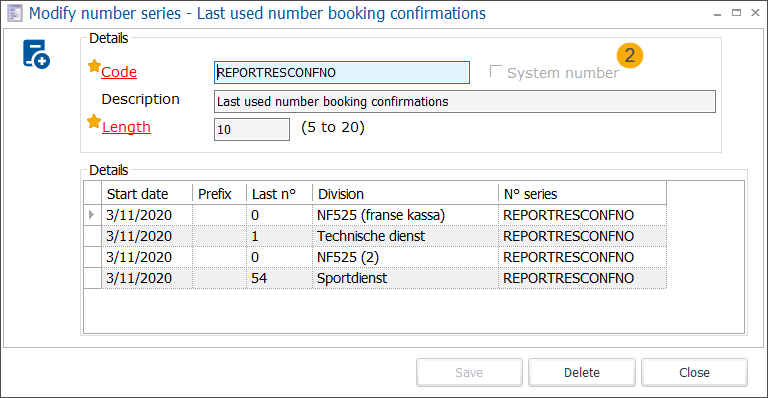
System number | If this setting is selected (1), the number series has been defined internally by the (Recreatex) system. The field Length* is disabled and cannot be modified. The Code* has been defined elsewhere. These number series are necessary for correct processing within Recreatex and cannot be modified or deleted. If this setting is not selected (2), the current number series has been created by a Recreatex user (or administrator). All characteristics of the number series can consequently be freely chosen. |
Description | A description of the number series. |
Length* | Define the mandatory length of the number series. |
Details | Define the rules which should apply to the number series structure. |
To create, modify or delete rules in the Details section use the available framework functionality.
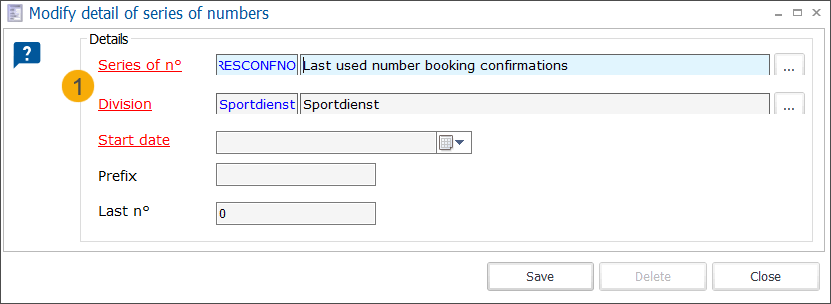
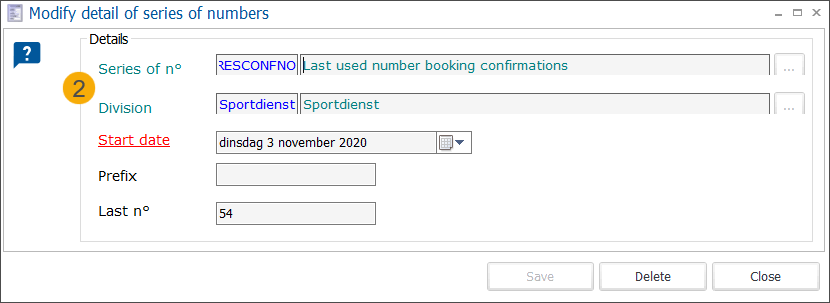
Series of n° |
|
Division | Determine for which division the series of numbers can be used.
|
Start date | The date on which the rule takes effect. |
Prefix | Prefix (digits/letters) is an optional part of the number series structure attached at the beginning of each number from the number series. |
Last n° | Specify the last number of the current series of numbers which is also the last number of the number series structure. All numbers that will be generated next will consequently start as of this last number. E.g. If the last n° is 999, the series will start with 999+1, which is 1000. |
Ticket templates
If you are selling tickets online you may want to design your own e-ticket templates. This part allows you to add, manage and modify the e-ticket templates within Recreatex. Templates are generally created by your Gantner consultant when implementing the e-Ticketing module, in collaboration with the final users/administrators of the module.
Apart from e-ticket templates, here you can also design any other e-documents for webshop and backoffice use.
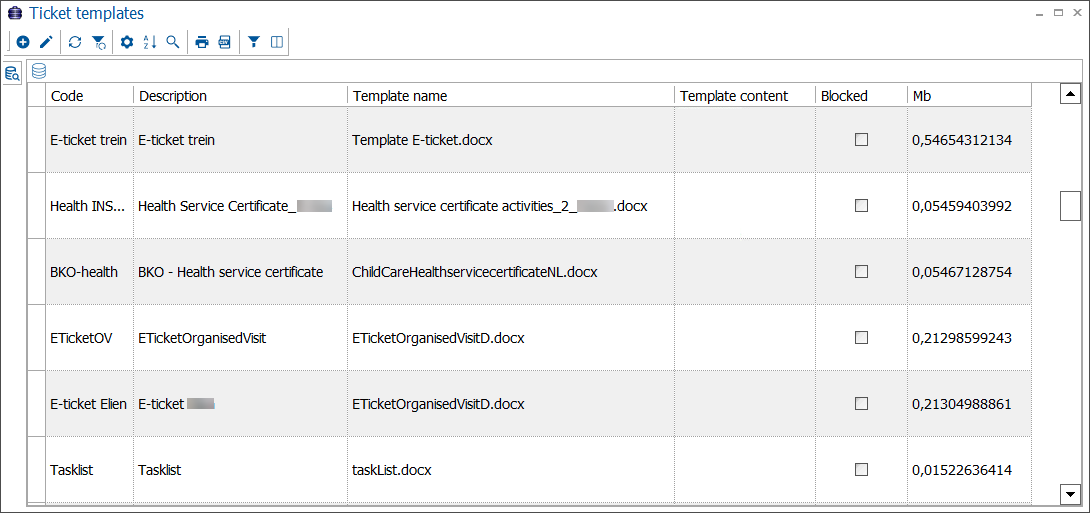
Go to General > Settings > Ticket templates to open the list of all ticket templates
 |
To create, modify or delete ticket templates use the available framework functionality.
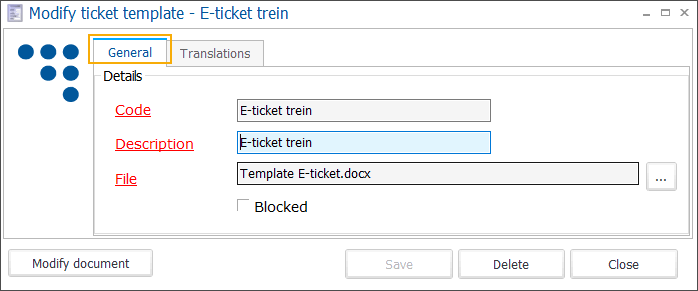 |
Code | The mandatory code must be unique and preferably descriptive enough so that you can identify the ticket template easily. |
Description | A description of the ticket template. |
File | Upload the template file here. |
Blocked | Possibility to block a ticket template. The templates will no longer be available in the list but can be visualized using the right-click function and selecting the option Incl. blocked. |
Modify document | Click this button to consult or modify the ticket template document directly from within the Recreatex application. |
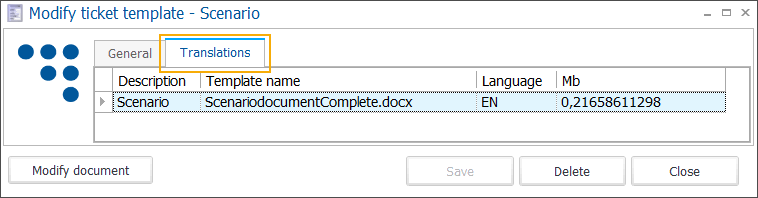
In the tab Translations, you can manage alternative (translated) versions of the current ticket template.
 |
To create, modify or delete translations of ticket templates use the available framework functionality.
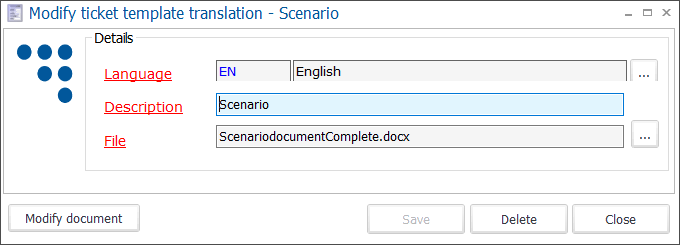 |
Language | The language of the ticket template translation. |
Description | The description of the translated ticket template (only visualized internally). |
File | Upload the translated ticket template here. |
Modify document | Click this button to consult or modify the ticket template translation document directly from within the Recreatex application. |
Web templates
For customers of the type "company", you have the possibility to add a personalized website by using separate web templates that can be linked via the customer's company ID on the customer address card. You can add a separate banner e.g. displaying a welcome text and a website template that is visualised when such customer visits your e-ticketing website.
Go to General > Settings > Web templates to open the list of all web templates.
 |
To create, modify or delete web templates use the available framework functionality.
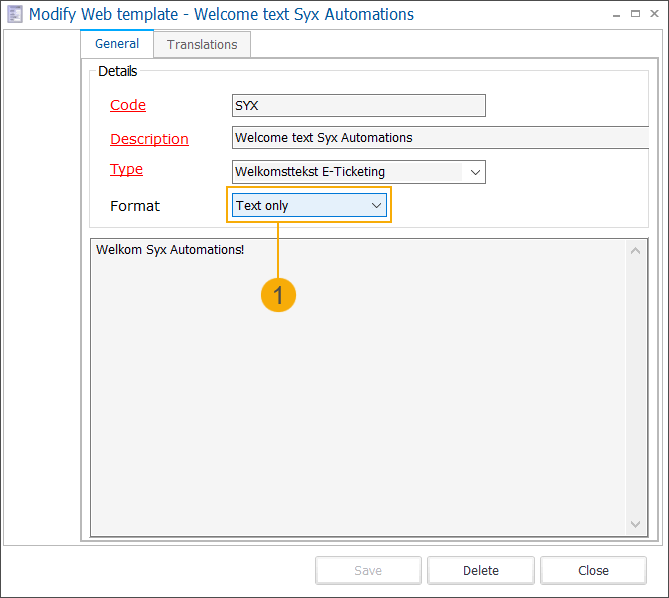

Code | The mandatory code must be unique and preferably descriptive enough so that you can identify the web template easily. |
Description | A description of the web template. |
Type | Select the type of welcome text. Currently, the only available option is Welcome text E-ticketing. |
Format | Select the format you want to use to create the template:
|
In the tab Translations you can manage alternative (translated) versions of the current welcome text.
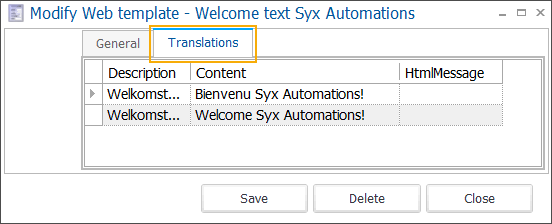 |
To create, modify or delete web template translations use the available framework functionality.
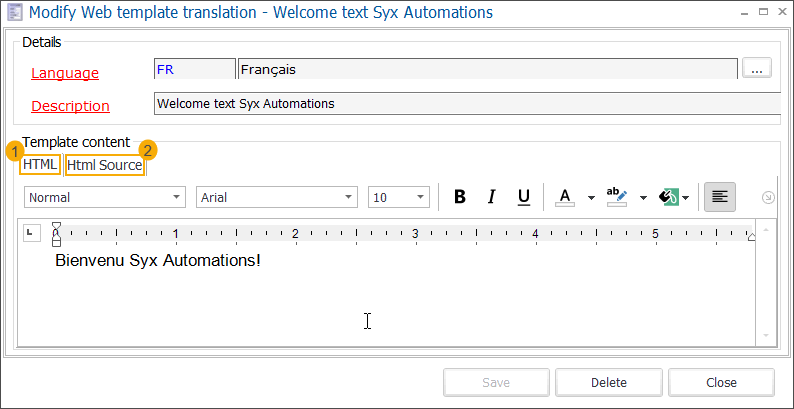 |
Language | The language of the translated welcome text. |
Description | The description of the translated welcome text. |
Template content | Add the translated welcome text:
|
Controls
Under General > Settings > Controls, you can manage the control types and control categories used for the control mechanism that can be applied in different Recreatex modules, such as WEB - Scenarios, Files/Guides planning, and Ticketing (Production planning). For more information on the control mechanisms, we refer to the respective manuals.
Types
In this part, you create and manage the control types for the control mechanism.
Go to General > Settings > Controls > Types to open the list of all control types.
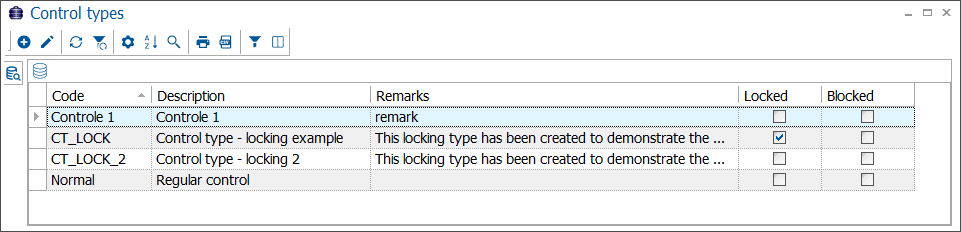 |
To create, modify or delete control types use the available framework functionality.
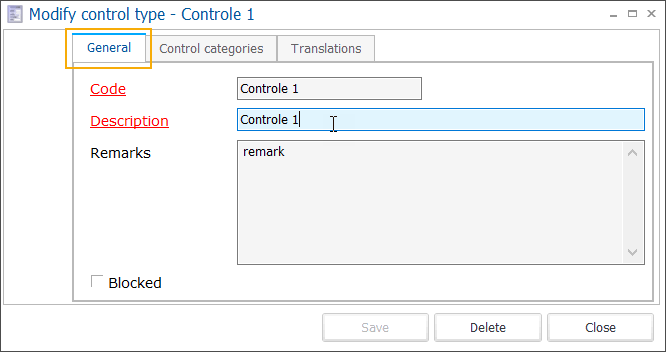 |
Code | The mandatory code must be unique and preferably descriptive enough so that you can identify the control type easily. |
Description | A description of the control type. |
Remarks | Possibility to add remarks. |
Blocked | Possibility to block a control type. The control types will no longer be available in the list but can be visualized using the right-click function and selecting the option Incl. blocked. |
In the tab Control categories, you can link the current control type to one or several control categories. To visualize only the selected control categories, use the right-click function and select the option Only checked lines.
If needed, you can also adjust the sort order to show the selected categories in the desired order.
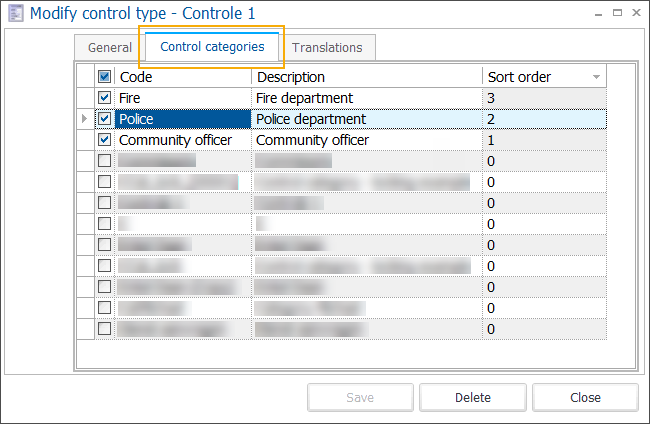 |
You can create, edit and modify control categories from here, using the available framework functionality or you can go to General > Settings > Controls > Categories to do the same.
In the tab Translations, you can add and manage translations of the current control type.
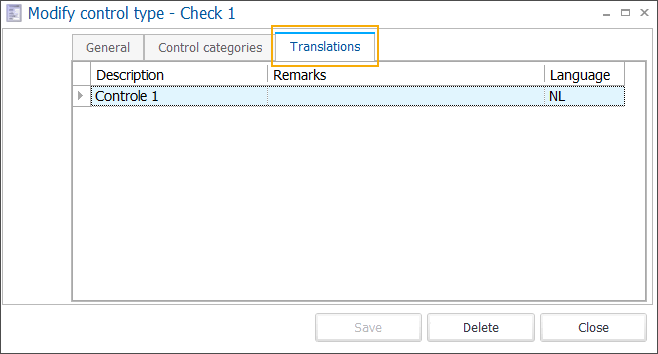
To create, modify or delete control type translations use the available framework functionality.
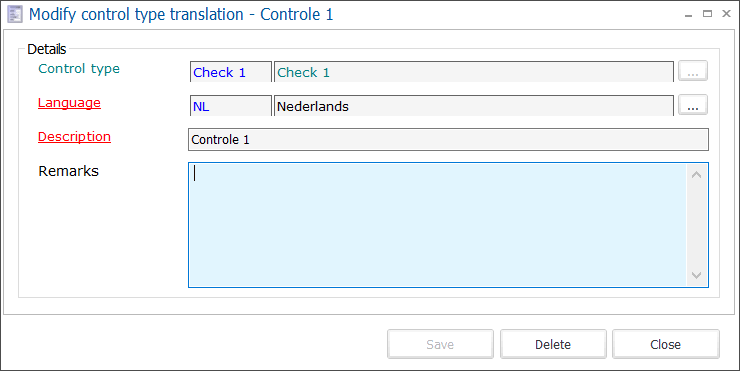
Control type | The current control type is read-only. |
Language | The language of the translated control type |
Description | The translation of the control type description. |
Remarks | Possibility to add remarks. |
Categories
In this part, you manage the control categories for the control mechanism.
Go to General > Settings > Controls > Categories to open the list of all control categories.
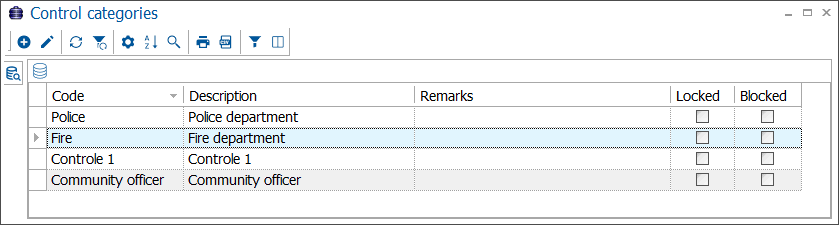 |
To create, modify or delete control categories use the available framework functionality.
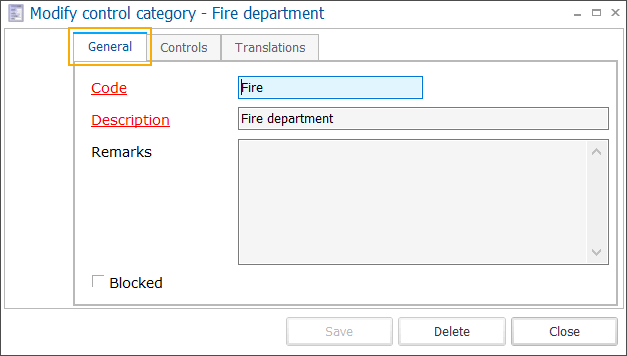 |
Code | The mandatory code must be unique and preferably descriptive enough so that you can identify the control category easily. |
Description | A description of the control category. |
Remarks | Possibility to add remarks. |
Blocked | Possibility to block a control category. The control category will no longer be available in the list but can be visualized using the right-click function and selecting the option Incl. blocked. |
The tab Controls allows you to set up the required controls. The creation and use of these controls are explained in detail in the manuals of the modules in which the control mechanism can be used.
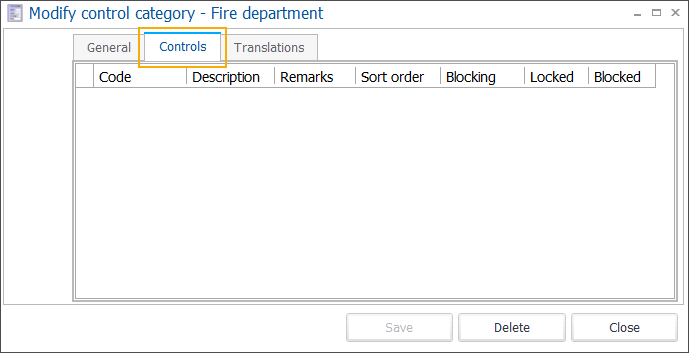 |
To create, modify or delete controls use the available framework functionality.
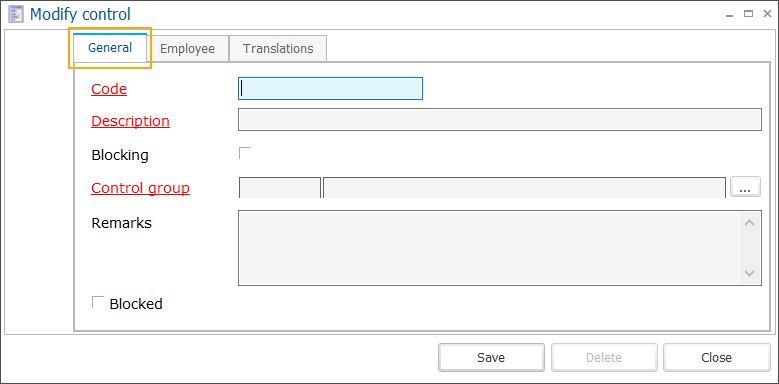
Tab General
Code
The mandatory code must be unique and preferably descriptive enough so that you can identify the control easily.
Description
A description of the control
Blocking
Control group
Linking a control group to control is mandatory
Remarks
Possibility to add remarks.
Blocked
Possibility to block a control. The control will no longer be available in the list but can be visualized using the right-click function and selecting the option Incl. blocked.
In the tab Employee, you can see all employees that have been linked to the control group that is linked to this control.
In the tab Translations, you can add and manage translations of the current control.
In the tab Translations, you can add and manage translations of the current control category.
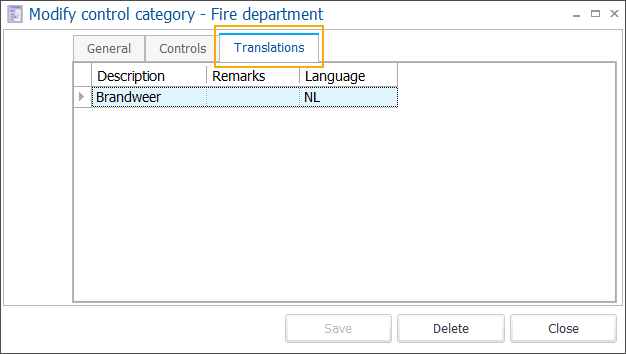
To create, modify or delete control category translations use the available framework functionality.
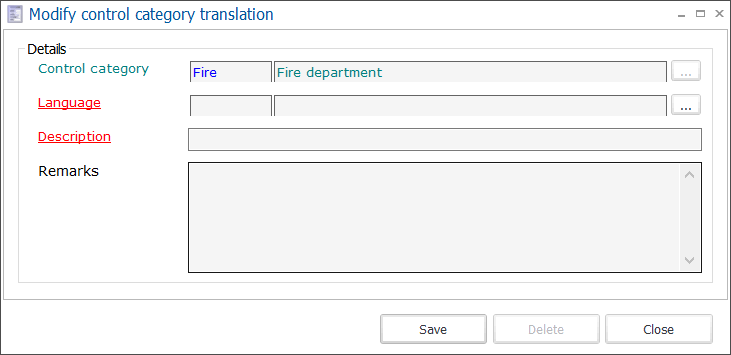
Control category | The current control category is read-only. |
Language | The language of the translated control category |
Description | The translation of the control category description. |
Remarks | Possibility to add remarks. |
E-mail messages
In Recreatex, many different actions across various modules result in sending an email to a customer or an employee. Whether you are sending an invoice, report, booking confirmation or a simple welcome message, in this part you can configure and manage all your email messages and templates. E-mail messages can be then linked from different modules and sent manually or automatically.
Go to General > Settings > E-mail messages to open the list of all email messages.
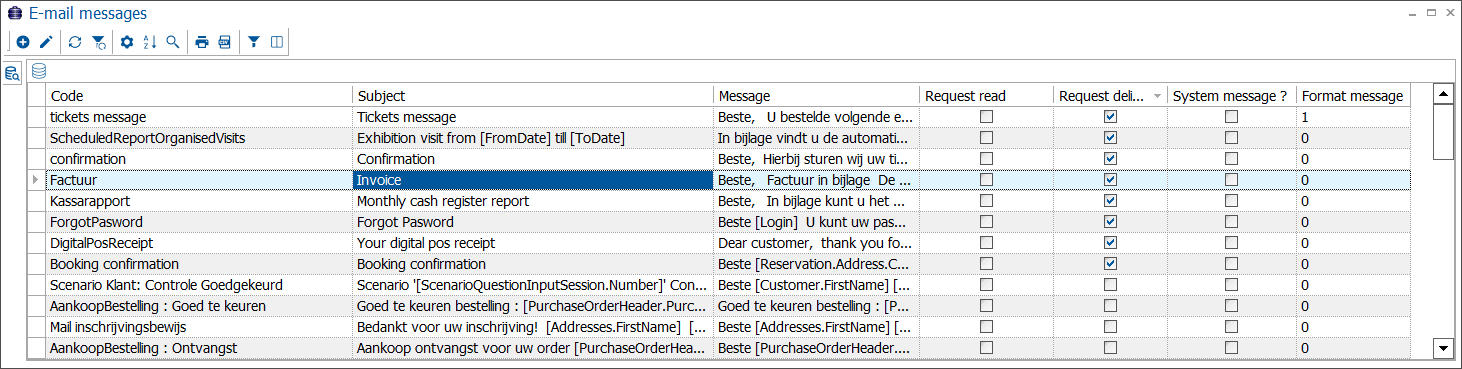 |
To create, modify or delete e-mail messages use the available framework functionality.

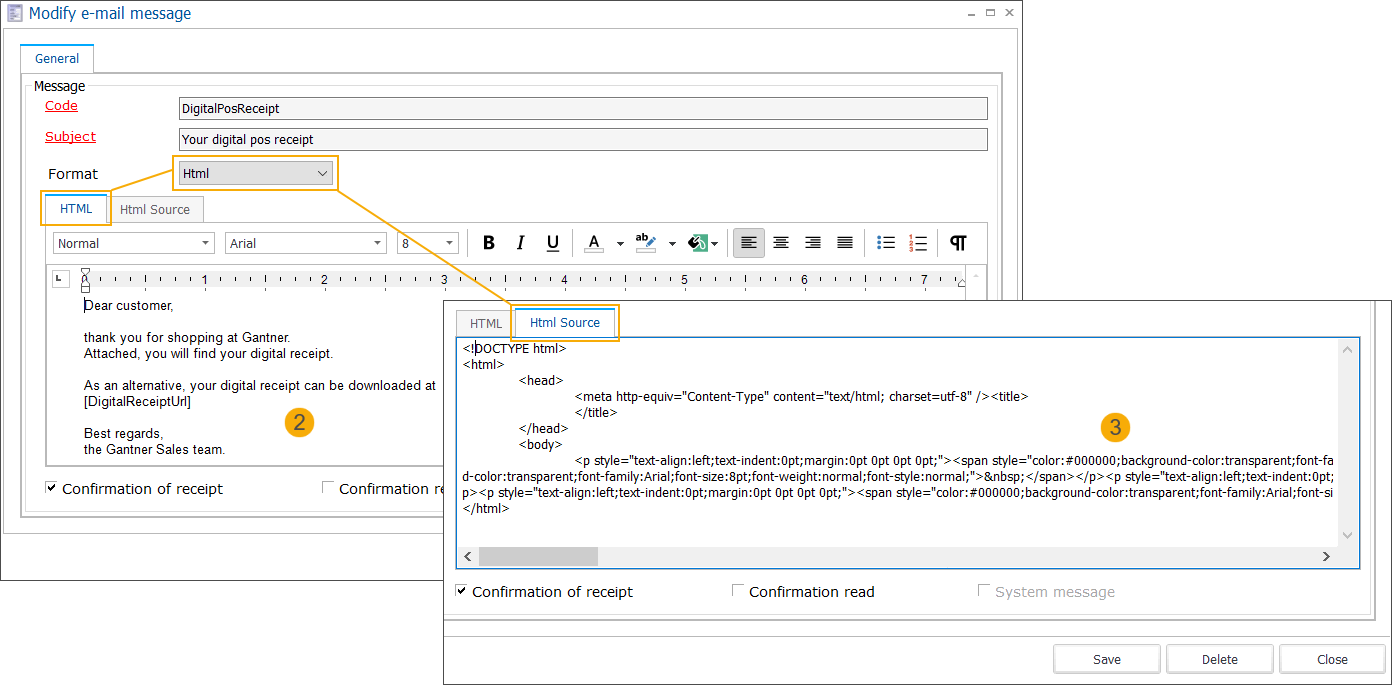
Code | The mandatory code must be unique and preferably descriptive enough so that you can identify the email message/template easily. |
Subject | The subject of the email message/template. |
Format | Select the format you want to use to create the email message/template:
|
Confirmation of receipt | Select this option to request a delivery receipt. |
Confirmation read | Select this option to request a read receipt. |
System message | (No longer applicable) |
Note
It is possible to use database references in email messages/templates, however, correct use of database fields requires proper knowledge of the Recreatex database.
Schedule templates
In most Recreatex modules at some point, you need to create periods (e.g. activity periods, availability periods, registration periods). To speed up the creation you have the possibility to select a predefined schedule template and automatically create the periods based on the template.
In this part, you can create and manage common schedule templates as well as specific mailing schedule templates (module Mailing required).
Go to General > Settings > Schedule templates to open the list of all schedule templates.
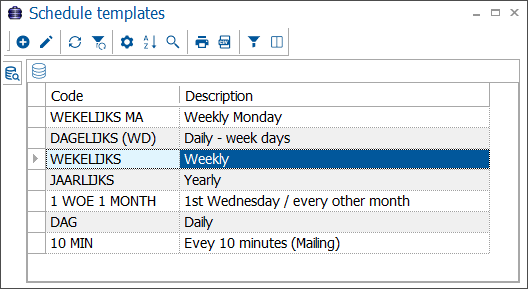 |
To create, modify or delete schedule templates use the available framework functionality.
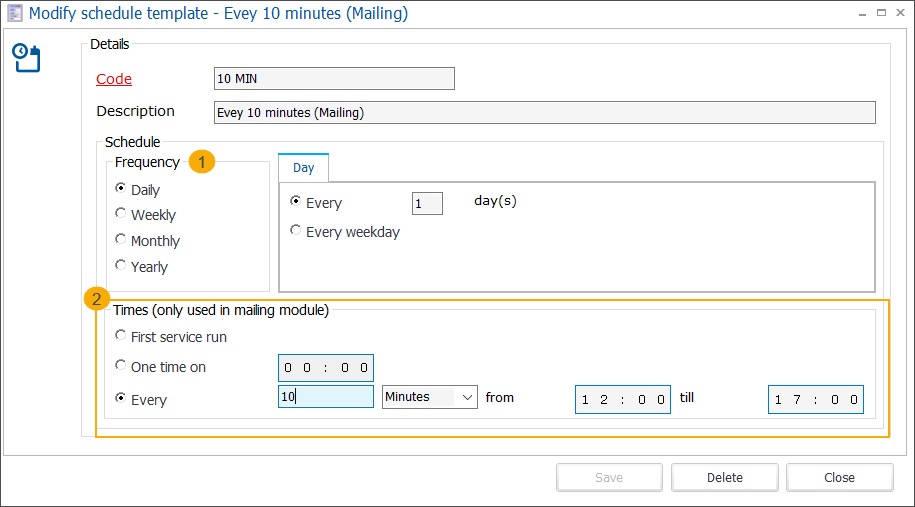
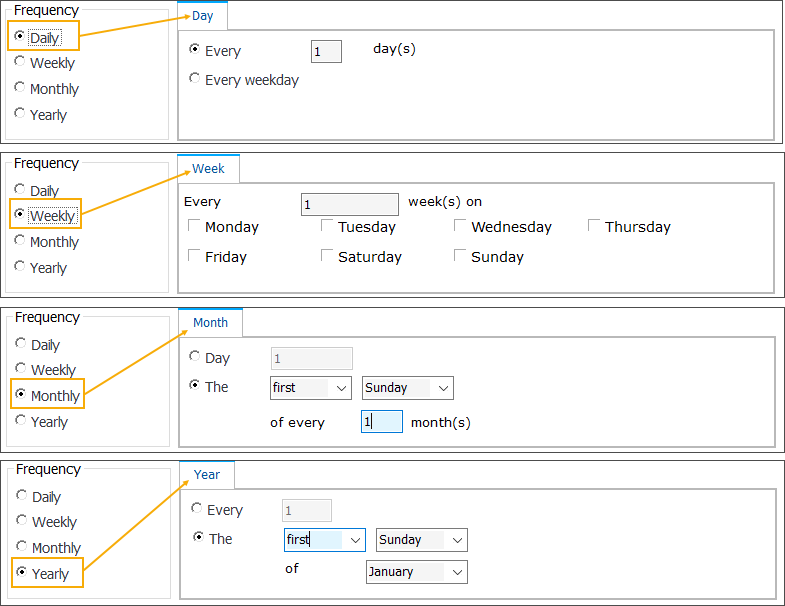
In the section Frequency (1) specify the frequency interval. For every selection a dedicated tab becomes available, providing additional options to refine the frequency interval.
In the section Times (only used in mailing module) (2) you have the possibility to add time specification to your frequency interval to create a more detailed mailing schedule. This is only supported within the module Mailing (separate license). The specified time interval is taken into account by the mailing engine but the exact time of execution depends further on the schedule of the plugin.
First service run: will run 1x, and the mailing will be executed the first time the service runs.
One time on (hour:minutes): will run 1x, after the configured time
Every x hours/minutes from...till: will run multiple times, every x minutes/hours, within the specified time range.
Important
When creating a new schedule template, the option First service run is enabled by default. Changing the radio button to any other option will cause the schedule template to become a mailing schedule template which will only be available inside the module Mailing.
Transport types
In the web parameters of the module Rental, you have the possibility to specify the transport type for the delivery of rented articles. Here you can create and manage all necessary transport types and select related articles.
Go to General > Settings > Transport types to open the list of all transport types.
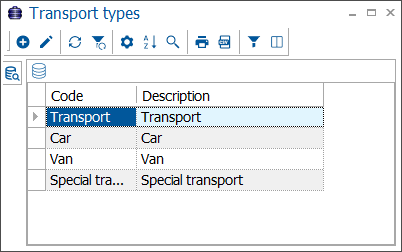
To create, modify or delete transport types use the available framework functionality.
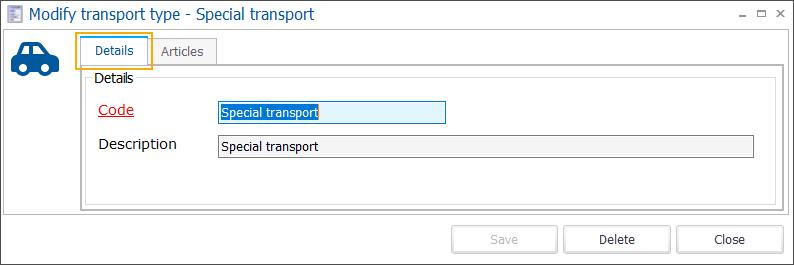
Code | The mandatory code must be unique and preferably descriptive enough so that you can identify the transport type easily. |
Description | A description of the transport type. |
Click Save, then go to the tab Articles.
Articles that you link here would typically be the possible collection/delivery options from which the customer can choose when renting an item. These articles can be set up as standard articles (no type specified) or rental articles (recommended).
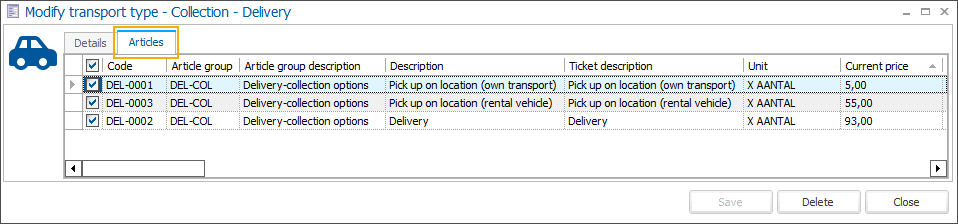
The selection is saved automatically.
Attachment types
Recreatex allows you to add documents for your customers via the backoffice application or provide them with the possibility to add documents themselves, via the Webshop. Here you create attachment types that can help you to classify and identify the attached documents.
Go to General > Settings > Attachment types to open the list of all attachment types.
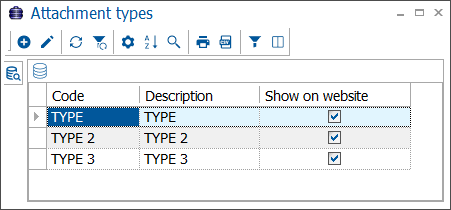
To create, modify or delete attachment types use the available framework functionality.

Code | The mandatory code must be unique and preferably descriptive enough so that you can identify the attachment type easily. |
Description | A description of the attachment type. |
Show on website | Select this option to make the attachment type available on the Webshop. Users can select this attachment type when uploading a document in My attachments on the Webshop. |
To allow a more detailed classification of your attached documents, you can further create attachment subtypes that are linked to the attachment types. For more information on how to create attachment subtypes, see Attachment subtypes.
Attachment subtypes
Create attachment subtypes to classify your attached documents in more detail. An attachment subtype is always linked to one of the attachment types and provides additional messaging functionality to inform the predefined user about an uploaded document.
For more information on how to create attachment types, see Attachment types.
Go to General > Settings > Attachment subtypes to open the list of all attachment subtypes.
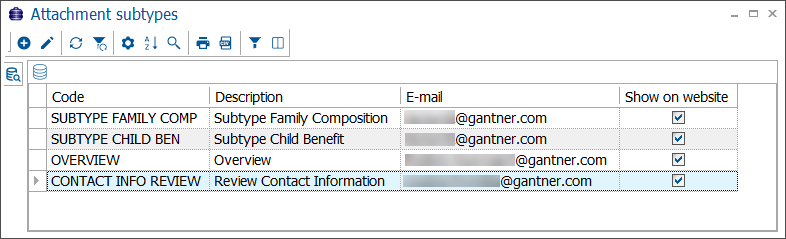
To create, modify or delete attachment subtypes use the available framework functionality.
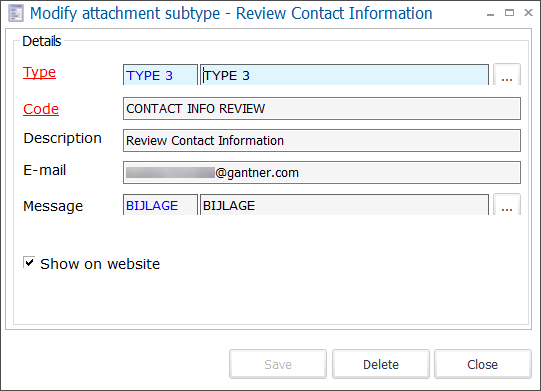
Type | Select the attachment type to which you want to link this attachment subtype. |
Code | The mandatory code must be unique and preferably descriptive enough so that you can identify the attachment subtype easily. |
Description | A description of the attachment subtype. |
You can provide an email address to notify a user when a document of a certain subtype has been uploaded to Recreatex, e.g. an employee responsible for all child benefits documents will receive an email whenever a document with the related subtype has been uploaded. | |
Message | Select an email message/template that will be sent to notify the user about the uploaded document. The actual document will be automatically attached to the email message. For more information on how to create an email message/template, see E-mail messages. |
Show on website | Select this option to make the attachment subtype available on the Webshop. Users can select this attachment subtype when uploading a document in My attachments on the Webshop. |
Dynamic selections
In Recreatex you can utilize database data to create custom dashboards, pivots or reports.
To define which data you want to retrieve from the database you have to configure data sources which are the link between the data in the database and the visualisations in the dashboards, pivots and reports.
Go to General > Settings > Dynamic selections to open the list of all dynamic selections (data sources).

To create, modify or delete dynamic selections use the available framework functionality.
 |
Code | The mandatory code must be unique and preferably descriptive enough so that you can identify the dynamic selection (data source) easily. |
Description | A description of the dynamic selection (data source). |
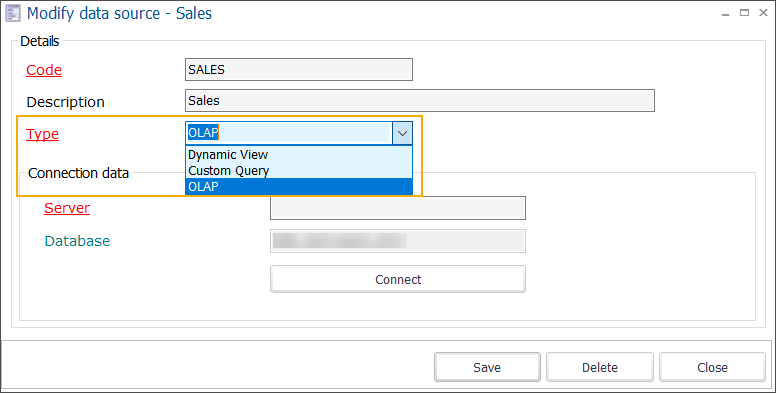
Type | Select the type of connection you want to use for the dynamic selection (data source). |
In the Connection data section, fill in the required data to establish the database connection. Depending on the selected type of connection, you will have to fill in different connection data.
There are 3 possible types of data sources:
Note
To set up the data sources Custom query or Dynamic view contact our customer service or your Gantner consultant.
OLAP model
Online Analytical Processing (OLAP) performs multidimensional analysis of business data. It allows for complex calculations, trend analysis and sophisticated data modelling, which provides the insight needed for better decision-making. It uses a multi-dimensional database, where each data attribute (e.g. sales, region, time period and so on) is considered a separate dimension.
The visualised data is stored in a separate location to increase performance.
 |
Important
When the data source type OLAP is used, the data visualised on the dashboards, pivots or reports are not real-time but day -1 (everything until yesterday).
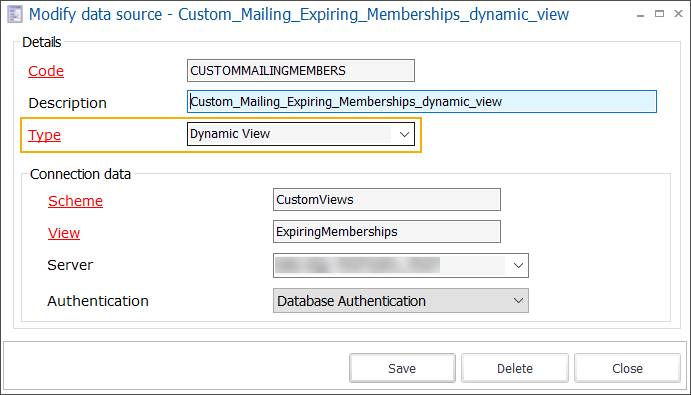
Dynamic view
When the data source type Dynamic View is used, a view is created directly in the SQL database. You can use the default view or request a customized version.
The data visualised on the dashboards, pivots or reports are in real-time, which can result in a slightly longer loading time of the data.
 |
Note
The data source of the type Dynamic view must be configured by your Vintia consultant or Vintia CSC agent.
Custom Query
With the data source Custom Query, you can create your own queries and include a customized selection of data.
To create customized queries, click the button Designer to access the Query Builder application.
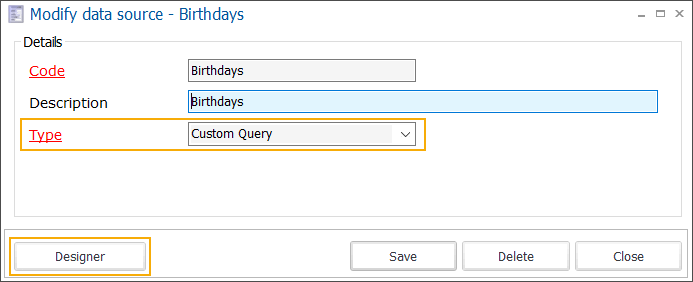
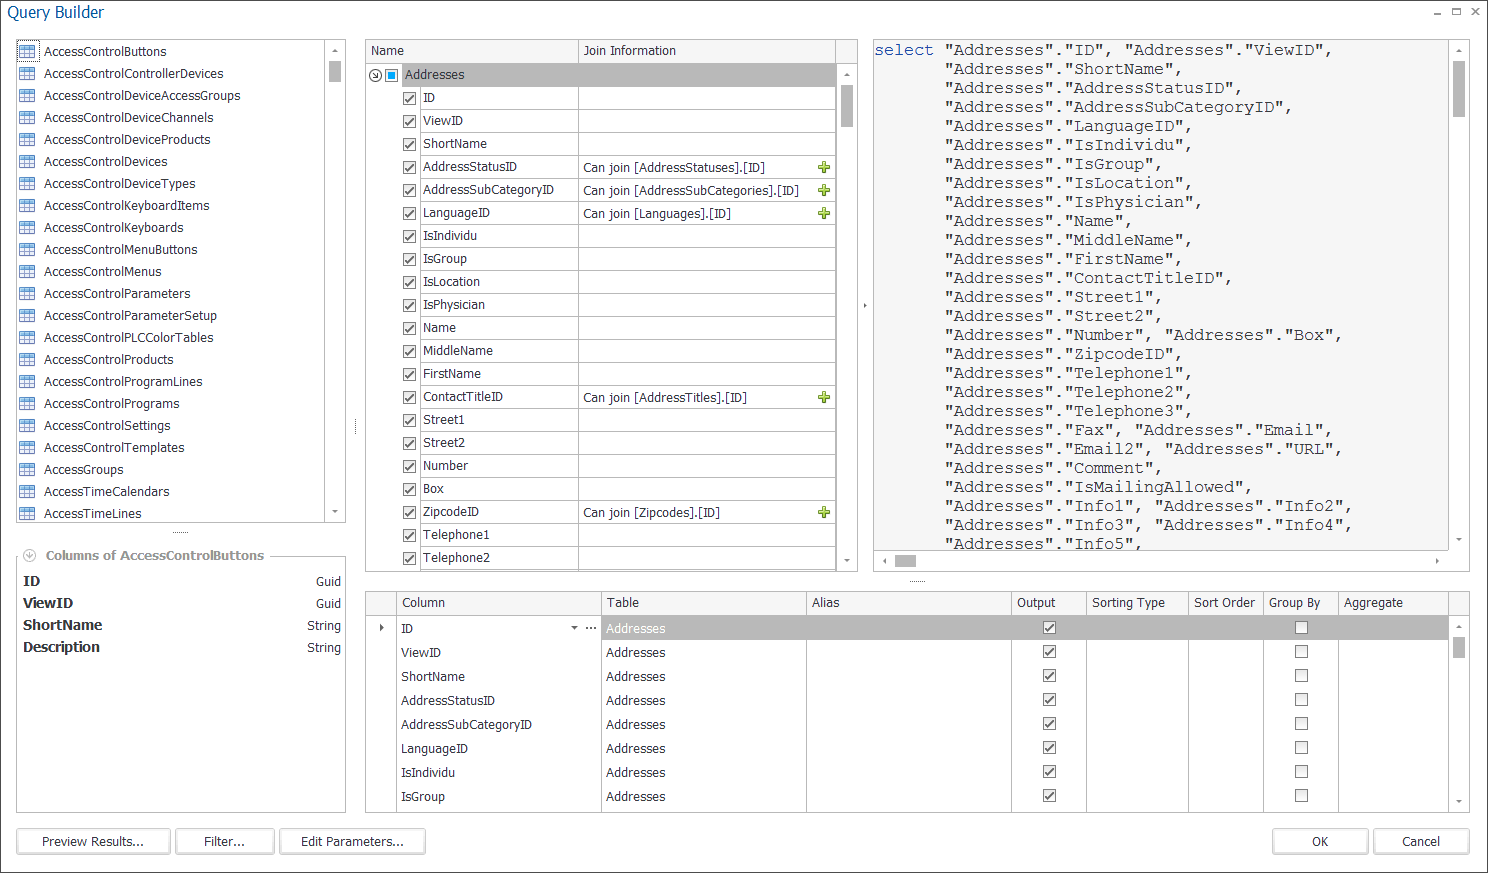 |
When the data source Custom Query is used, the data visualised on the dashboards, pivots or reports are in real-time, which can result in a slightly longer loading time of the data.
Note
The Custom Query option requires advanced knowledge of the database and the query builder application.
Consumption locations
In Recreatex, you have the possibility to define areas within your infrastructure to which you can link one or more points of sales. In the module Exhibitions, you can then link such area to your exhibition and make the exhibition only available for sale at the points of sale in that specific area, called consumption location.
Go to General > Settings > Consumption locations to open the list of all consumption locations.
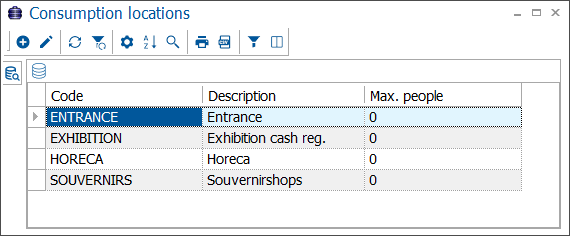
To create, modify or delete consumption locations use the available framework functionality.
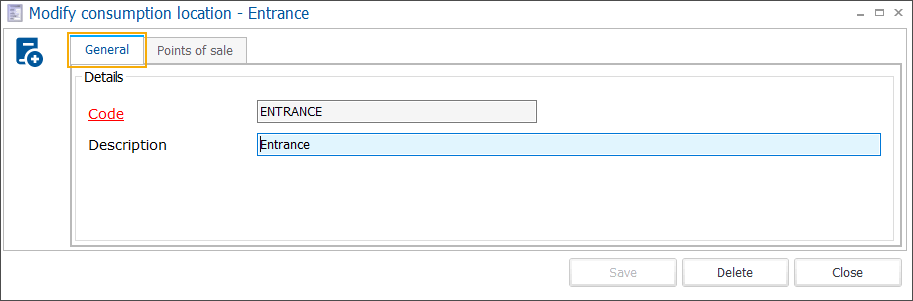
Code | The mandatory code must be unique and preferably descriptive enough so that you can identify the consumption location easily. |
Description | A description of the consumption location |
Click Save, then go to the tab Points of sale to link one or more points of sale to the consumption location.

The selection is saved automatically.