Reports
Under the part Reports you can call up different reports, each time on the basis of specific selection criteria.
Go to POS > Reports.
The following reports are available:
Tip
If a certain report consists of several pages, you can use the available buttons to navigate within the report. (see manual 'FRAMEWORK' Framework)
 |
Transactions per payment method
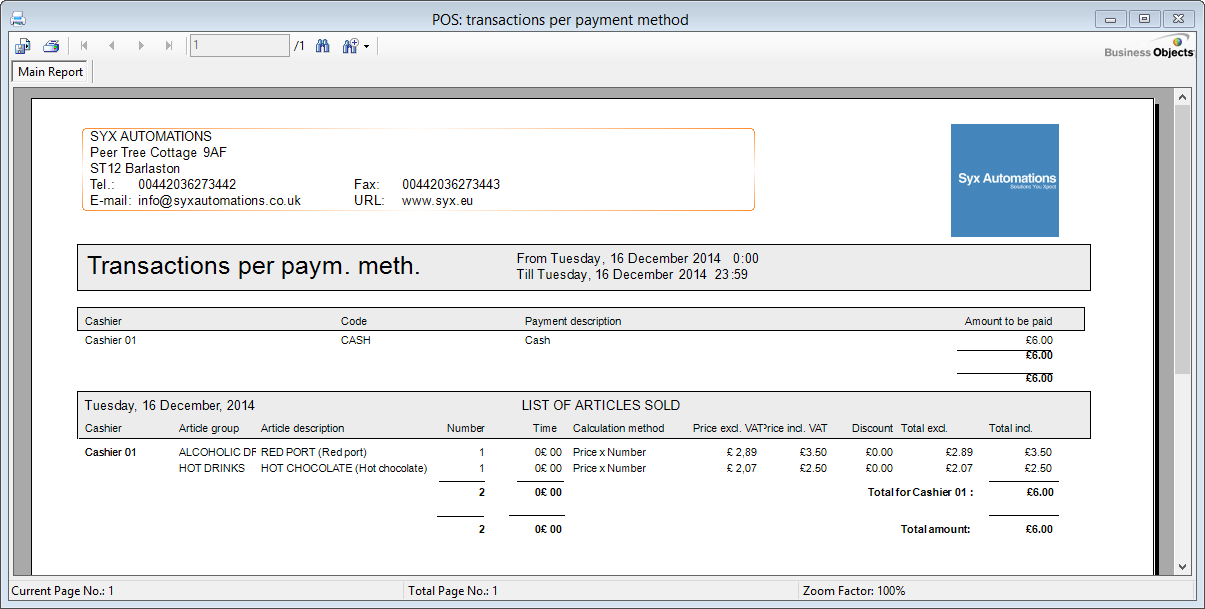
This report gives you an overview of registered POS transactions, split up per payment method (and if you wish so per date and/or customer).
Go to POS > Reports > Transactions per payment method.
The selection window below will appear.
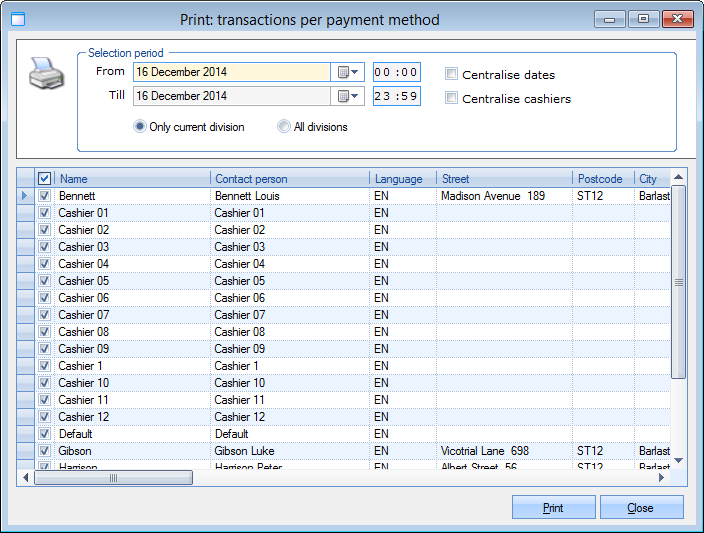 |
In the section Selection period you can define the period of which you want to call up the transactions. You can also choose to call up the data of the current division only, or of all divisions.
The option Centralise dates makes sure that the data on the report are not split up per date/day.
The option Centralise cashiers makes sure that the data on the report are not split up per cashier.
In the lower part of the window you can specify a cashier of which you want to see the POS transactions.
See next page.
If you have determined the selection criteria, you have to click on Print and the report below will appear:
 |
Transactions per cashier
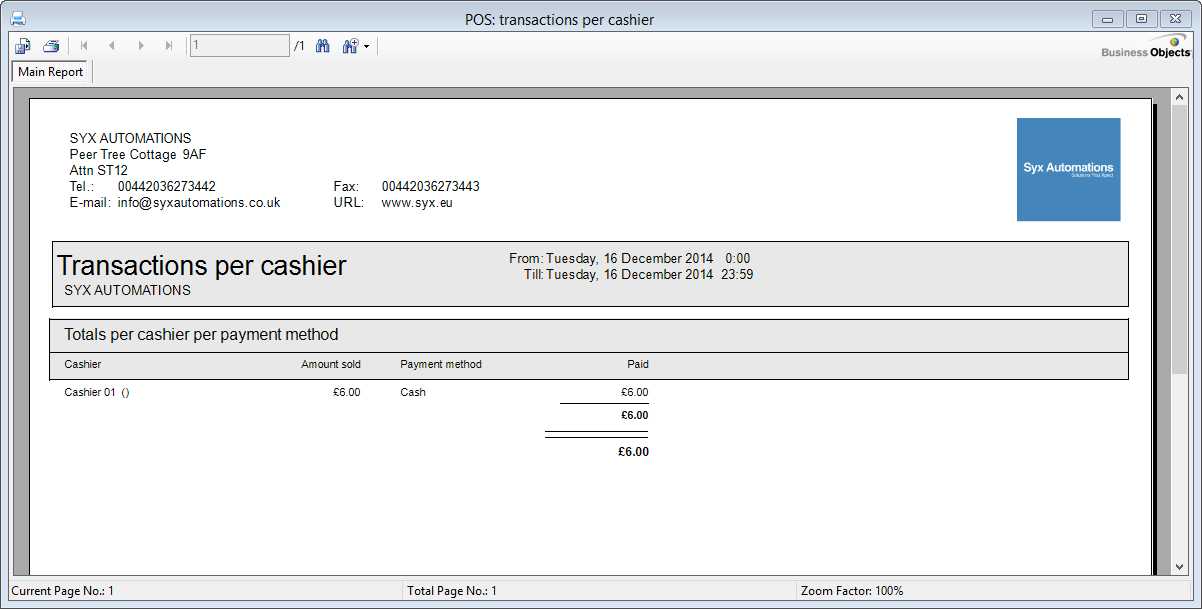
This report gives you an overview of the registered POS transactions, split upper cashier. This is a more global report than Transactions per payment method.
Go to POS > Reports > Transactions per cashier.
The selection window below will appear.
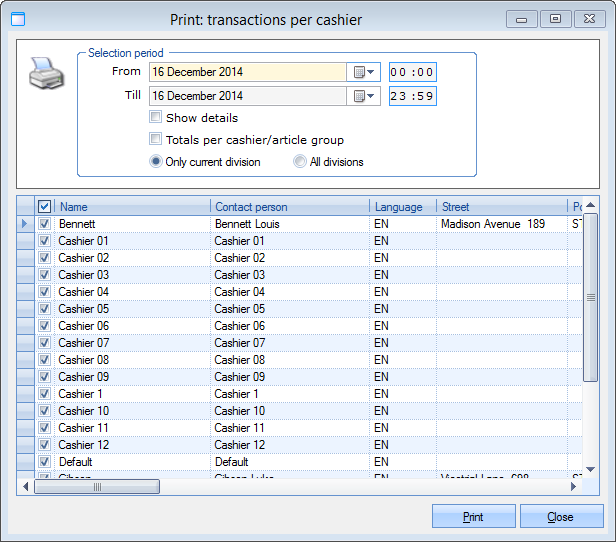 |
In the section Selection period, you can define the period of which you want to call up the POS transactions.
The option Show details allow you to include the details of the sales (the articles in question) in the report.
The option Totals per cashier/article group makes sure that the data in the report are also split up per article group.
Moreover, you can choose to call up the data of the current division only, or of all divisions.
In the lower part of the window, you can specify the cashier(s) of which you want to see the POS transactions.
If you have determined the selection criteria, you have to click on Print and the report below will appear:
 |
Transactions per point of sale
This report gives you an overview of the registered POS transactions, split up per point of sale (and per cashier).
Go to POS > Reports > Transactions per point of sale.
The selection window below will appear.
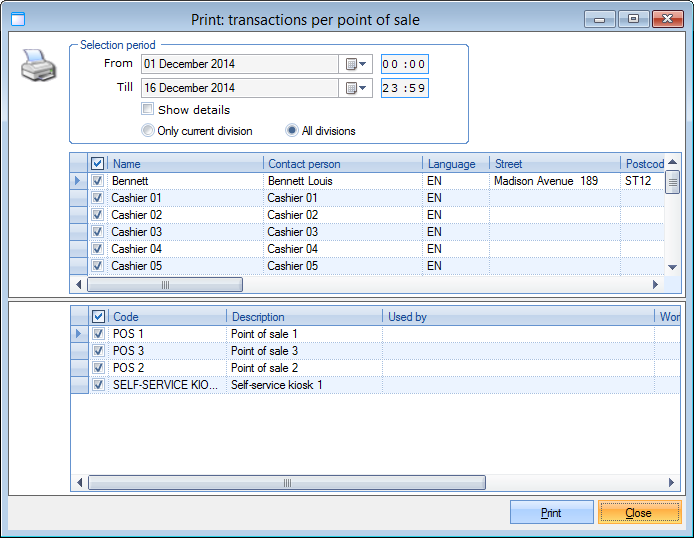 |
In the section Selection period, you can define the period of which you want to call up the POS transactions.
The option Show details allow you to include the details of the sales (the articles in question) in the report.
Moreover, you can choose to call up the data of the current division only or of all divisions.
In the lower part of the window you can, on the one hand, specify the cashier(s) of which you want to see the POS transactions and on the other hand of which point(s) of sale.
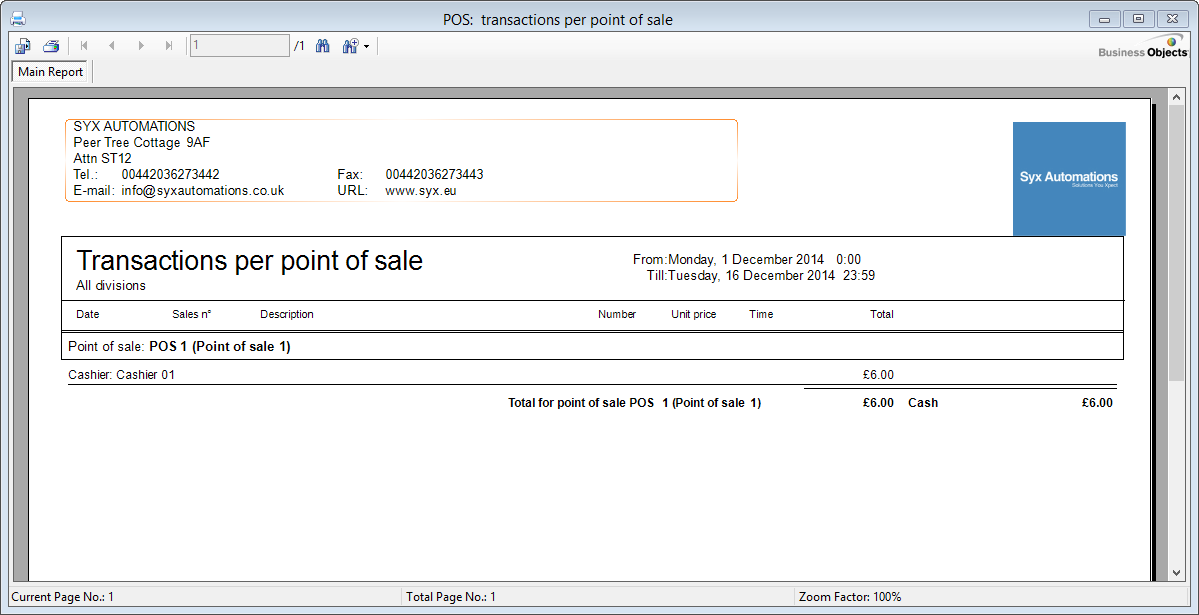
If you have determined the selection criteria, you have to click on Print and the report below will appear:
 |
Receipts per period
This report gives you an overview of the POS receipts, split upper worked period (POS shift).
Go to POS > Reports > Receipts per period.
The selection window below will appear.
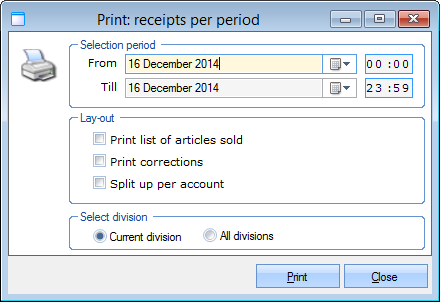 |
In the section Selection period, you can define the period of which you want to call up the POS receipts.
In the section Layout, you can use the available options to indicate if the articles and/or corrections have to be included in the report, and if the report data have to split upper ledger account or not.
Moreover, you can choose to call up the data of the current division only or of all divisions.
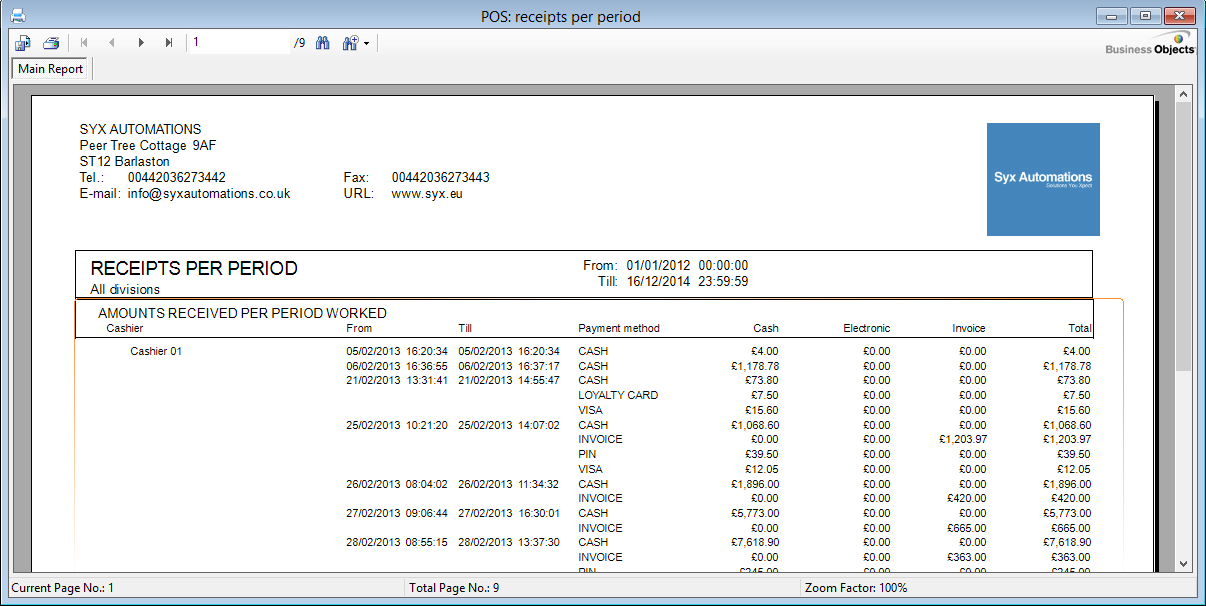
If you have determined the selection criteria, you have to click on Print and the report below will appear:
 |
Open shifts per employee
This report gives you an overview of all POS shifts that have been executed, including those that are open on the moment the report is generated.
Go to POS > Reports > Open shifts per employee.
The selection window below will appear.
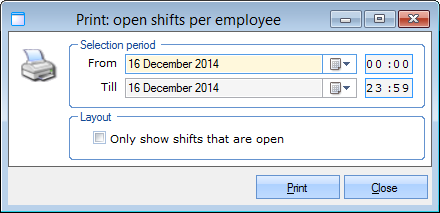 |
In the section Selection period, you can define the period of which you want to call up the shifts.
The option Only show shifts that are open allows you to indicate that only the shifts that are currently open have to be included in the report.
If you have determined the selection criteria, you have to click on Print and the report below will appear:
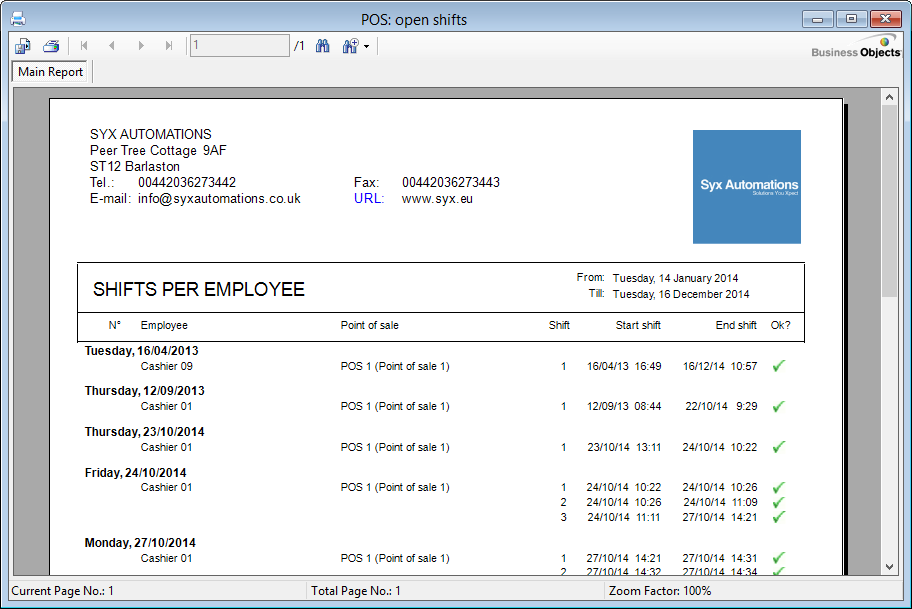 |
Tip
The symbol  indicates a POS shift that is currently open.
The symbol  indicates a closed POS shift.
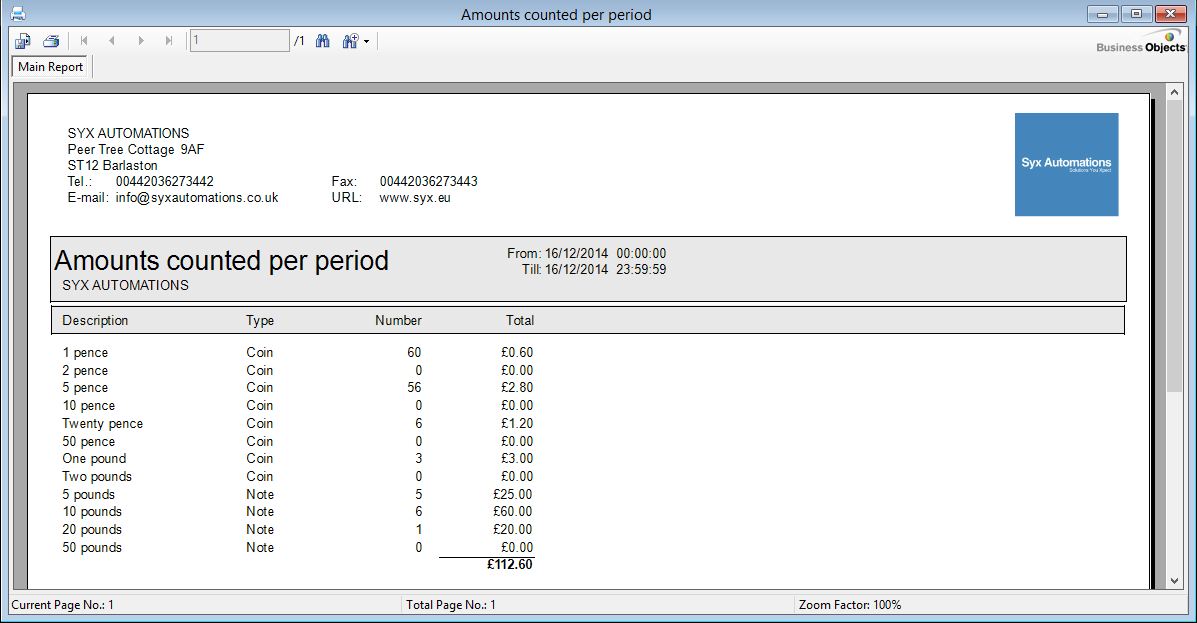
Amounts counted per period
This report gives you a specific overview of the coins and/or notes that have been counted when closing POS shifts.
Go to POS > Reports > Amounts counted per period.
The selection window below will appear.
 |
In the section Selection period, you can define the period of which you want to call up the amounts counted.
In the section Layout, you can use the available options to indicate that the division of coins and/or notes have to be included in the report or not.
Moreover, you can choose to call up the data of the current division only or of all divisions.
If you have determined the selection criteria, you have to click on Print and the report below will appear:
 |