Exhibition visits
This topic discusses the following items:
Register an exhibition visit
There are multiple methods to register an exhibition visit:
Through the exhibition visits overview
Go to Exhibitions > Visits.
Next, an overview of the registered visits is displayed (by default those with visit date starting today).
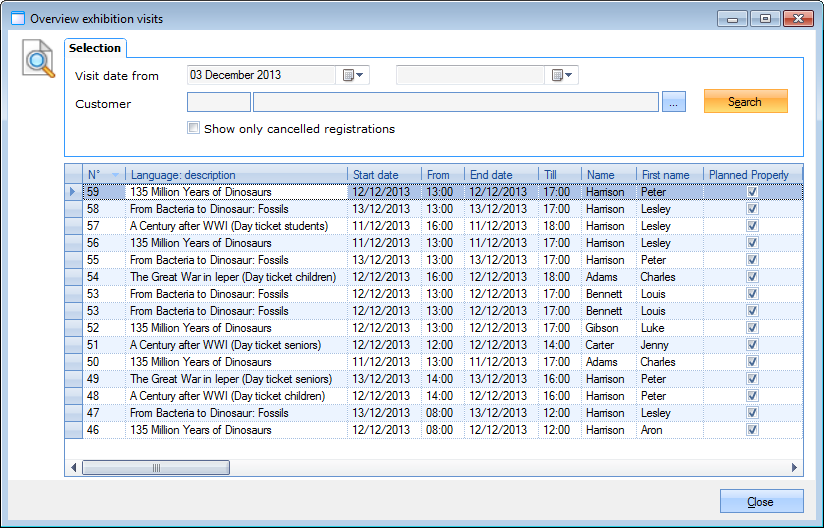 |
A new exposition visit can be created by pressing <F2> (or right-click, followed by New).
As a result, a new window called Modify exhibition visit is shown, in which all details of the visit can be entered on different tabs.
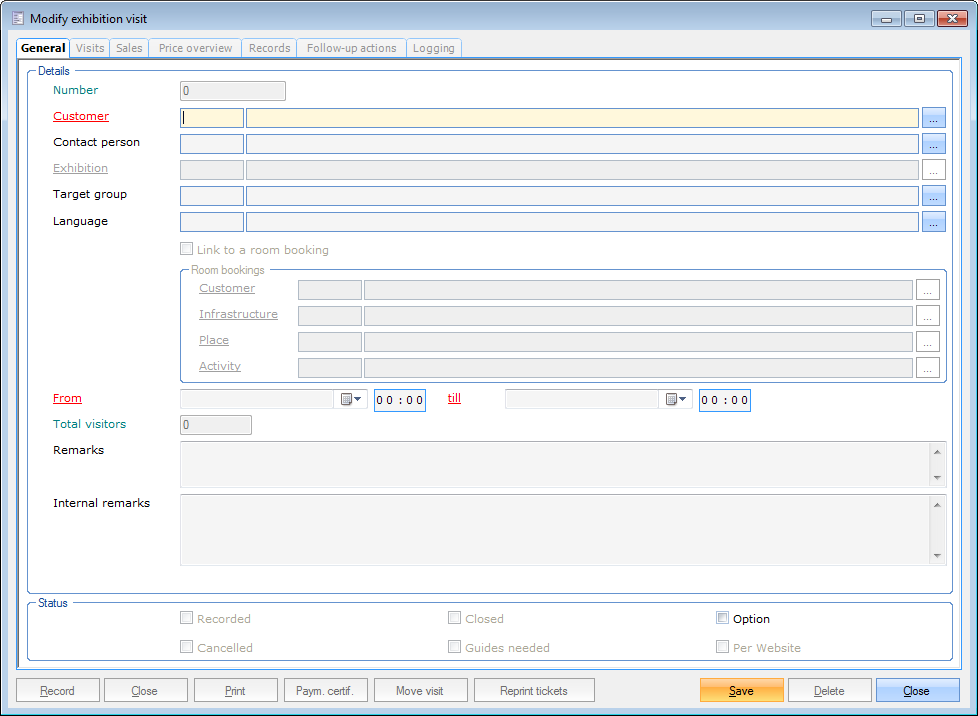
General
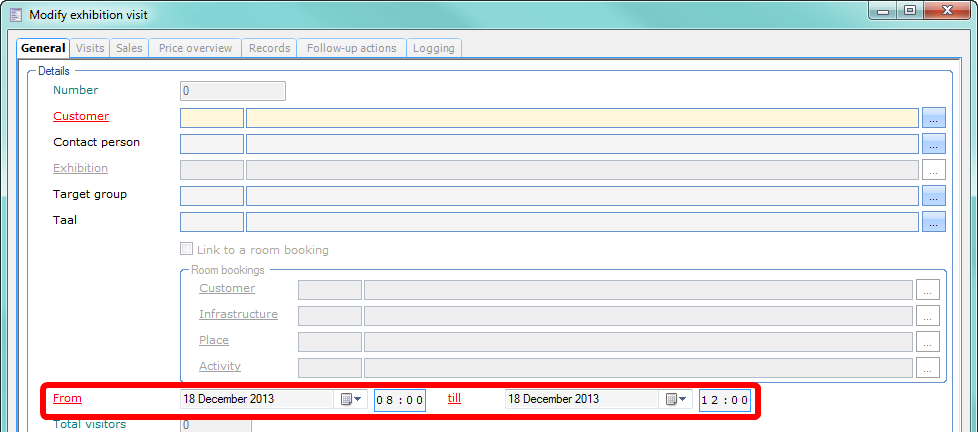
The General tab contains the basic properties of the exhibition visit, of which the customer and the visit period (from/till date/time) are mandatory fields.
 |
After providing the basic data for the visit, it is not yet necessary to press the Save button. When trying to save in this step of the registration process, the following message would appear:
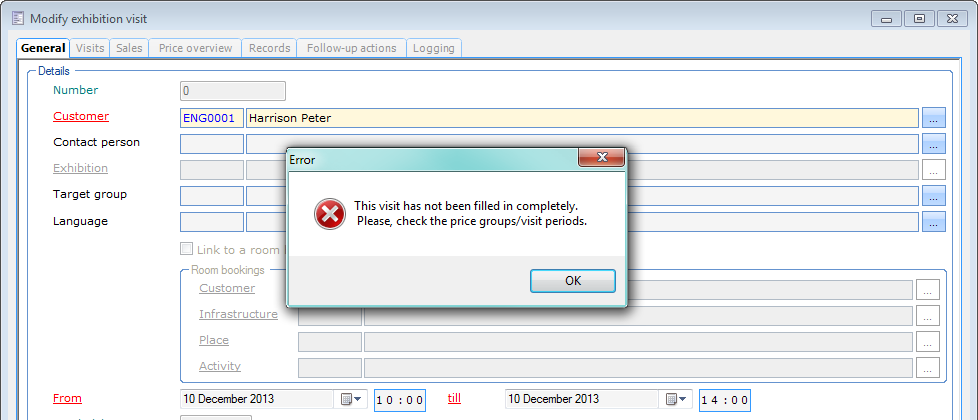 |
This message is displayed because first the exhibition in question as well as the visitor number needs to be defined in the Visits tab.
Visits
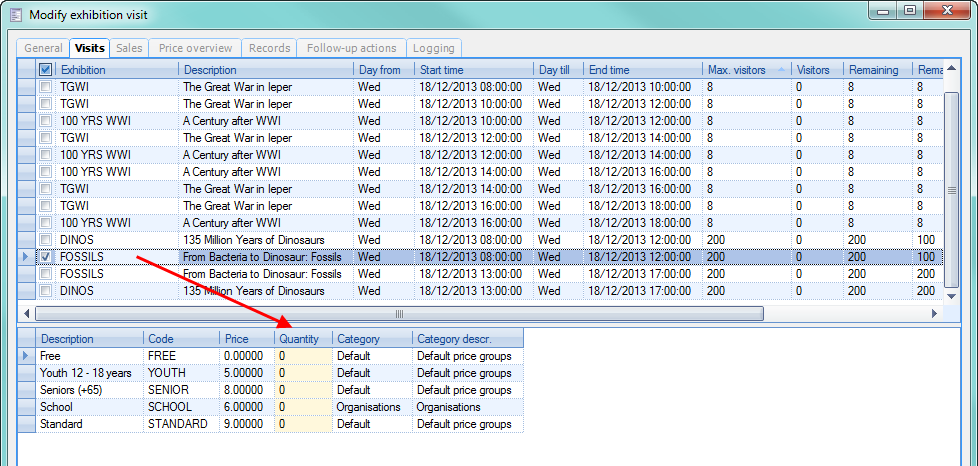
The upper section of the Visits tab displays all the exhibitions (and their respective periods) that take place on the date that was entered in the General tab of the visit.
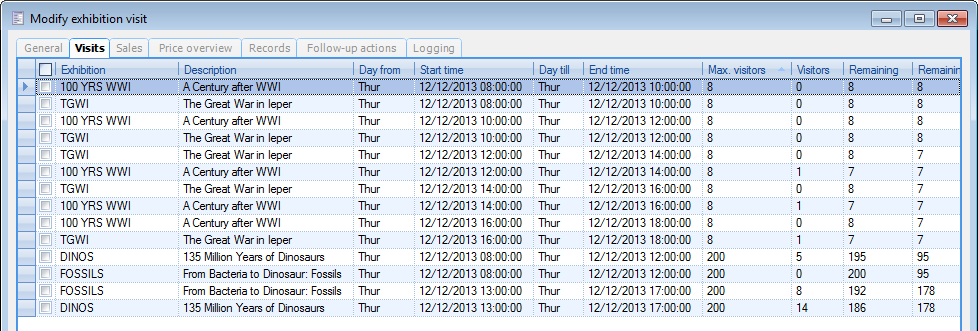 |
There, the desired exhibition must be selected (checked), which results in the display of the pricing in the bottom part of the window. This pricing depends on the type of pricing that was assigned to the exhibition (see chapter 'Exhibitions', paragraph 'Prices'Prices).
In case pricing is based on price groups:
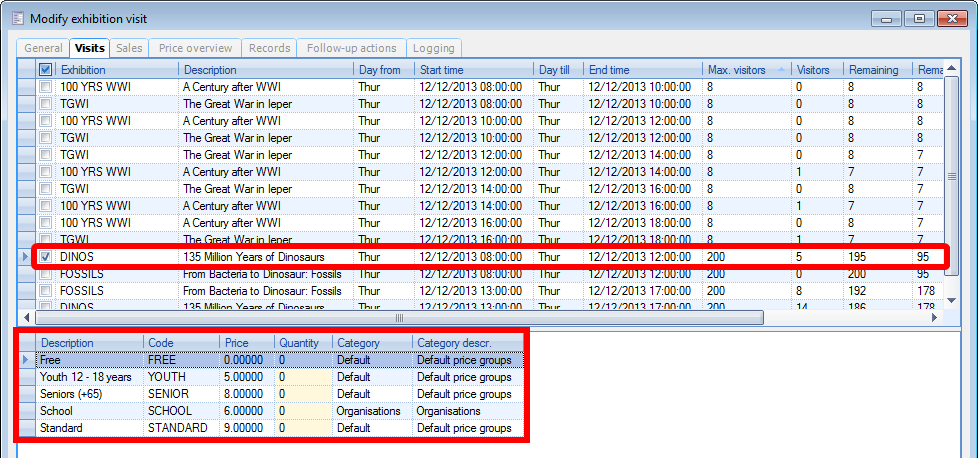 |
In case pricing is based on articles:
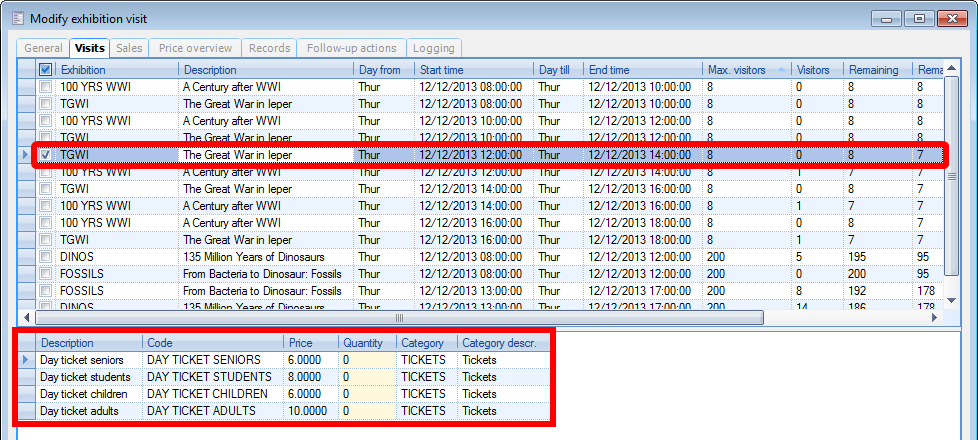 |
After selecting the exhibition, the required visitor numbers can be entered per article/price group.
At this point, the registration of the visit can be saved by pressing the button Save.
Sales
The Sales tab initially contains the articles which were set to be registered (sold) automatically for each visitor in a registered visit (see chapter 'Exhibitions', paragraph 'Articles'Articles).
In this case, a visitors guide is registered per visitor.
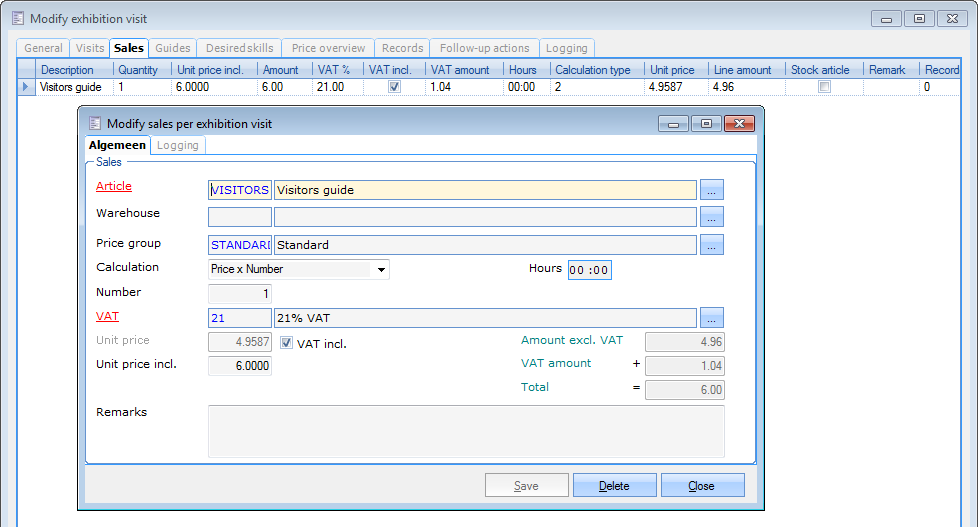 |
Naturally, it is possible to edit such sales, delete them, or even add other articles to this visit.
Guides
Note
The Guides tab is only available when the option Guides needed is active in the General tab.
The operation of the Guides tab depends on a specific parameter (see also chapter Parameters), that determines whether the assignment of employees (here: tour guides) happens through the task planning system or not.
In case the parameter Use task planning is enabled, then in the Guides tab it will be possible to add/edit tasks to which at that time it is not yet required to assign employees. The assignment of employees to a generated task can in that case be done through the planning in the Exhibitions module (see chapter Planning) or through the Recreatex Employees module (see manual 'GENERAL - Employees'Employees).
In case the parameter Use task planning is disabled, then in the Guides tab it will be possible to directly assign specific employees to the current exhibition visit. The task with the assigned employee then also needs to be followed up in the employee planning.
Parameter Use task planning enabled:
After saving the exhibition visit for the first time, the necessary tasks are automatically generated, according to the standard work type that is defined in the parameters. In case the given number of visitors exceeds the value of Max. visitors per group (determined on the exhibition itself), then multiple tasks will be created automatically.
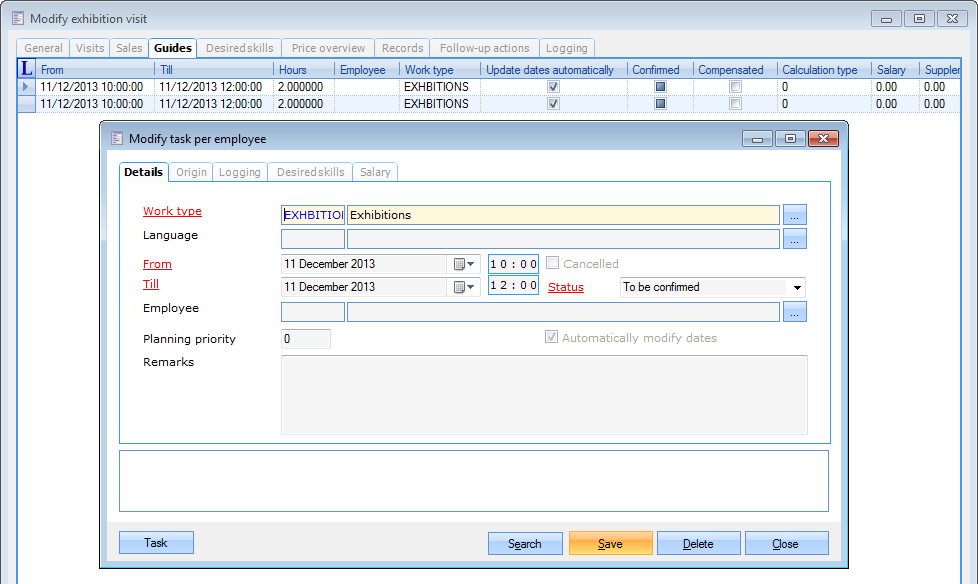 |
Such tasks can then be followed up at a later stage though the task planning.
See next page.
Parameter Use task planning disabled:
In this case, the Guides tab will display all employees that are considered for the current exhibition visit. This means only the employees will be shown that a) are available (and not yet assigned to other tasks), b) are assigned to the correct work type (that is defined on the exhibition) and c) have the appropriate skills as defined on the exhibition, or selected in the Desired skills tab of the current exhibition visit.
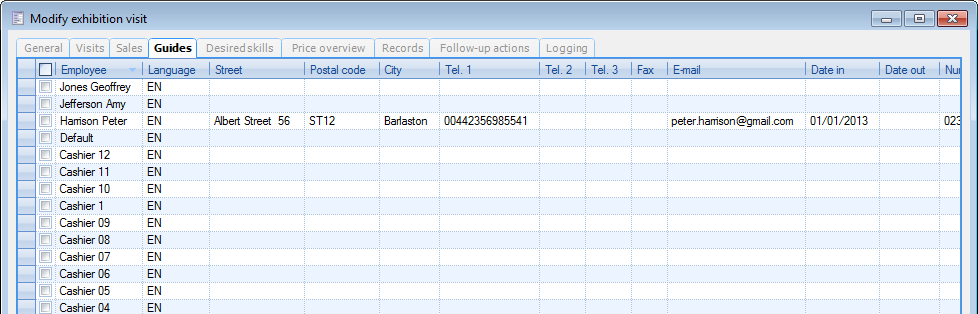 |
In this list, it is possible to select the employee(s) that need(s) to be assigned to the current exhibition visit. This will result in the generation of tasks with direct employee assignment. Generated tasks can then be followed up at a later stage through the planning in the Exhibitions module (see chapter Planning).
Note
More information on the creation, editing and removal of employee tasks can be found in the Recreatex manual 'GENERAL - Employees'Employees.
Desired skills
In this tab, the desired skills are initially inherited from those that were defined on the exhibition itself. Also the additional skills that were selected during the visit registration through the POS system appear in this list as being checked.
Of course it is possible to (de)select skills in this list yourself.
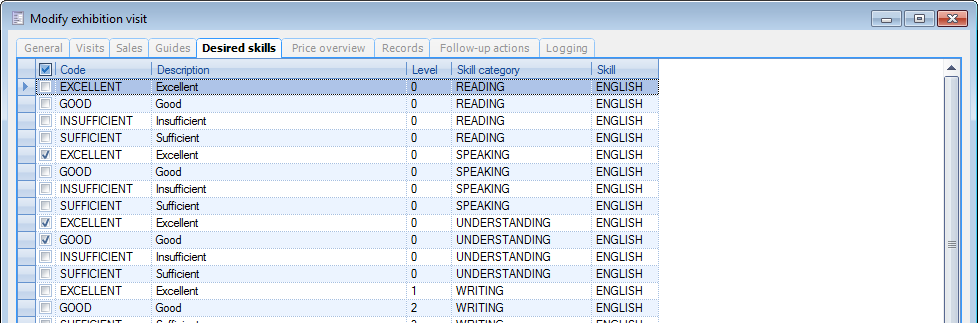 |
As mentioned earlier, the desired skills are a useful tool in the task planning process.
Price overview
This tab shows the price overview of the current exhibition visit.
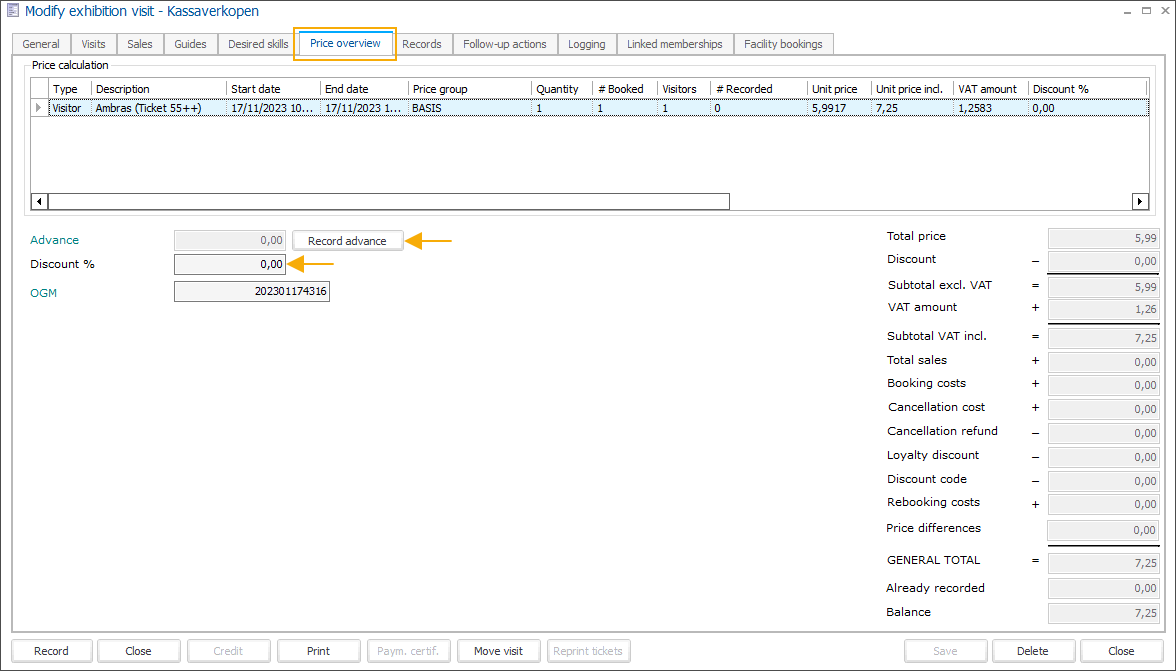 |
It also allows recording one or more advance payments (before the definitive payment) and/or applying a discount (%).
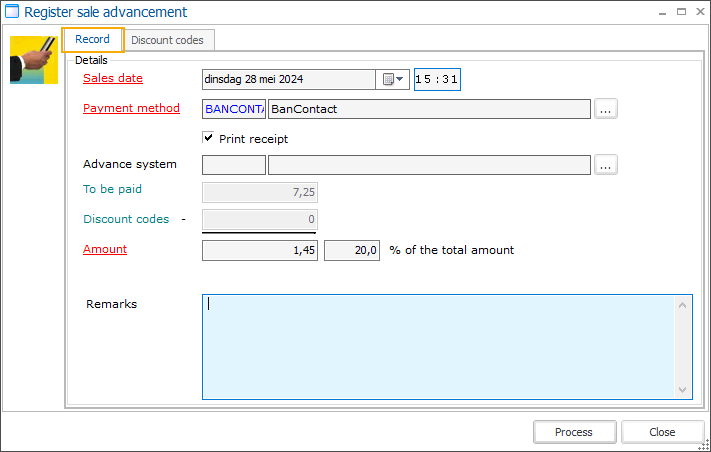
Sales date
The mandatory field automatically shows the current date and time when the payment has been initiated but it can be changed if necessary.
Payment method
Select the payment method that will be used to record the advance payment.
Advance system
To be paid
Discount codes
Amount
Remarks
Optional remark can be added to each advance payment. After the payment has been processed, the remark is stored in the related sale, under the tab Various.
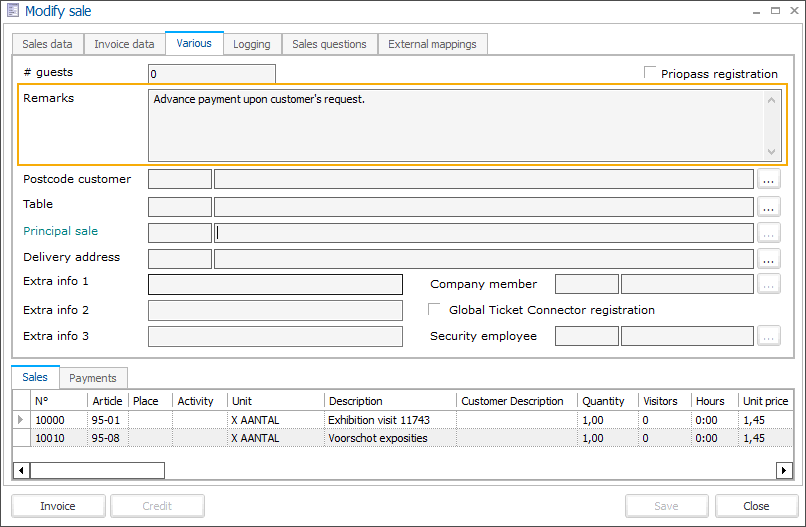
Note
You can retrieve the related sale under Sales admin > Visualisations > Sales or directly in the detail of your exhibition visit, under the tab Records.
Records
Here, all recorded payments of the current exhibition visit are shown. Multiple records are possible, for example as a result of advances.
 |
Follow-up actions
Here, the different follow-up actions, assigned to the exhibition type, are displayed. These are part of a follow-up system, where the registration of an exhibition visit needs go through a certain (internal) follow-up procedure (e.g. with approvals) before it can be made final.
 |
Logging
This tab contains all actions that have been recorded on the current exhibition visit, since its initial creation.

Through the overview of registered exhibition visits within an exhibition period
A second method to register an exhibition visit is directly within an exhibition period.
This is possible by opening an exhibition period in the Periods tab of the concerning exhibition.
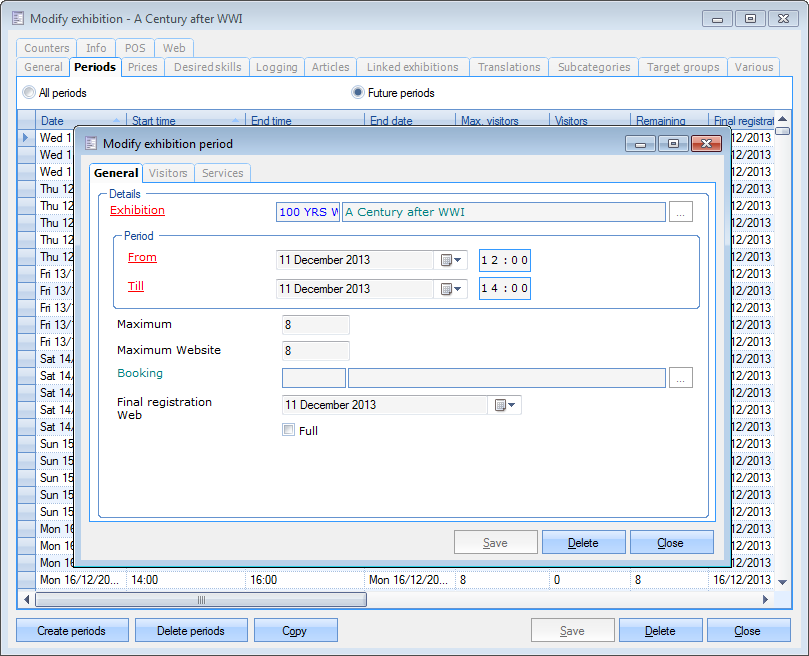 |
Next, a new registration can be started from within the Visitors tab, for example by pressing <F2> or by right-clicking and then selecting New.
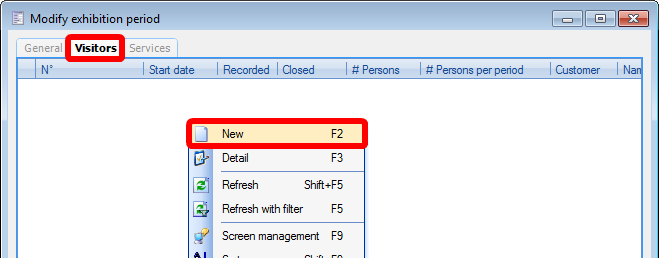 |
Subsequently, the window Modify exhibition visit appears, where the necessary data for the visit can be entered, as would be done when creating a new exhibition visit through the exhibition visits overview (see previous paragraph).
Through the calendar view
In this case, the registration of an exhibition is aided by a graphic calendar.
Go to Exhibitions > Visualisations > Calendar.
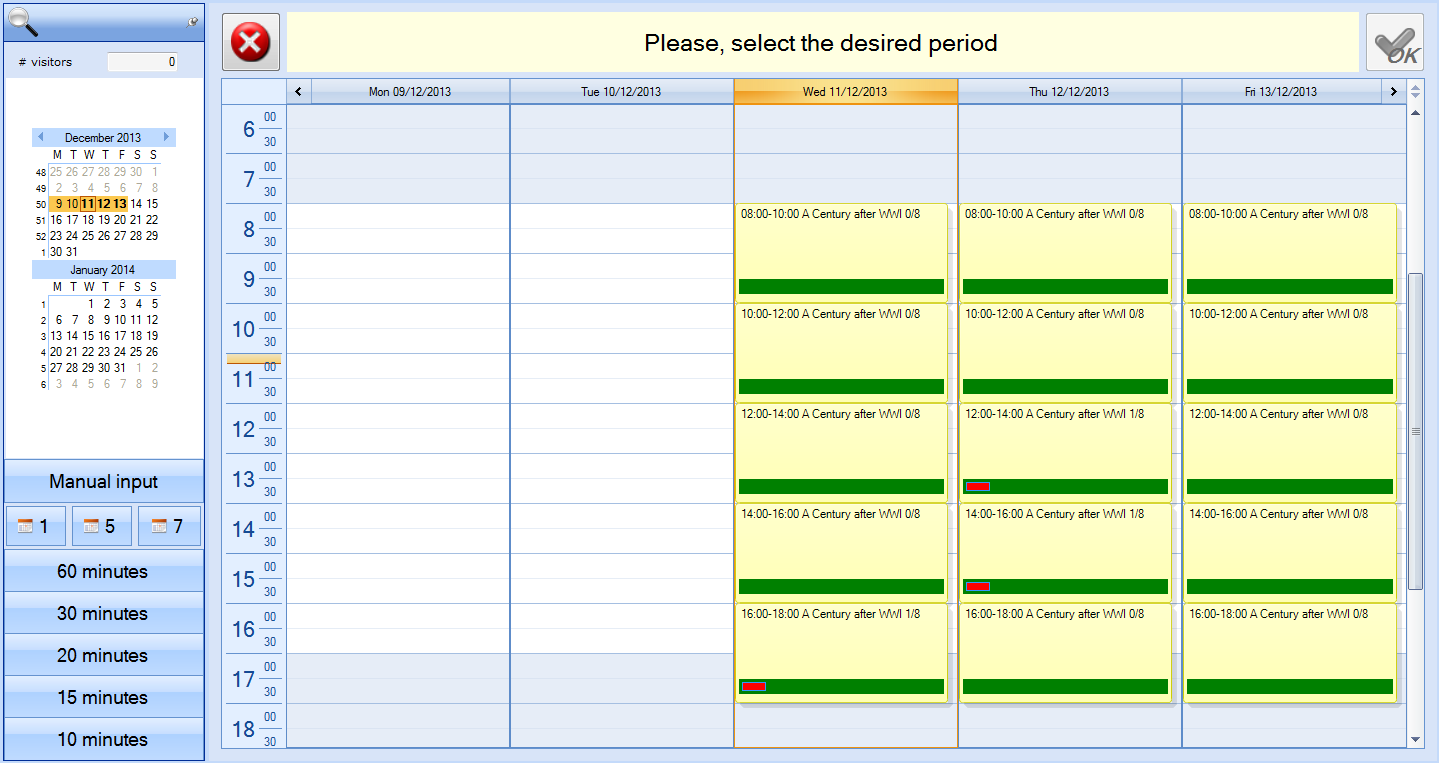
Next, the calendar is displayed, in which the left part can be used to filter on the desired number of visitors, visiting date, exhibition type and target group.
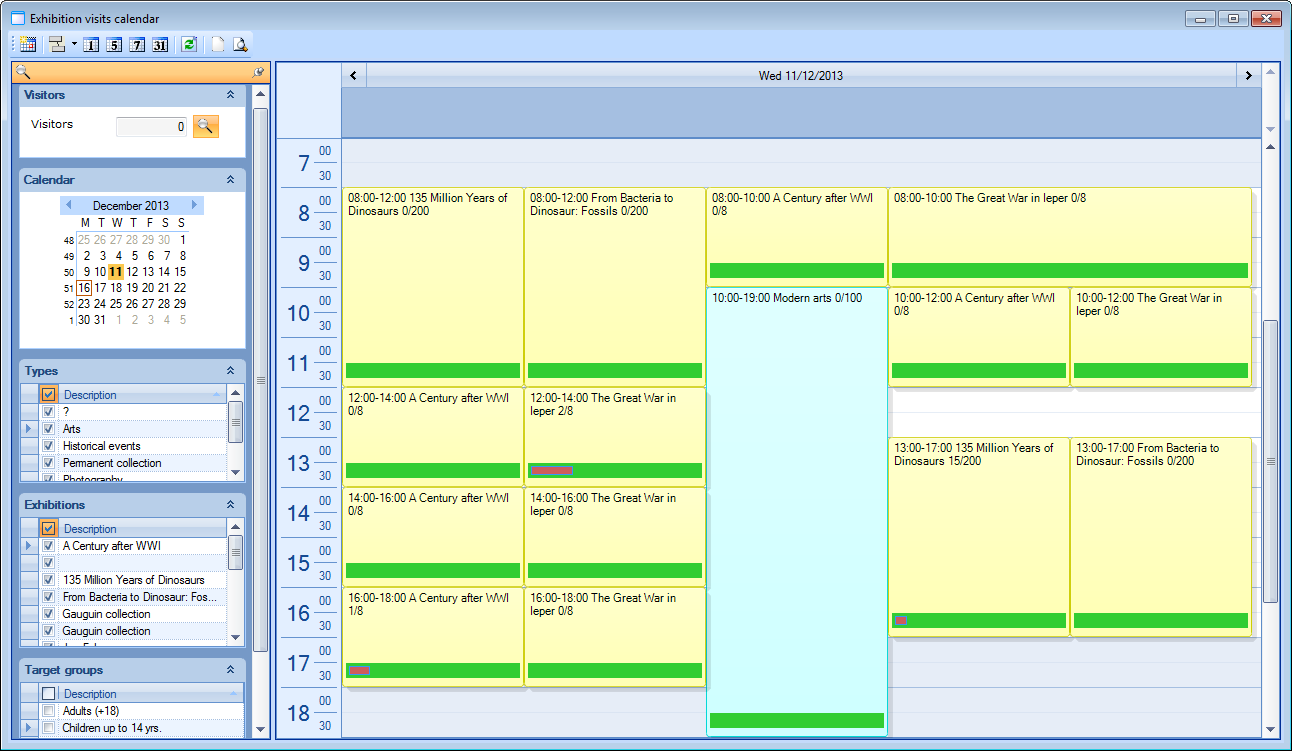 |
The calendar shows each exhibition period as a time slot. Each exhibition slot contains a capacity bar that shows the current occupancy (number of registered visitors/groups in relation to the maximum number of visitors/groups) of the current exhibition period. As the number of registrations grows, the red part of the capacity bar increases:
 |
The toolbar above the calendar contains some additional settings for the timetable, and from the toolbar it is possible to consult extra information of the selected exhibition period ( ), or to create a new exhibition visit (
 ).
).
 |
To register a new exhibition visit for one of the available periods, first select the desired period by clicking it.
After selecting the desired period, there are two possibilities to start a new registration:
by pressing the space bar on the computer keyboard.
by pressing the
button in the upper toolbar.
Next, the window Modify exhibition visit appears, where the visiting period is automatically filled in, based on the current selection:
 |
Additionally, the correct exhibition period is already selected in the Visits tab, making it possible to immediately start entering the number of visitors per rate.
 |
After determining the customer on the General tab, enter the remaining data of the exhibition visit, as would be done when creating a new exhibition visit through the exhibition visits overview.
Through the Recreatex POS system
There are two ways to register an exhibition visit through the Recreatex POS system.
In case the exhibition is available as a button on the POS menu, simply press that button to select the exhibition:
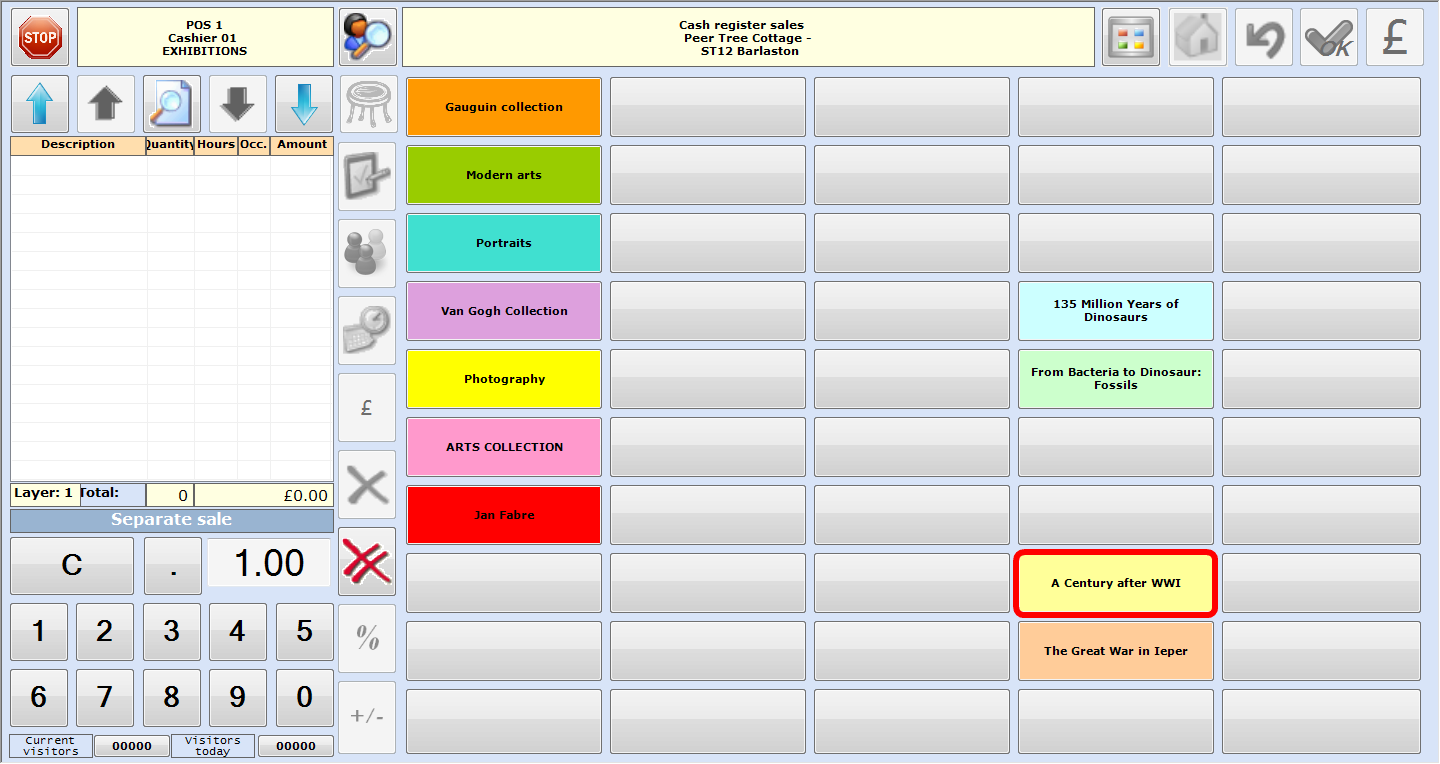 |
After selecting the desired exhibition, the graphic exhibition overview is displayed, showing the available periods of the selected exhibition.
 |
See next page.
In case the exhibition is not available as a button on the POS menu, or you are unable to find it quickly, it is possible to search for the exhibition by going to the Extra POS functions and pressing the Exhibitions calendar button:
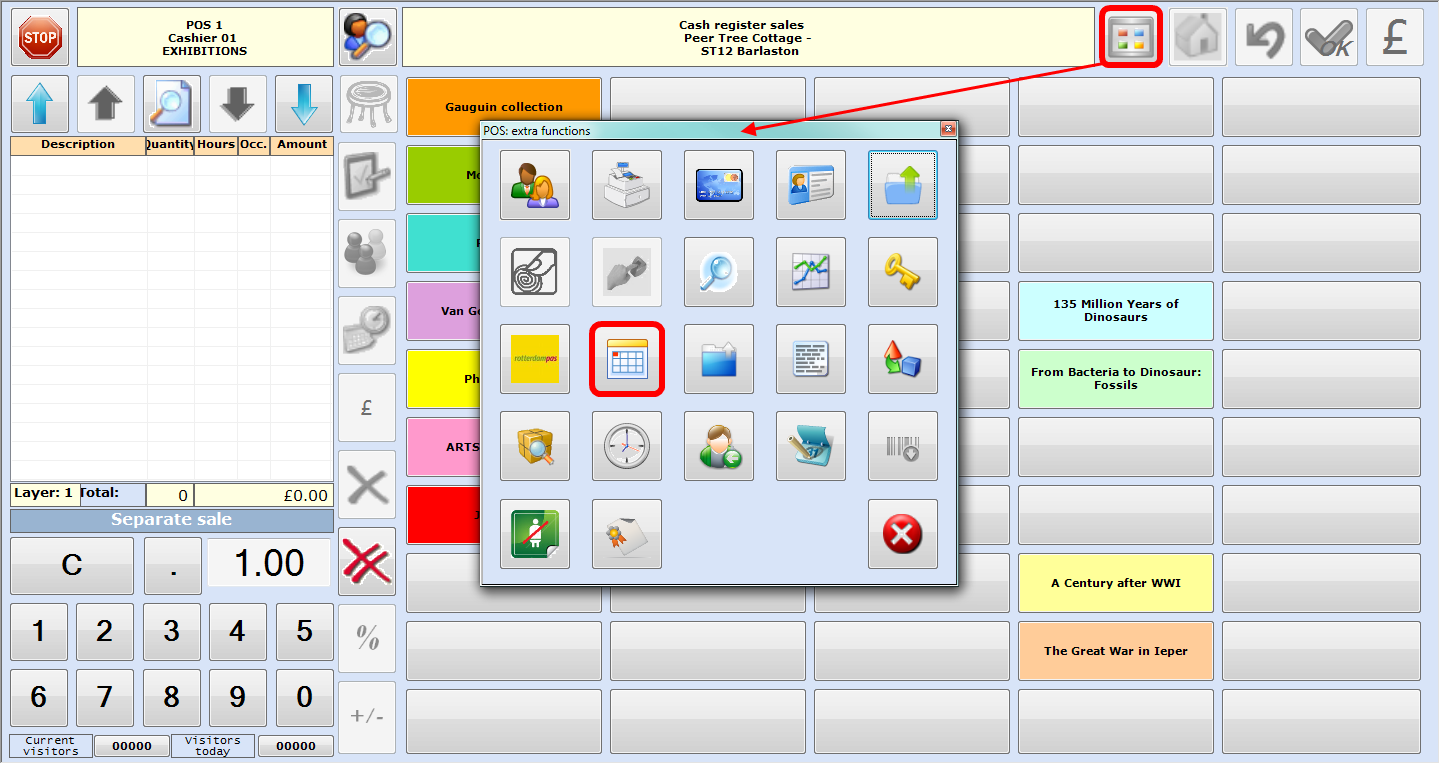 |
This results in the display of the exhibitions calendar:
 |
In contrast to the first method, by which only the periods of the selected exhibition are shown in the calendar, in this case all exhibitions are shown that meet the criteria in the left section of the calendar.
To create a registration on a selected exhibition (period), simply click the period to select it and press <Enter> (on the computer keyboard) to confirm.
Next, a window appears where it is possible to register the number of visitors.
Depending on the type of pricing, this is done in either of the following screens.
Pricing based on articles:
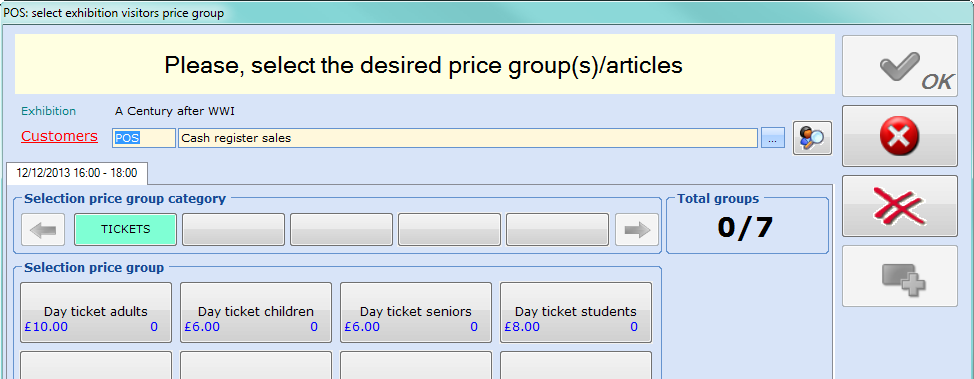 |
Pricing based on price groups:
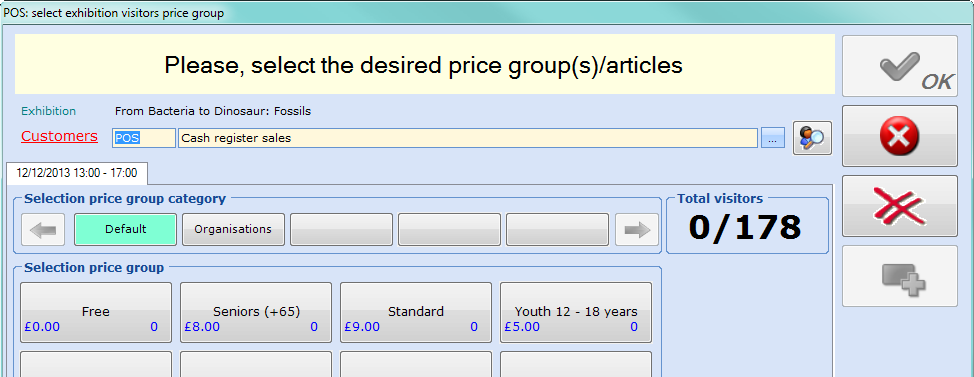 |
After selecting the customer (depending on settings this may be mandatory) and the number of visitors, the registration can be processed further through the POS system.
More information on the registration of exhibition visits through the Recreatex POS system can be found in the Recreatex manual 'POS - Use'POS - Use.
Through the Recreatex Web Shop
A last method to register an exhibition visit is through the Recreatex Web Shop. This kind of registration is performed by the customer himself, but in fact exactly the same exhibition visit is created in Recreatex, as with the other methods of visit registration.
Exhibition overview on the Recreatex Web Shop:
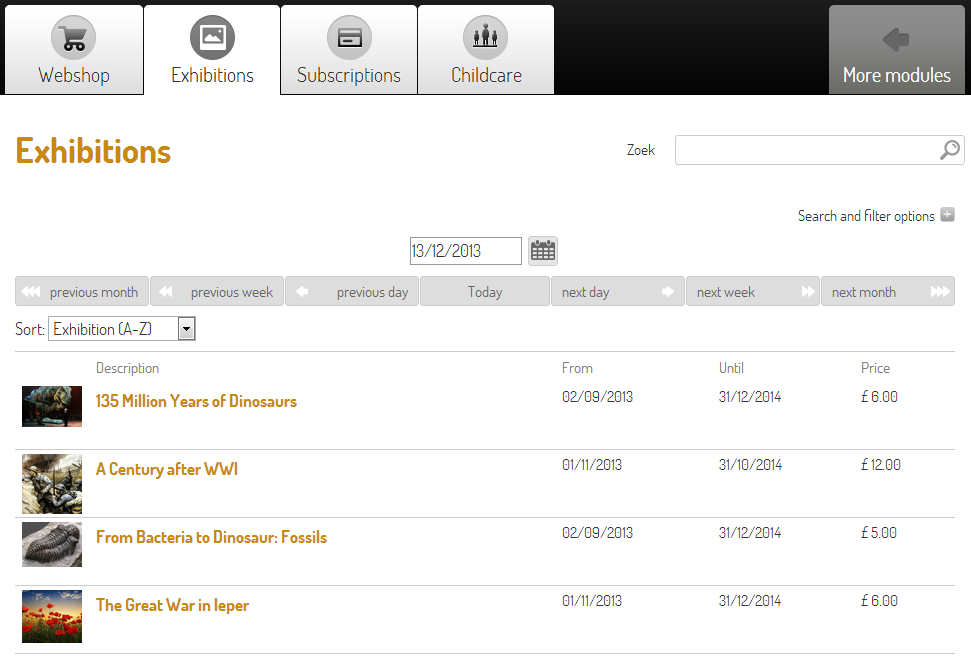 |
See next page.
Selection of period and rates:
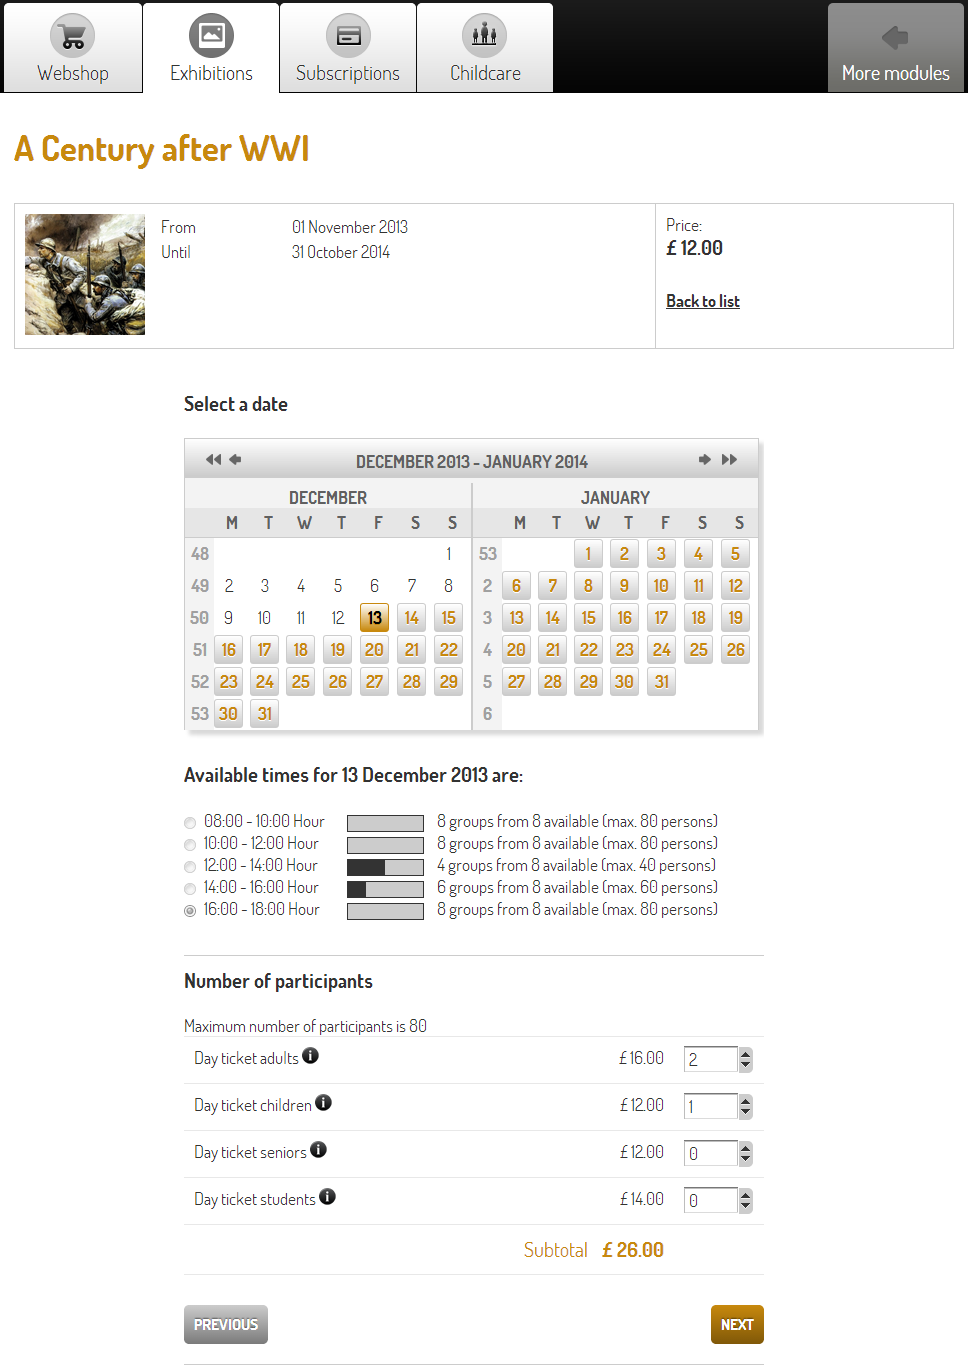 |
After completing the online booking, the exhibition visit will available in Recreatex, for example in the overview of exhibition visits (Exhibitions > Visits).
Move an exhibition visit
It is possible to change the visit date of a registered exhibition visit (whether it has been paid or not). This can be done by moving the exhibition visit.
Through Recreatex backoffice application
To move an exhibition visit through the backoffice application, click the Move visit button in the Modify exhibition visit screen.
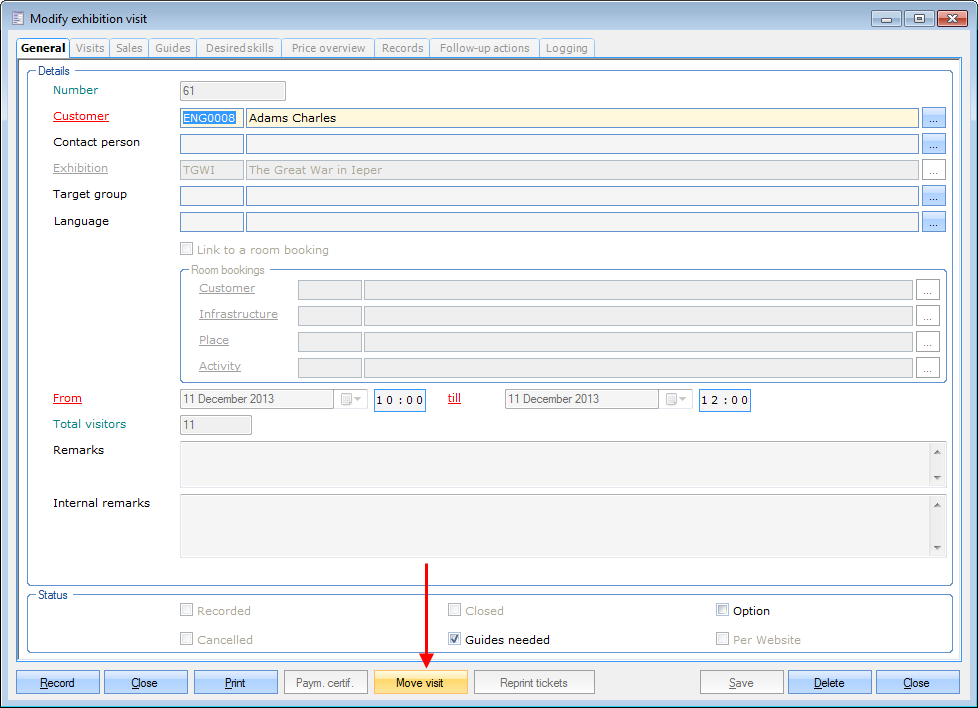 |
Then select a new exhibition period and click Next.
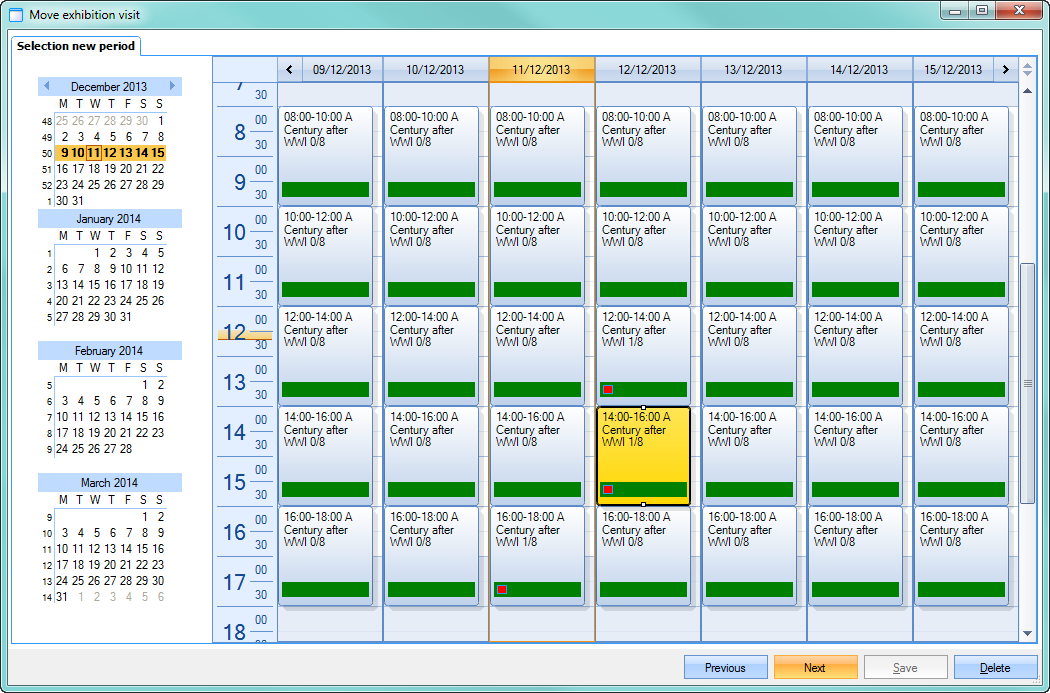 |
Complete the required steps to process the modification.
Through the Recreatex POS system
A registered visit can also be moved through the Recreatex POS system.
This can be done by searching for the concerning visit, using the Extra POS functions in the POS menu.
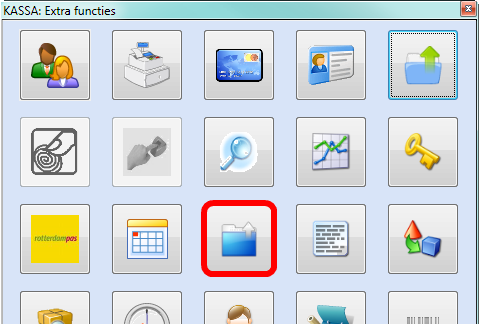 |
After selecting the required visit, it can be moved by pressing the  button.
 |
Finally, follow the same steps as when moving a visit in the Recreatex backoffice application (see previous paragraph).
Record/settle an exhibition visit
In accordance with the other Recreatex modules, an exhibition visit can be recorded/paid for/settled in different ways. The visit can for example be paid for at the moment of registration through the POS system, or by way of the Record button within the visit itself.
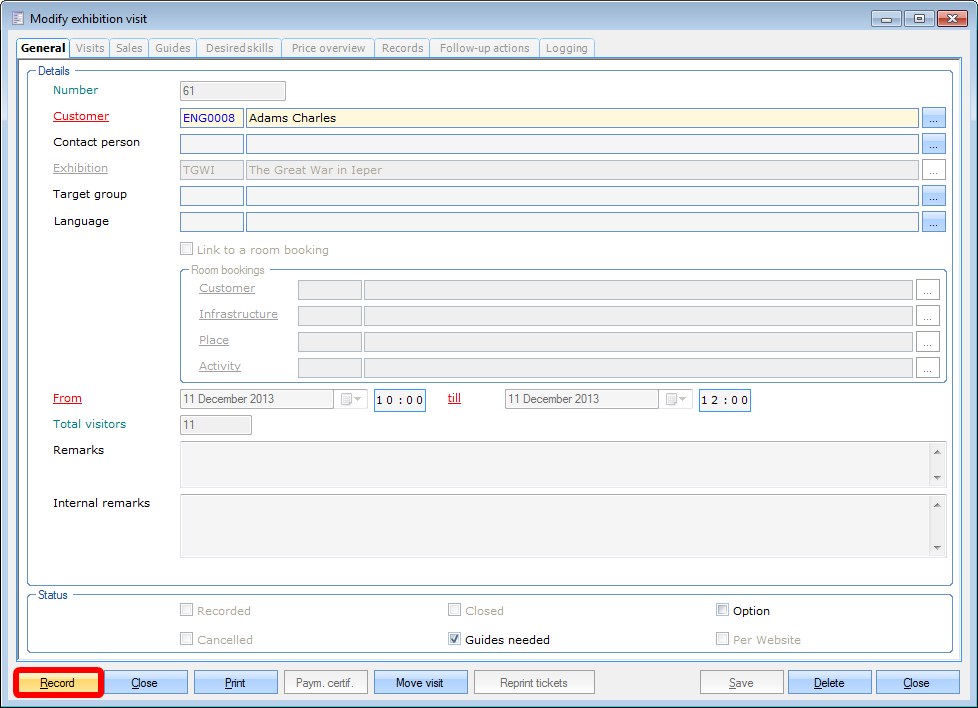 |
On the Recreatex Web Shop it is also possible to let the user/customer pay for his bookings of exhibition visits (e.g. through secured online payment).
Delayed payment is also an option, e.g. through invoicing.
Cancel an exhibition visit
To cancel an exhibition visit, press the Delete button in the Modify exhibition visit window.
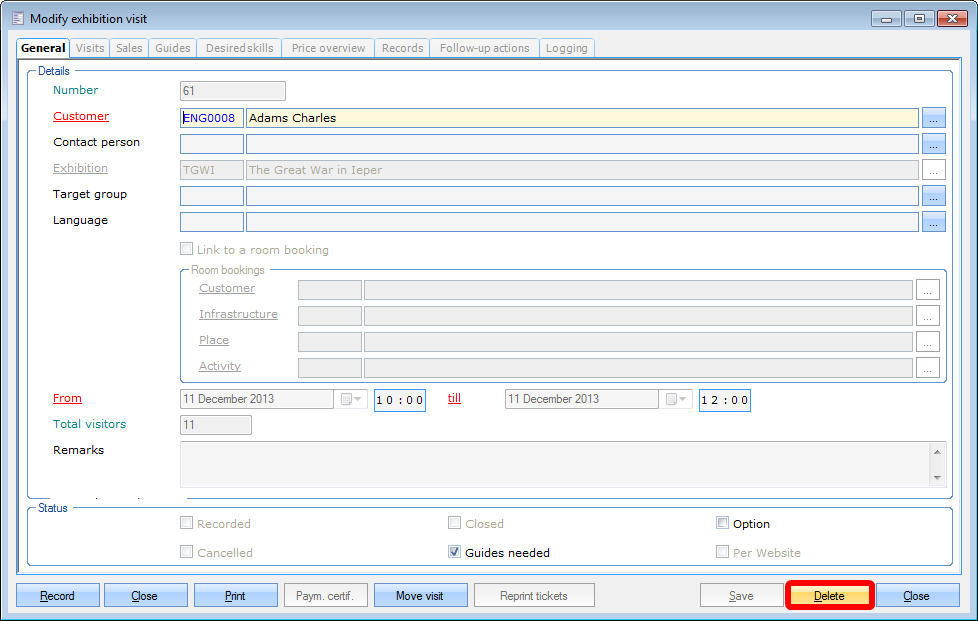 |
In the cancellation window, it will then be possible to enter the data for the cancellation and, if necessary, apply and record a cancellation cost.
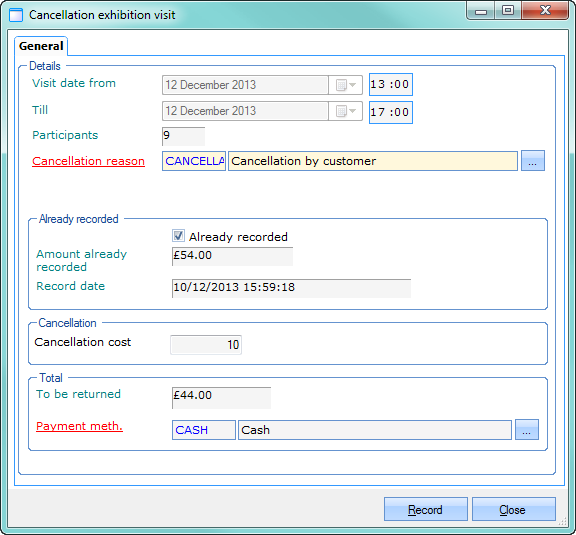 |