General
The tab General contains the different settings of the Recreatex Webshop that are not linked to a specific module.
 |
User interface
In the part User interface, it is possible to define the main interface of the Recreatex Webshop, more specifically through a CMS (Content Management System).
 |
On the level of user interface different items can be set up:
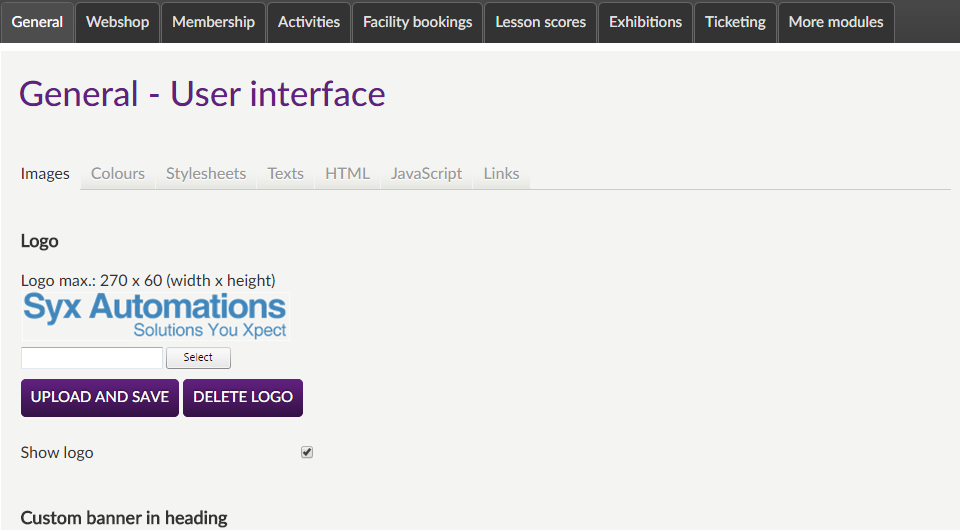
Images
It is possible to upload your organisation's logo to be displayed on the Recreatex Webshop. This logo will be displayed by default in the banner of the Recreatex Webshop, as well as on the different confirmation e-mails that are sent to the user (when a new account is created, an order, and so on.
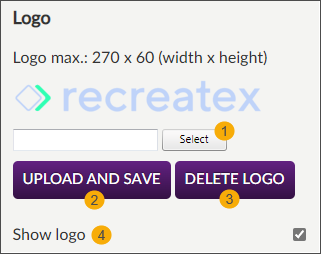 |
To add a logo, click the button Select (1).
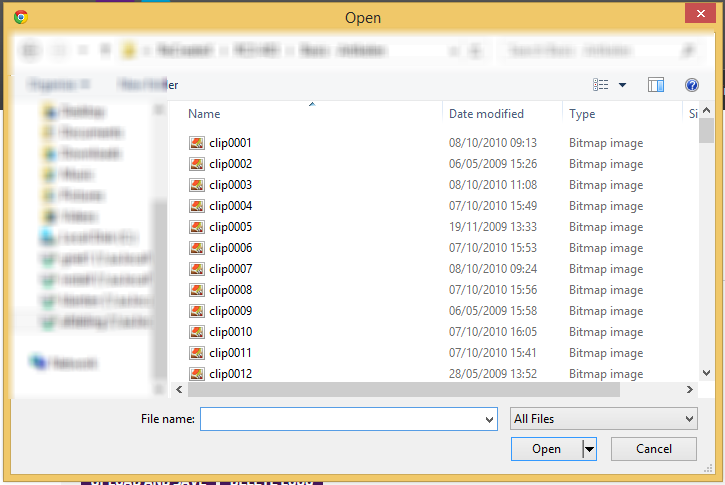
Select the desired image from a location on your PC or network and click Open.
Then click the button Upload and Save (2) to add the chosen image as a logo for your Recreatex Webshop. The preview of the currently uploaded logo will also be visualised on the manager page.
When visiting the Recreatex Webshop, the chosen logo is shown in the upper-left corner of the webpage.

Note
If an image larger than 270 x 60 pixels (width x height) is uploaded, it will automatically be scaled to this maximal size, taking into account the width-to-height ratio. Dimensions of smaller images are left unchanged.
For the logo of the Recreatex Webshop (partially) transparent images are supported (for example transparent .png images), as is shown in the example above.
Delete/deactivate logo
The default logo used for the Recreatex Webshop is the Recreatex logo. If another logo was used, it is possible to restore the default Recreatex logo using the button Delete logo (3).
If the visualisation of the logo, however, has to be deactivated completely (for example in the function of a banner that has to be displayed), you can do so by deactivating the option Show logo (4).
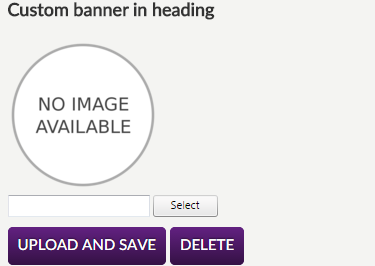
In this part, it is possible to link an image that will be used as a banner for the Recreatex Webshop.
Click on Select to select the new banner image from the PC or a network location.
 |
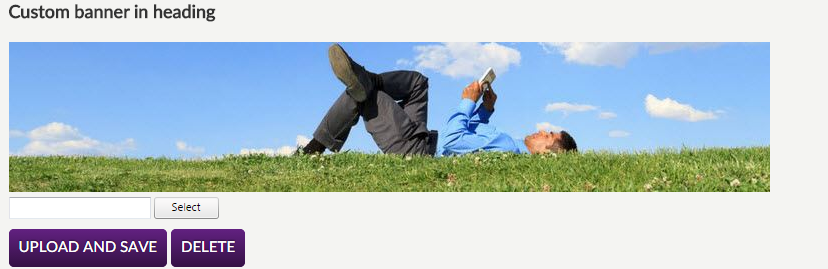
Then click on the button Upload and Save to save the chosen image and to define it for the Recreatex Webshop.
Afterwards, the image will also be visualised on the manager page:
 |
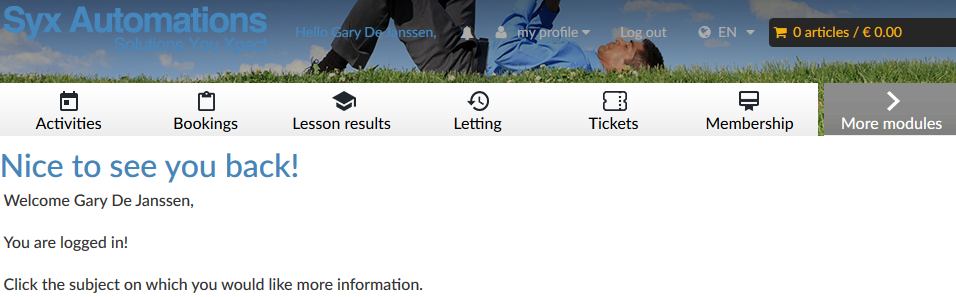
When visiting the Recreatex Webshop, the chosen banner is shown in the upper-left corner of the web page.
 |
Note
The banner on the Recreatex Webshop is set to 960 x 190 pixels. Banner images that are larger or smaller than this format are not rescaled but centred at the top of the web page.
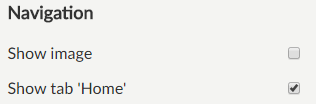 |
The option Show image allows you to determine if the icons of the module buttons in the Recreatex Webshop header are used or not.
 |
Deactivating the images results in text buttons:
 |
The option Show tab 'Home' allows you to visualise the tab Home on the Recreatex Webshop. This tab is, in fact, the start page of the Recreatex Webshop.
 |
You have the possibility to define your own favicon for the Recreatex Webshop. The favicon (or URL-icon) is the small icon that appears next to the URL in the browser (dependent on the browser used), on the tab and also in the favourites (list or the button itself).
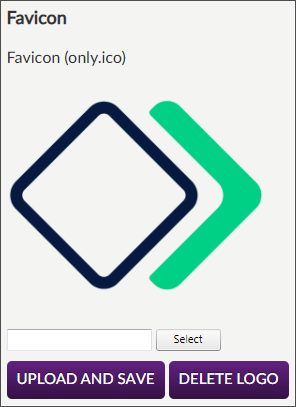 |
You can select the favicon the same way as the logo for the Recreatex Webshop (see above).
 |
Note
For the favicon, only files of type .ico are supported.
Colours
The different colours of the user interface of the Recreatex Webshop can be modified as well (tab Colours).
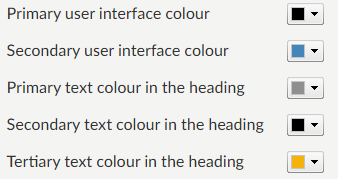 |
Primary user interface colour | The background colour of the default banner (upper banner) of the Recreatex Webshop. |
Secondary user interface colour | Colour of certain titles and descriptions, as well as of most buttons. |
Primary text colour in the heading | Colour of texts My profile, Log in/Log out and the languages that can be chosen in the banner. |
Secondary text colour in the heading | Colour of the texts in the module buttons. |
Tertiary text colour in the heading | Colour of the selected hyperlinks in the banner. |
In order to choose a colour, click on the button of the current colour. Next, you will be able to select a colour from all the colours offered.
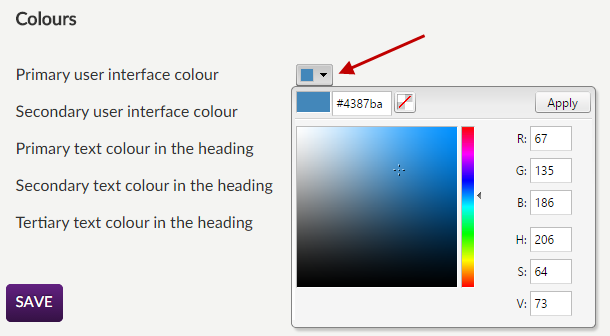 |
Click on the desired colour and then click on the button Apply to confirm.
 |
After selecting the colours for the user interface and saving the settings (button Save at the button of the manager page), the new colours will immediately be applied on the Recreatex Webshop.
 |
Stylesheets
It is possible to create a completely customised style for the Recreatex Webshop. You can do this using "LESS" stylesheets.
For more information on creating a customised style, we refer to the manual Recreatex Webshop (WSDL) - Styling the Webshop.
Once a customised style is available, it can be set up through the manager, by filling in the exact name of the style:
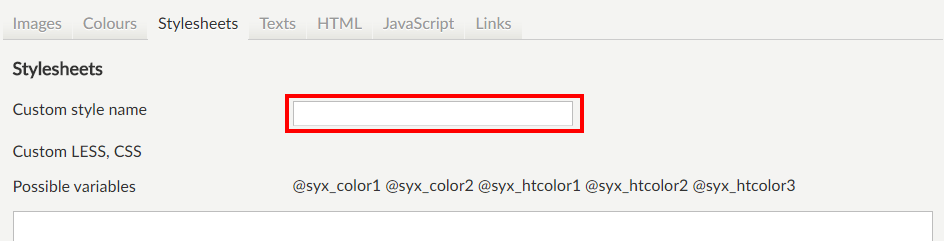 |
In the part Custom LESS CSS it is possible, if required, to specify a custom LESS CSS in the Webshop Manager yourself.
Save the new setting by clicking on the button Save at the bottom of the manager page.
Texts
Using the setting Show duration of (error) message (sec) it is possible to define how long (in seconds) the different messages in the Recreatex Webshop have to be shown before disappearing automatically.
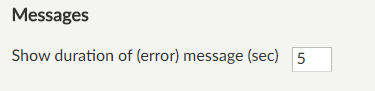 |
A message is always visualised in a red or green bar at the top of the web page, for example:
 |
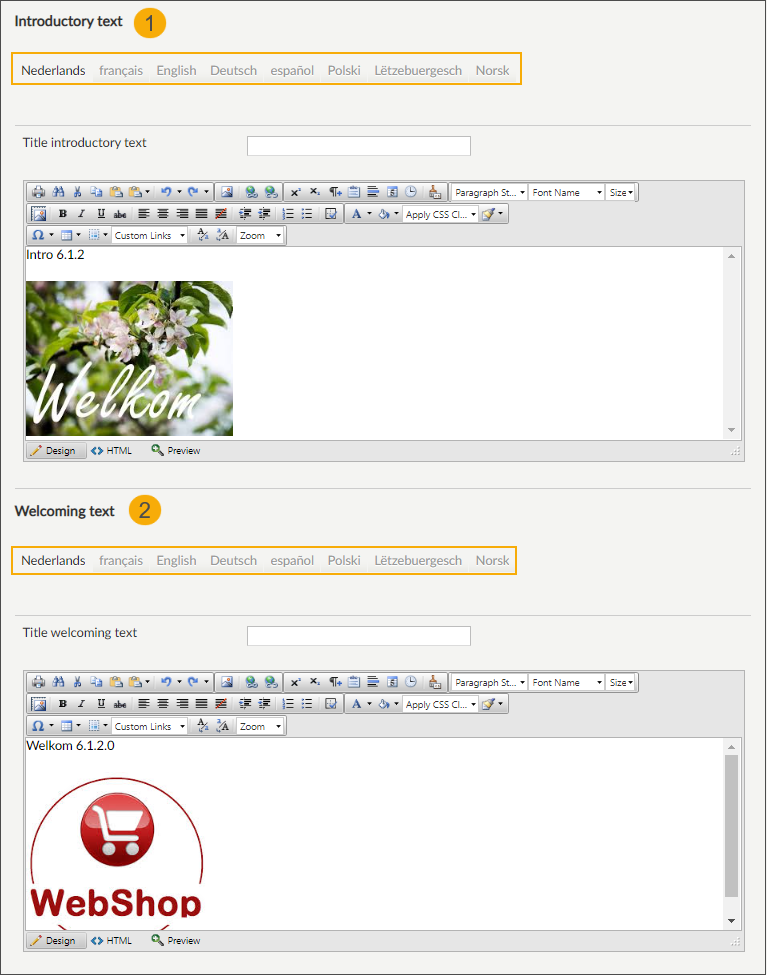
Add an introductory and welcome text for the Recreatex Webshop, including a picture or a graphic. For the content, you can use the layout possibilities of the CMS and, if required, even enter the text in HTML.
You can provide a translation or a different introduction and welcome message for each available language: Dutch, French, English, German, Spanish, Polish, Luxembourgish and Norwegian.
Click Save at the bottom of the page to apply the changes.
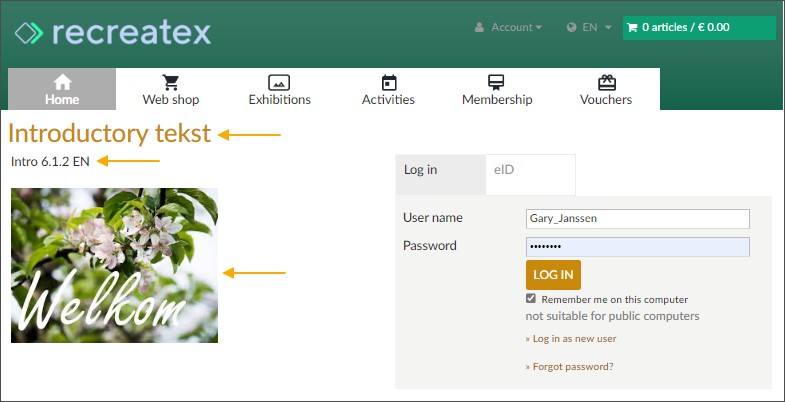
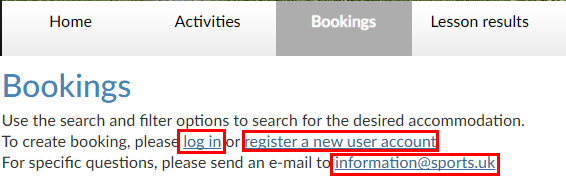
The introductory text (1) appears on the login page before the user logs in.
 |
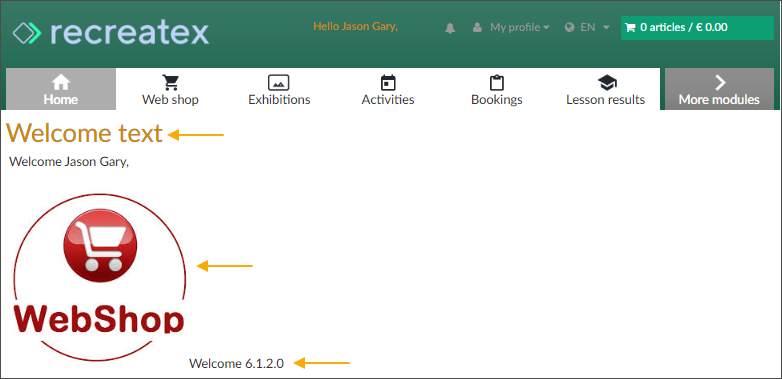
The welcome text (2) appears on the page after the user has logged in.
 |
Note
You can also define a separate introductory text per Webshop module, using the respective settings under each module tab of the Webshop Manager.
HTML
It is possible to use or add HTML, which will be applied on top of the header (banner) of the Webshop. This can, for example, be useful to add one or several hyperlinks to the banner or even to program the entire design of the banner in HTML. |
 |
This way, for example, a URL can be shown in the header/banner.
 |
It is possible to enter additional HTML code, that will be applied at the bottom of the Recreatex Webshop screen.
 |
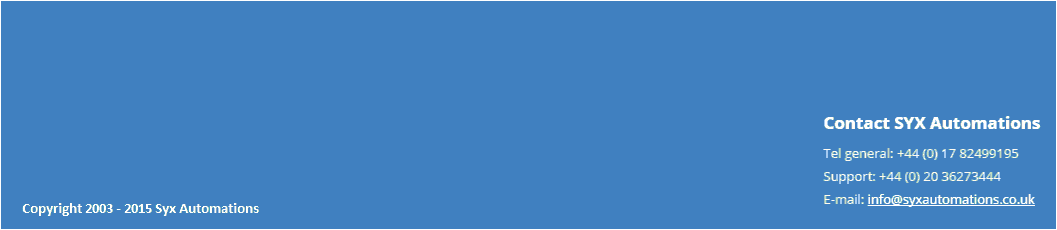
This way, for example, a URL can be shown in the footer.
 |
The functionality lets the manager define HTML code or Javascript that is placed on each page of the webshop. For these variables to work, the VerstaTag function must be active in the Recreatex Webshop manager (see VersaTag ID under Technical settings).
 |
JavaScript
In the tab JavaScript you can fill in a general JavaScript, that will be executed on each page of the Recreatex Webshop.
 |
Links
It is possible to define in the Webshop Manager in which cases a (hyper)link has to be underlined in the Recreatex Webshop for better visibility.
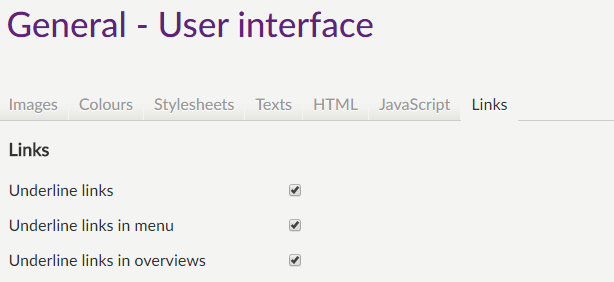 |
Underline links | Underline links within a normal text, and link actions within the page.
| |
Underline links in menu | Underline links within the main menu of the Recreatex Webshop.
| |
Underline links in overviews | Underline links to detailed data (e.g.: exhibitions, ticketing events, articles, ...)
|


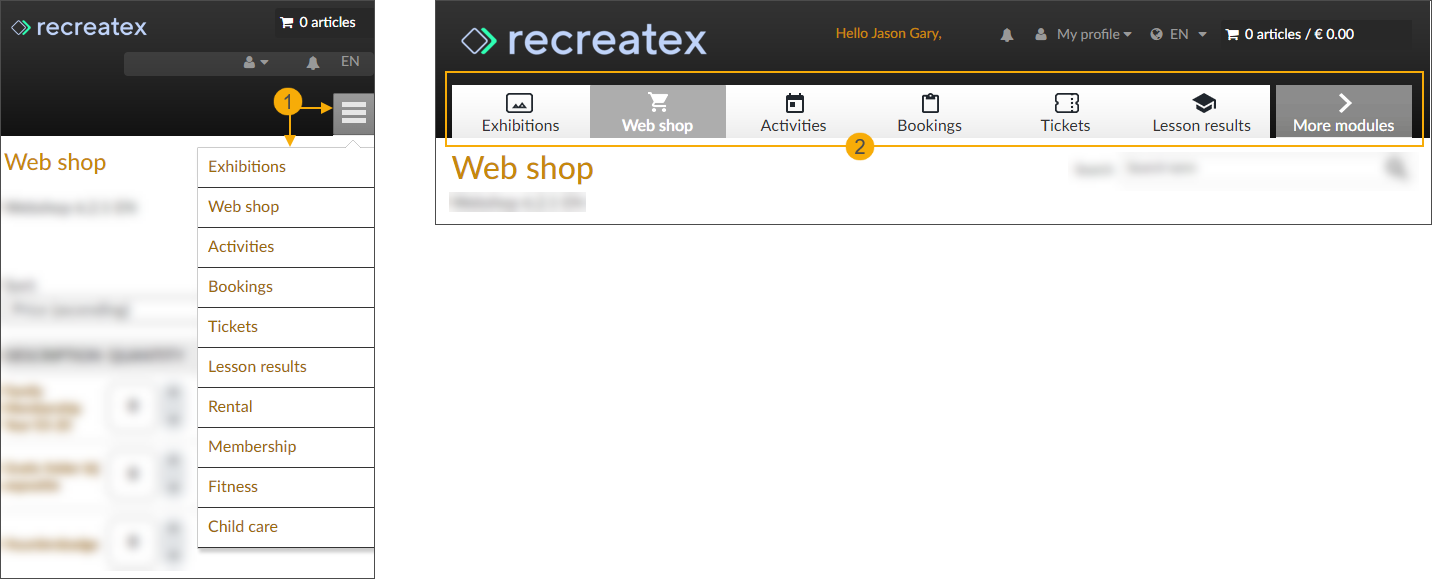
Miscellaneous
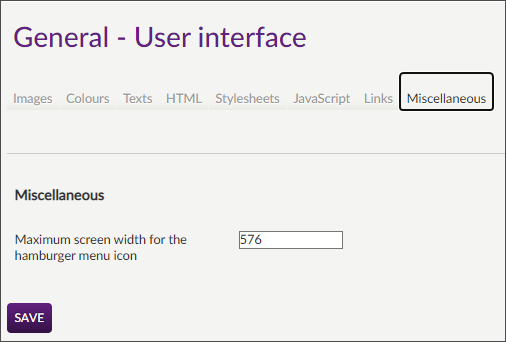
Set the screen width at which the application should switch from the hamburger menu (1) to the full menu bar showing the modules as buttons (2).
Settings
Under General > Settings different basic settings of the Recreatex Webshop can be defined.
These general settings are grouped in different tabs.
 |
The general settings are divided into different tabs:
Users
The tab Users contains all sorts of settings relating to the users of the Recreatex Webshop.
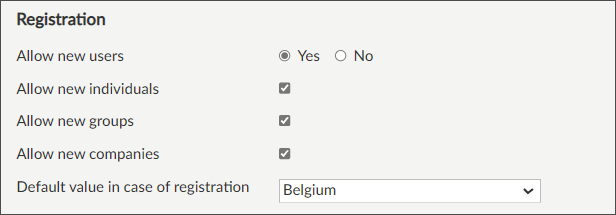 |
Allow new users | If this setting is deactivated, the option Log in as a new user will not be visualised on the log-in screen of the Recreatex Webshop. | |
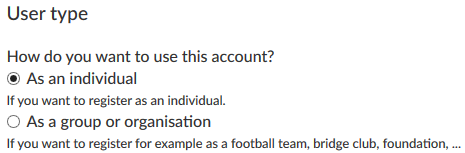
Allow new individuals/groups | By default, this setting is active together with the setting Allow new users, allowing the user that creates a new account to choose to register as an individual or as a group.
If the option Allow new individuals is deactivated, the customer will not be able to choose and all registrations as a new user will be considered as a registration of a customer of the type groups in Recreatex. The same applies to the option Allow new groups: if this option is deactivated, all new registrations will be considered as customers of the type individual. | |
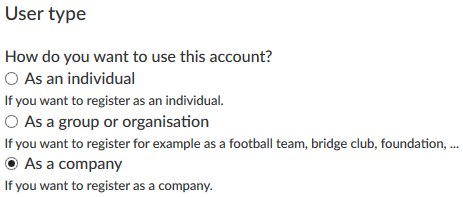
Allow new companies | Activate to make this user type selectable when creating a new account. This setting is not active by default.
| |
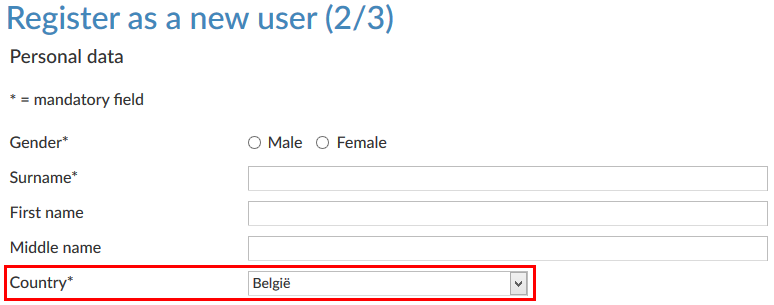
Default value in case of registration | This is the default value that will be suggested as a country during the registration of a new user.
|
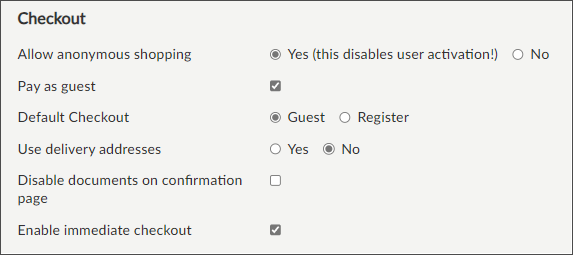
Allow anonymous shopping | It is possible to define per module whether anonymous access is allowed, giving a user limited access to the information on the Webshop. This so-called "anonymous shopping" can, however, also be set up generally using this general Webshop setting. If you use this option:
WarningSince the use of this option only allows the user to register when paying, the user activation by the user himself (with the activation e-mail) is deactivated for the entire Recreatex Webshop. It is indeed not possible to wait for manual activation by the user during the last phase of the purchase process (shopping basket). | |
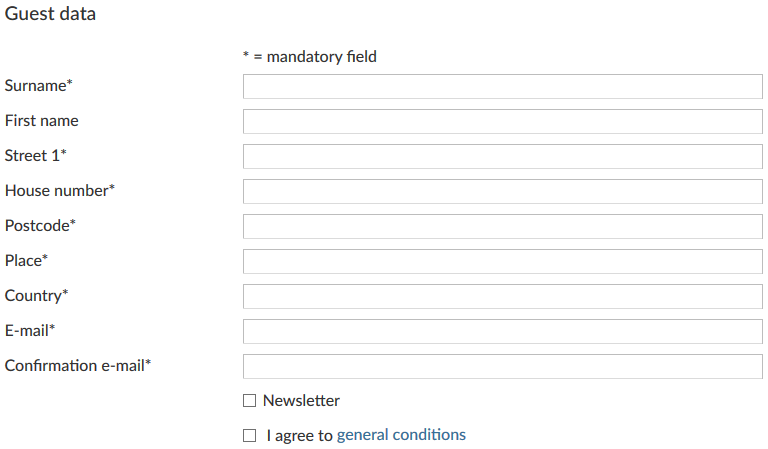
Pay as guest | This setting allows a fully anonymous purchase. If active, in the step "Log in" of the basket flow, the user has an option to simply enter the guest data for completing the transaction without Webshop account.
| |
Default Checkout | ||
Use delivery addresses | Determine whether the user can choose a deviating delivery address (including addressee name) for an order on the Recreatex Webshop.
| |
Disable documents on confirmation page | With this setting, you can choose to exclude the actual document downloads (e-tickets, booking confirmations) from the confirmation page. (1) When the setting is deactivated, the user can see and download the documents directly on the confirmation page. (2) 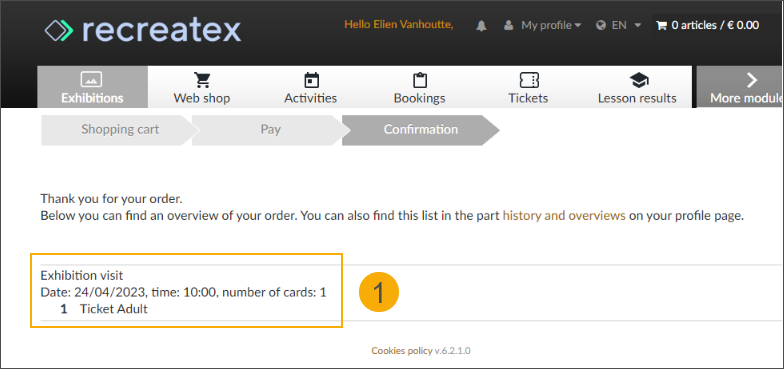 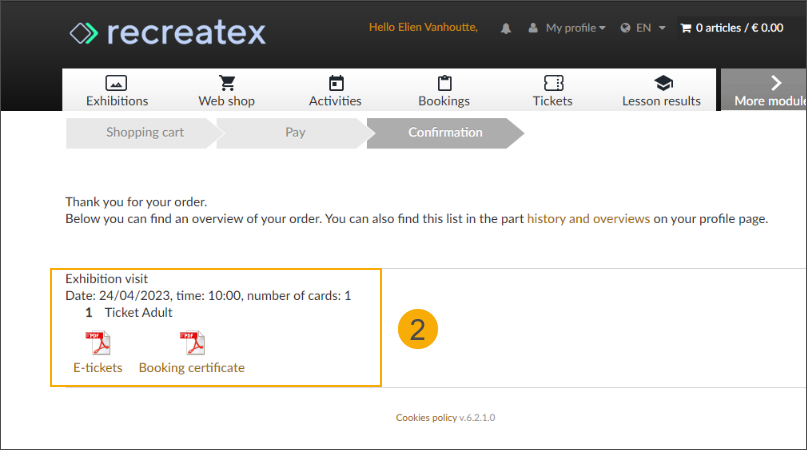 | |
Enable immediate checkout | When this setting is active, the customers do not have to wait until the basket checkout is completed when paying with one of the following methods: Pay later, Pay by invoice, Digital Wallet, E-purse, Direct Debit, and zero checkout. The payment flow skips the basket checkout and shows the payment confirmation page immediately. |
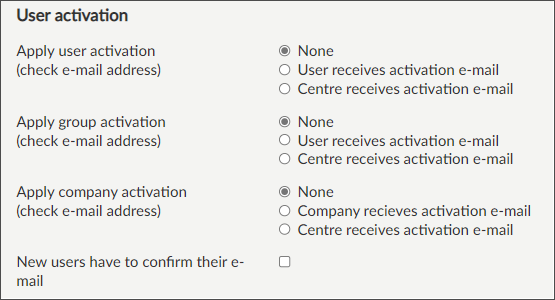
Apply user/group/company activation (check e-mail address) | With this option, you can specify if user/group activation (at the creation of a new user/group) is used or not.
| |
New users have to confirm their e-mail | If this option is activated, the given e-mail address will have to be confirmed (filled in a second time) when creating a new account for the Recreatex Webshop.
This is, for example, useful to avoid typing errors that lead to the registration of an invalid/incorrect e-mail address. |

 |
Allow reselling | Activate this setting to allow reselling. Webshop articles and exhibition tickets can be sold through reselling. |
Reselling type | This option allows you to define the reselling type. It is possible to choose between a trader Webshop (sell to end-customers) and a company website (sell to employees). |
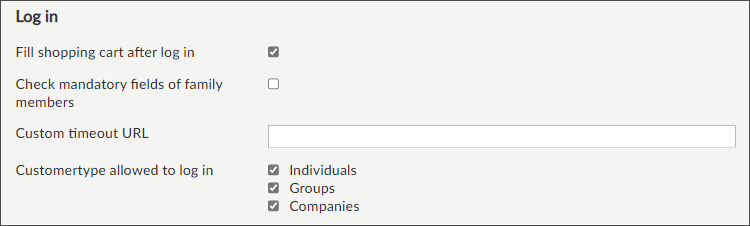
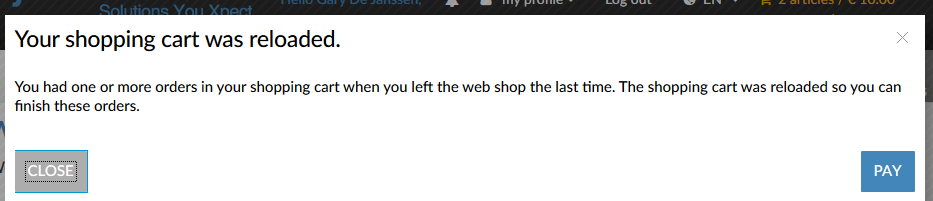
Fill shopping cart after log in | If this parameter is active, the system will check at each login if the user in question still has orders that have not yet been finalised. If this is the case, these orders will be loaded into the shopping basket and the system will ask the user to go directly to the shopping basket to process it.
Note
| |
Check mandatory fields of family members | If activated, the Webshop will check (during login of the head of a family) whether all required (mandatory) fields of the linked family members are filled in. | |
Custom timeout URL | If this URL is filled in, the system will automatically navigate to this URL instead of the default page in case of a timeout on the Recreatex Webshop (automatic close-down of the session due to inactivity). | |
Customer type allowed to log in | Per Webshop you can restrict which types of users are allowed to log in: Individuals, Groups, Companies By default, all types are allowed. When modifying this setting at least 1 customer type must be allowed. If all customer types are deselected, the customer type Individuals will automatically be selected before saving the changes. An attempt to log in with credentials of a customer type that is not allowed will result in an error. NoteIf an individual user is also a contact of a company or group he/she will always be able to use the individual credentials but only be able to log in to the accounts of the allowed customer type(s), e.g:
|
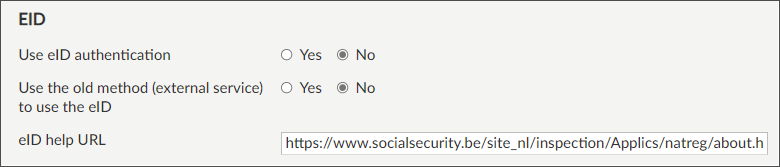
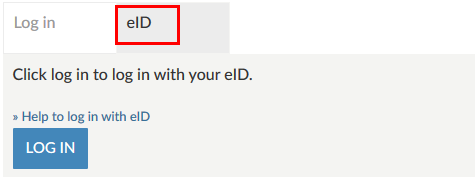
Use eID authentication | By means of this setting, you can allow the users to log in by reading the eID card. In this case, the extra tab eID will appear on the log-in screen.
After clicking on Log in, the data of the eID card will be loaded through an external website. Two scenarios:
| |
eID help URL | When clicking on the link Help to log in with eID, this is the underlying URL to which the system will navigate. This link only appears in the tab eID, for which the parameter Use eID authentication has to be active. |
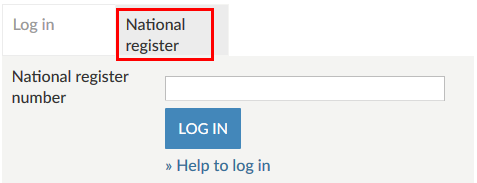
Use national register number login | By means of this setting, it is possible to register as a new user, based on the National register number. In this case, the extra tab National Register will appear on the log-in screen.
If this principle is used, it is assumed that:
The creation of a new account by means of the National register number thus only allows calling up the existing customer data during the registration process on the Recreatex Webshop, and to simplify in this way the registration of a new user. Once the user has a username and password, these login data have to be used instead of the National register number. | |
National register number help URL | When clicking on the link Help to log in, this is the underlying URL to which the system will navigate. This link only appears in the tab National register nr, for which the parameter Use National register number login has to be active. | |
Always log in using national number | If this parameter is active, the Webshop users will always be able to log in using their National register number. If not active, logging in using the national register number will only be possible to create an account. Afterwards, the users will always have to log in with their username and password. |
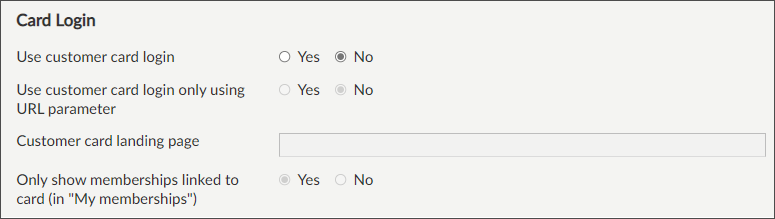
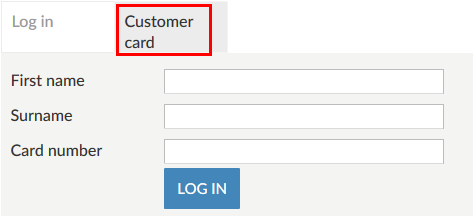
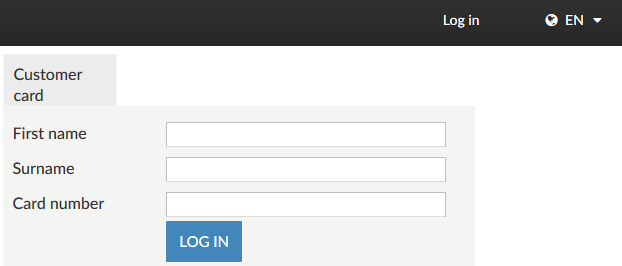
Use customer card login | It is possible to allow Webshop users to log in using their customer card (for example, membership). If this principle is used, customers can connect to the Recreatex Webshop by filling in their name, surname and card number.
| |
Use customer card login only using URL parameter | If this option is active, it is possible to use a restricted log-in page that only allows login with a customer card. Pay attention: For this purpose, the parameter &iscustomercardlogin=1 has to be added to the default webshop-URL.
| |
Customer card landing page | Here it is possible to fill in the page (within the Recreatex Webshop) to which the user has to be navigated after logging in with a card number. Pay attention: For this purpose, it is not necessary to use the full URL; only the part after the base URL (for example /Welcome.aspx). If this setting is not filled in, the user will be redirected by default to /Profile/MyHistory.aspx?view=9 (the customer's membership overview). | |
Only show memberships linked to card (in "My memberships") | By means of these settings, you can allow a Webshop user who has logged in using a membership card number, to view memberships of his/her family members and contacts that are not linked with the card number used for login. The user can consult memberships from the part History and overviews (My membership)on the Webshop. |
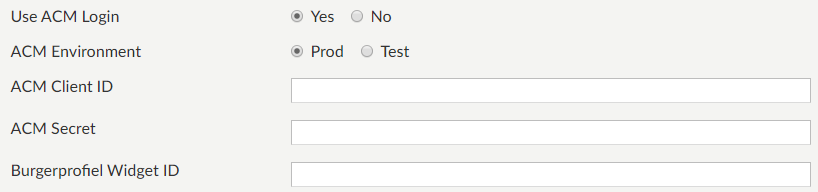 |
Use ACM login | If activated, the user will be able to log into Webshop using his/her ACM credentials. For this purpose, the (following) fields related to ACM integration must be configured correctly in the Webshop Manager. |
ACM environment | It is possible to choose on which environment the functionality to log in using ACM credentials will be implemented - the production environment or the test environment. This is, for example, useful when you want to test the integration before it goes live for the Webshop users. |
ACM client ID, ACM secret and Burgerprofiel Widget ID | Fill in the connection details to use logging into Webshop using ACM. |
After successful integration with ACM, users will be able to log into Webshop in two different ways:
by clicking Log in in the ACM login tab or
by clicking Aanmelden in the top right corner on the BurgerProfiel banner
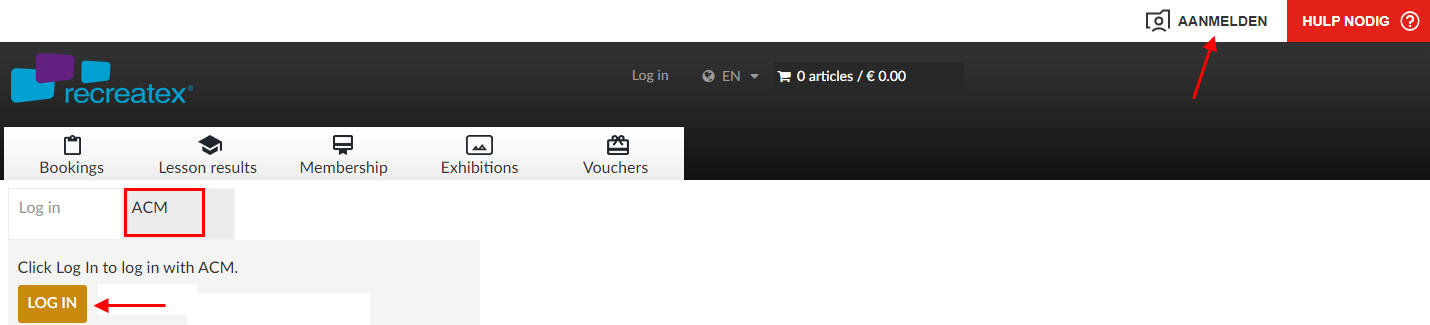 |
Important to know:
Both the ways to log into Webshop execute differently.
When using the tab ACM, the login works on the Webshop itself.
copyright
When using the Aanmelden button in the BurgerProfiel banner, it works in an iframe that runs on top of the Webshop.
 |
If required, it is possible to use external authentication on the Recreatex Webshop.
When using external authentication, the browser doesn't redirect to the default login page of the Recreatex Webshop, but to the configured external login URL.
Note
External authentication is a very specific principle and is consequently only used in special environments.
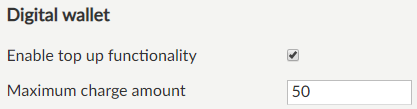 |
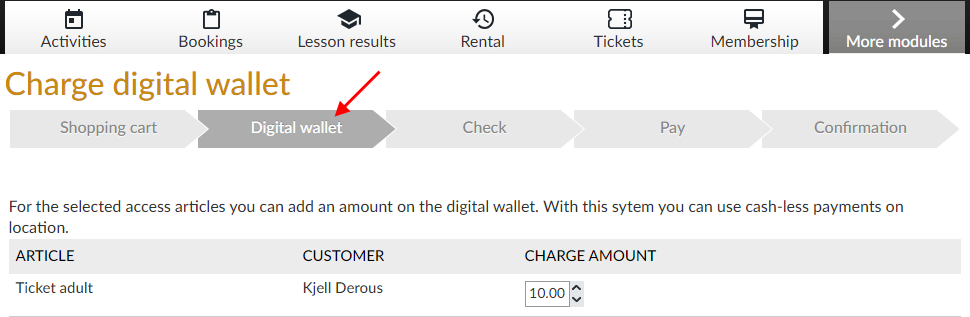
It is possible to enable the user to charge his/her digital wallet on the Webshop as well as limit the maximum amount of charge.
While paying for items for which the digital wallet is activated in Recreatex, the user will have the option to charge his/her digital wallet.
 |
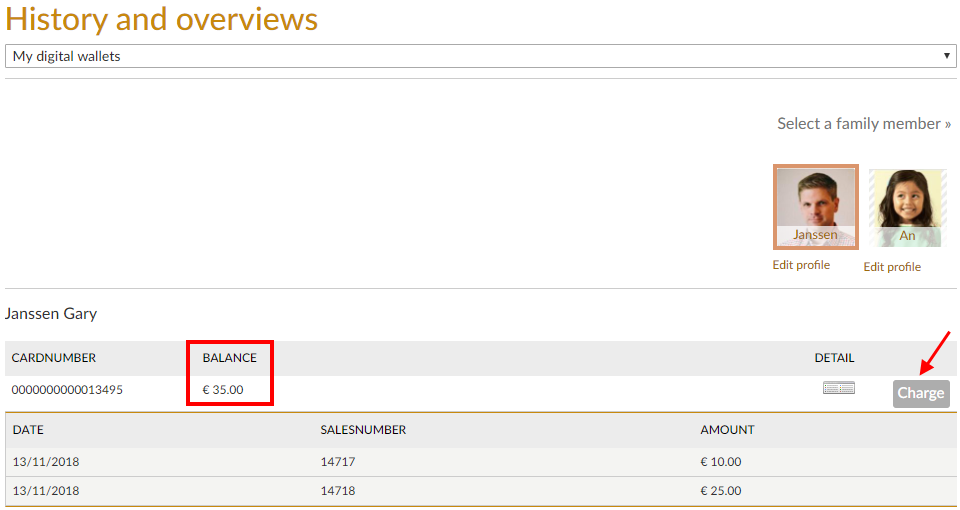
The user can check his/her digital wallet balance and also charge it from History and overview > My digital wallets > Charge
 |
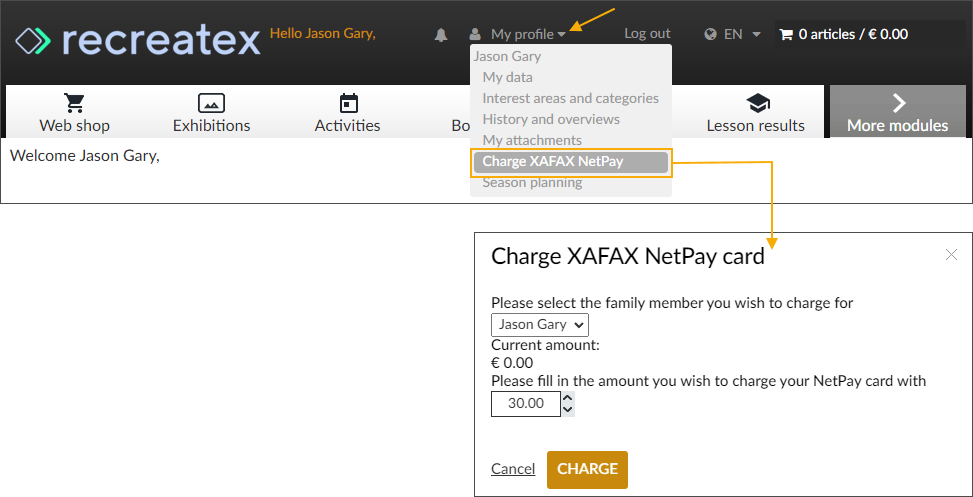
Activate the Charge XAFAX NetPay card functionality in the Webshop user profile. This functionality allows the Webshop user to check the current balance of his NetPay card, charge (top up) the NetPay card and create a NetPay account if a user does not yet have a NetPay account.
If a Webshop user has family members linked, he/she can use this functionality the same way for the family members, who can be selected in the drop-down list.
Note
The NetPay integration requires proper backoffice configuration, including the counter plugin: ReCreateX.CounterPlugin.NetPay.
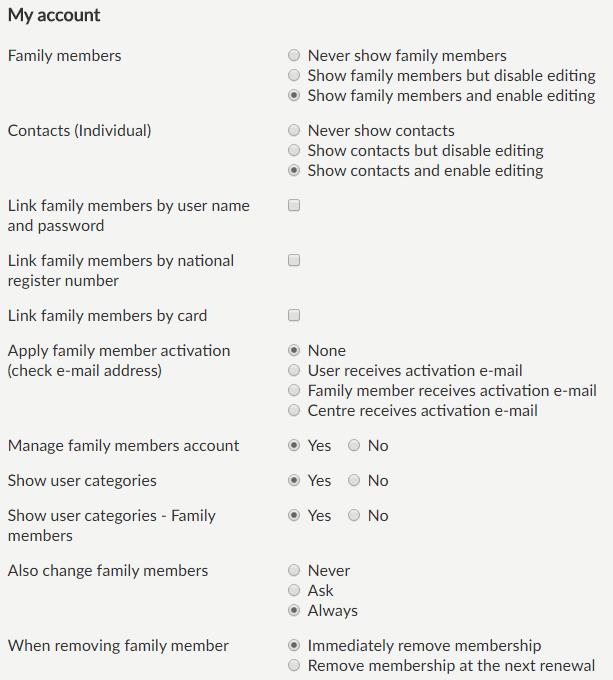 |
Family members | With this parameter, it can be defined if users can see/modify their family members (the linked family relations in the Recreatex database) within the Recreatex Webshop.
| |
Contacts (Individual) | With this parameter, it can be defined if users can see/modify their contacts. NoteA Contact (Individual) is a person residing at an address different from the logged-in user and can be added from My Profile > Contacts within the Recreatex Webshop.
| |
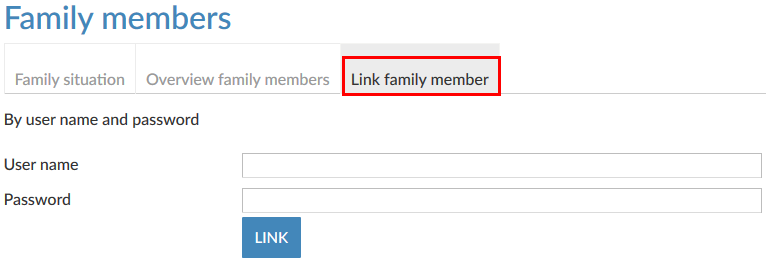
Link family members by user name and password | This option allows the Webshop user to link his/her family members. A family member can only be linked if he/she already exists as a customer in the Recreatex database. Specifically for this parameter, it is assumed that the user who wants to link the family member has the user name and password for the Recreatex Webshop of that specific family member. In that case, the family member can be linked under the tab Add new family member within the family members section on the Recreatex Webshop.
| |
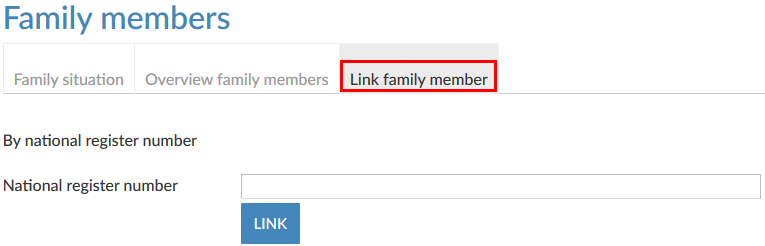
Link family members by national register number | Using this option allows the user to link family members by filling in the National register number.
| |
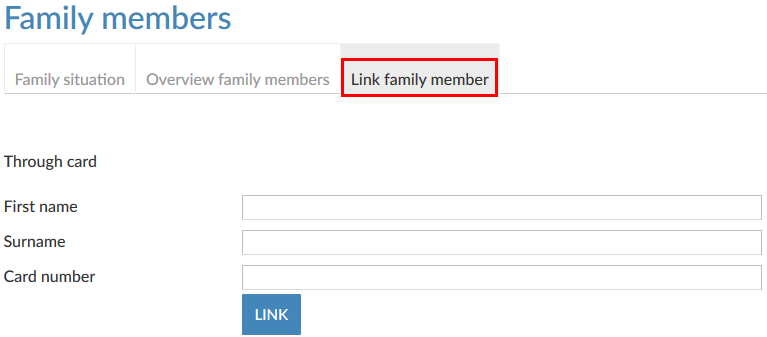
Link family members by card | If this option is used, a user will be able to link a family member based on the name, first name and card number under My profile > Family members.
| |
Apply family member activation | This setting is similar to the setting for user and group activation (see above), but then specifically for creating and linking family members. | |
Manage family members account | If this setting is active, the user will be able to edit the user name and password of his/her relations under My profile > Relations > tab Overview relations.
| |
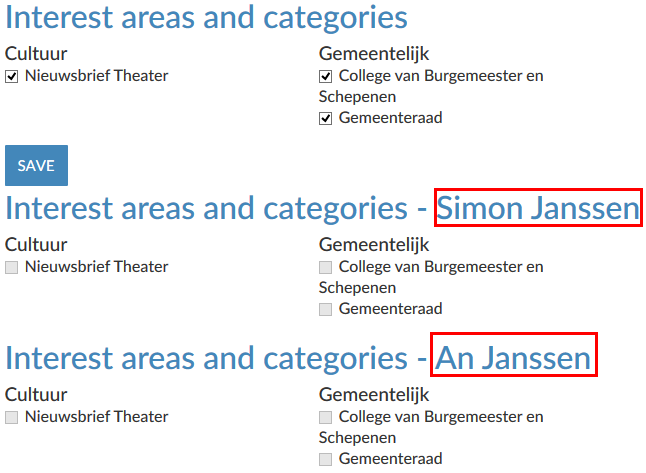
Show user categories | If this setting is active, the user categories will be shown, both when registering a new user account and when consulting it in the Recreatex Webshop, under My profile > Interest areas and categories.
NoteThe user categories shown are the completely defined address categories from Recreatex Desktop Application (General > Basic data > Customers > Settings > Address categories), of which the option Show on website for user details is active. | |
Show user categories - Family members | If this setting is active, the user categories will be shown, both when registering a new account for a family member and when consulting it in the Recreatex Webshop, under My profile > Interest areas and categories.
| |
Also change family members | This setting determines the behaviour when changing the address data (street, number, postcode,...) of the head of a family on the Webshop. If set to "Ask question" or "Always", Webshop will allow transferring the address modification of the head of the family to the linked family members. | |
When removing family member | When removing a family member you can define whether the purchased family membership is cancelled immediately or at the next renewal for the removed family member.
|


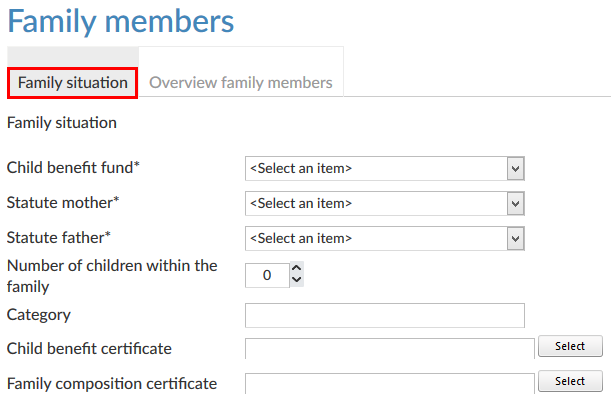
The family situation is specifically for the Childcare module.
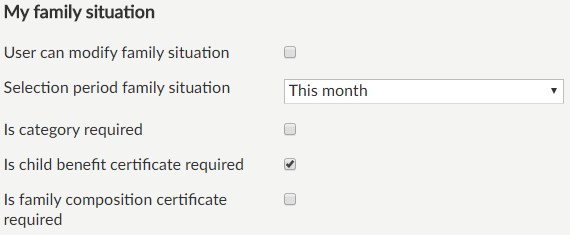 |
User can modify family situation | Activating this setting will provide an additional tab in the section family members (through My Profile) on the Webshop.
| |
Is required... | It is possible to define the field in question as obligatory for the user to fill in under Family situation on the Webshop. |
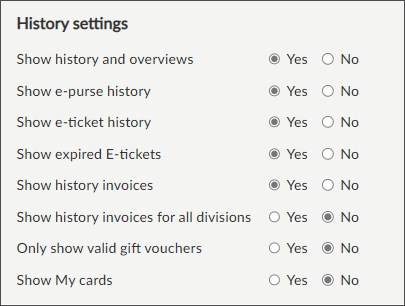
Show history and overviews | This option allows you to deactivate the possibility to consult the part History and overviews on the Recreatex Webshop. If you deactivate this setting, the part History and overviews will simply not be available and consequently, the parameters below will not be taken into account, neither will the visualisation settings per module. |
Show e-purse history | If this option is active, the user will be able to consult his/her e-purse in the part History and overviews. |
Show e-ticket history | If this option is active, the user will be able to consult his/her already paid e-tickets in the part My E-tickets (History and overviews) and reprint them if required. |
Show expired e-tickets | If the option Show e-ticket history is active, you have an additional possibility to activate a filter option in My E-tickets (History and overviews) to allow the user to show/hide the expired e-tickets in the overview. When the setting is active, the filter option is selected by default, showing the expired e-tickets in the overview. 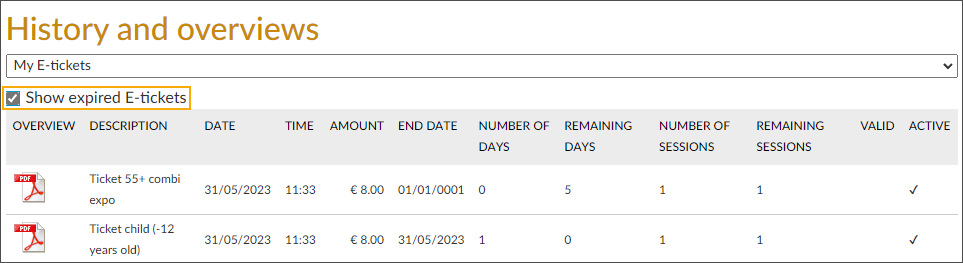 |
Show history invoices | If this option is active, the user will be able to consult his/her invoices in the part History and overviews and reprint them if required. In this case, invoices for the division which is linked with Recreatex Webshop will be displayed. |
Show history invoices for all divisions | If this option is active, the user will be able to consult his/her invoices for all the divisions in the part History and overviews and reprint them if required. |
Only show valid gift vouchers | Determine whether all gift vouchers should be shown or only the valid ones in History and overviews > My gift vouchers. |
Show My cards | If this option is active, the My cards overview becomes available under My profile > History and overviews. Customers can see all their cards in one place and are able to display a QR code for each card. 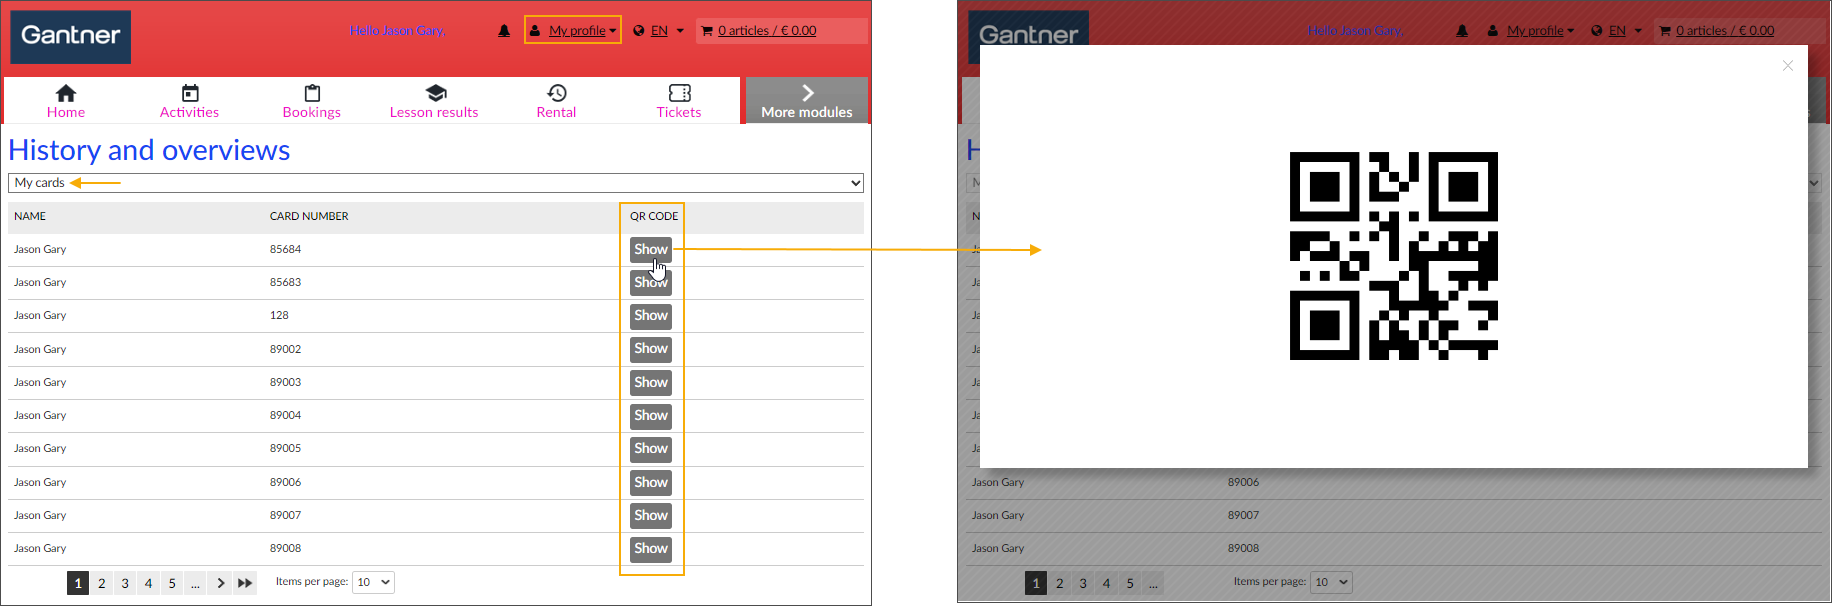 Default: not active (radio button option "No") ImportantThe card definitions to be displayed in the My cards overview must be specified in the Recreatex backoffice application, under General > Parameters > Web. |
Allowing users of the Recreatex Webshop to upload attachments is done using the settings in the Webshop Manager.
 |
Show my attachments | Activation of the functionality. |
Max. size attachment (in MB) | Limit (file size) of attachments that are uploaded by the user. |
If active, the additional item My attachments will appear under My profile on the Recreatex Webshop:
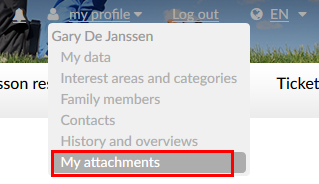 |
Next, the user can upload an attachment after selecting the type and subtype in question under the tab New attachment.
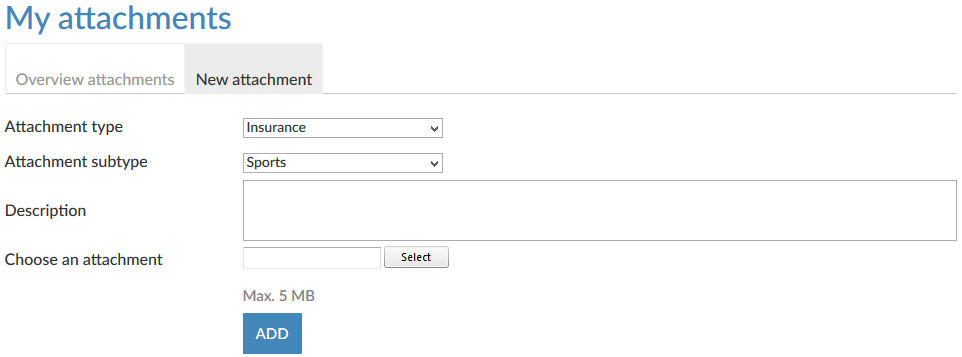 |
Under the tab Overview attachments the user can also consult the attachments that are currently linked to his/her customer card (tab Attachments) and that are linked to a (sub)type of which the option Show on website is active. Moreover, the user is able to download attachments.
 |
Allow to modify user name | Activating the setting will make the field "User name" editable in the account data of the Webshop user (login data). By default, a Webshop user is not allowed to change his/her username. |
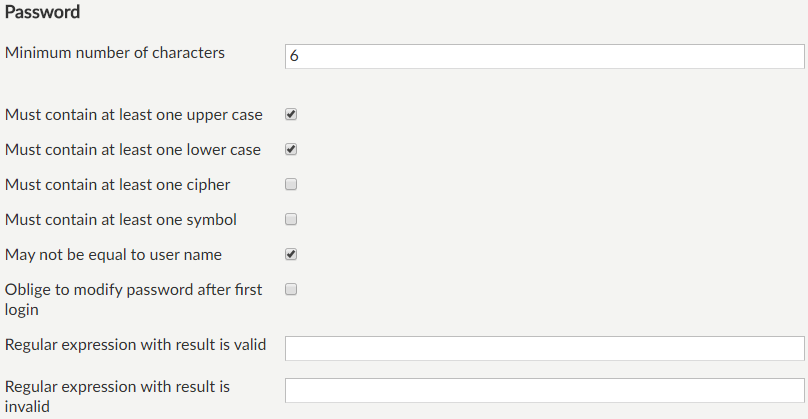 |
In this part, all conditions can be defined which have to be met by the given password at registration of a new user (or when modifying the password yourself). The minimal number of characters can be defined, as well as which characters have to be used in the password, and if the password may be equal or not to the chosen user name.
If a password is created or modified on the Recreatex Webshop, the necessary messages will appear in case the password does not meet the given conditions, for example:
 |
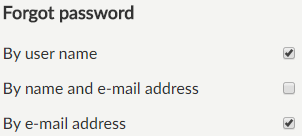 |
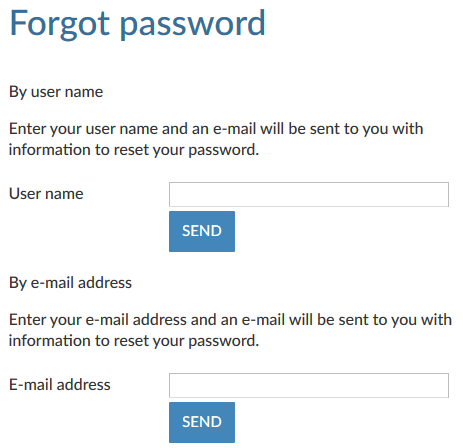
These settings determine which data will be asked for when using the function Forgot password.
 |
Note
If you use the functionality Forgot password, the user name and password will no longer be e-mailed to the user.
Note that this might mean you will have to modify the e-mail template for Forgot password.
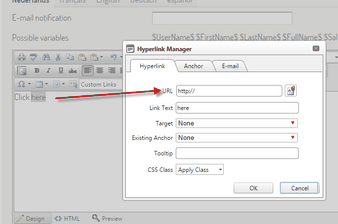
For this purpose, a new variable $ResetLink$ has been provided to use in the e-mail that is sent in case the functionality Forgot password is used and which leads the user to a specific page on which the password can be changed.
 |
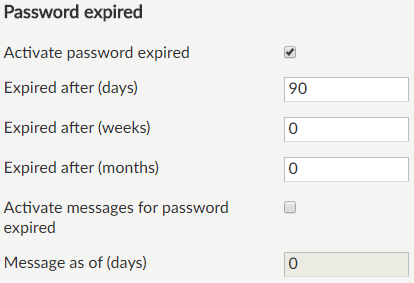 |
Password expiration can be configured for Webshop users. Passwords can be reset from the Webshop manager. This can be done for one user or for multiple users in batch. The user receives a mail with a link to change the password when a reset has been done.
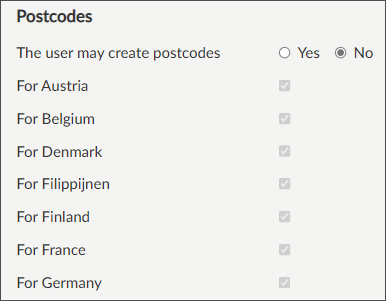 |
With this setting, you can determine whether users may create a postcode (with city) that does not yet exist in the Recreatex database when creating/modifying their profile data. If this is allowed, such postcodes are created as new records in the Recreatex database. If this is not allowed, the user will see the message below when going to the next registration step:
 |
Additionally, you can define for which countries postcodes may be created or not.
Always save the new settings by clicking on the button Save at the bottom of the manager page.
Technical settings
This tab contains several technical settings of the Recreatex Webshop.
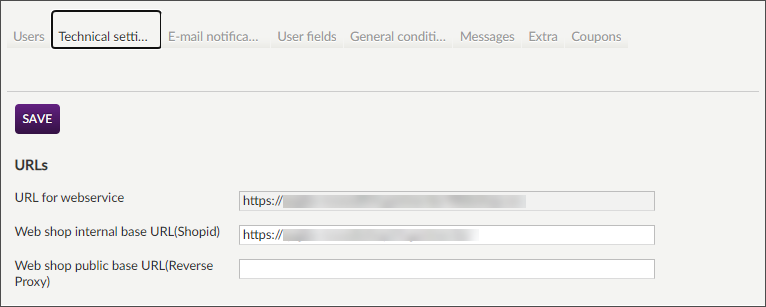
URL for webservice | The URL of the webservice that is used for the Recreatex Webshop. This is the link to the general ServiceHost-instance of the Webshop. |
Webshop base URL | Here you can fill in the base URL of the Webshop. When navigating to this URL, the correct ShopID will automatically be linked.
|
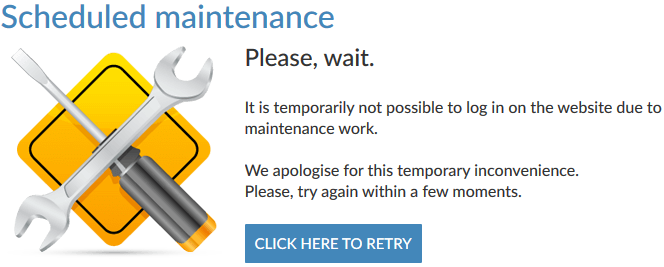
The setting Maintenance active allows you to make the Recreatex Webshop temporarily unavailable, for example, during the execution of updates or maintenance works.
When trying to access the webshop, the following default message will appear:
 |
Tip
The text of this message can be modified under General > Translations in the Manager.

Use safe cookies | If active, the Webshop is only reachable over HTTPS and no longer over HTTP. |
External security.txt url | Configure and test a redirect to a custom external URL that leads to the security.txt file used by security researchers to report security vulnerabilities. |
 |
Webservice documents through Webshop | If this setting is active, all images and documents will no longer be sent directly from the WSDL to the customer. Instead, these will be loaded through the Webshop and sent to the customer. In this way, the Webshop URL will always be shown in the browser for images and documents. NoteThis may have consequences for the performance, taking into account the busy traffic between the Webshop and the WSDL. | |
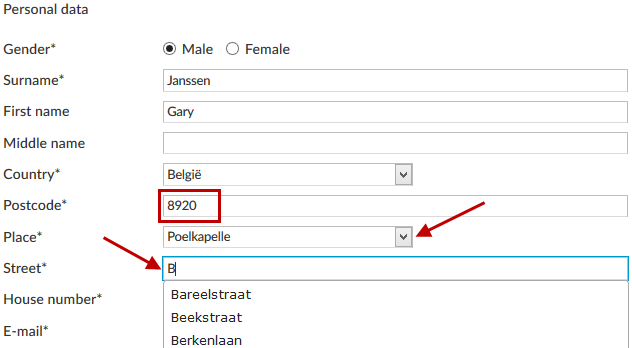
Enable crab service for auto suggest streets | This setting determines the behaviour when entering a Belgian address for a member on the Webshop. If this option is active, after entering the postcode, a drop-down of possible places will be shown in the place field. On selecting a place, a list of possible streets will be shown when typing in the street text box.
NoteFor this purpose, CRAB must be integrated in the Recreatex desktop application. | |
Enable cendris service for auto suggest streets | This setting determines the behaviour when entering an NL address for a member on the Webshop. If this option is active, after entering the postcode, the fields for street and place will automatically be filled in.
|

By means of the setting Use own error page it is possible to define that in case of an unexpected error the system has to navigate to another page than the default Recreatex error page. This page is then defined by means of an URL, in which certain variables are allowed.
Note
In the Web.config file of the Recreatex Webshop, the field CustomErrors has to be changed for this from RemoteOnly to On.
In this section, you can modify the password for the Manager page.
VersaTag is an analytical service as well for collecting and analysing certain data of a website (comparable to Google Analytics) and here you can fill in the tracking ID for VersaTag.
Here you can determine if a so-called "CAPTCHA" has to be used when finalising a new user registration.
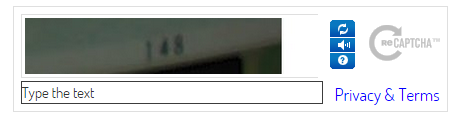 |
This is extra security to ensure that only people (and thus no fraudulent programs/web robots) can create a new account on the Webshop.
To use this tool, fill in the specific public and private keys (to be obtained by registering and linking the webshop through http://www.google.com/recaptcha), and choose the theme (style) of the CAPTCHA.
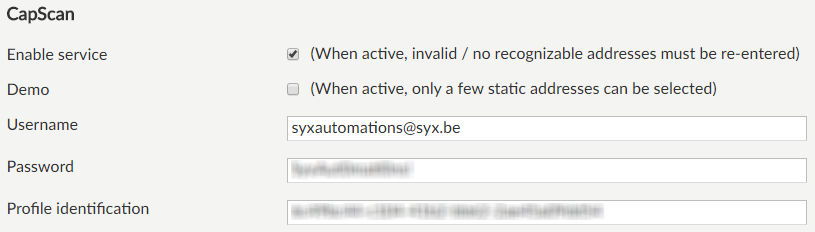 |
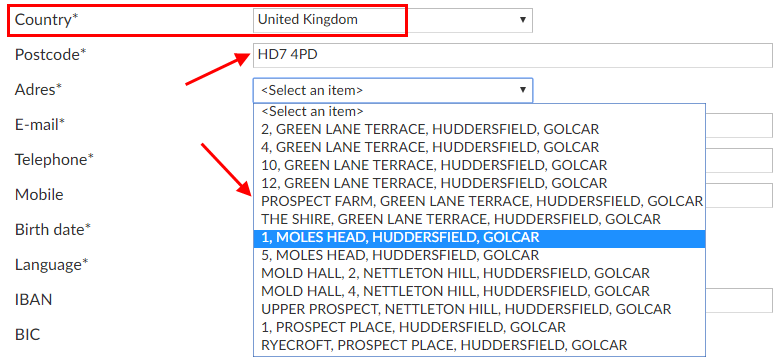
Enable service | This setting determines the behaviour when entering a UK address for a member on the Webshop. If this option is active, after entering the postcode, the address field will show a list of address suggestions that match the postcode.
| |
Demo | This setting can be activated together with the setting Enable service. If active, data won't be retrieved from the service, but from predefined test data. This is done for testing purposes. | |
Username, password and Profile identification | Enter the username, password and profile identification received from CapScan. |
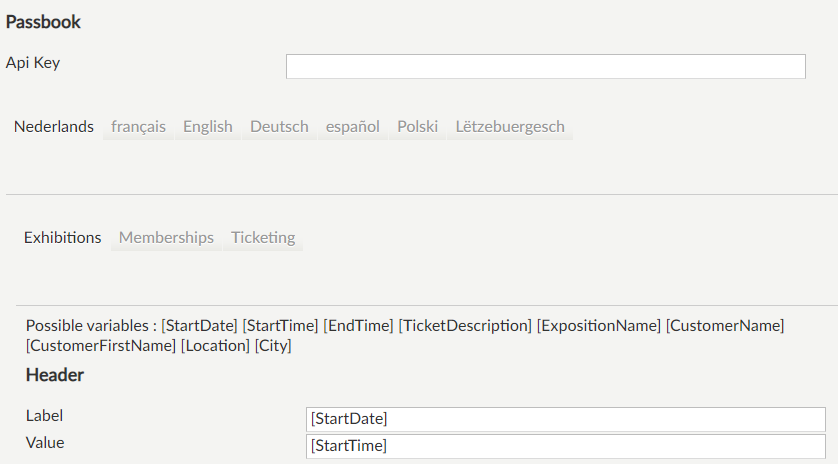
Enter the passbook API Key. It is possible to add fields that will show on the passbook for Exhibition, Memberships and ticketing. It is possible to add field translations as well.
Note
Set the $Passbook$ placeholder in the email templates (WebShop Manager > General > Email messages) so that the Webshop user can get a passbook file.
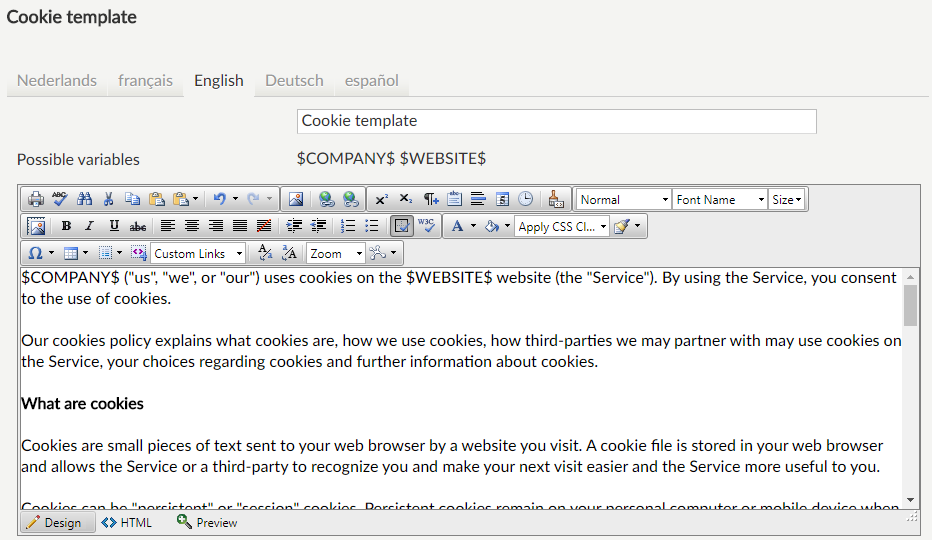 |
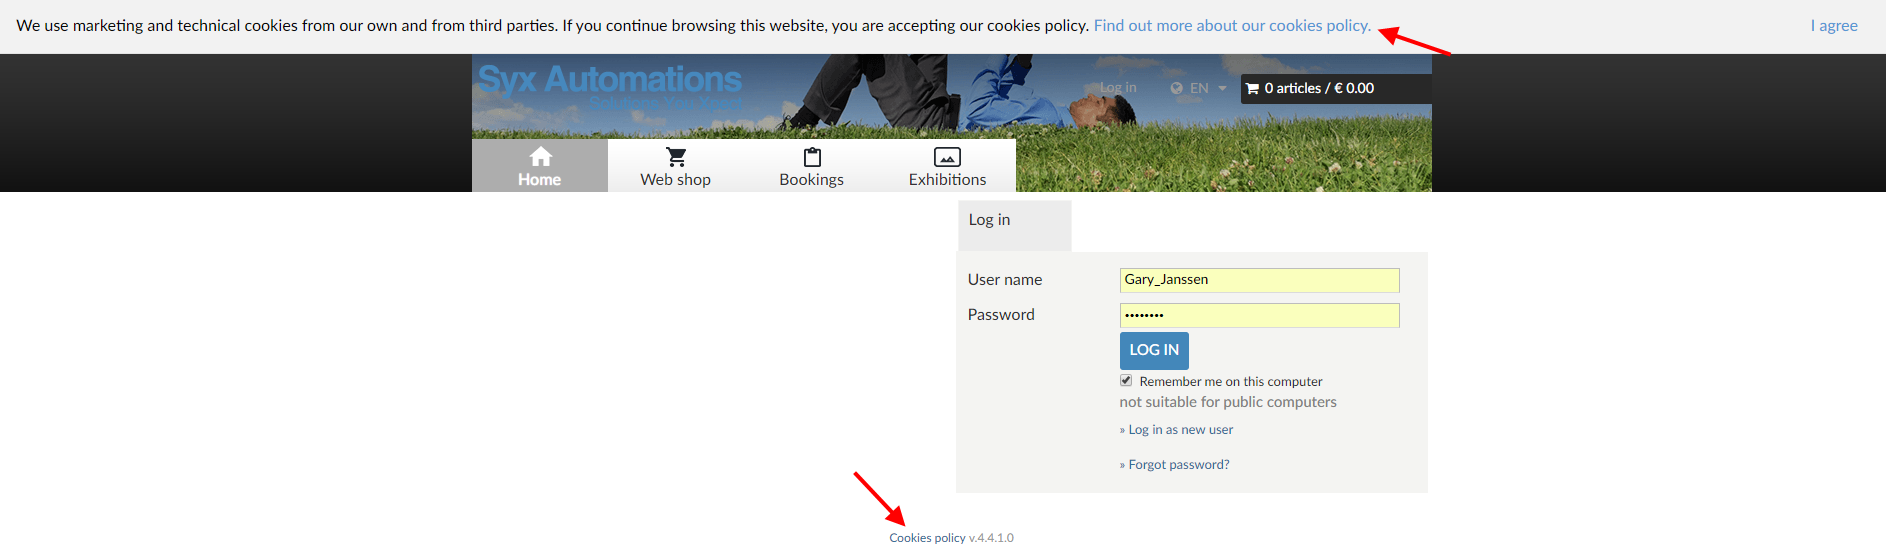
Under the Cookie template, it is possible to modify the default template or create a new cookie policy, which the user can consult on the Webshop.
 |
E-mail notification
In the part E-mail notification different notification e-mails can be defined, that will automatically be sent in case of specific actions on the Recreatex Webshop. In this way, you as a company/organisation will be informed per e-mail of certain actions done on the Webshop.
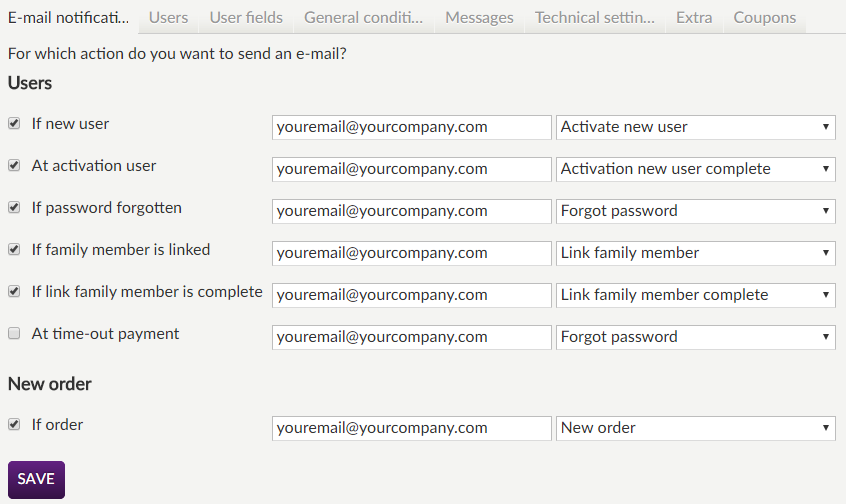 |
Tick off the actions for which you want an e-mail to be sent to the given e-mail address.
If new user | An e-mail will be sent if someone has registered as a new user and if activation of the account is required. |
At activation user | An e-mail will be sent if the web account of a new user has been activated. |
If password forgotten | An e-mail will be sent if a user of the Webshop has clicked on Forgot password in the log-in screen. |
If family member is linked | An e-mail will be sent if a user has linked a family member on the Webshop (if this possibility is offered on the Webshop - see also the settings in question under My account in paragraph Settings > Users). |
If link family member is complete | An e-mail will be sent if linking a family member has been completed by means of the activation e-mail. (If this possibility is offered on the Webshop - see also the settings in question under My account in paragraph Settings > Users). |
If order | An e-mail will be sent if a user has placed an order (purchase, booking, registration, ...) on the Webshop and has finalised the transaction through the shopping basket. This is thus a copy of the order confirmation that is sent to the customer in case of an order. Note
|
Per action, an e-mail address has to be filled in to which the e-mail in question will be sent.
This is usually an e-mail address within your organisation/company.
 |
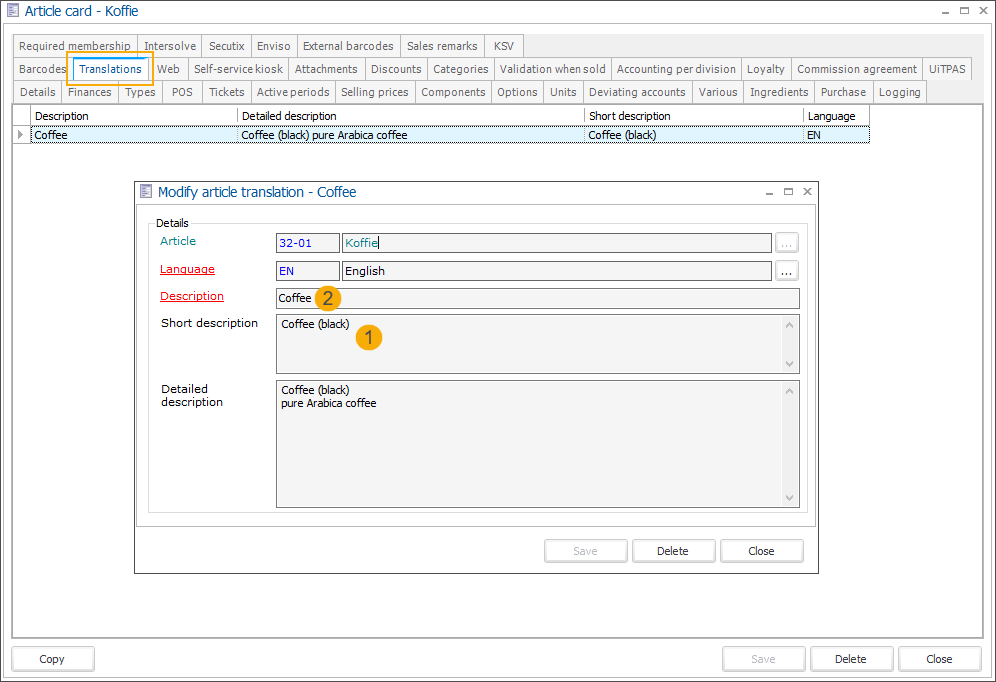
Finally, the e-mail template has to be chosen per action.
 |
Note
Initially, six default e-mail templates are available. It is, however, possible to modify the default templates and to make new e-mail templates on the manager page. This is possible under General > E-mail messages.
See further: paragraph E-mail messages.
Always save the new settings by clicking on the button Save at the bottom of the manager page.
User fields
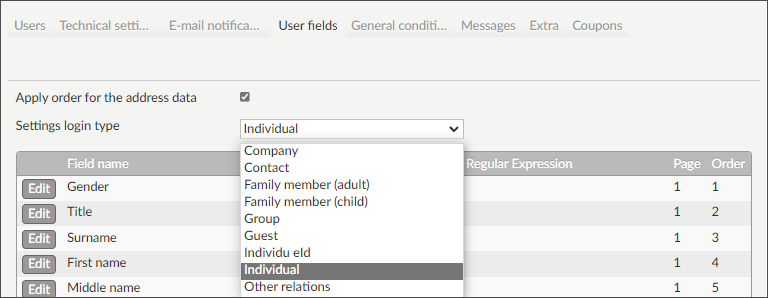
Under the tab User fields you can define per login type which address fields will be visible to a user when registering a new account or when consulting his/her profile data. Moreover, it is possible to define such fields as Mandatory and/or Editable or not and to determine per field on which page of the profile data it has to be shown.
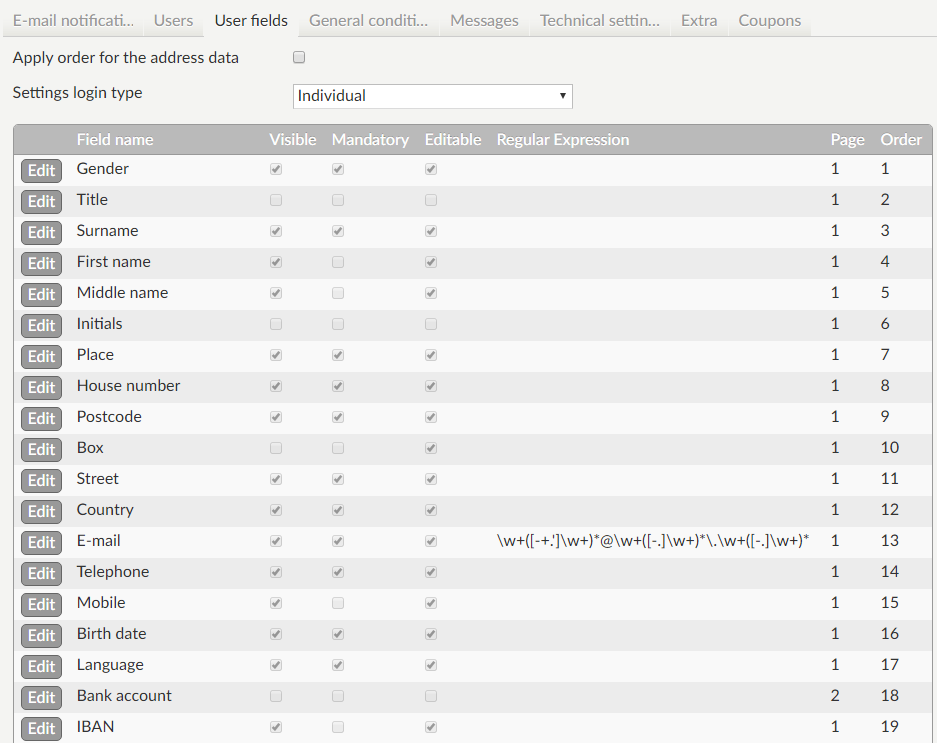 |
The list contains all available fields of the current login type. The different login types are Company, Contact, Family member (adult), Family member (child), Group, Guest, Individual, Individual eID, Group, and Other relations.
 |
In order to define the characteristics of a certain field, you have to click on the button Edit.
The line in question is maximized, in the example below for the field E-mail:
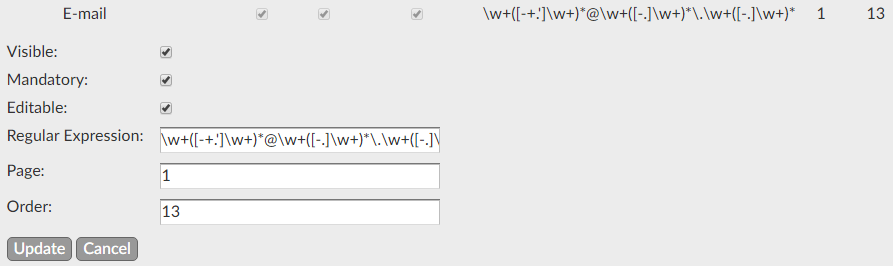 |
Visible | Does this field have to be shown when creating/modifying/consulting the profile data? Pay attention: the field Surname is an essential field for the Recreatex database and can consequently not be deactivated. |
Mandatory | Does this field have to be filled in obligatory when creating/modifying/consulting the profile data? Pay attention: the field Surname is an essential field for the Recreatex database and is consequently always obligatory. |
Editable | May this field be modified by the user himself? |
Regular Expression | By defining a "regular expression" it is possible to determine that the content of the field has to meet certain rules relating to (allowed or non-allowed) characters and signs. An example of a regular expression for e-mail addresses: [a-z0-9!#$%&'*+/=?^_`{|}~-]+(?:\.[a-z0-9!#$%&'*+/=?^_`{|}~-]+)*@(?:[a-z0-9](?:[a-z0-9-]*[a-z0-9])?\.)+(com|org|net|edu|gov|be|nl|fr|de|uk|eu)\b More information on regular expressions: |
Page | If the profile data are divided over several pages, it is possible to define on which page the current field has to be visualised. |
Order | It is possible to define the position of the field on the page (by number). |
Always save the modified settings of a field by clicking on the button Update.
General conditions
This tab contains the settings relating to the general conditions for using the Recreatex Webshop.
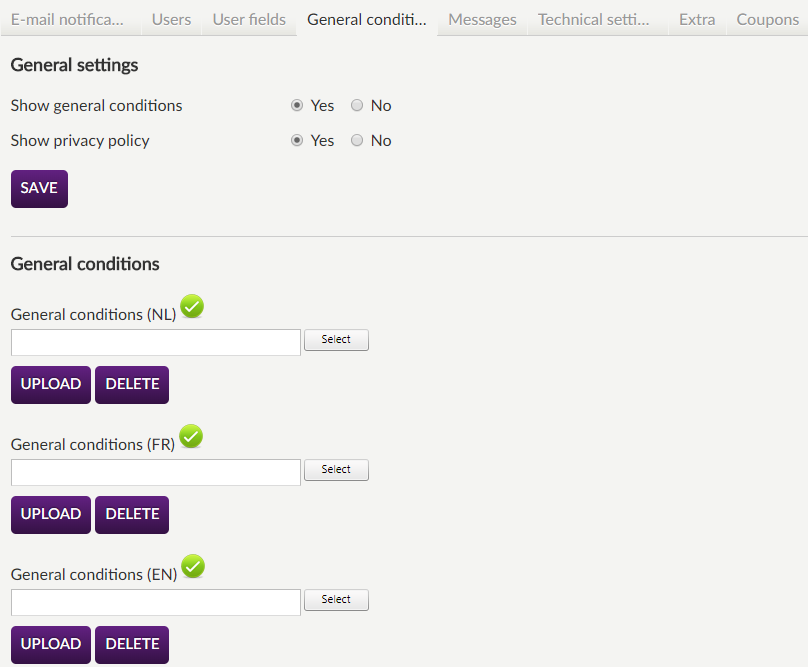 |
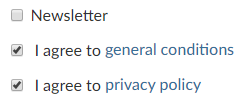
Show general conditions | This setting allows you to determine whether a new user has to accept the general conditions or not when creating a new user account before the registration process can be finalised. If this setting is deactivated, the option I agree to general conditions will not be shown during the registration process on the Recreatex Webshop. |
Show privacy policy | This setting allows you to determine whether a new user has to accept the privacy policy or not when creating a new user account before the registration process can be finalised. If this setting is deactivated, the option "I agree to privacy policy" will not be shown during the registration process on the Recreatex Webshop. |
Click Save to apply the modifications.
In the part Documents, you can upload the documents with the general conditions and privacy policy per language (Dutch, French, English, German and Spanish). These documents can then be downloaded during the registration process by clicking on the link in question.
 |
Click on the button Select to select the file, and afterwards on Upload to effectively upload the file for the current language.
Messages
It is possible to show notifications on the Recreatex Webshop in two cases.
The birthday of the user or his/her family members.
Obtaining a new diploma within the course management tool.
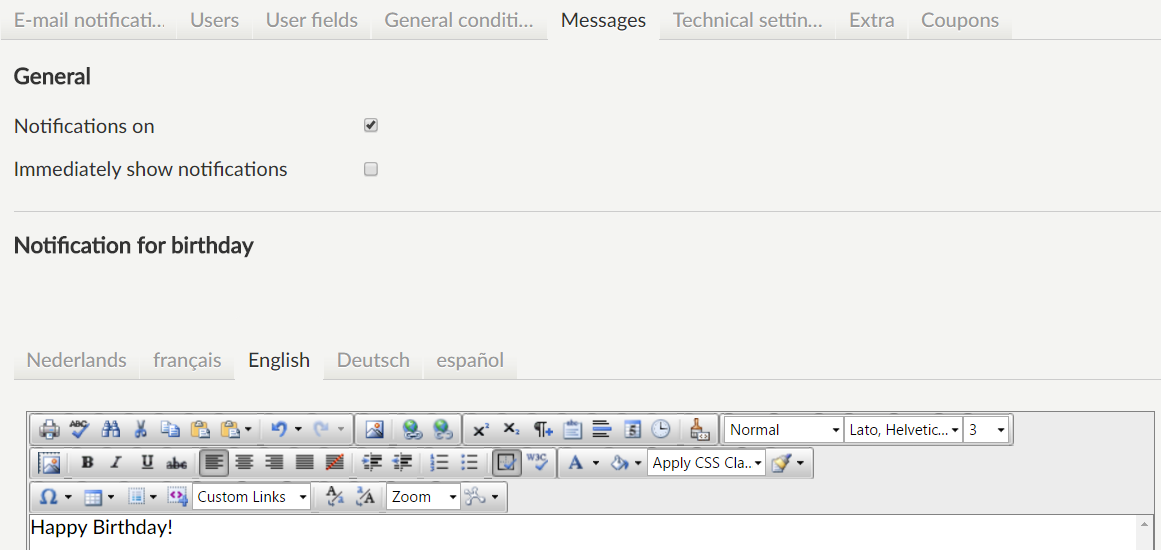 |
Notifications on | Activate the use of notifications. |
Immediately show notifications | If active, the new notification will immediately appear if the user logs in to the Recreatex Webshop. |
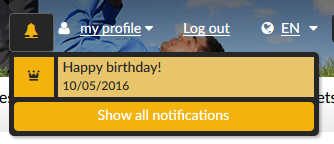
In the HTML fields for the notification for birthdays and for obtaining a diploma, you can fill in HTML that will then appear if the notification is opened.
The notifications can also be called up within the history of the user (My profile > History and overviews > My notifications).
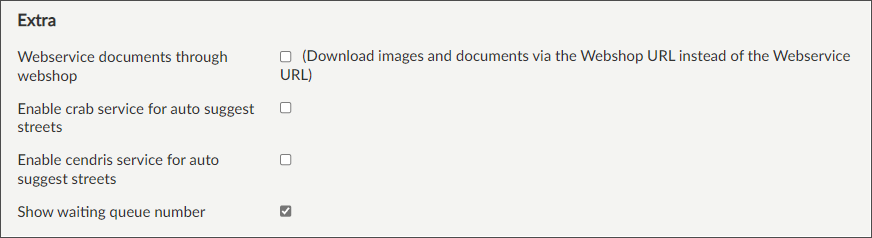
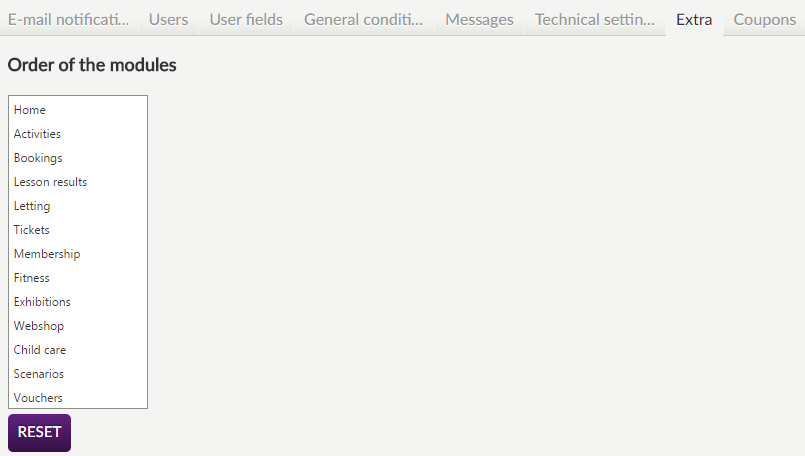
Extra
In the tab Extra of the general settings, the order in which the modules are visualised on the Recreatex Webshop can be set up.
 |
 |
You can do this by clicking on the module in question in the list and by dragging it to the desired place.
Note
The modifications are saved immediately and do not have to be saved by an additional action. Click on the button Reset to return to the default order.
Coupons
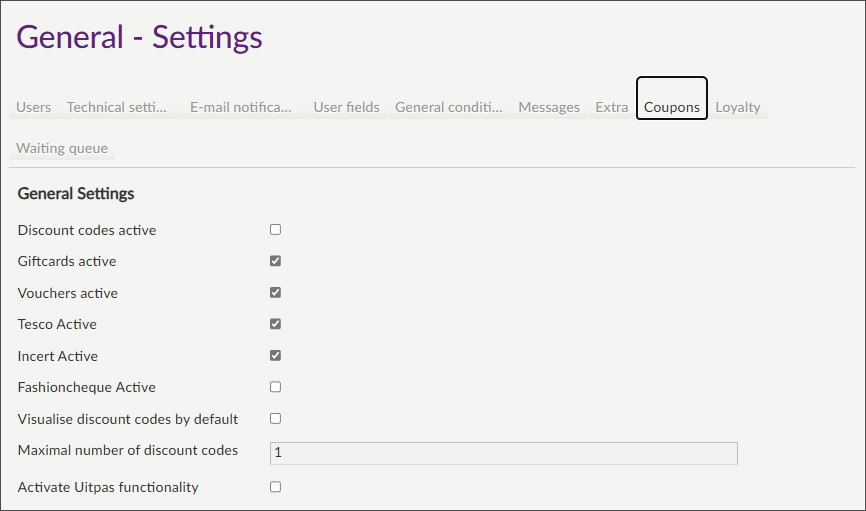
Discount codes active | By activating this option, the principle of discount codes (coupon codes) can be used on the Recreatex Webshop. In this case, the discount code can be filled in when paying.
| |||
Gift cards active | By activating this option, the principle of gift cards can be used on the Webshop. In this case, the discount code can be filled in when paying. | |||
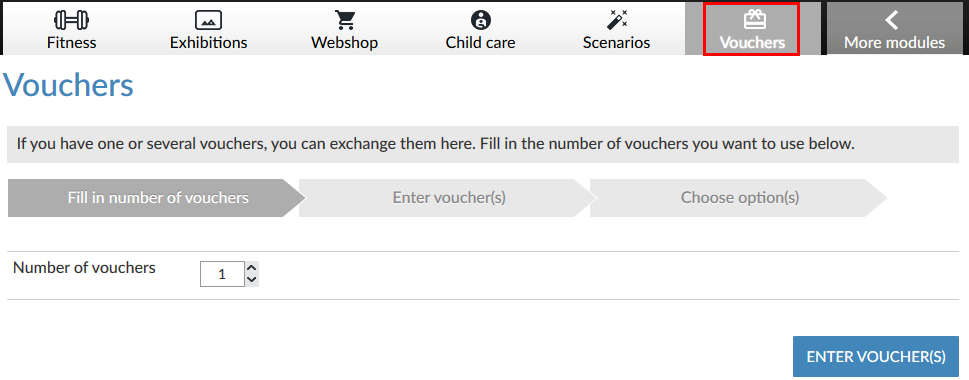
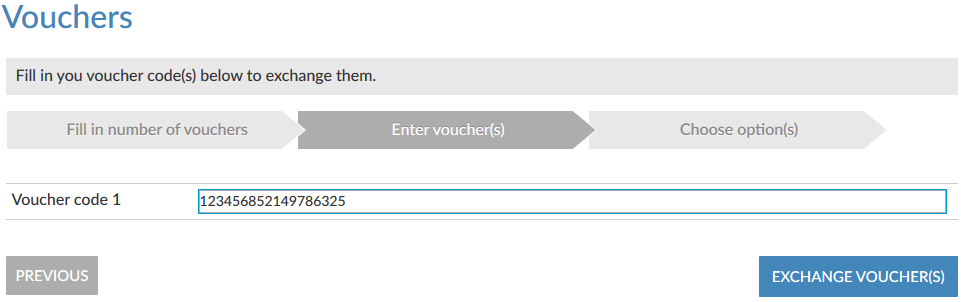
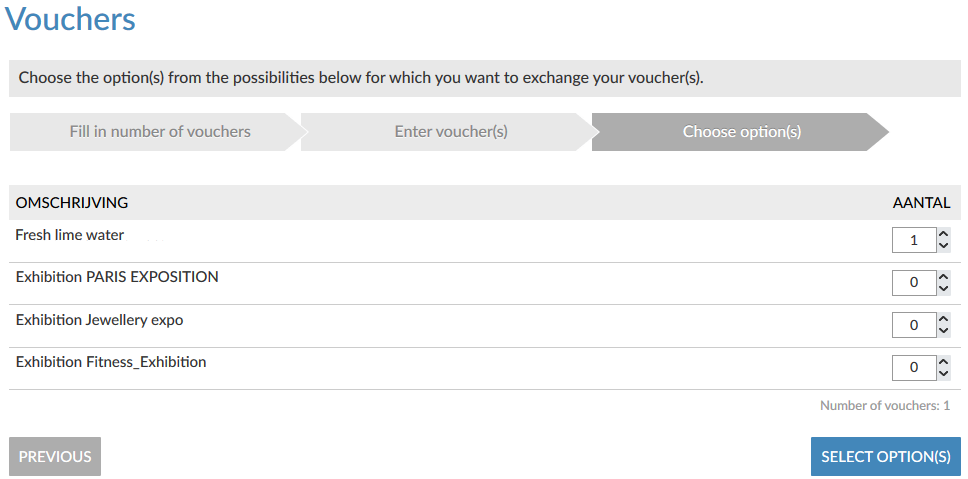
Vouchers active | If active, an extra tab Vouchers is available on the Recreatex Webshop, in which the user can fill in his/her voucher code(s).
After exchanging the voucher, the possible products are shown.
Finally, this selection is added to the shopping basket. | |||
Tesco Active | ||||
Incert Active | Activate this functionality to allow the user to enter the Incert voucher code and redeem the available amount during purchase on the Webshop. In the Shopping cart, enter the voucher code in the available field and click Check (1) to verify the voucher. Select /adjust the amount (2) that you want to redeem and click Redeem (3) to apply the selected amount to the total amount of your shopping cart. 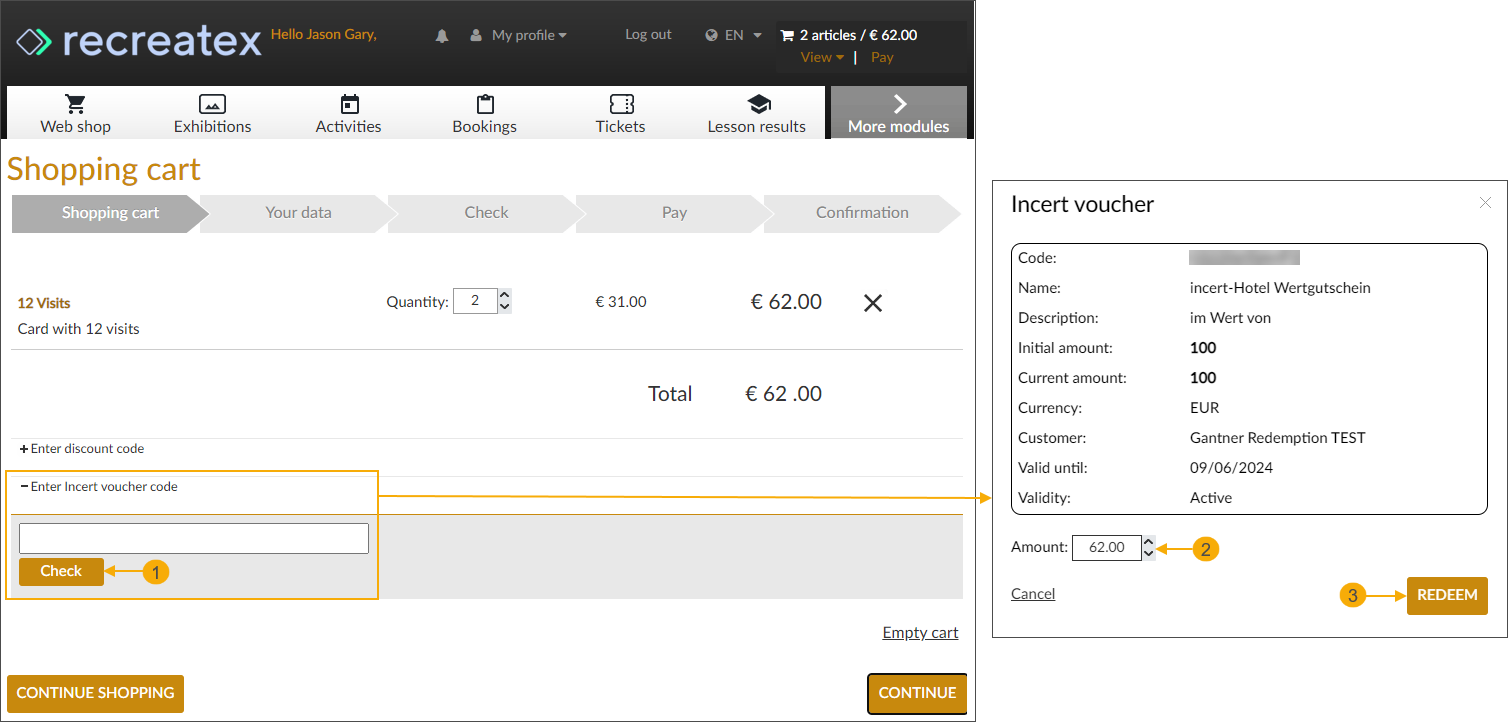 The selected voucher amount is deducted from the total price of the shopping cart (4). If you want to use multiple vouchers, at this point you have the possibility to enter additional codes (5) and you can also cancel an already applied voucher discount (6), if necessary. 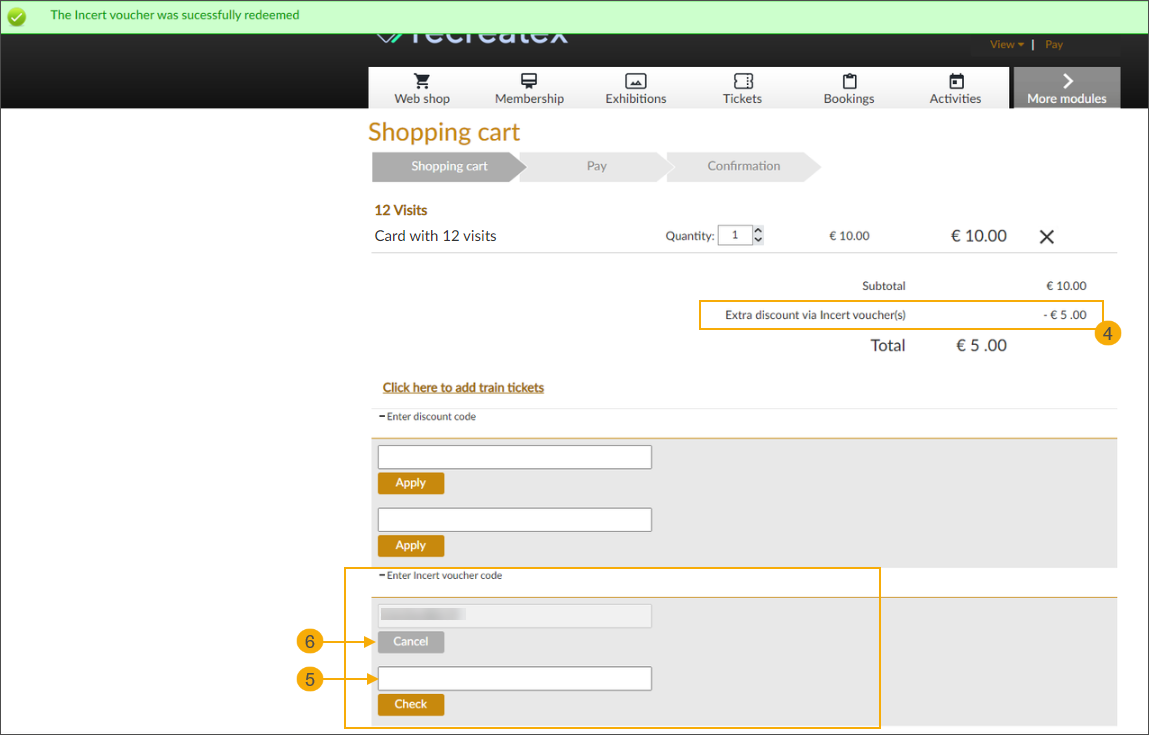 | |||
Fashioncheque Active | Activate this functionality to allow the users to redeem Fashioncheque gift cards for their Webshop purchases. ImportantTo use this functionality you must first set up the Recreatex counter plugin: FashionCheque In the Shopping cart, enter the card number in the dedicated field and click Check (1) to verify the card. A pop-up shows up with the details of the card, including the available balance. The amount to be deducted (2) is filled in automatically, depending on the available balance but you can adjust the amount manually. Enter the security code and click Redeem (3) to apply the selected amount to the total amount of your shopping cart. 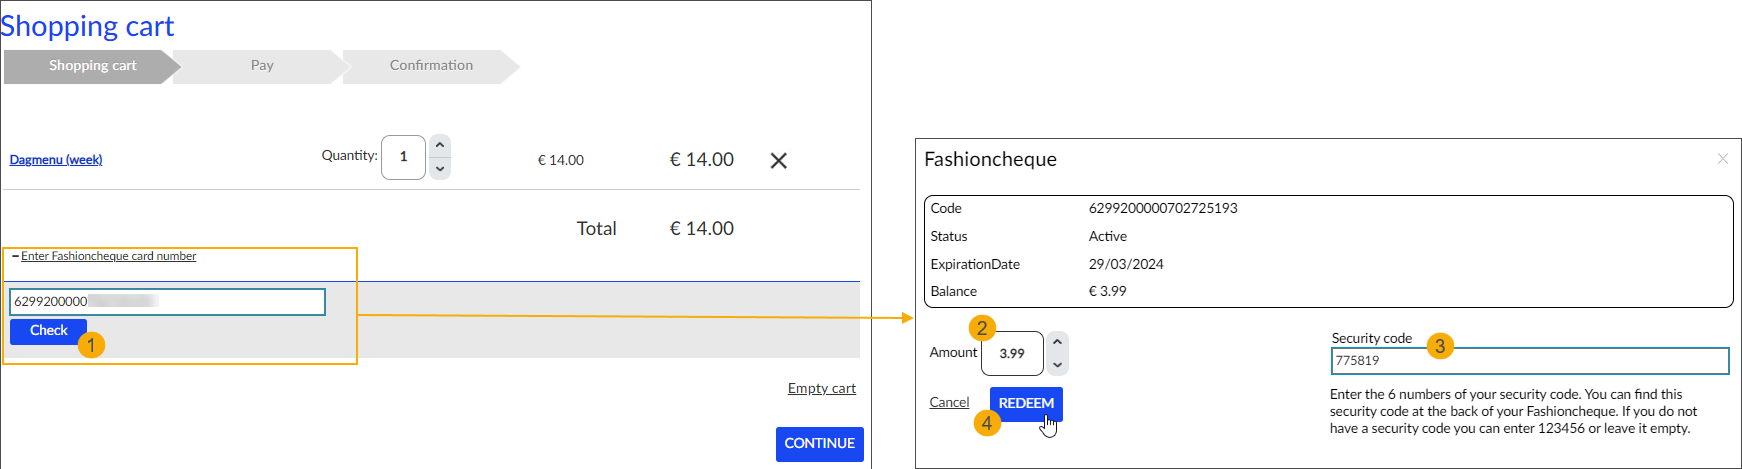 The amount is deducted from the total price of the shopping cart (5). If you want to use multiple vouchers, at this point you have the possibility to enter additional card numbers (6) and you can also cancel an already applied voucher discount (7), if necessary. 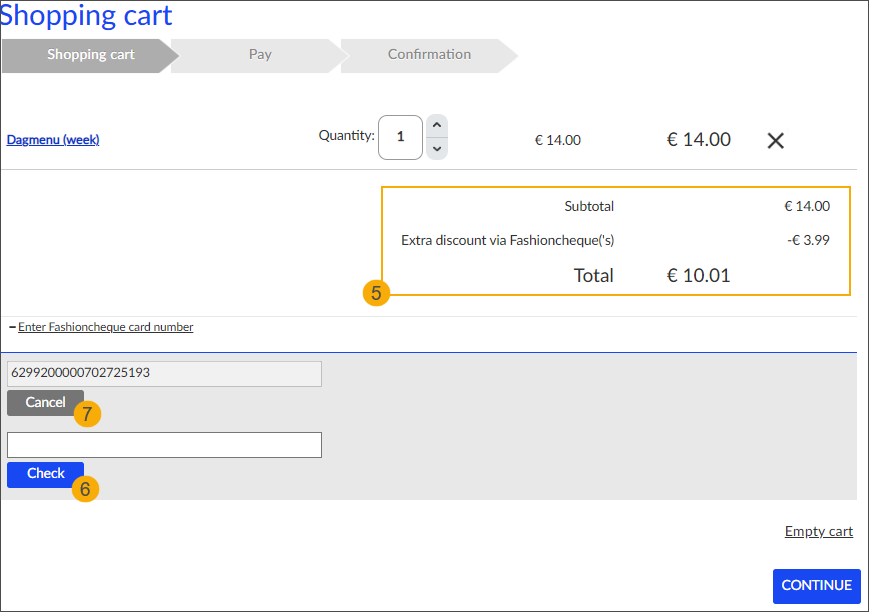 | |||
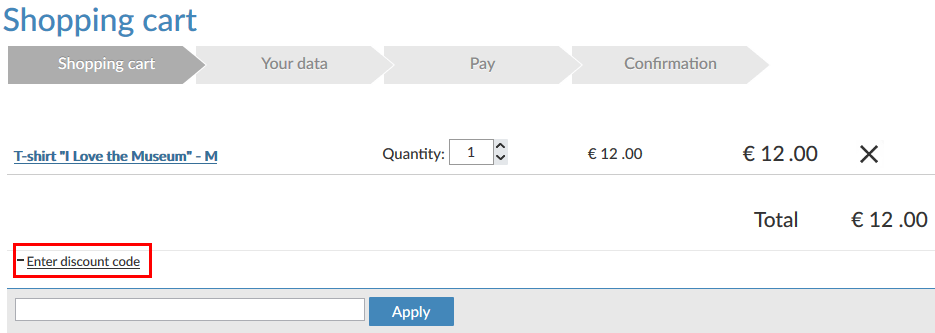
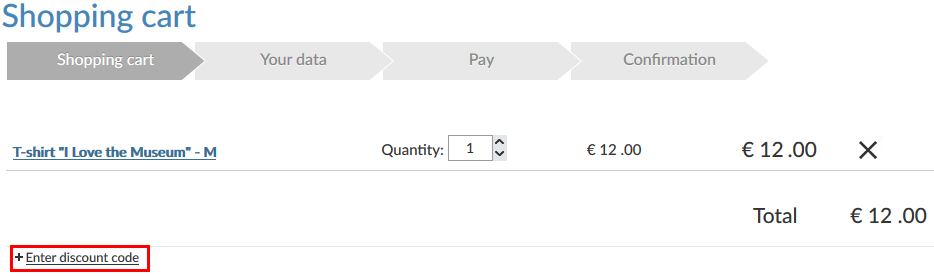
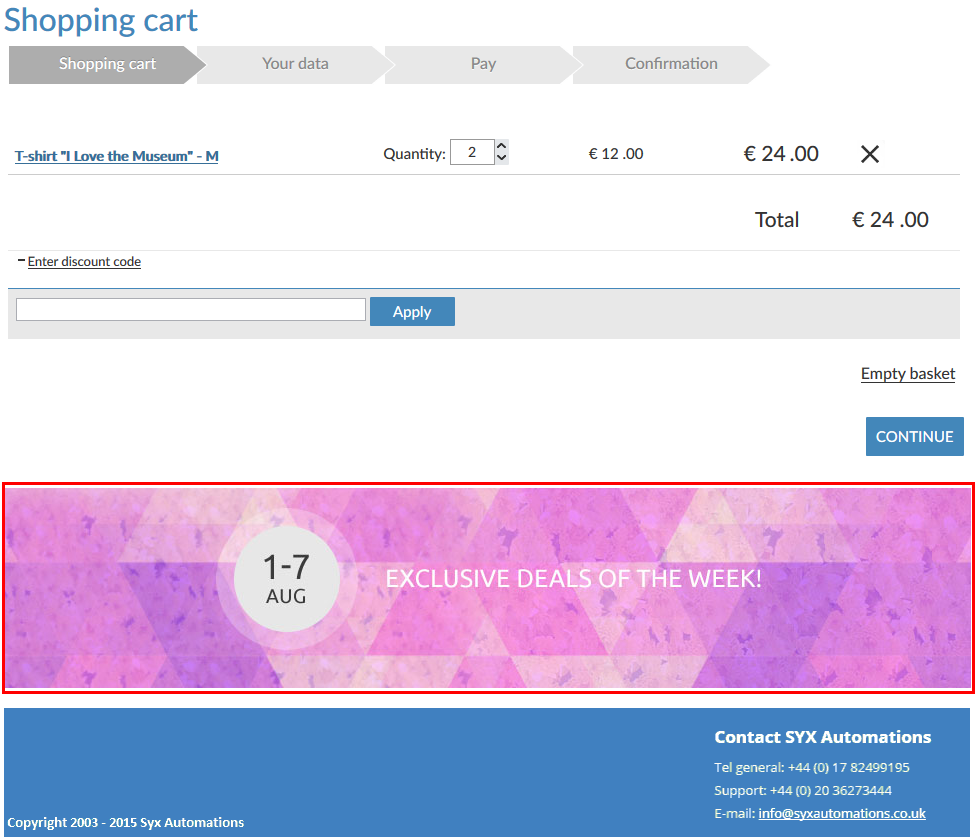
Visualise discount codes by default | By default this option is disabled and the user needs to click the + button to expand the discount code box to enter the discount code in the purchase process (shopping basket). If this setting is active, the box will be expanded by default and immediately visible to the user.
| |||
Maximal number of discount codes | This setting allows you to limit the number of discount codes that can be filled in when paying the shopping basket (0 = no restriction). | |||
Activate UiTPAS functionality | Activate this setting to allow the customer to utilize his/her UiTPAS card when buying an article with UiTPAS advantage configured. 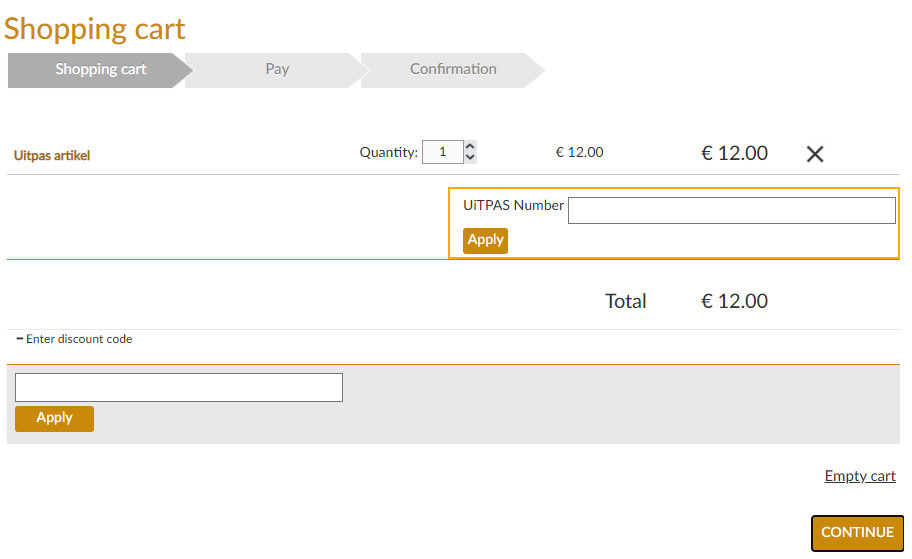 When buying exhibition tickets with an UiTPAS discount rate, the customer will have to provide the UiTPAS card for each participant/purchased ticket. 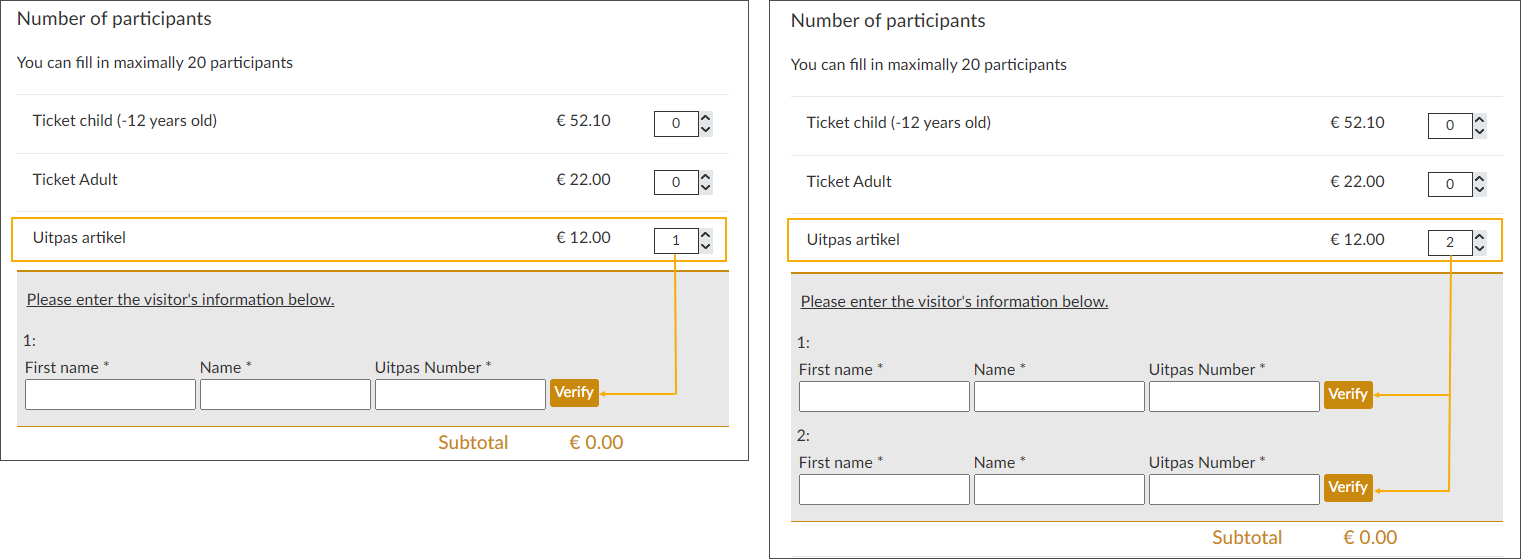 For complete information about the backoffice activation and configuration of the UiTPAS functionality, see UiTPAS. |
 |
Show coupons in history | If this option is active, the user will be able to consult his/her coupons in the part History and overviews (My coupons). |
Show customer | Activate this option to visualise the customer info in the part History and overviews (My coupons). |
Show sales number | Activate this option to visualise the sales number in the part History and overviews (My coupons). |
Enable search | If active, the filter and search options are available on the History and overviews (My coupons) page. |
Show gift vouchers in history | Activate this option to visualise gift vouchers in the part History and overviews (My gift vouchers). |
Loyalty
Activate the Gezinsbond functionality on the Webshop to allow the customers to use their Gezinsbond card online and automatically add the reward amount from their purchase to their Gezinsbond account balance.
The Webshop integration makes use of the existing Gezinsbond counter plugin to define the reward percentage, process the transactions and update the balances on the Gezinsbond side regularly.

Select the setting Activate Gezinsbond and click Save to activate the functionality.
Upload the Gezinsbond logo to make it easy for your customers to find the correct field for the Gezinsbond card number on your webshop.
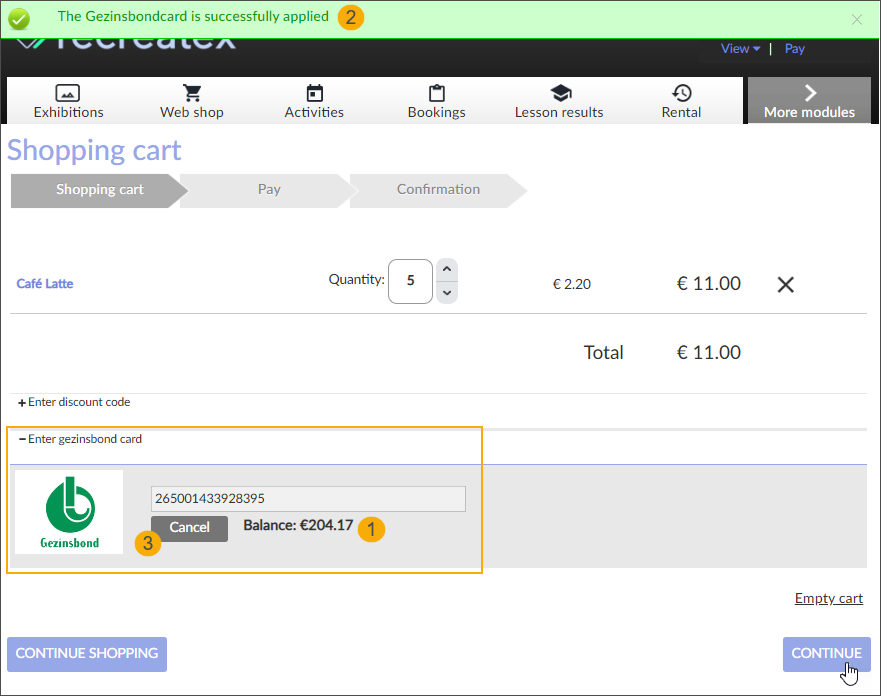
When articles are added to the shopping cart, the customer has the opportunity to enter the Gezisbond card number and validate the card.
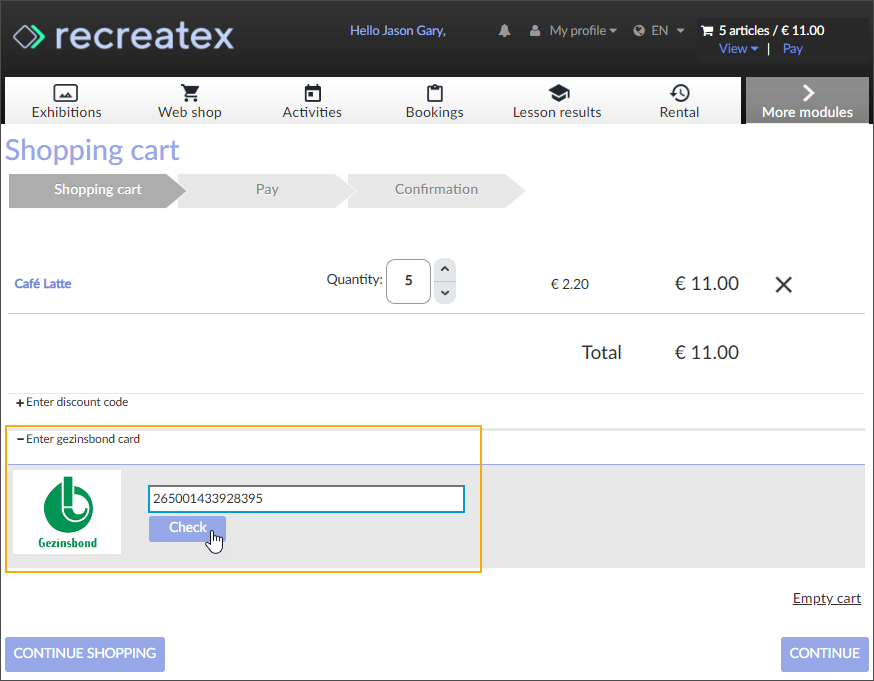
If the card is valid, the current balance is shown (1) and the card is automatically applied to the current purchase (2). Customers also have the possibility to cancel/re-enter the card number (3) if needed.
After finalizing the payment, customers receive a confirmation email where they can see the actual reward amount added to the account and the new balance amount available on the Gezinsbond card.

In the backoffice, you can easily recognize the sales containing a Gezinsbond transaction. Go to Sales admin > Visualisations > Sales and look up the relevant sale.
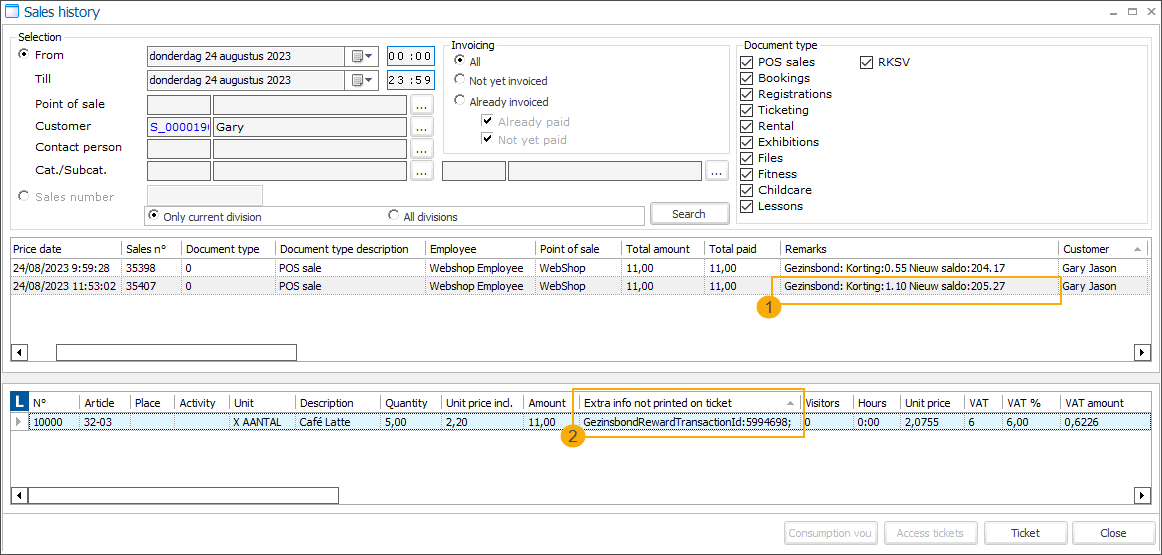
The sales header includes the actual amount of the rewarded amount and the updated balance amount.
On the article level, you can find the Gezinsbond transaction ID.
Waiting queue
The Recreatex Webshop supports the use of a waiting queue system. The waiting queue can be activated in situations when the load is too heavy during specific booking moments.
The waiting queue limits the number of users that can actually reach and use the webshop. Users who try to enter the webshop when the number of allowed users has been reached are redirected to the waiting queue page where they optionally receive additional information. Once a spot is freed the user is automatically redirected to the webshop.
The waiting queue system has been introduced to reduce possible performance and heavy load issues.
This waiting queue option is always available in your Recreatex Webshop.
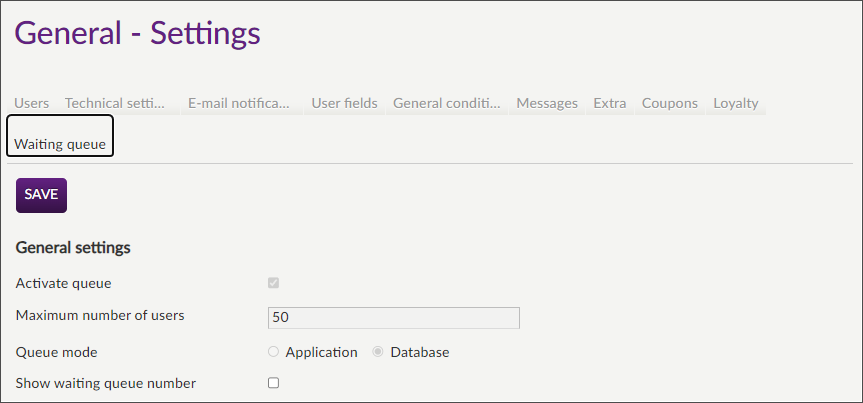
Activate queue | Select the checkbox to activate the waiting queue (default). If disabled, an unlimited number of users is allowed on the webshop. |
Maximum number of users | Define the maximum number of users allowed on the webshop. When this number is exceeded, users will be redirected to the waiting queue page. This number depends on the queue mode:
|
Queue mode |
|
Show waiting queue number | Activate this setting to show the exact position of the customer in the waiting queue. 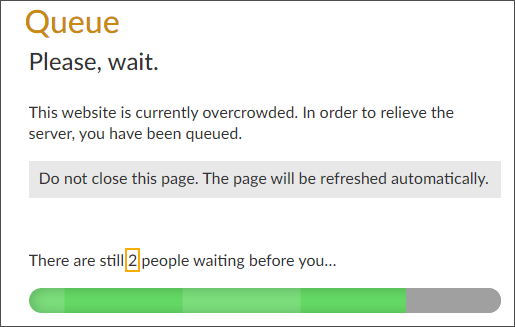 When the setting is not active, a general message is shown to the customer and only the progress bar is updated. 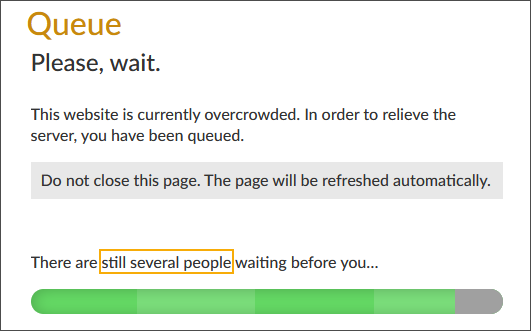 |
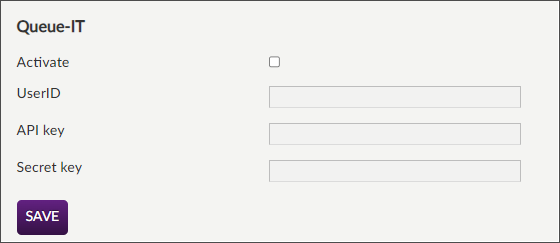
3rd party waiting queue option
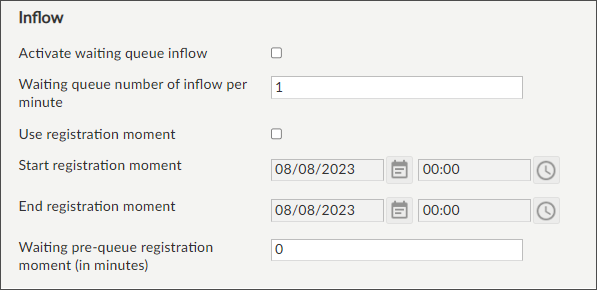
3rd party waiting queue option
Translations
Under General > Translations you can select the active languages of the Recreatex Webshop and modify and/or translate the texts of the Recreatex Webshop.
Active languages
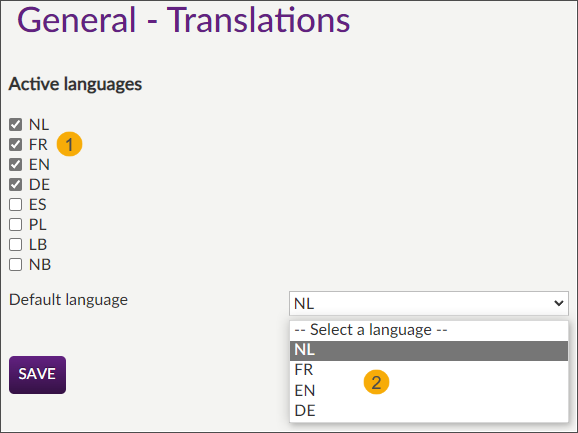
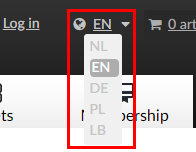
The active languages (1) are the languages in which the Webshop is available. Currently available languages are Dutch (NL), French (FR), English (EN), German (DE), Spanish (ES), Polish (PL), Luxembourgish (LB), and Norwegian (NB).
 |
If you deactivate a language, it will not be visualised as a language option of the Webshop.
 |
Default language option (2) allows you to define the default language of the Webshop which will be used when visiting the Webshop for the first time. When selecting/deselecting the active languages, the drop-down list selection of the possible default language will be adjusted accordingly.
Click Save to update the settings.
Filter translations
It is possible to search for translation using the text string's code, default translation or current translation.
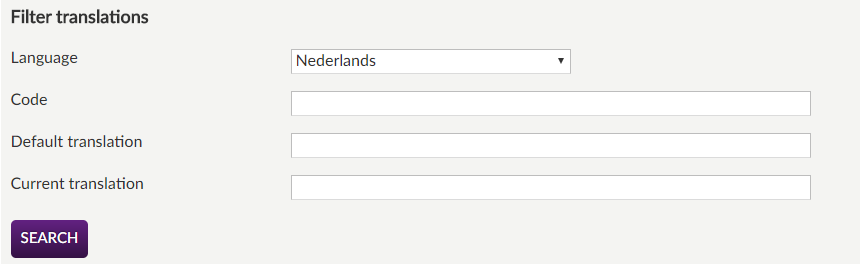 |
Custom translations
On clicking the button Search, a new section Custom translations will appear.
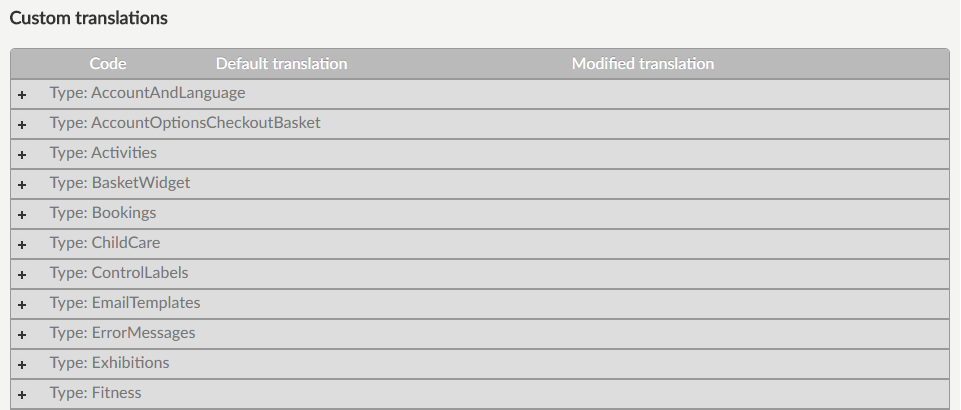 |
In the part Custom translations, you can provide your own texts/translations that will be used on your Recreatex Webshop. Translations can be filled in in all supported languages: Dutch, French, English, German, Spanish, Polish, Luxembourgish, and Norwegian.
Note
Use the search functionality to quickly find the text you want to translate or edit.
Enter the code, default translation or custom translation and click Search , to find all fields containing the given text.
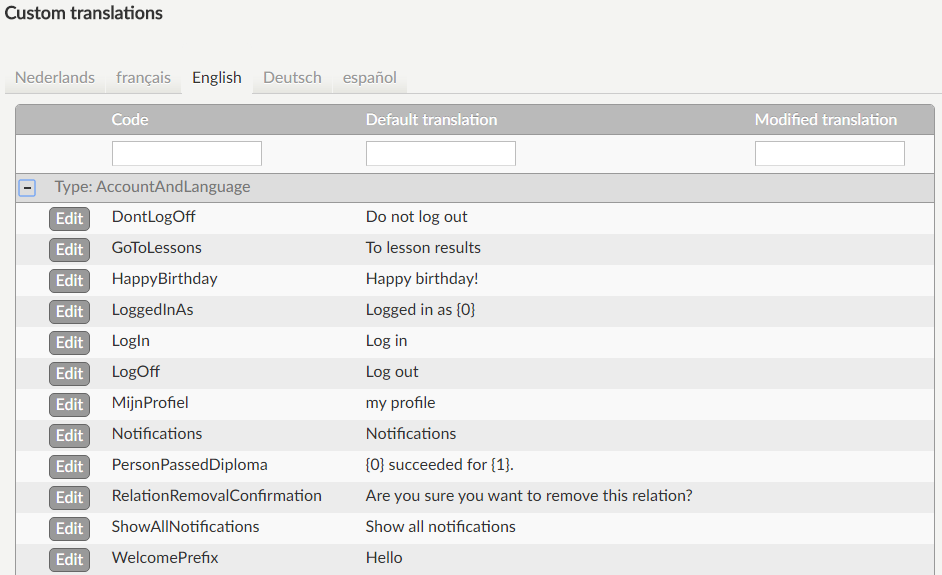 |
The translations are subdivided per type, and each type can be expanded by clicking on the + button.
To modify the translation of an item, click Edit.
 |
The current line will be expanded. Fill in the custom translation and click Update.
 |
If the translation has been accepted, the new value will appear in the column Modified translation.
 |
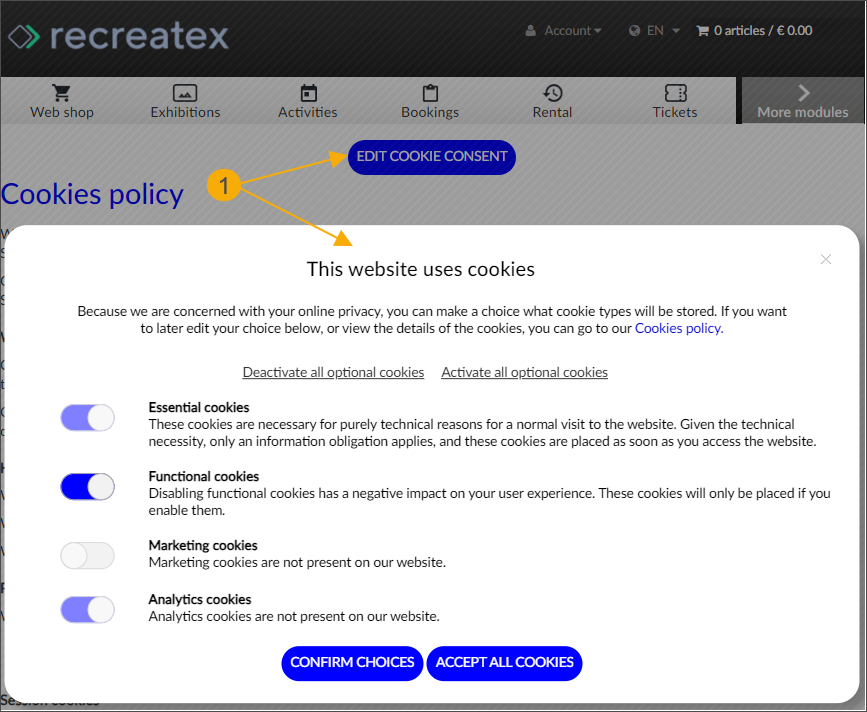
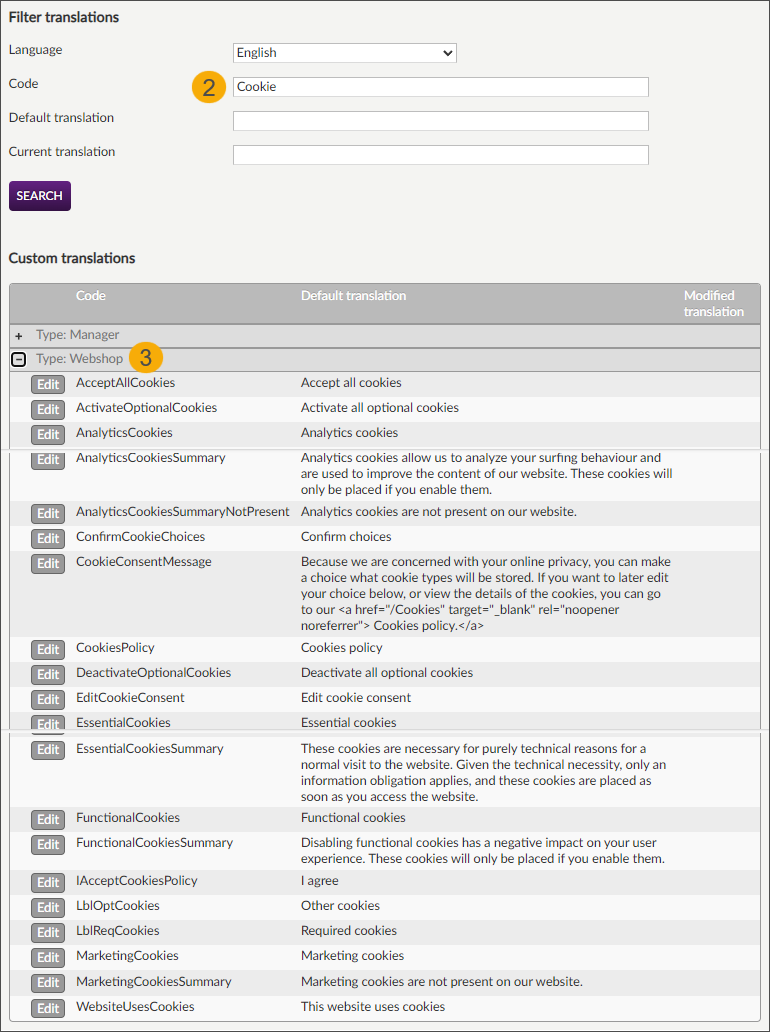
Cookie consent banner
To filter out all texts and button labels related to the cookie consent banner (1), use "Cookie" as the search term (2). Then expand the section Webshop (3).
Shopping cart
Under General > Shopping cart different settings can be determined relating to payments in the Recreatex Webshop.
The settings for the shopping basket are divided into different tabs:
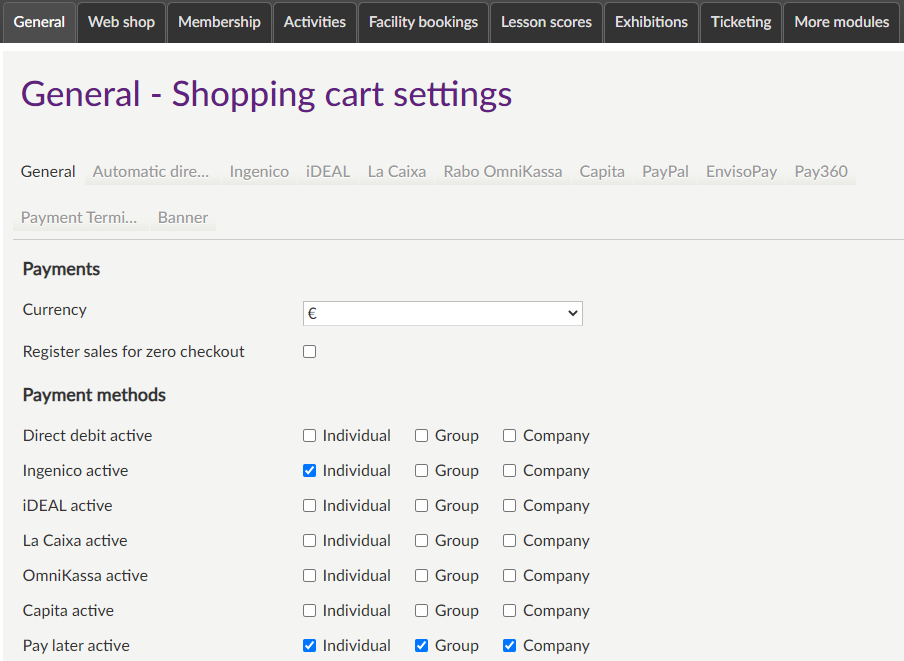
General
General settings for the shopping basket:
Currency | The currency in which prices are visualised and payments are executed. 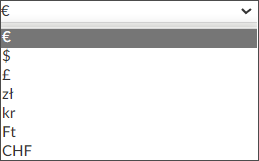 |

In this part, you can define the payment methods that are offered on the Webshop. It is also possible to define which customer types (individual/group/company) are allowed to use the payment method.
Direct debit active | This setting allows placing orders by means of automatic direct debit. When finalising the order process, the user has to fill in his/her bank account number or IBAN number. Afterwards, a direct debit contract will be generated. | |
Ingenico active | This setting allows the customer to pay online (for example, using a bank card) through Ingenico processing (a strongly secured service for processing online payment traffic). If Ingenico processing is used, extra settings have to be defined in the tab Ingenico (see next paragraph Ingenico). | |
iDEAL active | iDEAL is another form of online payment, mainly used in The Netherlands. To specify the extra settings for this option, see paragraph iDEAL. | |
La Caixa active | La Caixa is one of the Spanish online payment methods and also requires additional settings (see paragraph La Caixa). | |
OmniKassa active | If this option is active, extra settings have to be defined (see paragraph Rabo OmniKassa ). | |
Capita active | Capita is another form of online payment. To specify the extra settings for this option, see the section Capita. | |
Pay later active | If this option is active, the user will be able to place orders without having to pay for them when finalising the order process. Such registrations are normally followed up by the administration department by means of invoices or invites for bank transfers. | |
E-purse | If this option is active, the user will be able to pay for orders using his/her Recreatex e-purse. | |
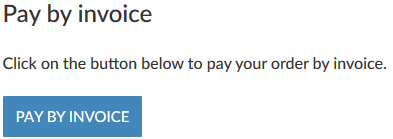
Pay by invoice active | If this option is active, the user will be able to pay by invoice. In case an order is settled, the user will then be able to register the order on invoice.
If the user chooses to pay by invoice, the sale will be recorded in Recreatex on the default payment method for an invoice, as indicated in the POS parameters. Contrary to the payment method Pay later, e-tickets will be generated for online sales paid by invoice. | |
PayPal active | This setting allows the customer to pay online through PayPal processing. To specify the extra settings for this option, see the paragraph PayPal. | |
EnvisoPay active | This setting allows the customer to pay online through EnvisoPay processing. To specify the extra settings for this option, see the section EnvisoPay. | |
Pay360 active | This setting allows the customer to pay online through Pay360 processing. To specify the extra settings for this option, see the section Pay360. | |
Digital Wallet active | This setting allows the customer to pay online through Digital wallet processing. | |
Payment terminal active | This setting allows the customer to pay online through Adyen payment terminal processing. To specify the extra settings for this option, see the section Payment terminal. | |
Ingenico Direct active | ||
SystemPay | This setting allows the customers to pay online, using SystemPay |
Note
Not all payment methods listed above are available for each module of the Recreatex Webshop. Regular article sales can, for example, be paid for by Ingenico processing and by automatic direct debit but not by pay later.
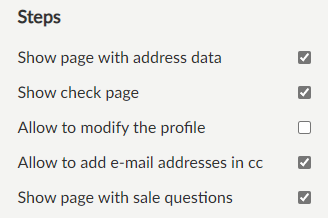
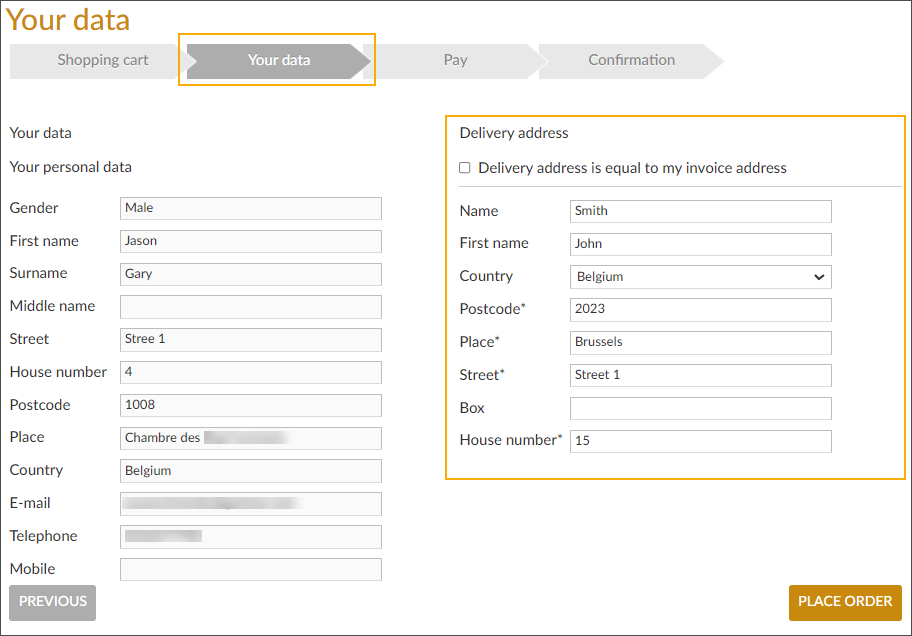
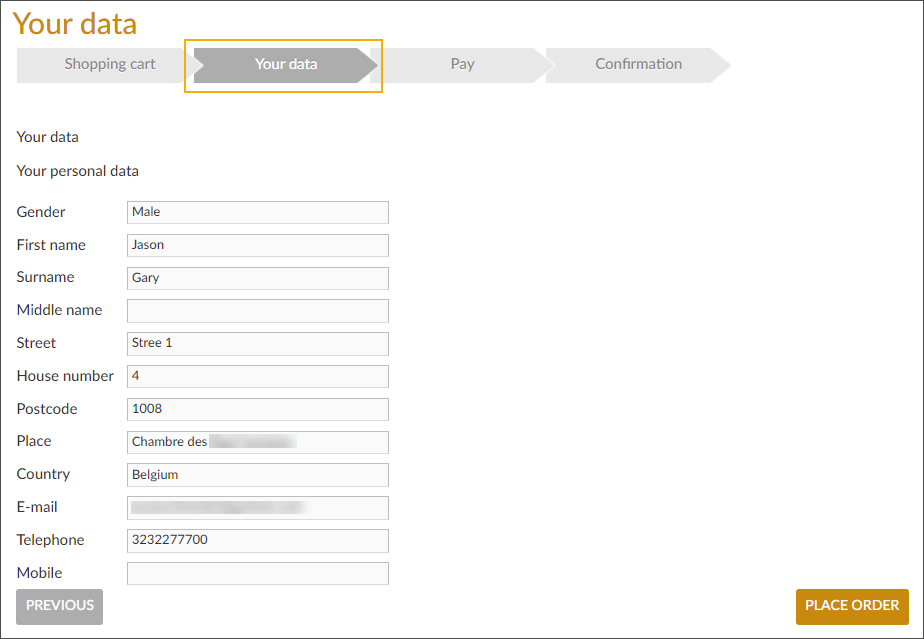
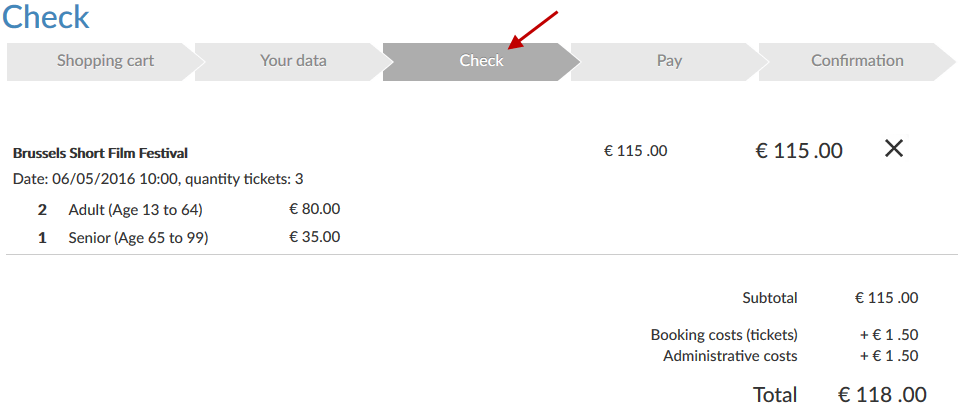
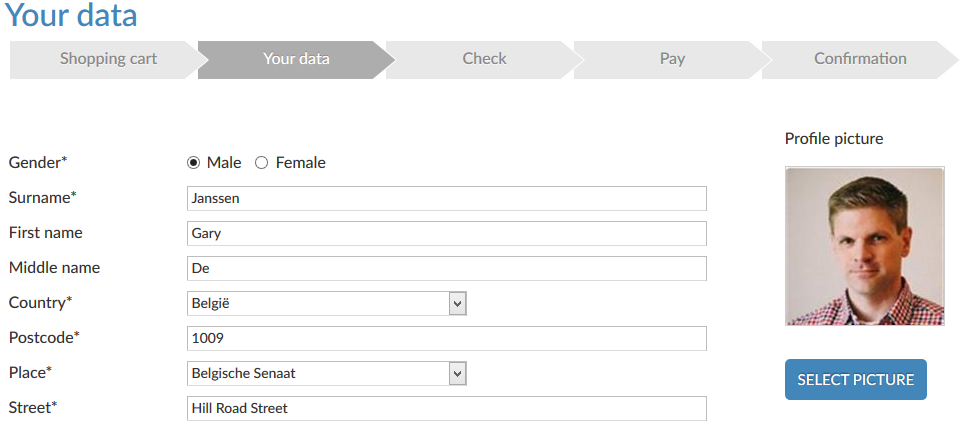
Show page with address data | Activate this setting to show the customer address information in an additional step Your data when processing the shopping cart. When the setting is not active, the step is not visualized. Depending on whether the setting Allow to modify the profile is active or not, the information in the tab Your data will be editable or read-only.
To include the possibility of deviating delivery address, you need to activate the setting Use delivery address, under General > Settings > tab Users > section Checkout. | |
Show check page | If you deactivate this option, the step that allows you to check the order will not be visualised during the payment process of the shopping basket.
| |
Allow to modify the profile | If this setting is active, an extra page will be visualized in the step Your data when finalizing the shopping basket, allowing modification of the user data.
| |
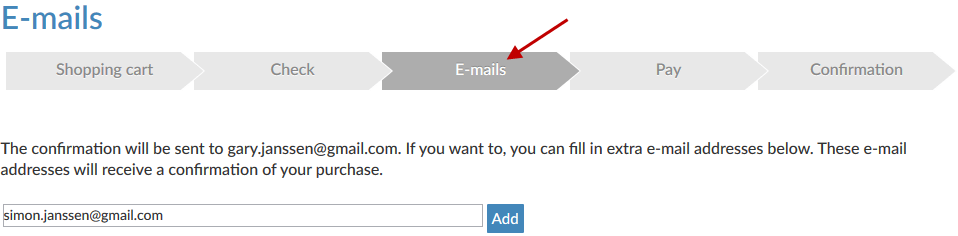
Allow to add e-mail addresses in cc | If this setting is active, the user can add additional email addresses to which the purchase confirmation will be sent.
| |
Show page with sales questions | If this setting is active, Webshop customers will see an additional tab with the sales questions on the shopping cart overview page. All mandatory questions are marked with an asterisk *. 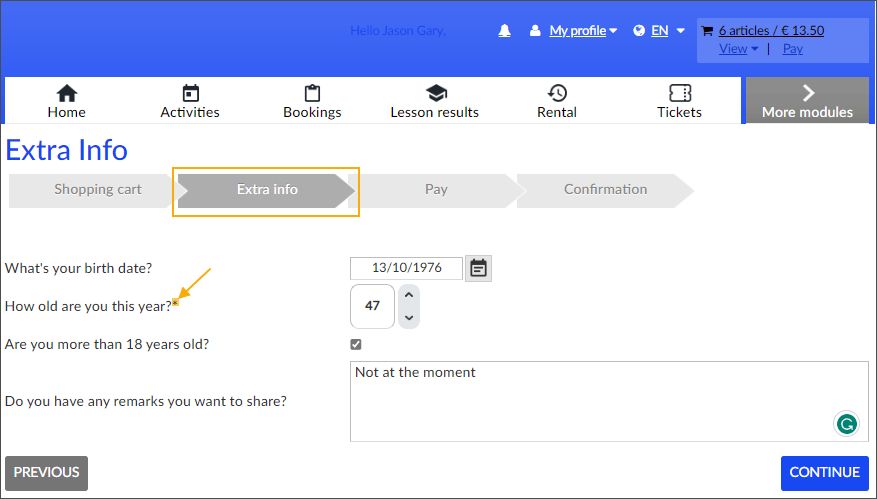 See the complete procedure here: Ask custom sales questions at the checkout |
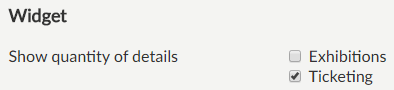 |
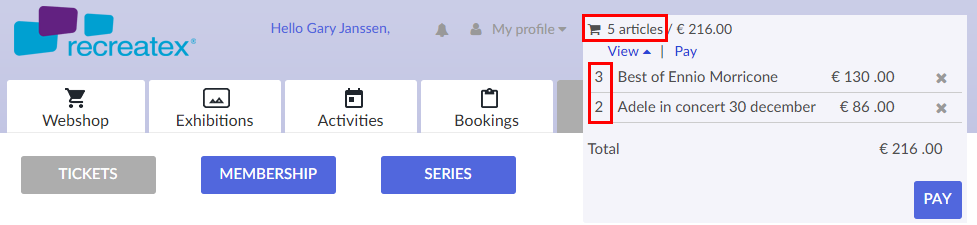
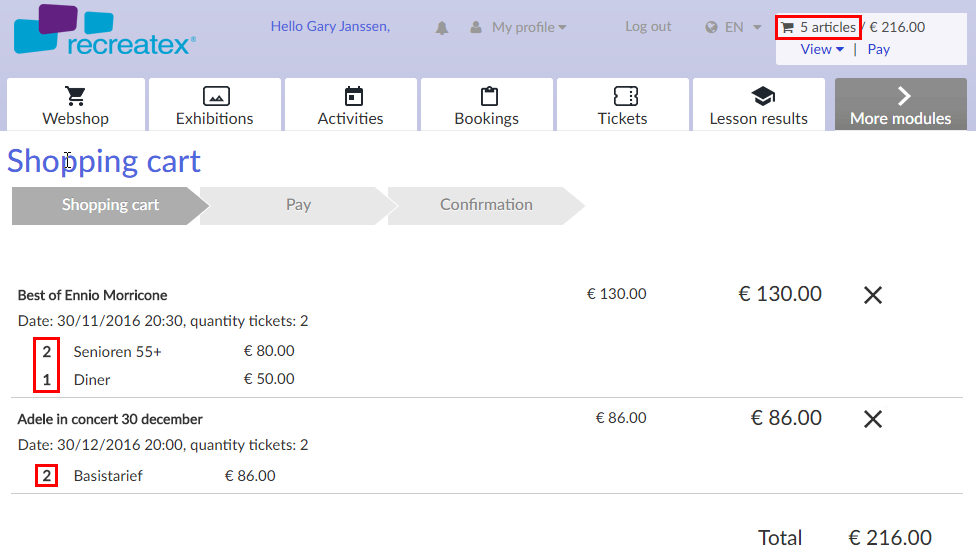
Show quantity of details | This setting determines whether the quantity of basket shows the number of visits/tickets or the sum of the number of visits/tickets and option articles on the Webshop. This setting is available for ticketing and exhibitions modules of the Webshop. If activated, for example for the Ticketing module, the quantity of the shopping basket shows the total number of item details.
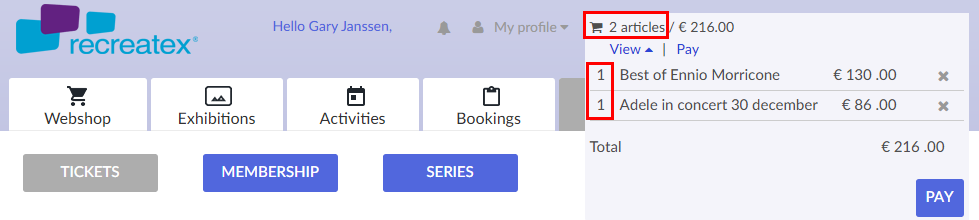
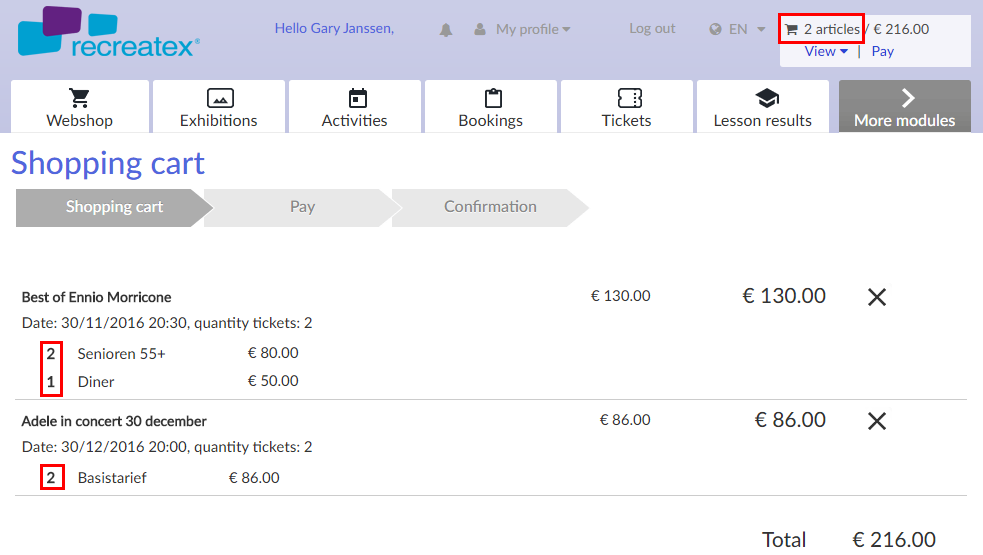
If deactivated, the quantity of the shopping basket shows the number of ticket bookings.
|
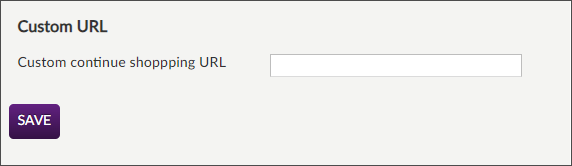
Custom continue shopping URL | With this setting, you can link a custom URL to the Continue shopping button, e.g. to direct the customer to your main web page, rather than to the overview. 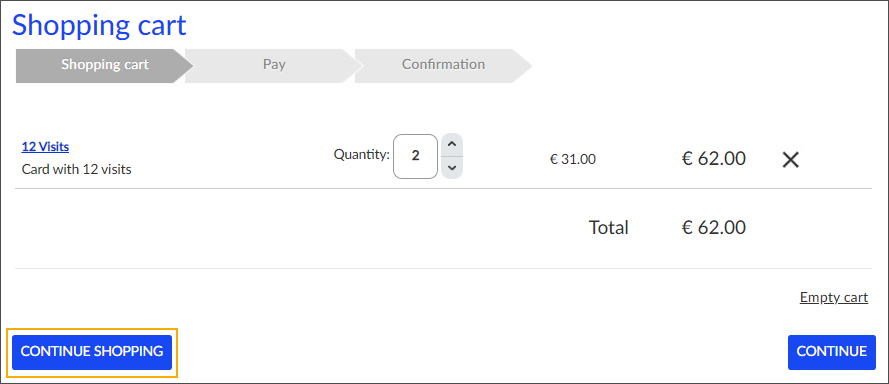 Default behaviour: Clicking the Continue shopping button will redirect the customer back to the overview page of that particular module. |
Always save the new settings by clicking on the button Save.
Automatic direct debit
The settings below only apply if payments through direct debit processing are allowed in the Recreatex Webshop (option Direct debit active).
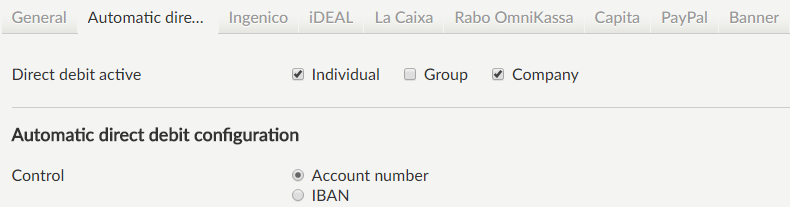 |
It is possible to activate direct debit and define whether the validation of the customer should be done on the bank account number or on the IBAN number.
Always save the new settings by clicking on the button Save.
Ingenico
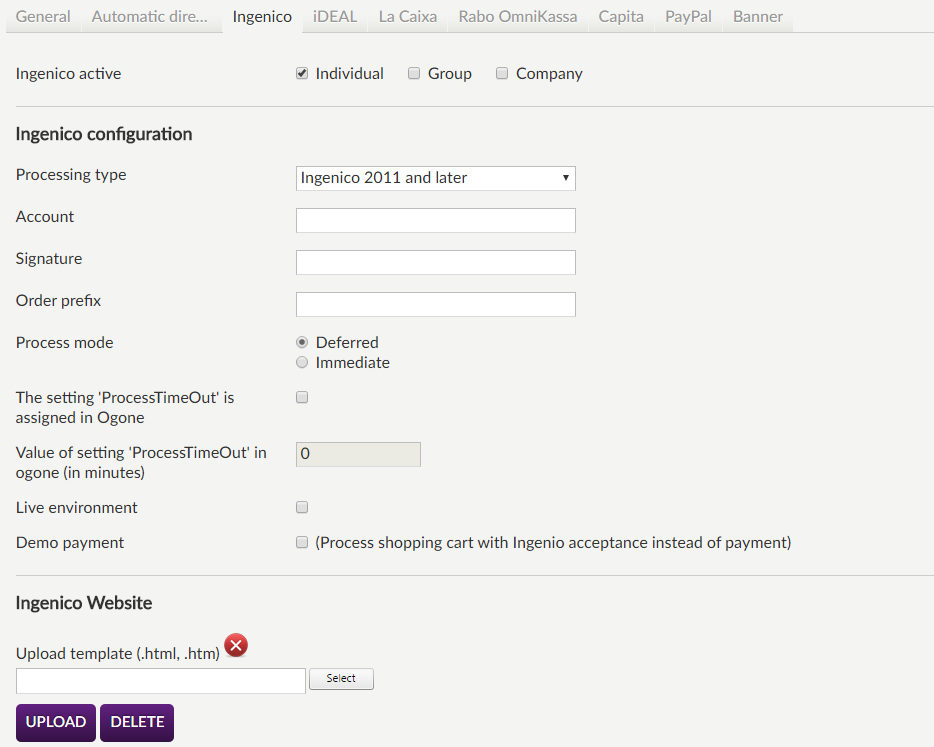
The settings below only apply if payments through Ingenico processing are allowed in the Recreatex Webshop (option Ingenico active).
 |
Warning
The Ingenico settings are determined at the start-up/integration of the Recreatex Webshop and normally do not have to be changed anymore.
Since wrongly defining these settings can lead to problems with online payment, it is advised to have modifications executed by authorised persons.
Ingenico active | This is the same parameter as in the tab general and allows you to effectively make payments (for example by giro) through Ingenico processing. NoteActivating/deactivating this parameter is applied in both tabs. |
Processing type | Since the Recreatex Webshop uses a specific method, you can only choose Ingenico 2011 and later here. |
Account | The Ingenico account. |
Signature | The Ingenico signature. |
Order prefix | Here you can fill in a prefix for the Ingenico orderID that is created when initiating a payment process in the Recreatex Webshop. In this way, payments for Recreatex can easily be filtered out of the Ingenico statements. |
Live environment | This option indicates if the Recreatex Webshop is used in a production environment ("live") or in a test environment. This setting determines which URL to Ingenico is used. This parameter thus has to be activated when going from a test environment to a production environment. |
Demo payment | If this option is activated, online payments can be executed through the Ingenico test account, leading to the execution of "virtual" payments. This option may only be used for test purposes! |
Note
Detailed instructions on the full configuration of Ingenico for the Recreatex Webshop are to be found in the manual "Recreatex Webshop - Set-up and configuration Ingenico".
Always save the new settings by clicking on the button Save.
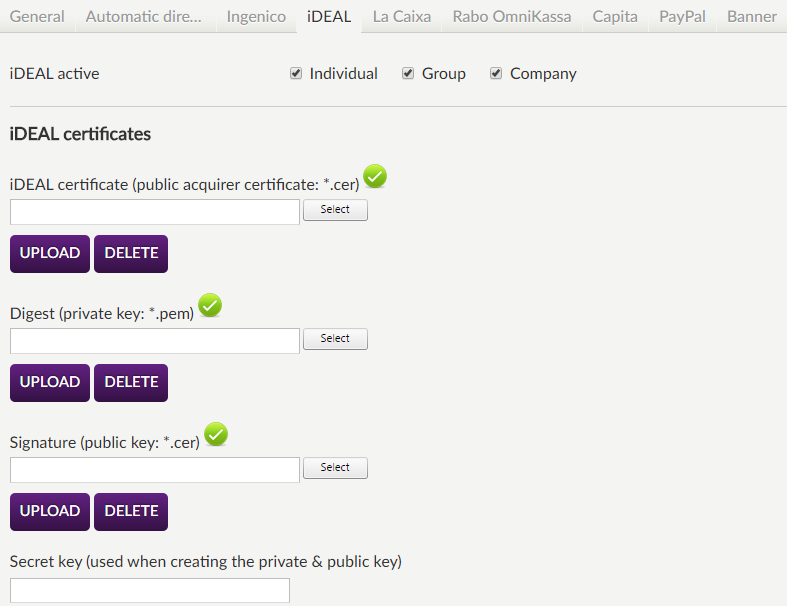
iDEAL
The settings below only apply if payments through iDEAL processing are allowed in the Recreatex Webshop (option iDEAL active).
 |
Warning
The iDEAL settings are also determined at the start-up/integration of the Recreatex Webshop and normally do not have to be changed anymore. In this case, as well, it is advised to have modifications done by authorised persons only.
iDEAL active | This is the same parameter as in the tab General and allows you to effectively make payments (for example by giro) through iDEAL processing. NoteActivating/deactivating this parameter is applied in both tabs. |
iDEAL certificates | Here you have to upload the specific certificates. |
Bank | It is possible to select the bank to which iDEAL is linked, e.g. RABOBANK, ING or ABN AMRO. |
Merchant ID & Sub ID | These data can be found in your iDEAL account (dashboard of the iDEAL web environment). |
Payment method | Defines the Recreatex payment method on which iDEAL payments will be registered. |
Signature validation active? | This setting determines the validation of the signatures of the iDEAL responses (answers). This setting may only be deactivated if problems occur with this validation! |
Live environment | This setting determines if the iDEAL production environment is used. |
Note
Detailed instructions on the full configuration of iDEAL for the Recreatex Webshop are to be found in the manual "Recreatex Webshop - Set-up and configuration iDEAL".
Always save the new settings by clicking on the button Save.
La Caixa
The settings below only apply if payments through La Caixa processing are allowed in the Recreatex Webshop (option La Caixa active).
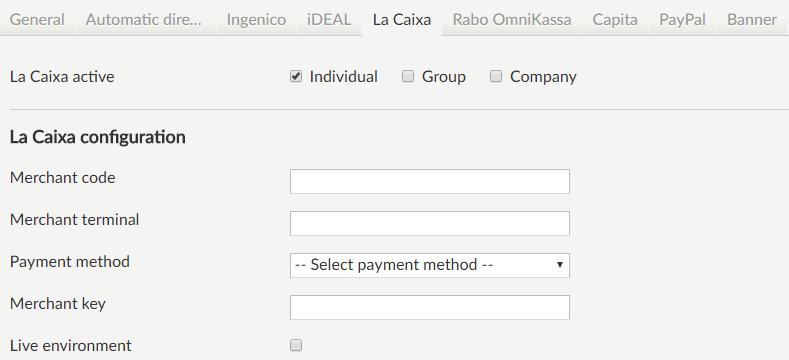 |
Merchant code & Merchant terminal | These data refer to the La Caixa account. |
Payment method | Defines the Recreatex payment method on which La Caixa payments will be registered. |
Merchant key | The specific merchant key. |
Live environment | This setting determines if the La Caixa production environment is used. |
Always save the new settings by clicking on the button Save.
Rabo OmniKassa
The settings below only apply if payments through Rabo OmniKassa processing are allowed in the Recreatex Webshop (option Rabo OmniKassa active).
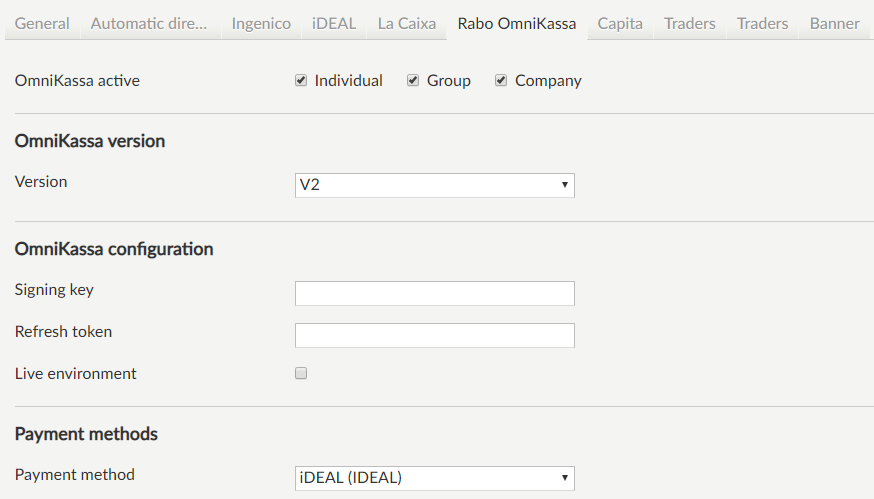 |
In case of OmniKassa version V2, if the key version is, for example, HP_2.0, the value 2 can simply be filled in for the field Version.
Warning
OmniKassa 1.0 is end-of-life as of December 31, 2018. Therefore, integration with OmniKassa 2.0 is needed from February 28, 2019.
Always save the new settings by clicking on the button Save.
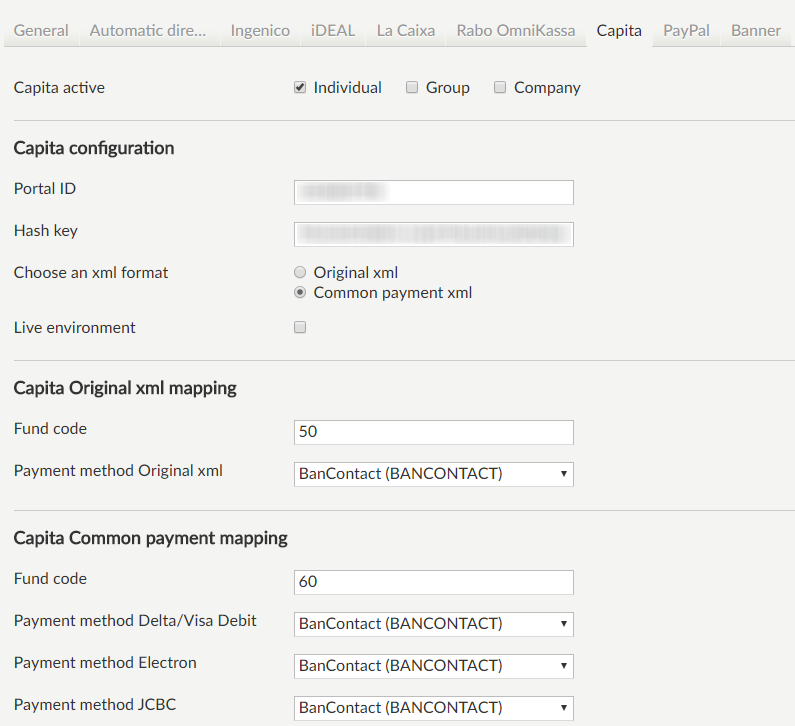
Capita
The settings below only apply if payments through Capita processing are allowed in the Recreatex Webshop (option Capita active).
 |
Note
At least one payment method must be mapped before Capita can be used by the customer.
Always save the new settings by clicking on the button Save.
PayPal
The settings below only apply if payments through PayPal processing are allowed in the Recreatex Webshop (option PayPal active).
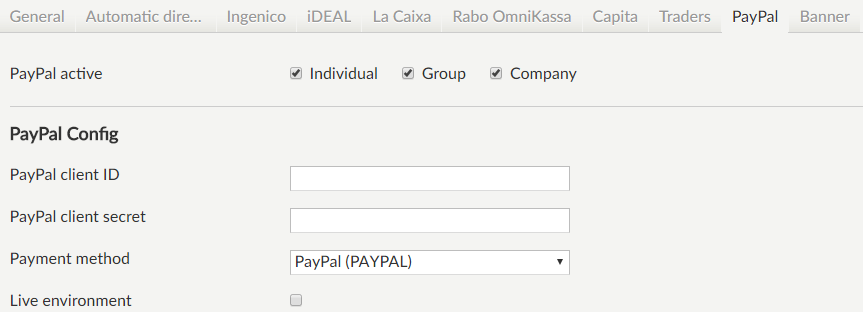 |
Note
At least one payment method must be mapped before PayPal can be used by the customer.
Always save the new settings by clicking on the button Save.
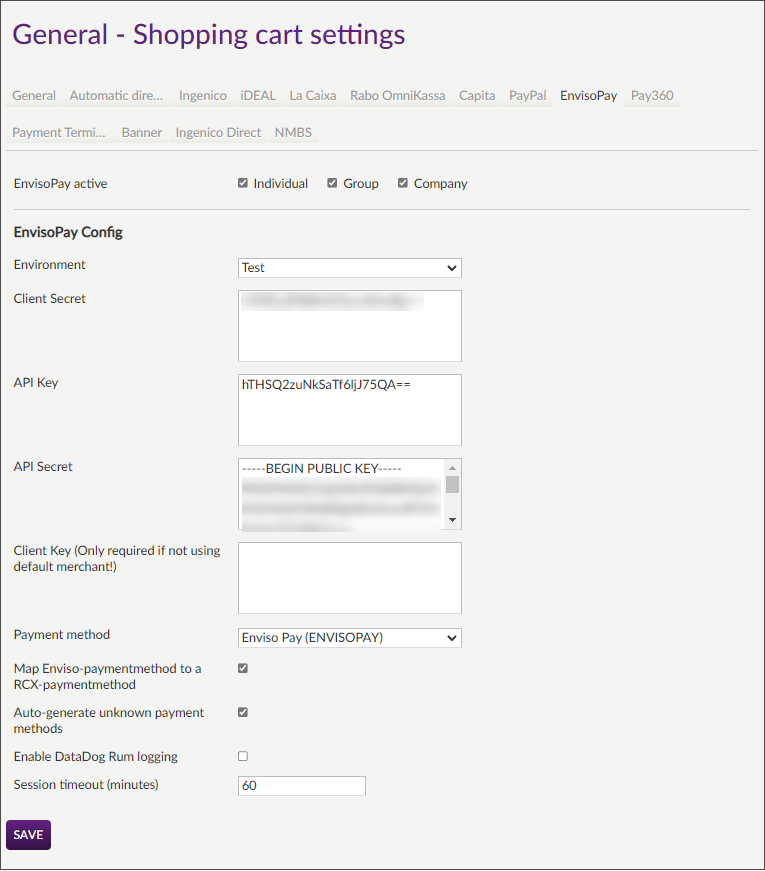
EnvisoPay
The settings below only apply if payments through EnvisoPay are allowed in the Recreatex Webshop (option EnvisoPay active)
 |
Important to know:
A successful connection with Enviso is required to be able to use EnvisoPay on Webshop. Contact GANTNER support for assistance.
EnvisoPay works only on HTTPS URLs.
Always save the new settings by clicking on the button Save.
Next to the general configuration, there are several additional settings possible when using EnvisoPay.
Client Key (Only required if not using default merchant!) | Provide Adyen Client key in Enviso Pay configuration to allow the use of own Adyen account. Enviso Pay widget then takes into account the client key specified here. If empty, it will use the default client key. |
Map Enviso-paymentmethod to a RCX-paymentmethod | |
Auto-generate unknown payment methods | |
Enable DataDog Rum logging | Enable/disable the additional logging calls. |
Session timeout (minutes) | Define the expiration time of Enviso Pay payment sessions. The default limit is 60 minutes. |
Pay360
The settings below only apply if payments through Pay360 processing are allowed in the Recreatex Webshop (option Pay360 active in Shopping cart > tab General).
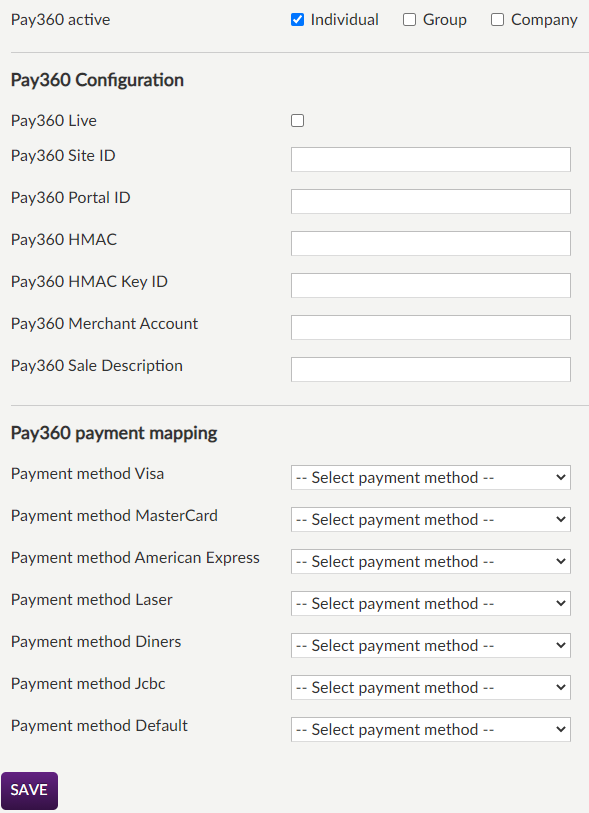
Pay360 Live | Determines whether the live or test environment should be used. |
Pay360 Site ID - Pay360 HMAC KeyID | These values are provided by Capita |
Pay360 Merchant Account | This field is not mandatory. It will be implemented in the future release. |
Pay360 Sales description | The entered value is used at the time of payment confirmation. You may enter your company or webshop's name here. |
It is possible to map several payment methods from Pay360 to payment methods in Recreatex.
Note
While it is not mandatory to map all the payment methods, it is mandatory to fill in at least 'Payment method Default'.
Always save the new settings by clicking on the button Save.
Payment terminal
The settings below only apply if payments through Adyen payment terminal processing are allowed in the Recreatex Webshop (option Payment terminal active in Shopping cart > tab General).
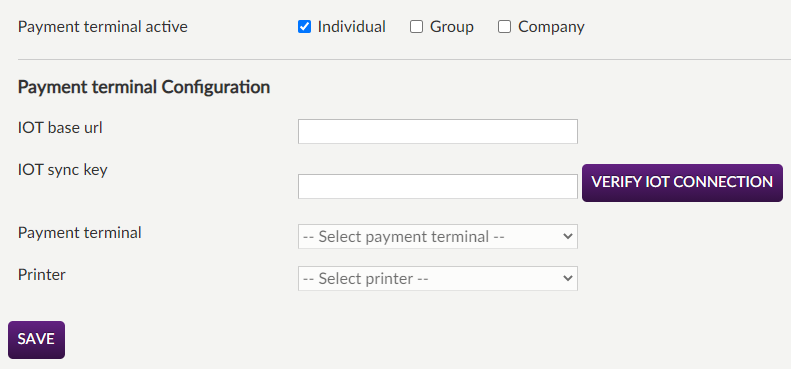
Enter the IOT base URL and IOT sync key to connect to IOT. Click Verify IOT connection. On a successful connection, the discovered payment terminals and printers will be available for selection from the fields Payment terminal and Printer.
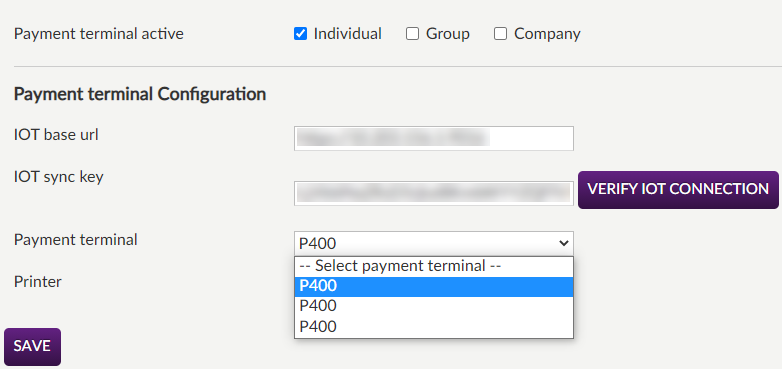
Always save the new settings by clicking on the button Save.
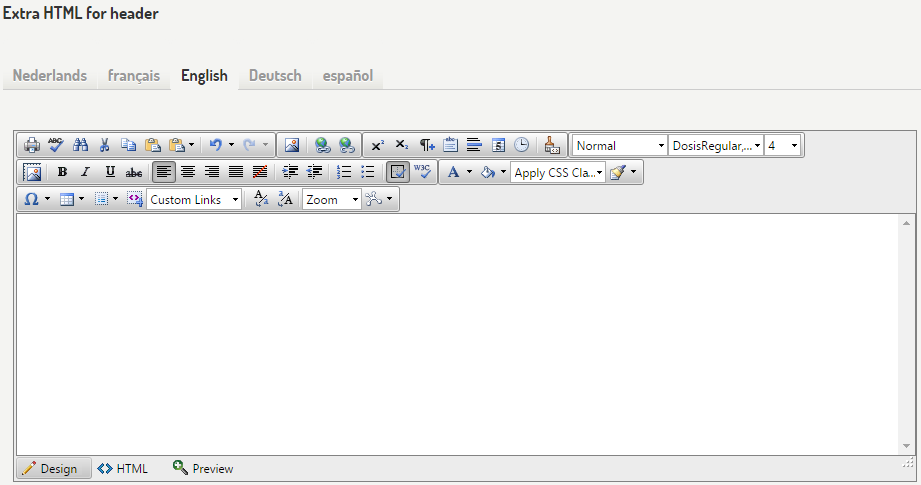
Banner
 |
It is possible to define on which stages of the purchase process the defined header and footer (see below) will be visualised.
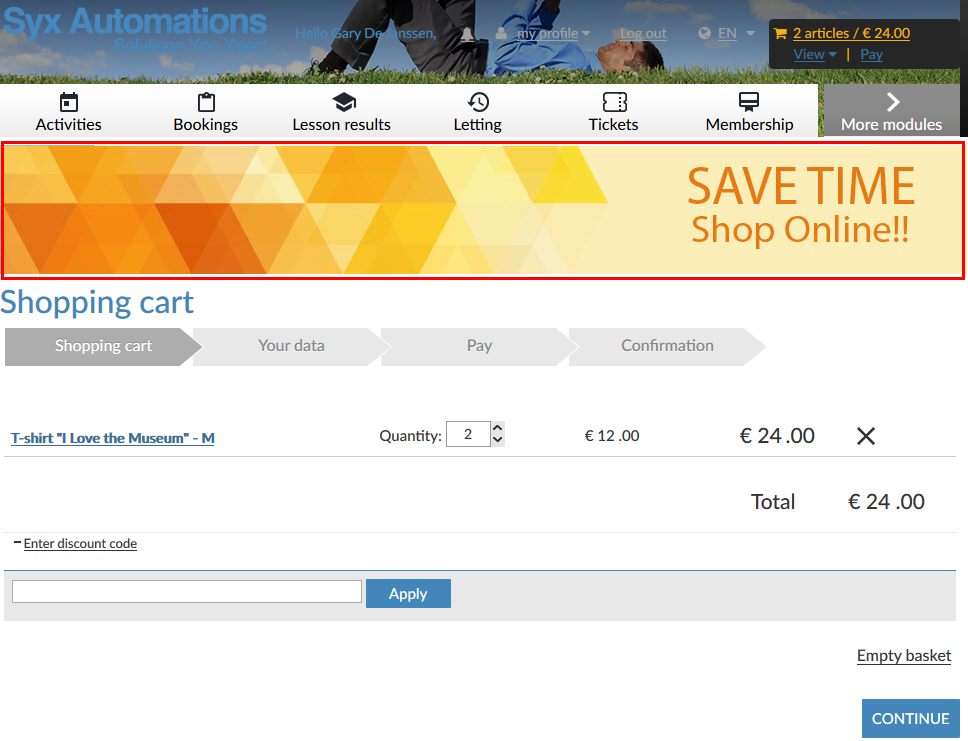
It is possible to add an additional banner just below the header (banner) of the Recreatex Webshop, which will be visualised at different stages of the purchase process by the Webshop user. This can, for example, be useful to add one or several hyperlinks or even program the entire design of the banner in HTML, which will be shown to customers while making a purchase.
 |
 |
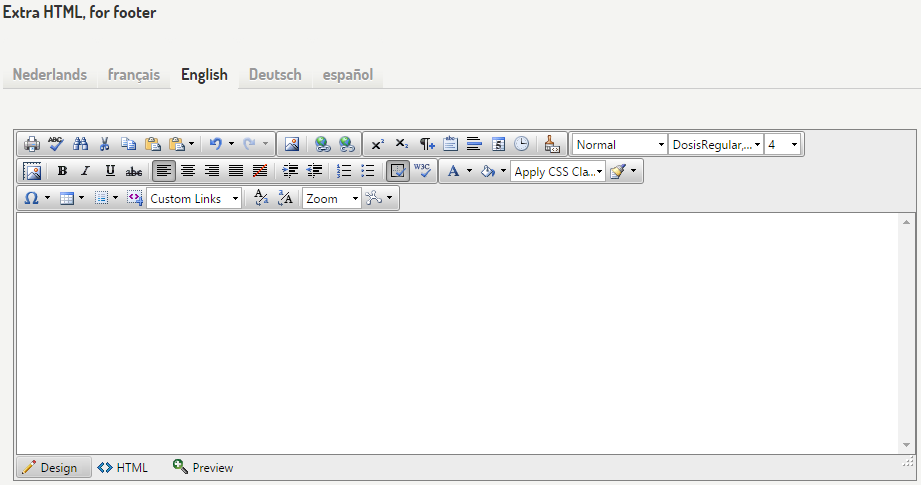
It is possible to add an additional footer just above the footer of the Recreatex Webshop, which will be visualised at different stages of the purchase process by the Webshop user. This can, for example, be useful to add one or several hyperlinks or even program the entire design of the footer in HTML, which will be shown to customers while making a purchase.
 |
 |
Ingenico Direct
Activate and configure the payment solution Ingenico Direct to be used by your Webshop customers.
Open the Recreatex Webshop Manager and go to General > Shopping cart
In the tab Ingenico Direct activate the payment solution and fill in the configuration.
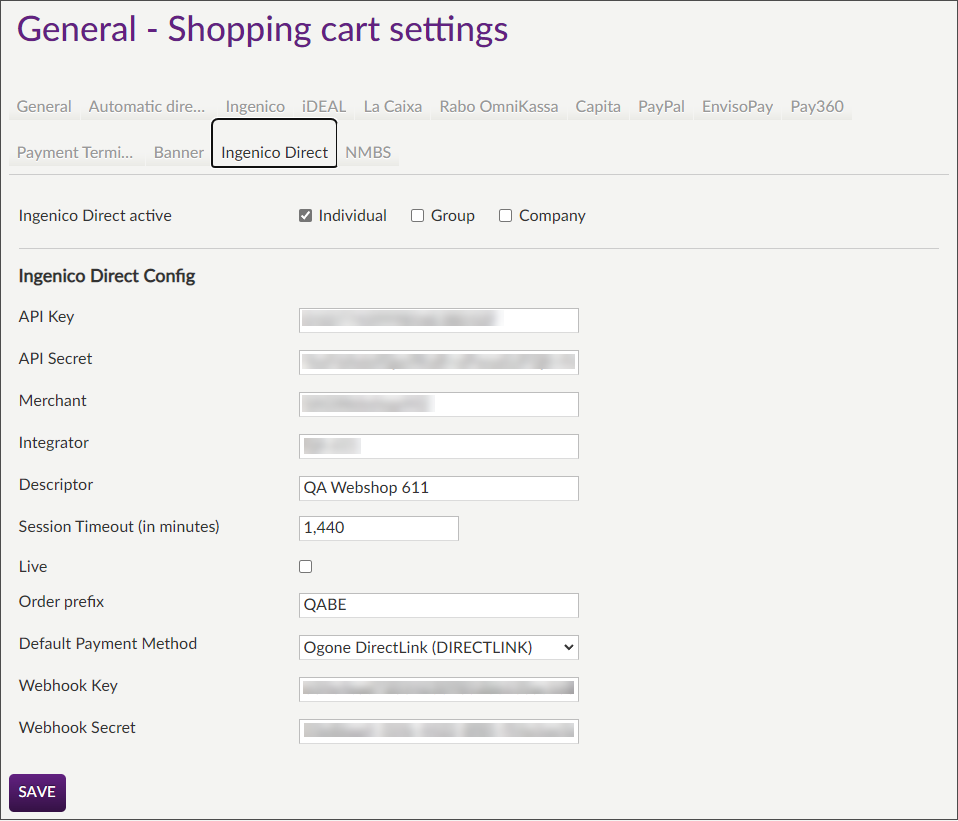
Ingenico Direct active
Select which customer types (individual/group/company) are allowed to use this payment option.
API Key
API Secret
You can generate these values under your account on the Ingenico Backoffice portal.
Merchant
Your PSPID (Unique Ingenico e-commerce merchant ID).
Integrator
Your (company) name or any unique identifier that will be used for debugging and tracking requests sent to the Ingenico platform.
Descriptor
E.g. a company or division name that will appear on the customer's bank statement.
Session timeout (in seconds)
Transaction session timeout in seconds
Live
Leave unchecked to test the integration or check the option to go live.
Order prefix
You have the possibility to include a prefix in the order ID of Ingenico Direct payments.
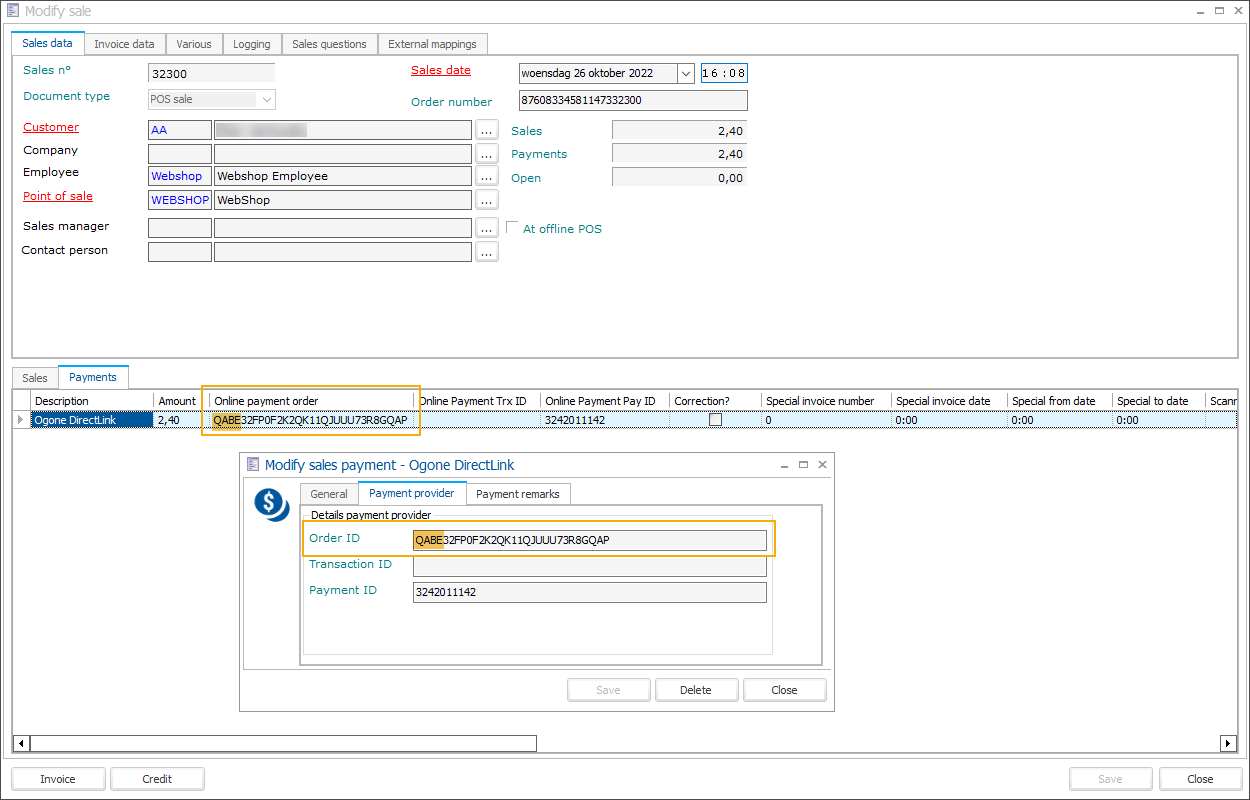
In this example, a predefined prefix "QABE" has been added to the payment order ID.
Default payment method
The Webshop purchases paid with one of the Ingenico Direct payment methods can be linked in Recreatex to a corresponding payment method based on its WorldLine payment product ID.
If the corresponding payment method does not have a WorldLine payment product ID specified in Recreatex, this default payment method will be used as a fallback method to which Webshop purchases will be linked instead.
Webhook Key
Webhook Secret
Webhook credentials can be generated under your account on the Ingenico Backoffice portal.
Configuring webhooks makes it possible to receive information about the results of your transactions or about status changes that happen at a later point (e.g. refunds).
Click Save.
In the Webshop, select Ingenico Direct from the available payment options.
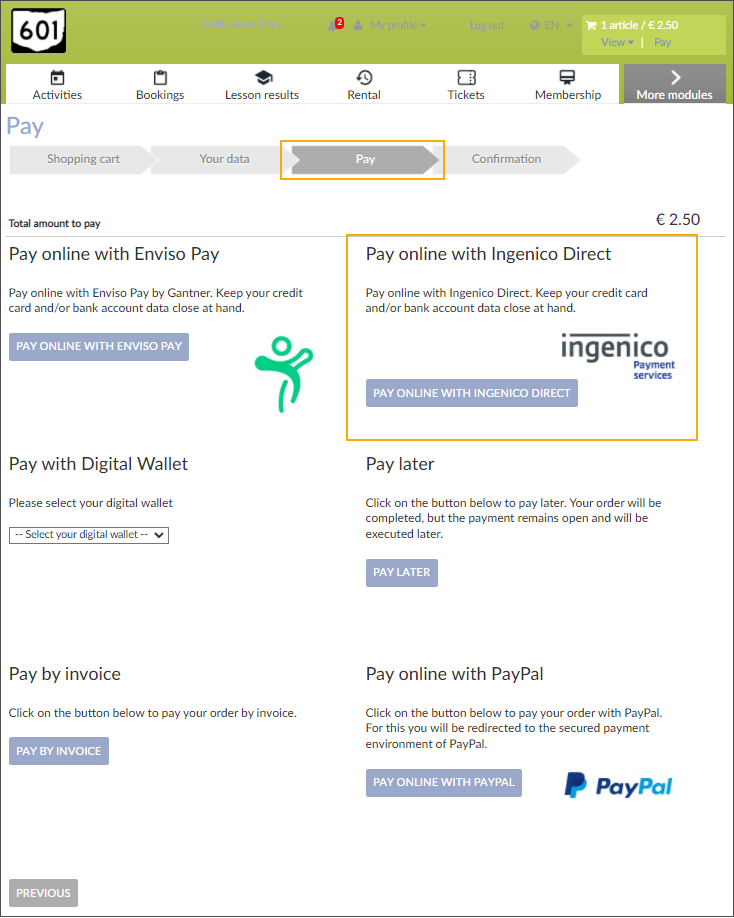
You will be redirected to the Ingenico Hosted Checkout Page where you can select one of the pre-configured payment methods (1) and proceed with the payment (2, 3).
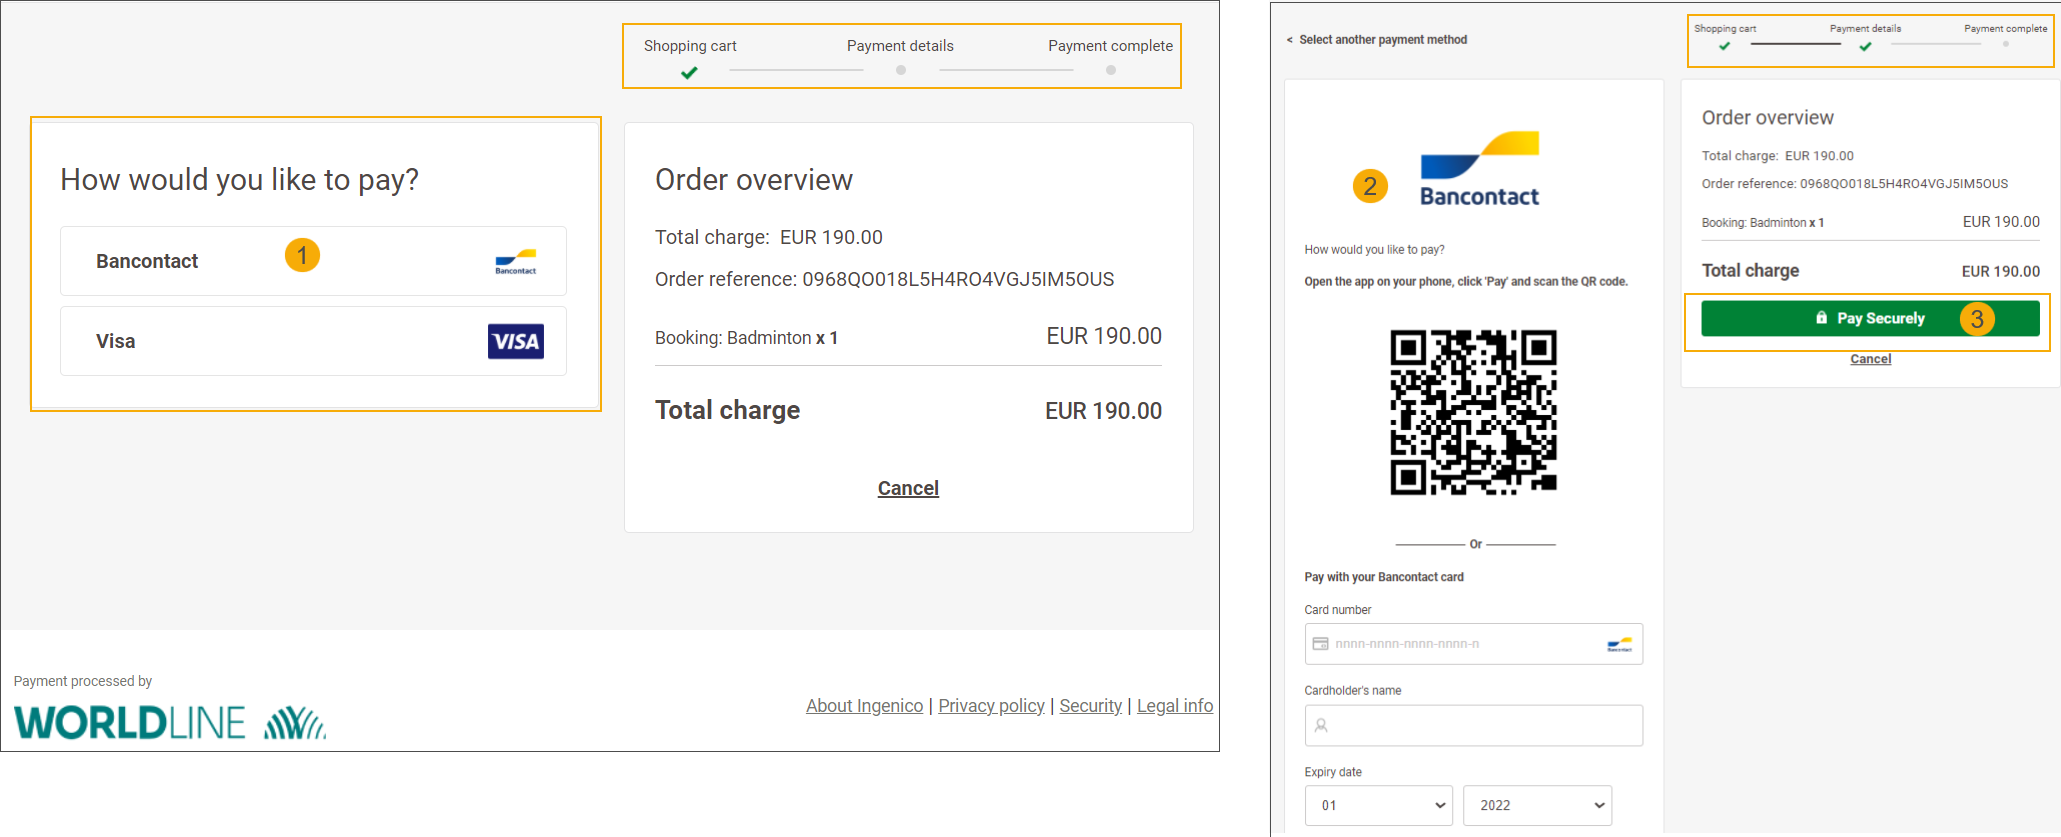
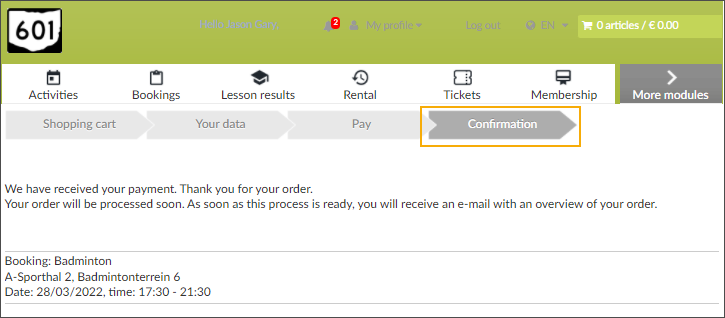
Receive the payment confirmation in the Webshop.
NMBS
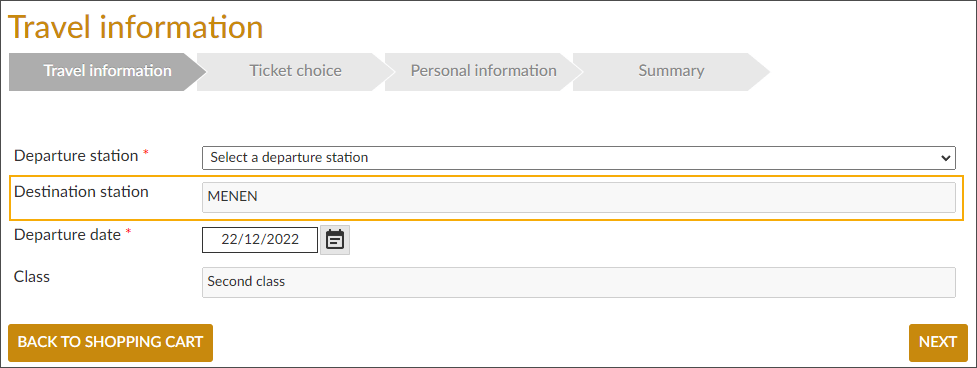
If you use the NMBS integration to sell articles together with NMBS train tickets on the Webshop, with this setting you configure the default destination station of the train tickets. The drop-down list contains all available NMBS train stations.
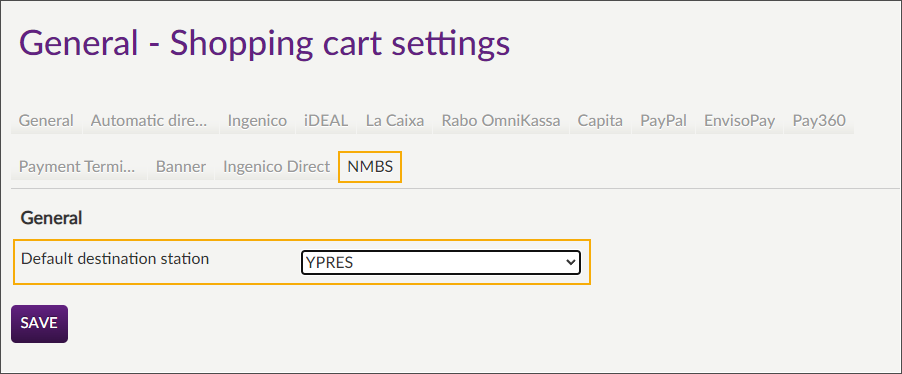
This destination will be automatically filled in when purchasing train tickets and cannot be altered by the customer.
To find out more about the NMBS train ticket functionality, see NMBS integration: Sell NMBS train tickets on the Webshop
SystemPay
The SystemPay integration supports:
online payments
refunds (processed automatically by Recreatex and sent to SystemPay to credit the customer's bank card.
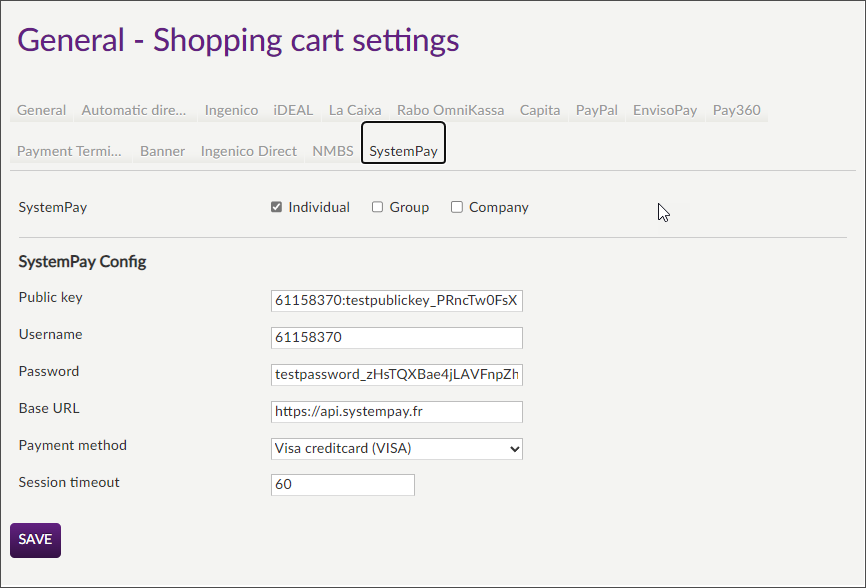
Important
This payment option also requires mapping of the Recreatex payment method to a SystemPay payment method in Recreatex backoffice application.
E-mail messages
Under General > E-mail messages you can manage the different e-mail templates of the messages that are sent (to the user and to the organisation if e-mail notifications are used) in case of specific actions in the Recreatex Webshop.
It is possible to modify the default templates or to create new e-mail templates.
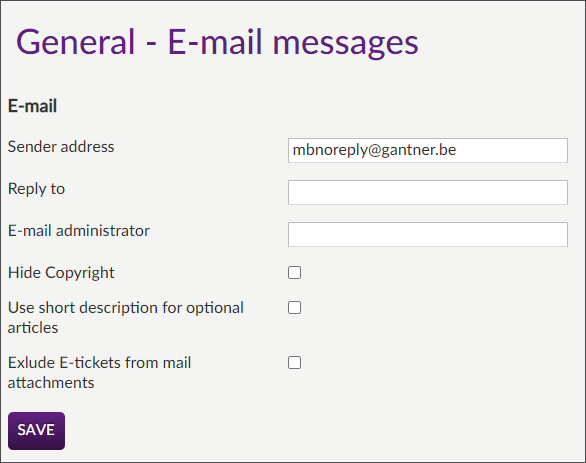
Sender address | This address is used as the sender of the e-mails that are sent out of the Recreatex Webshop. | |
Reply to | Here you can fill in an address to be used as a reply address (the address used if the recipient of the e-mail decides to answer the mail - reply) instead of the given sender address (from). In this way, it is possible to use noreply@xxx.yy as the sender address (to which it is in principle not possible to answer) and a deviating response address. In this way, answers to e-mails will be sent to an existing mailbox after all. | |
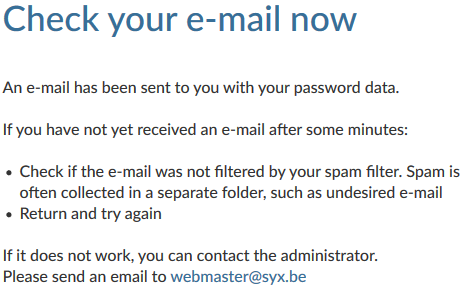
E-mail administrator | This is the e-mail address that is shown in the text that appears after asking for the password data in case the user forgot his password.
| |
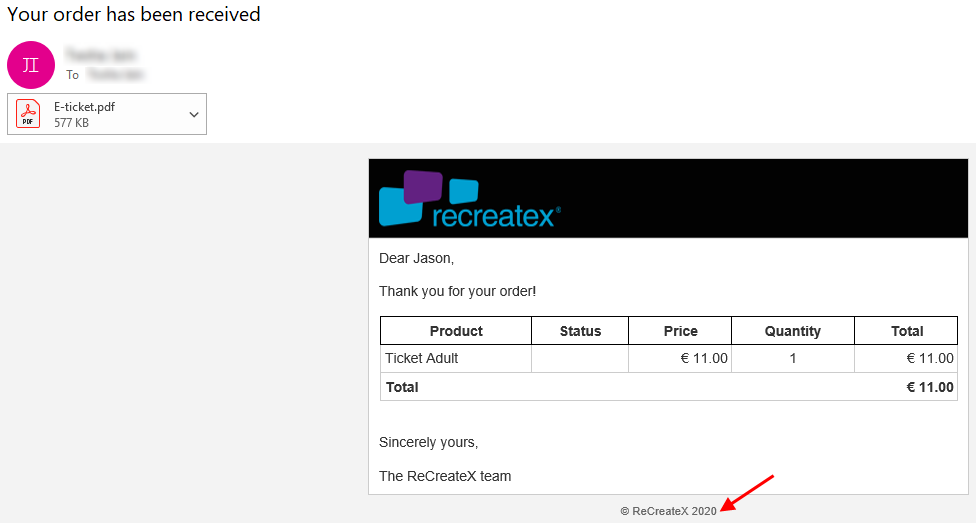
Hide copyright | It is possible to show or hide the Recreatex copyright mark in the emails sent from Webshop. The defined setting will be applicable to all the email templates.
| |
Use short description for optional articles |
| |
Exclude E-tickets from mail attachments | Activate this setting to exclude the e-tickets from the attachment of the confirmation email, while keeping other documents (e.g. order confirmations, receipts, invoices) attached. This option can be useful if handling orders containing a large number of tickets. Default: not active |

Content
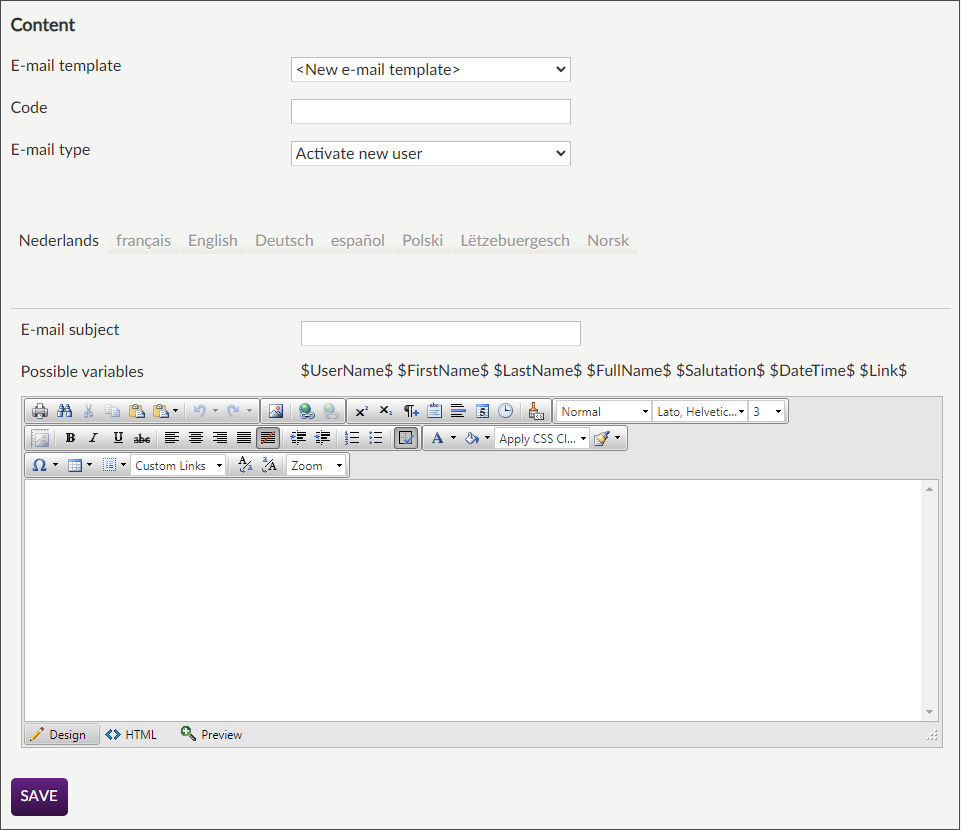
E-mail template | Select the e-mail template you want to show or modify. Select New e-mail template if you want to create a new template. |
Code | In this field, you can fill in the name of the e-mail template as it will appear in the list. If the new template is created, the code thus serves to fill in the name of the template. |
E-mail type | The e-mail type of the current template. The following types are possible:
|
E-mail subject | The content of this field is taken over as the subject of the e-mail in question. |
Possible variables | These are the available variables of the current e-mail type. A variable is a non-fixed text, of which the value is called up from the Recreatex database at the creation of the e-mail. |
E-mail body | This is the content of the e-mail template. This generally contains fixed text combined with one or several of the supported variables. The text of the content can, if required, be written in HTML (for example to place text in italics). |
Modify existing template
In order to modify an existing e-mail template, you have to select the desired template and modify the desired data.
In order to create a new e-mail template, you first have to select New e-mail template.
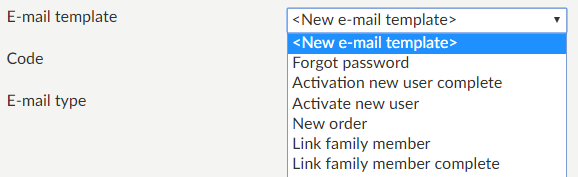 |
It is important that you then fill in a Code (template name) that deviates from the existing templates.
Finally, you have to fill in all other data of the template and save the modified settings by means of the button Save.
After saving the template, you will be able to choose it in order to send it as an e-mail notification (Manager > General > Settings > E-mail notification).
Statistics
Under General > Statistics you can consult the current status of the queue.
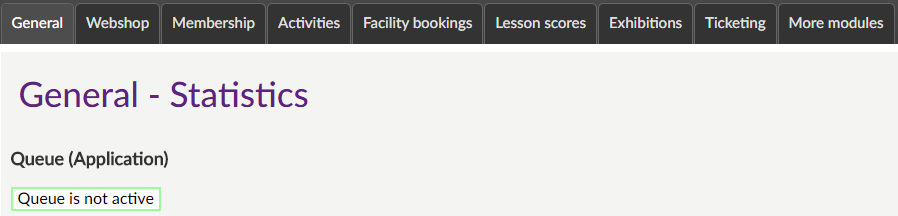 |
You can see how many users are currently queued (number of users compared to max. number of users) and how many users are currently on the Webshop.
If you want to, you can click on the button Refresh to call up the most recent status of the queue and the number of users.
Actions
Under General > Actions you can reset the password for specific or all users who have a web username. When resetting a user's password, the email for the forgotten password is sent to the user, from which he can provide a new password.
Once the password is reset, the user can no longer log in with the known password.
Reset password
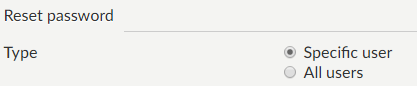 |
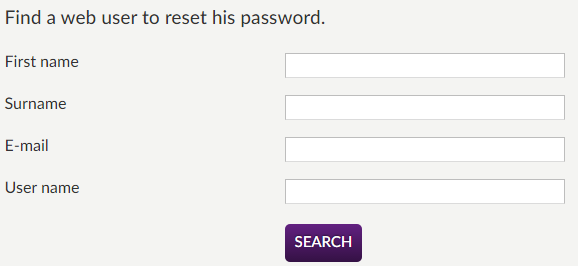
Specific user | This parameter allows you to search and select a specific user to reset his/her password.
| |
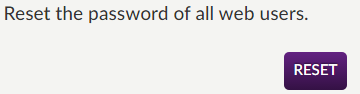
All users | This parameter allows you to reset the password of all the web users at once.
|
Social media
Under General > Social Media, it is also possible to set sharing active, using which customers can share their Webshop purchases on social media. Moreover, you can select which social media accounts of your organisation you want to display on the Webshop.
The settings for Social Media are divided into various tabs:
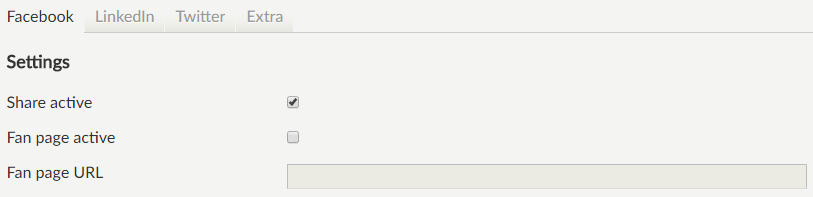 |
Share active | Activate this option to allow Webshop users to share purchases on their Facebook page. If active, the user can share on Facebook in two ways - on the article overview and order confirmation page.
| |
Fan page active | Activating this option will display the Facebook button in the footer of the Recreatex Webshop pages. When clicking this button, the Webshop user will be transferred to your organisation's Facebook page. For this option to work, it is important to enter the URL of your organisation's Facebook page in Fan page URL. | |
Fan page URL | If the setting Fan page active is selected, enter the web link of your organisation's Facebook page. |

Always save the new settings by clicking on the button Save.
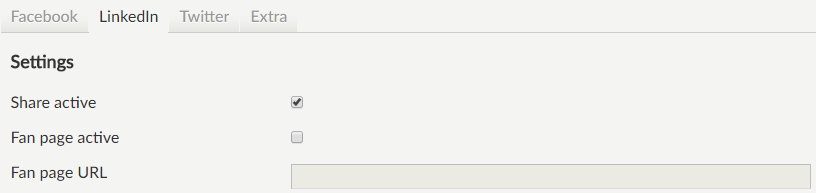 |
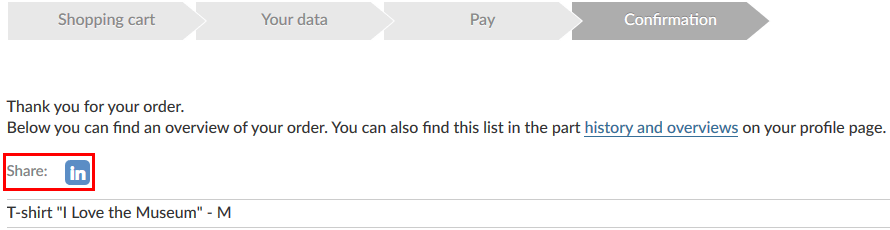
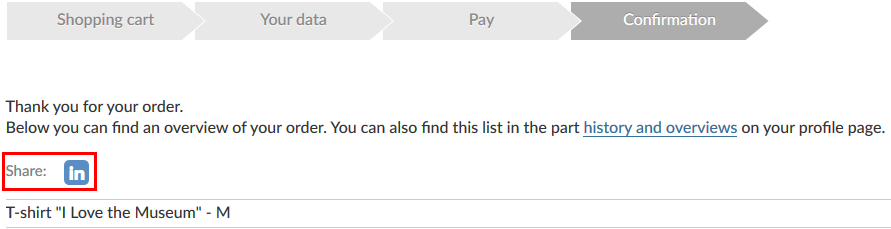
Share active | Activate this option to allow Webshop users to share purchases on their LinkedIn page. If active, the user can share on LinkedIn in two ways - on the article overview and order confirmation page.
| |
Fan page active | Activating this option will display the LinkedIn button in the footer of the Recreatex Webshop pages. When clicking this button, the Webshop user will be transferred to your organisation's LinkedIn page. For this option to work, it is important to enter the URL of your organisation's LinkedIn page in Fan page URL. | |
Fan page URL | If the setting Fan page active is selected, enter the web link of your organisation's LinkedIn page. |
Always save the new settings by clicking on the button Save.
 |
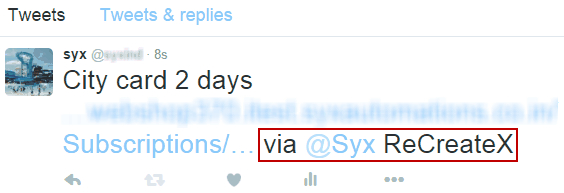
Share active | Activate this option to allow Webshop users to share purchases on their Twitter page. If active, the user can share on Twitter in two ways - on the article overview and order confirmation page.
| |
Website name for sharing | The entered website name will display in the tweet when the Webshop user shares his/her purchase on Twitter.
| |
Fan page active | Activating this option will display the Twitter button in the footer of the Recreatex Webshop pages. When clicking this button, the Webshop user will be transferred to your organisation's Twitter page. For this option to work, it is important to enter the URL of your organisation's Twitter page in Fan page URL. | |
Fan page URL | If the setting Fan page active is selected, enter the web link of your organisation's Twitter page. |
Always save the new settings by clicking on the button Save.
Extra
In the tab Extra you can upload a generic image which will be displayed in the posts shared on social media for items for which no image is defined in the Recreatex Desktop Application.
Click on Select to select the new banner image from the PC or a network location.
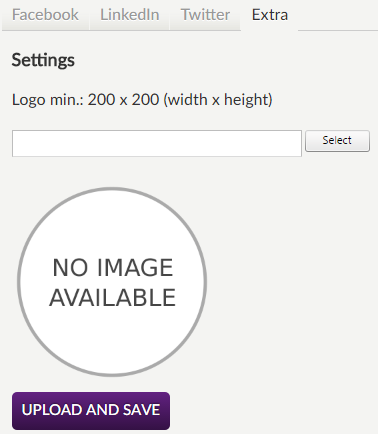 |
Then click on Upload and Save to save the chosen image.
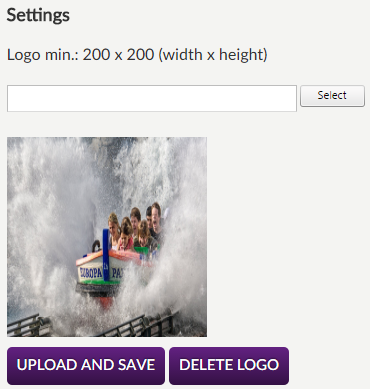 |
Afterwards, the image will be visualised in the social media posts for items for which no image is defined in the Recreatex Desktop Application.
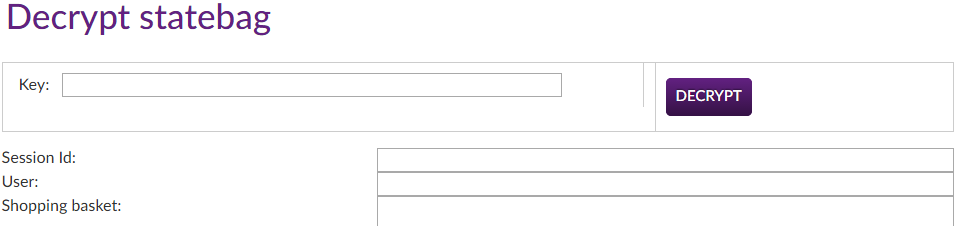
Decrypt statebag
Here you can fill in the decryption key along with the user’s name and session ID in order to decode a statebag (basket) that has not been processed.
 |
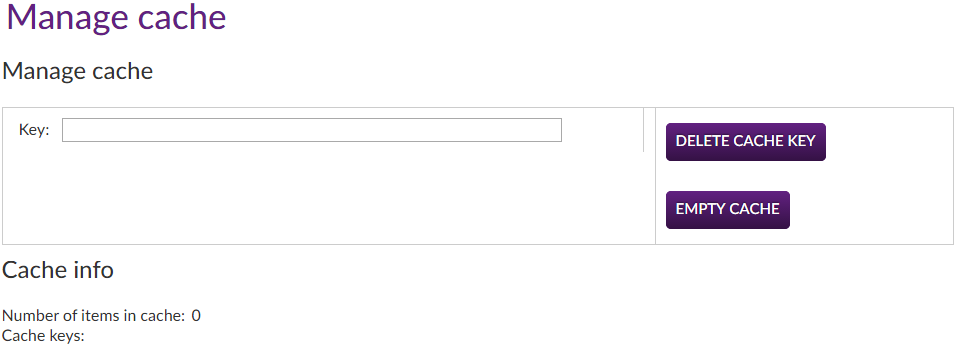
Manage cache
It is possible to manually delete some or all cached items.
You can fill in a cache key, allowing the deletion of specific cached items. Additionally, you can delete all the cached data by clicking on the button Empty cache.
 |
Test connections
It is possible to test the connectivity of the Webshop with various databases and the web service.
You can do this by selecting the desired databases/web service and by clicking on the button Execute test.
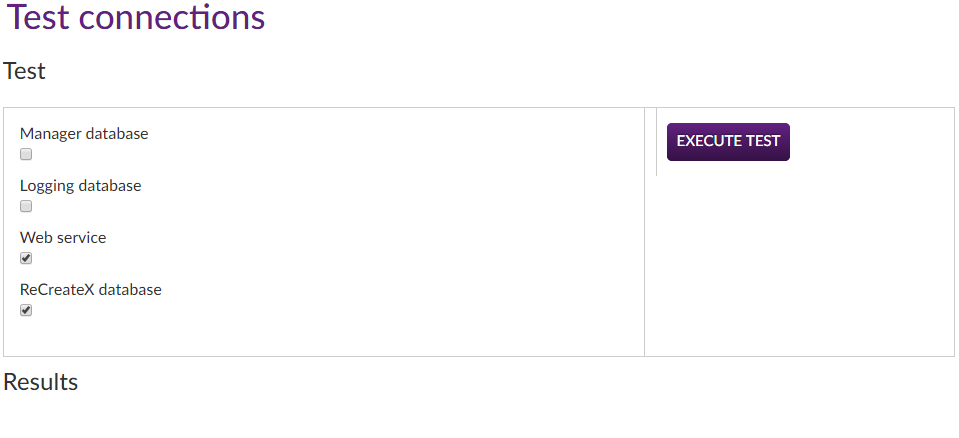 |
The connectivity status will be displayed under Results.
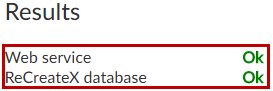 |
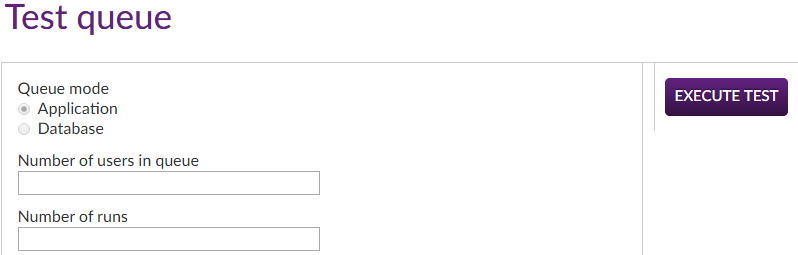
Test queue
In the part Test queue, it is possible to test both of the queue modes, application and database when using the queuing functionality.
For more information on the description of queuing functionalities, see technical settings.
 |
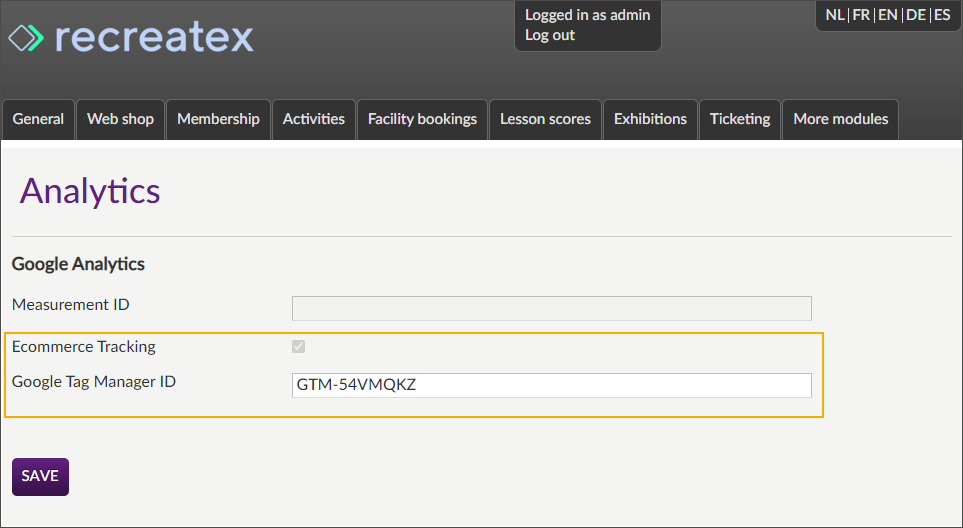
Analytics
Activate the Analytics setting to allow Google Analytics to collect and process the data from Recreatex Webshop.
Before you activate the setting, make sure your Google Analytics and Tag Manager accounts are set up correctly. See Introduction manual to learn how to configure Google Analytics in combination with Tag Manager.
Fill in the Google Tag Manager ID if you use Google Analytics 4 together with Google Tag Manager.
You can find the ID of the Google Tag Manager container in multiple places in your Google Tag Manager application, e.g. on the Workspace page in the header on the right.

Fill in the Measurement ID generated during the data stream creation in the Google Analytics application if you use only Google Analytics 4.
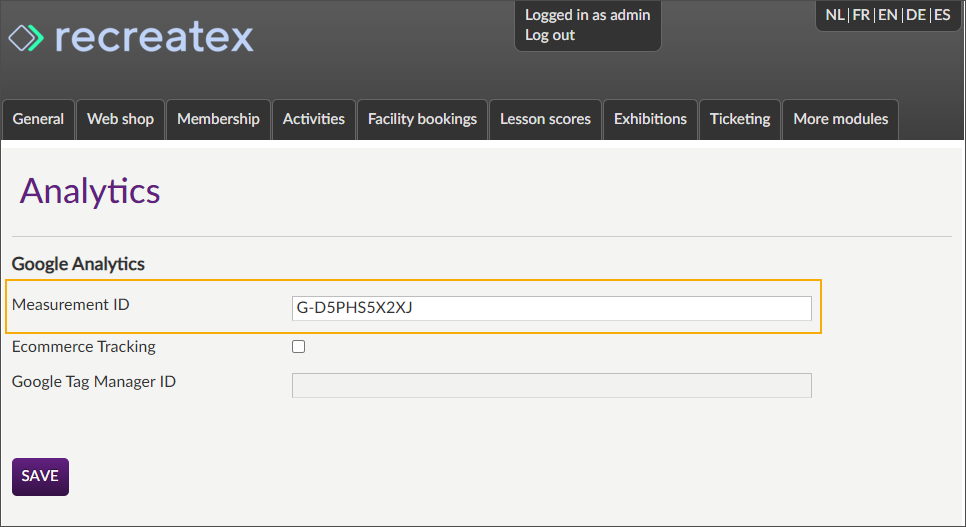
You can retrieve the Measurement ID at any moment in Google Analytics: Admin > select the related account and property > Data Streams > open the data stream and copy the Measurement ID.
Click Save to activate the setting.