Sell combi exhibition tickets at the POS
Important
The combi-exhibition flow is only supported for points of sale using the Modern POS menu layout.
You can find the setting under Sales > Settings > Points of sale > modify the point of sale > tab Various > setting Layout POS menu.
Add the combi exhibition to the POS.
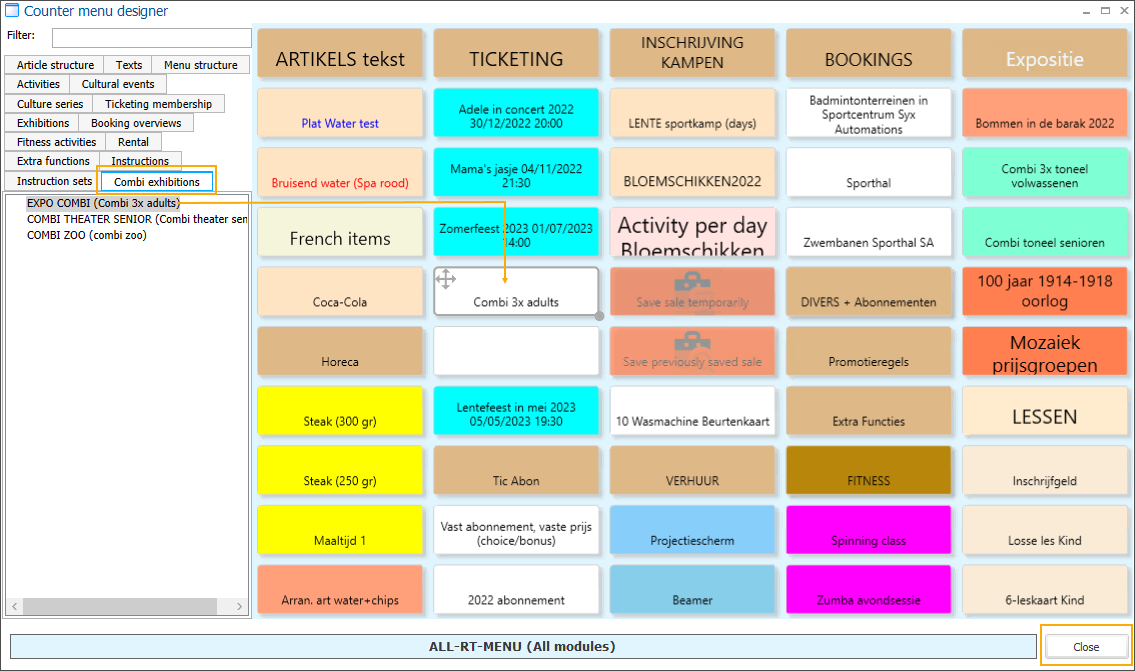
In Recreatex, go to the module POS > Settings > POS menus and open the relevant POS. Then click the button Settings to open the Counter menu designer.
Under the tab Combi exhibitions select the combi exhibition and drag and drop it on the counter menu.
Select the combi exhibition and specify the type and amount of combi tickets.
First, specify the types of combi tickets that you want to purchase (1) and the number of visitors for each ticket type (2).
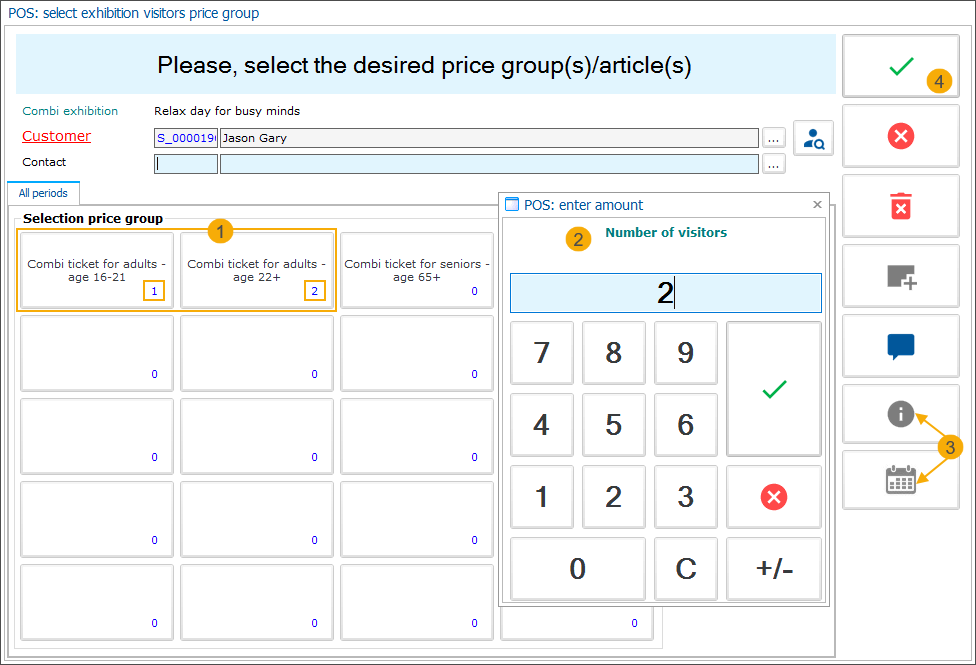
Notice that the calendar function (3) and the information button (3) are not available because there are multiple exhibitions included in the combi exhibition.
Confirm your selection by clicking the green checkmark (4) on the vertical toolbar.
Note
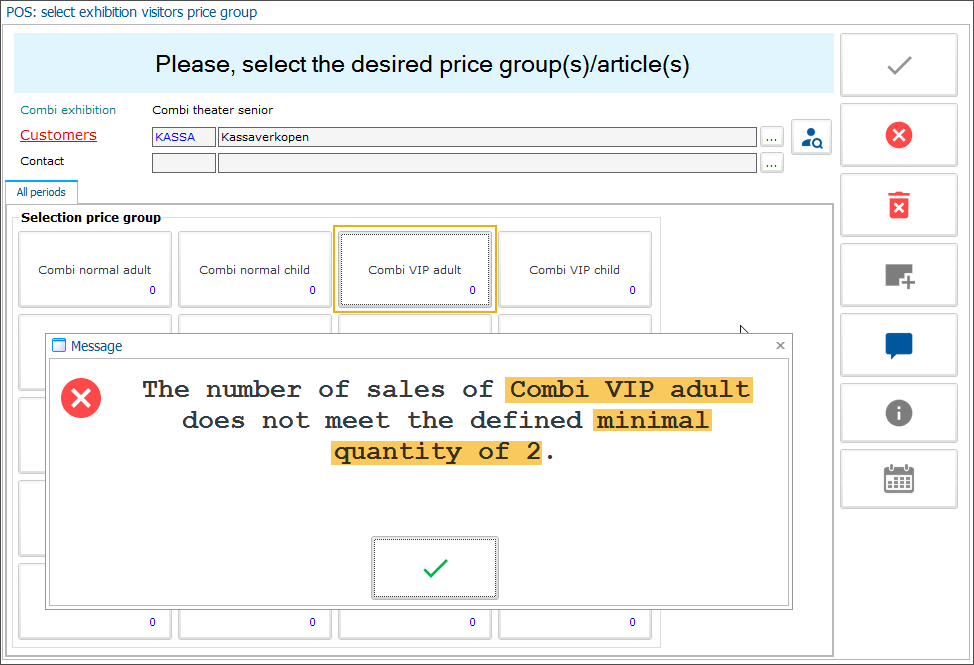
If you have configured a mandatory number of tickets that must be purchased for the selected ticket type, a blocking message will be displayed if the number of tickets specified is lower than defined by the setting Min. number of sales (Combi exhibition ticket > tab General).
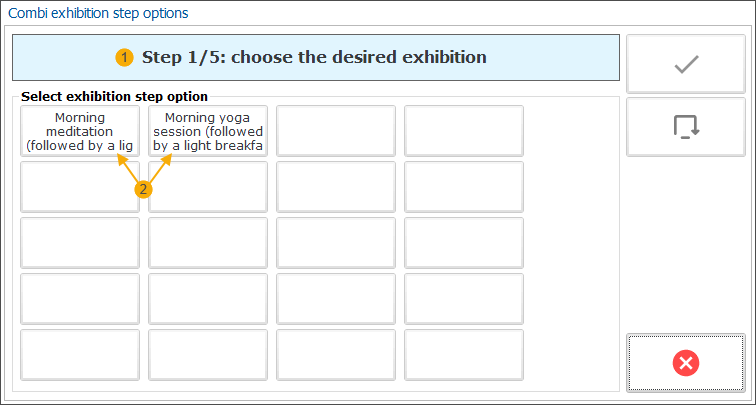
In step 1 choose one of the presented exhibition options (2).
You will automatically be forwarded to the calendar view of the selected exhibition. The displayed time slots take into account the specified number of visitors.
Select the desired time slot (1) and confirm by clicking the green checkmark (2).

If you have configured optional articles on the level of individual exhibitions, the choice will be presented after the timeslot selection.
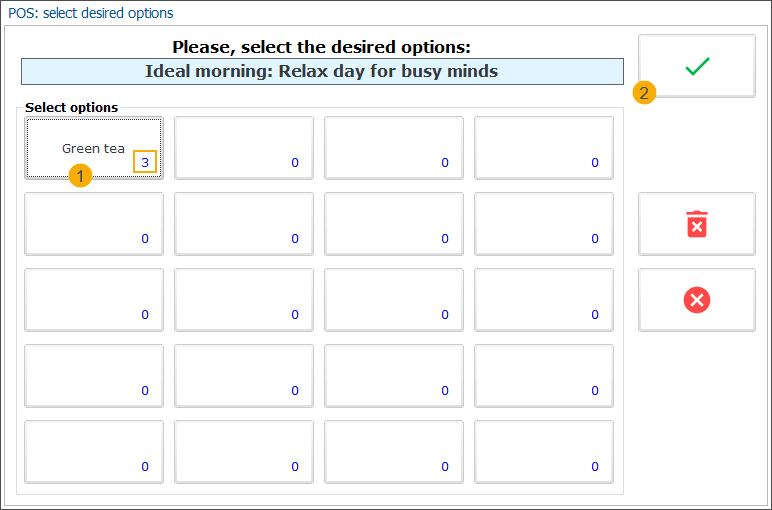
Specify the number of articles the customer wants to include or leave 0 if the customer does not wish to include any optional articles (1). Then click the green checkmark (2) to confirm the choice and move to the next step.
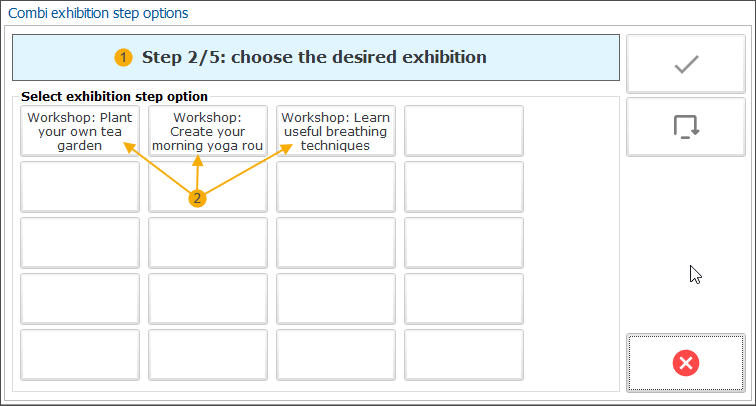
In step 2 again, select one of the presented options.
The calendar view of the 2nd exhibition will open automatically. You can see the highlighted timeslot of the first exhibition (1) and all available time slots for the 2nd exhibition.
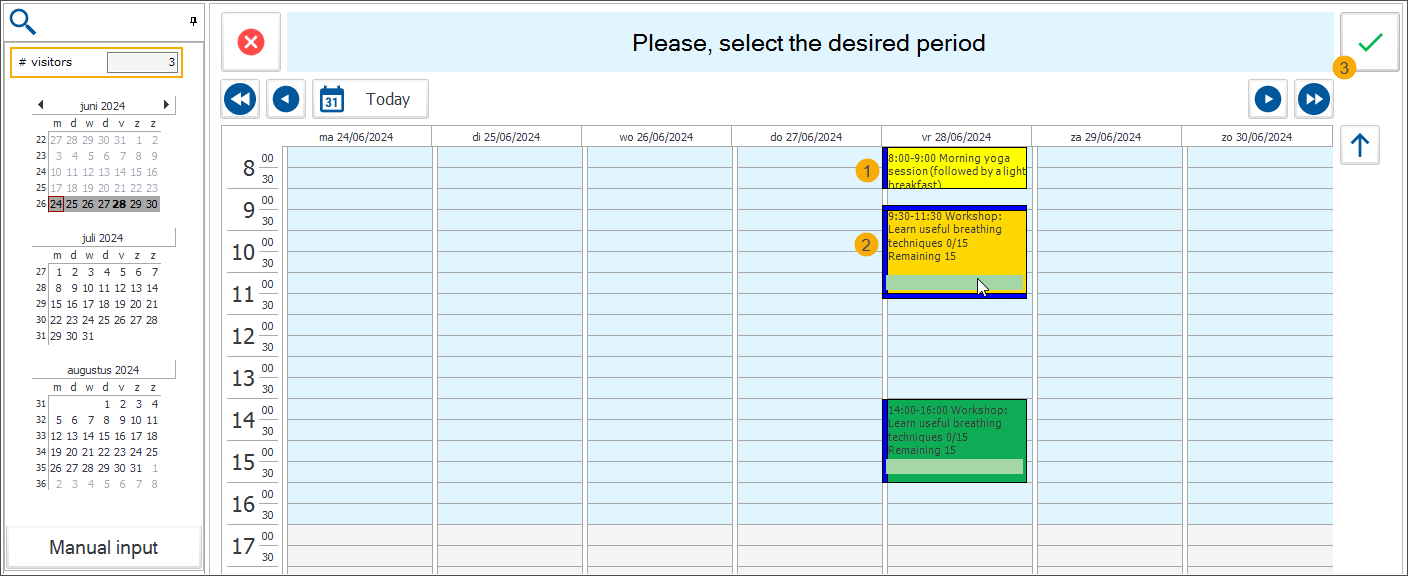
Select the desired time slot (2) and confirm by clicking the green checkmark (3).
Note
From the 2nd exhibition (step), the available time slots are filtered not only by the specified number of visitors but also by the settings specified (or not) during the configuration of the combi exhibition:
Registrations allowed over multiple days: if allowed, time slots will be shown not only for the date of the first exhibition but for other days too. Otherwise, only time slots on the same day will be shown.
Fixed chronological order (+ sequence defined for each step): If specified, only time slots available after the time slot of the previous exhibition will be shown.
Minimum time before: if configured, only time slots that are not overlapping with the specified extra time, will be shown.
Continue the selection for the remaining steps.
If you have included an optional step in your combi exhibition configuration, the customer will have the option to skip (1) this step without selecting any of the presented options.
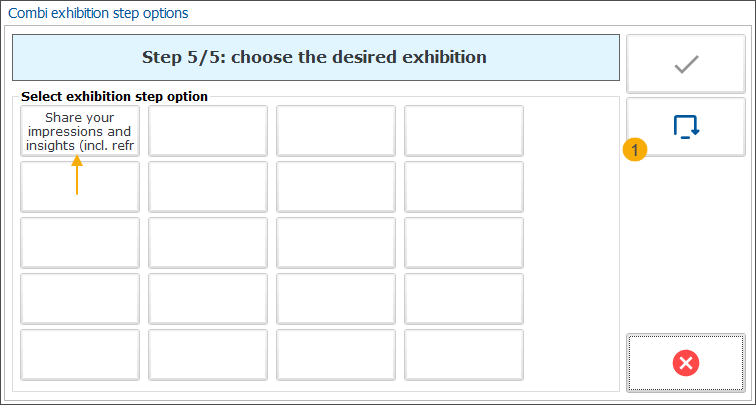
If you have configured any optional articles on the level of a combi-exhibition ticket, the articles will be available for selection after completing the selection for the last step.
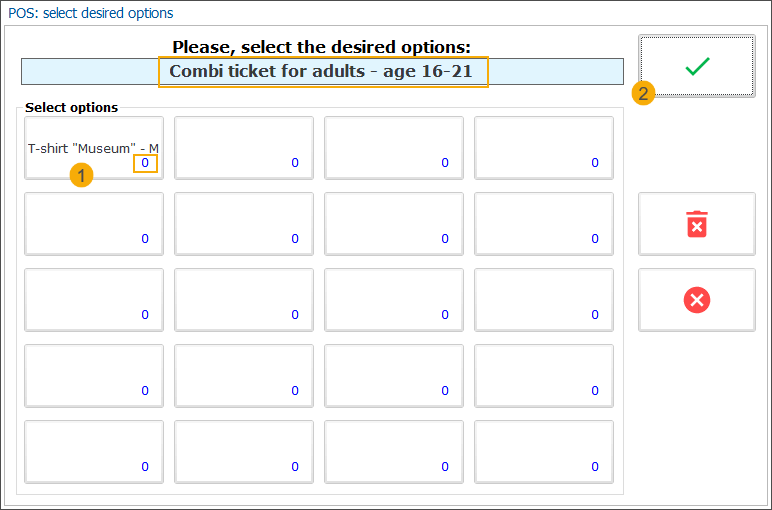
Specify the number of articles the customer wants to include or leave 0 if the customer does not wish to include any optional articles (1). Then click the green checkmark (2) to confirm the choice.
Process the payment and print the tickets.
In the order overview (1), you can see the exhibitions in chronological order followed by the automatically sold articles (2) and the optional articles (3). You can only delete the complete combi exhibition, not the individual parts (4).
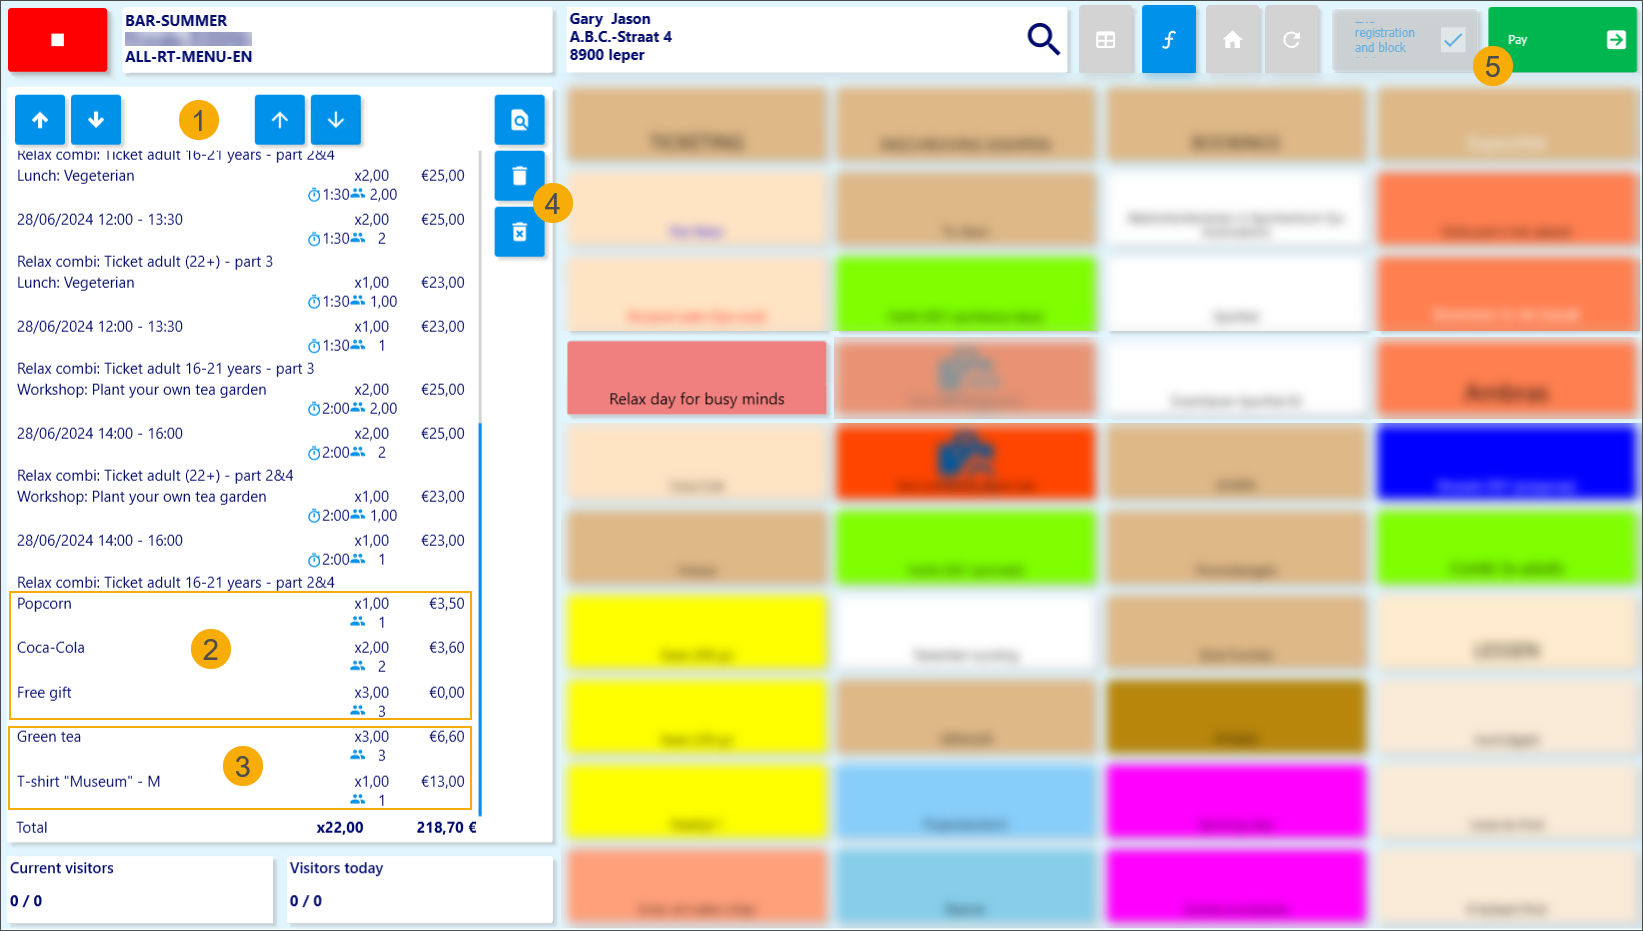
Click Pay (5) and follow the payment flow to finish the order.
The chronological order of the exhibitions is also maintained on the receipt.
Depending on your configuration, you can generate a separate entry ticket/barcode for each part of the combi exhibition or combine the tickets into 1 ticket per visitor.
In the backoffice, a field Combi exhibition is available on the exhibition visit level (tab General) to indicate that the visit is part of a combi exhibition.
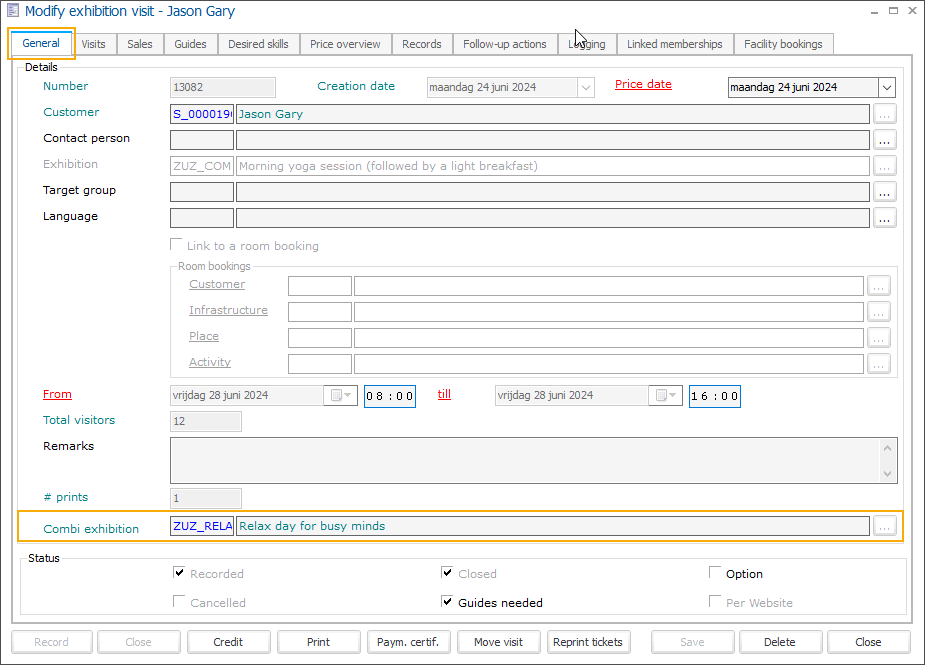
In the tab Visits, you can see all tickets per exhibition visit. A combi ticket will have additional information in a separate column Exh. combination ticket (1).
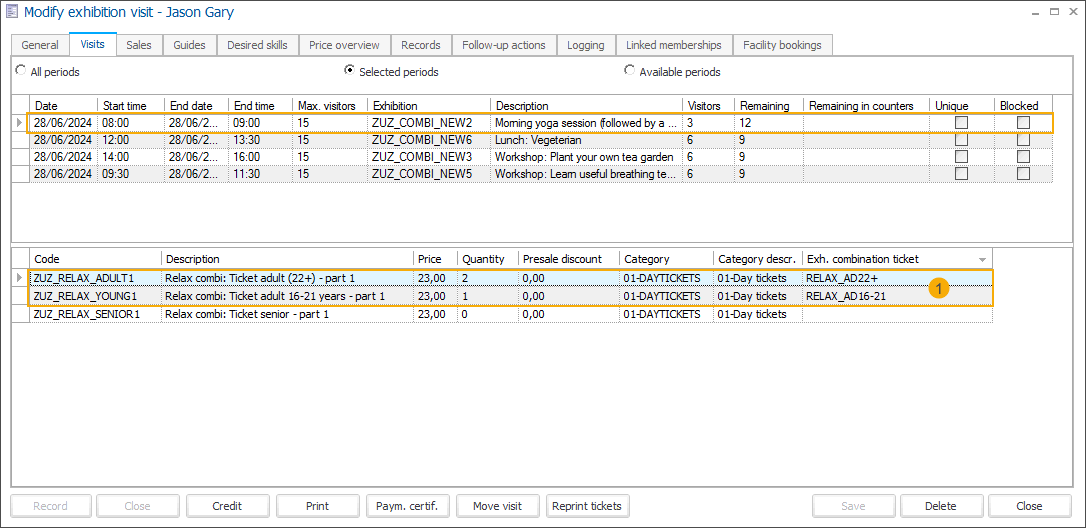
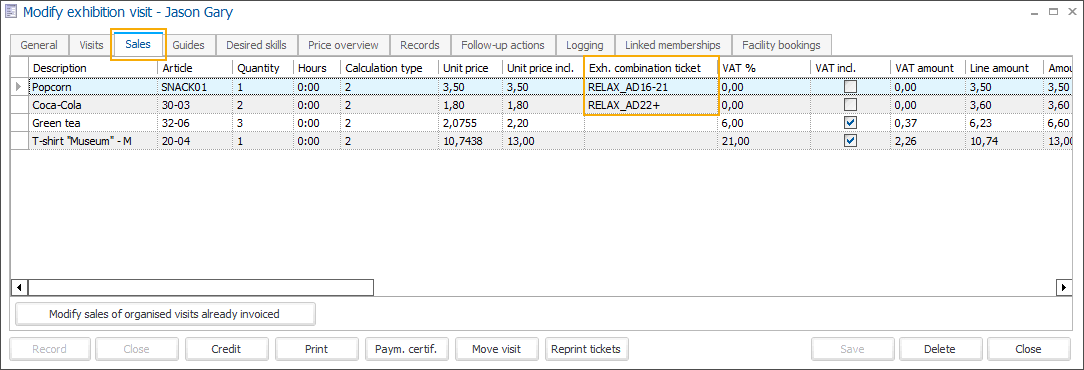
All automatically sold and optional articles are visible in the tab Sales. The articles configured on the combi ticket level have the ticket information in a separate column Exh. combination ticket.
