Setup
Note
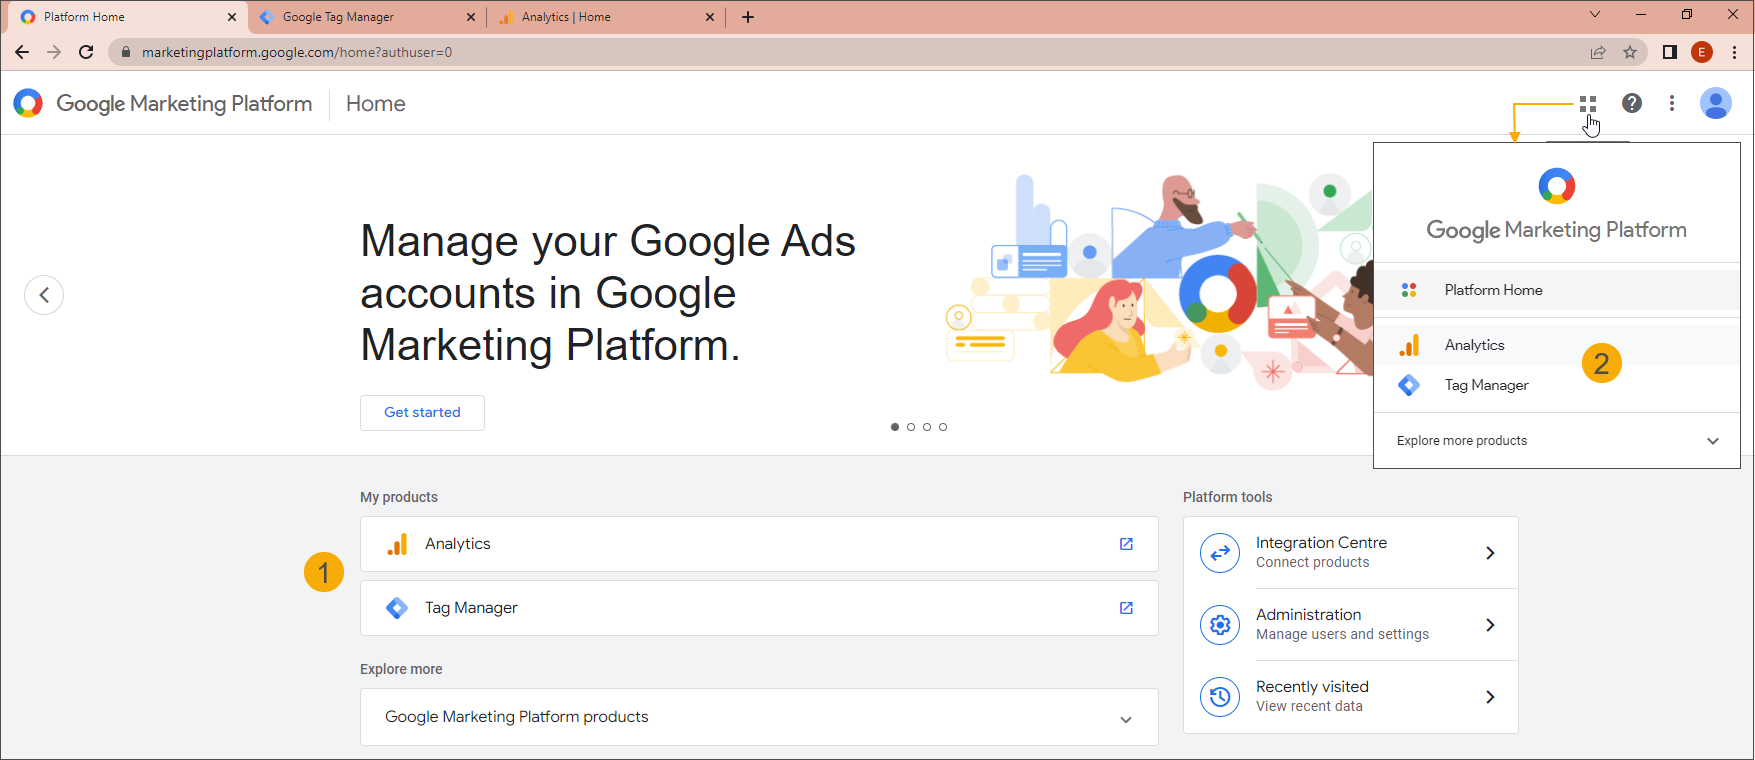
Before starting the setup, you should have Google Analytics and Google Tag Manager accounts. Once you have created the accounts it is sufficient to log in to your Google account to easily access both applications without additional login.
E.g. Go to the Google Marketing Platform homepage (1) or use the Switch product functionality (2) to access both applications.
Setting up Google Analytics 4 requires executing steps in the Google Analytics, Google Tag Manager and Webshop Manager applications.
When all these steps are executed correctly, data from the Recreatex Webshop will become available in the Google Analytics reports after 24 to 48 hours.
Set up Google Analytics 4 (GA4)
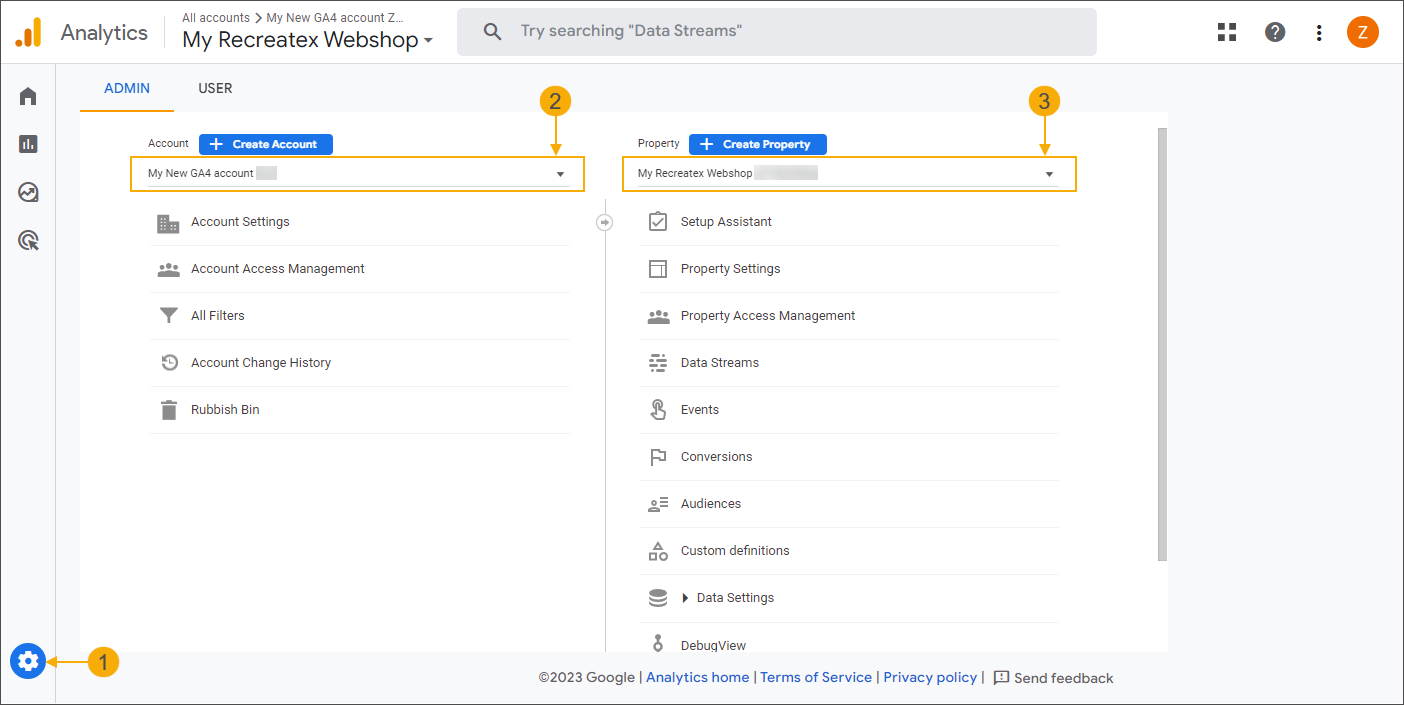
Open your Google Analytics application and go to the Admin page (1). If you have multiple accounts and properties, also select the relevant account (2) and the property (3) that will serve as a container for your Recreatex Webshop reports.
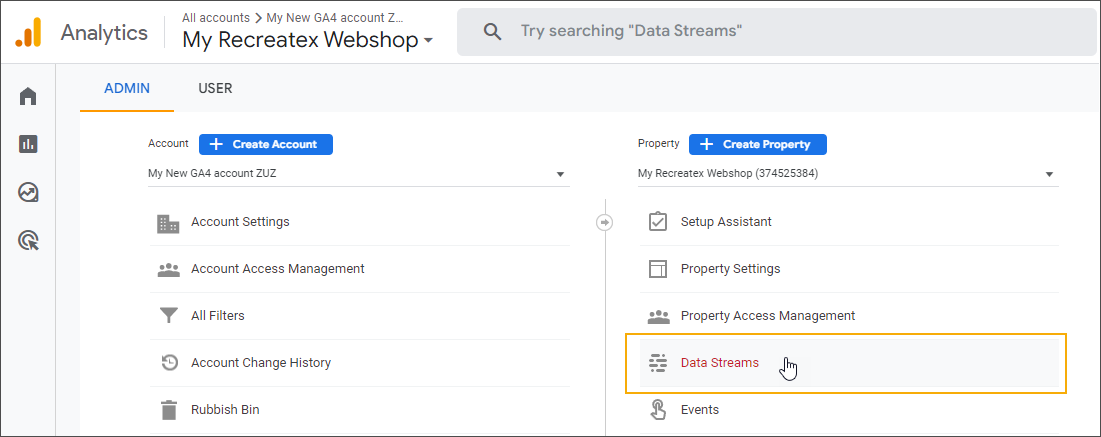
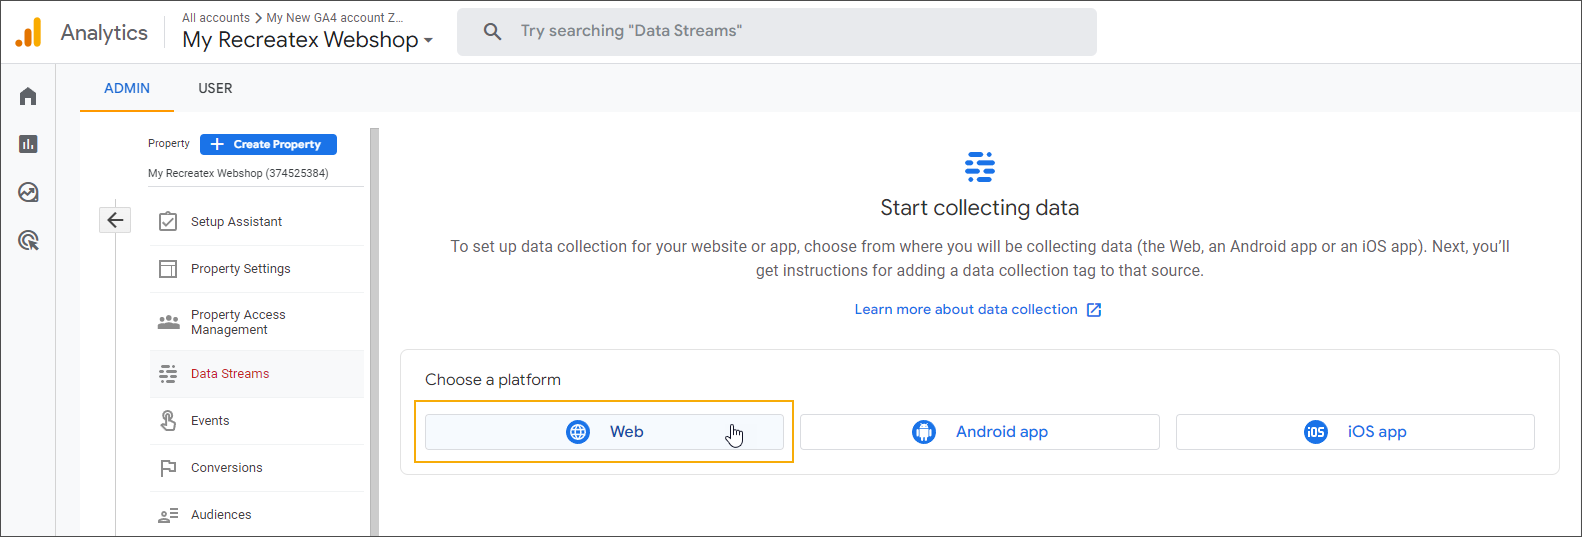
Under the selected property add a new data stream via the option Data Streams.
Click the Add stream dropdown and select the source type you want to stream. For the Recreatex Webshop, select Web.
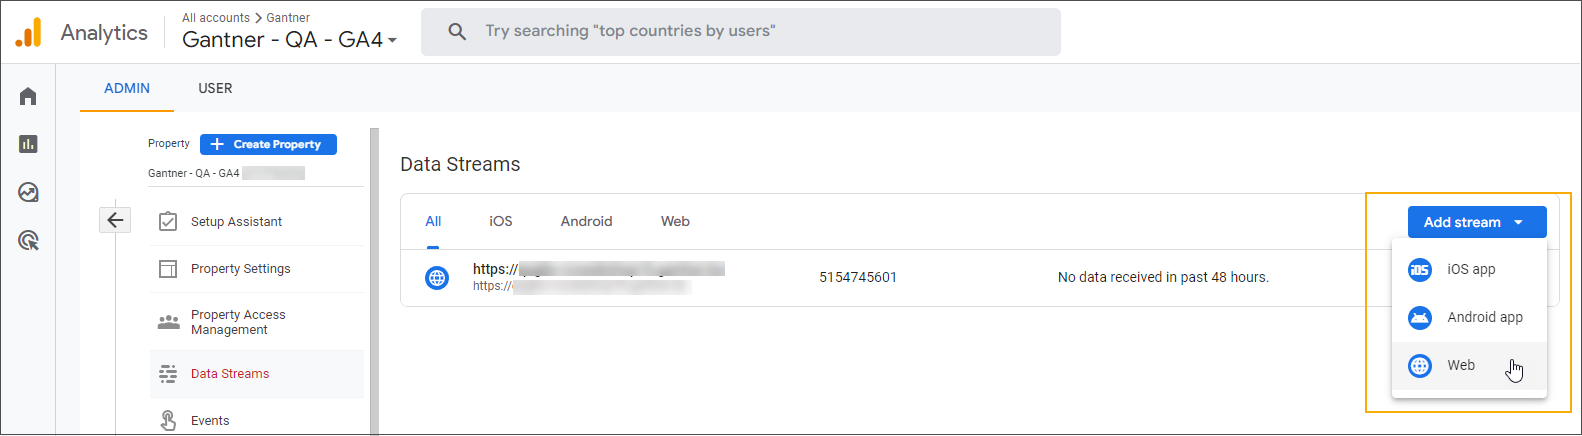
If you are creating your first data stream for this property, select Web directly from the displayed options.
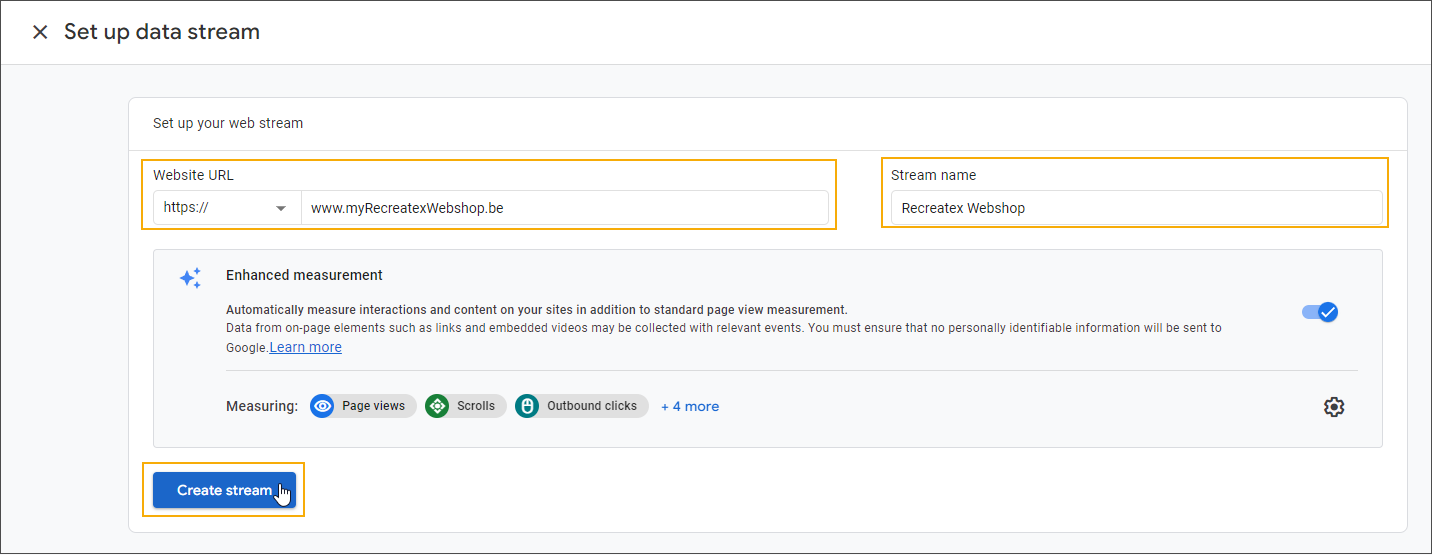
Set up the data stream.
Fill in the URL of your Recreatex Webshop and choose a stream name. Then click Create stream to finalize the setup.
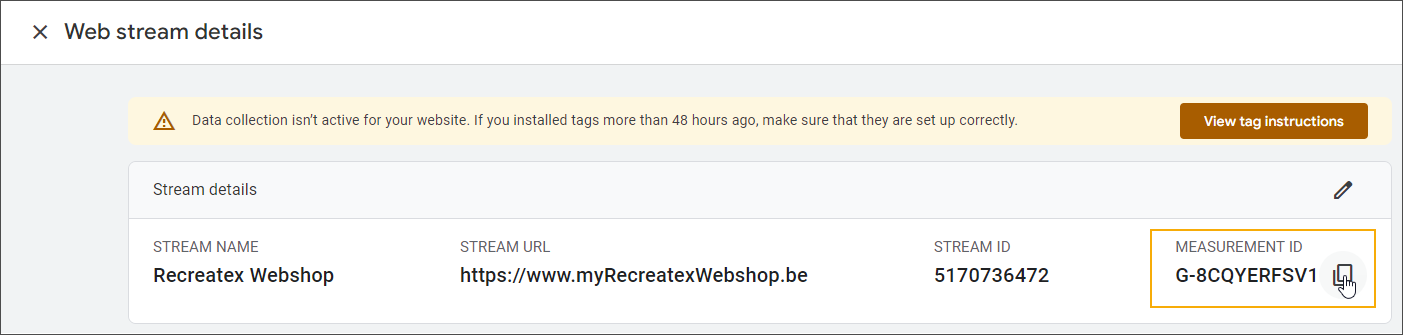
Ignore the Google tag installation instructions by clicking the close button.
Copy the Measurement ID so that it can be used in the setup of Google Tag Manager.
Set up Google Tag Manager
Next to the essential Google Analytics, you can add customized events to capture more specific actions. Configuring additional custom Google Analytics 4 (GA4) tags in Google Tag Manager will allow you to capture more particular events on your Recreatex Webshop.
1. Log in and define the container
Open your Google Tag Manager application and select the account/container (1) you want to use for this purpose.
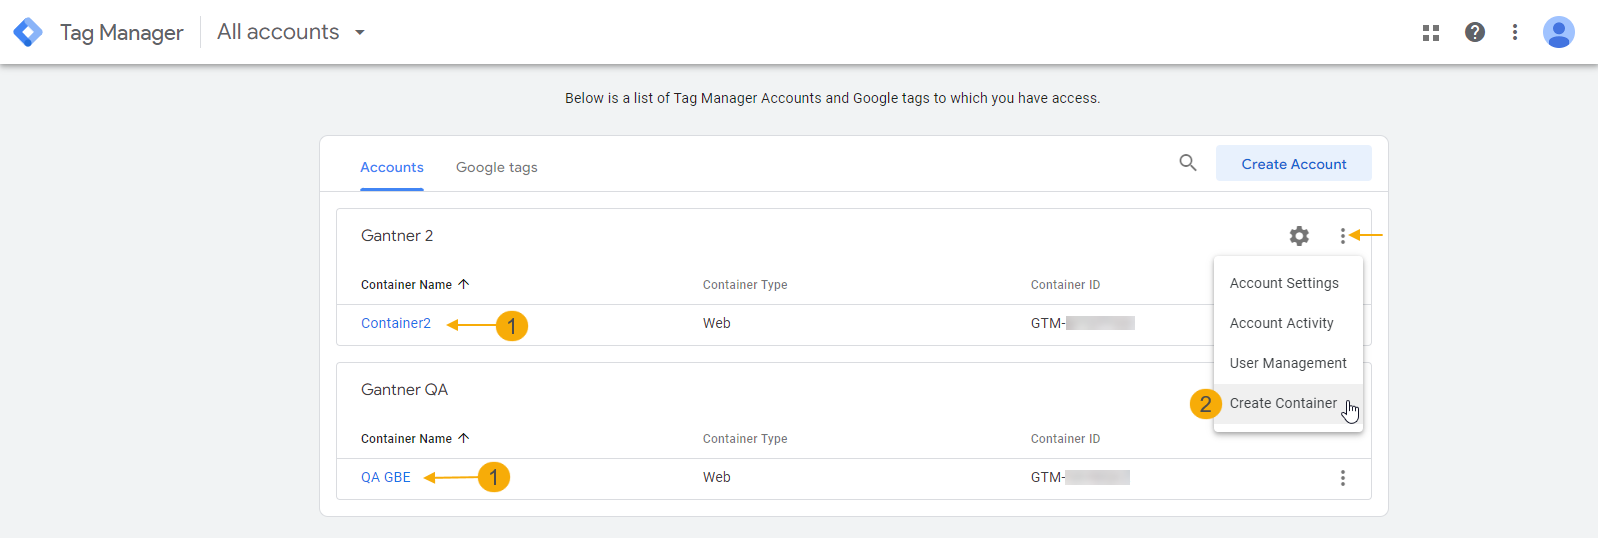
If the container configured during the account creation is not the one you want to use, you can add another container to your account now (2).
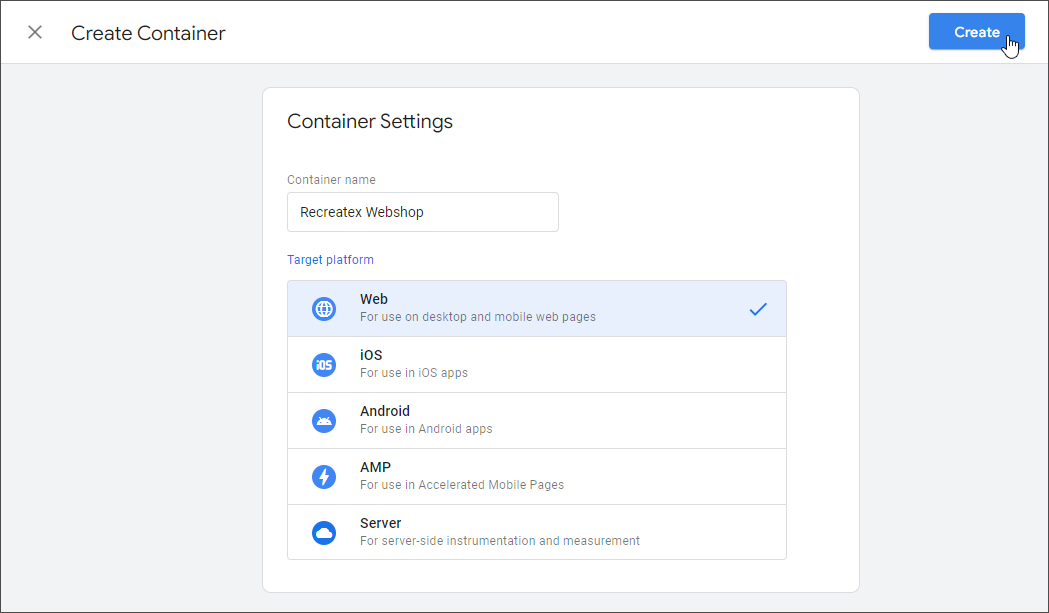
Fill in the container name, select the correct target platform Web, and click Create.
Ignore the Install Google Tag Manager window for now, by clicking the OK button.
2. Create the GA4 Configuration tag
The GA4 Configuration tag creates a link between your Google Tag Manager and Google Analytics which allows the data collected by Google Tag Manager to be processed by Google Analytics reports.
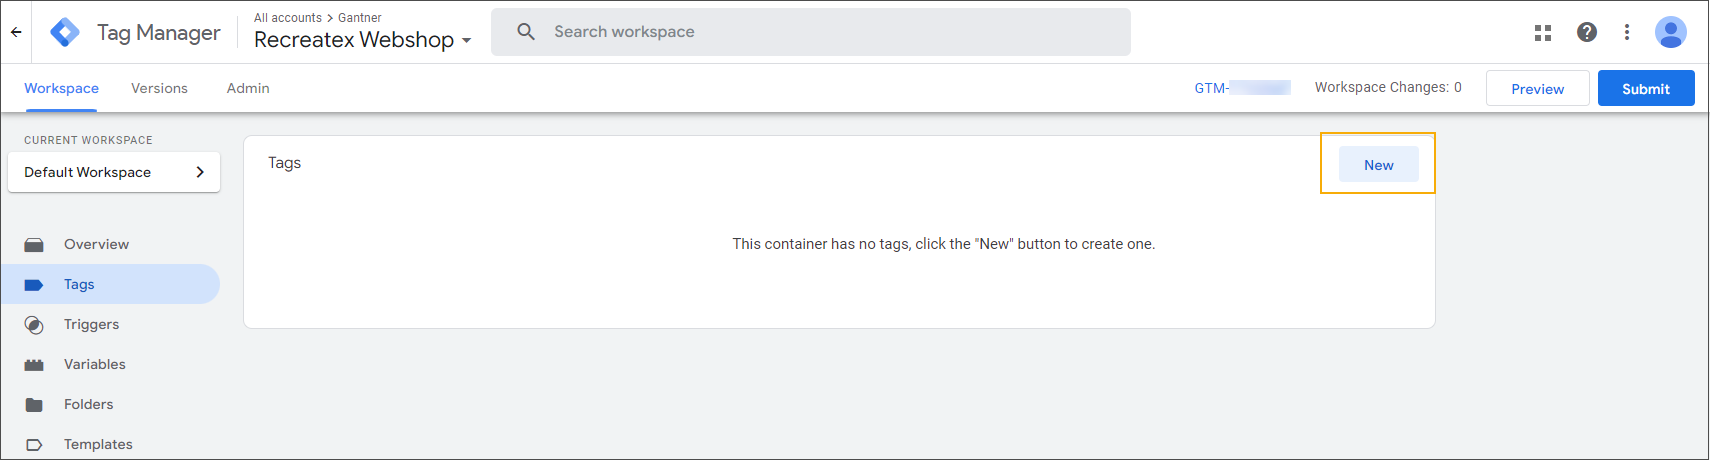
On the Workspace page, go to Tags and click New.
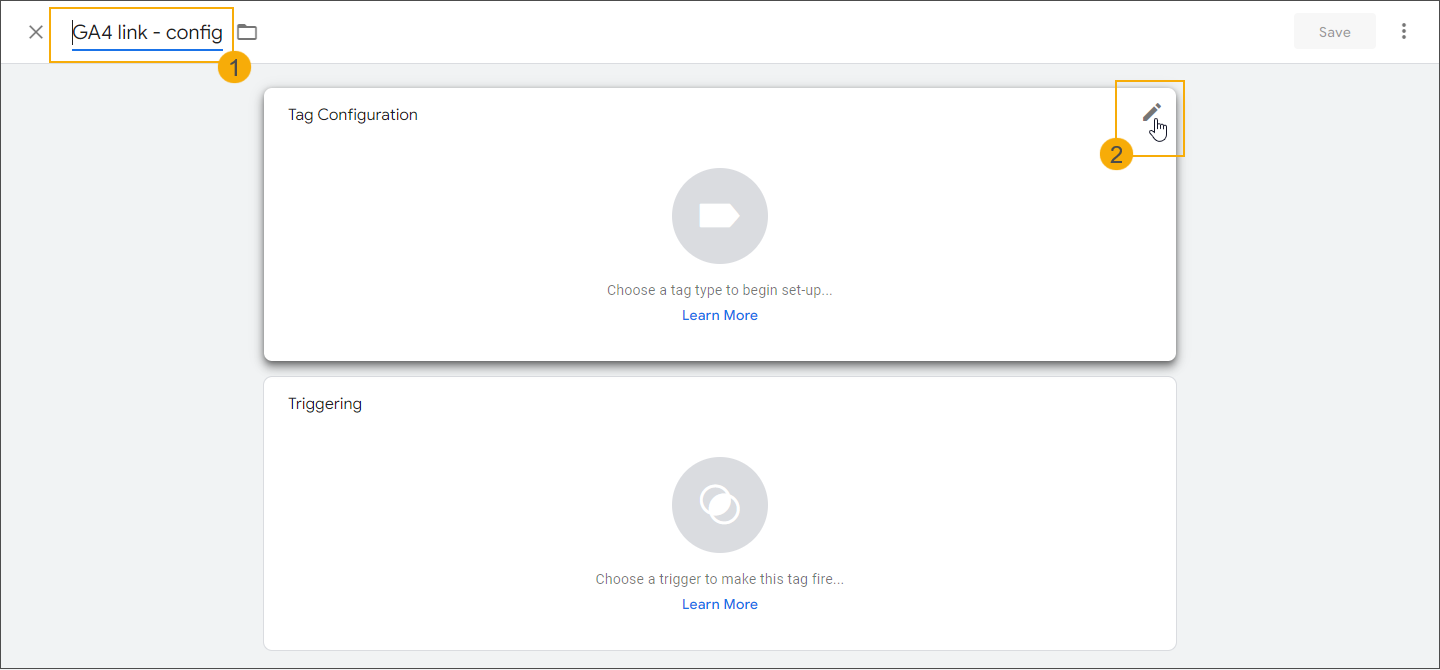
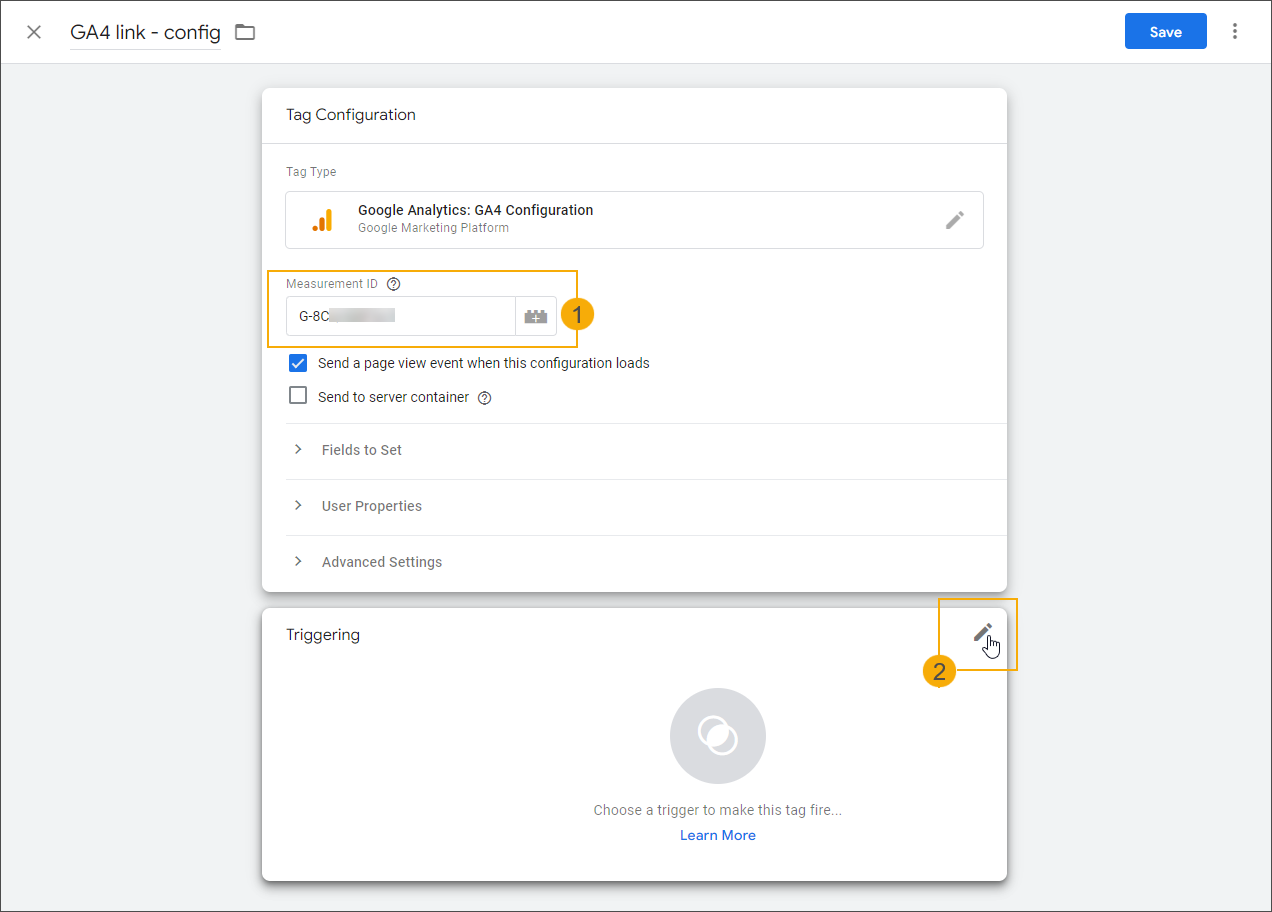
Give the tag a name (1), e.g. GA4 link - config, then edit the Tag Configuration tile (2) to choose the tag type.
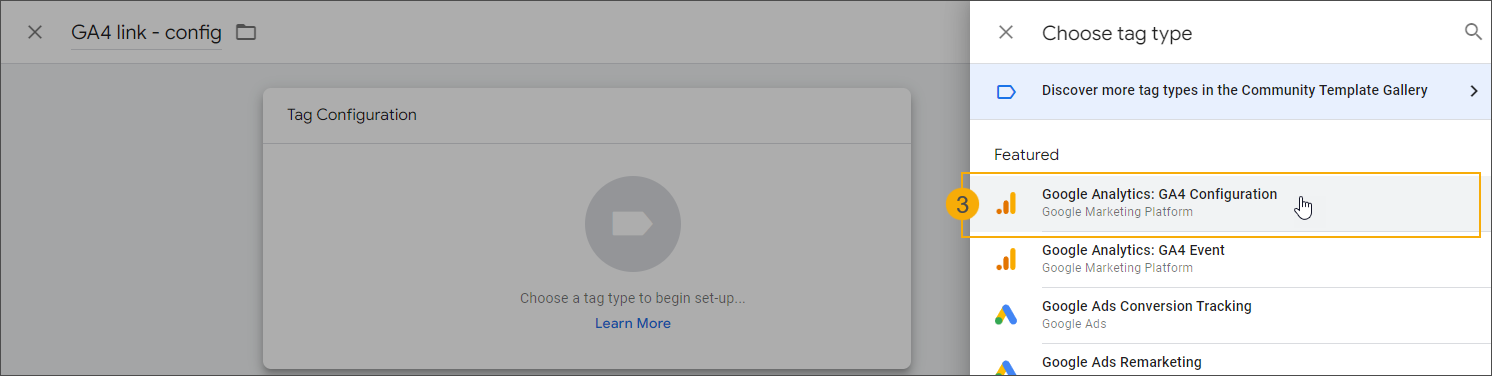
Select the type Google tag, currently used for GA4 setup (3).
Notice
As of late 2023, the Google Analytics: GA4 Configuration tag has been replaced by the Google tag in Google Tag Manager. This tag is now used for setting up GA4 in the Recreatex Webshop. Existing GA4 setups continue to work without changes.
In the field Tag ID paste or enter the Measurement ID of your data stream from Google Analytics (1), then click the Triggering tile (2) to choose the trigger.
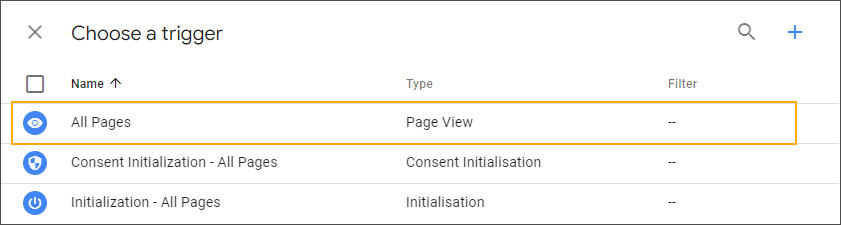
Select the default trigger All Pages.
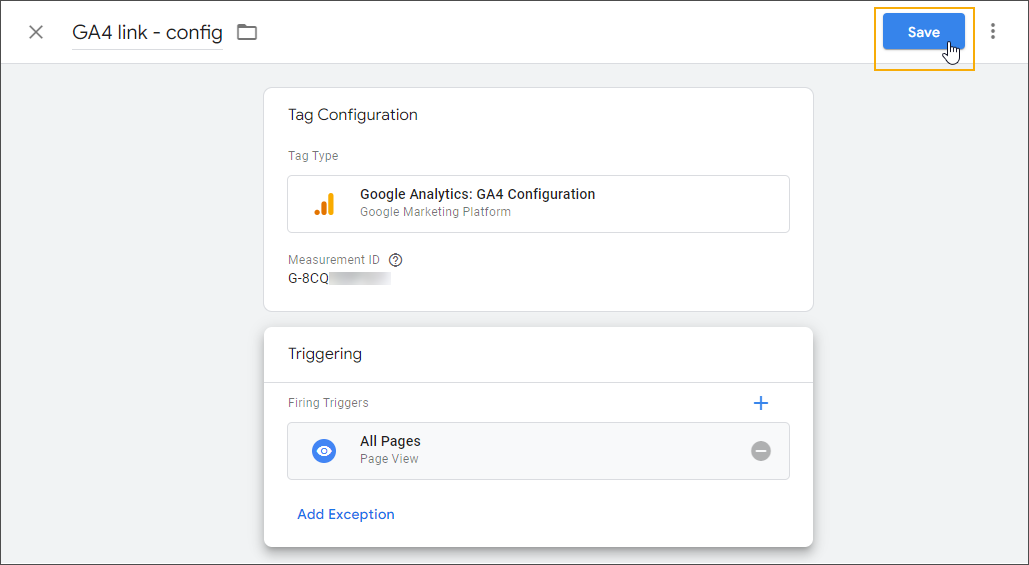
Click Save to finish the tag configuration.
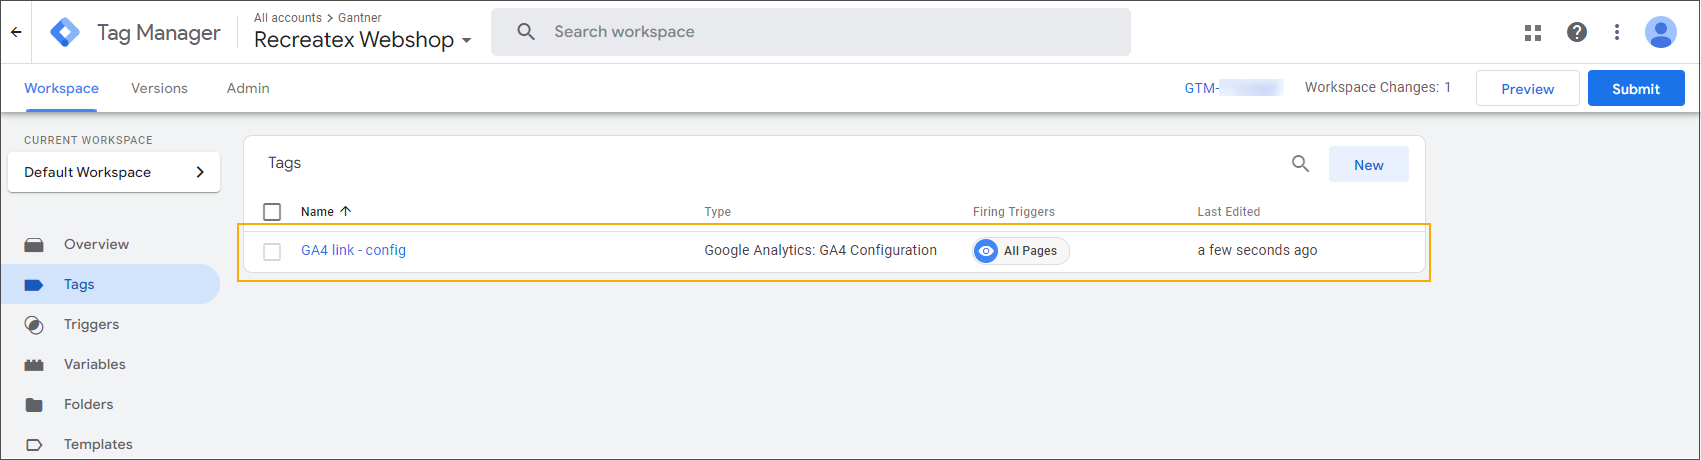
The configuration tag is added to the tag overview.
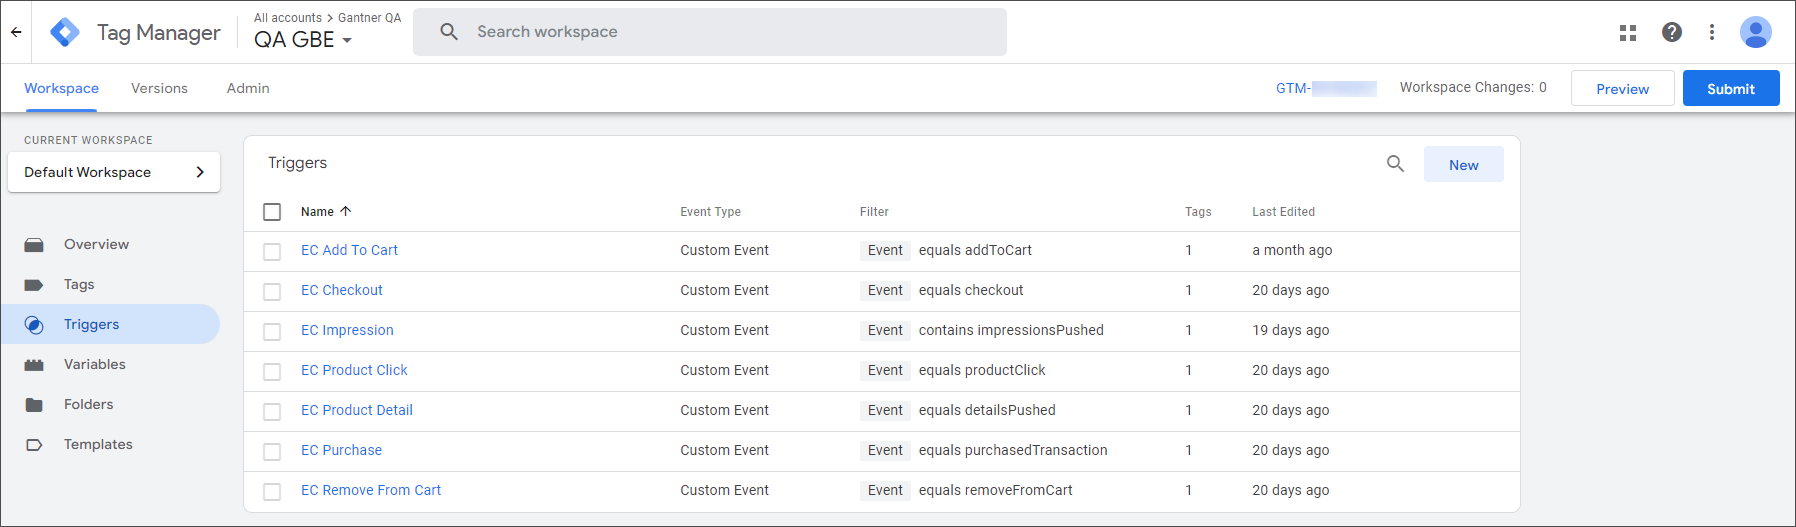
3. Create the triggers
You can create all the necessary triggers first to have them ready to link when you start creating the event tags.
Trigger name* | Event (exact name) | Trigger fires on | Conditions | ||
|---|---|---|---|---|---|
EC Add To Cart |
| Some Custom Events | Event | equals |
|
EC Checkout |
| Some Custom Events | Event | equals |
|
EC Impression |
| Some Custom Events | Event | contains |
|
EC Product Click |
| Some Custom Events | Event | equals |
|
EC Product Detail |
| Some Custom Events | Event | equals |
|
EC Purchase |
| Some Custom Events | Event | equals |
|
EC Remove From Cart |
| Some Custom Events | Event | equals |
|
*You can define your own trigger names.
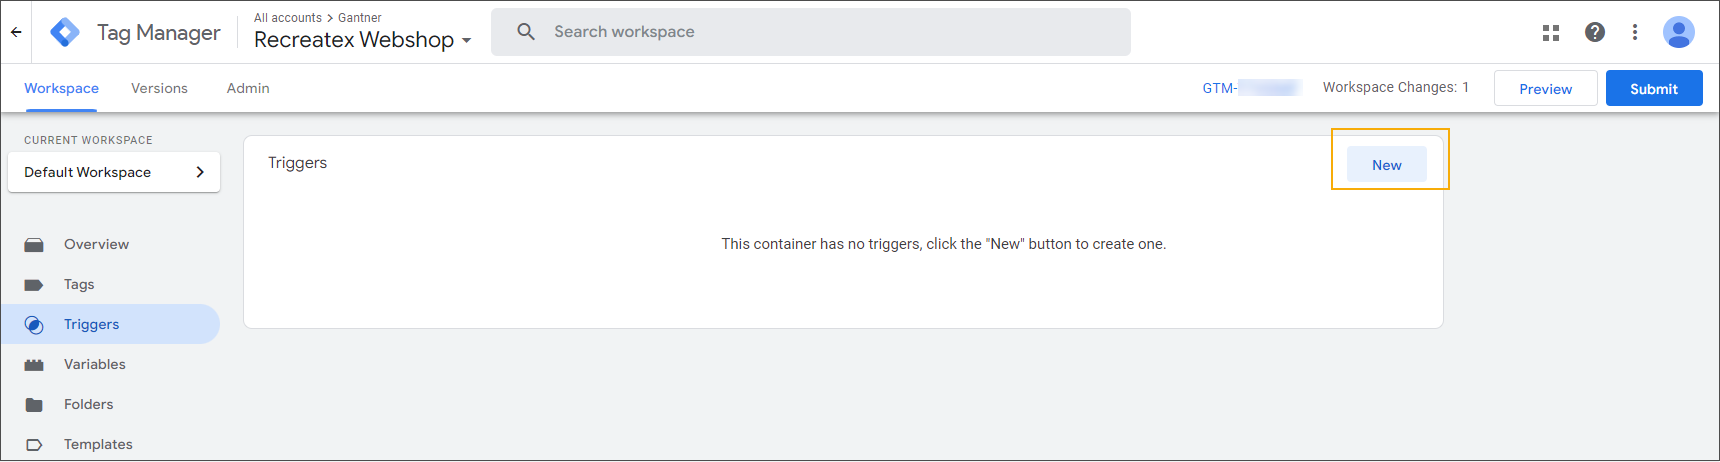
On the Workspace page, go to Triggers and click New.
Give the trigger a name (1), e.g. EC Add To Cart, then edit the Trigger Configuration tile (2) to choose the trigger type.
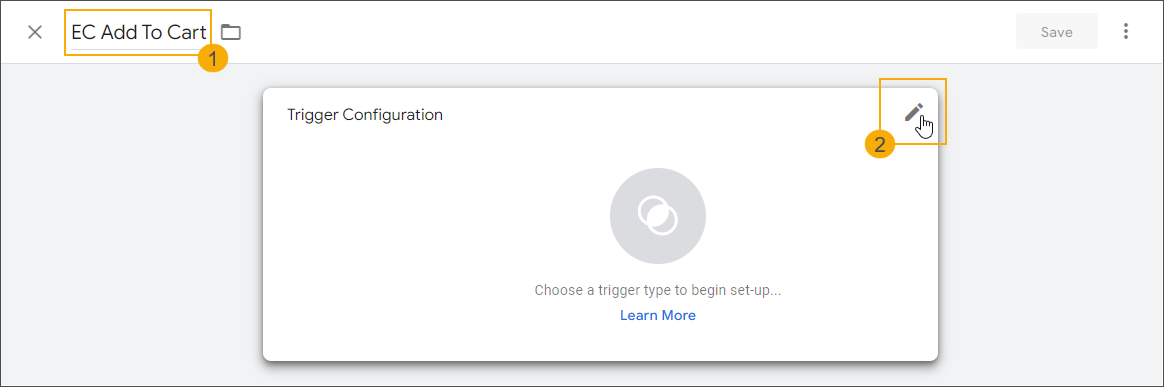
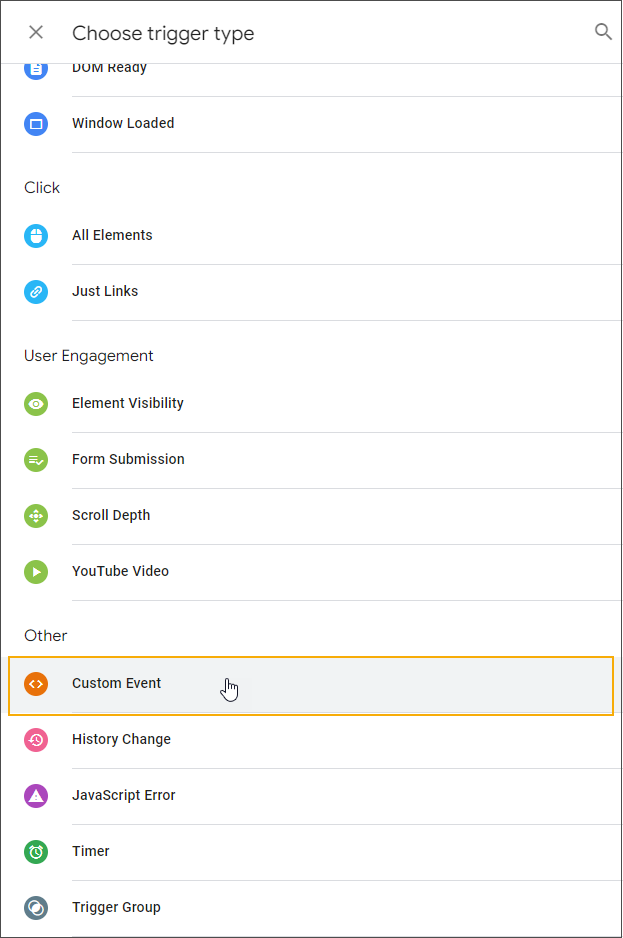
Select Custom Event from the available trigger types (section Other).
Complete the Trigger Configuration settings:
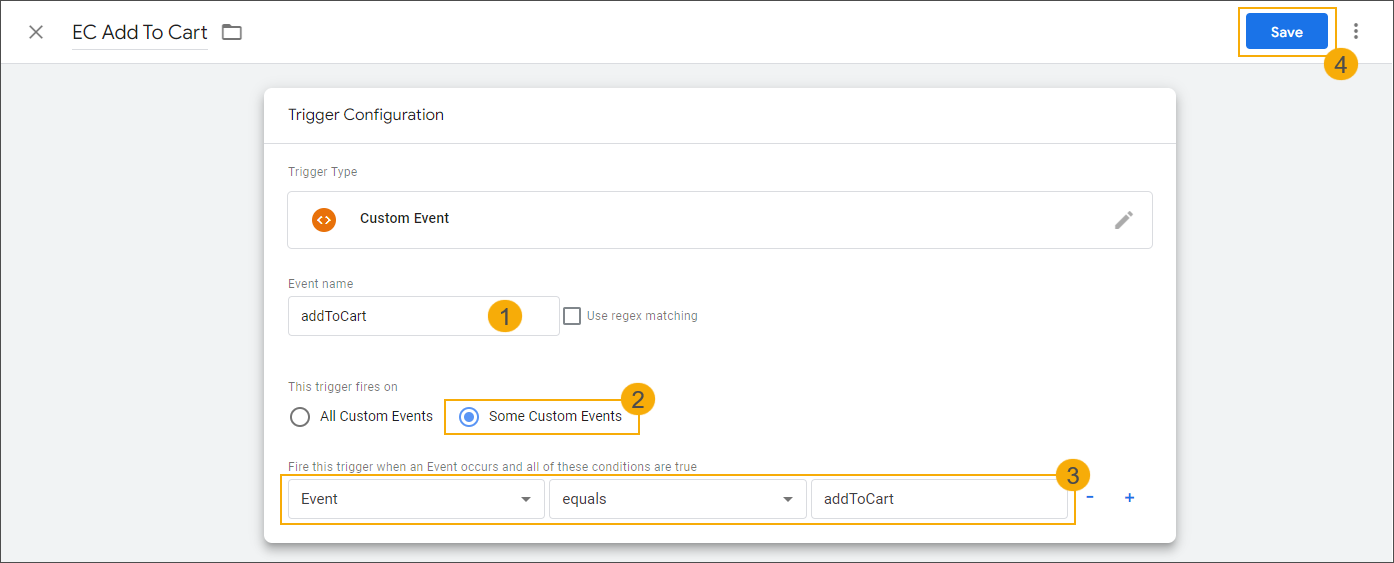
Add the exact event name (see table) (1)
Select the option Some Custom Events (2)
Specify the conditions (see table) (3)
Click Save to finish the trigger configuration. The trigger is added to the list of triggers.
Repeat the steps to create all the triggers listed in the table above.
4. Create the event tags
Events allow you to measure specific interactions or occurrences on your Webshop, e.g. when a customer removes a product from the shopping cart or completes a purchase.
Create the following event tags to use with your Recreatex Webshop. You can define your own tag names the same way as you have defined the trigger names previously but it is always a good idea to keep the names clear and descriptive, e.g. see the names suggested in the table below*.
Tag name* | Tag type | Trigger* |
|---|---|---|
GA4 Add To Cart | Google Analytics: GA4 Event | EC Add To Cart |
GA4 Checkout | Google Analytics: GA4 Event | EC Checkout |
GA4 Impression | Google Analytics: GA4 Event | EC Impression |
GA4 Product Click | Google Analytics: GA4 Event | EC Product Click |
GA4 Product Details | Google Analytics: GA4 Event | EC Product Detail |
GA4 Purchases | Google Analytics: GA4 Event | EC Purchase |
GA4 Remove From Cart | Google Analytics: GA4 Event | EC Remove From Cart |
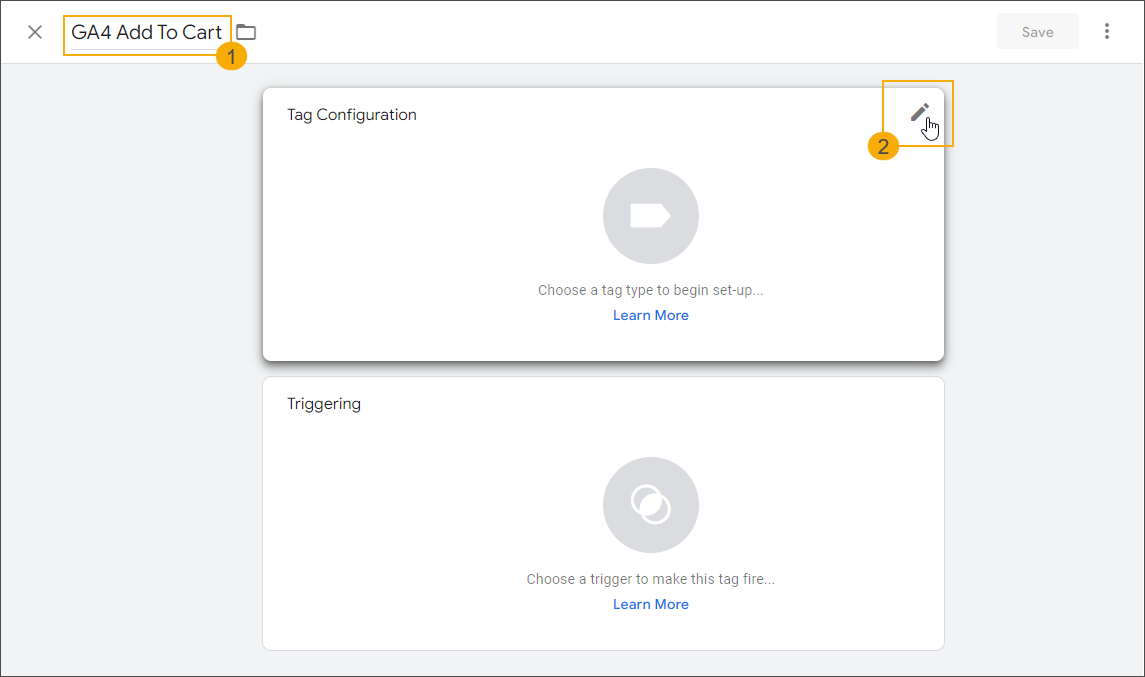
On the Workspace page, go to Tags and click New.
Give the tag a name (1), e.g. GA4 Add To Cart, then edit the Tag Configuration tile (2) to choose the tag type.
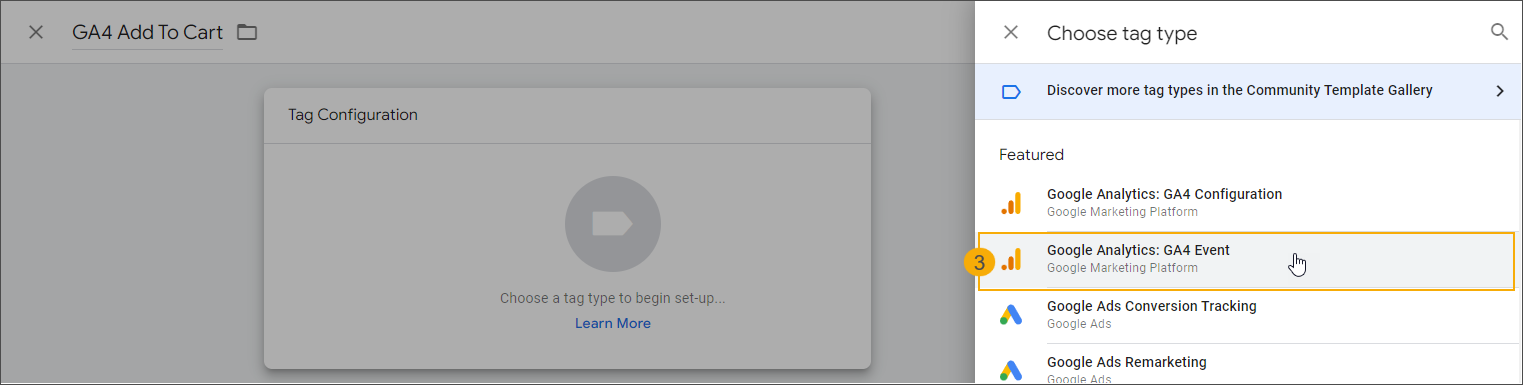
Select the type Google Analytics: GA4 Event (3).
Complete the Tag Configuration settings.
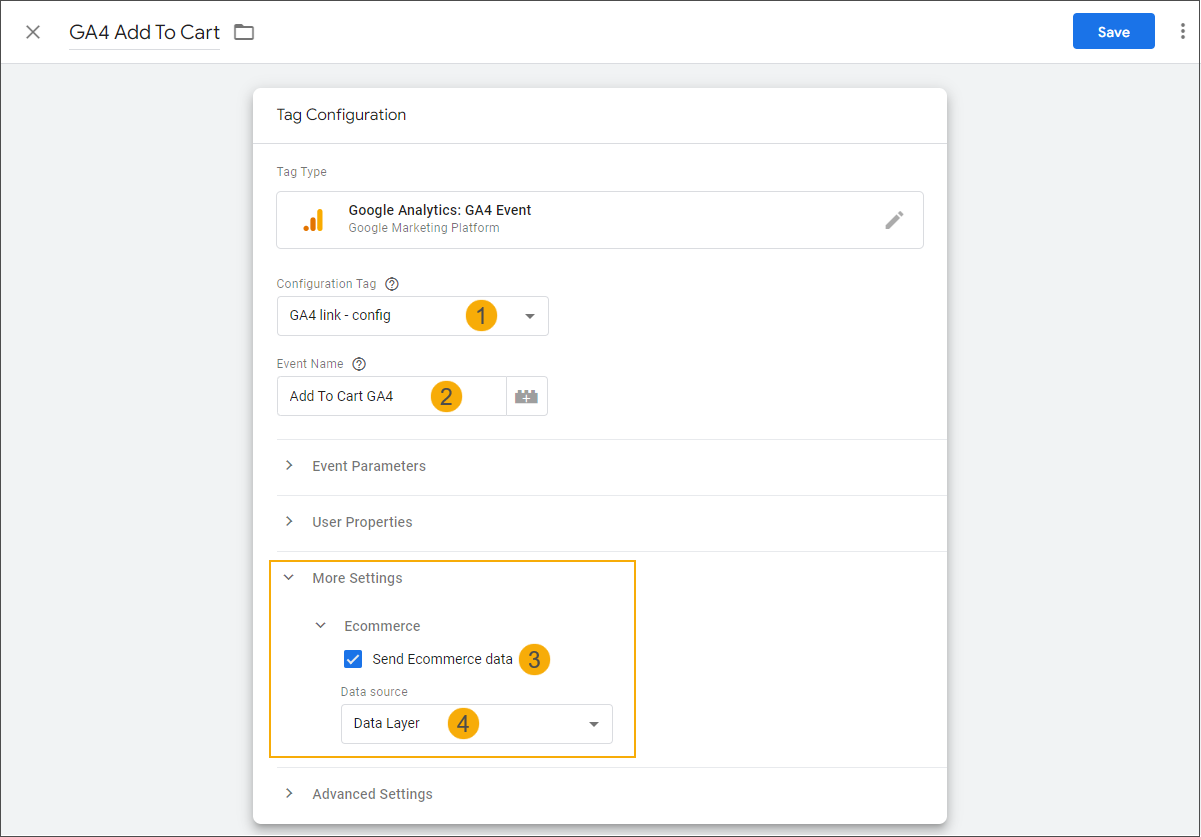
Link your event tag to the configuration you have created previously, the GA4 Configuration tag. (1)
Provide an Event name as you want it to be displayed on your Google Analytics reports. (2)
Under More Settings, in the section Ecommerce , select the option Send Ecommerce data (3) and as Data source choose Data Layer (4).
Go to the Triggering tile (1) and select the trigger created previously for this event.
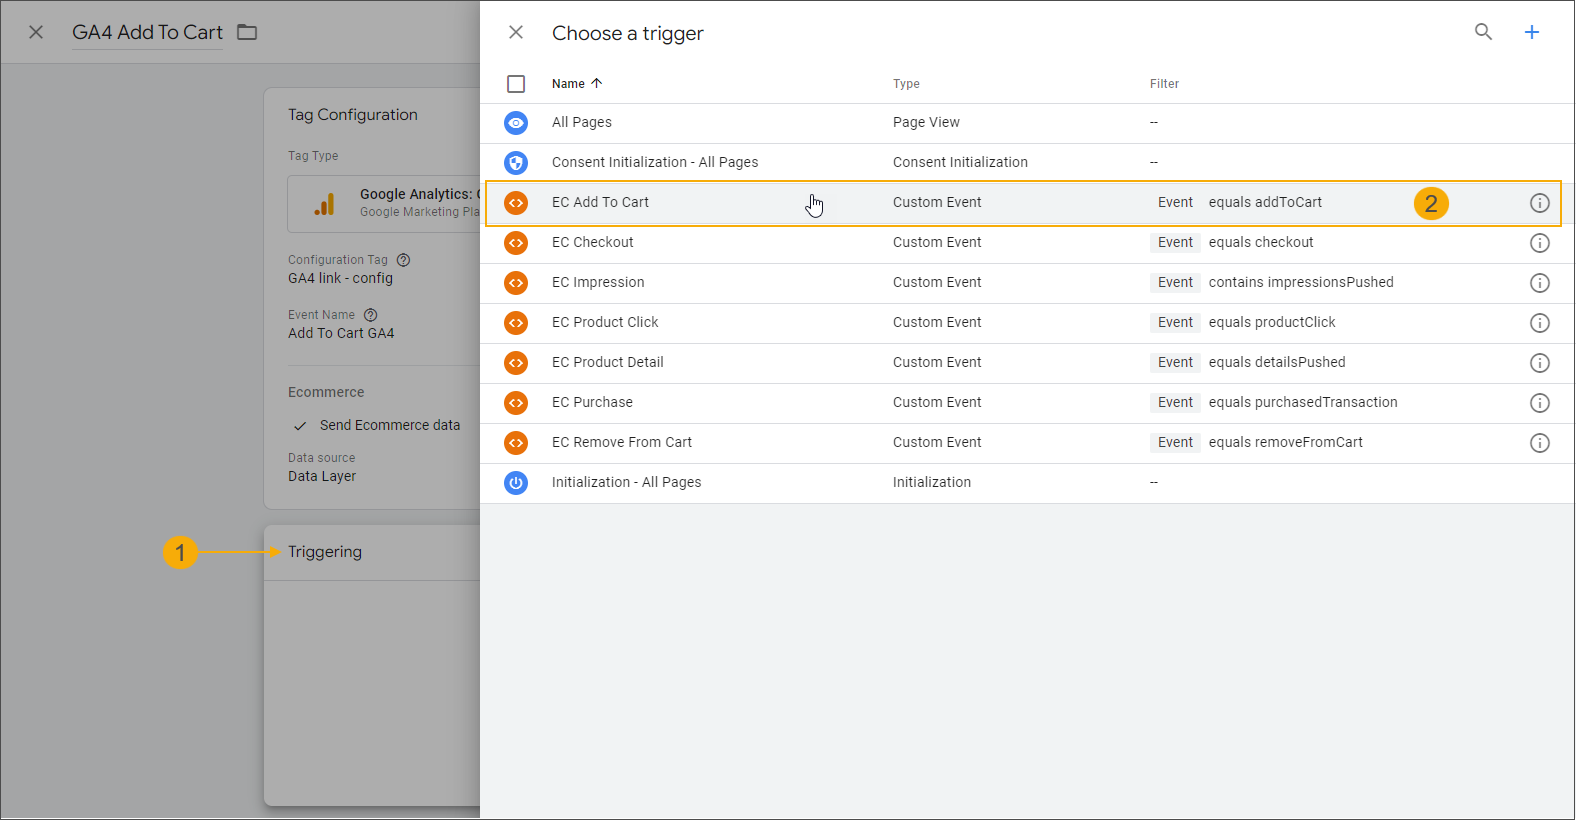
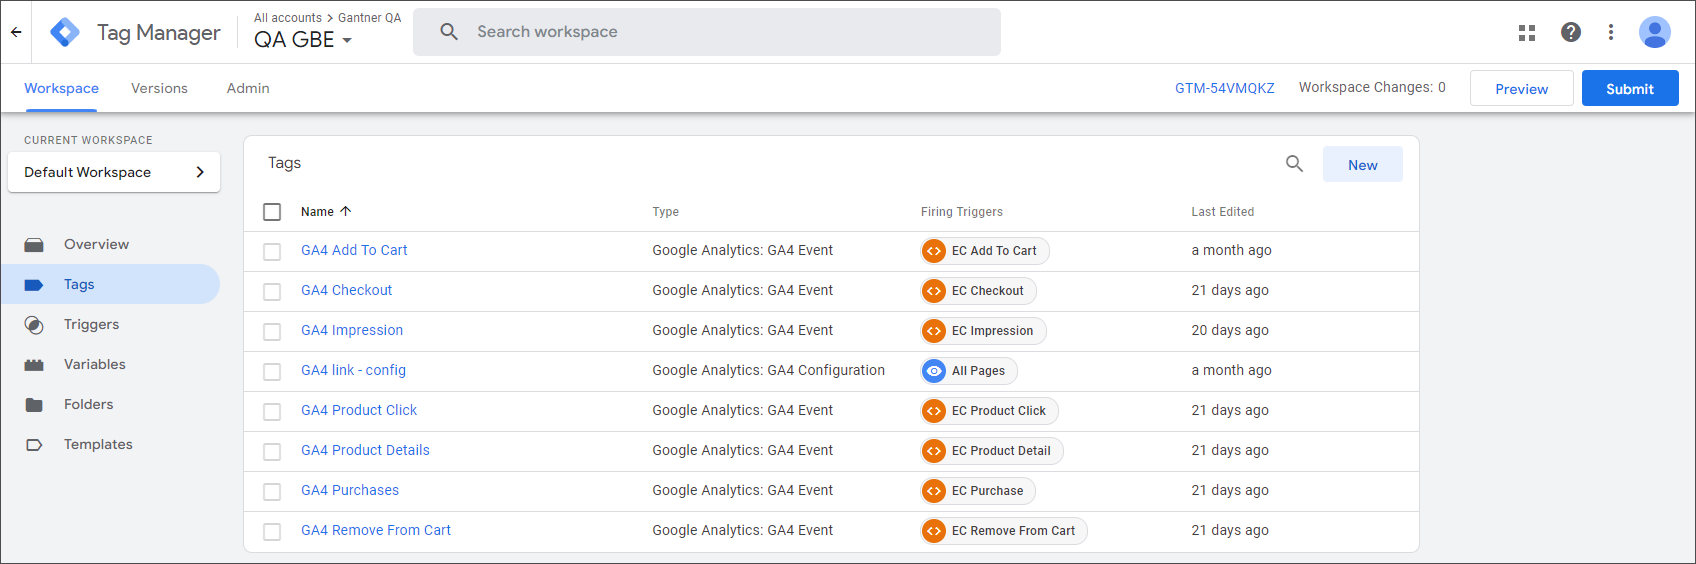
Click Save to finish the event tag configuration. The event tag is added to the tag overview.
Repeat the steps to create an event tag for each trigger as suggested in the table above.
5. Publish the tag configuration
To make your configuration/changes operational you need to create a Workspace version and publish it to the environment where you want to apply the configuration.
Creating versions will also allow you to track your Workspace changes and revert a version if needed.
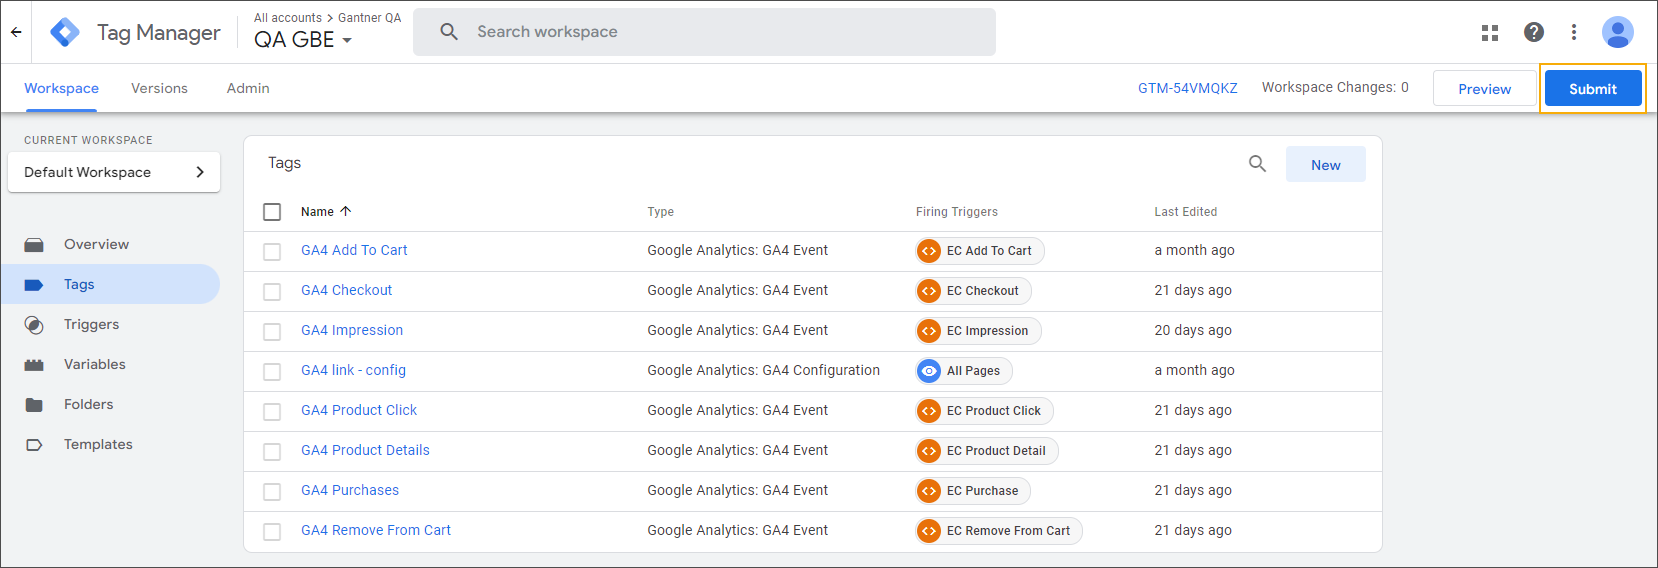
On the Workspace page click Submit in the top-right corner.
Indicate Publish and Create Version (1), add a version name and description (2), and select environment if you have multiple (3).
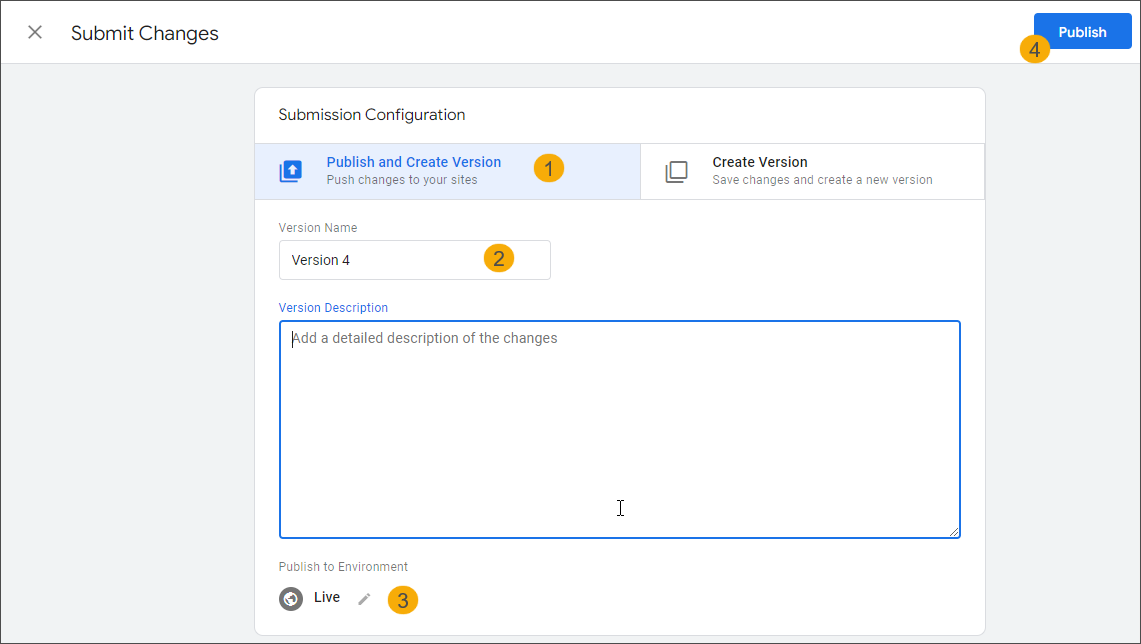
Click Publish (4).
Configure Recreatex Webshop
To allow Google Analytics to collect and process the data from Recreatex Webshop you need to activate the Analytics setting in the Webshop Manager.
In the Webshop Manager application, go to General > Analytics
Fill in the Google Tag Manager ID if you use Google Analytics 4 together with Google Tag Manager.
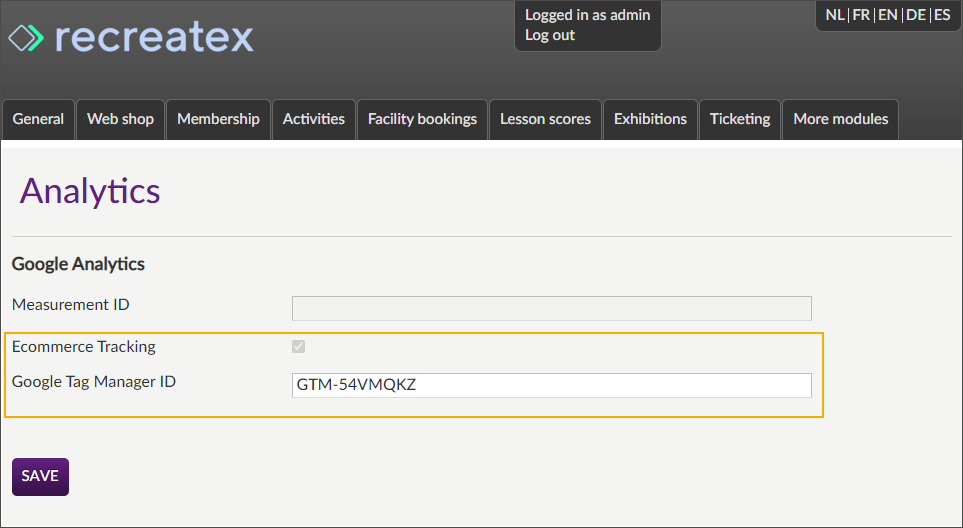
You can find the ID of the Google Tag Manager container in multiple places in your Google Tag Manager application, e.g. on the Workspace page in the header on the right.

Fill in the Measurement ID generated during the data stream creation in the Google Analytics application if you use only Google Analytics 4.
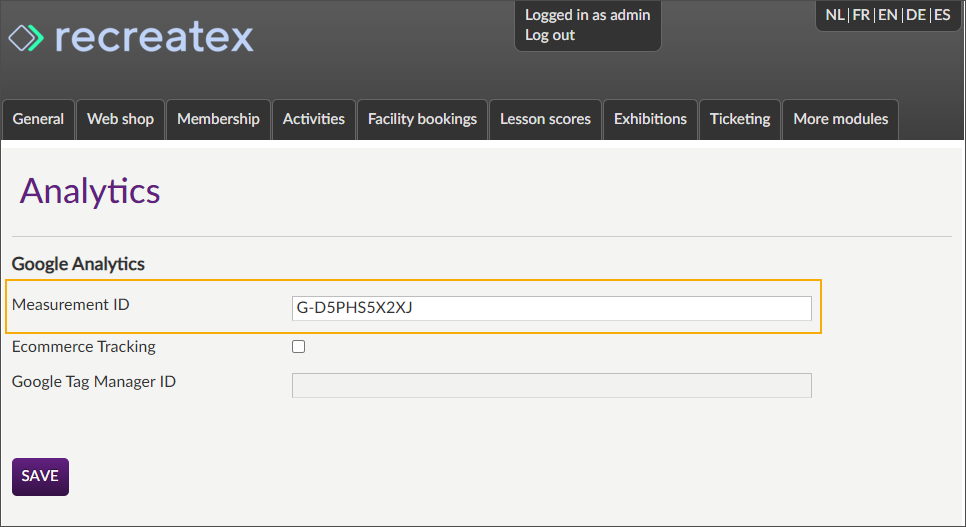
You can retrieve the Measurement ID at any moment in Google Analytics: Admin > select the related account and property > Data Streams > open the data stream and copy the Measurement ID.
Click Save to activate the setting.