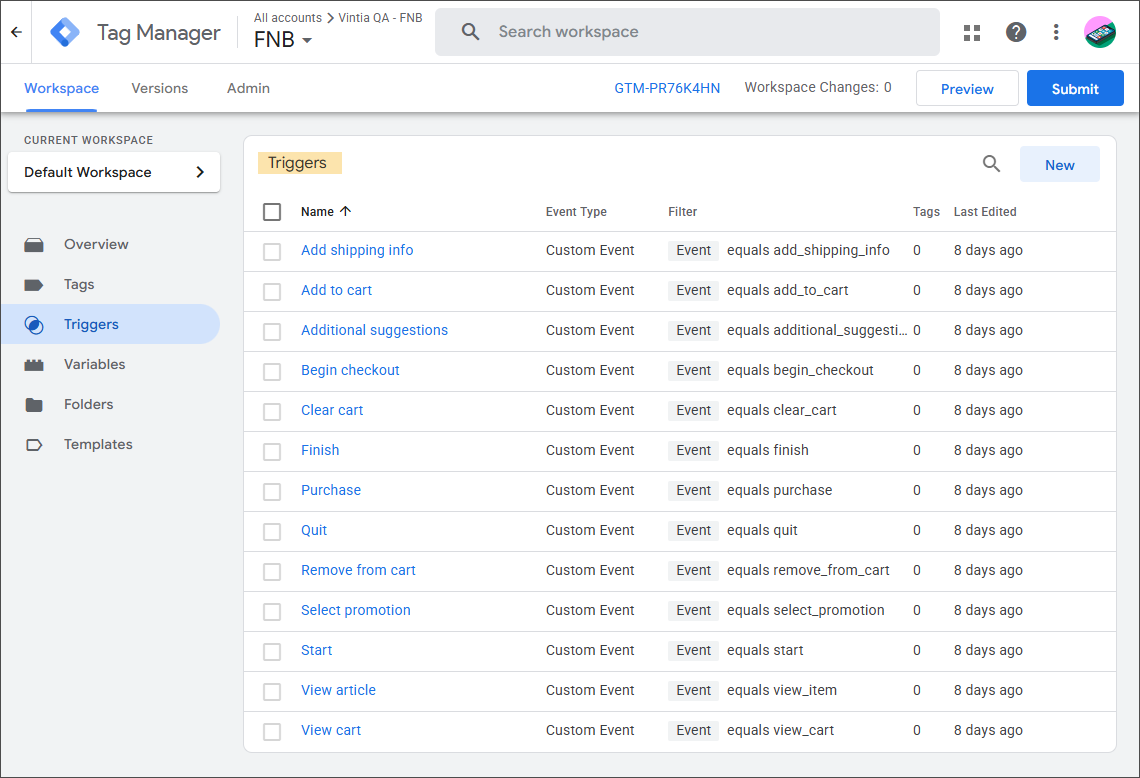
2. Create the triggers
The following table provides an overview of all available triggers you can create:
Trigger name* | Event (exact name) | Trigger fires on | Conditions |
|---|---|---|---|
Start |
| Some Custom Events | Event equals |
View article |
| Some Custom Events | Events equals |
Add to cart |
| Some Custom Events | Event equals |
Remove from cart |
| Some Custom Events | Event equals |
Clear cart |
| Some Custom Events | Event equals |
View cart |
| Some Custom Events | Event equals |
Select promotion |
| Some Custom Events | Event equals |
Add shipping info |
| Some Custom Events | Event equals |
Begin checkout |
| Some Custom Events | Event equals |
Additional suggestions |
| Some Custom Events | Event equals |
Purchase |
| Some Custom Events | Event equals |
Quit |
| Some Custom Events | Event equals |
Finish |
| Some Custom Events | Event equals |
*You can define your own trigger names.
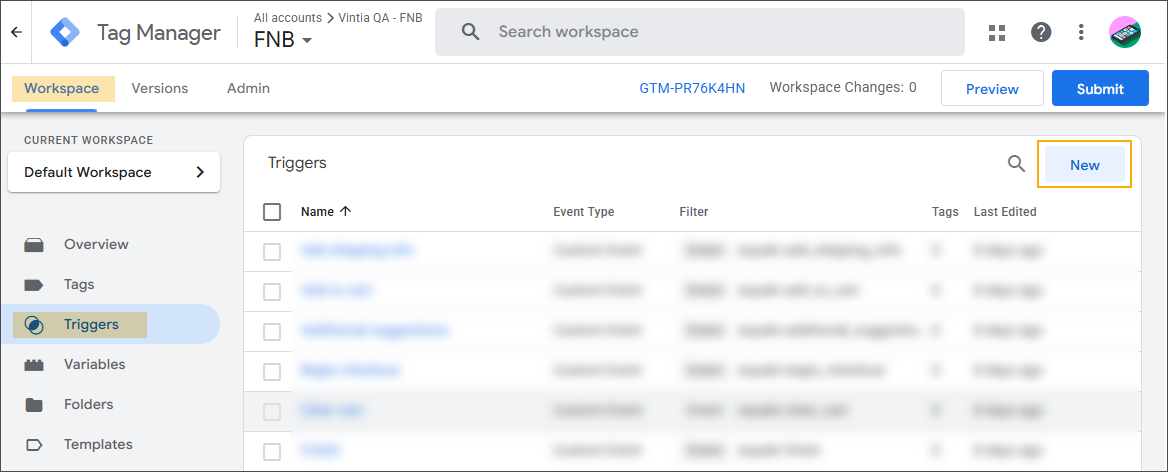
Open the relevant container. On the Workspace page, go to Triggers and click New.
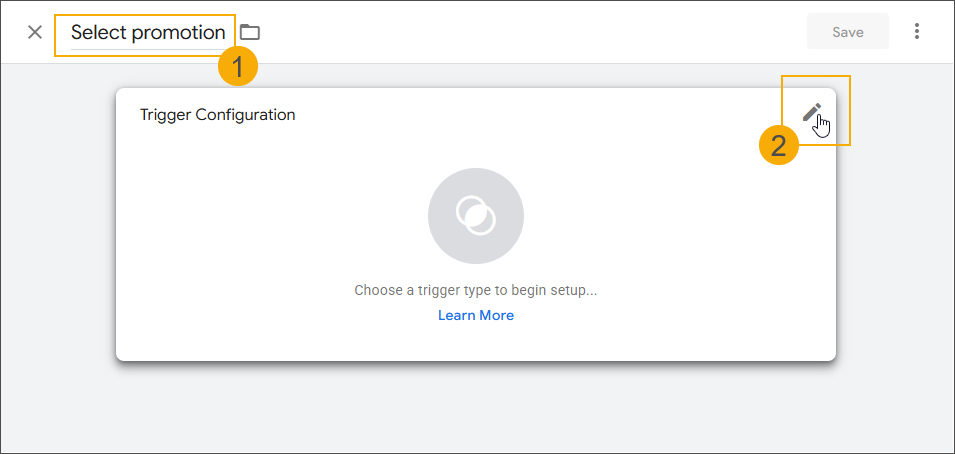
Give the trigger a name (1), e.g. "Select promotion", then edit the Trigger Configuration tile (2) to choose the trigger type.
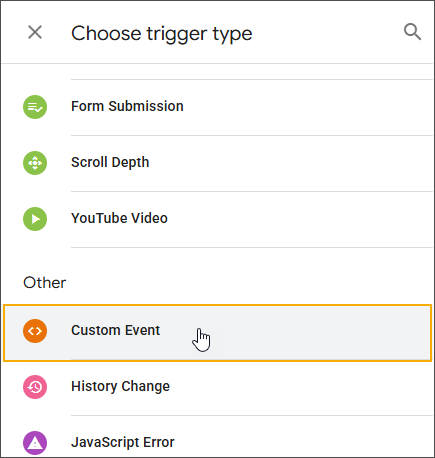
Select Custom Event from the available trigger types (section Other).
Complete the Trigger Configuration settings:
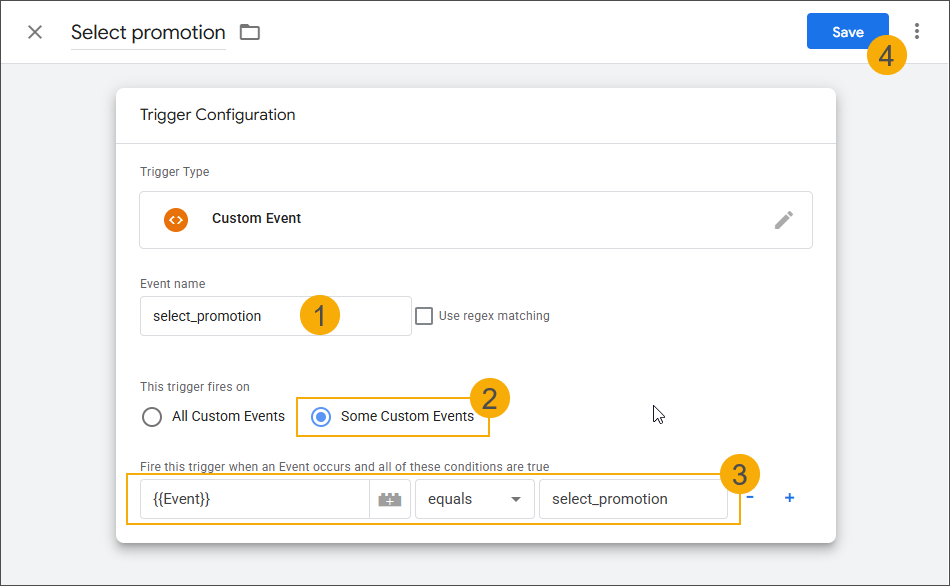
Add the exact event name (see table) (1)
Select the option Some Custom Events (2)
Specify the conditions (see table) (3)
Click Save to finish the trigger configuration. The trigger is added to the list of triggers.
Repeat the steps to create all the triggers listed in the table above.