Configure call lists
Define call list parameters
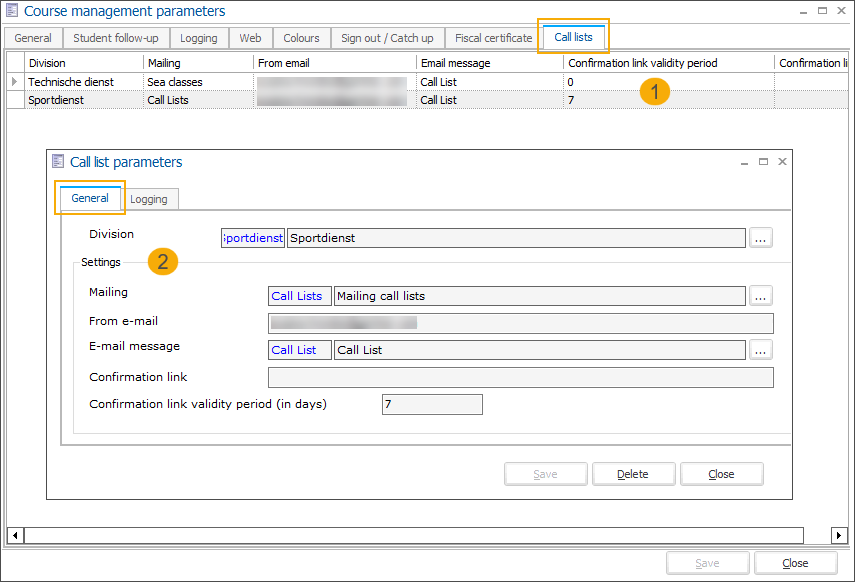
In Recreatex, go to Swimming courses > Parameters > tab Call lists to open the overview (1) and use the available framework functionality to define call list parameters per division (2).

In the tab General, specify the following parameters:
Division | Specify the division for which you want to define the call list parameters. ImportantPer division, only 1 parameter configuration is allowed. |
Mailing | Specify the mailing list to be used for sending email messages to the students. |
From e-mail | Enter the e-mail address of the sender. This e-mail also serves as a fallback in case you do not specify a separate address when creating a call list. |
E-mail message | Specify the email template that can be used to generate the automatic e-mail message. This template also serves as a fallback in case you do not configure a separate template when creating a call list. |
Confirmation link | Enter the base URL of your webshop. |
Confirmation link validity period (in days) | Specify the period after which the confirmation link should expire. This period also serves as a fallback in case you do not specify a separate period when creating a call list. |
In the tab Logging you can trace all modifications of the call list parameters, including the date/time of the adjustment, type of modification, which field has been modified, old and new value and who has performed the modification.
Create a call list
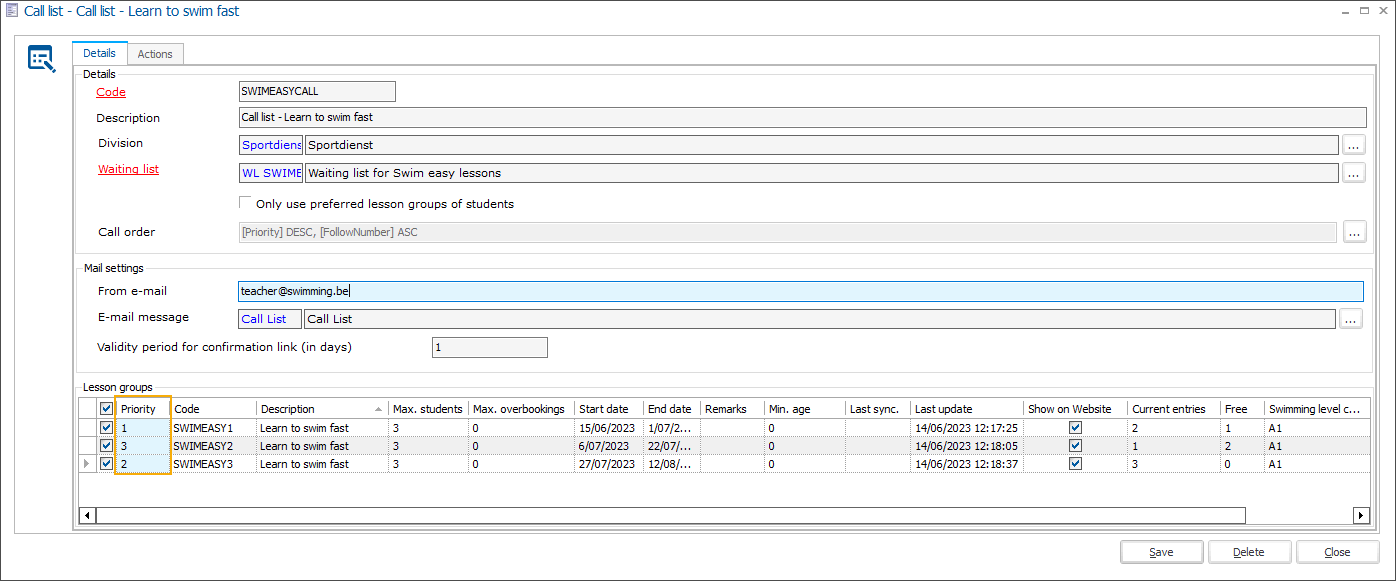
Go to Swimming courses > Settings > Call lists to open the overview of all call lists and use the available framework functionality to create a new call list.

Code | The mandatory code must be unique and preferably descriptive enough so that you can identify the call list easily. |
Description | Meaningful description of the call list. |
Division | When a division is selected, only the waiting lists for that particular division are available in the overview. |
Waiting list | Select the waiting list you want to process using this call list. Each call list is linked to 1 waiting list. Each waiting list can only be linked to 1 not-blocked call list. |
Only use preferred lesson groups of students | If selected, students will not be called if their preferred lesson group is not available. ImportantThis also means that students without preferred lesson groups will not be called. This setting is used as a default configuration for this call list and is automatically taken over in the processing screen Call waiting list students where you still have the possibility to select/deselect this option. |
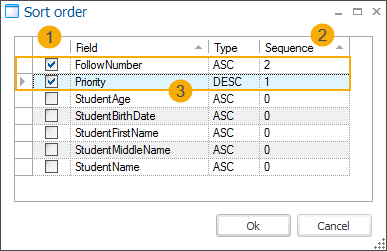
Call order | Select the criteria (1) and the order in which they should be applied (2) when processing the students from the list.  The default configuration (3) will automatically be applied to each new call list but can be changed as needed. |
From e-mail | Enter the e-mail address of the sender. If not filled in, the default e-mail will be used as configured in the call list parameters. |
E-mail message | Specify the email template that can be used to generate the automatic e-mail message. If not selected, the default template will be used as configured in the call list parameters. |
Validity period for confirmation links (in days) | Specify the period after which the confirmation link should expire. If not specified, the default period will be used as configured in the call list parameters. |
Lesson groups | Select the lesson groups for which students can be called using this call list. It is also possible to set the priority of each lesson group by manually editing the number in the column Priority. |
Blocked | Possibility to block a call list. The call list will no longer be available in the overview but can be visualized using the right-click function and selecting the option Incl. blocked. |
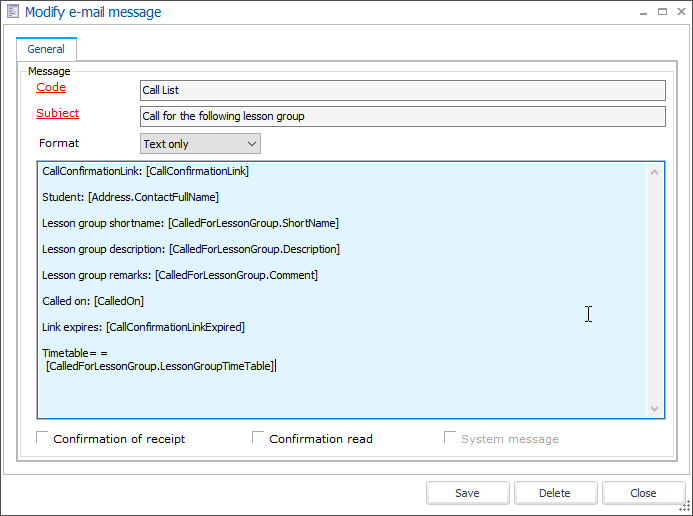
Create the email message template
To create your email message template, you can use the following fields:
|  |