Swimming lessons
Warning
The functionalities described in this chapter are only applicable if you have a license for the Course management module.
In this part the integration of the course management system in the ReCreateX POS is explained, such as registering for the waiting list, transfers, and sale and renewal of lesson memberships.
Register for the waiting list
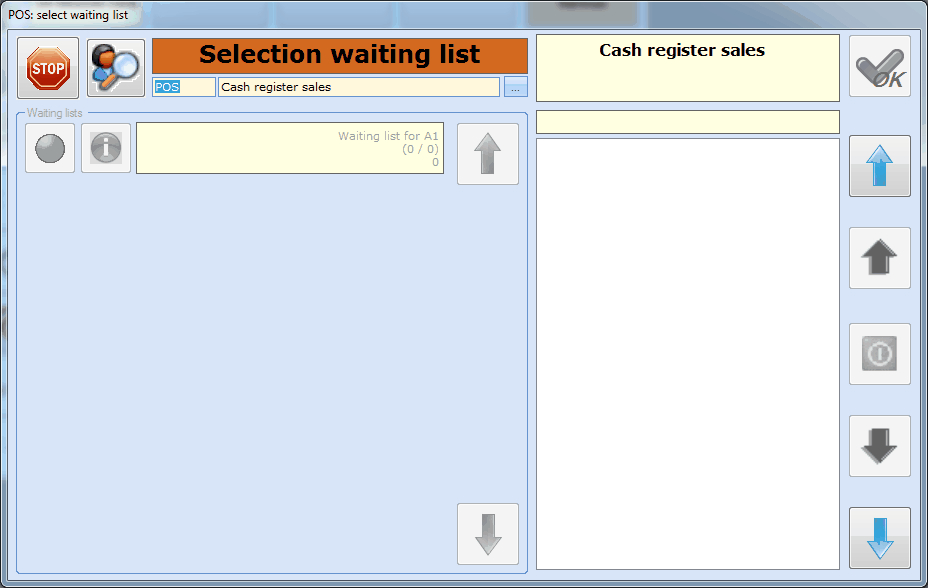
Registering a customer (student) for a waiting list can be done in the same way as selling a membership. After selecting a waiting list article, however, the window POS: select waiting list will appear in which you have to specify the customer and the desired waiting list.
 |
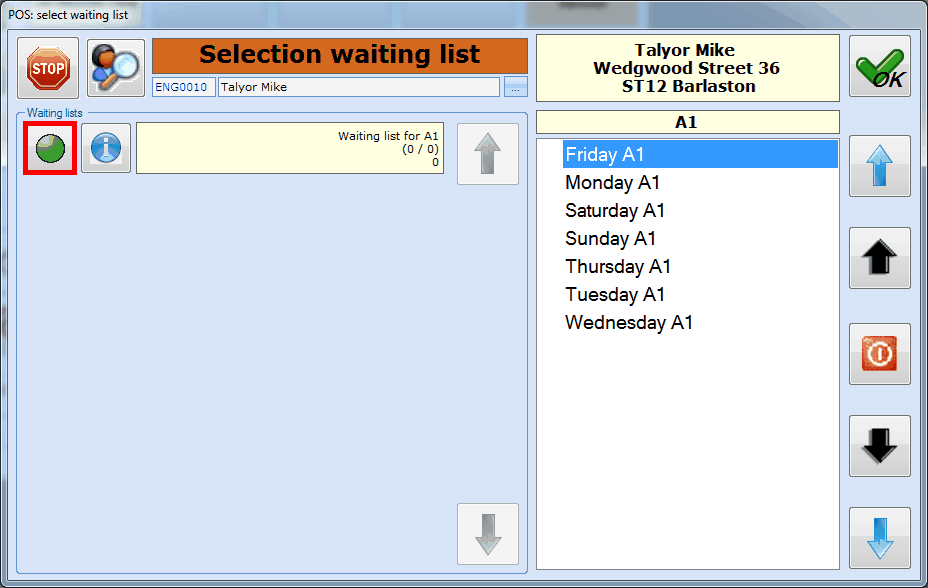
Once you have selected the desired customer, you will be able to select the desired waiting list (click on  ). Moreover, you will be able to add extra remarks and indicate possible preferences.
 |
In order to add extra remarks, you have to click on  next to the selected waiting list after which the window Remarks swimming lessons will appear.
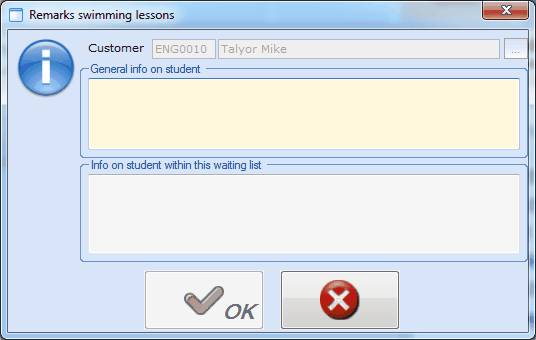 |
You can fill in two types of remarks:
General information on student: These remarks will be saved as long as the student is on the waiting list or is in a lesson group.
Info on student within this waiting list: These remarks will be saved as long as the student is on the waiting list. (For example: if the student is transferred to a lesson group, these remarks are no longer saved.)
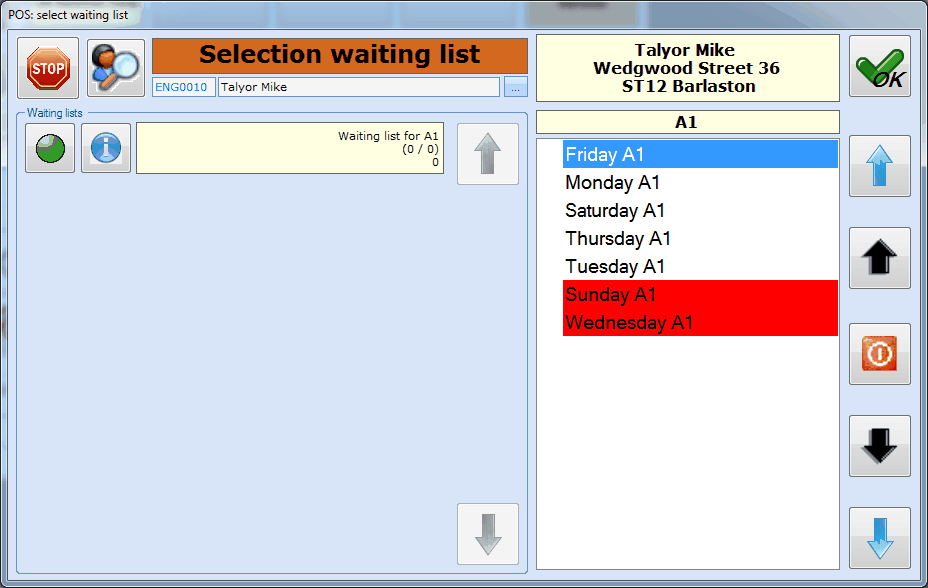
In order to select preferences when registering a student, it is sufficient to deactivate the lesson groups for which the customer does NOT want to be called up. You can do so by selecting (= clicking before the name of the lesson group) the NON-preferential lesson groups and clicking on  .
.
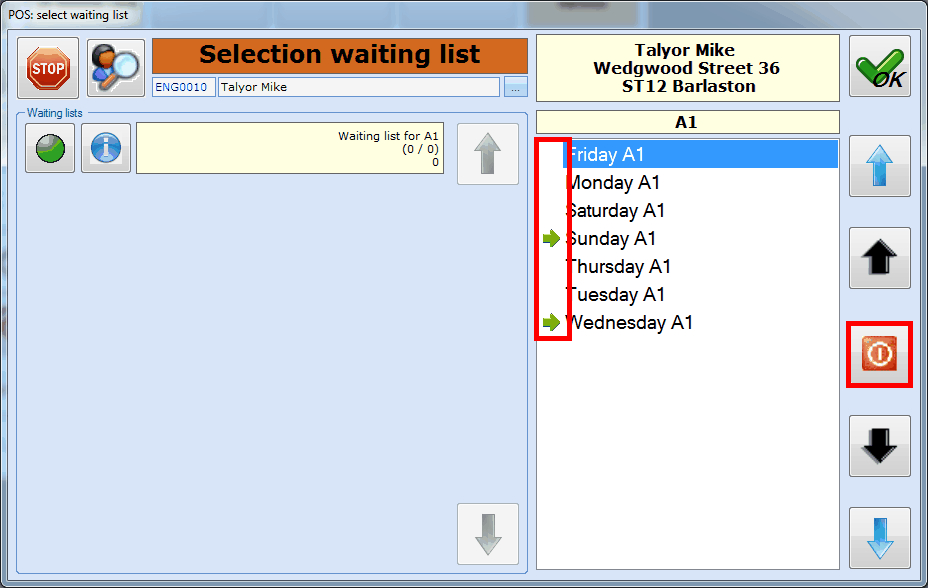 |
After deactivating the NON-preferential lesson groups, the deactivated lesson groups are placed at the bottom of the list and marked in red.
 |
In order to reactivate the deactivated lesson group(s), it is sufficient to reselect the lesson group(s) and click again on  .
.
After selecting the desired customer and the desired waiting list, filling in extra remarks and clicking on  the window POS: select waiting list is closed and the POS selection screen reappears. Here you will be able to see the customer and waiting list article in question.
 |
The sale of a waiting list article can be further processed by clicking on  in the selection screen and on
  in the payment screen.
Warning
If you have defined that a card also has to be given to the customer at registration on a waiting list, you will still have to link a card to the waiting list article.
Transfer waiting lists/lesson groups
Transferring customers/students between different lesson groups/waiting lists or between a lesson group and a waiting list has to be done in the window Transfer waiting lists/lesson groups. The transfer window can be opened by going to Course management > Processing > Transfers.
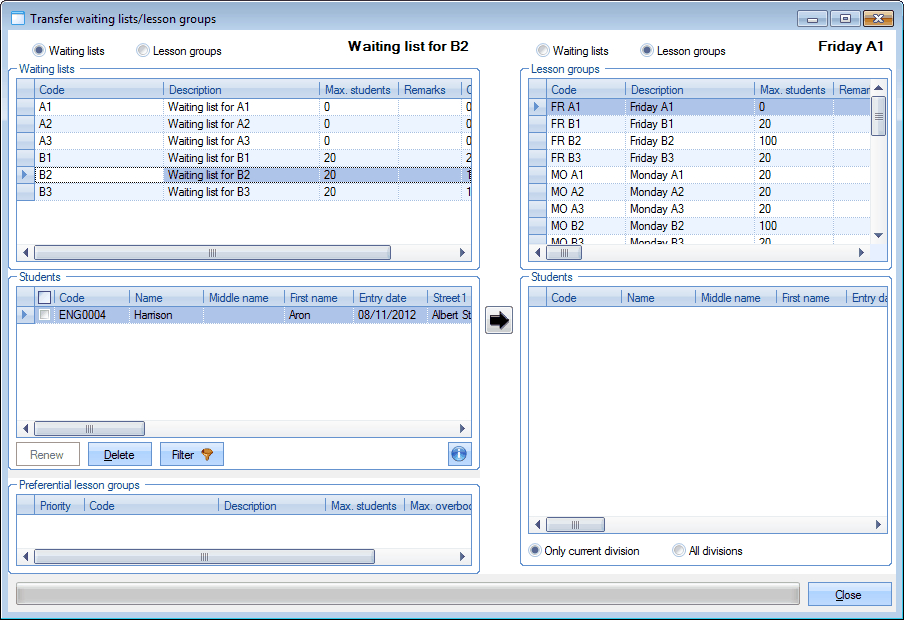 |
For more information on how to transfer students, we refer to Lesmodule - LLVthe manual 'Course management'.
Warning
If customers are called up but not immediately transferred to the called up lesson group, you can, dependent on the parameter settings, not only indicate the correct lesson group after or during the sale of the first lesson card, but also delete the customer from the waiting list. A customer is in fact NEVER automatically deleted from a waiting list when a lesson card is sold.
Sell lesson membership
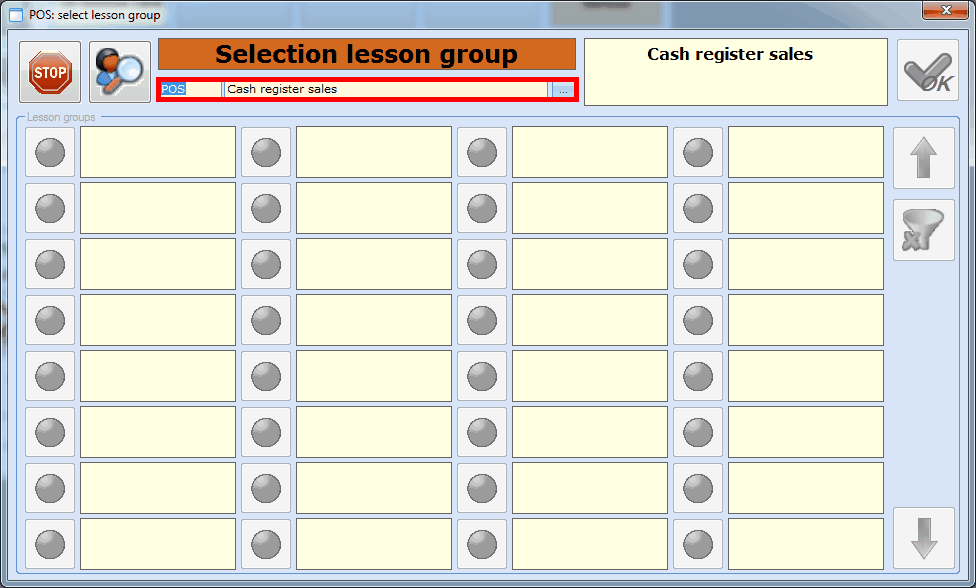
Selling a lesson membership is done in the same way as selling a regular membership. If you select a lesson group article, however, the window POS: select lesson group will appear in which you will have to specify the customer and select the desired lesson group.
 |
Warning
The window POS: select lesson group is NOT a transfer window. If the customer is already in a lesson group, you will not be able to deactivate that lesson group and indicate a new one here. This would lead to the customer being registered in two lesson groups! Transfers always have to be settled using the window Transfer waiting lists/lesson groups.
Customer is already in a lesson group
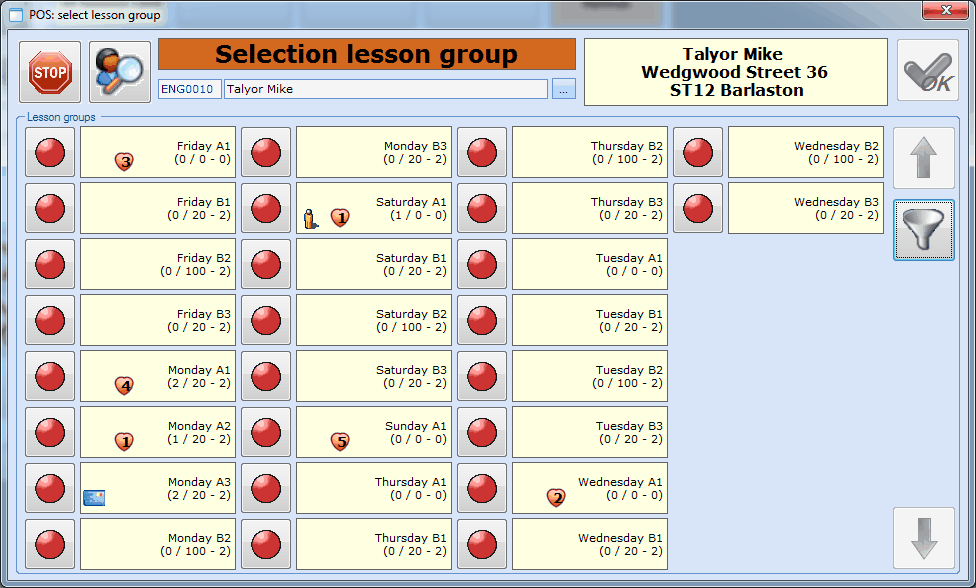
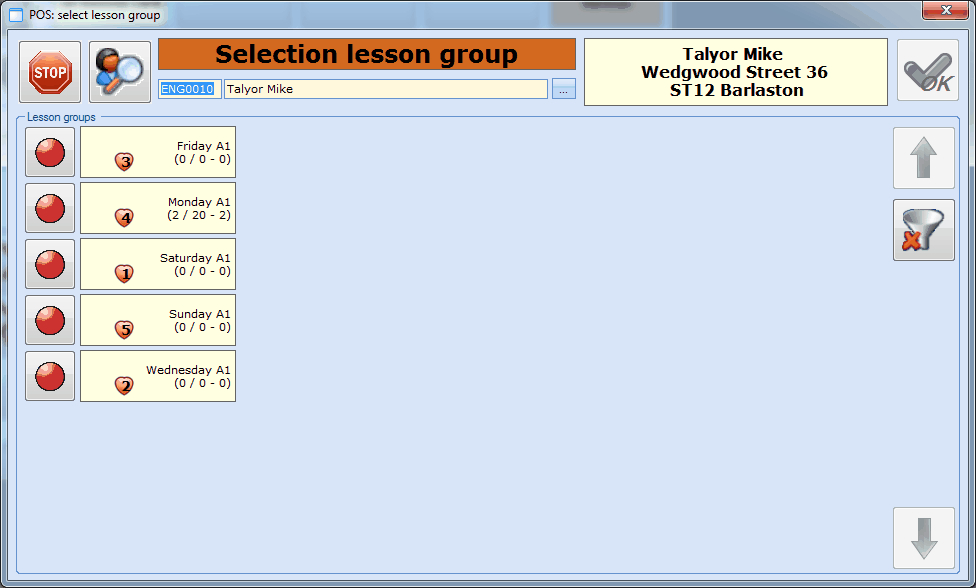
If the current customer is already in one or several lesson groups, only these lesson groups for which the customer has already registered will be visualised in the window POS: select lesson group after the desired customer has been selected.
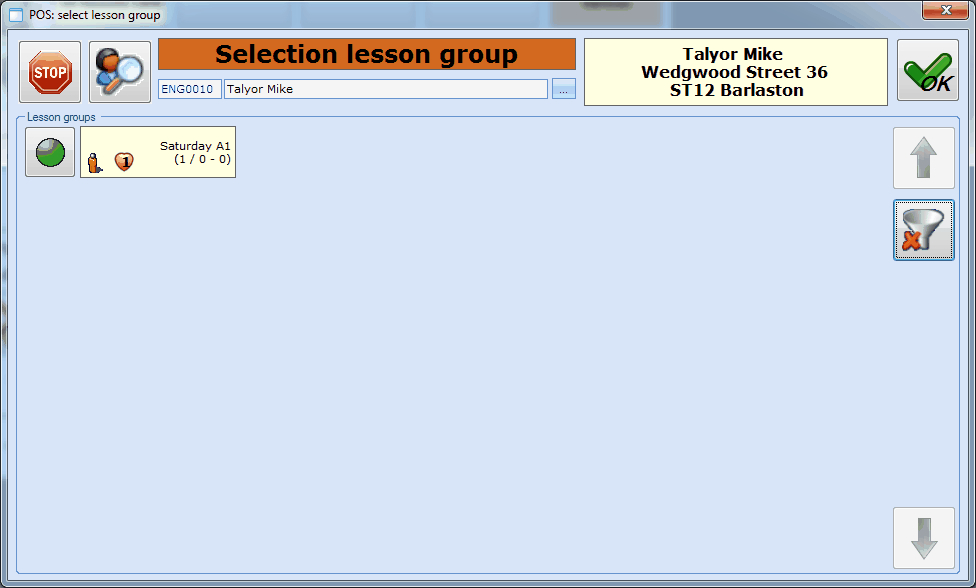 |
If the desired lesson group is not present in the list, you can delete the filter by clicking on  after which all available lesson groups will be shown (in function of the selected lesson group article).
 |
If required, you can reactivate the filter by clicking on  .
.
You will remark that extra images can be depicted next to the lesson groups:
 | Customer is already in the lesson group, but NO lesson membership/card has (yet) been bought. |
 | Customer is already in the lesson group and has already bought a lesson membership/card for this lesson group. |
After the selection of the desired customer and the desired lesson group and clicking on  the window POS: select lesson group is closed and the POS selection screen reappears. Here you will be able to see the customer and lesson group article in question.
 |
The sale of a lesson group article can be further processed by clicking on  in the selection screen and, after finishing the financial part in the payment screen, linking a card to the sold lesson group article. For that purpose, the window POS: link card to membership will appear after clicking on
  .
.
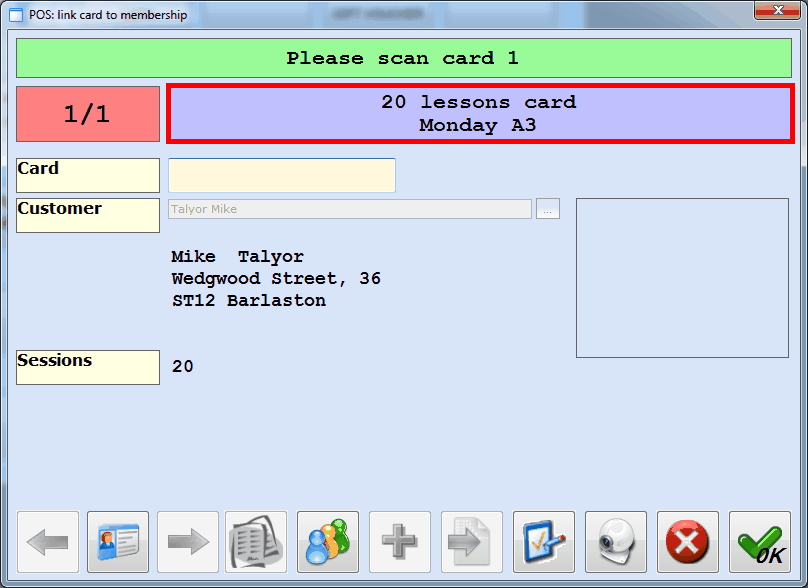 |
In this window you can see the selected lesson group under the lesson group article and after scanning the desired card you can click on  after which the sale will be registered, the lesson membership created and a receipt printed.
Customer is NOT yet in a lesson group
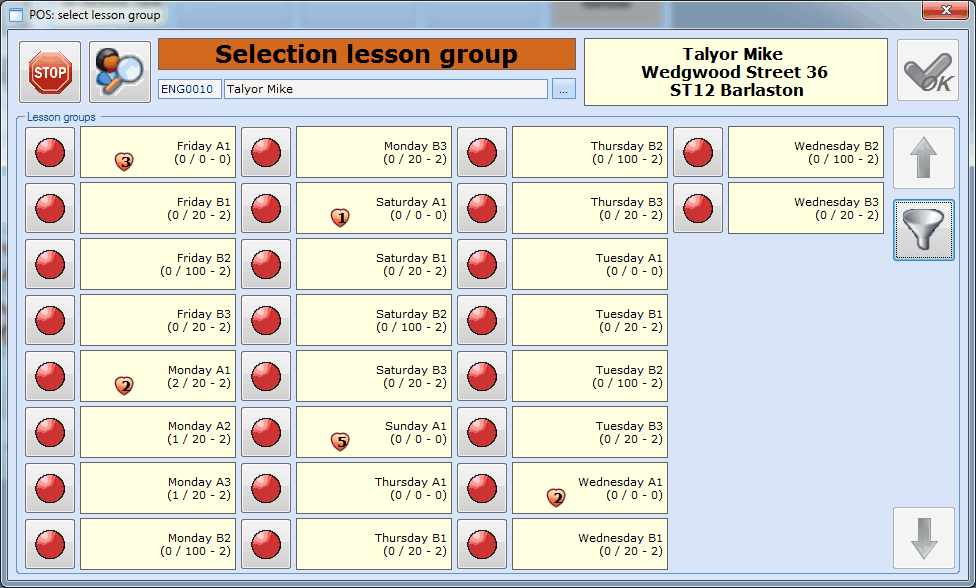
If the current customer is not yet in one or several lesson groups, all lesson groups will be listed in the window POS: select lesson group after the selection of the desired customer. If the customer is still registered on a waiting list and had also indicated preferential lesson groups during the registration on the waiting list, you will only be able to choose from the preferential lesson groups. Moreover, it is indicated which was the customer's first, second, third, ... preference.( ).
).
 |
Warning
If it has been defined in the course management parameters that the lesson group screen can never be edited, you will only see the default lesson group.
If the desired lesson group is not present in the list, you can delete the filter by clicking on  after which all available lesson groups will appear (in function of the selected lesson group article).
 |
If required, you can reactivate the filter by clicking on  .
.
If the customer is still on a waiting list, you will be able – after the selection of one of the preferential lesson groups and dependent on the parameter settings – to immediately indicate if the customer has to be deleted from on or several waiting lists. You can delete the customer from the selected waiting list by clicking on  and delete him from ALL waiting list by clicking on
  .
.
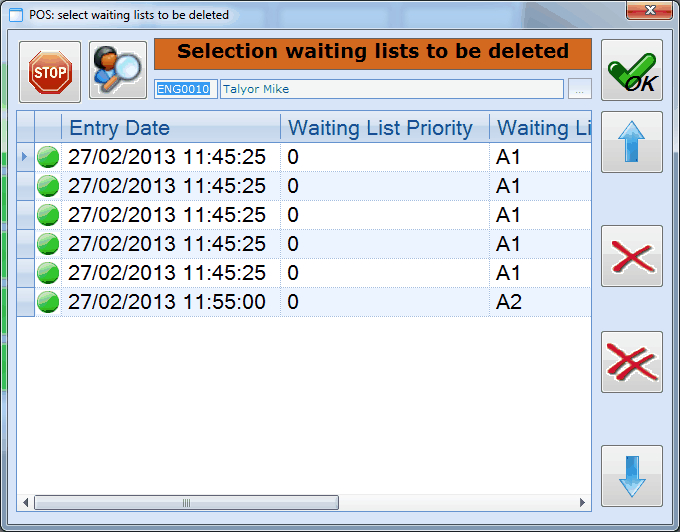 |
Warning
If it has been defined in the course management parameters that the lesson group screen can never be edited, the window above will not appear and it will thus not be possible to delete students from waiting lists in the POS module.
After selecting the desired customer and the desired lesson group and clicking on  the window POS: select lesson group will be closed and the POS selection screen will reappear. Here you will be able to see the customer and lesson group article in question.
 |
The sale of a lesson group article can be further processed by clicking on  in the selection screen. After finishing the financial part in the payment screen, you still have to link a card to the sold lesson group article. For that purpose, the window POS: link card to membership will appear after clicking on
  .
.
 |
In this window you can see the selected lesson group under the lesson group article and after scanning the desired card you can click on  after which the sale will be registered, the lesson membership created and a receipt printed.
Register for full lesson group
It is normally not possible to register (sell a membership) for a lesson group that is full. In such cases, you will not be able to select the lesson group in question (grey) in the overview of lesson groups.
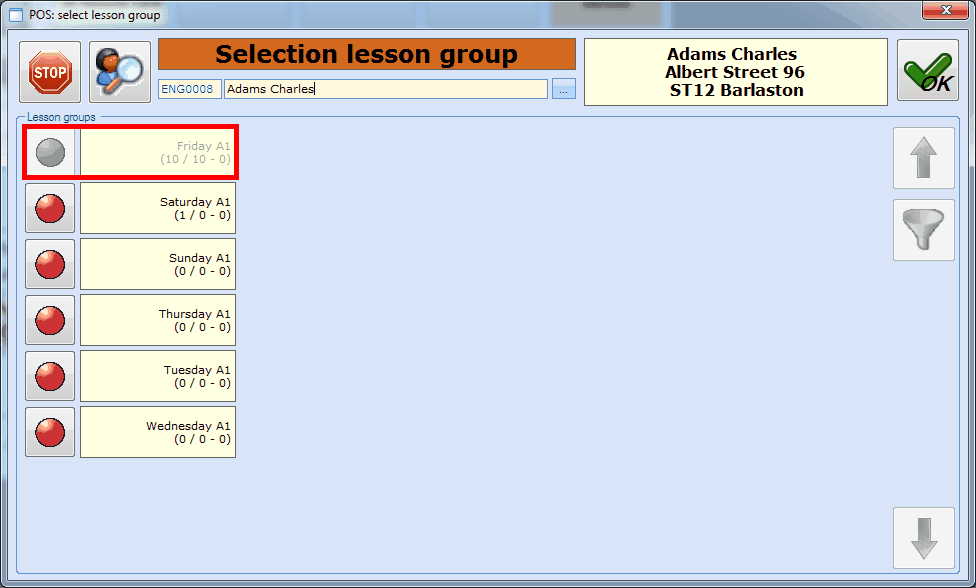 |
If, however, a waiting list article is linked to the lesson group, you will be able to select the full lesson group and to register immediately for a waiting list.
In this case, the following message will appear if you hit the full lesson group:
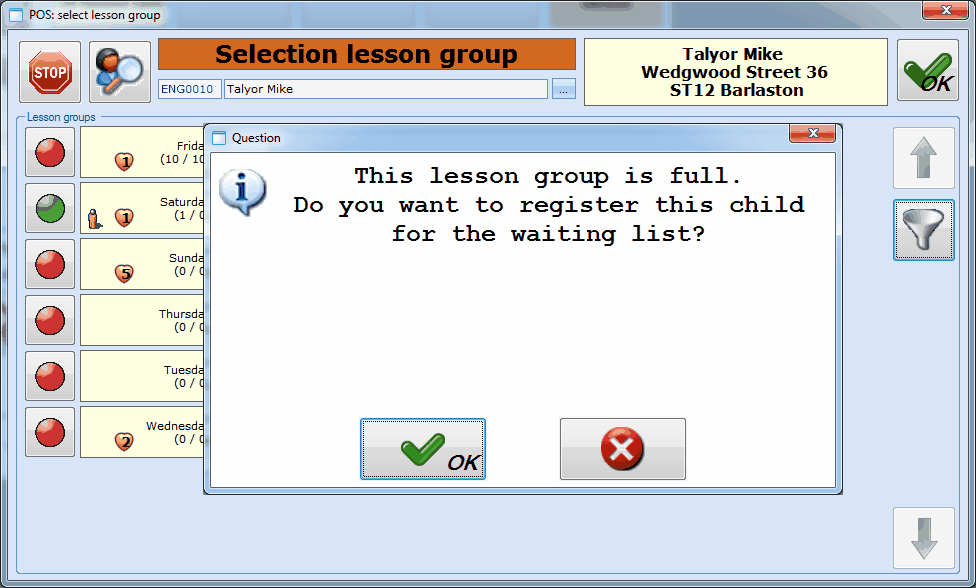 |
After confirmation, the window POS: select waiting list will appear, in which you can select the desired waiting list(see paragraph 'Register for the waiting list').
Renew lesson membership
Renewing a lesson membership can be done in two different ways:
By scanning/searching lesson membership
If you scan a card and if only one valid lesson membership is present on that card, the window POS: membership info will appear allowing you to renew the current membership by clicking on  .
.
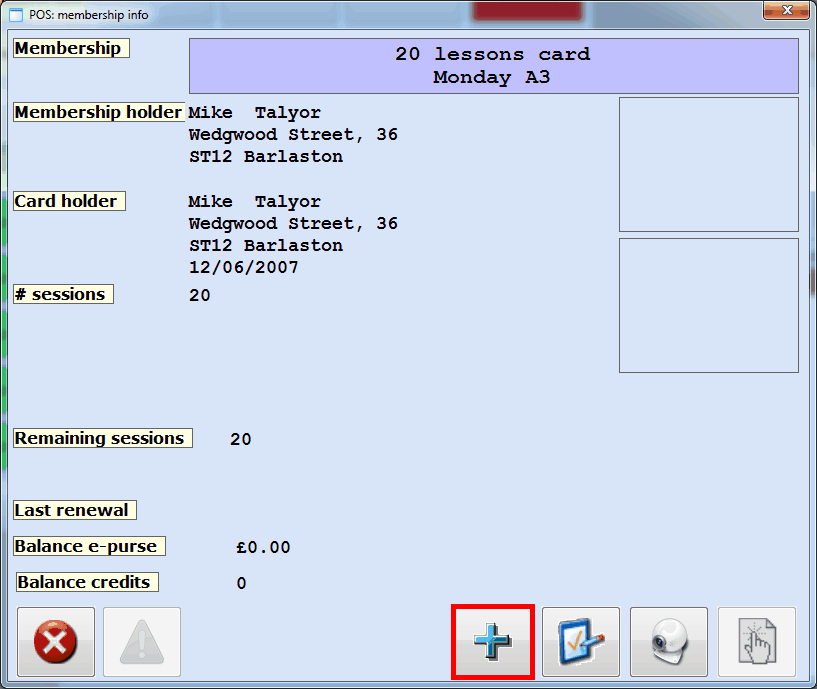 |
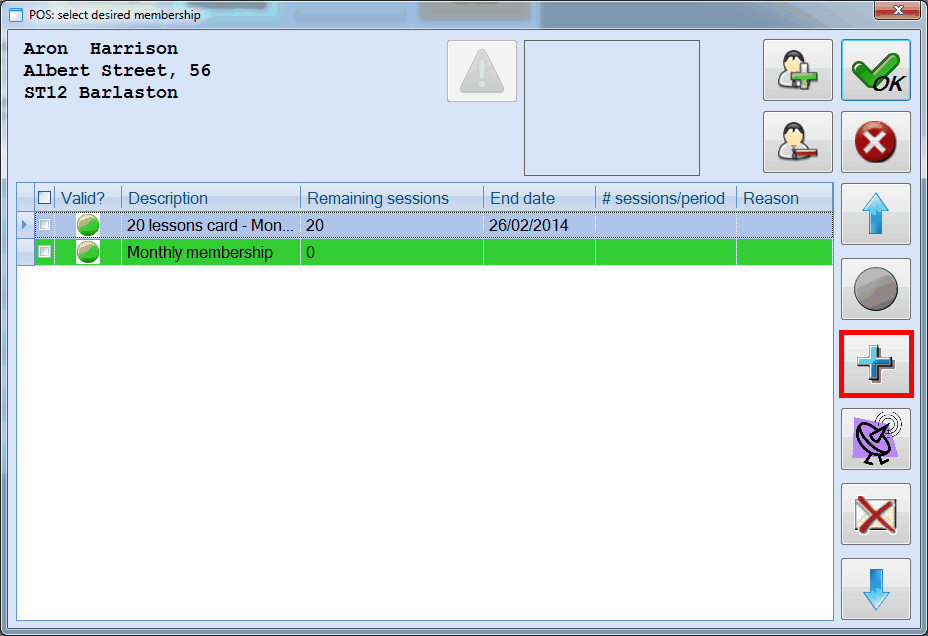
If you, however, scan a card with several (course) membership articles or invalid/expired (course) membership articles, the window POS: select desired membership will appear in which you are also able to renew the selected (ticked off) membership by clicking on  . It is also possible to tick off several membership articles and to renew them in one go.
 |
Note
In order to visualise ALL or only the valid (course) membership articles you have to click respectively on  or
or  .
.
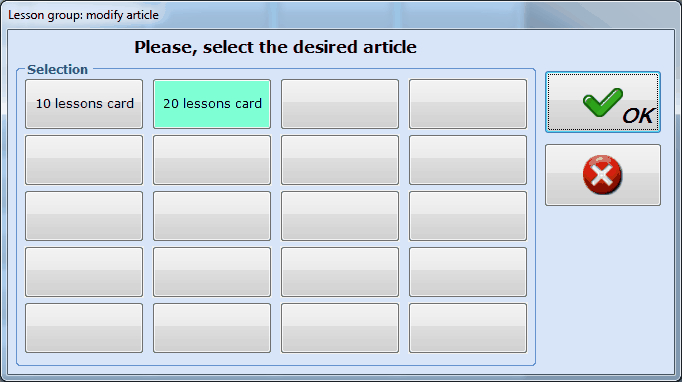
If you have clicked on  you will be able to indicate with which course membership article you want to renew the selected membership. The same course membership article as the membership article to be renewed will be selected by default, but it is also possible to renew the selected membership article with another course membership.
 |
Warning
The window Lesson group: modify article only shows those course membership articles that are linked to the lesson group of the course membership article to be renewed. (see Articlesmanual 'General - Articles')
After selecting the desired course membership article, the desired new course membership and clicking on  the window POS: select lesson group will be closed and the POS selection screen will reappear. Here you will be able to see the customer and lesson group article in question.
 |
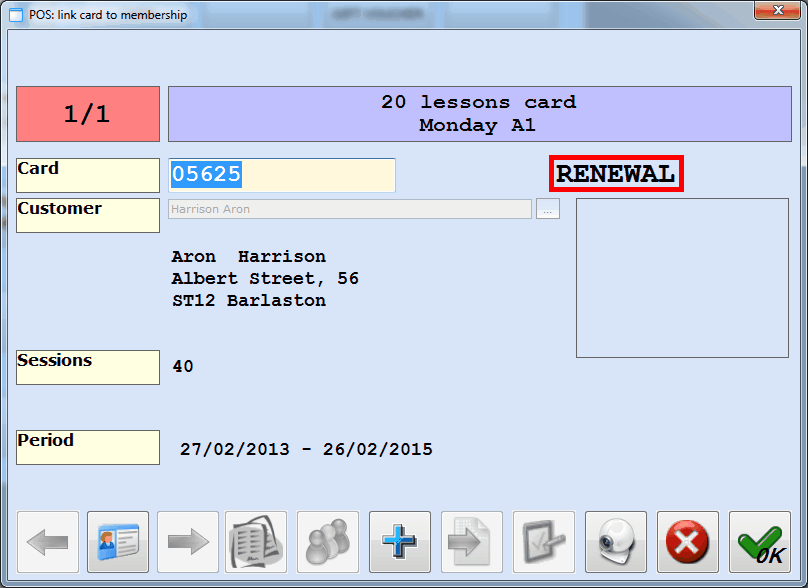
Further processing of a renewal can be done in the same way as the sale of a new membership. The extra mention RENEWAL will appear as you can see in the image below and if you click on  the sale will be registered, the course membership renewed and a receipt printed.
 |
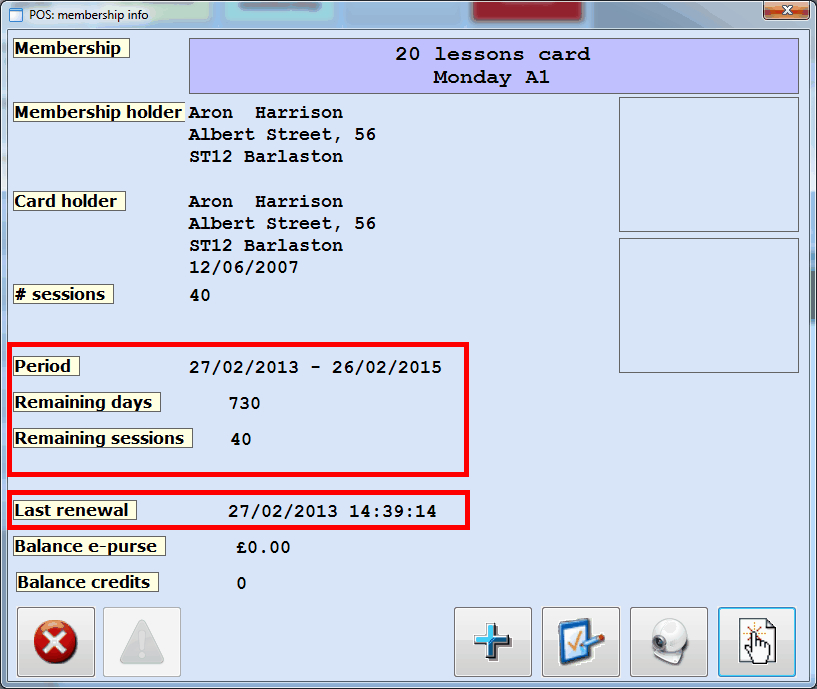
If the renewal has been confirmed, the course membership can be consulted again and you will notice that the desired course membership has been correctly renewed.
 |
Note
The Number of sessions that is visualised is the total number of sessions/turns that has been sold to the customer for the current membership. The Remaining sessions indicate the number of sessions/turns that effectively remain on the current membership.
Increasing the number of remaining sessions and/or extending the period always depends on the parameter settings.
By selling lesson membership
If you sell a course membership and select a lesson group with the symbol  you indicate in fact that you want to renew the course membership linked to the selected lesson group.
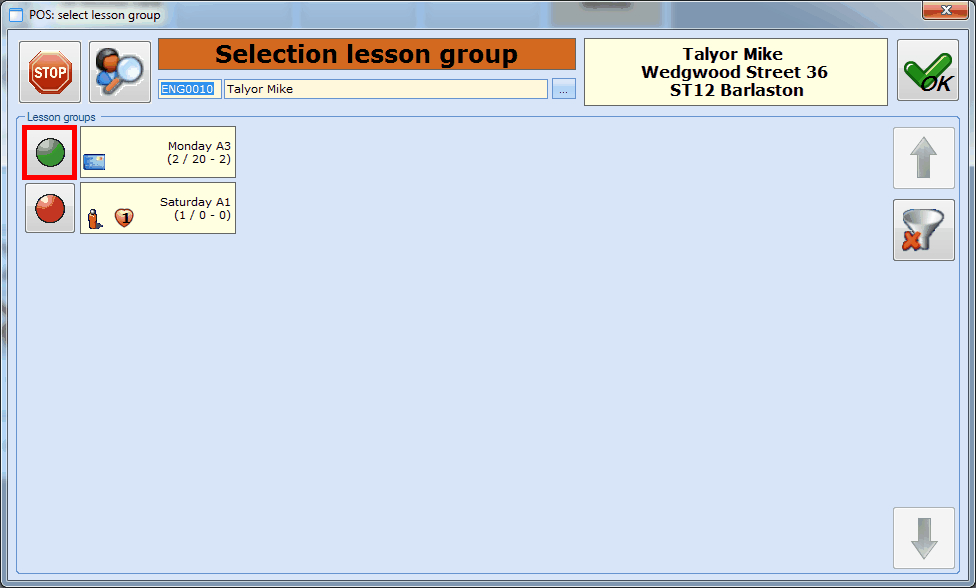 |
After the selection of the desired course membership and the desired new course membership and clicking on  the window POS: select lesson group will be closed and the POS selection screen will reappear. Here you will be able to see the customer and lesson group article in question.
 |
Note
You can also process several lesson cards in one sale. For example: a mother has two children and wants a lesson card for both children. You can do so by clicking 2x on a lesson card and by indicating per lesson card who is the customer and in which lesson group the customer has to be registered.
If you finish the sale of a lesson card and scan a card that has already been linked to the same sales customer and the same course membership, the window below will appear.
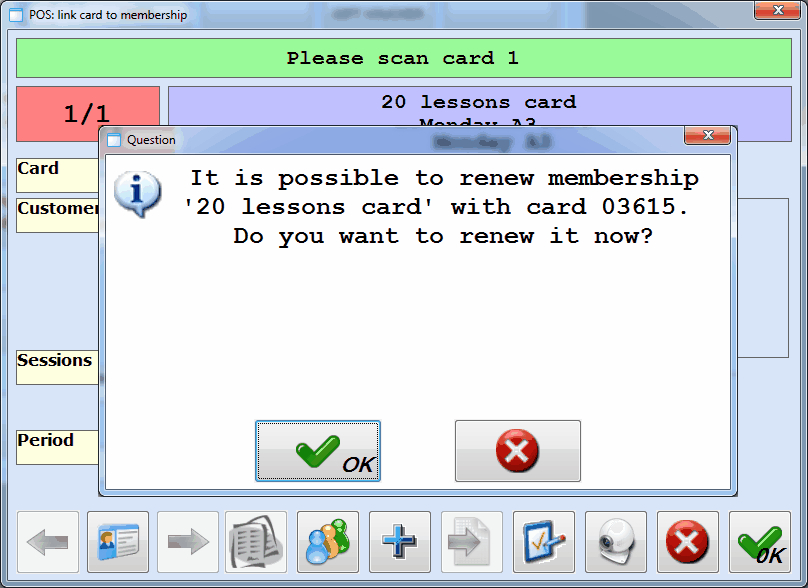 |
If you answer  on the question above, the extra mention 'renewal' will appear as you can see in the example below and after clicking on
  the sale will be registered, the membership renewed and a receipt printed.
 |
If you have confirmed the renewal, the course membership can be consulted again and you will notice that the desired course membership has been correctly renewed.
 |
Warning
If a lesson card is renewed the lesson group of the lesson card that is renewed is ALWAYS respected!
For example: you sell a lesson card and select the lesson group Tuesday and you eventually renew the lesson card of the lesson group Monday; in this case the new card will still be linked to the lesson group Monday, because the sale of a lesson card has got NOTHING to do with moving the customers from one group to another. In such cases you have to put the customer in the correct lesson group before or after the sale using the window Transfer waiting lists/lesson groups.