Sell combi exhibition tickets on the Webshop
Next to Recreatex backoffice and POS, combi exhibition tickets can now also be sold on the Webshop.
To set up this functionality correctly, make sure the following configuration has been completed:
Backoffice configuration
Make sure the exhibitions included in the combi exhibition are available on the Webshop: Modify exhibition screen > tab Web > setting Show on Website.
Create and configure your combi exhibitions and the related tickets in Recreatex backoffice. See Combi tickets for multiple exhibition visits for detailed steps.
Additionally, select a visit confirmation template under the tab Web in the Modify combi exhibition screen.

Webshop configuration
To make the combi exhibitions available for Webshop customers enable the following settings in the Webshop Manager application, under Exhibitions > Settings:
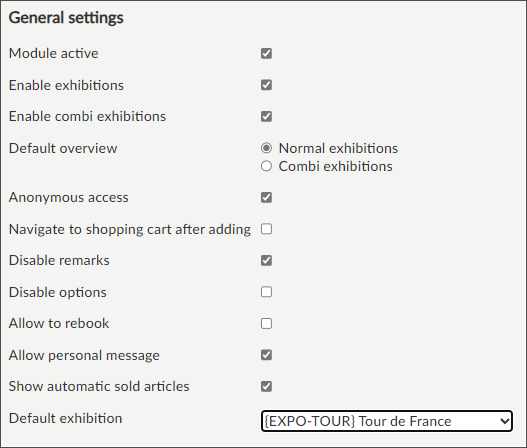
Enable combi exhibitions | Combi exhibitions will become available in a separate section in the module Exhibitions and in My Exhibitions (History and overviews). |
Default overview | If you display the combi exhibitions next to your regular exhibitions, you can choose which overview should be opened by default when a customer enters the Exhibitions module.
|
Combi tickets ordering flow
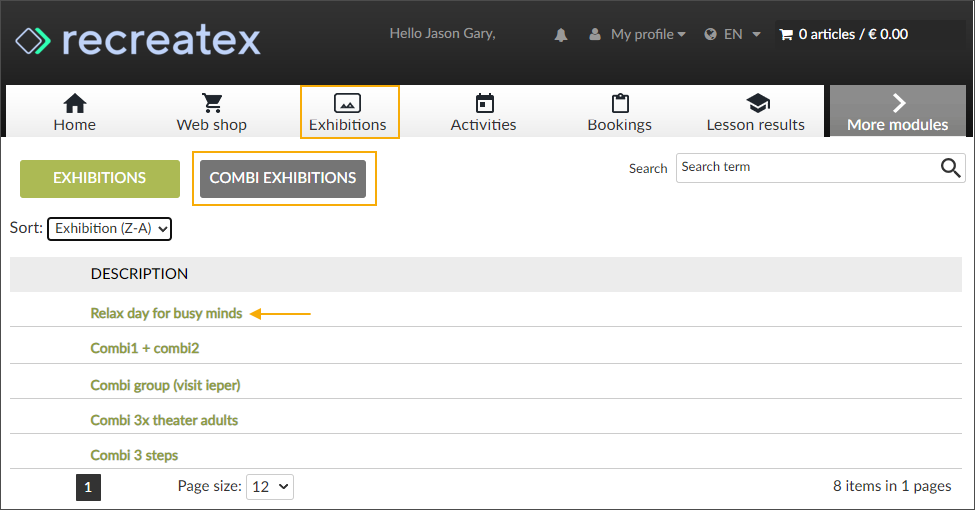
In the module Exhibitions, go to Combi exhibitions and select the desired combi exhibition. Our example is a combi exhibition consisting of 3 parts.
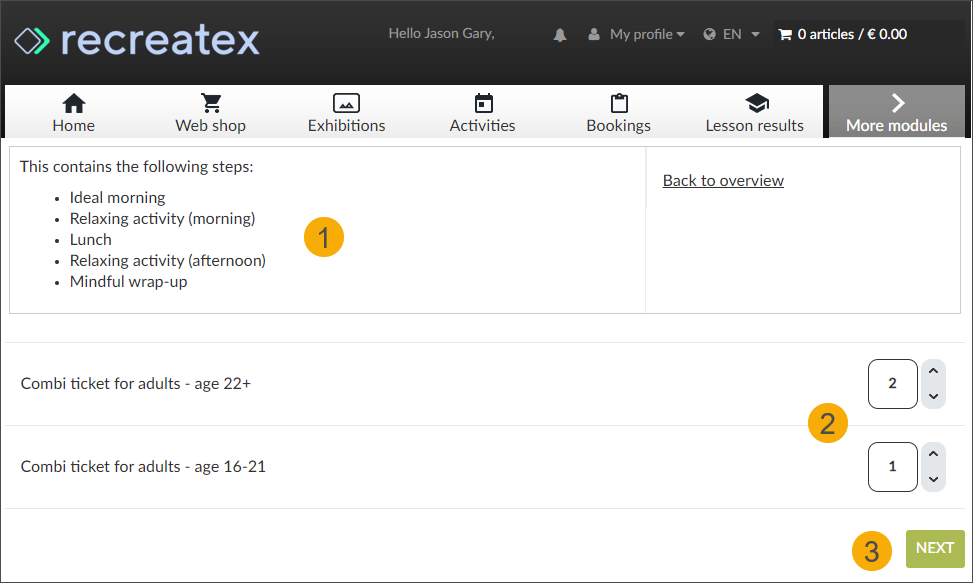
On the ticket selection screen, you can see the overview of all the steps included in this combi exhibition (1). Select the type and number of tickets (2) and click Next (3).
Note
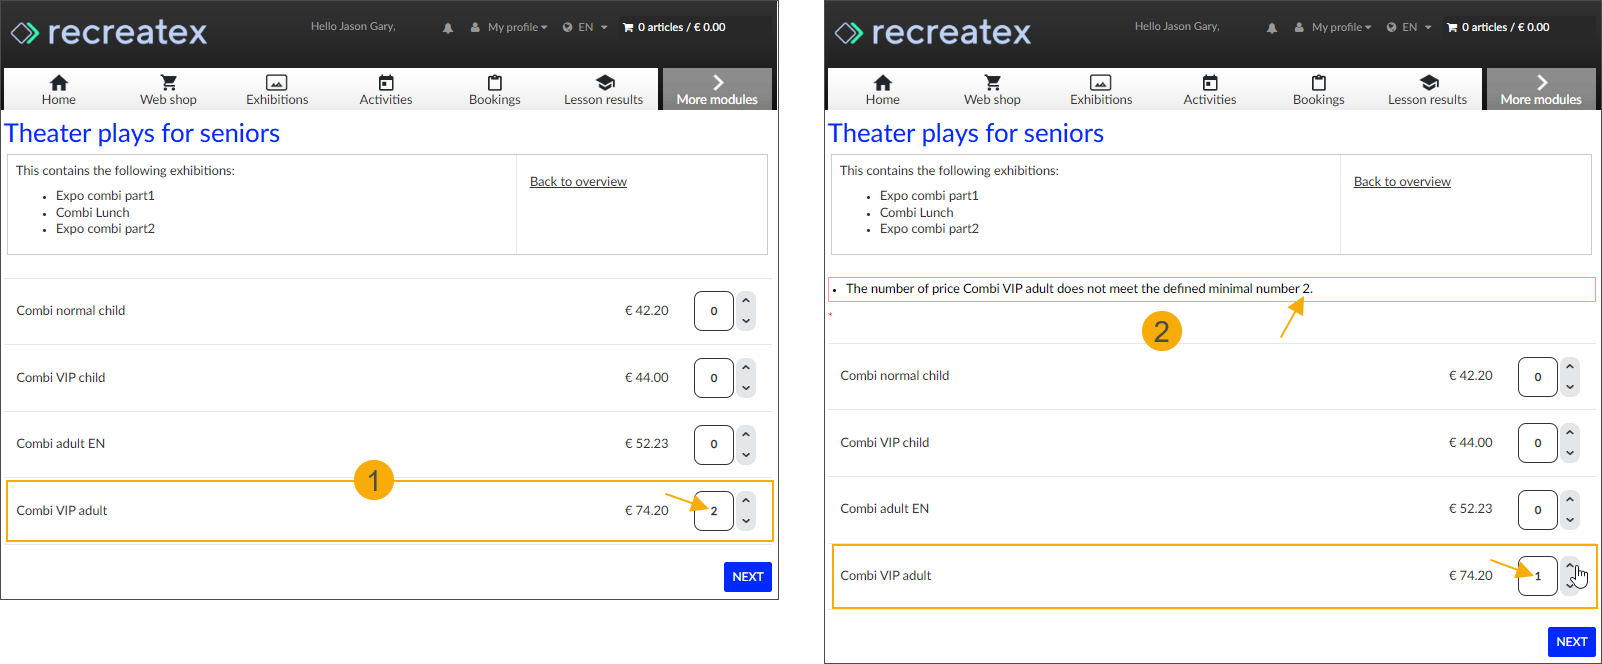
If you have configured a minimum number of tickets that must be purchased, defined by the setting Min. number of sales (Combi exhibition ticket > tab General) for any of the ticket types, the behaviour on the Webshop will further depend on the setting Mandatory to buy at least the minimum quantity (web):
If checked: The minimum amount of tickets to purchase is mandatory, meaning that the minimum number of tickets is preselected and cannot be reduced.
The minimum number of tickets of this type will thus automatically be included in each ticket purchase for this combi exhibition.
If unchecked: The minimum amount of tickets to purchase is mandatory on the Webshop if a customer chooses to purchase tickets of this type.
The number of tickets can be selected but if lower than the required number, a blocking message is displayed.
You will be guided through the steps of the combi exhibition one by one (1). Select 1 exhibition from the list of options (per step) (2).
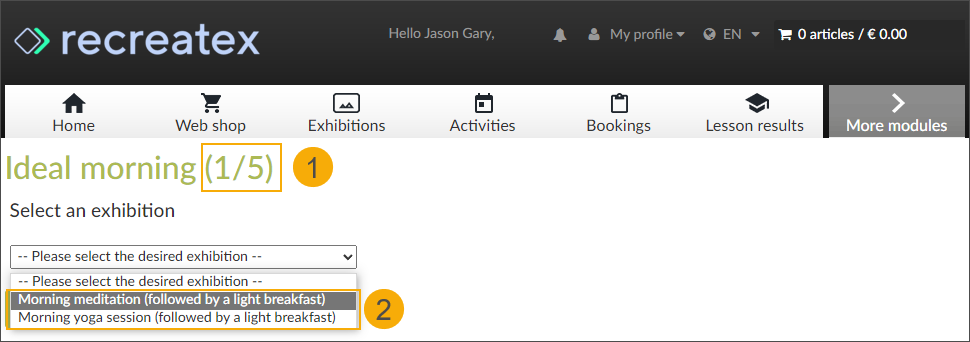
The next selection screen will open automatically. Pick the date (3) and an available timeslot (4). If optional articles (5) are configured for this exhibition, you can select them here as well.
Click Next (6), to continue to the next step.
Click Back (7), to return 1 step back. If you want to adjust the number of tickets, depending on how far you are in the ordering flow, you may need to click the button several times to return to the ticket selection screen.
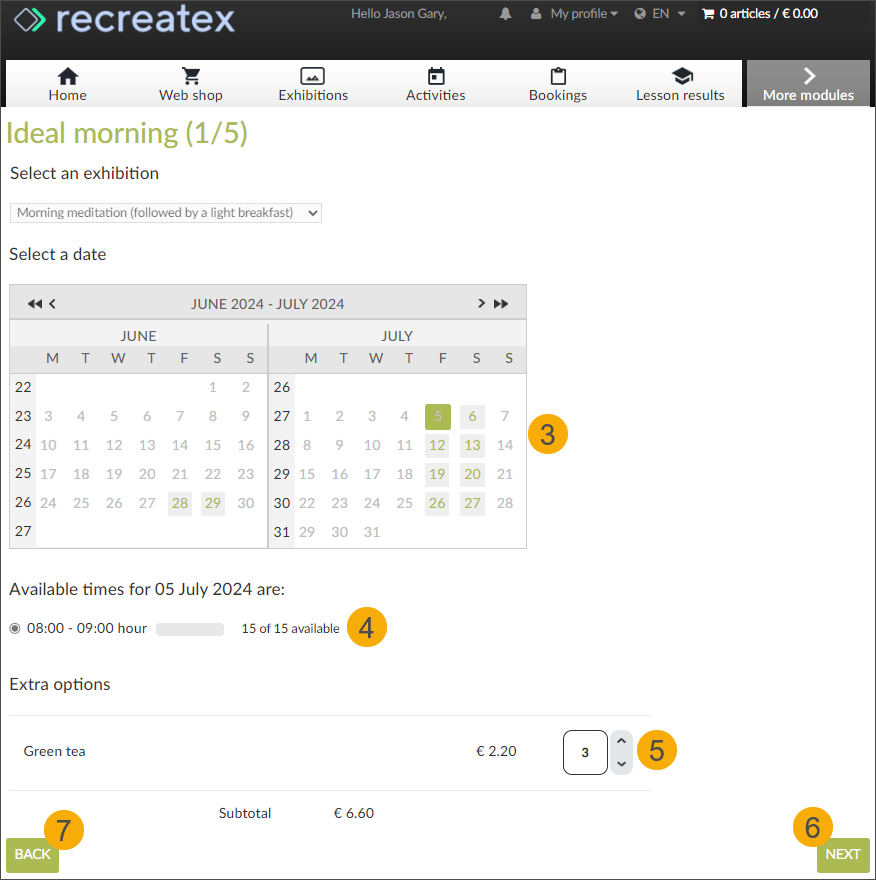
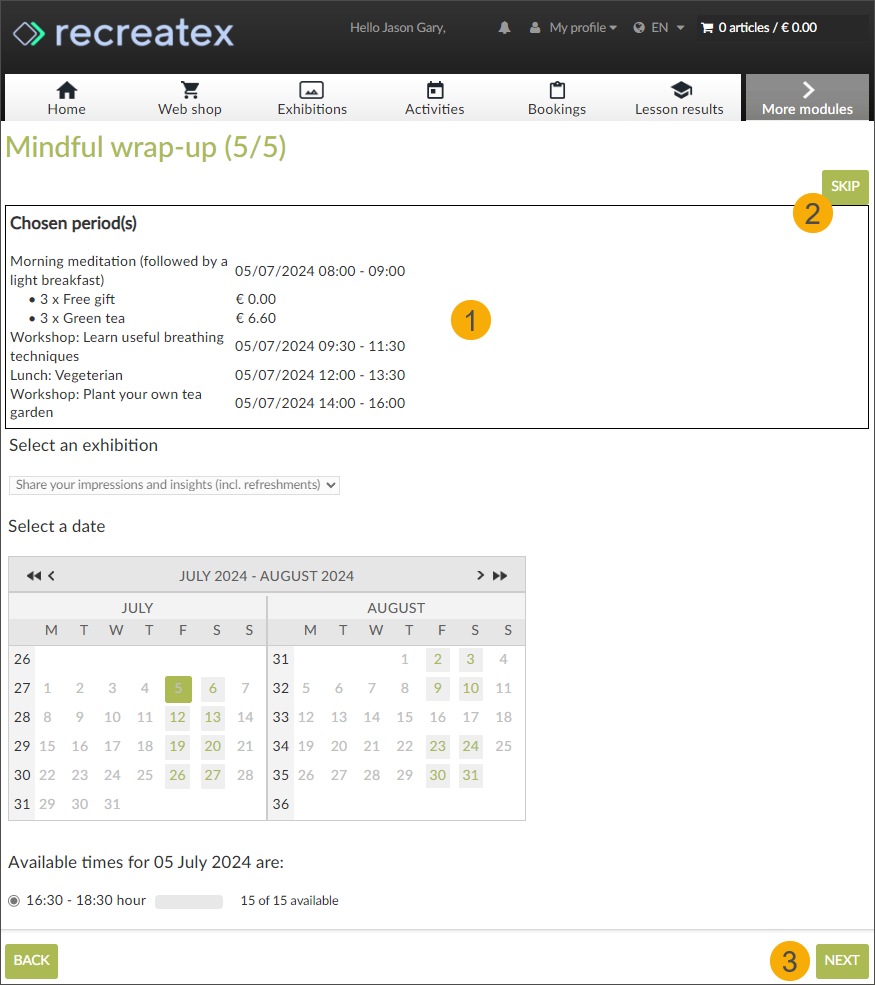
After each step, your selection is added to the overview at the top of the screen (1) and visualized on each subsequent screen. If there is an optional step included, you will see the option to skip the step entirely (2), without making a selection. Click Next (3) to continue.
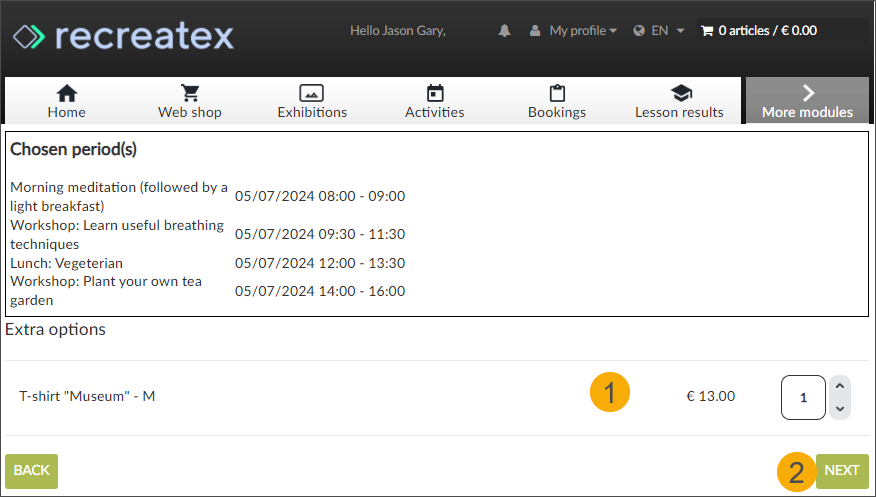
After completing your selection for the last step, you can select optional articles (1) that have been configured on the combi-ticket level. Click Next (2) to finalise your order.
In the Summary, you can see the overview of all selected timeslots (1), including the automatic and optional articles that have been selected per exhibition (2). Further, you can see all selected tickets and their prices (3), including the automatic and optional articles selected on the combi-ticket level and a the bottom, the total price of your order (5).
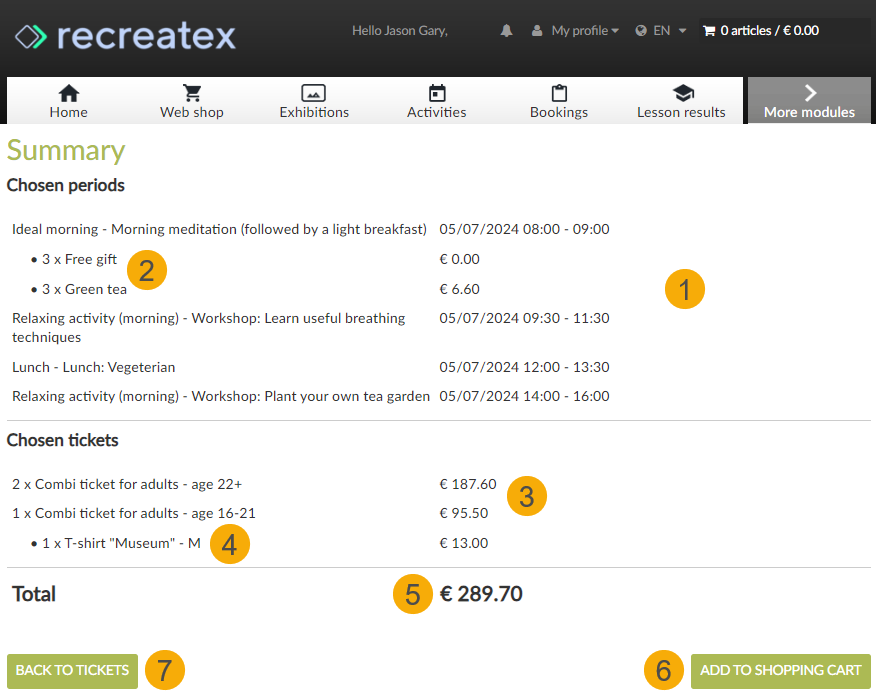
Click Add to shopping cart (5) and follow the checkout flow to pay and receive your tickets.
Click Back to tickets (6) to return to the ticket selection screen and restart the ordering flow.
Combi tickets overview
When buying exhibition tickets on the Webshop your tickets are available immediately after the successful payment on the Confirmation page and in your email.
However, if you need to retrieve your tickets later for any reason or check the details of your order, you can always find this information under My profile > History and overviews > My Exhibitions > Combi exhibitions (1).
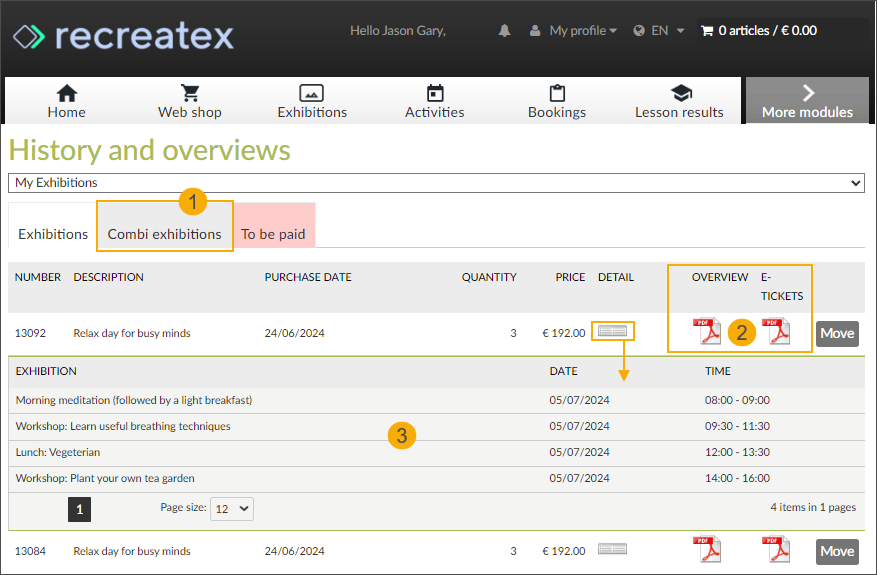
Download your order confirmation and the e-tickets in PDF format (2). Note, that the columns Overview and E-tickets are only visible if activated (History settings: Show e-Tickets in history and Show booking certificate in history).
Click the icon in the column Details to expand a handy overview of the date and timeslot of each exhibition (3).