The article card
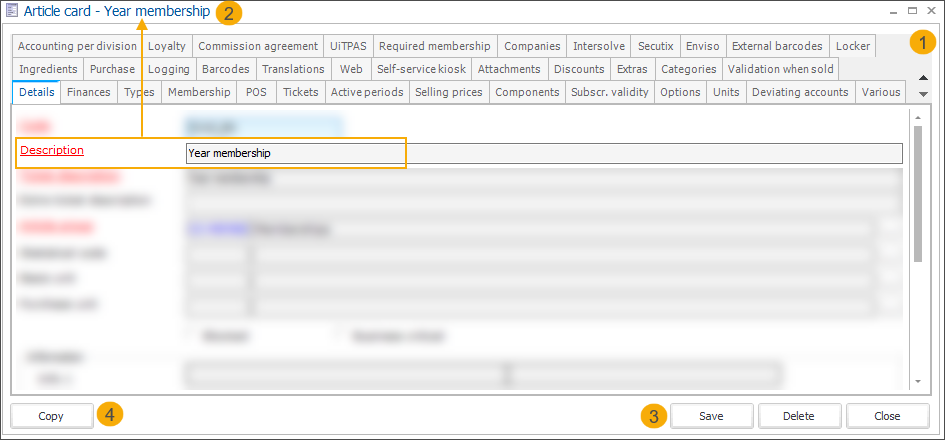
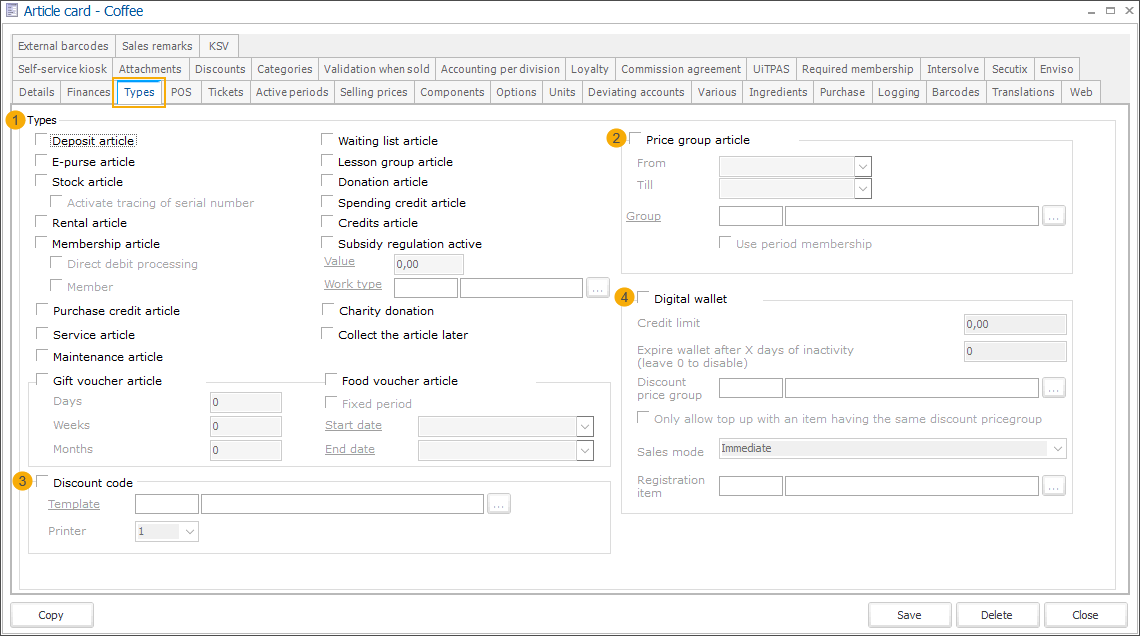
The article card contains the complete article configuration divided into several different tabs (1). Regardless of in which tab you are, you can always see the name of the article (description) displayed in the header of the article card (2).
Using the available framework functionality at the bottom of the screen, you can Save or Delete the article and Close the article card. (3)
Additionally, you can easily Copy the article (4). This is very useful if you need to create multiple articles with the same configuration.
Important
Always start the configuration by filling in the mandatory data in the tab Details. Then click Save and continue with the configuration in the other tabs.
Depending on the article type (defined under the tab Types) additional tabs may become available.
Details
The tab Details contains the basic configuration of an article.
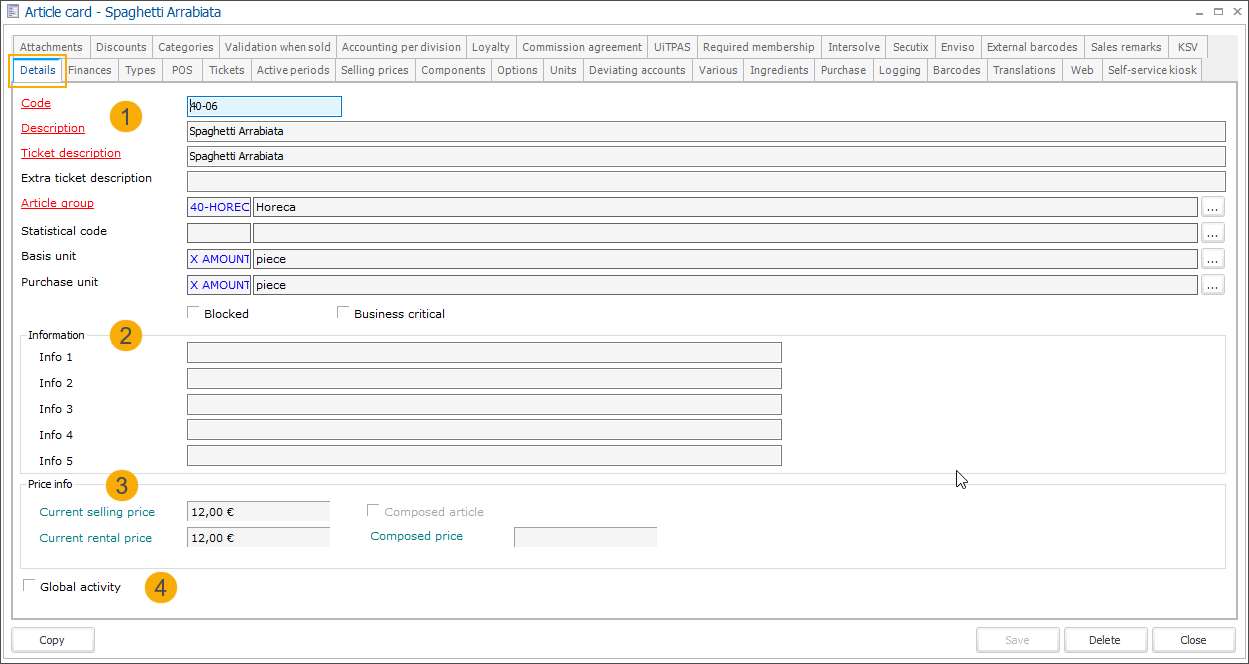 |
In the general part of this tab (1), fill in the mandatory information and select the following basic article options (if applicable to your article):
Code | The mandatory code must be unique and preferably descriptive enough so that you can identify the article easily. |
Description | A description (name) of the article. Max. 50 characters long. |
Ticket description | This description will be visible on the receipt. By default, the description (name) is copied to this field automatically when defining a new article but the text can always be adjusted. |
Extra ticket description | |
Article group | Link the article to a group of related articles. |
Statistical code | This code is used in the report Day/Month results per statistical code (Sales admin > Reports). You can create your own statistical codes under Articles > Settings > Statistical codes. |
Basis unit | The default unit in which the article is sold. All units, available for this article can be defined in the tab Units. |
Purchase unit | This is the default unit in which the article is purchased. All units, available for this article can be defined in the tab Units. |
Blocked | Use this option if you no longer want to offer this article to the customers. An article that has been sold or otherwise used by the Recreatex system, cannot be deleted. This option allows you to hide articles that are no longer used and keep only active articles in the overview. You can visualize the blocked articles in the overview using the right-click function and selecting the option Incl. blocked. ImportantIf you block an article you will not be able to sell it anymore. To avoid confusion always delete blocked articles from POS menus in which these articles are included. |
Business critical | Articles configured as business critical cannot be modified by employees without permission. To allow modifications of business-critical articles, you need to activate the setting May modify business critical articles per employee (General > Basic data > Employees > Employees > edit employee > go to tab Cashier data > subtab Authorisation > General) 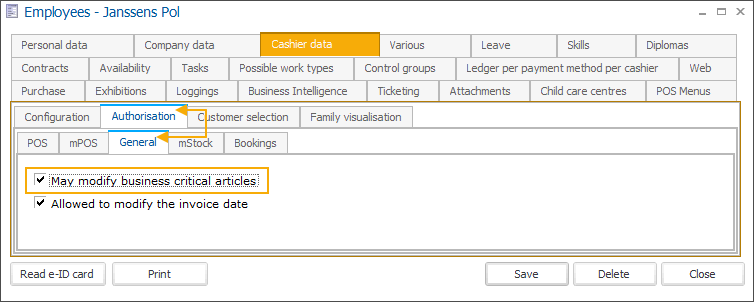 |
In the section Information (2), you can find 5 available info fields where you can store additional information on this article. Each info field can be visualized in the overview as a separate column.
Information in the section Price info (3) displays the current selling and rental price of the article. If the article is a composed article (has multiple components), you can also see the total price of the composed article.
Important
This section only shows prices if an article price has been defined without linking a price group to the price setting.
The option Global activity (4) allows you to configure an article as an item (e.g. a swimming ticket) that can be imported into the UiTdatabank and published on the UiTPAS website (Belgium only).
Finances
This tab contains the financial data of the article.
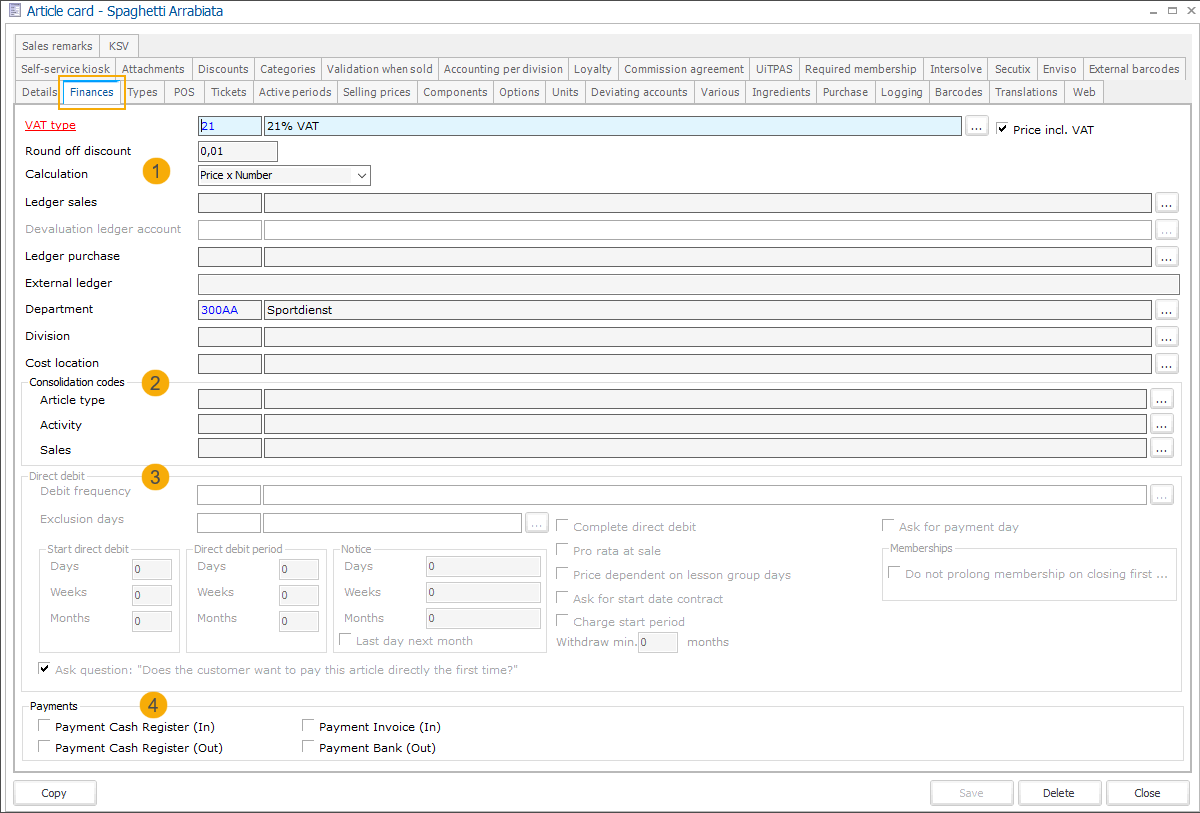 |
In the general part of this tab (1), fill in the mandatory information and specify the following financial settings:
VAT type | Determine which VAT type (tariff) applies to this article. |
Price incl. VAT | Specify if the current price is VAT-inclusive or not. |
Round off discount | Determine, to how many decimal places the discount should be rounded. The default value of 0,01 can be adjusted if required. |
Calculation | Select how the price will be calculated when selling this article.
By default, the calculation is set to Price x Number. |
Ledger sales | Link the ledger account to register the sales of this article. When applying the revenue recognition principle, fill in the temporary ledger account. |
Devaluation ledger account | This account is used as the definitive ledger account when applying the revenue recognition principle. It allows you to book sales on a temporary ledger account at first and move it to the definitive ledger account when the purchased membership (ticket) has been devalued. This field is only active when your membership article is correctly configured (has the number of sessions specified on the tab Subscr. validity). For all details on the configuration and application of this accounting principle in Recreatex, see Revenue recognition. |
Ledger purchase | Link the ledger account to register the purchases of this article. |
External ledger | You can add an external ledger account number linked to this article. This is only used if it differs from the ledger account number. |
Department | This is the article department with a linked cost centre and analytical account on which this article has to be recorded by the accounting division. For more information about article departments and where/how to create them, see Departments. |
Division | Fill in the division to which you want to attribute the article and its related revenues. Leave this field empty if multiple divisions have to be able to sell the article. In such a case, the division defined on the point of sale level will be respected. ImportantIf you register a sale of articles assigned to different divisions, multiple sales lines will be generated (1 line per division). When a receipt is printed at the POS, it will contain multiple receipt numbers on 1 receipt. |
Cost location | This is the cost location on which the article has to be recorded by the accounting department. For more information about article departments and where/how to create them, see Cost locations. |
In the section Consolidation codes (2) you can specify the codes for Article type, Activity and Sales. Using these codes allows you to group different aspects of article sales into categories and generate a general overview of turnover and visitor numbers. The data is presented in an Excel document with a number of basic graphs and pivot tables.
The section Direct debit (3) becomes available if you configure an article as a membership with direct debit processing (tab Types).

Debit frequency | Define how often the direct debit should be collected. To define direct debit frequencies, go to Sales admin > Direct debit > Settings > Direct debit frequencies. |
Exclusion days | Add a calendar to exclude days when no direct debit collection should be executed. To create an exclusion calendar, see Calendars. |
Complete direct debit | When purchasing the membership it is possible to pay part of the membership at the POS (or via Webshop). When this above setting is on then nothing needs to be paid in advance. This setting can be utilized when the direct debit is associated with the customer's record, where no pro-rata fees are chargeable. In fact, the customer's account will be debited the full amount for the purchased membership within the first direct debit collection. |
Pro rata at sale | When this option is used, Recreatex will calculate the amount that needs to be paid immediately at the POS/Webshop. |
Price dependant on lesson group days | In this case, the amount of the collection will be calculated depending on the number of lesson group days that fall within the collection period. This option is only available if the article is configured as a membership article with direct debit processing and a lesson group article (tab Types). |
Ask for start date contract | With this option, you can allow the customer to have a different start date other than today. A reason could be that the customer can only start to use the membership after attending an introduction. |
Charge start period | When this setting is active the start direct debit period needs to be paid at the POS/Webshop. See setting Start direct debit. |
Withdraw min. {x} months | With this option, you can determine the minimum duration of the direct debit contract. The customer must be warned that even if cancelled the direct debit payments will be collected for the rest of the set period. E.g. when set to 12, a minimum of 12 months will be collected before the direct debit may end. |
Ask for payment day | When this setting is active the Webshop will allow the customer to choose the day of the month on which the direct debit collection (BACS, SEPA) may occur. |
Do not prolong membership on closing first collection period | This option allows you to skip the membership extension when closing the first collection period of this contract. It concerns a specific situation when:
In this situation, when a membership is sold it is immediately valid for the period defined on the membership article (e.g. 1 year) but the customer still has to pay for that year. With this option, you prevent a membership from getting an additional (undesirable) extension when closing the first collection period. |
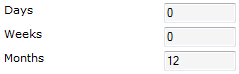
Start direct debit | Specify how many days/weeks/months after the start date of the contract the direct debit period should start. This period may or may not be free of charge (setting Charge start period). E.g.: If the values in this section are all ‘0’ then the contract is assumed to start on the date of purchase. If the value in the section Months is '1', then the contract would be deemed to start 1 month after the start date. |
Direct debit period | Specify a fixed period after which the direct debit should be ended. If the values in this section are '0' then the Direct debit is considered an “Ad infinitum” contract and will continue till it has been cancelled by the customer or the organisation. |
Notice | Specify the notice period that has to be taken into account before the end of the direct debit contract. E.g.: If the value in the section Months is '1', the direct debit contract will end 1 month after the cancellation date: cancellation date 28/02 - contract end 28/03.
|
Ask question: "Does the customer want to pay this article directly the first time?" | By default, this setting is on and this question is always asked at the POS when the membership with direct debit processing is also a composed article. However, you have the possibility to disable this question. In such case, the question will not be asked and the customer will have to pay directly. |
In the section Payments, you can create financial types of articles used to register cashier transactions that are not considered as regular sales: e.g. taking out cash amounts from the POS. These amounts are then registered as special financial transactions and are not included in the turnover.
Payment Cash Register (In) | E.g. when a cashier needs to add extra spare change to the cash register. |
Payment Cash Register (Out) | E.g. when a cashier needs to take out some amount for a purchase. |
Payment Invoice (In) | E.g. when a customer comes to pay an invoice at the POS |
Payment Bank (Out) | E.g. when a cashier takes out an amount of money to be deposited in the bank. |
Types
This tab is extremely important in the function of the other tabs and of the correct functioning within the different modules. This is why it is advised to fill in this tab correctly at the beginning of the creation of an article.
In principle, each article you create is an article that can be sold (unless you immediately block it). In order to correctly set up the article, however, you also have to define the correct article type.
Note
In some cases, the choice of the article type will result in the visualisation of one or several extra tabs in the article card.
Section Types (1)
Warranty article | If this type of article is sold, the article price is saved as a warranty on the account of the sales customer (see also manual 'GENERAL - Customers' > 'Warranties'Warranties). It is advised to create warranties as separate sales articles (a warranty can in fact not be added to a sales article as an option). The warranty is always saved per customer so that someone who finds the card of another person cannot claim the warranty on this card. Recreatex does not allow to return a warranty if the customer's account does not hold a sufficient warranty amount. |
E-purse article | If this type of article is sold, the article price is saved as an electronic e-purse on the account of the sales customer (see also manual 'GENERAL - Customers'Customers). A next sale can then be paid with the payment method E-purse, by means of which the amount to be paid will be deducted from the electronic e-purse of the given sales customer. |
Stock article | When this option is enabled, the stock of the relevant article can be managed. If required, the stock quantity can be automatically updated after each sale. (Requires the Recreatex module Stock) After you configure the article as a stock article, a new Stock tab appears on the article card. From there, you can complete the rest of the stock configuration. It is also possible to register the sales on the basis of the serial number if you tick off Activate tracing of serial number. |
Letting article | If you tick off this option, the chosen article can be rented and the availability of the letting article can always be called up. (module Letting required) |
Membership article | If this type of article is sold, a card or badge will be linked to which a certain validity applies. (module Membership required) If you define an article as a membership article, you can also immediately tick off two other fields:
WarningThe option Membership article can only be ticked off if the option Register a visit under the tab POS is NOT active. |
Family article | If this type of article is sold, a membership card will be asked/created for each family member (= relations of the type family) of the selected customer, taking into account the defined family filter (for example [Age] >= 2) and the selected family composition. (see also manual 'GENERAL - Customers'Customers) |
Gift voucher article | If this type of article is sold, a certain amount is given to the sales customer in the form of a gift voucher. |
Food voucher article | If this type of article is sold, a ticket will be printed with a virtual card number as a barcode. The amount is saved on this card. The ticket is then considered as a payment method and has the same functionalities as a gift voucher. The ticket is printed on the printer set up under Ticket printer. |
Waiting list article | If this type of article is sold, the customer is put on the selected waiting list (and can afterwards be transferred to an effective lesson group). (module Course management tool required) |
Lesson group article | If this type of article is sold, the customer is immediately put in the selected lesson group (module Course management tool required) |
Price group article | If this type of article is sold, the price group will be linked to the selected customer for a certain period (see also manual 'GENERAL - Customers'Customers). The customer will then temporarily enjoy the prices linked to this price group. |
Purchase credit article | If this type of article is sold, the value of the article is saved on the account of the sales customer (see also manual 'GENERAL - Customers'Customers). A next sale can then be paid with the payment method 'Purchase credit' by means of which the entire value of the sale will be deducted from the customer's purchase credit. |
Service article | A service article is an article that is linked to a specific sale that requires a work type (= a task to be executed by an employee), at a certain cost price or not. This work type will then (afterwards) be linked to a certain employee. |
Credits article | If this type of article is sold, a number of credits is attributed to the customer that can be used to make a booking for, for example, a fitness activity. (Module Direct debit required) |
Maintenance article | A maintenance article is an article that is linked to a facility booking if after-care (for example: cleaning up) is required, at a certain cost price or not. (module Facility bookings required) |
In the section Museum card you can set up the link between Recreatex and the use of museum cards.
Digital wallet (article type)
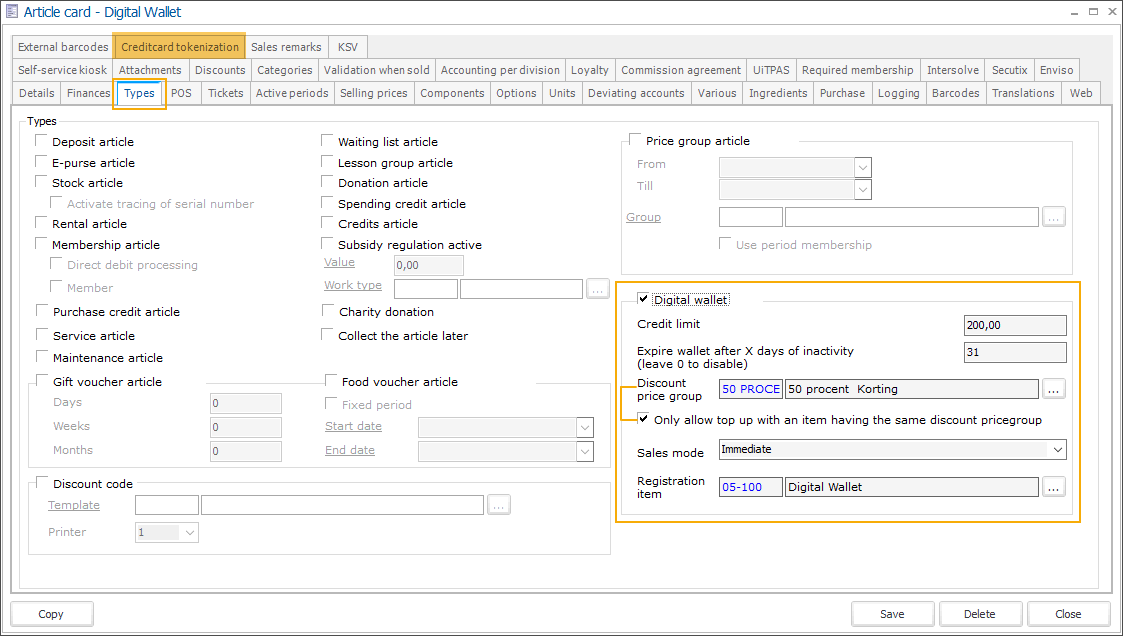
When creating a new article of type Digital wallet you can define additional parameters to tweak the digital wallet to your specific needs.
Credit limit |
|
Expire wallet after x days of inactivity (leave 0 to disable) | |
Discount price group | Configure a discount price group that will be applied to the articles in the shopping cart during the payment flow when paying with a Digital wallet. For detailed information, go to Apply discounts when paying with Digital wallet Only available for individual sales articles and for exhibition tickets (including any optional/automatic articles) purchased via POS cash register, Self-service kiosk or Webshop. |
Only allow top up with an item having the same discount price group | This setting becomes available when you configure a discount price group on your digital wallet article and applies to the Webshop, Self-service kiosk and POS (cash register). When activated, the customers can only top up their digital wallet by purchasing a digital wallet (article) with the same discount price group. This means that the top-up function will suggest the default minimum amount (the price set on the related digital wallet article) for customers to pay, and only allow the possibility to select a higher amount if desired. Filling in a lower amount will result in a warning message or the amount being automatically changed back to default (Webshop). This way you can prevent situations when customers would top up their digital wallet with smaller amounts while still enjoying the digital wallet discount. 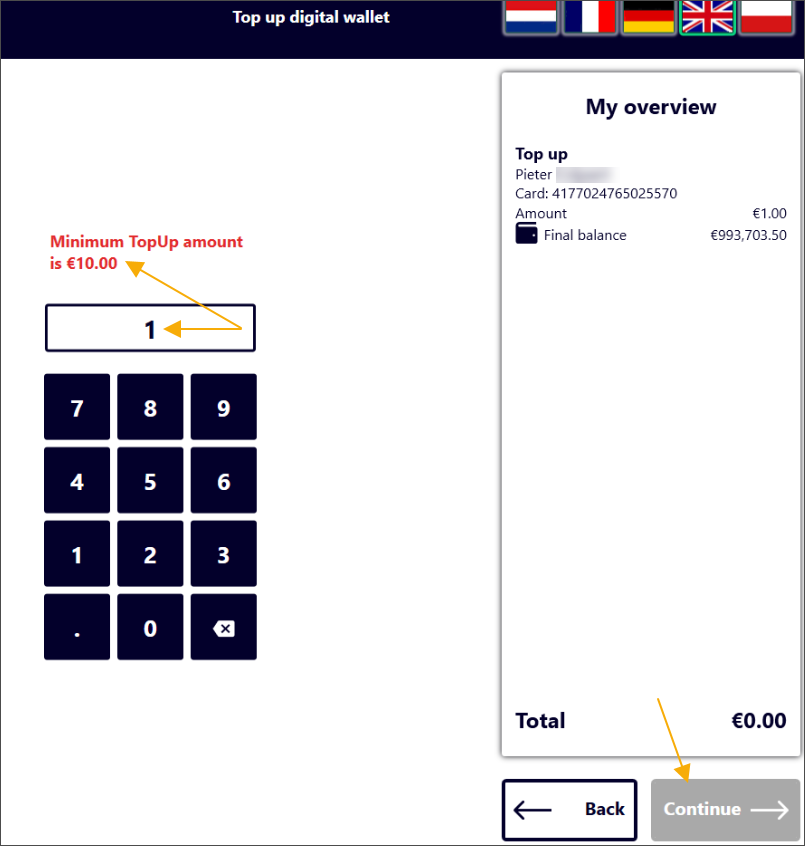 Example: Self-service kiosk |
Sales mode | |
Registration item |
Membership
Note
The tab Membership becomes available when an article is of the type membership (to be defined under the tab Types).
Under the tab Membership, you can configure the basic parameters of the membership article. The validity parameters of the membership article have to be defined afterwards in the separate tab Subscr. validity (see paragraph 'The article card > Subscr. validity').
General
Article card screen > tab Membership > subtab General
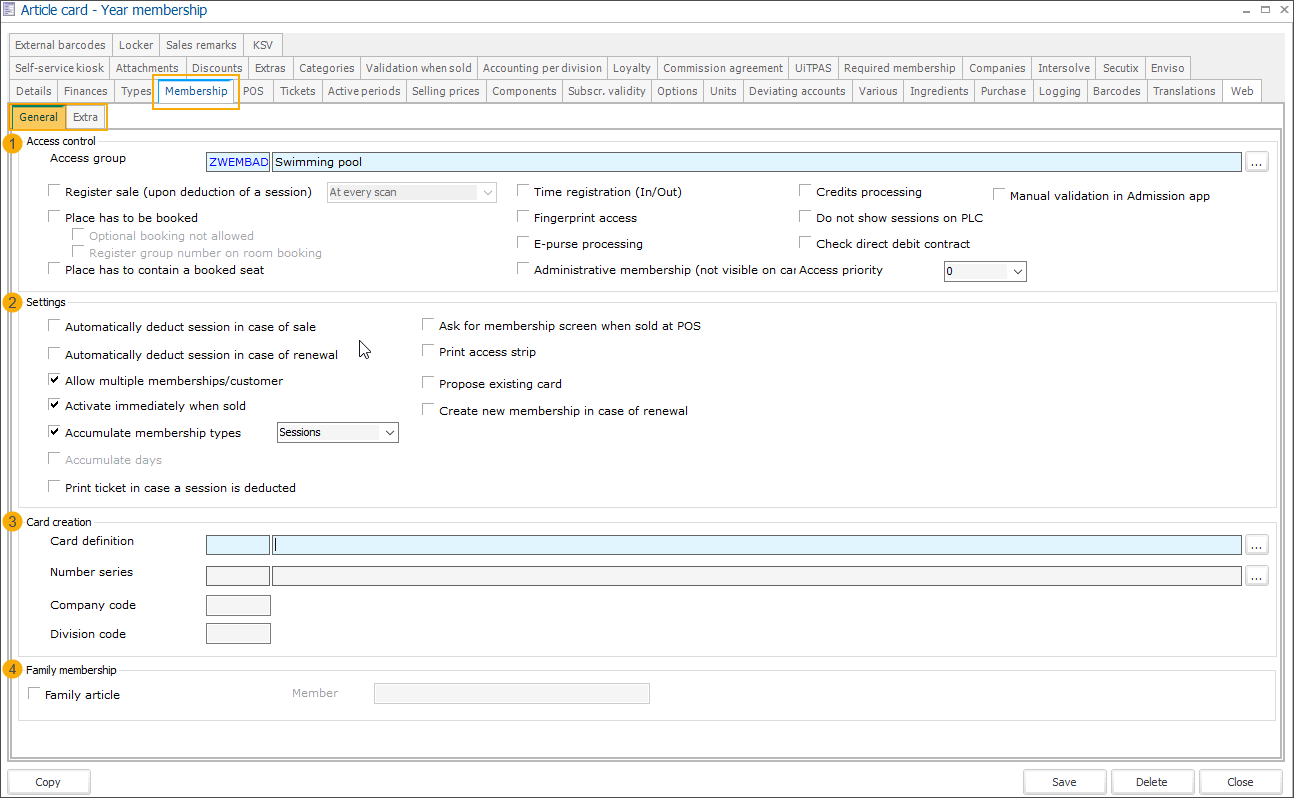
In the section Access control you can determine the membership settings related to access control.
Access group | You can link an access group to a membership article. This is necessary if the infrastructure where the membership will be used relies on access control or a simulation of it. The selected access group determines where and when access is granted, and what must be checked and registered. ImportantWhen a lesson group article is sold:
|
Register sale | If this article is offered at the access control, a sale will automatically be registered for the price of the same article. |
Place has to be booked | In addition to access control, this article also requires a booking, which must be made in the facility bookings module. The facility booking has to be on the same name as the cardholder, and the cardholder has to have a valid membership for the booked activity. |
Place has to contain a booked seat | In addition to the access control this article also requires a booking made in the ticketing module. The ticket has to be on the same name as the ticket holder. |
Time registration (In/Out) | If this option is ticked off and if this membership is offered at the access control, the entrance and exit time will be registered. (module Time registration required). |
Fingerprint access | Access for this membership can be granted by scanning fingerprints. (module Integration met SAGEM USB fingerprint required). |
E-purse processing | If this option is ticked off and if this membership is offered at the access control, a certain amount of the e-purse will each time be deducted. |
Credits processing | If this option is ticked off and if this membership is offered at the access control, a certain amount of credits of the customer will each time be deducted. |
Access priority | If a card holds several valid membership items, the access priority allows Recreatex to automatically choose the membership with the highest priority. NoteThe membership gets a higher access priority when a higher number is selected. E.g.: a membership with access priority 2 has priority over a membership with access priority 1. |
Manual validation in Admission app | When this setting is active on the article level, it will automatically be activated for each new membership generated when selling this membership article. When scanning such membership by the Admission app, the employee will be prompted to request the additional membership card from the customer for manual validation. This setting is a part of the following functionality configuration: Prompt additional membership validation on the Admission app Any changes to this setting (on/off) can be traced in the tab Logging. |
Moreover, you can fill in the following membership settings:
Automatically deduct session in case of sale | If the membership is sold, a visit will immediately be registered. |
Automatically deduct session in case of renewal | If the membership is renewed, a visit will immediately be registered. |
Allow multiple membership/customer | If you tick off this option, it is possible to allow several items of the same membership article to one customer. If this option is not active, the customer will only be allowed to have one item of this membership article. |
Activate immediately when sold | If this option is ticked off, this membership will immediately be activated when sold. |
Accumulate membership types | This option is only active if the article is a card with multiple sessions (the number of sessions is filled in under the tab Subscr. validity). This allows you to put several sales of the same article on 1 card. You can choose to join the sessions, visitors per session or sessions per visit. 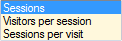 |
Administrative membership | This option allows you to link a card to customers without them having a membership. |
Print ticket in case a session is deducted | If you tick off this option, a receipt will be printed each time a membership is devalued at the POS. Mark, however, that this parameter also depends on the same parameter on point of sale level. If you have defined on point of sale level that no receipt has to be printed in case a session is deducted, a receipt will in fact never be printed, irrespective of the setting on article level. |
Automatically create card number | If this option is selected, Recreatex will automatically create a card number that will be linked to the membership. |
Ask for membership screen when sold at POS | If a card is created using the option Automatically create a card number, you can choose to visualise the membership at the POS or not. (module POS required)
|
Print access ticket on POS printer | If you tick off this option, a barcode will automatically be printed on the receipt. This option is only available if you have ticked off the option Automatically create a card number. |
Print access strip | If you tick off this option, a specific access ticket with barcode will be printed after the sale allowing to call up and to consult the membership in another way that with the standard linked card. |
Propose existing card | If a customer already possesses a card, this card will automatically be suggested to link the membership to. |
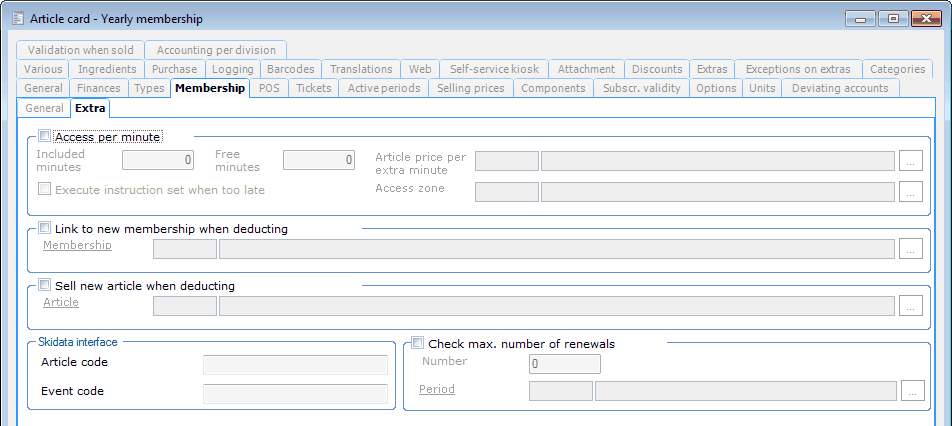
Extra
Article card screen > tab Membership > subtab Extra
 |
Caution
The settings in the sections Access, Access per minute and Link to new membership when deducting are only applicable if you work with access control. If you do not work with an access control system, these settings do not have to be specified.
The section Access per minute only has to be filled in if you use a system according to which the customer has to pay a supplement if he/she leaves the infrastructure after the allowed time. The extra time can then be settled with the Extra POS functions in the POS module (see POS - Usemanual 'POS - Use'). This principle is only possible if the infrastructure works with access control or a simulation.
Included minutes | This is the number of minutes that the customer buys if he buys this membership item. |
Free minutes | This is the number of minutes that the customer can stay longer in the infrastructure without having to pay extra. This can for example be required to take into account waiting times at the exit of the infrastructure. If the customer wants to leave the infrastructure within the allowed time but still has to queue at the exit, the customer does not have to pay extra as long as the free minutes have not yet expired. |
Article price per extra minute | Here you can link the sales article that has to be registered in case the number of minutes bought (+ free minutes) is exceeded. This article determines the price per extra minute. |
Execute instruction set when too late | Here you can fill in the instruction set (for the access control) that has to be executed if the number of minutes bought (+ free minutes) is exceeded. |
Access zone | The access zone in which the principle Access per minute is valid. |
The section Link to new membership when deducting concretely implies that you can deduct a session of a certain card (for example a 10 sessions card) but that Recreatex will also immediately ask you to scan a new card (or wristband, ...) to give to the customer so that the customer can also effectively enter the infrastructure.
In the section Skidata interface you can determine the Article code and Event code for the link with the Skidata database. To do this you have to have a license for the module Access control Skidata interface.
In the section Check max. number of renewals? you can limit the number of membership renewals allowed in a given period.
Subscription validity
Note
The tab Subscr. validity is only available if a membership article is concerned (to be defined under the tab Types).
The validity settings of the membership article under the tab Subscr. validity are important for the correct functioning of the membership article. For more information on the use of membership articles, we refer to the manual 'Membership'.
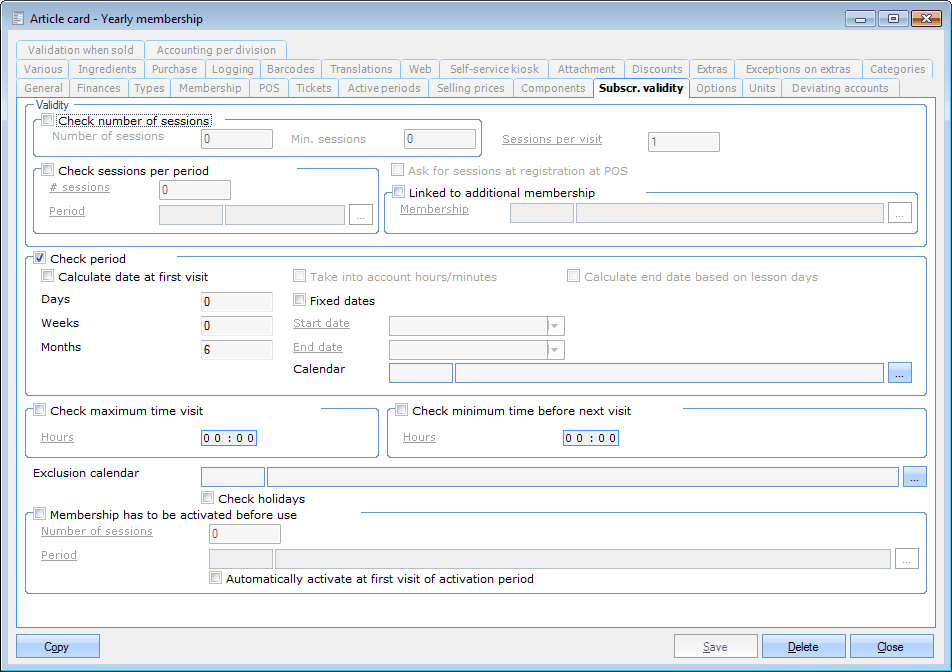 |
If you create a new membership article, all settings on this tab are deactivated. As soon as you tick off an option, a number of fields are to be filled in obligatory.
The different options are logical and concern access control. Consequently, this tab is only interesting if you effectively work with access control linked to ReCreateX.
In the section Validity the sessions are checked.
Check number of sessions: This means that the validity of the membership article will depend on the presence or not of a number of sessions on this membership. If all sessions have been used, the membership will no longer be valid.
 |
Number of sessions | The number of sessions to which the customer is entitled. |
Min. sessions | The minimal number of sessions that has to be present on the membership article for the membership article to be valid. |
Sessions per visit | The number of sessions that will be deducted per visit. The standard value is 1. |
Ask for sessions at registration at POS | It is possible to let the cashier fill in the number of sessions to be deducted manually. The 'sessions per visit' will be deducted by default. |
Warning
If the sessions screen does not appear, you have to tick off the parameter Ask for entries screen under the tab Cashier data of the employee card.
Check sessions per period: If this option is active, the system will take into account the number of times a customer can use this membership article in a certain period.
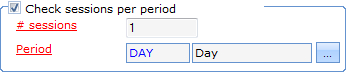 |
# sessions | The number of times the customer can use this membership article in a certain period. |
Period | The period during which the restriction is valid. |
Linked to additional membership: If this option is active, the system will take into account the validity of the additional membership. In other words, access will only be granted if both the current membership and the additional membership are valid.
 |
In the section Check period access will be checked on the basis of a period. If this option is active, the system will take into account the period during which the membership article is valid. If a customer offers the membership outside the valid period, access will be refused.
 |
Calculate date at first visit | This option means that the validity only takes effect on the moment the customer checks in at the cash register for the first time. This option can not be combined with the option Fixed dates. | |
Duration | The validity duration can be specified in days, weeks and months or using a combination of these three. A combination of for example 1 day, 1 week and 1 month is thus possible. The total validity will then be 38 days if the current month counts 30 days.
| |
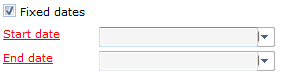
Fixed dates | If a membership with fixed dates has to be created, you have to select this option. This option can not be combined with Calculate date at first visit. The choice for fixed dates implies that the membership article will only be valid between the given start and end date.
| |
Calendar | If the period is checked, you can fill in the calendar that has to be taken into account when determining the validity duration. You can for example create a calendar Holidays and select it in the section Check period. This will imply that if a customer buys a monthly membership, the validity duration of this membership will be 1 month + the number of holidays within the first month. | |
Take into account hours/minutes | This setting can only be ticked off if the option Calculate date at first visit is already active.
| |
Calculate end date based on lesson days | This option is only applicable for the renewal of lesson memberships and can therefore only be activated/deactivated in case of a lesson group article (to be defined under the tab Types). If this option is active, the system will check during renewal if the linked lesson group has specified lesson days.
|
Warning
The renewal of membership articles also depends on the parameters that can be set up under Membership > Parameters > Renewals.
In the sections Check maximum time visit and Check minimum time before next visit access will be checked on the basis of the time registration. The settings below are only applicable if you work with access control or a simulation.
 |
Check maximum time visit | If the visit of the customer takes longer than the time provided for, the system will take this into account. In other words, the exit will be blocked if the customer tries to leave. |
Check minimum time before next visit | This setting assures that the customer can not offer his membership again until the minimal time before a next visit has expired. If the number of hours is for example 04:00 and a customer comes swimming today at 16:00 and leaves the swimming pool at 18:00, access will not be granted again until 20:00. |
Warning
The checks for maximum time visit and minimum time before next visit are only applied if these checks are also ticked off per reader for the given access group (see manual 'Access control').
In the section Exclusion calendar you can determine on which days the article is invalid. An exclusion calendar allows you to make membership items invalid on the days selected in the exclusion calendar. You can also define that this article can not be valid on Holidays. If you want to use the option Check holidays, you have to select the holidays calendar under Membership > Parameters > General.
 |
Finally, there still is the section with activation settings.
 |
Membership has to be activated before use | The membership article has to be activated fist before it can be used. See also POS - Usemanual 'POS - Use'. |
Number of sessions | The number of times the holder of this membership will have access during a certain period. |
Period | The period during which the restriction is valid. |
Automatically activate at first visit of activation period | If the membership is offered at the access control for the first time, it will immediately be activated for use. |
POS
This tab contains the data that influence the use of the article in the Recreatex POS module.
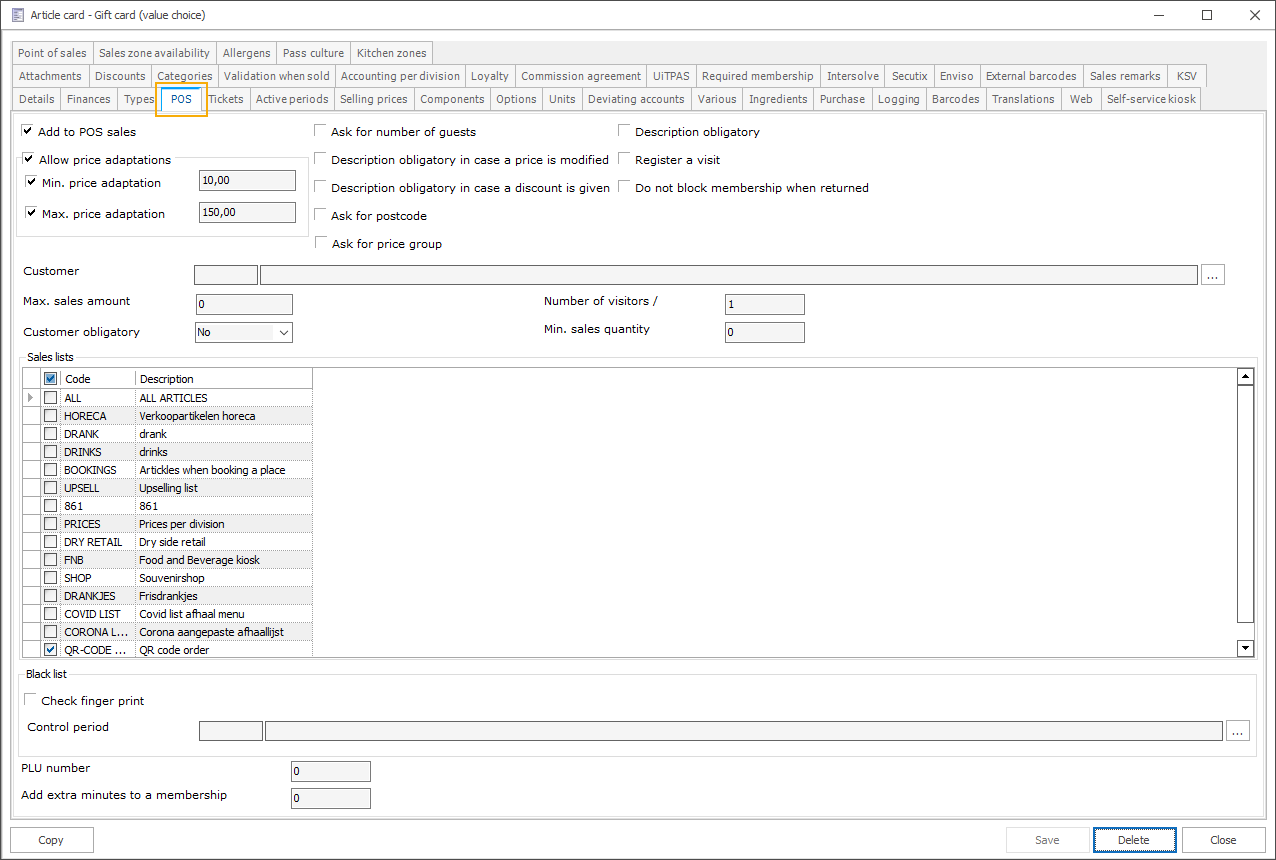
This tab allows you to tick off a number of options that largely determine the use of the article on the cash register.
Add to POS sales | This parameter allows you to add the article to a POS menu. Since you can always define POS menus yourself, it is best to leave this setting unchanged. |
Allow price adaptations | Allows you to modify the article price manually at the POS (by clicking on the
At the POS (cash register), the cashier can adjust the price within the defined range. If the selected price falls outside this range, an error message is displayed indicating the minimum required price or the maximum allowed limit. 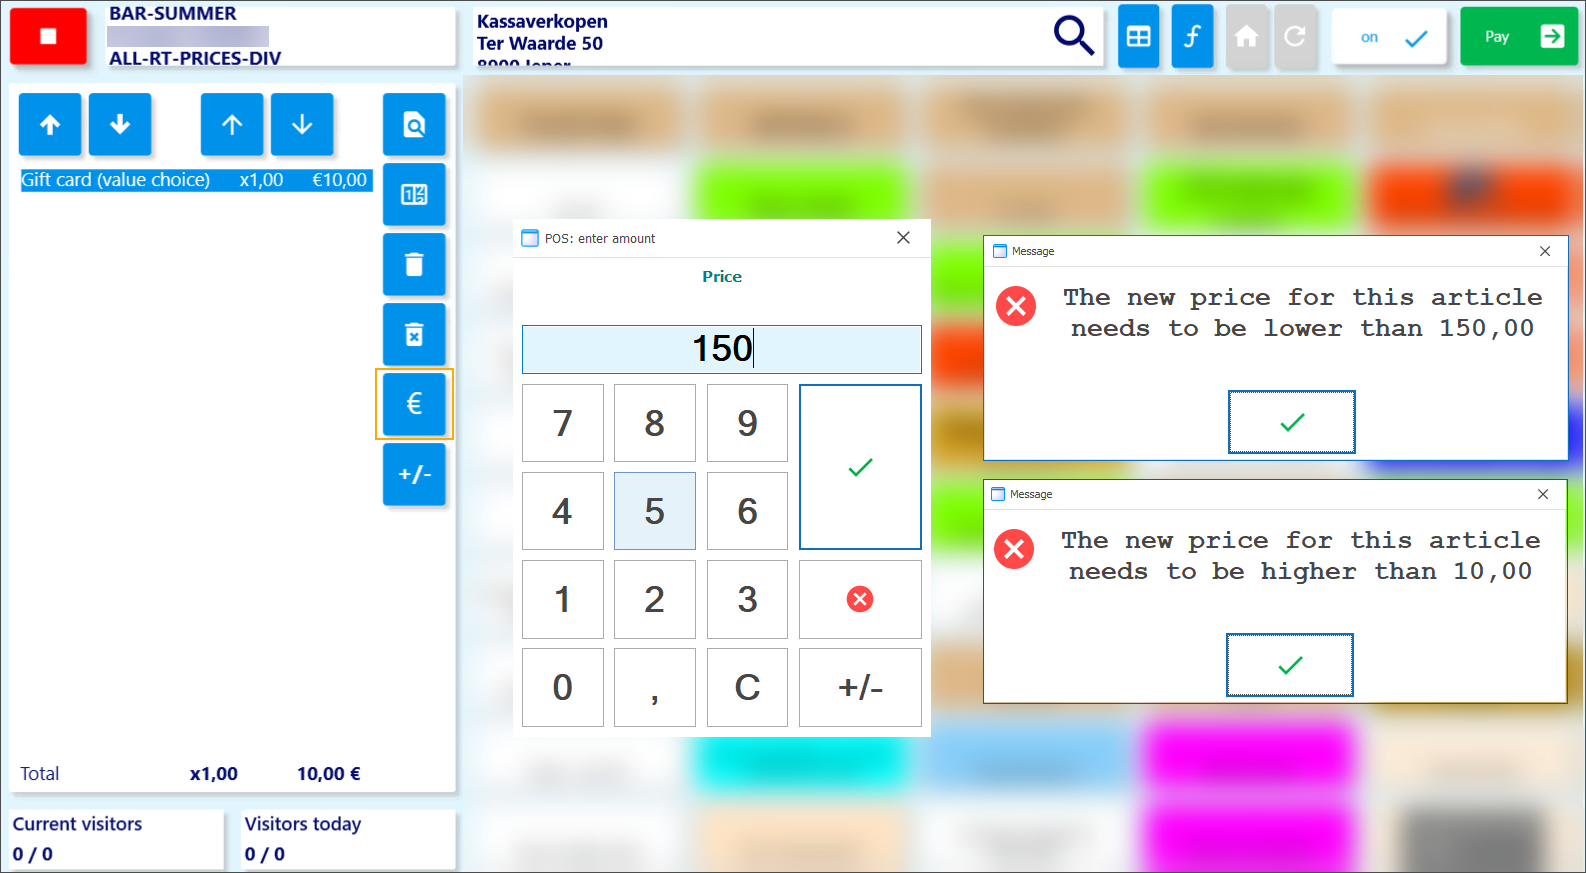
|
Description obligatory | Obliges the cashier to fill in a description if he chooses this article. |
Max. sales amount | If a number is filled in here, you will not be able to sell more than the given amount per customer. If you do not want to define a maximum, you simply have to fill in 0. This means that the quantity that can be sold will not be limited (and thus not that you can not sell any articles). |
Customer | If you fill in a customer, the sale of this article will be registered on this customer by default. This is interesting for articles that can only be sold to 1 specific organisation (firm, association, group, …). |
Customer obligatory | If you tick off the option Customer obligatory, you will have to fill in the customer name. In case of a membership article (for example a 10 sessions card) it can be useful to link the correct customer to the card. This is why we advise you to oblige the cashier to link a customer in case such an article is sold. The cashier can then choose a customer from the list of all customers (or create a new customer). |

Register a visit | If you also automatically want to link a visit to the sale of a certain article, you have to tick off the option Register a visit. By default this option is not selected. |
Warning
The option Register a visit can only be ticked off if the option Membership article under the tab Types is NOT ticked off.
Number of visitors / session | It is possible to link more than 1 visitor to the sale/registration of an article. An example is a family ticket: father, mother and 2 children. This is why you can link 4 visitors to this article at the moment this article is sold/offered. | |
Ask for number of guests | Is used for catering. If this option is ticked off, the system will ask for the number of guests if an article is sold. | |
Description obligatory in case a price is modified | It is possible to oblige the cashier to fill in a description if he/she modifies the price of the given article in the POS module. | |
Description obligatory in case a discount is given | It is possible to oblige the cashier to fill in a description if he/she grants a discount for the given article in the POS module. | |
Ask for price group | If you tick off this option, it is possible to sell the article at the POS on the basis of price groups. If several prices for several price groups have been set up for the article (tab Selling prices), and if this article is chosen at the POS, an additional window will be opened in which the price group of the customer can be selected, for example:
|

In the section Sales lists you can immediately link the current article to a certain sales list.
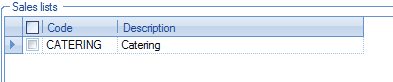 |
A sales list determines the content of the article list that can be opened using the function POS: Extra functions > Find article. See also manuals 'GENERAL - Sales' and 'POS'
Check finger print | Here you can define whether it has to be checked if the customer is on the black list or not in case this article is sold. The check is done on the basis of a finger scan at the sale of the article. |
Control period | This is the period during which the check of the black list has to be done. |
PLU number | This is the Price Look Up number of the article. Thanks to this identification number you can select articles at the cash register using cipher codes. If you enter the PLU number, followed by the + key, the article linked to the PLU number will automatically be selected. |
Loyalty codes | With these codes, you can make a link with the Rotterdampas. (module Rotterdampas required) |
Tickets
In the tab Tickets, you can find configuration options related to the printing of receipts, tickets and kitchen/bar orders.
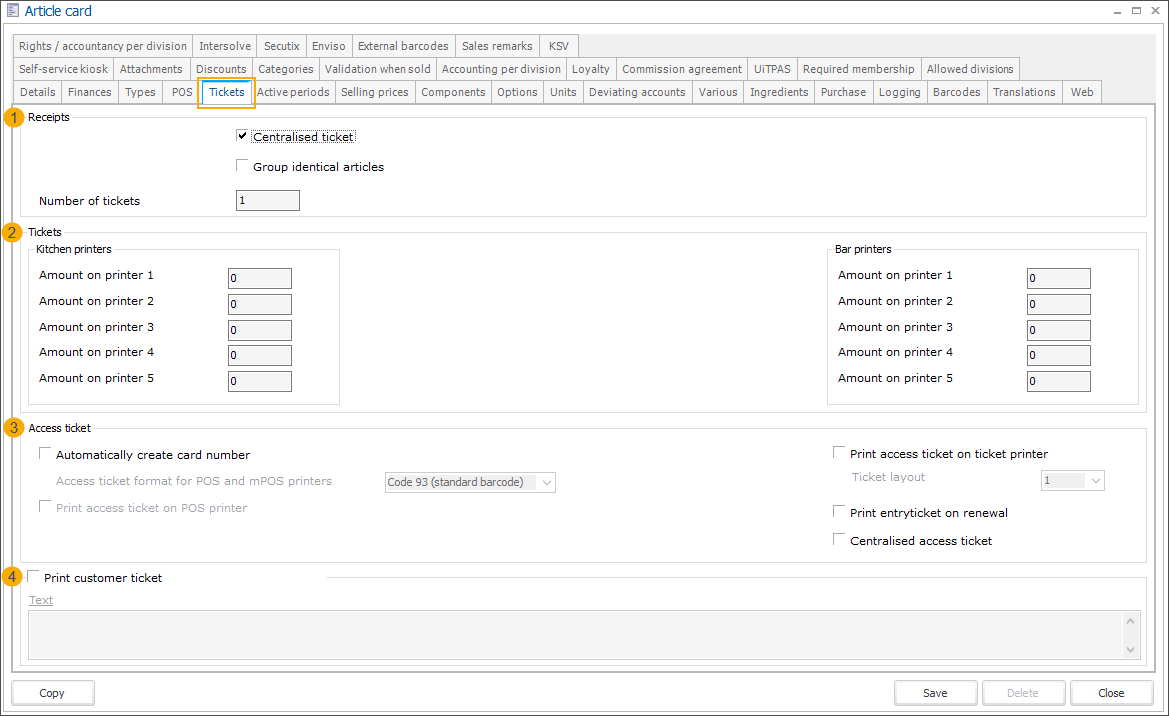
Section Receipts (1)
Centralised ticket | Activate this option to include articles from one sale on the same receipt. |
Group identical articles |
CautionIf you are selling articles with options (e.g. steak with sauce, side dish, etc.) and activate this setting, you will only be able to make 1 selection. When you select the article again, only the quantity will be adjusted without the possibility to choose other options. With such articles, you rather keep this option deactivated and when selecting the same article multiple times only adjust the quantity of the article manually, using the POS function Modify number/options. Based on this setting, the articles are not only added to the POS basket in a certain way but they are also printed the same way on the sales receipt. |
Number of tickets | You can choose how many times the receipt should be printed. You can divide these receipts over the different kitchen and/or bar printers. |
Section Tickets: Printing options for kitchen and bar orders
Section Access ticket: you can indicate if you want to print an access ticket or not, and if you want to put several sales of this article on 1 card.
Automatically create card number | If you activate this option, a card number will automatically be created and linked to the membership when selling this article. |
Access ticket format for POS and mPOS printers | Select the format in which the access ticket should be printed:
ImportantThis option only becomes available after you activate the option Automatically create card number. |
Print access ticket on POS printer | If you activate this option, an access barcode will automatically be printed on the receipt. ImportantThis option only becomes available after you activate the option Automatically create card number. |
Print access ticket on ticket printer
| This option allows you to select a predefined layout for the access ticket and print it using a dedicated ticket printer. |
Print entry ticket on renewal | Activate this setting to re-print the access ticket every time the membership has been renewed at the POS. |
Centralised access ticket | With this option active you can put all access tickets within one sale on the same ticket. |
Section Print customer ticket: is specific for the Gift Aid scheme (only for users in the United Kingdom). If this concept is used, a specific second receipt will be printed (with the text you can fill in here) that can be used as the donation certificate for the customer's tax declaration.
Rental
Note
The tab Rental is only available if a rental article is concerned (to be defined under the tab Types).
Under the tab Rental several settings can be determined in the function of article renting.
General
The tab General under the tab Rental contains the general rental settings of the article.
 |
Default deposit | The default deposit amount for the rental article can be defined as:
|
In the section Rental location (2), you can link, modify or delete rental locations for the selected article.
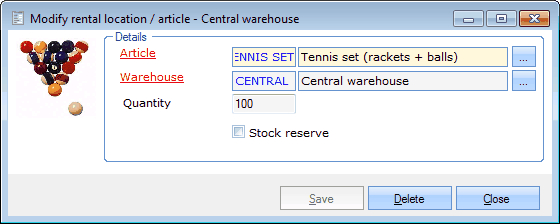 |
Article | The chosen article. |
Warehouse | The rental location in which the article is available or not. |
Quantity | The total number of units in the chosen rental location. |
Stock reserve | This is a specific option for the online rental of articles. The articles of a rental location that are marked as stock reserve are not visualised on the website. If you, however, have only one rental location (that has to be included for online letting), this setting allows you to mark articles as reserve on article level. |
In the section Details (3), you can define the following characteristics of a rental article:
Max. quantity to be rented | With this option you can determine the maximal quantity of this letting article that can be rented in one rental. |
Default rental duration | With this option you can indicate the default rental duration of this article. When renting the article at the POS or via the Webshop, the from/until rental period is proposed and filled in but the customer can still adjust the duration if necessary.  |
Negative balance allowed | With this option you can determine if it is allowed to take orders for this article if the article is no longer in stock. |
Components are stocked separately | If this setting is active and if a composed article is rented (article that consists of several parts/items), the number of parts will be deducted and the available number of the composed article will be recalculated on the basis of the remaining parts. |
Max. rental duration | Here you can determine the maximal rental time of this article. If a rental is effectively booked, you will not be able to choose a time longer that the given maximal duration. |
Max. quantity to be rented on web | This setting is comparable to the setting Max. quantity to be rented, but specifically applies to online rentals. |
To be delivered | This option allows you to indicate that the rental of this article requires a delivery by default. |
Time before rental | This option allows you to determine how many time before the effective rental the rental article can be collected. |
Time after rental | This option allows you to determine how long after the effective rental the rental article may be returned. |
Article value | If you wish so, you can fill in the value of the rental article. This value is merely indicative and can for example be used as a standard in case of damages or loss of the article. The value of the article can also be added to the order form, collection form or return form (module Letting) |
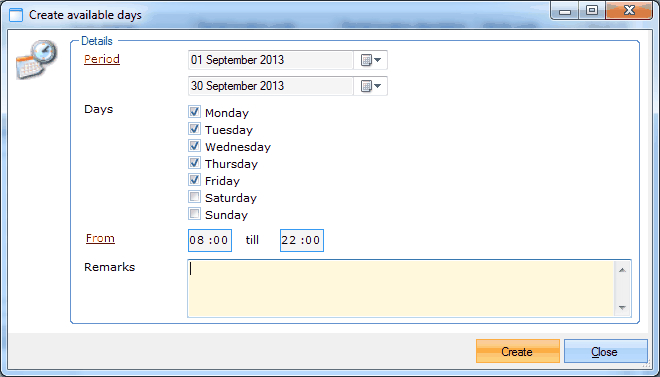
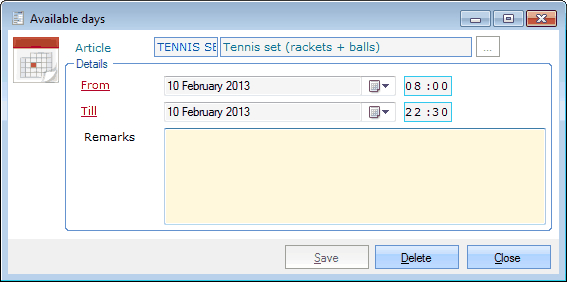
In the section Available periods (4) you can define when the chosen article can be rented. By clicking on Create days you can define the hours and days on which the article can be rented.
 |
Tip
If you want to define that the letting article is available for a longer period, irrespective of days, we advise you to manually create an availability period. You can do this by creating a new record in the overview of available periods (<F2>, or click on the right mouse button followed by New).
 |
Prices
If it has been defined in the parameters of the letting module that the rental prices are NOT based on the selling prices, you will also see the tab Prices under the tab Letting on the article card. Here you can fill in specific prices for the use of the chosen article in the letting module. If required, the section Details allows to set up specific prices and/or discounts for certain quantities that are rented.
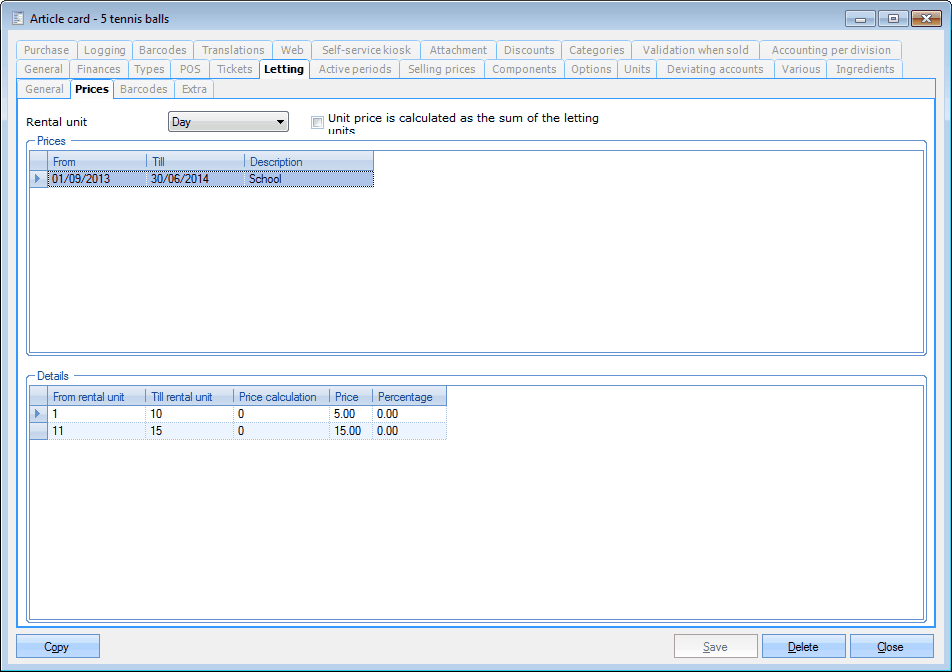 |
For a more detailed explanation, we refer to the manual Letting.
Barcodes
If you want to rent an article at the POS, it is also possible to do so using barcodes.
Under the tab Barcodes you can import the articles linked to barcodes into the system and print them if you want to.
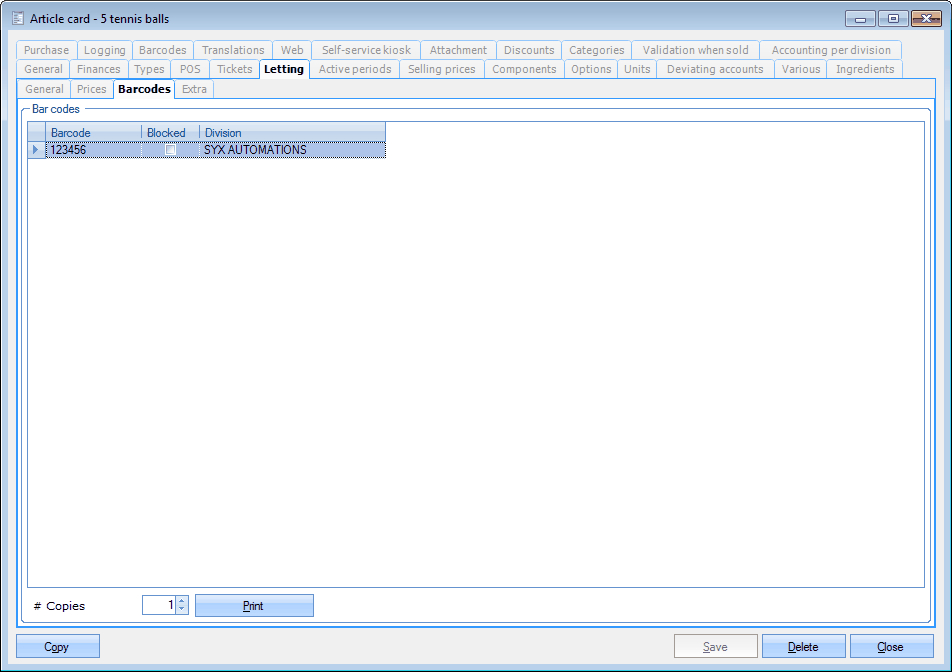 |
You can link, modify or delete barcodes for the selected articles at all times.
(see manual 'FRAMEWORK' Framework)
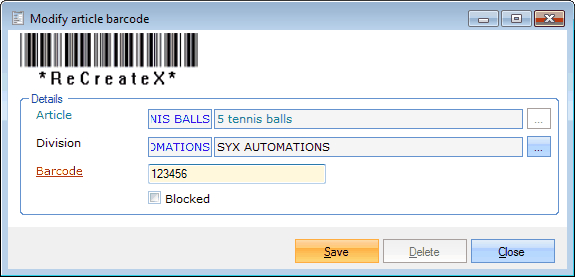 |
Article | The chosen article. |
Division | If you wish so, you can link the barcode of the letting article to a specific division by selecting a division here. |
Barcode | Here you can fill in the number of the barcode or scan the barcode. |
If required, barcodes linked to rental articles can be printed, also in several copies:
 |
Next, you can select which information you want to print:
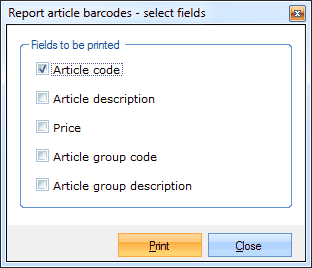 |
Extra
Finally, the extra information fields allow you to link additional information to the rental article.
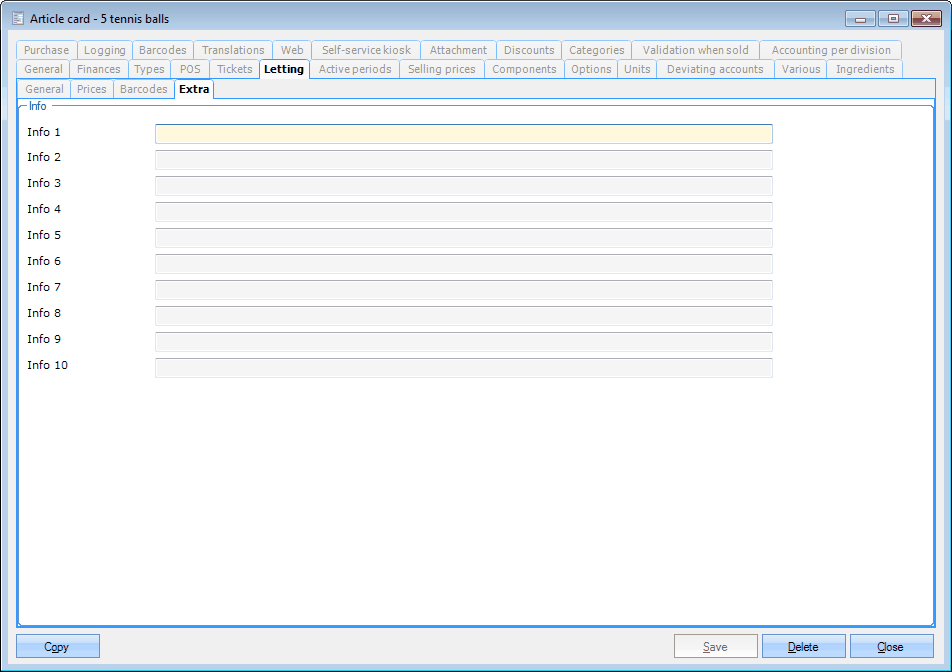 |
If you want to, these information fields can be added to the layout of certain rental reports.
Active periods
Under the tab Active periods you can determine when this article can be sold. Specific sales periods can for example be applicable for seasonal products. These active periods are taken into account at the POS as well as at the self-service kiosk.
 |
You can create, modify or delete active periods at all times.
(see manual 'FRAMEWORK' Framework)
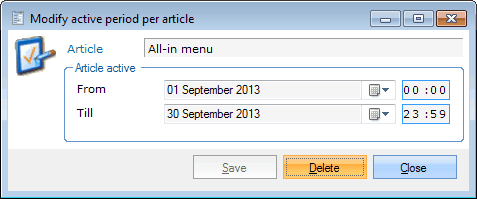 |
Article | Is filled in by default and refers to the article for which you want to create of modify the active period. |
Article active | Here you can determine during which period the article can be sold. Thanks to the presence of time settings it is for example possible to create several active periods within one day. |
If you try to sell the article outside an active period, a message will appear, for example:
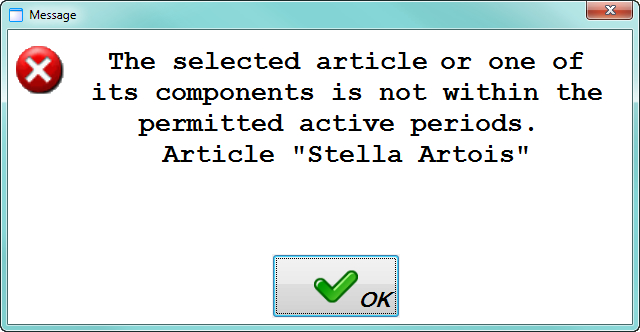 |
Selling prices
Under the tab Selling prices you can add all article prices:
 |
Note
It is not obligatory to fill in a start and end date.
If you define a period without a start date, the entire period before the end date will be taken.
If you define a period without an end date, the entire period after the start date will be taken.
Avoid setting an end date for current prices unless future price changes are planned. Items sold outside the defined period will not have a price and may be given away for free.
To create, modify, or delete (block) selling prices, use the available framework functionality.
In the tab General, configure the selling price details:
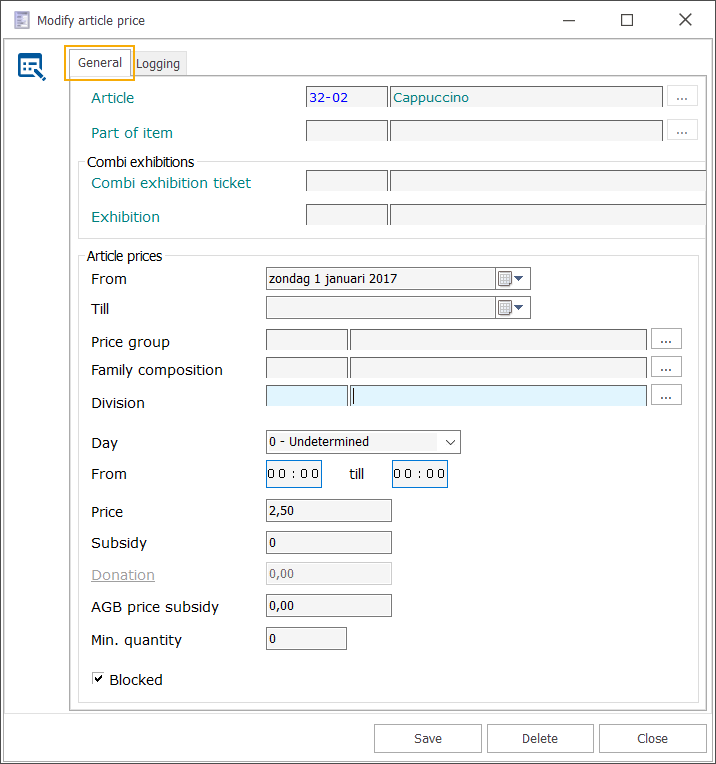
Article | Is filled in by default and refers to the article for which you want to create or modify the price. |
From - Till (date) | The period in which the given price is/was valid. |
Price group | The price group for which the given price is valid. WarningDo take into account that if your customer file contains customers to whom no price group has been linked, you also have to define an article price without a linked price group in function of these customers. You have to do so to avoid the article being sold to these customers for 0 pounds. |
Family composition | The family composition for which the given price is valid. |
Division | Define separate article prices per division. Logging into this division |
Day | The day on which this article price is valid. |
From ... till | The time for which this article price is valid. |
Price | The article price. |
Subsidy | The subsidy system implies that if customer X buys an article with a subsidy, a part of the amount will be invoiced on the name of the subsidy customer. If the subsidy customer is not filled in, the price + subsidy will be charged. For example: Customer X buys article Y at a price of 5.00 pounds and 2.50 pounds subsidy:
|
Min. quantity | The minimum number of articles that must be sold to enjoy the chosen price. WarningIf you create a price for a specific minimum quantity, you must also create a price line without a minimum quantity. If not, the article will be sold for 0 pounds as long as the minimum quantity is not reached. |
Blocked | A selling price cannot be deleted in order to ensure data consistency within the Recreatex system. Instead, you can use the Blocked option to hide selling prices that are no longer used and keep only active prices in the overview.
Blocked selling prices are hidden by default. To display them, right-click in the overview and select Incl. blocked. |
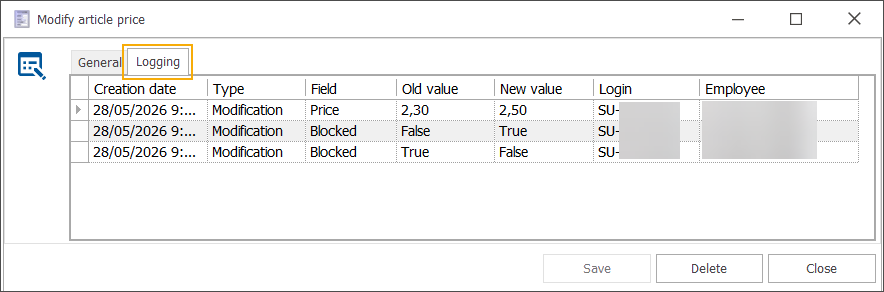
Under the tab Logging you can see which manipulations have been done to the price of this article.
Components
Under the tab Components you can determine of which components the chosen article consists. This is used to set up composed articles.
 |
Warning
If you define a composed article, you do not have to fill in a price under the tab Selling prices. The price of a composed article is always the sum of the prices of the components.
Since the VAT tariff of each part has already been defined in the separate article cards, the VAT tariff of the composed article has to be set to 0% (tab Finances). You have to do so to avoid VAT being charged on the assembled article in addition to the separate parts.
You can create, modify or delete components at all times.
(see manual 'FRAMEWORK' Framework)
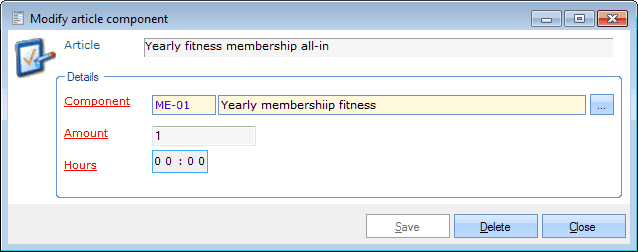 |
Article | Is filled in by default and refers to the article for which you want to create or modify the components. |
Component | Here you can choose the article of the component. |
Amount | Here you can determine the amount of the chosen component. |
Hours | Here you can determine the number of hours of the chosen component. This setting is only important if the composed article will be rented. |
Options
Under the tab Options you can determine the options of this article. These are mainly used for catering purposes. Examples for a steak are hot sauces, dressings, cooking, ...
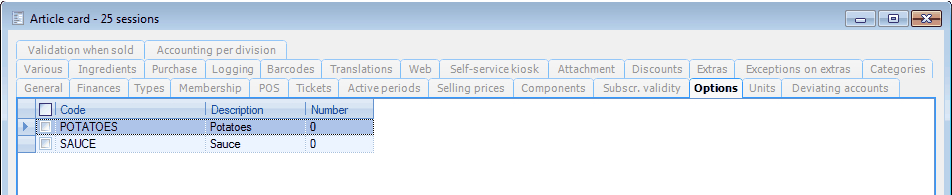 |
You can create, modify or delete options at all times.
(see manual 'FRAMEWORK'Framework)
For more information on setting up article options, we refer to the chapter 'Settings', paragraph 'Options'.
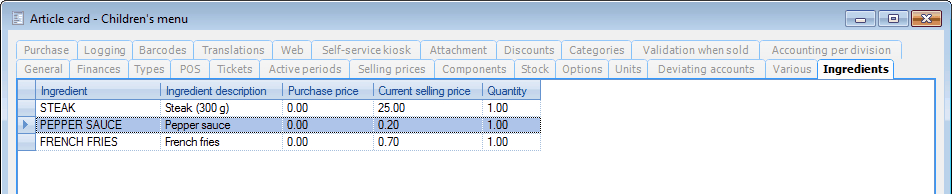
Ingredients
Under the tab Ingredients you can fill in the different ingredients that are used to prepare the article. This is evidently only useful for catering purposes and can be handy to determine the total price of the product.
 |
You can create, modify or delete ingredients at all times.
(see manual 'FRAMEWORK' Framework)
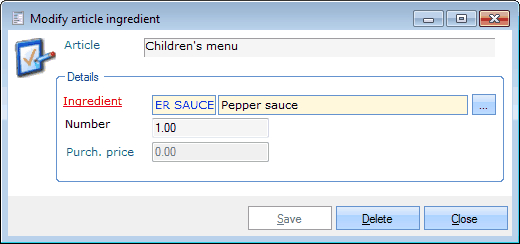 |
Article | Is filled in by default and refers to the article for which you want to create or modify the ingredient. |
Ingredient | Here you can choose the article you want to add as an ingredient. |
Number | Here you can choose the amount of the article you want to add as an ingredient. |
Purchase price | The purchase price of the given ingredient is filled in by default. |
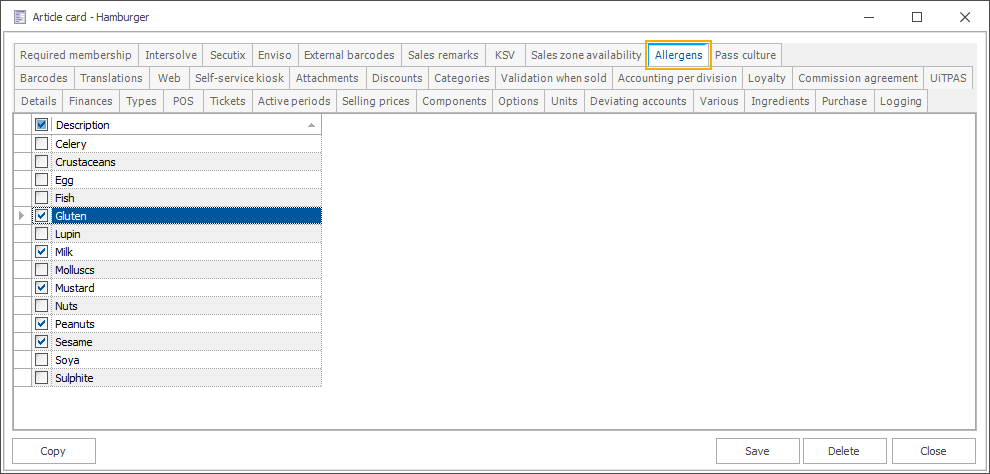
Allergens
The tab Allergens contains a predefined list of the 14 official EU allergens (milk, sulphite, fish, egg, peanuts, molluscs, crustaceans, nuts, lupin, mustard, gluten, celery, soya, sesame).
You can specify allergen information for all relevant food and beverage articles that are sold via the Vintia Order Kiosk and Vintia Order App.
Detailed information on how allergens are displayed is available in the dedicated kiosk and app manuals:
Specify allergens (Vintia Order Kiosk configuration)
Specify allergens (Vintia Order App configuration)
Stock
Note
The tab Stock is only available if a stock article is concerned (to be defined under the tab Types).
Under the tab Stock you can fill in the default warehouse and the number of available articles per warehouse, as well as the stock prices.
General
 |
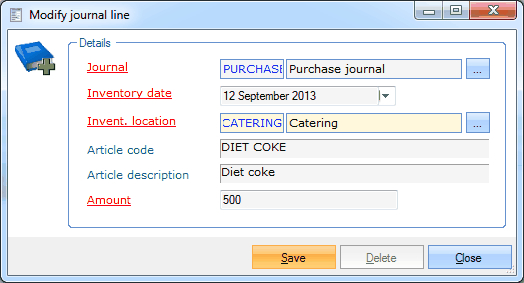
Default warehouse | This is the warehouse that will be suggested by default when registering articles in the purchase journal. |
Current stock price | The current stock price. NoteIf the current stock price is 0, this means that either no stock price has been defined, or that the current date is not within the defined period of the stock price. |
This tab also contains the data concerning the available warehouses for the article.
 |
You can link, modify or delete warehouses for the selected article at all times.
(see manual 'FRAMEWORK'Framework)
 |
Article | The chosen article. |
Warehouse | This is the warehouse in which the article is in stock or not. |
Min. amount | The desired minimal number of units in the chosen warehouse. |
Max. amount | The desired maximal number of units in the chosen warehouse. |
Current stock | The current number of units in stock in the chosen warehouse. |
By clicking on the button Modify stock you can change the stock directly from the article card on the basis of the purchase journal.
 |
In the section Stock price you can determine one or several stock prices of the article (see also Stockmanual STOCK).
You can create, modify or delete stock prices at all times.
(see manual 'FRAMEWORK' Framework)
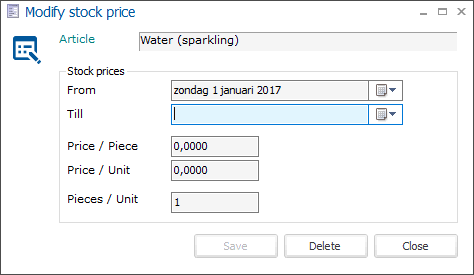
Article | The chosen article. |
From ... till | The period in which the given price is/was valid. |
Price / Piece | This is the price for one piece of the article. The prices can have up to 4 decimal places following the decimal separator. |
Price / Unit | This is the price for one unit of the article. The prices can have up to 4 decimal places following the decimal separator. |
Pieces / Unit | Here you can determine of how many pieces a unit consists. |
Warning
If the Price/Piece is modified, the Price/Unit will be recalculated based on the Pieces/Unit.
If the Price/Unit is modified, the Price/Piece will be recalculated based on the Pieces/Unit.
If the Pieces/Unit are modified, the Price/Piece is modified based on the Price/Unit.
Note
For more information on the topics above, we refer to Purchase and Stockthe manuals 'PURCHASE' and 'STOCK'.
Extra
Finally, the available information fields allow you to link additional information to the stock article.
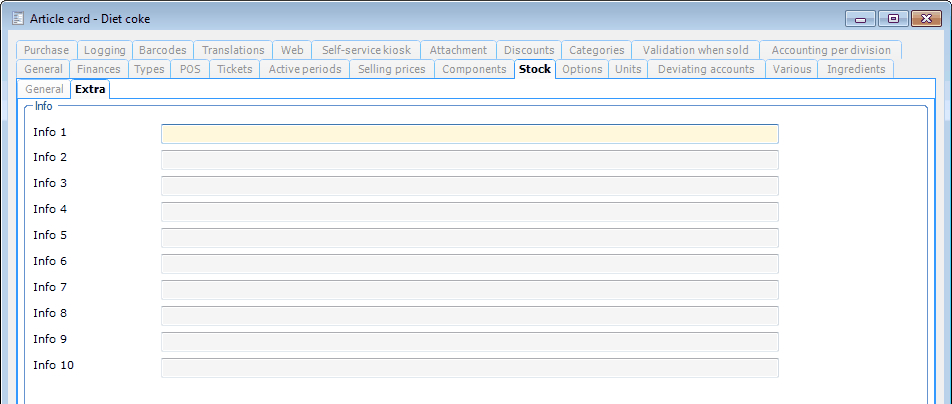 |
If you want to, these information fields can then be added to the layout of some stock reports.
Units
Under the tab Units you can determine in which units the article can be sold or bought.
 |
You can link, modify or delete units for the selected article at all times. (see manual 'FRAMEWORK' Framework)
 |
Article | Is filled in by default and refers to the article for which you want to specify the units. |
Unit | Here you can choose the unit for the article. |
Number per unit | Here you can define the default quantity. |
Note
If additional units are possible on top of the 'basic unit' (the smallest unit of the article), a multiple of the basic unit will always be used, for example:
1 BOTTLE (basic unit)
1 CRATE = 24 BOTTLES
1 PALLET = 1200 BOTTLES (assuming there are 50 crates on one pallet)
Waiting lists
Note
The tab Waiting lists is only available if a waiting list article is concerned (to be defined under the tab Types).
Here you can determine on which waiting lists a customer can register if he buys the chosen waiting list article.
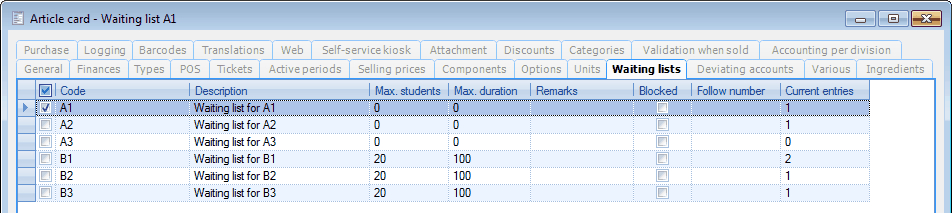 |
An overview will appear of all waiting lists and by ticking off the desired waiting lists, you can make them available for the chosen waiting list article. For more information on waiting lists, we refer to POS - Use, Membership and Course managementthe manuals 'POS - Use','Membership' and 'Course management'.
Lesson groups
Note
The tab Lesson groups is only available if a lesson group article is concerned (to be defined under the tab Types).
Here you can determine for which lesson groups the customer can register if he buys the chosen lesson group article.
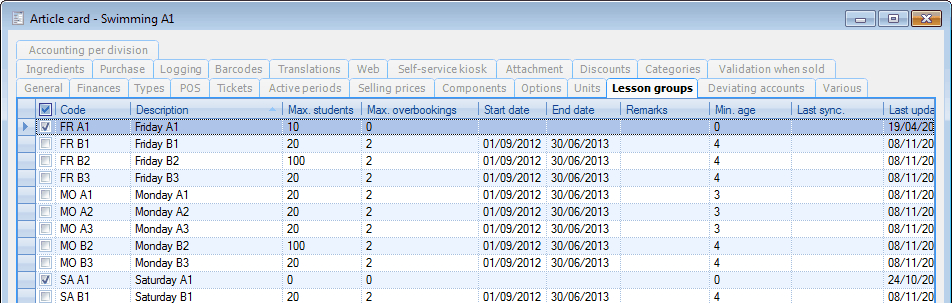 |
An overview of all lesson groups will appear and by ticking off the desired lesson groups, you can make these available for the chosen lesson group article. For more information on lesson groups, we refer to POS - Use, Membership and Course managementthe manuals 'POS - Use','Membership' and 'Course management'.
Dev. accounts
Per article, you can fill in a ledger account number that deviates from the ledger account number set up under the tab Finances.
 |
You can create, modify or delete deviating accounts at all times.
(see manual 'FRAMEWORK' Framework)
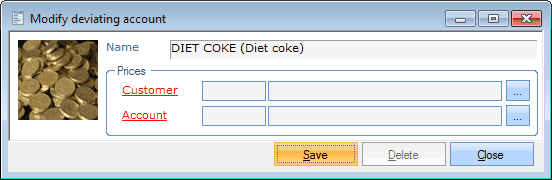 |
Name | Is filled in by default and refers to the article for which you want to specify the account. |
Customer | This is the customer for who the deviating account is created. |
Account | This is the ledger account number on which the sale will be recorded. |
Various
Under the tab Various you can fill in additional information concerning the article.
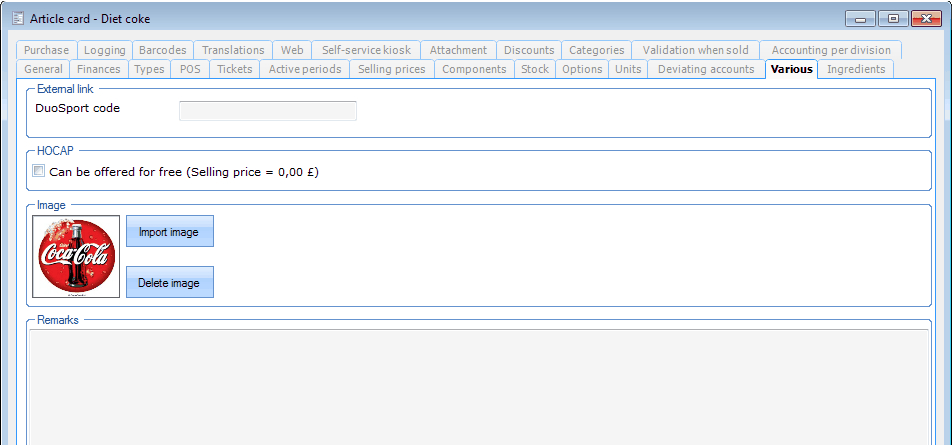 |
In the section External link you can set up the code for this article in order to make the link with DuoSport. (module DuoSport required)
 |
In the section HOCAP (HOreca CAlculation Program) you can determine if the chosen article will be offered for free in the HOCAP module (module HOCAP required).
 |
In the section Image you can import an image that can be visualised on the POS menu (see POS - Managementmanual 'POS - Management') or on the self-service kiosk (see manual 'Self-service kiosk').
In the section Remarks you can fill in a detailed description or additional information.
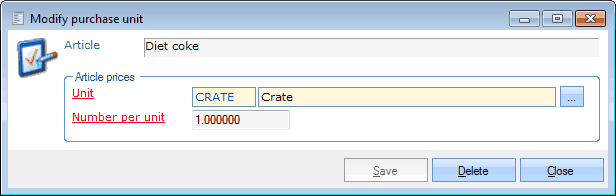
Purchase
Under the tab Purchase you can fill in one or several purchase prices for the article.
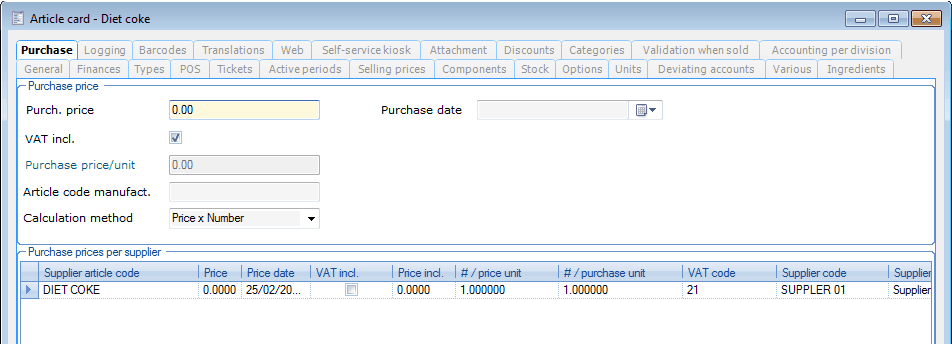 |
Purchase price | This is the purchase price of the article. |
Purchase date | This is the date on which you buy the article. |
VAT incl. | If you tick off this option, the purchase price is VAT incl. |
Purchase price/unit | The price is calculated per unit. The units can be determined under the tab Units. |
Article code manufact. | The article used by the manufacturer of the article. |
Calculation method | The calculation method used for the purchase of the article. |
In the section Purchase prices per supplier you can, if you wish so, define purchase prices per supplier. Module Purchase required.
Family compositions
Note
The tab Family compositions is only available if a family article is concerned (to be defined under the tab Types).
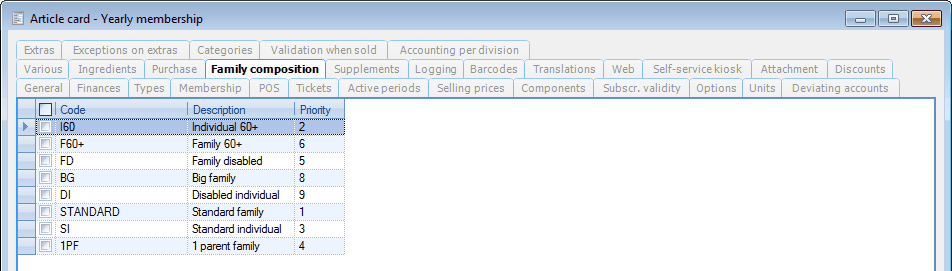 |
By ticking off the family compositions(see also manual 'GENERAL - Customers') ,you can determine for which family composition(s) this article is valid.
Supplements
Note
The tab Supplements is only available if a family article is concerned (to be defined under the tab Types).
If a certain customer meets the test condition, the supplementary amount is added to the article price.
 |
You can create, modify or delete test conditions at all times.
(see manual 'FRAMEWORK' Framework)
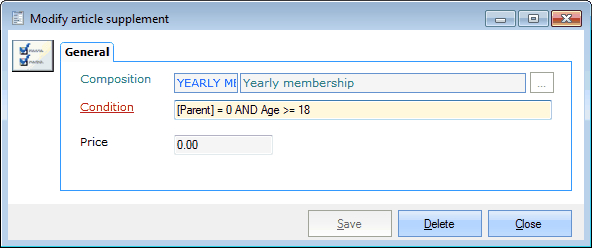 |
Composition | The family article to which you want to link the chosen supplement. |
Condition | If one or several members of the family meet the condition, the supplement will be added to the current article price. In the example above, a supplement will be charged for each child ([Parent] = 0) older that 18 years (Age >= 18) within the family. For more information on the control fields to be used, we refer to the manual 'GENERAL - Customers > Family compositions'Family compositions. |
Price | The price of the supplement. |
Logging
Under the tab Logging you can see all modifications of this article.
 |
In the column Field, you can see which setting has been modified. In the columns Old value and New value, you can see which modification has been done.
Barcodes
Under the tab Barcodes you can link a barcode to this article.
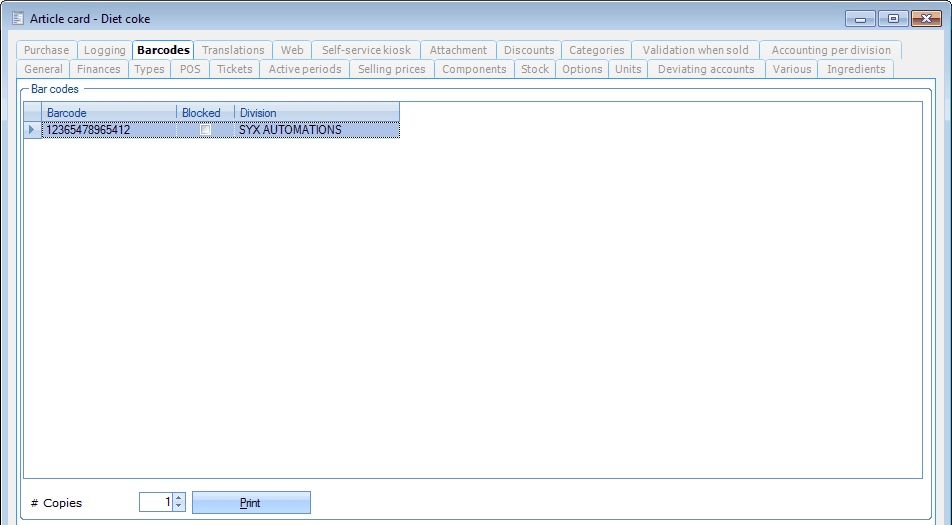 |
You can link, modify or delete barcodes for the selected article at all times. (see manual 'FRAMEWORK' Framework)
|
Article | The chosen article. |
Division | If you want to, you can limit the linked barcode to a division by selecting a division here. |
Barcode | Here you can fill in the number of the barcode or scan the barcode. |
If required, the barcodes linked to the article can be printed, also in several copies:
|
Next, you can indicate which information you want to print:
|
Translations
Under the tab Translations you can fill in an article description in another language. These translations will then be taken over on the receipt (if you have set up on point of sale level that the language has to be asked for if a POS sale is registered) or on the self-service kiosk.
 |
You can create, modify or delete translations at all times.
(see manual 'FRAMEWORK' Framework)
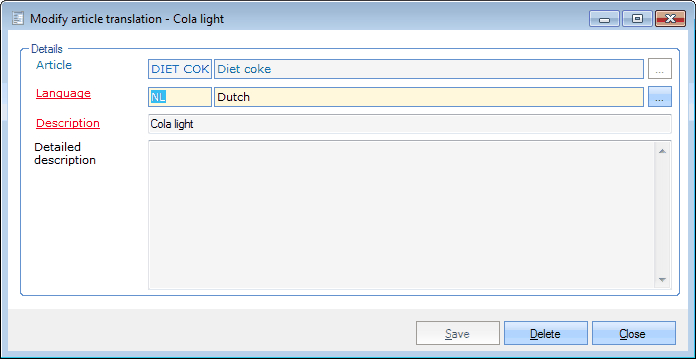 |
Article | Is filled in by default and refers to the article for which you want to create of modify the translation. |
Language | The language in which you want to fill in the description of the article. |
Description | The translation of the chosen article. |
Detailed description | The detailed description of the chosen article. |
Web
Under the tab Web you can determine the settings for processing the article in the Recreatex online modules.
General
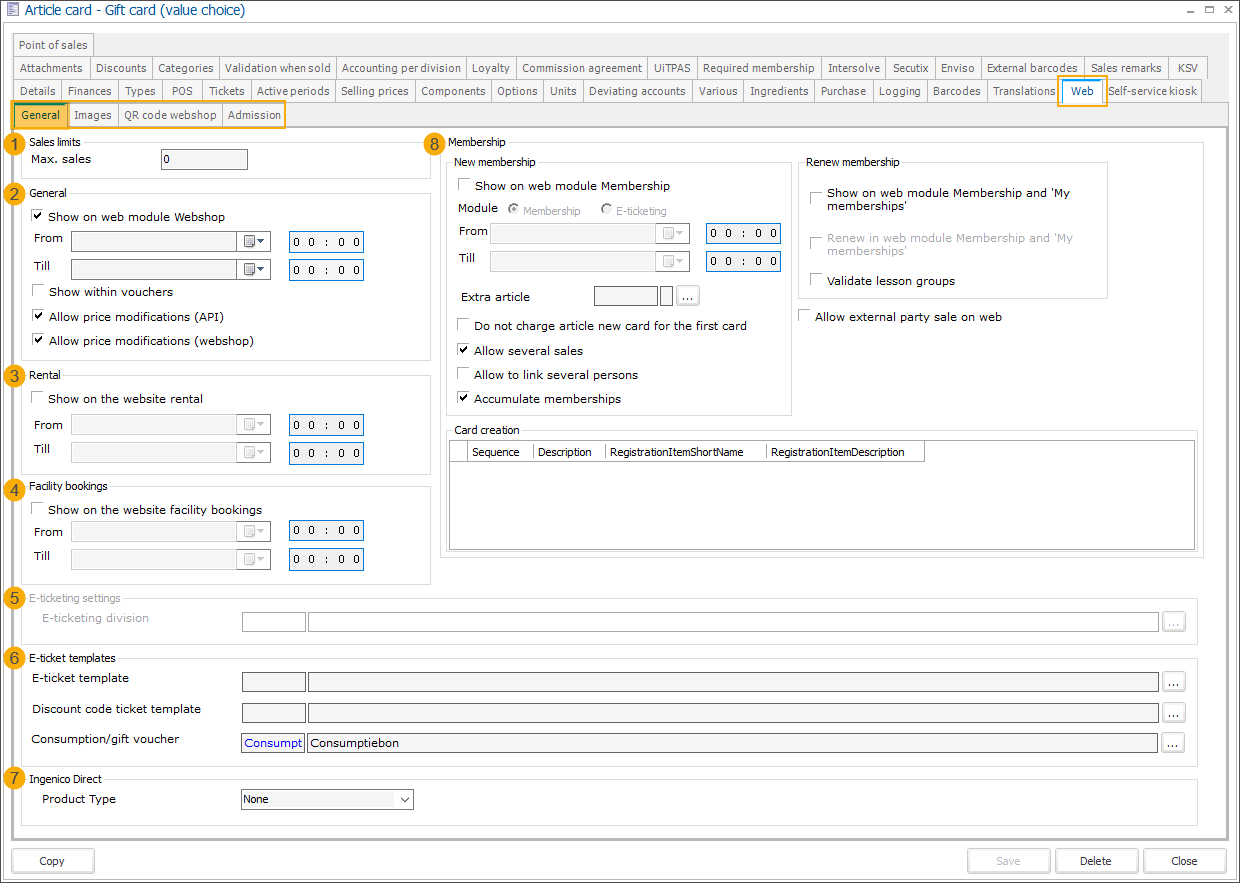
Sales limits
General
Show on Web module Webshop: With this option, you can indicate whether the article may be visible online.
Rental
Facility bookings
E-ticketing settings
E-Ticketing division: Here you can determine which division will be linked to an online sale of the chosen article.
E-ticketing templates
E-Ticketing template: Here you can determine which ticket template will be linked to an online sale of the chosen article.
Ingenico Direct
Membership
Show on web module Membership: With this option, you can determine whether the article should be available in the web module Membership or the web module Tickets.
Section Card creation
In this section, you can configure the card options for a certain membership. Customers purchasing this membership on the Webshop will then be offered a choice to link the new membership to one of the card options.
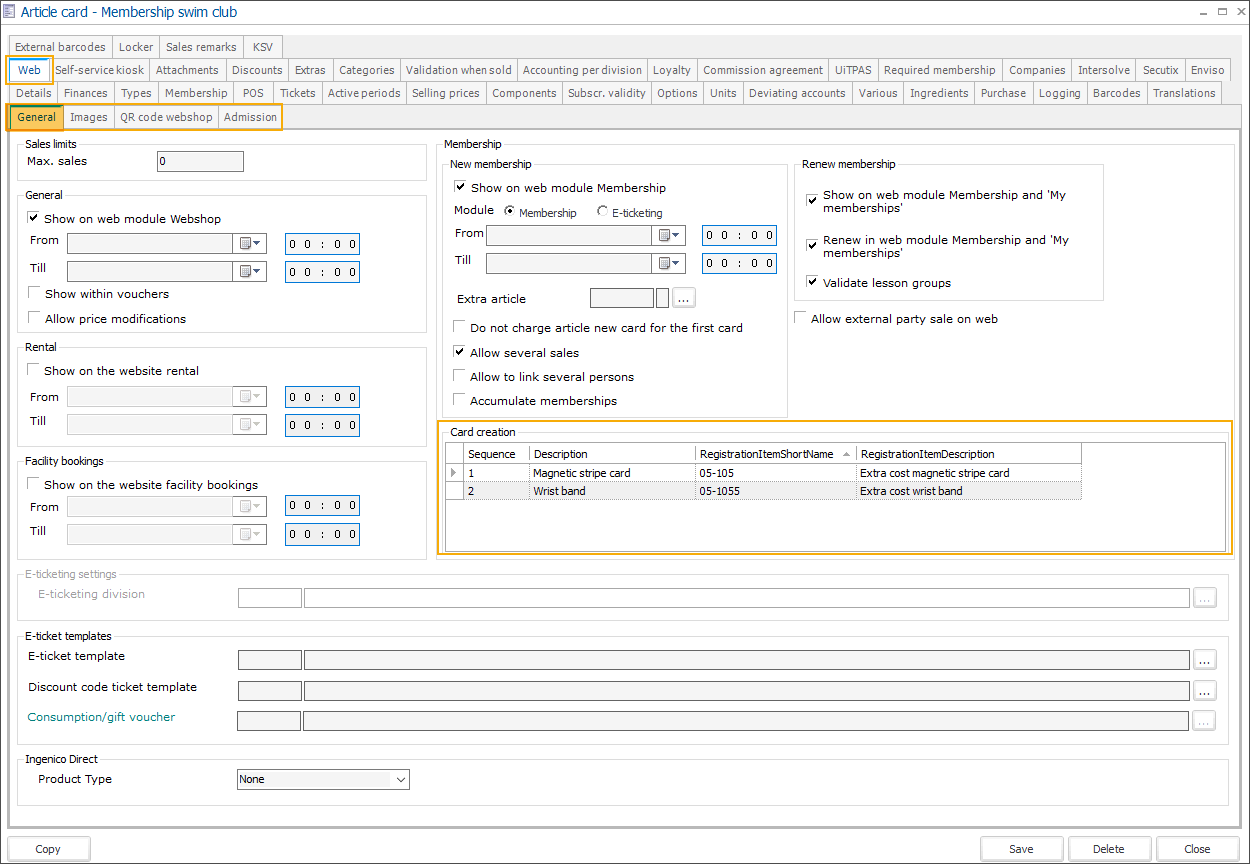
Using the available framework functionality add all relevant card options for this membership.
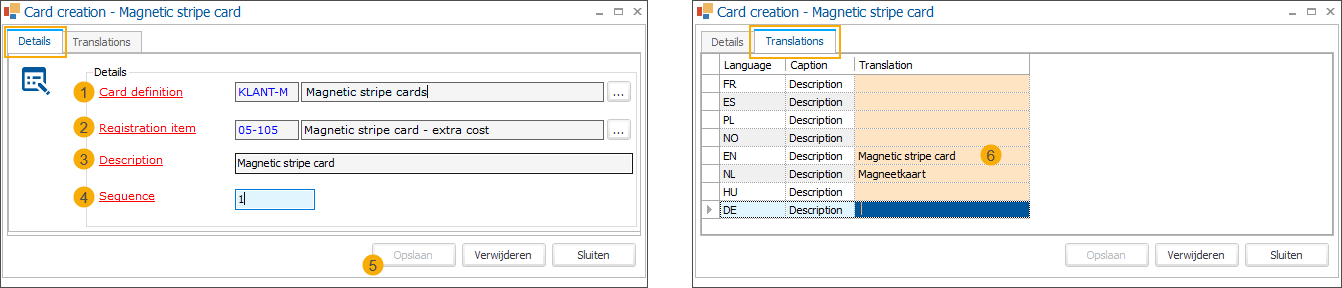
For each card option you need to configure:
Card definition (1): Only card definition with the setting Show on web active can be selected here.
Note
Each card definition can only be used once within the same membership article.
Registration item (2): Select an article to register the sales of this card option. Here you can also define the additional price for this type of card. This price will automatically be added to the card type: (Extra cost of {0})
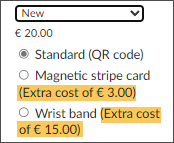
Description (3): Provide a name for your card option. This description will be used on the Webshop if no translations have been provided for the individual languages.
Sequence (4): If you have multiple card options, here you can define the sequence number of the current option. This number will be used on the Webshop to sort and display the options in the desired order.
Click Save (5) to add the card option. In the tab Translations (6) you can now add translated descriptions for all relevant languages.
Save your membership article.
Important
To be able to use these pre-configured card definitions based on a specific card range you have to turn off the setting Automatically create card number on your membership article (tab Tickets > section Access ticket).
For complete information on this functionality, see Choose a card type when purchasing a membership on the Webshop
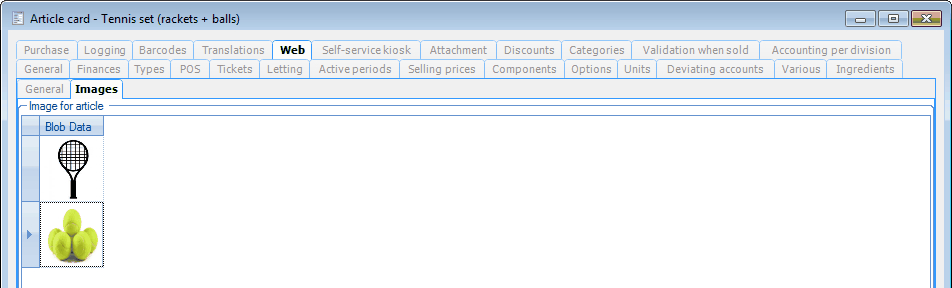
Images
Under the tab Images you can import one or several images for the online visualisation of the article.
Note
The visualisation of more than one web image is only possible in case of web modules based on WSDL.
 |
You can import, modify or delete web images at all times.
(see manual 'FRAMEWORK'Framework)
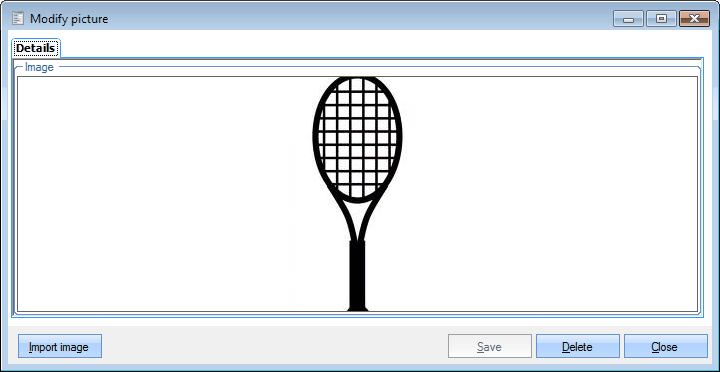 |
Use the button Import image to link an image to the article.
Admission
Article card screen > tab Web > subtab Admission
Settings in this subtab are related to the Admission app
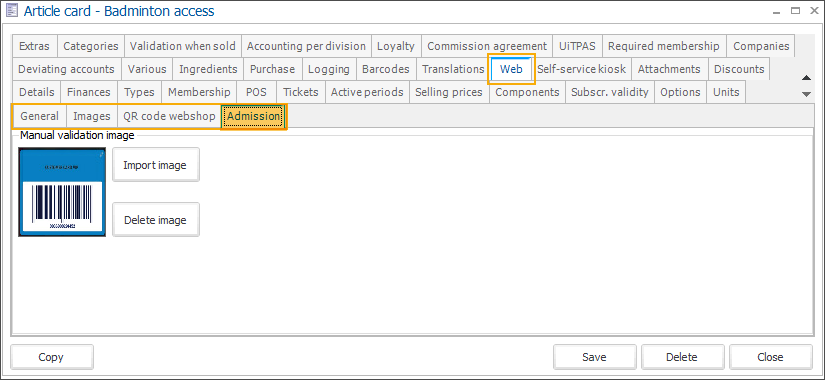
In the section Manual validation image, you add an image of the card that needs to be asked by an employee as an additional validation requirement when validating a membership based on this membership article.
When the Admission app scans this kind of membership at the entrance, this image will be shown on the app screen and the employee will be prompted to request this card for validation.
This setting is a part of the following functionality configuration: Prompt additional membership validation on the Admission app
Self-service kiosk
Under the tab Self-service kiosk you can determine the settings for processing the article on the self-service kiosk. (License Self-service kiosk required)
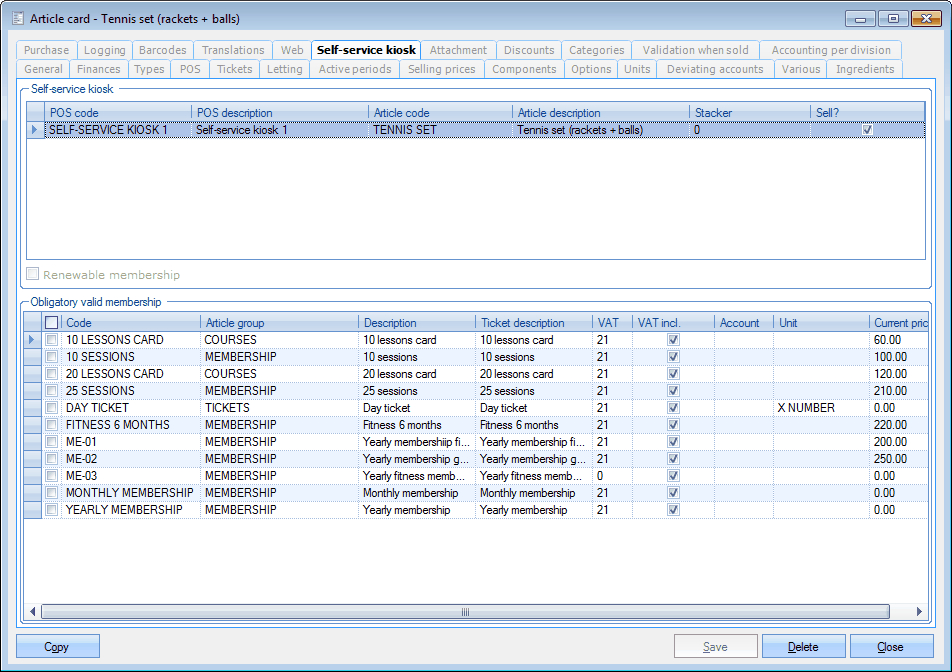 |
If you want to offer the current article on the self-service kiosk, you have to add this article in the section Self-service kiosk.
 |
You can add, modify or delete the article for the self-service kiosk at all times.
(see manual 'FRAMEWORK'Framework)
 |
Article | The current article you want to make available at the self-service kiosk. |
Point of sale | The specific self-service kiosk (= point of sale) on which you want to offer the article and on which the transactions of the article have to be registered. |
Stacker | If the article you want to offer at the self-service kiosk is linked to a plastic card when sold (for example a magnetic stripe card), you can choose here which of the two Stackers (distributors) in the self-service kiosk has to be used to take out the cards. If the article is not linked to a card, you can leave the value 0. |
Can be sold | Here you can determine if the current article is available as an article to be sold at the self-service kiosk. If the article can temporarily not (or not yet) be sold, you can simply deactivate this option. It is consequently not necessary to delete the article from the self-service kiosk. |
If a membership article is concerned, you can also allow the membership article to be renewed at the self-service kiosk (setting Renewable membership).
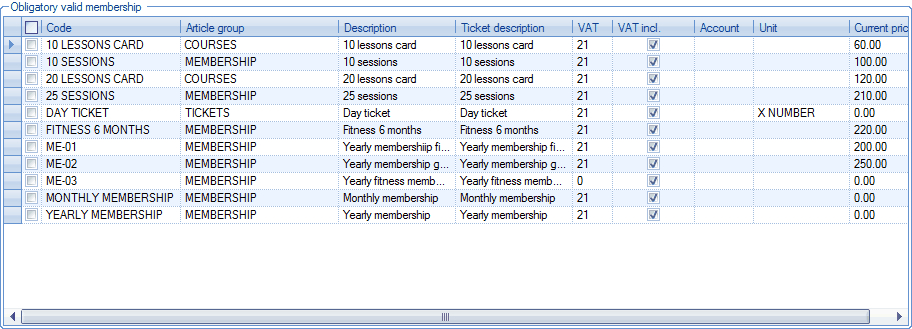
In the section Obligatory valid membership you can tick off the additional valid membership articles the customer needs to possess in order to be able to buy the chosen article.
 |
Attachments
Under the tab Attachment you can link one or several attachments to the chosen article.
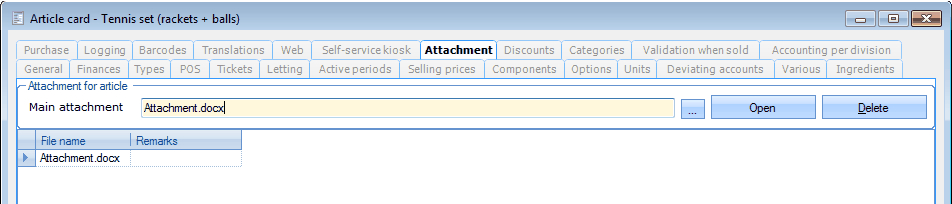 |
Main attachment | The attachment that can also be used for the visualisation of the article on the website. |
You can create, modify or delete attachments at all times.
(see manual 'FRAMEWORK' Framework)
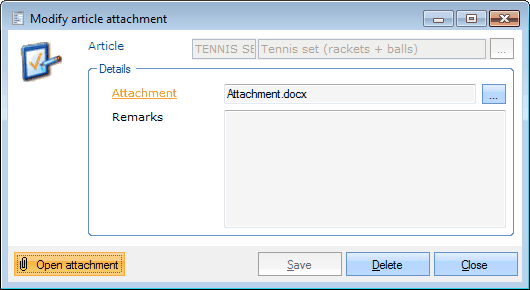 |
Article | Is filled in by default and refers to the article for which you want to create or modify the attachment. |
Attachment | The file you want to link to the chosen article. |
Remarks | Additional information concerning the attachment of the chosen article. |
Tip
If you click on the button Open attachment you can consult the selected attachment (the attachment will be opened in read-only mode).
Discounts
Under the tab Discounts you can link different discounts to the chosen article in the form of a discount amount or a discount percentage.
 |
You can create, modify or delete discounts at all times.
(see manual 'FRAMEWORK'Framework)
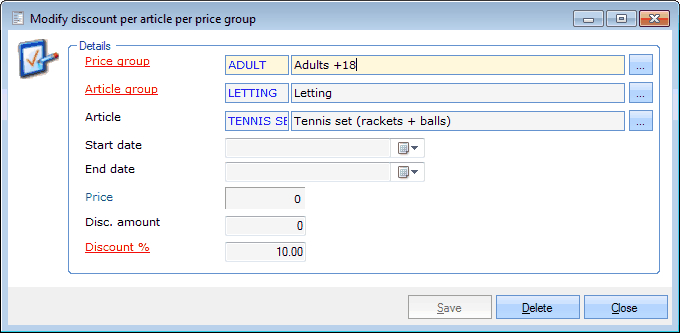 |
Price group | The price group to which the discount applies. |
Article group | The article group to which the discount applies. |
Article | The specific article within the article group to which you link a discount. |
Start date | The start date as of which the discount is valid. |
End date | The end date until which the discount is valid. |
Price | If you link the discount to a specific article, the price of the article is shown here for your information. |
Disc. amount | If you link the discount to a specific article, you can fill in a fixed discount amount here instead of a discount percentage. In this case, the Discount percentage will automatically be calculated. |
Discount % | Here you can fill in the discount percentage for the chosen article group or the specific article. If you link a discount percentage to a specific article, the value next to Discount amount will automatically be calculated and filled in. |
Extras
Note
The tab Extras is only available if a membership article is concerned (to be defined under the tab Types).
The principle of Extras allows you to give a certain advantage (extra) to a customer if he/she renews his/her membership.
 |
You can link, modify or delete extras for the current membership article at all times.
(see manual 'FRAMEWORK'Framework)
Under the tab General of an extra, you can determine the conditions to enjoy the advantage, and fill in the value of the extra e-purse amount that is given to the customer:
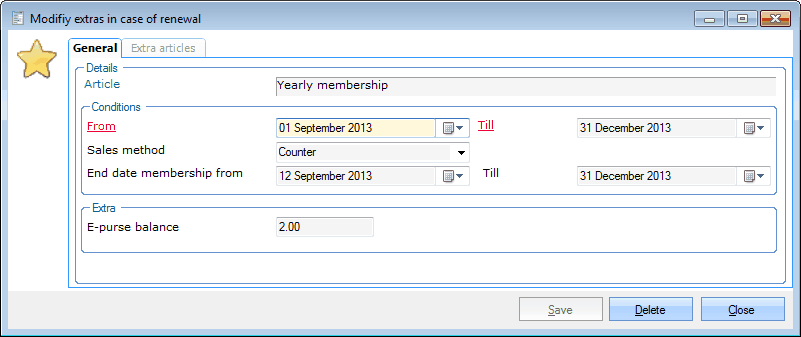 |
Under the tab Extra articles you can tick off the access articles that will be given as an extra to the customer if the conditions defined under the tab General are met:
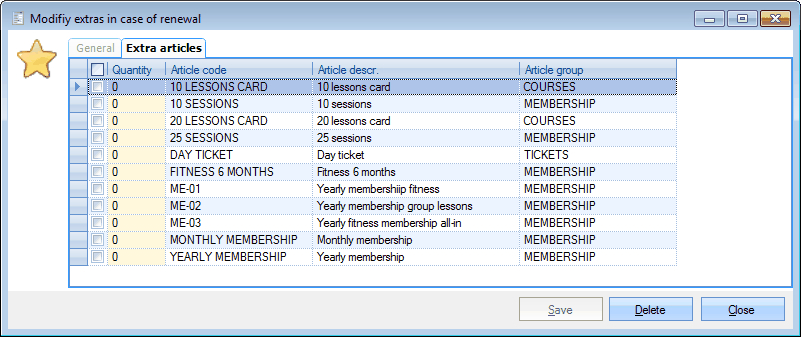 |
For a more detailed explanation on the principle of Extras, we refer to Membership: Extras in case of renewalthe manual 'MEMBERSHIP - Extras in case of renewal'.
Exceptions on extras
Note
The tab Exceptions on extras is only available if a membership article is concerned (to be defined under the tab Types).
Under Exceptions on extras you can select price groups that will be excluded from possible extras in case of membership renewals (see previous paragraph).
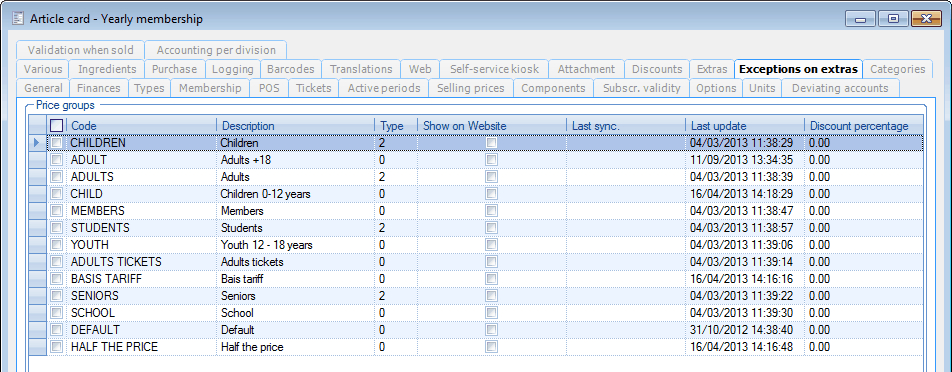 |
For a more detailed explanation on the principle of Extras, we refer to Membership: Extras in case of renewalthe manual 'MEMBERSHIP - Extras in case of renewal'.
Categories
Under the tab Categories the current article can be linked to a certain category.
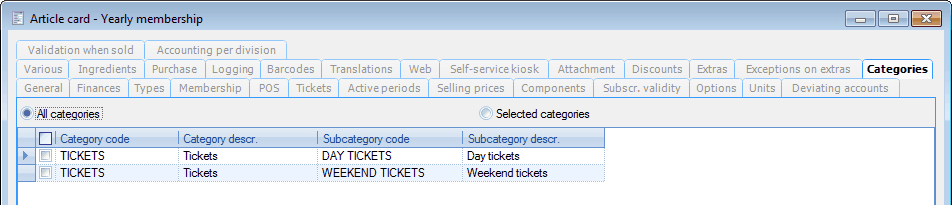 |
You can choose to visualise all categories or only the selected (ticked off) ones.
The possible categories can be managed under General > Articles > Settings > Article categories. (see chapter Settings)
Validation when sold
This tab allows you to create a validation rule for the current article on the basis of the age of the customer. If you sell the article to a customer at the POS, the validation rule will be taken into account.
 |
If you link/consult a validation rule, the window below will appear:
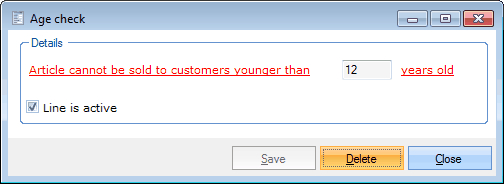 |
If the article is sold (at the POS) to a customer that is younger than the given age, the message below will appear if the customer tries to pay:
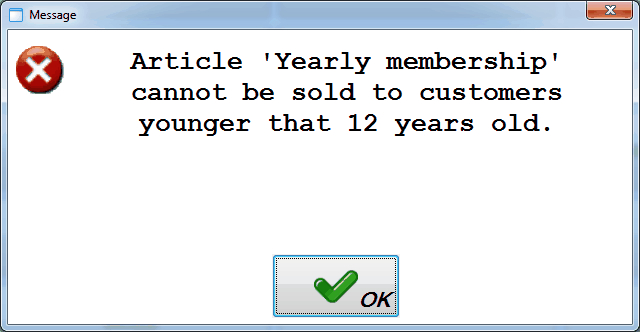 |
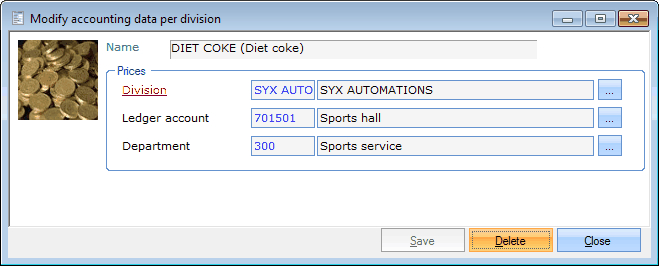
Accounting per division
Under the tab Accounting per division you can fill in accounting data per division.
 |
You can link, modify or delete new accounting data per division at all times.
(see manual 'FRAMEWORK'Framework)
 |
Note
The data that are linked to the division (ledger account and department) are the same as those under the tab Finances on the article card (paragraph Finances in this chapter). The data that are defined per division, however, have priority over the settings under the tab Finances.
Copy an existing article
In order to copy an existing article card (for example to use as the basis for the creation of a new article), you have to click on the button Copy.
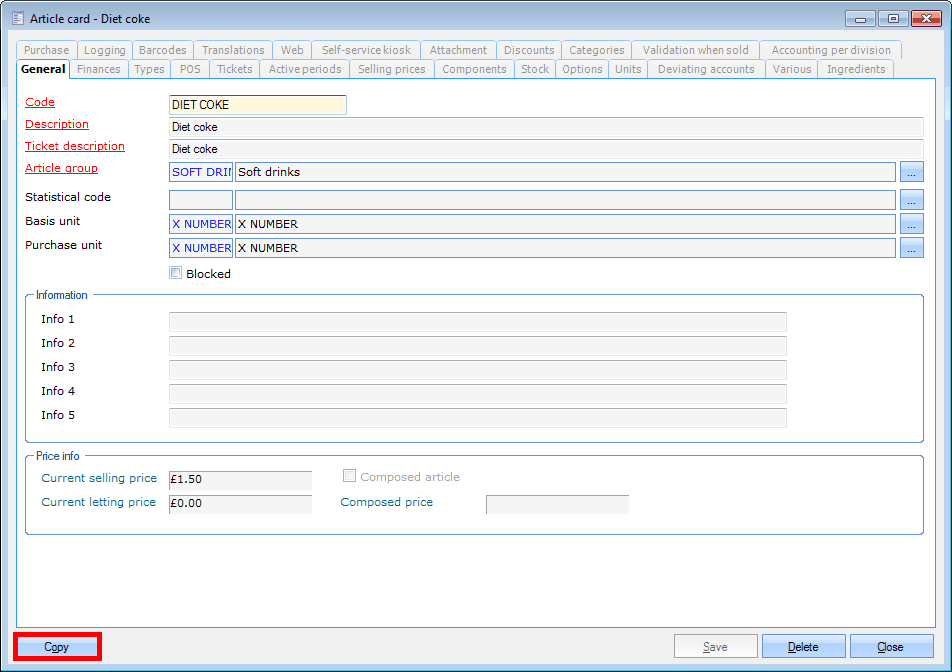 |
The article card will automatically be copied (without message) and immediately visualised. An asterisk (*) will appear next to the Code on the article card in order to indicate that the current article card is a copy of the previous one.
 |
Now, you can modify the data of the copy and if you save it, the new card will be saved as such.
Warning
If you copy an article card, we advise you to modify the data on the copy as soon as possible to avoid double articles in the system.
Delete an article card
Warning
An article card can only be deleted if it has not yet been used. Article cards that are linked to other data no matter where in the Recreatex database, can thus no longer be deleted.
It is, however, possible to Block a certain article (tab General), after which the article in question will no longer be visualised in the different article overviews.
In order to delete the current article card, you have to click on the button Delete.
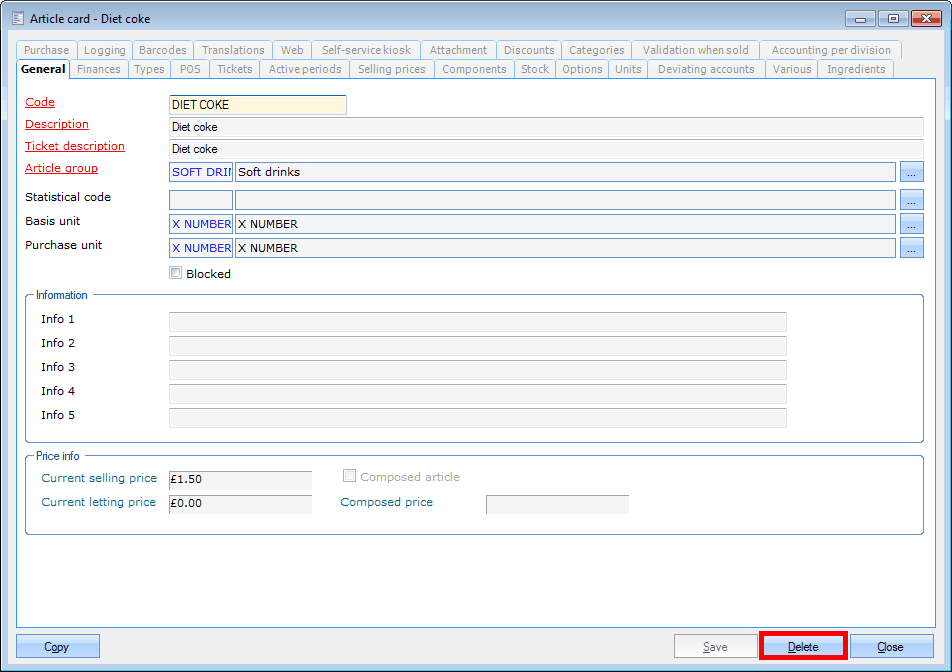 |
The message below will appear:
 |
After confirmation, the article card is irrevocably deleted.