Use customizable calendar styles to highlight exhibition periods
Module: Timeslot ticketing
Available for: Webshop
Utilizing the 5 new configurable styles you can define custom colours for specific exhibition periods, e.g. to highlight additional special events organized during a certain exhibition. The colour-coded calendar view with an explanation provides a clear overview for the Webshop customer on one screen without needing to look for further information.
To configure the colour-coded exhibition periods follow these configuration steps:
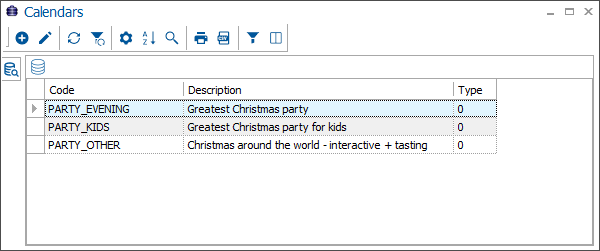
Create calendars for all periods that you want to highlight.
You create calendars in your Recreatex application, module General > Settings > Calendars (existing functionality).
Link the calendars to the exhibition.
Use the available framework functionality to create an exhibition web calendar for each calendar that you want to link and visualize on the Webshop.
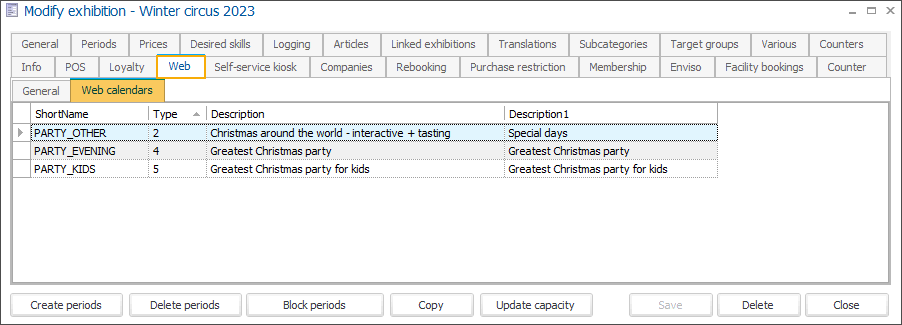
Use the available framework functionality to create an exhibition web calendar for each calendar that you want to link and visualize on the Webshop.
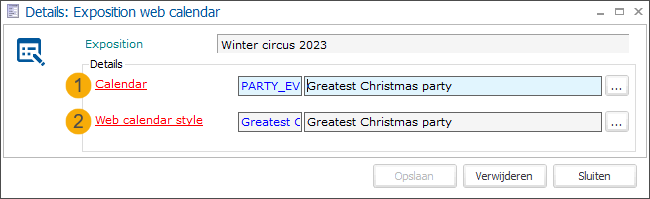
An exhibition web calendar is simply a combination of a Calendar (1) and a Web calendar style (2)
Each calendar can only be linked once within the same exhibition.
Web calendar styles: Currently you can define up to 5 custom styles. It is not allowed to define multiple calendar styles for the same type (1 to 5).
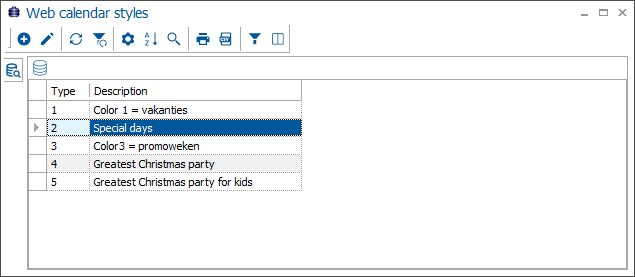
To create each of the 5 calendar styles use the available framework functionality.

In the tab Details select the Type (1) ranging from 1 to 5 and provide a Description (2). Click Save (3).
Under the tab Translations add a translated description for each relevant language (4). The translated descriptions are displayed in the legend and serve not only to explain the meaning of each colour but also to provide basic information about the related event.
If no translations are provided, the web calendar description (2) will be used instead and displayed for all languages.
Assign colour to each calendar style.
In the Webshop Manager, go to Exhibitions > Settings > tab Colours and select a colour for each type of calendar style that you intend to use.

In our example, we are organizing several Christmas-themed events in the month of December/January that can be attended by customers during the regular opening hours: Christmas around the world (interactive exhibition), Greatest Christmas party and Greatest Christmas party for kids.
We want to make sure our customers can clearly see in the calendar view on the Webshop which event takes place on which day(s) and provide all necessary basic information.
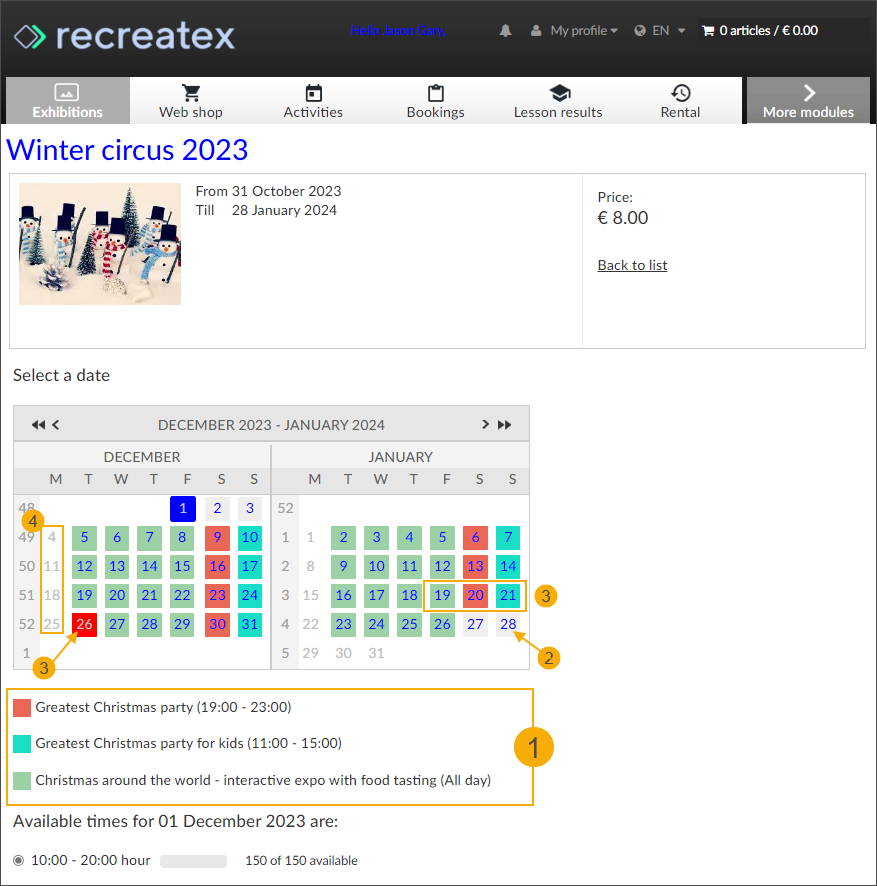
Colour-coded exhibition periods to highlight the special events during Christmas - customized styling
Note
If 1 period has multiple overlapping colour-coded events, only the colour of the calendar style that has been defined as first will be visualized in the calendar.
E.g. If you first define the calendar style type 3, the colour linked to this style will be used in the calendar even if there are other events with other calendar styles on the same day.
Regular exhibition periods with available capacity - default styling
Exhibition periods without capacity (sold-out) - default styling
No exhibition periods available - default styling