Recreatex backoffice configuration
Enable season planning for infrastructures
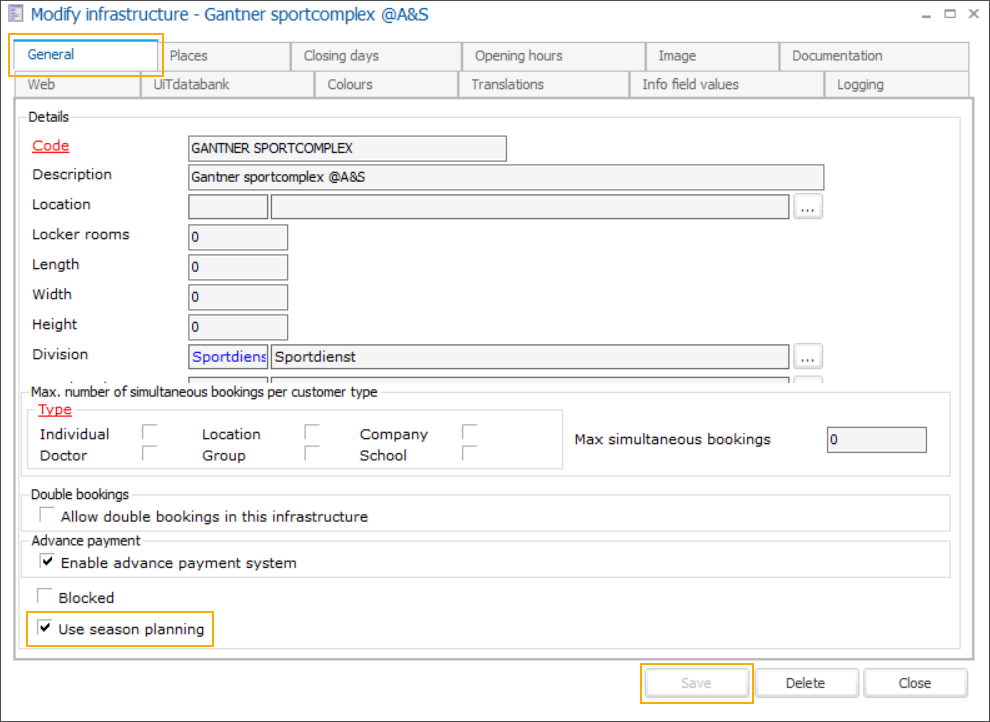
In Recreatex, go to Bookings > Settings > Infrastructures and open an infrastructure from the overview.
In the Modify infrastructure screen, go to the tab General and select the setting Use season planning. Then click Save and Close.
Note
The activation/deactivation of the setting Use season planning is registered in the application logs, in the Modify infrastructure screen, under the tab Logging.
Define status colours
In Recreatex, go to Bookings > Parameters
Under the tab Season planning, click the
 button next to each status type to define a colour. Then click Save.
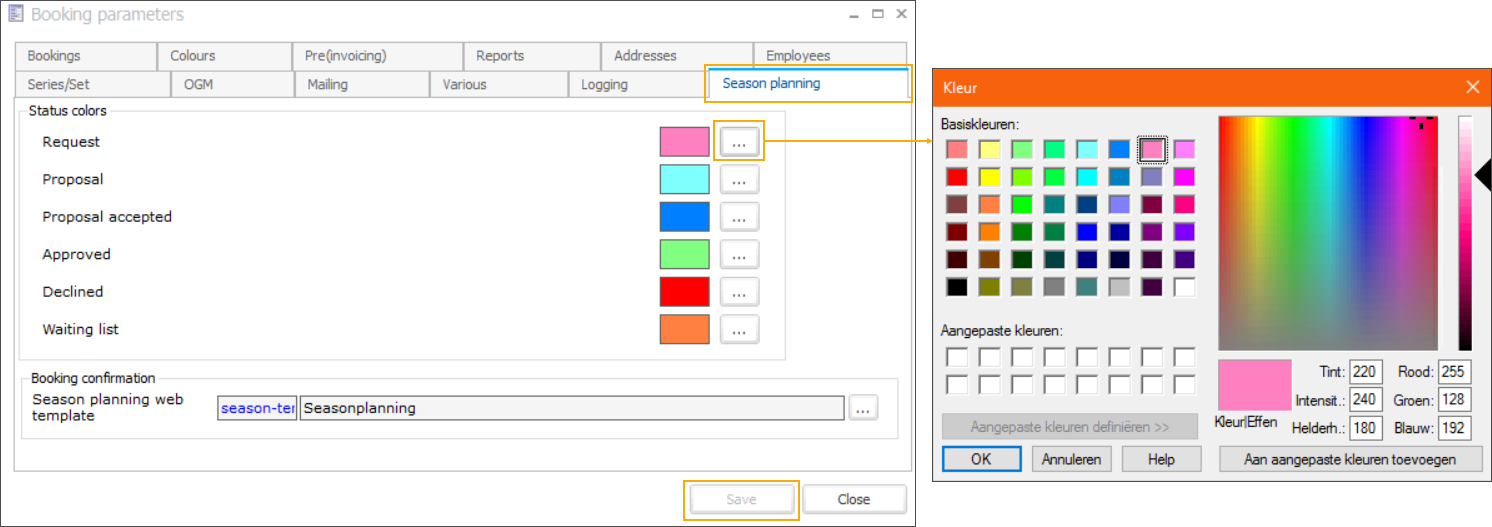
Note
The status colour modifications are registered in the application logs, in the Booking parameters screen, under the tab Logging.
Allow customers to use season planning on the webshop
The use of season planning functionality on the webshop can be defined per customer, via the address card.
In Recreatex, go to General > Basic data > Customers > e.g. Addresses (All) and from the overview select the user.
In the Address card screen, go to the tab Bookings and select the setting Use season planning. Then click Save and Close.
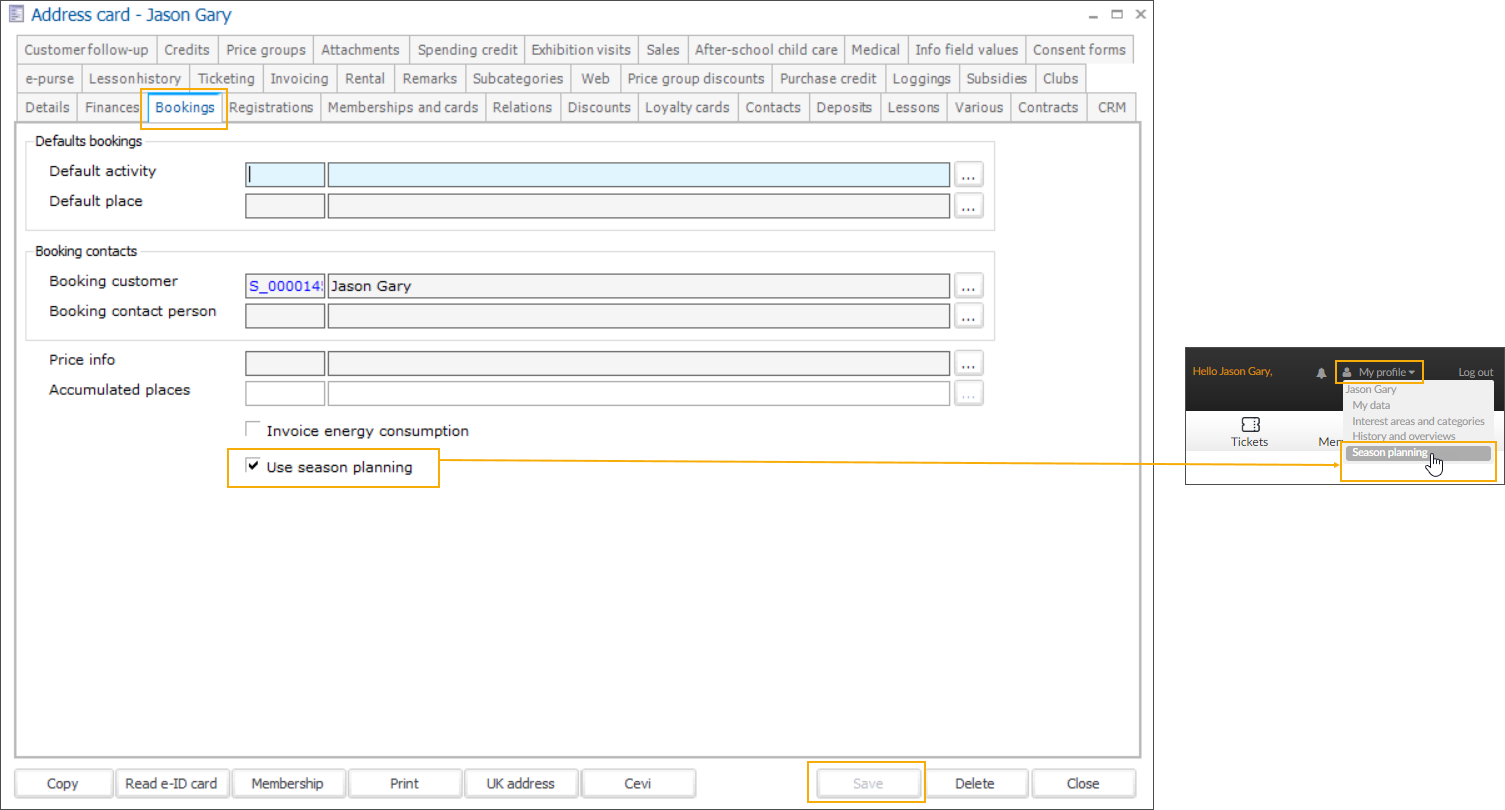
The user can now access the season planning functionality on the Webshop from the My profile menu.
Make infrastructures, places and activities available for season planning on the Webshop
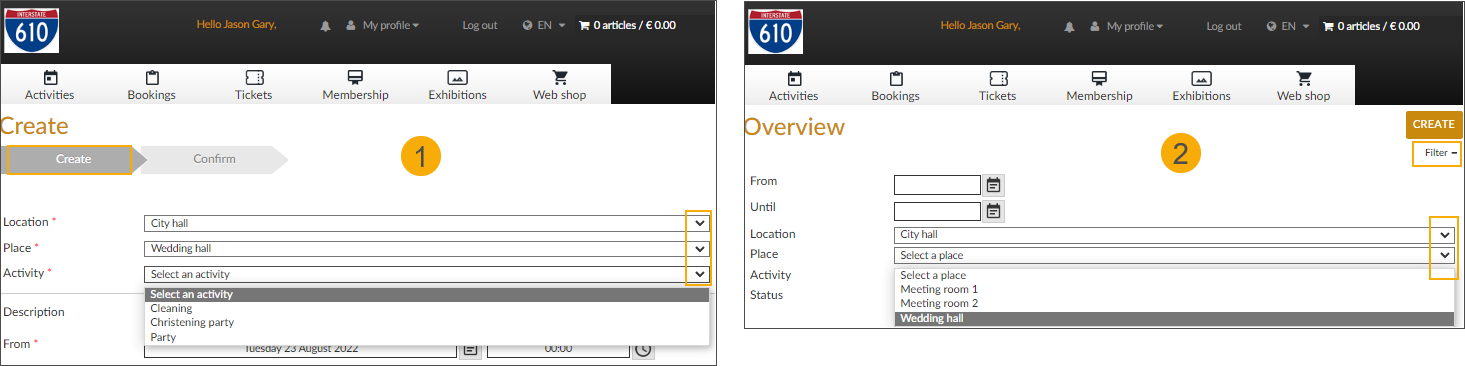
A separate setting on multiple levels (infrastructure, place, activity) allows you to exactly specify which infrastructures, places and activities should be available for season planning and can be requested via the Webshop.
Correctly configured infrastructures, places and activities will become available on the Webshop in respective drop-down lists - when creating a new booking series (1) and when filtering the existing booking series in the overview (2).
Important
The general setting Show on Website must also be selected for each infrastructure, place and activity in order to make the season planning-specific setting work.
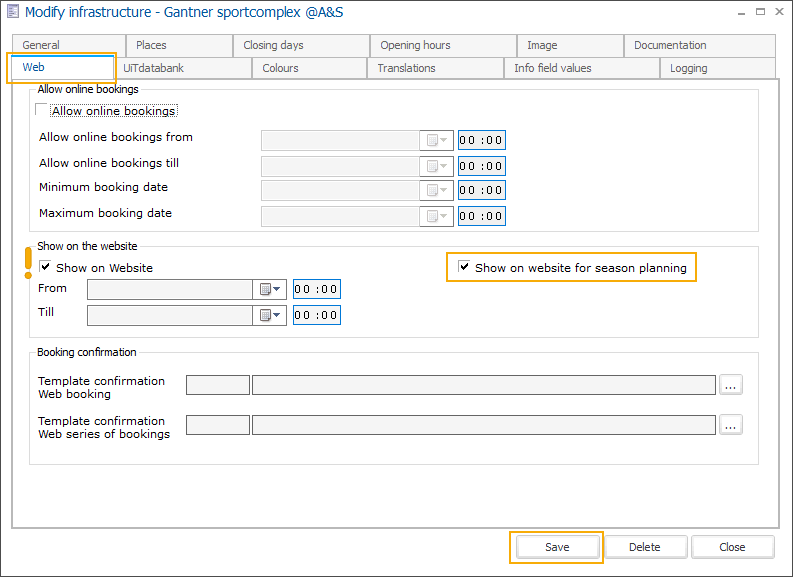
In Recreatex, go to Bookings > Settings > Infrastructures and open an infrastructure from the overview.
In the Modify infrastructure screen, go to the tab Web and select the setting Show on website for season planning. Then click Save and Close.
If your infrastructure is divided into multiple places, you can specify which places can be requested via the webshop.
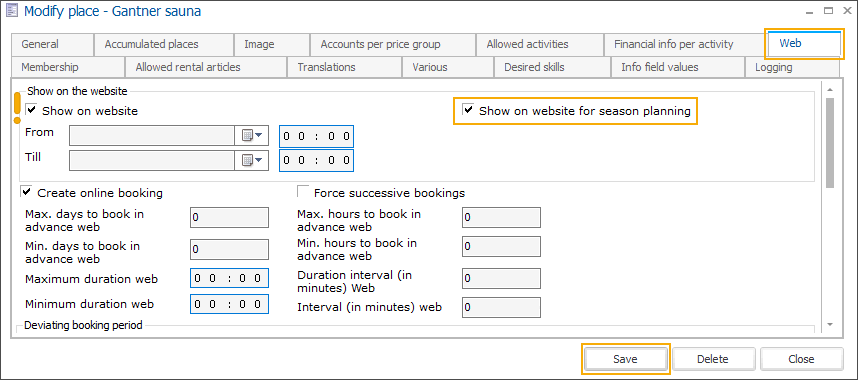
In Recreatex, go to Bookings > Settings > Places and open the relevant places one by one from the overview of all places (regardless of the infrastructure), or
In the Modify infrastructure screen, go to the tab Places to select and modify only the places for that particular infrastructure.

In the Modify place screen, go to the tab Web and select the setting Show on website for season planning. Then click Save and Close.
Repeat this step for each place.
If your places are linked to 1 or more activities, you can specify which activities can be requested via the webshop.
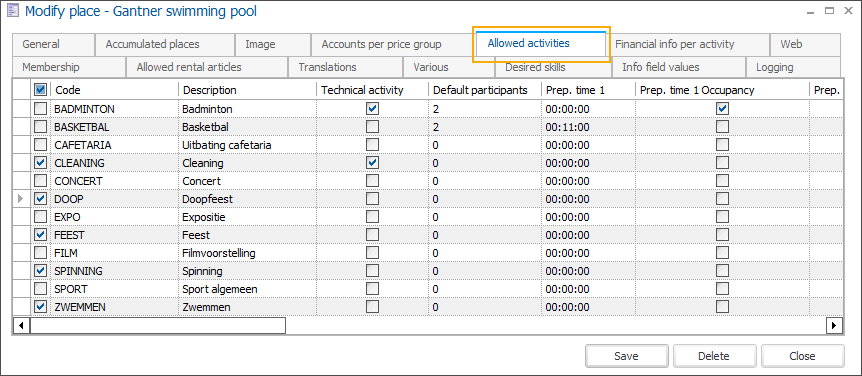
In Recreatex, go to Bookings > Settings > Activities and open the relevant activities one by one from the overview of all activities (regardless of the place), or
In the Modify place screen, go to the tab Allowed activities, to select and modify the activities for that particular place.
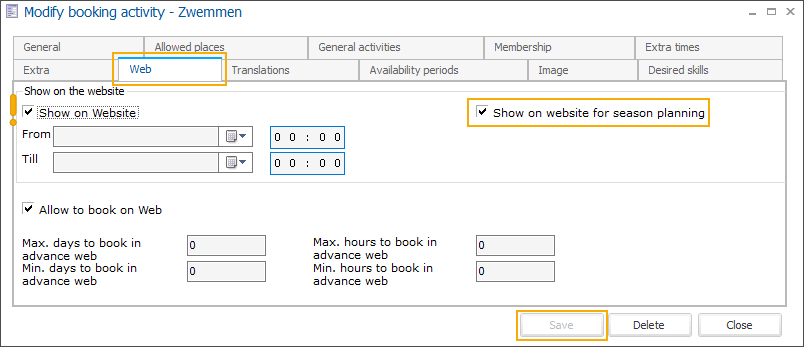
In the Modify booking activity screen, go to the tab Web and select the setting Show on website for season planning. Then click Save and Close.
Repeat this step for each activity.
Tip
Go to Bookings > Settings > Season planning > Modify 'Show on website for season planning' to access and modify all infrastructures, places and booking activities on 1 screen.
Selecting the checkbox on the left (1), automatically activates the setting Show on website for season planning under the tab Web (2).
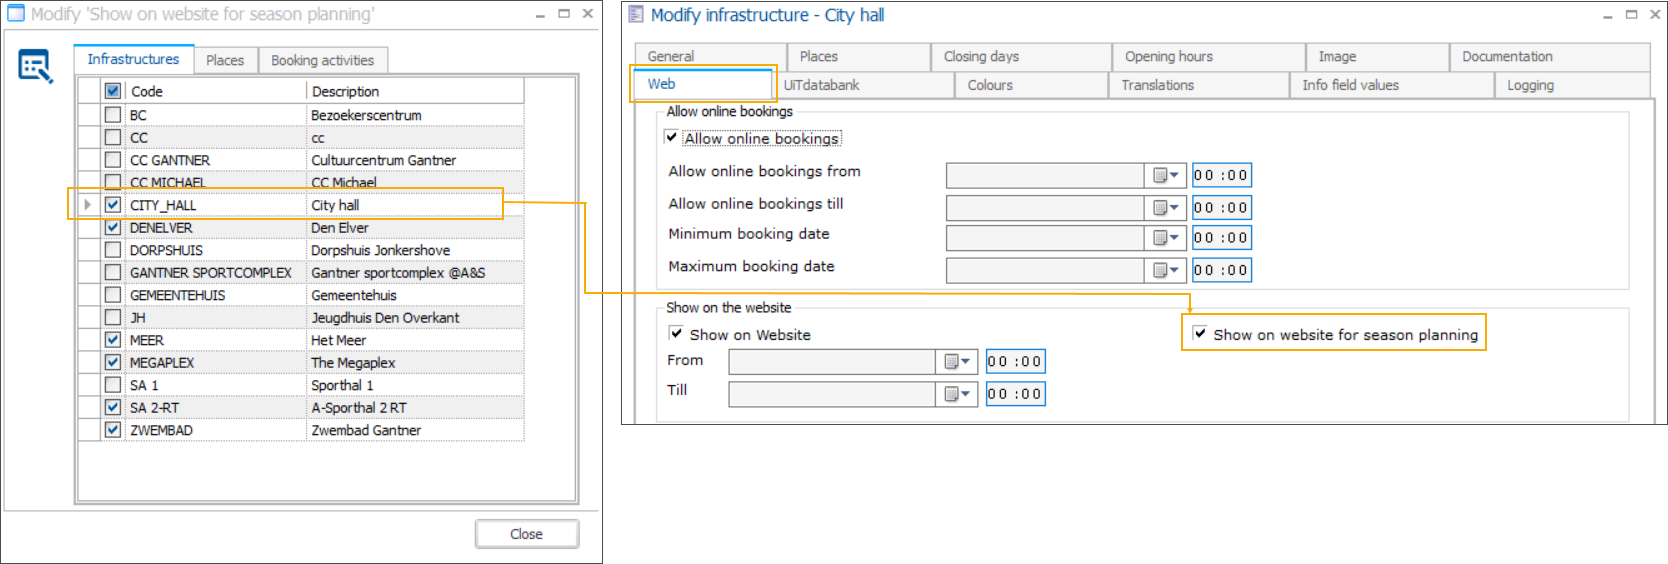
If you need to modify additional settings, you can always open the detail of the infrastructure, place or activity, using the context menu (right-click), double-click the line or press the F3 shortcut on your keyboard.
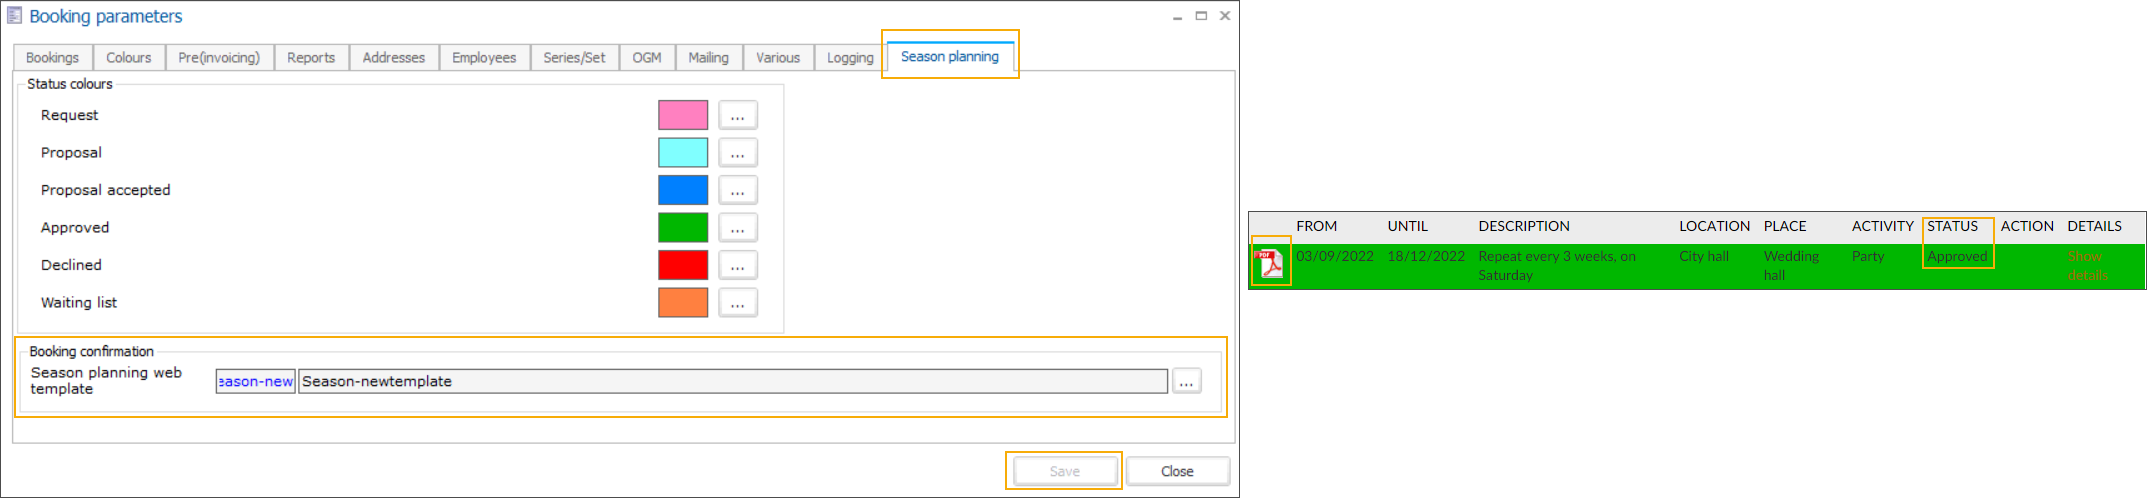
Configure confirmation template for the Webshop
In Recreatex, go to Bookings > Parameters
In the Booking parameters screen go to the tab Season planning
In the section Booking confirmation , select your predefined confirmation template and click Save.
When a season planning booking series is approved the customer can print a confirmation in the Webshop, in PDF format.
For more information on how to create a template, see ???Ticket templates .