Recreatex 5.12.1
Introduction
These release notes contain all new features and modifications for the Recreatex intermediate release 5.12.1.0
New versions
The Recreatex Q1 2016 release contains the development tickets and internal optimisations of the following applications and their respective versions:
Recreatex 5.12.1.0
Recreatex WSDL 3.8.1.0
Recreatex WEBSHOP 3.8.1.0
What's new
Back office
Easily track money flows when using safe deposits at point-of-sales.
Improved ticket delivery using printing and emailing entrance tickets in batch.
Data archiving increases your operational performance.
Enhanced course management, possibility to unsubscribe students and register for catch-up lessons.
Web shop
Powerful insights using flexible Google tag manager analytics.
New functions and improved usability for online sales of culture events.
Enhanced usability with our new flow for online sales of memberships.
You can now provide corporate customers with a reseller web shop for easy in-company ticket sales.
Flexible styling of emails sent from web shop.
Redeem gift cards online.
Point of sale
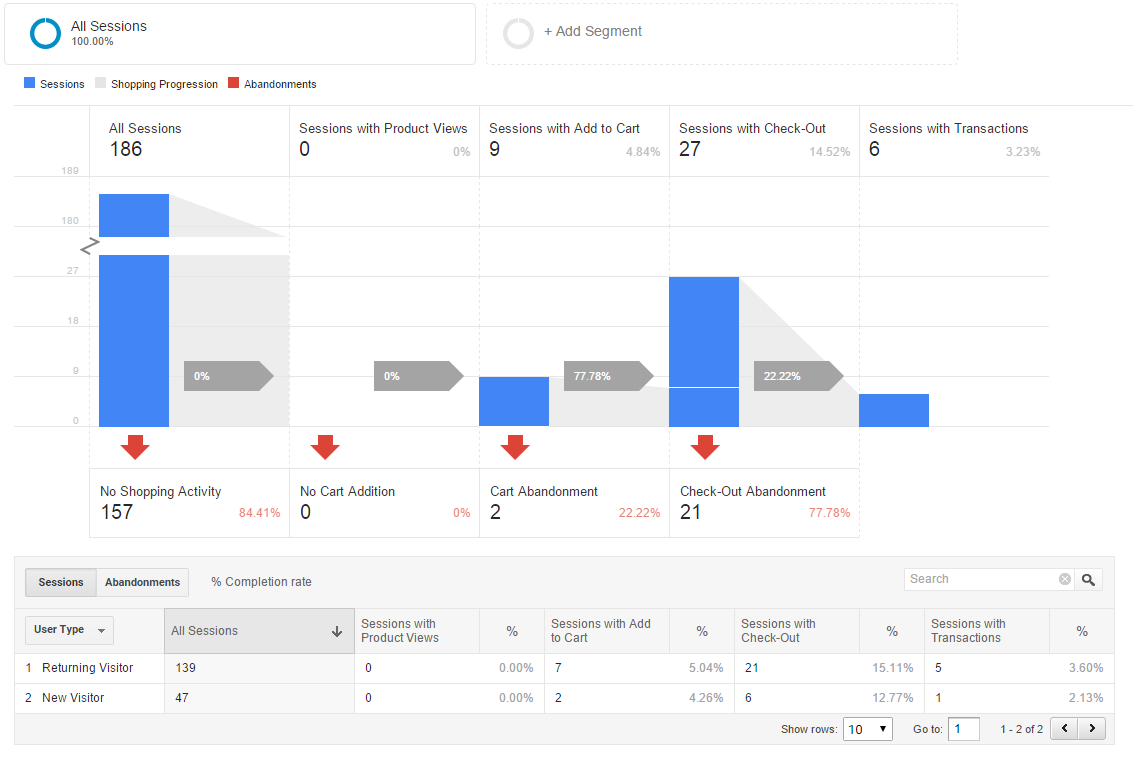
 Web analytics improvements
Integration with Google Tag Manager
See in which step of the purchase flow the user abandons the web shop.
 |
Membership usability improvements
A new flow for the memberships is available
Choose whether to use the old or the new flow
Display prices based on relevant price group
All safe-deposits in your organisation can be configured in Recreatex
Easily view the amount of money in the safe
Keep track of the money flow from and to the safes
 Ticket management
Print tickets in batch
Email tickets in batch
Filter on date / customer / delivered / ...
Ticketing features and usability improvements
Show the hall plan and all prices in the culture event detail pages
Use donations for culture events
Sell culture event tickets on the reseller web shop
New type of reseller web shop to sell tickets to employees of a specific company
Configure a company-specific banner and introduction text
Link entrance tickets, exhibitions and culture event tickets
Configure company-specific ticket lay-outs
Online use of gift cards
Sell e-gift cards on the reseller web shop
Use gift card to pay for Purchase on the web shop
Warning
IMPORTANT: Only use the new gift card functionality in combination with randomly generated card numbers. If card numbers are generated with autonumbering, the customers could guess the gift card numbers.
Course management
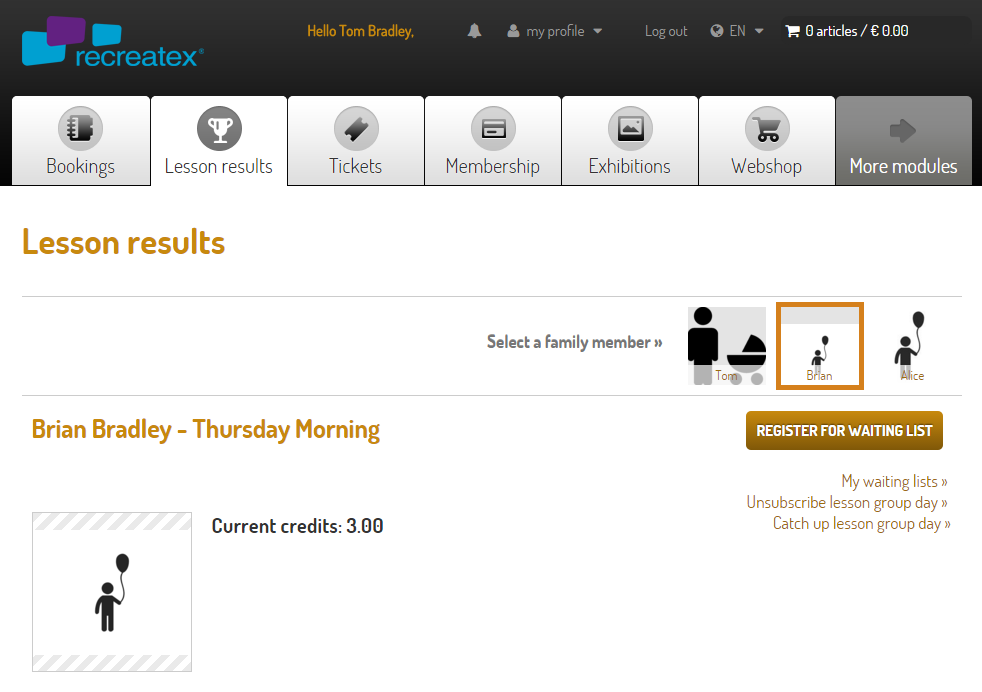
Unsubscribe / catch-up lessons
Enable the possibility to unsubscribe from a lesson and/or register for catch-up lessons
A student can save credits by unsubscribing from a lesson
Credits can be exchanged to register for another day in another lesson group of the same level
Capacity of the lesson group is taken into account when registering for a catch-up lesson
Parents can unsubscribe for a lesson on the web shop.
Parents can see their credits on the web shop.
Parents can register for catch-up lessons on the web shop
 |
Data archiving
Note
Initially, this feature will only be gradually introduced to a limited number of customers.
Archive database and views database can be created when updating or during new installation.
Archived data is stored in a separate database.
Reports in the operational database can dynamically visualise data stored in both the operational and archive database by using a separate views database.
New users can be created and be added to the views and archive database.
User can choose what data to archive.
User can choose age of data to archive.
 |
Detailed information
This topic contains more detailed information about certain new features in this version:
Safe-deposits
Companies that work with POS often keep a part of the cash money in a safe-deposit. Some of them put the cash in the safe-deposit at the end of a shift. Others regularly transfer the cash to a safe-deposit during the day to avoid having large amounts of cash in the POS. Some companies may even have multiple safe-deposits on multiple locations. It is now possible to manage safe-deposits in combination with POS. You can now track money that is transferred between a safe-deposit and a POS.
Getting started
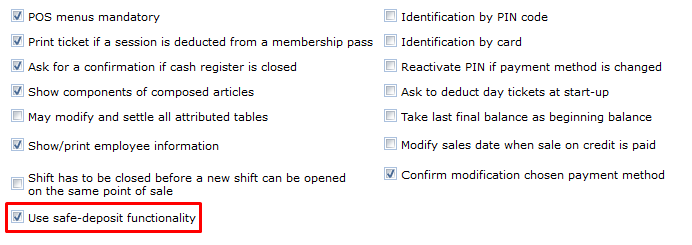
Configuration
To be able to use this functionality go to POS > Parameters and tick the check box Use safe-deposit functionality and press Save. For the changes to take effect, you may need to log off the user and log back in again.
 |
To manage a safe-deposit go to POS > Safe-deposits > Safe-deposits. Safe-deposits can be created and configured by using the Framework functionalities.
 |
Authorisation
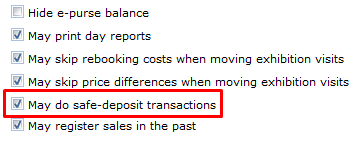
To determine which employee is authorised to do safe-deposit transactions go to General > Basic data > Employees > Employees and then select tabs Cashier data > Authorisation > POS. Then tick the check box May do safe-deposit transactions.
 |
Safe-deposit functionalities at cashier level
Cash transfer at start of shift
When starting a new shift on your POS, Recreatex will ask you to enter the amount of starting money you took out of the safe-deposit and to select the safe-deposit you took the money from. After pressing OK, a transaction report will be printed. The starting money is deducted from the money that was in the safe-deposit. The balance of the safe-deposit will be adjusted accordingly.
 |
Cash transfer during shift
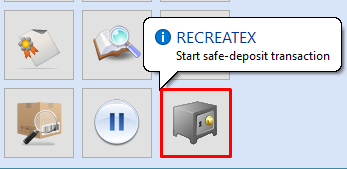
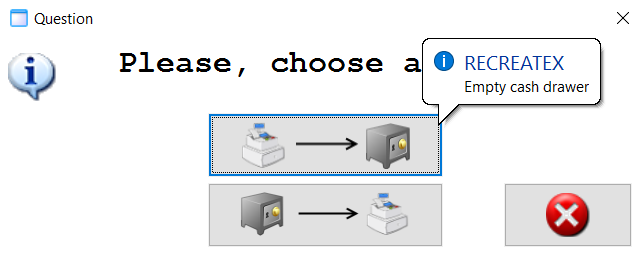
During a shift, money can be transferred to/from a safe-deposit by pressing the extra POS function Start safe-deposit transaction.
 |
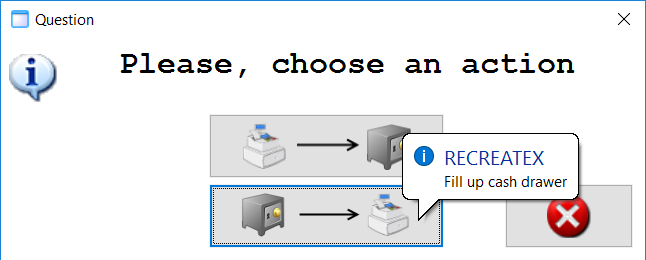
Next, you will be given the choice to either transfer money from the POS to the safe-deposit (Empty cash drawer) or to transfer money from the safe-deposit to the POS (Fill up cash drawer).
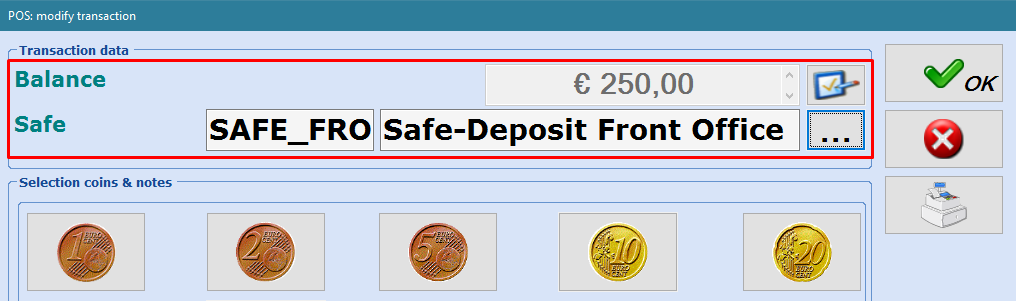
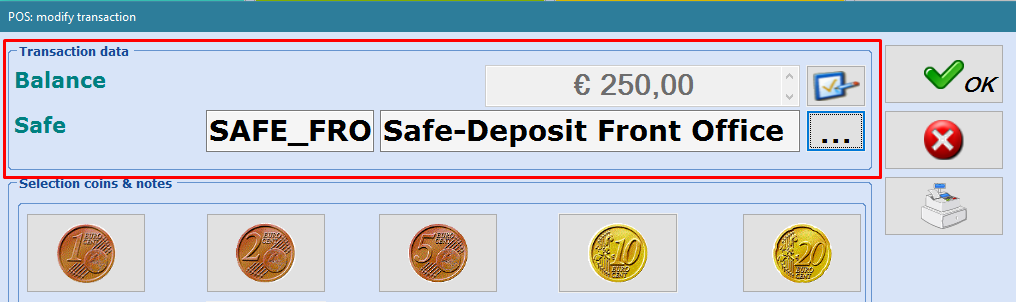
In the next window, you can enter the amount you wish to transfer and select the safe-deposit you wish to transfer to/from. After pressing the OK button, a transaction report will be printed. The balance of the safe-deposit will be adjusted accordingly.
 |
Cash transfer at end of shift
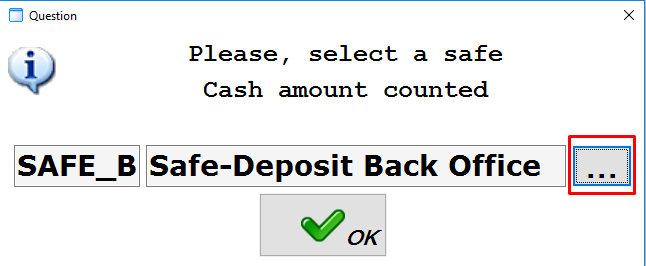
When closing a shift on your POS, Recreatex will ask you to enter the Amount counted. If necessary, a cashier report can be printed by pressing the printer button. Proceed by pressing OK.
 |
Recreatex will now ask you to select the correct safe-deposit. After pressing OK, a transaction report will be printed. The balance of the safe-deposit will be adjusted accordingly.
 |
Safe-deposit functionalities at back-office employee level
Modify transactions
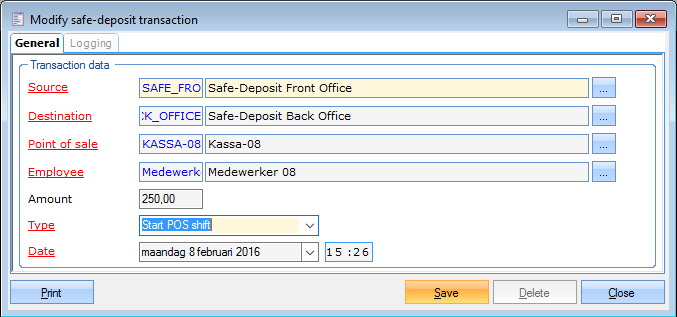
In case of mistakes or discrepancies, all transactions can be modified by an authorised user in the back office. To modify transactions go to POS > Safe-deposits > Visualisations > Transactions or go to POS > Safes > Safe-deposits, select a safe-deposit and go to the tab Transactions. If you double-click a transaction line, the window Modify safe-deposit transaction will open.
Here you can modify all the data of the transaction and also change the transaction type in the drop-down box: Start POS shift, End POS shift, Take out of cash drawer, Fill up cash drawer, Empty safe, Fill up safe, Safe Mutation and Correction line.
After verification click Save to finalise your modification. The balance of the safe-deposit will be adjusted accordingly.
 |
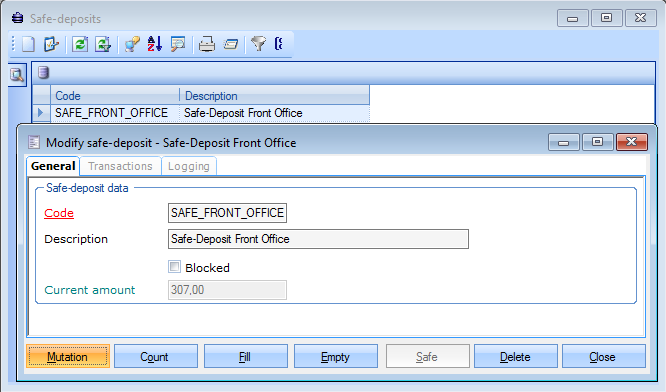
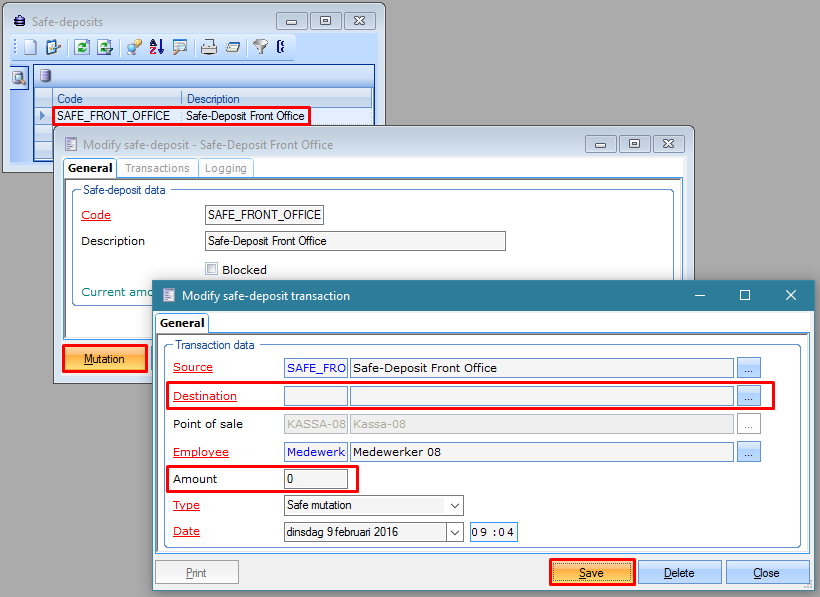
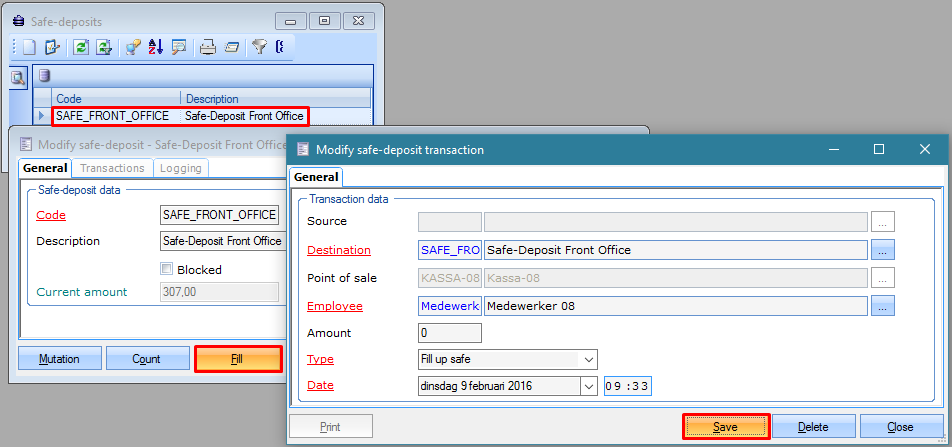
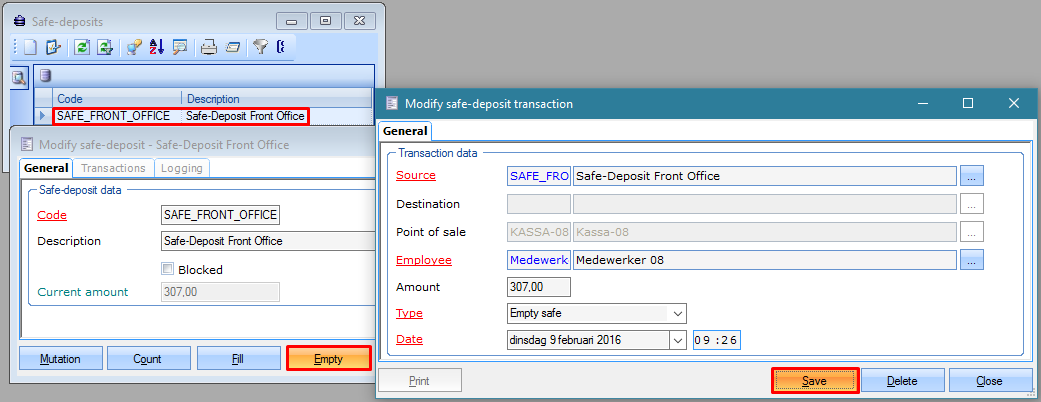
There are also 4 quick buttons to make common modifications easier: Mutation, Count, Fill and Empty. To access these buttons, go to POS > Safes > Safe-deposits and double-click a safe-deposit.
Mutation: If you have more than one safe-deposit, you can transfer cash from one safe-deposit to another. Go to POS > Safe-deposits > Safe-deposits.
 |
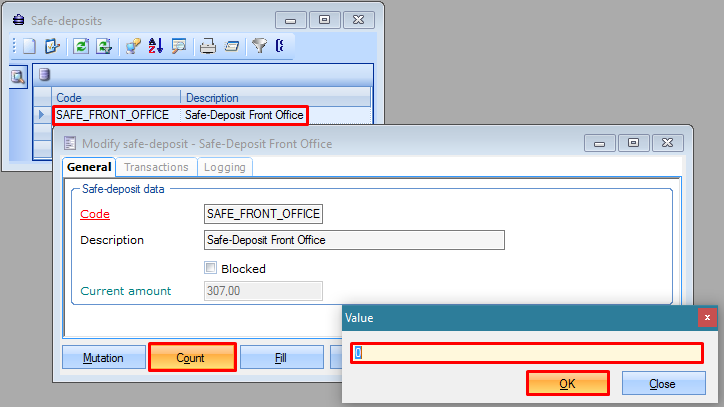
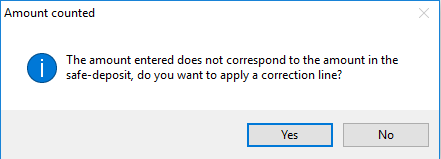
Count: If you discover discrepancies when counting the cash in a safe-deposit.
Enter the correct amount that you counted in the window Value and click OK. Next click Yes to apply a correction line.
Fill: If you need more cash, e.g. coins for change.
 |
Empty: If cash money needs to be transferred to the bank.
 |
Visualisations
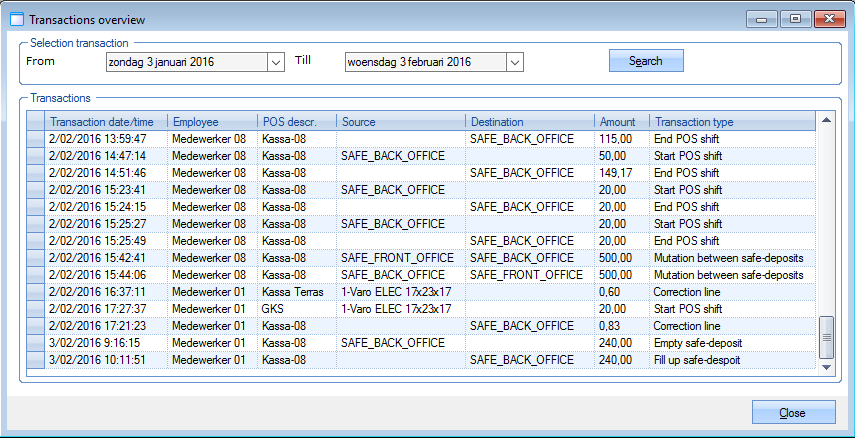
To get an overview of all transactions go to POS > Safe-deposits > Visualisations > Transactions. Here you can define the period in time for which you wish to see all transactions and then click Search. If you double click on a transaction line, the window Modify safe-deposit transaction will open. Here you can also correct potential mistakes or discrepancies.
Reports
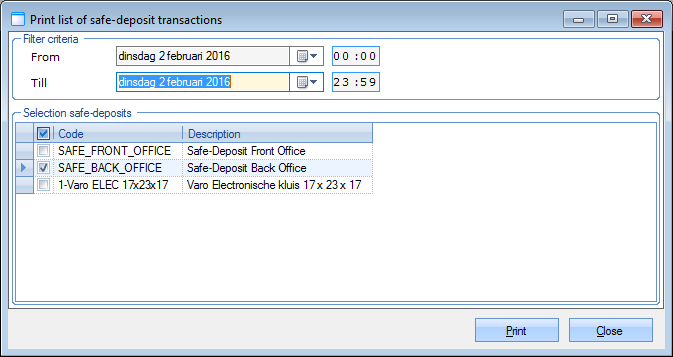
To print transaction reports of a certain period in time go to POS > Safe-deposits > Reports > List of transactions. Next you can determine the period in time and which safe-deposit(s) will appear on the report. Next click Print.
 |
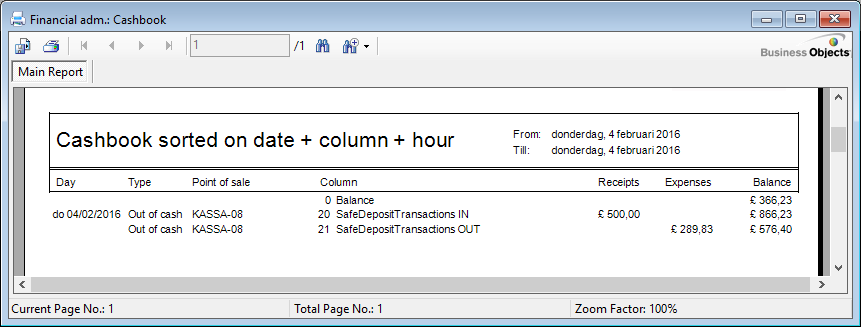
Cashbook
To keep track of the cash going in and out of the safe-deposit(s) two columns have been added to the cashbook. To make these appear in the cashbook, please create column 20 and 21.
20 contains the sum of the transactions of type 'Refill safe' and the sum of the transactions of type 'Correction' where the SourceID is unknown.
21 contains the sum of the transactions of type 'Empty safe' and the sum of the transactions of type 'Correction' where the DestinationID is unknown.
 |
Ticketing features and usability improvements
Usability improvements
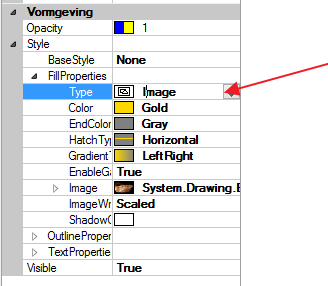
It is possible to configure an image for a block to show on the web shop. This image needs to be configured in the hall plan in Recreatex.
 |
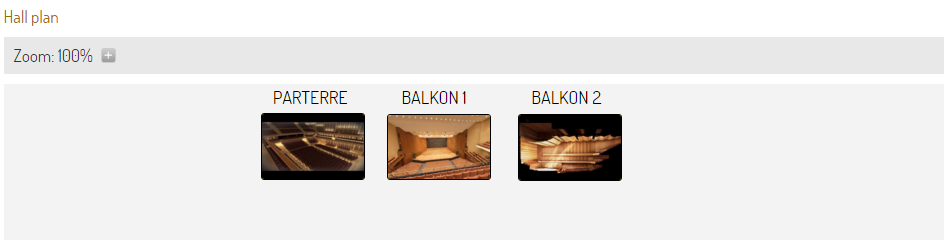 |
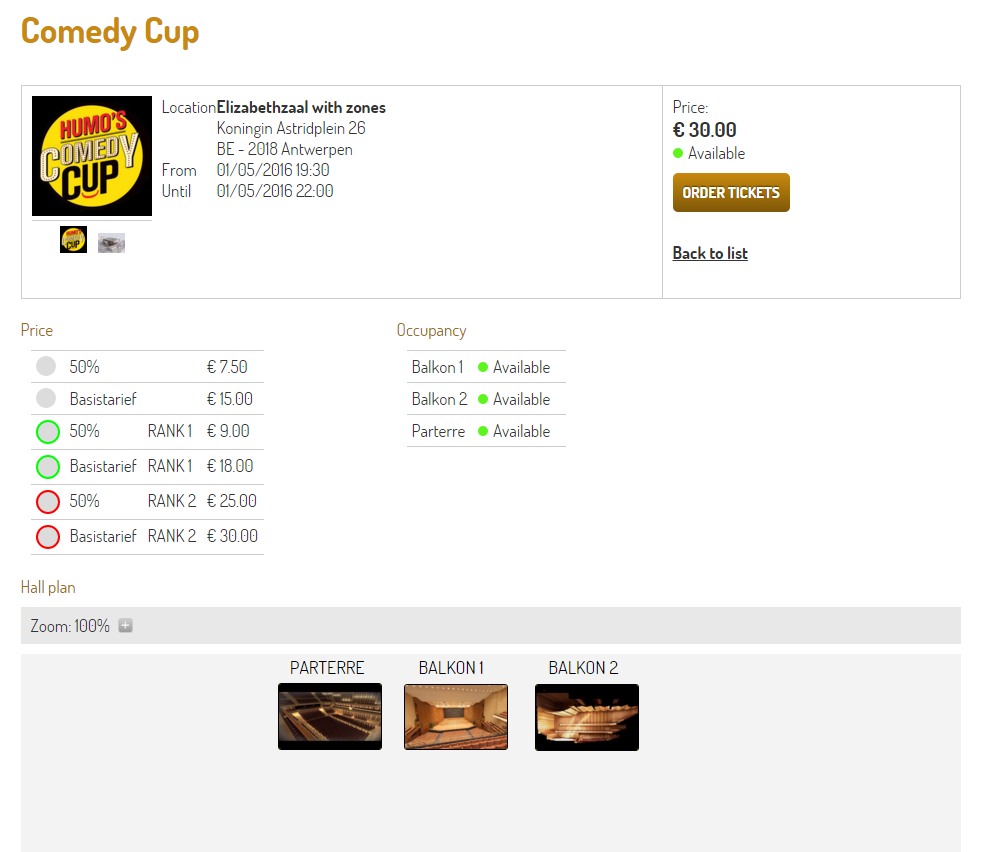
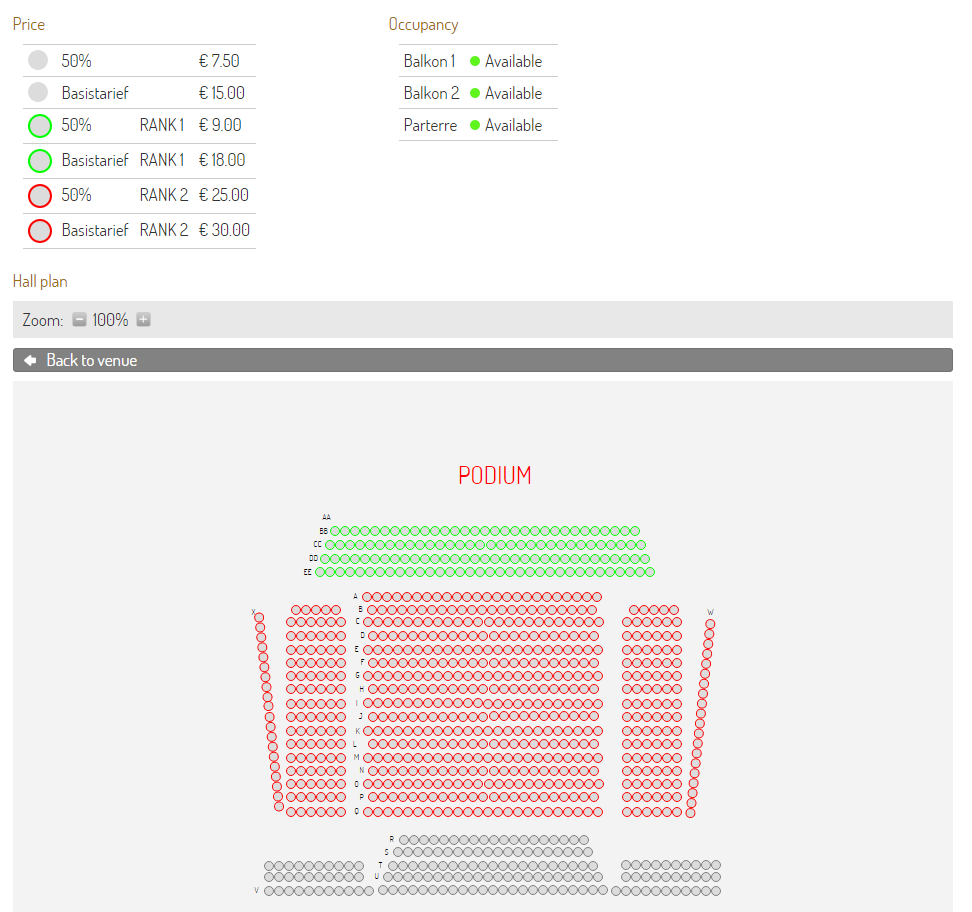
The hall plan and the prices for the event can be shown in the web shop. When blocks are used, the occupancy per block is shown. These details are also shown to users that haven’t logged in yet. To show this you need to enable this in the web shop manager.
 |
 |
 |
Donations
It is possible to link a donation price to each price record in a culture event. To use the donations functionality this must be enabled in Recreatex. Ticketing > Parameters
 |
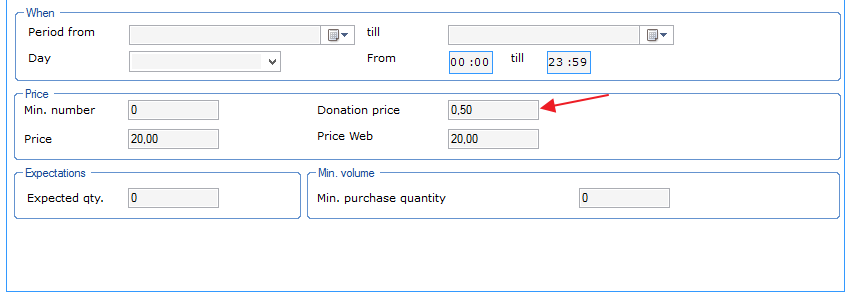
The donation price needs to be configured on the price records of the culture event.
 |
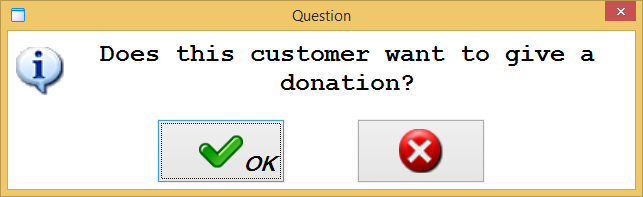
When a ticket is bought in Recreatex a pop up will ask if the customer wants to give a donation.
 |
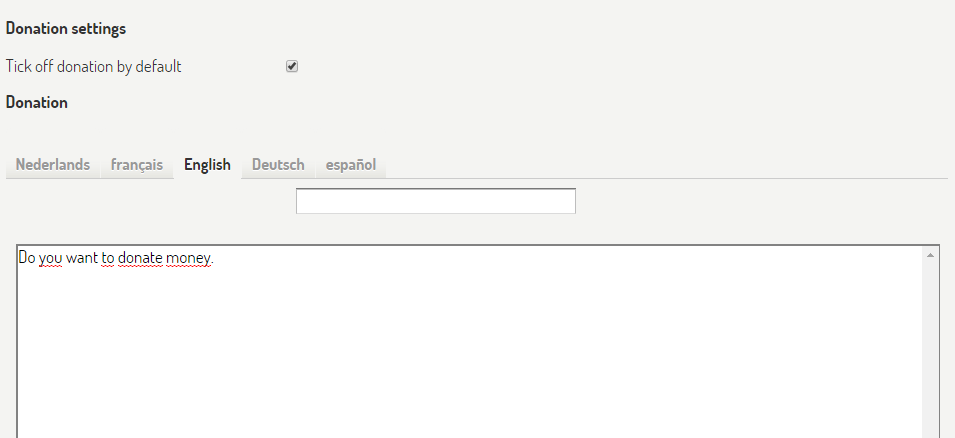
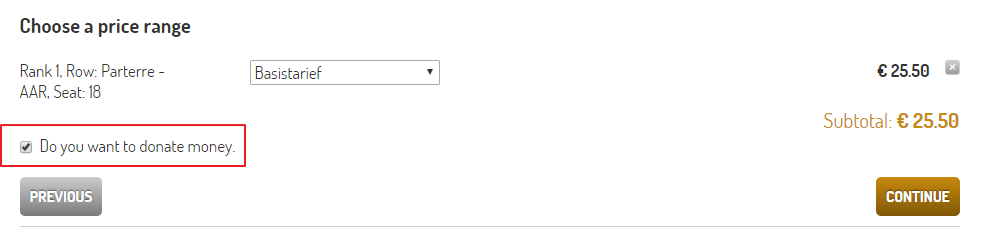
In the web shop Manager you can configure the text you want to display on the web shop and decide if the donation must be active by default or not.
 |
The amount to be paid will automatically be adjusted on the web shop when you check or uncheck the donation check box.
 |
Ticketing for resellers
It is now possible to sell tickets for culture events on the reseller web shop.
On the culture events, you need to configure one or more ranks and link the rank to a company.
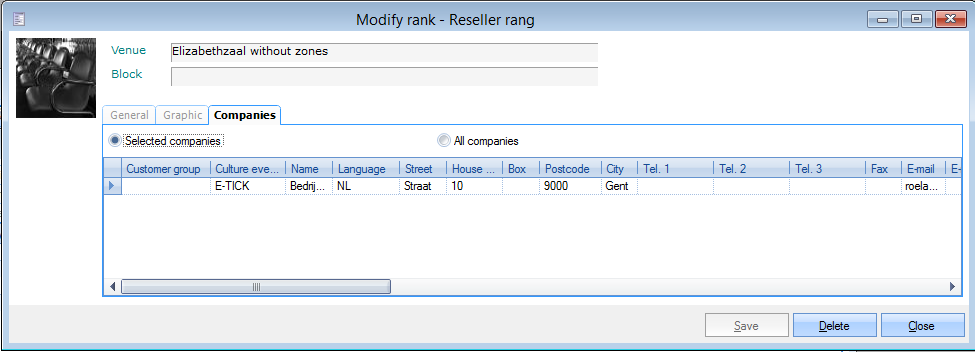 |
The linked companies can then sell tickets for that rank on the reseller web shop.
Enhanced membership flow on web shop
Login is now integrated within the flow. A user can start by choosing a membership without having to log in first. After making his choice, he can then log in order to complete the purchase.
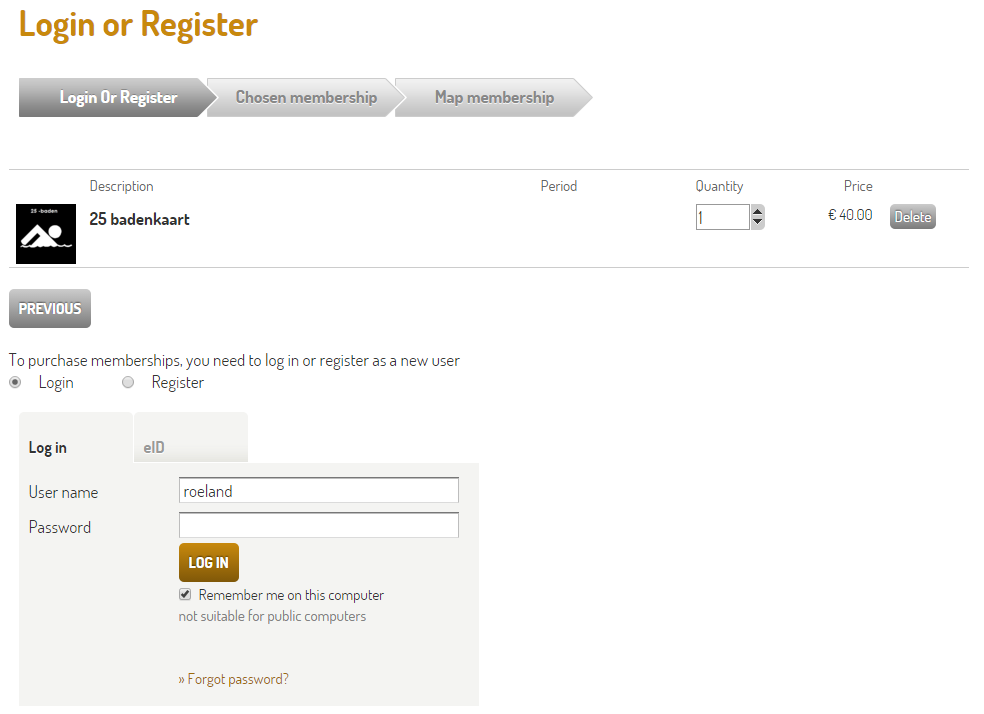 |
Possibility to add or edit family members within the membership purchase flow.
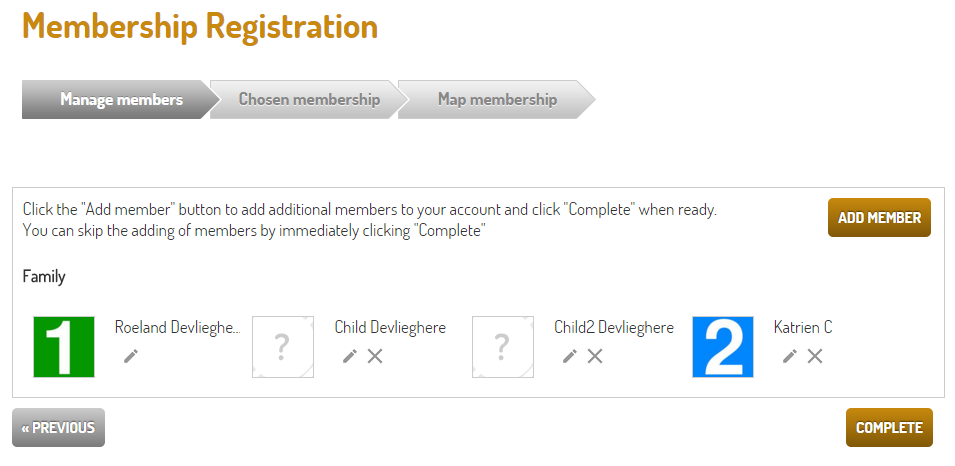 |
User-friendly selection of family members to link to the membership.
Only the members that pass the age validation of the membership are shown in this page.
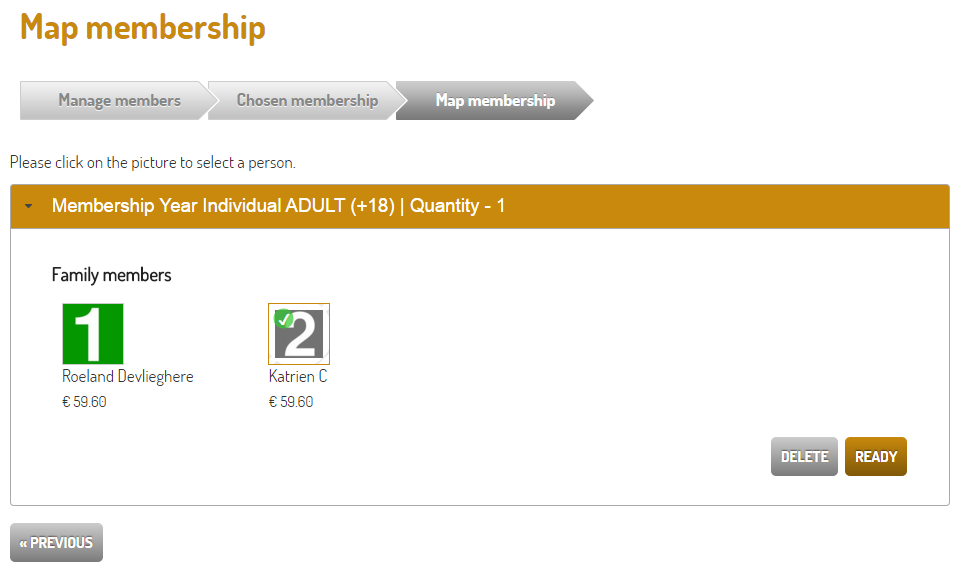 |
When multiple memberships are selected after validating the first membership, that screen closes and the second membership screen automatically opens.
Company specific reseller web shop
With the new type of reseller web shop, tickets can be sold through a company specific web shop to the contacts (employees) of that company.
In the web shop manager, you can enable reselling and choose the type of reselling web shop you want to use.
 |
In Recreatex, the reseller web shop can be configured per company.
It is possible to use a different introduction text and banner per company.
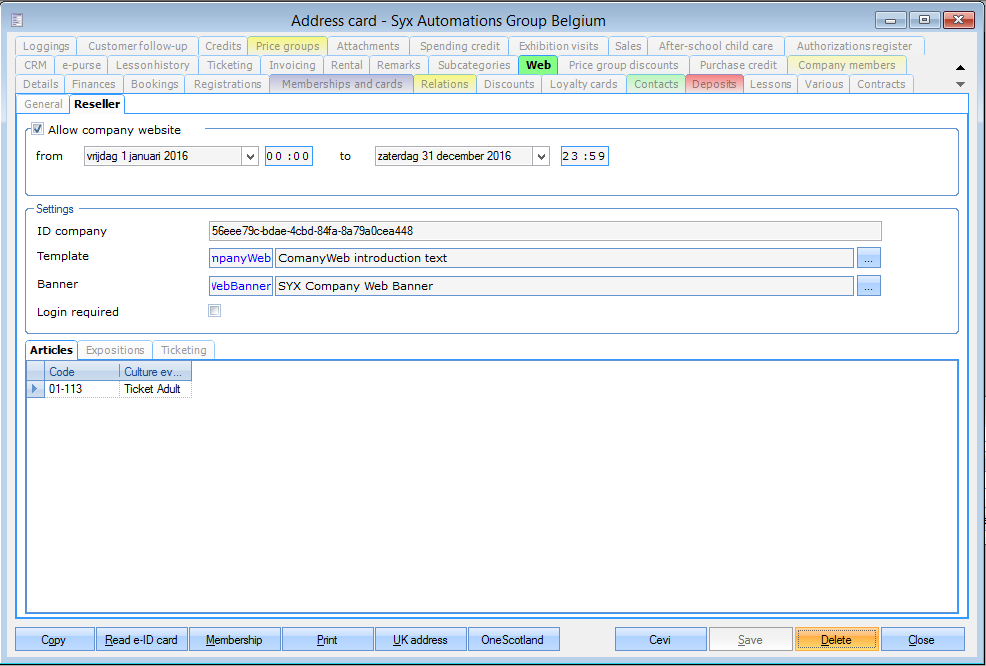 |
It is possible to sell culture events, exhibitions and subscription articles through the reseller web shop. A company specific ticket template can be configured for each of these.
Data archiving
Warning
Initially, this feature will only be gradually introduced to a limited number of customers.
To increase performance, it is possible to move older data from the production database to a separate archive database. The archiving functionality needs 3 databases:
Production
Archive
Views (database for reporting on production and archive)
Configuration
During an update to 5.12.0 it is possible to configure all databases.
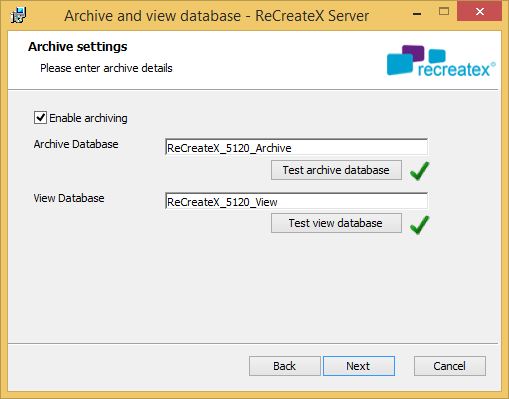 |
You can link manually created databases or you can create them with the installer.
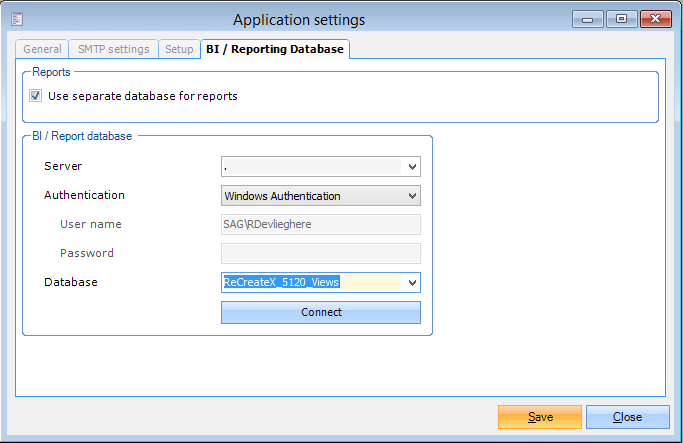
To be able to generate reports and BI pivot tables with data in both production and archive database, some settings need to be configured in SydAdmin.
In SydAdmin: Management > Application settings
Configure the views database as the BI / reporting database
 |
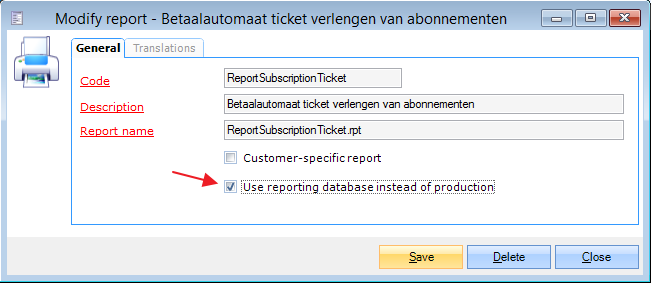
Configure the reports to use the views database.
Management > Reports
 |
In Recreatex:
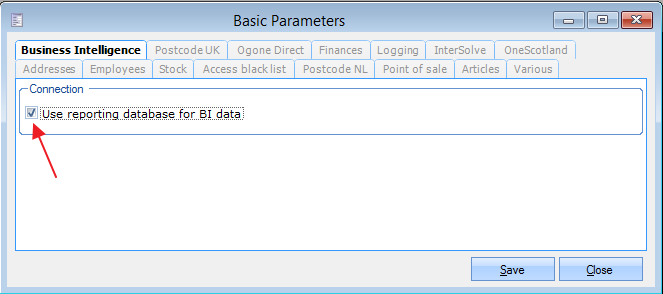
Configure the BI to use the views database
General > Parameters
 |
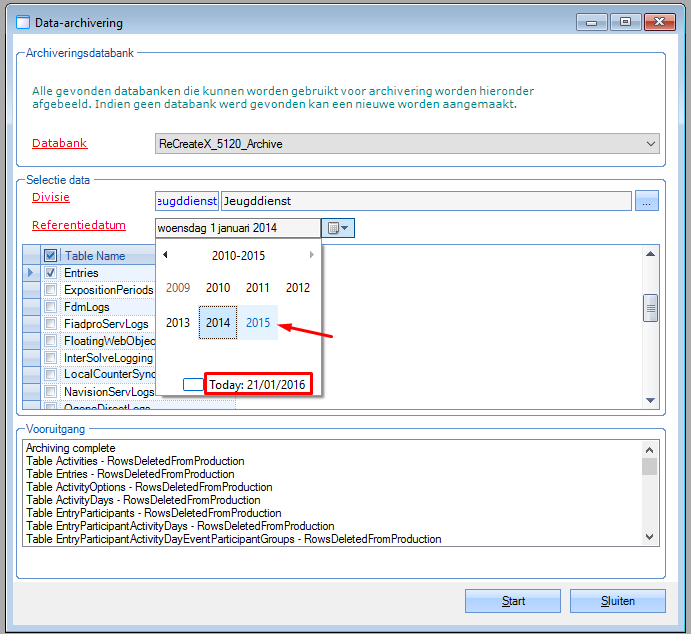
Data archiving
In SydAdmin you can start the actual archiving.
Tools > Archiving.
You can choose for which division and which dates the data needs to be archived.
Data can only be archived if it is at least one year old.
|