General
In this part the general functionalities of the Recreatex POS module are explained, such as how to start up the POS, the different POS menu layouts, how to register a sale, the functioning of the extra POS functions and how to correctly shut down the POS.
Start up POS
Start up the POS by clicking on POS > Cash register sales.
Tip
It is also possible to launch the cash register by clicking on  in the toolbar.
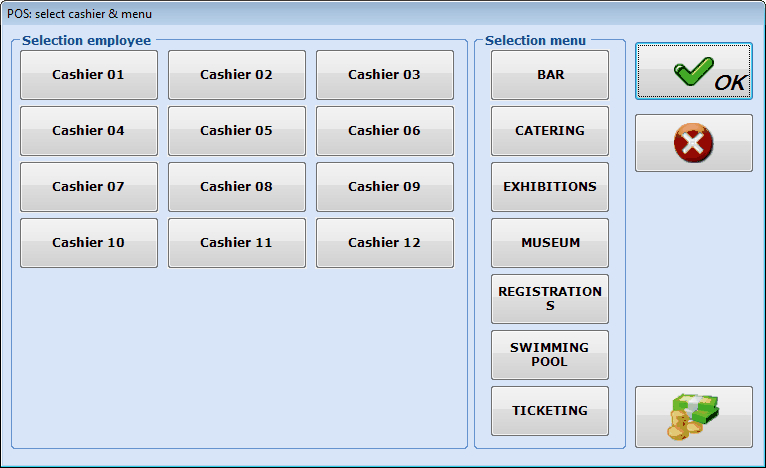
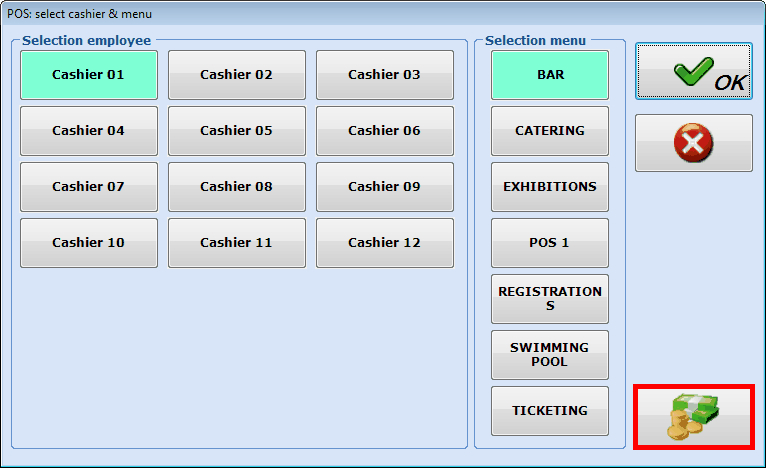
The window POS: Select cashier & menu will appear.
 |
Warning
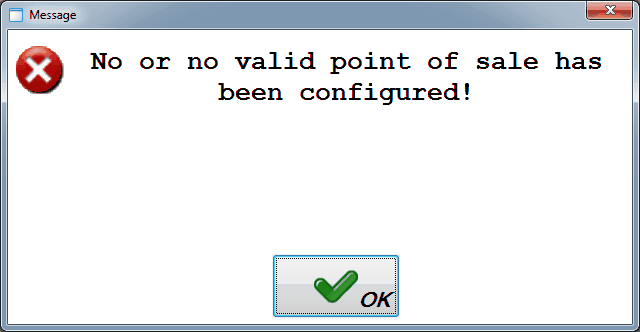
If no point of sale has been configured yet in Recreatex (seeSalesmanual 'GENERAL - Sales'), the following message will appear first at start-up of the POS:
 |
In the window POS: select cashier & menu you first have to select the desired cashier, followed by the desired POS menu before clicking on  .
.
The following question will appear:
 |
If you are sure you want to start a new shift, click on .
Warning
If the question above does NOT appear, you have NOT correctly closed your previous shift (see 'Close down POS')). In this case, it is still possible to first settle the previous shift before starting a new one. If you, however, do not correctly close the previous shift, ReCreateX will continue working in the previous shift, possibly leading to cash differences when closing down.
Dependent on the parameter settings, the following window may appear when starting up a new POS shift:
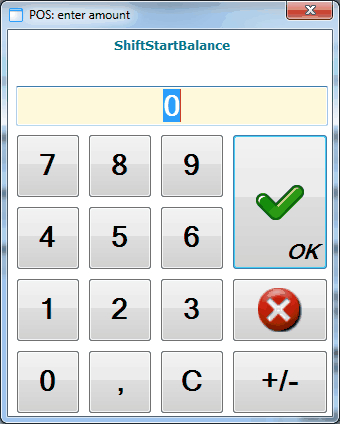 |
This window allows you to fill in the start balance of the POS shift in order to indicate how much money the cash register contains at start-up of a new shift .
Click on the cipher keys to enter the start balance of the cash register an confirm by clicking on OK.
POS layouts
To define the layout of your POS screen, go the the module Sales admin > Settings > Points of sale and open the detail of your point of sale. Under the tab Various, select the desired layout from the drop-down list of the setting Layout POS menu.
Standard (without keyboard)
Modern
Exhibition
Note
Irrespective of the choice of the current POS layout, POS sales in this manual will further be discussed on the basis of the POS layout having the most functionalities, more specifically the Standard (with keyboard) POS layout.
If you work with the simplified POS layout and dependent on the desired possibilities of the cash register and the Recreatex modules that are installed, it is possible that the restrictions of the simplified POS layout will oblige you to switch to the standard layout.
Standard (with keyboard)
The standard POS window layouts (with or without keyboard) consist of two windows:
The selection screen
The payment screen
Overview selection screen
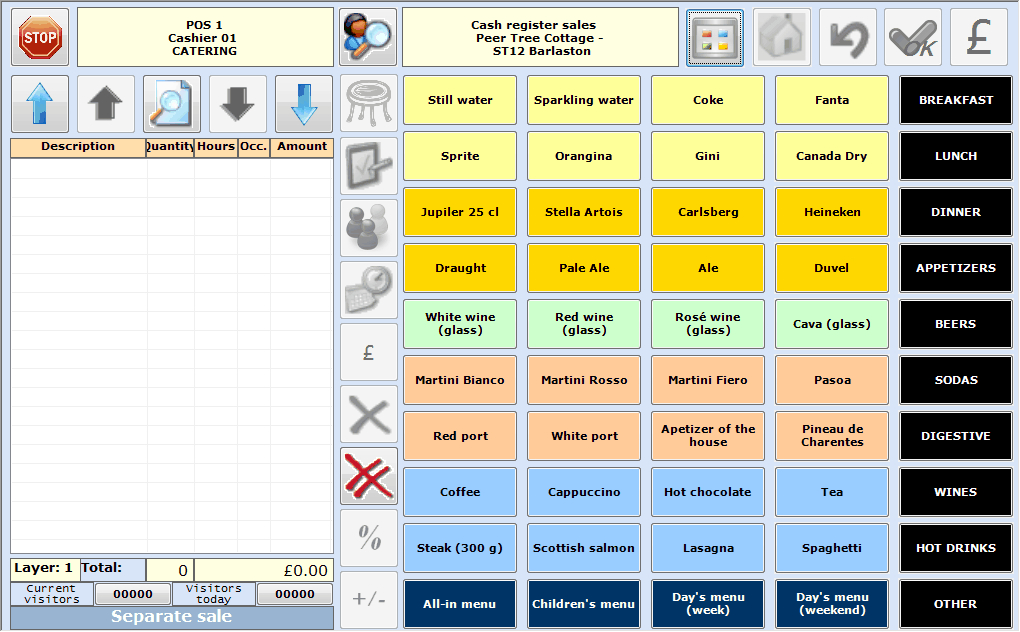
If you have selected the desired cashier (= employee) and the desired POS menu, the selection screen will be opened.
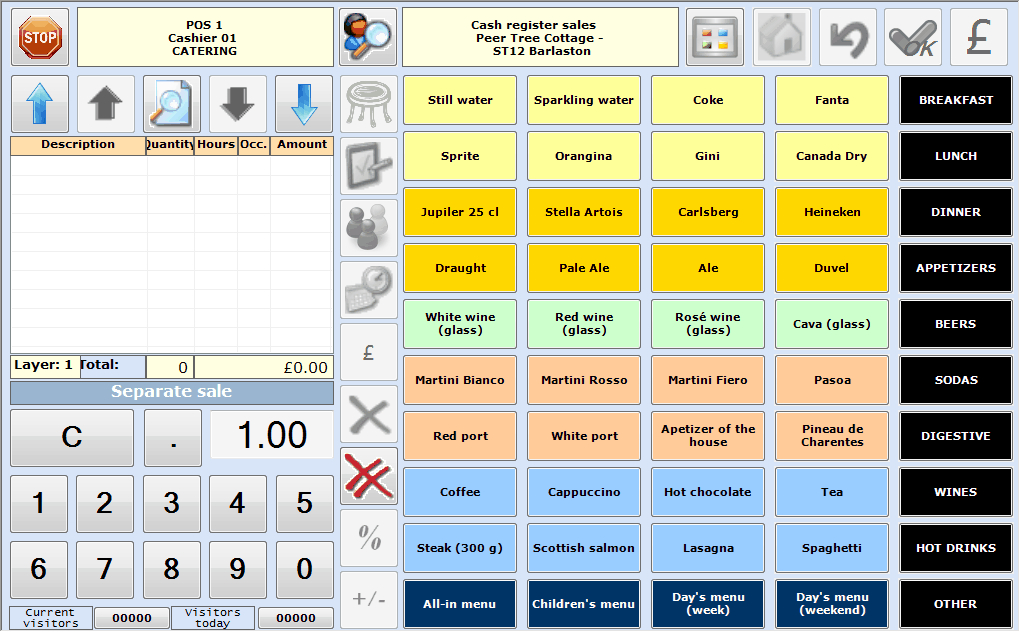 |
The most important part of the selection screen is without doubt the articles overview:
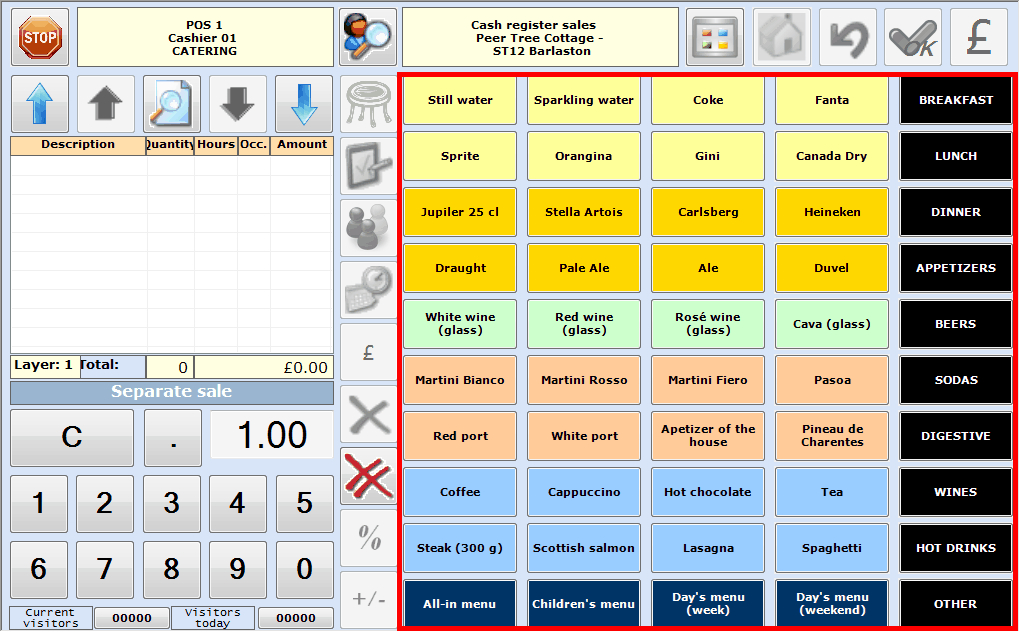 |
These buttons allow to select an article but can also link to another article overview. The last mentioned buttons are also called "submenu buttons" and can be found in the example above in the far right column.
Tip
It is possible to link images to articles (see manual 'GENERAL - Articles'Articles) and to determine on point of sale level if these article images have to be used in the POS module or not (see Salesmanual 'GENERAL - Sales'). For example:
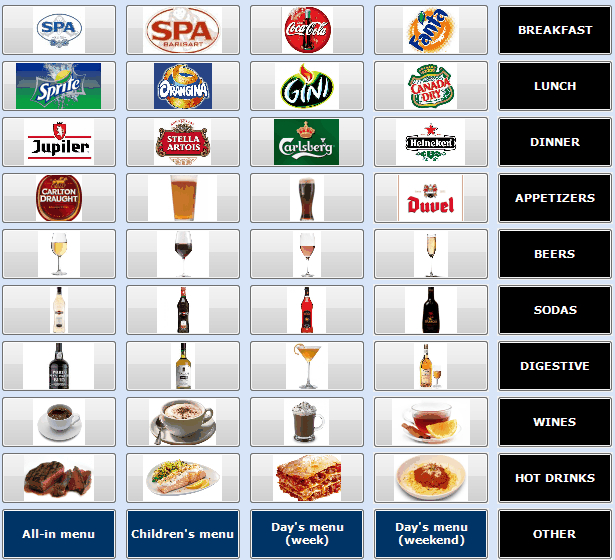 |
In addition to the article overview, the selection screen also contains numerous buttons and information.
At the top of the window you will find the following buttons.
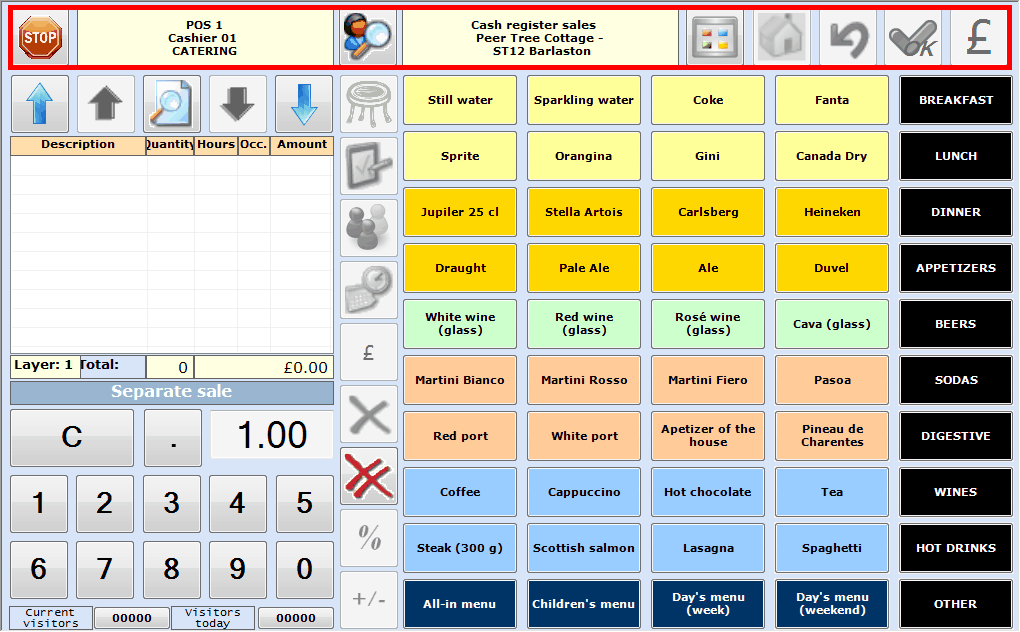 |
| Close down POS. | |
|
| |
| Find sales customer. | |
| The sales customer. | |
| Extra POS functions. | |
| Return to the main menu of the selection screen. | |
| Return to the previous level of the selection screen. | |
| Register a table sale (catering) or booking. | |
| Continue to the payment screen to pay for the chosen articles or to settle outstanding balances of the customer. |


On the left, you will find the list of articles already selected completed by the total number of selected articles and the total amount to be paid:
 |
 |
On top of the list of selected articles, you will find some specific buttons:
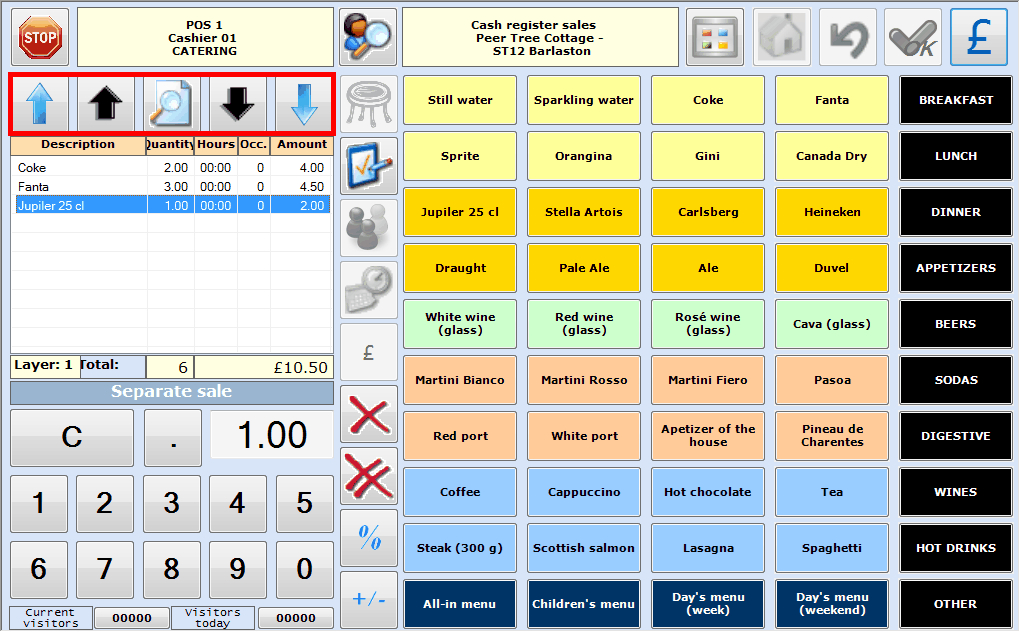 |
| Select the previous sales line. | |
| Move the currently marked sales line one line up (sort). | |
| Call up previous POS sales. | |
| Move the currently marked sales line one line down (sort). | |
| Select the next sales line. |


The list of articles already chosen is further completed by a numerical keyboard allowing you to specify the number of units/pieces before hitting the desired article:
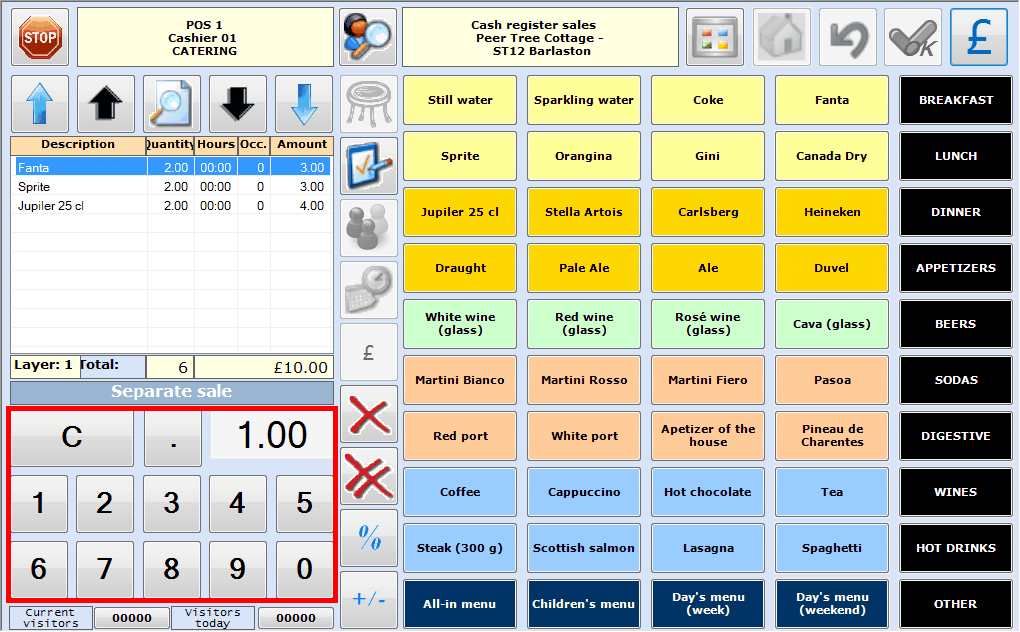 |
At the bottom, you will also find an overview (also buttons) of the current number of visitors and visitors today.
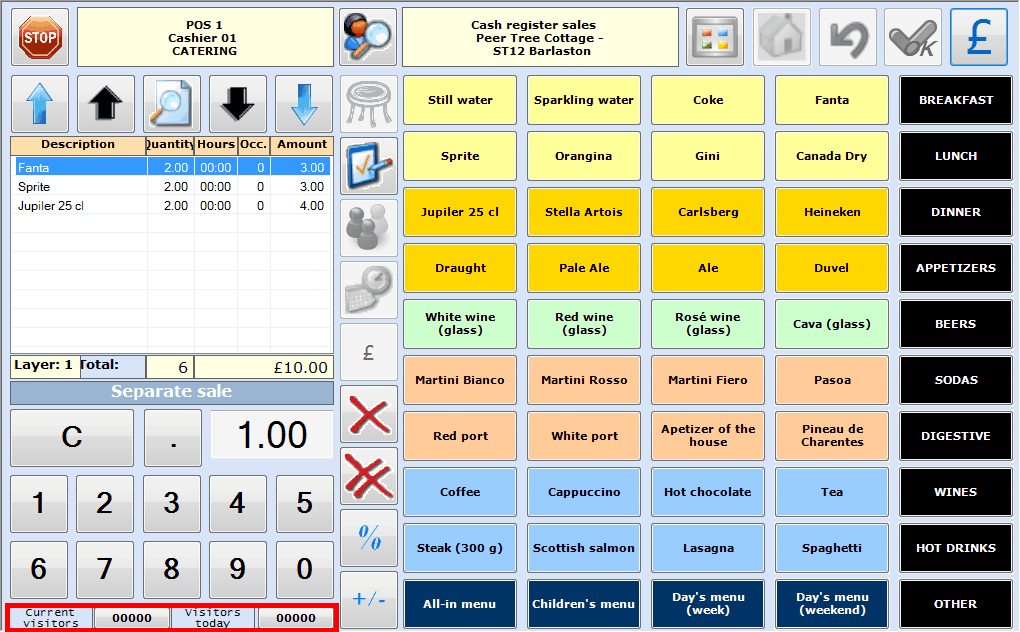 |
| This is the number of visitors still present in the access zone. See also Extra POS functions > Visitors overview. | |
| This is the total number of visitors of the current day. See also Extra POS functions > Visitors overview. |


Tip
If you wish so, a setting on point of sale level allows you to switch off the visualisation of the visitor numbers (for example if you work without access control). Switching off this visualisation (and the underlying calculations) may cause the POS system to work faster.
Between the window of selected articles and the articles that can be sold:
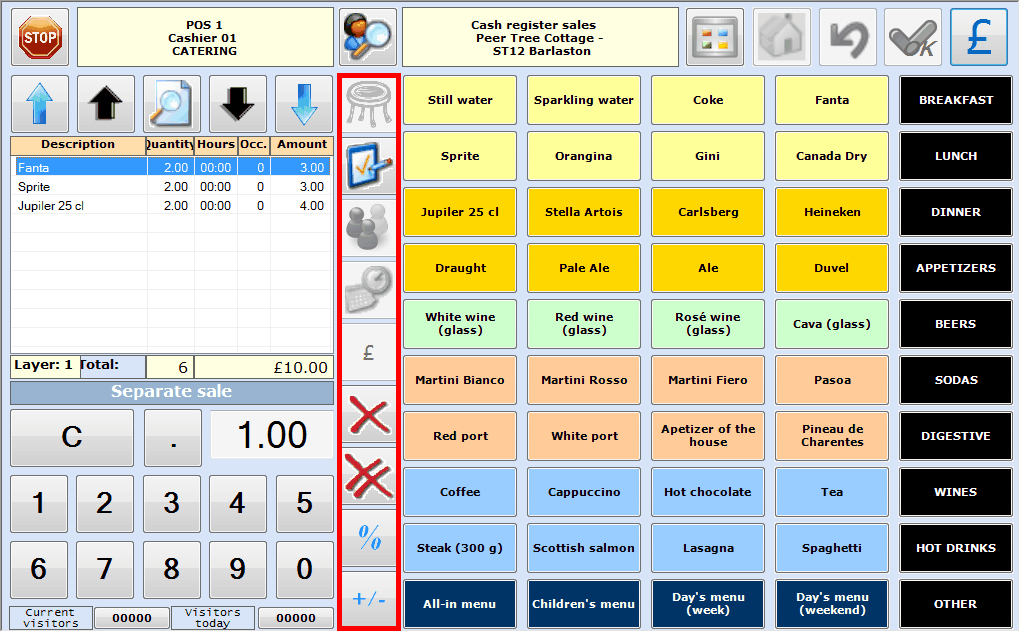 |
| Register a table sale (catering) and keep the same cashier. This button is only available if you work with a sales zone/table plan. | |
| Enter/modify the number of articles to be sold and/or modify the obligatory description. | |
| Enter/modify the number of visitors/participants. | |
| Enter/modify the number of hours (in case of rental). | |
| Enter/modify article price. | |
| Delete one sales line. | |
| Delete all sales lines. | |
| Discount per sales line (= article). | |
| Modify +/- sign in function of a refund registration. |


Warning
Not all buttons are always active. Only if a function can effectively be applied and if, dependent on certain settings, the function is allowed for the selected article, you will be able to use the button in question.
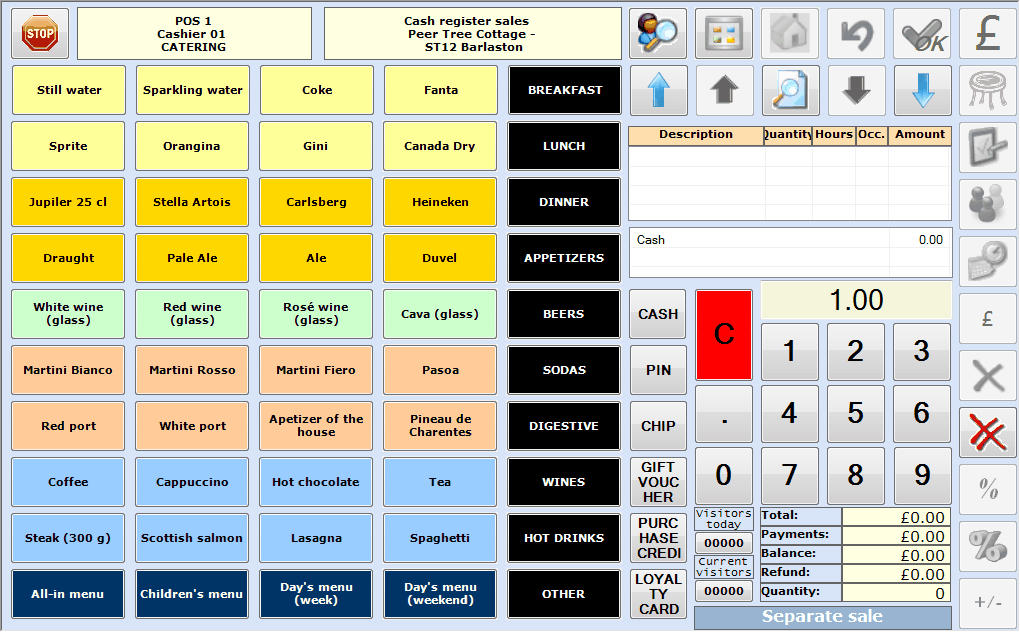
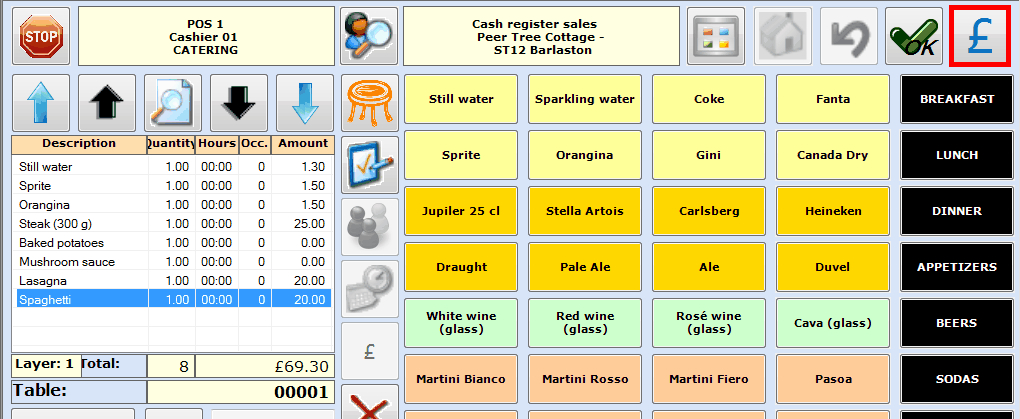
Overview payment screen
In order to settle chosen articles or open balances, you have to click on  in the selection screen. The payment screen will appear, for example:
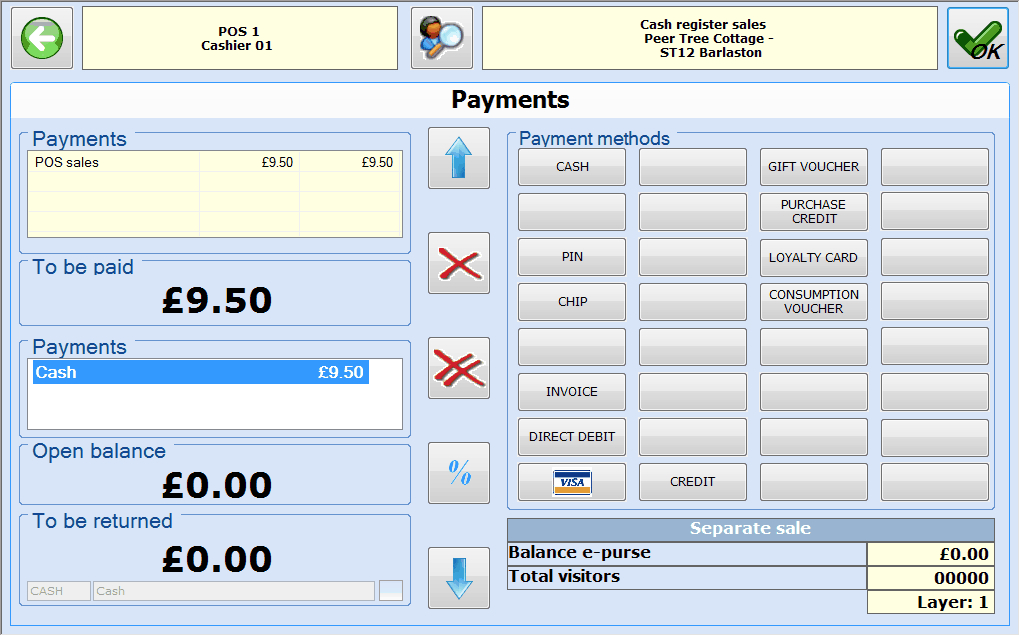 |
The following buttons can be found on the top of this window:
| Return to the selection screen. | |
| Find sales customer. | |
| Register the sale. |


On the left you can see the list of outstanding payments:
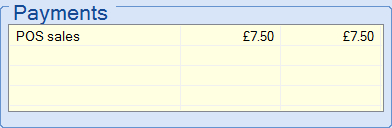 |
In the section To be paid you can see the payment you want to make:
 |
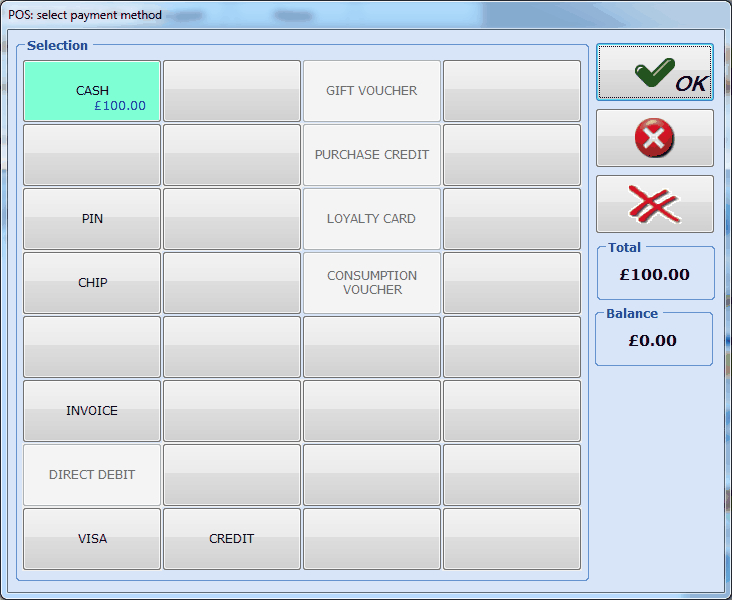
In the section Payments you can indicate by means of what payment method the payment will be made:
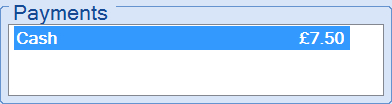 |
In the section Open balance you can see which amount still has to be settled:
 |
In the section To be returned you can choose how you want to return the money, if required.
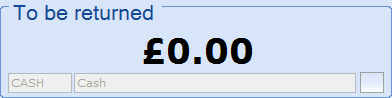 |
On the right, you will find the buttons with the available payment methods.
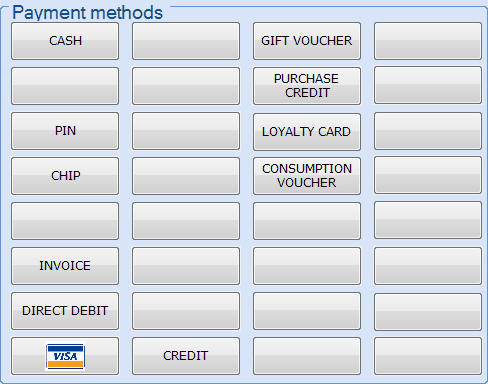 |
Note
As is the case for articles, it is also possible to link an image to a payment method. If an image is linked to a payment method, it will appear in the overview of payment methods, for example:
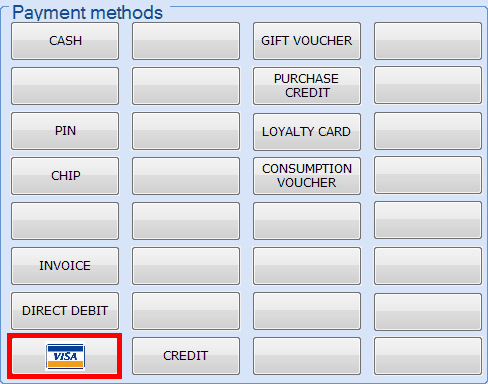 |
Between the window with payment methods and the payment window:
| One payment line up. | |
| Delete one payment line. | |
| Delete all payment lines. | |
| Discount on the entire amount (global discount). | |
| One payment line down. |
Standard (without keyboard)
If you have selected the desired cashier (= employee) and the desired POS menu, the POS window will appear and, as opposed to the standard layout with keyboard, this POS layout does not have a numerical keyboard.
 |
Except for the functions of the numerical keyboard, this POS layout offers the exact same functions as the standard layout with keyboard. (see 'Layout POS menu' > 'Standard (with keyboard)')
Simplified
Warning
The simplified POS layout can be advantageous in function of the use of the POS. Dependent on the desired possibilities of sales at the cash register and dependent on the presence of specific Recreatex modules (for example Ticketing, Letting, Registrations,...), it is possible, however, that the simplified POS layout appears to be too limited. This is also the reason why sales at the cash register will be further explained in this manual on the basis of the Standard (with keyboard) POS layout.
If you have selected the desired cashier (= employee) and the desired POS menu, the POS window will appear. As opposed to the standard layout with keyboard, the simplified POS layout only has one window which contains the essential functions of both the selection screen and the payment screen.
 |
Modern
Modern POS layout gives you the flexibility to tailor the POS screen specifically to your needs.
Design the sale and payment screens separately
Include/exclude the available panels (functions)
Move the panels around and resize them
Adjust the font and icon size
To access the Modern POS layout options, go Sales admin > Settings > Points of sale and open the detail of your point of sale. Under the tab Various select Modern from the drop-down list of the setting Layout POS menu.
Then click the button Design layout to open the Cash desk layout designer.
Modern layout panels
These panels are specific to the sale screen design.
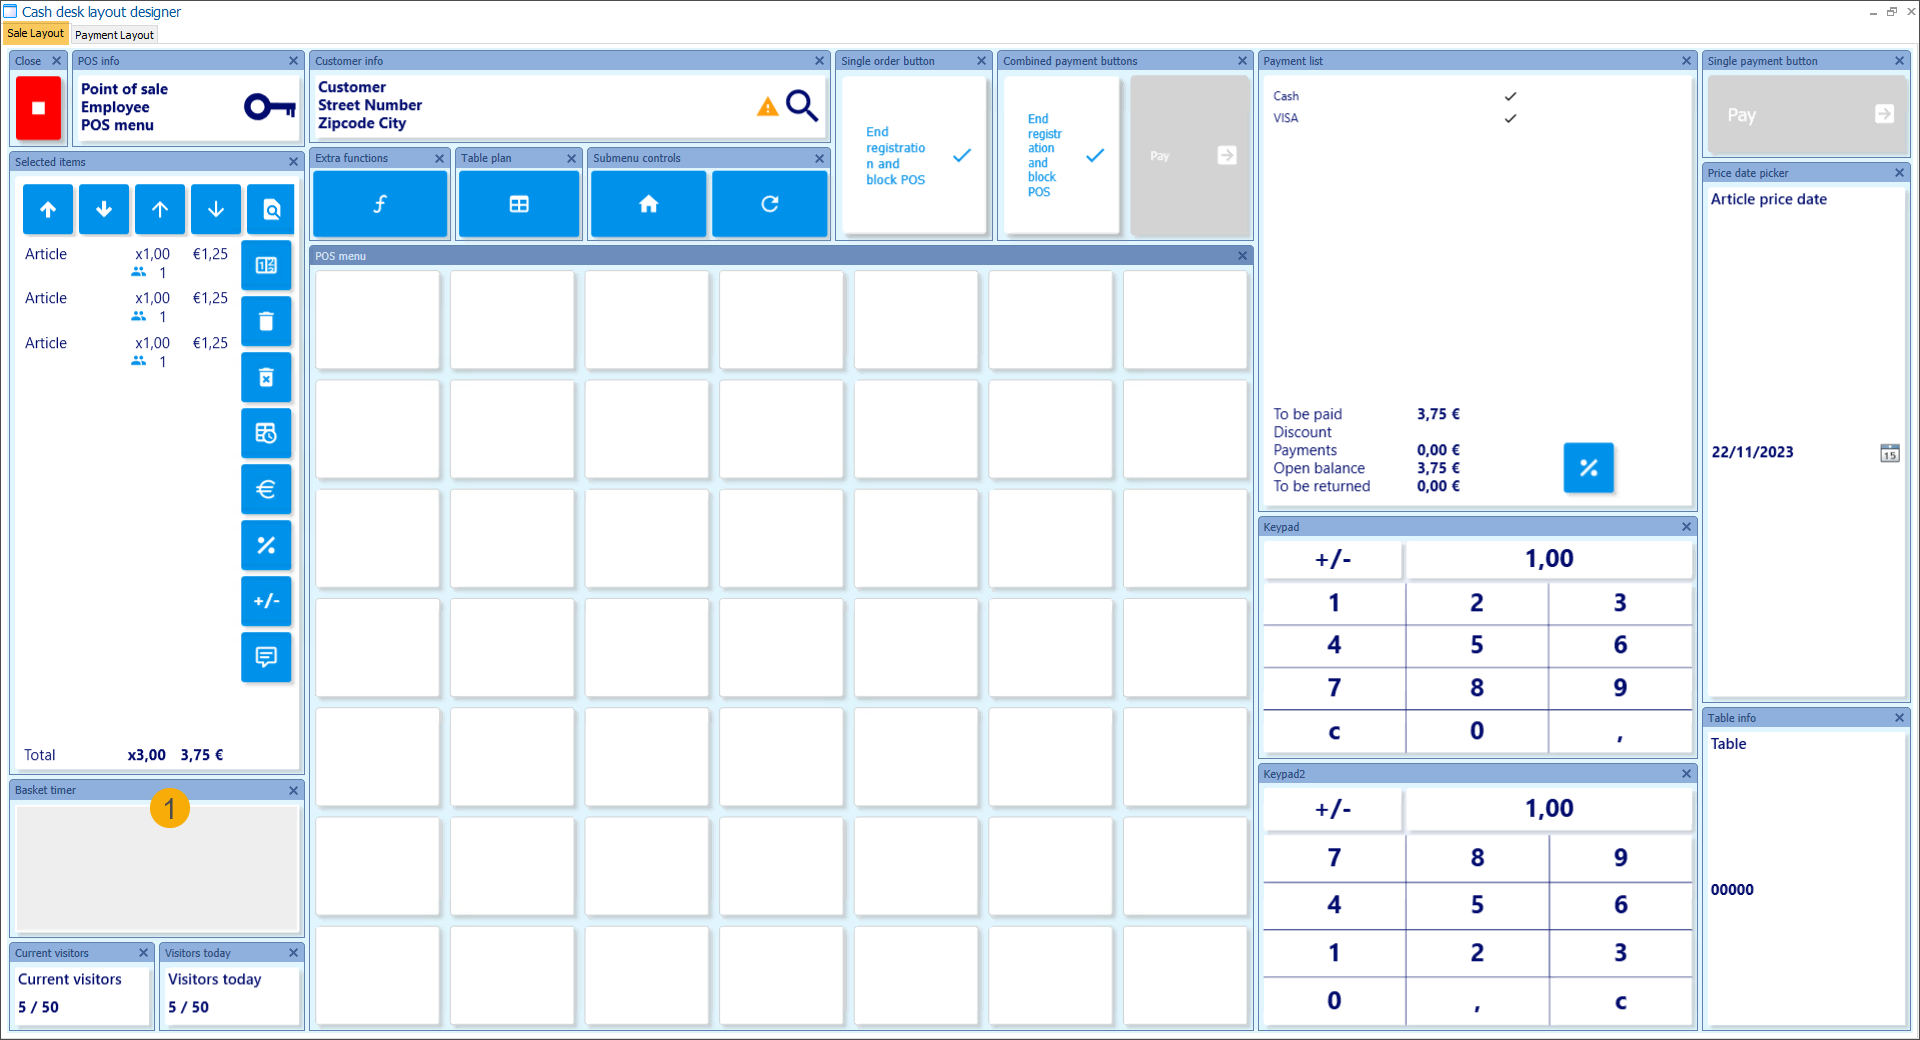
These panels are specific to the payment screen design.

These panels can be added to both, the payment and sale screen.
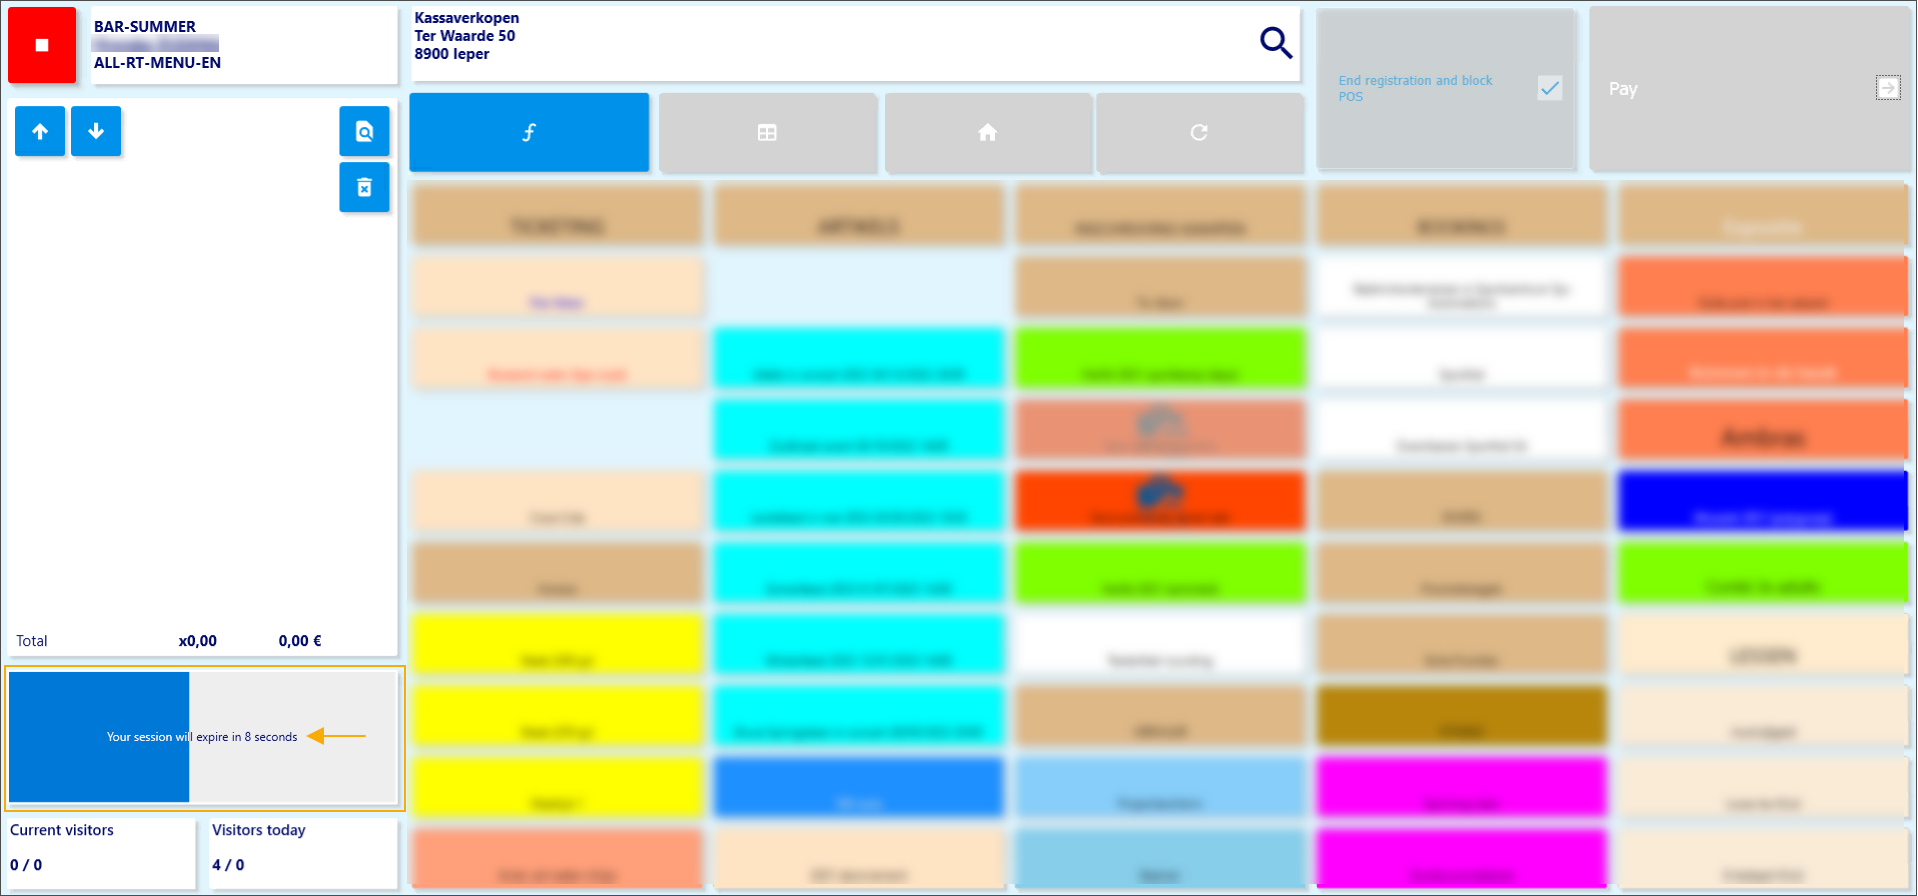
Basket timer (1)
Add this element to your POS screen to visualize the timer count-down before the cash register screen closes automatically or the basket is cleared.
To configure the basket timer to close the cash register automatically, see Close cash register automatically after x seconds.
Register a sale
In the following paragraphs the different types of POS sales are discussed:
Separate sale
The separate sale is the most simple and direct form of a sale and implies nothing more than selling and paying for one or several articles.
Select the articles to be sold in the selection screen and each time you select an article, the article will be added to the list of chosen articles on the left. The various buttons allow to modify a selected article. For example: increase the quantity, allow a discount, modify +/- sign, …
Articles can also be indicated/selected by scanning the barcode or by entering the linked PLU code followed by +.
 |
Note
If you move the cursor over a button, more info on the specific button will appear. In case of articles, the unit price of the article will appear.
Click on in the upper right-hand corner or press <Enter> on the keyboard to go to the payment screen.
|
In the payment screen you can select the desired payment method(s) (it is possible to split up the amount over several payment methods) and click on  in the upper right-hand corner or press <Enter>. The sale will be registered and a receipt will be printed.
Warning
Printing a receipt after the registration of a sale depends on several parameters and settings on article level and point of sale level. You should also avoid that Recreatex is started up several times on the PC; this will in fact prevent receipts from being printed.
Sale based on price group
It is possible to define on article level that the price group has to be asked for if the article is sold at the cash register.
If you select such an article, an overview will appear with the article groups linked to the article.
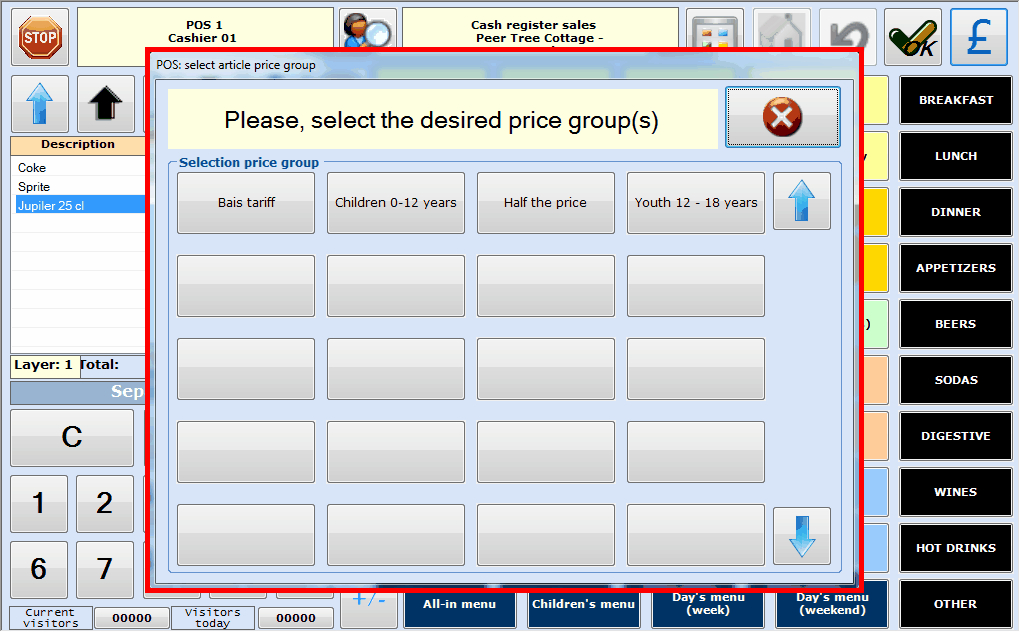 |
Once you have selected the desired price group, the article is added to the list of chosen articles.
Note
For more information on price groups and article settings, we refer to the manuals 'GENERAL - Customers' and 'GENERAL - Articles'Articles and Customers.
Sale with discount
Note
If you want to allow a discount, the parameter Allow discounts on sales has to be active on both the point of sale in question as on the level of the employee who is currently logged in.
If you sell articles at the cash register, you can allow two types of discounts: article discount and global discount. A discount is always entered as a percentage of the article price or of the entire sale.
Article discount
In case of an article discount, the discount entered is always applied to the currently selected article line. In order to allow a discount on the currently selected article line, you have to click on  .
.
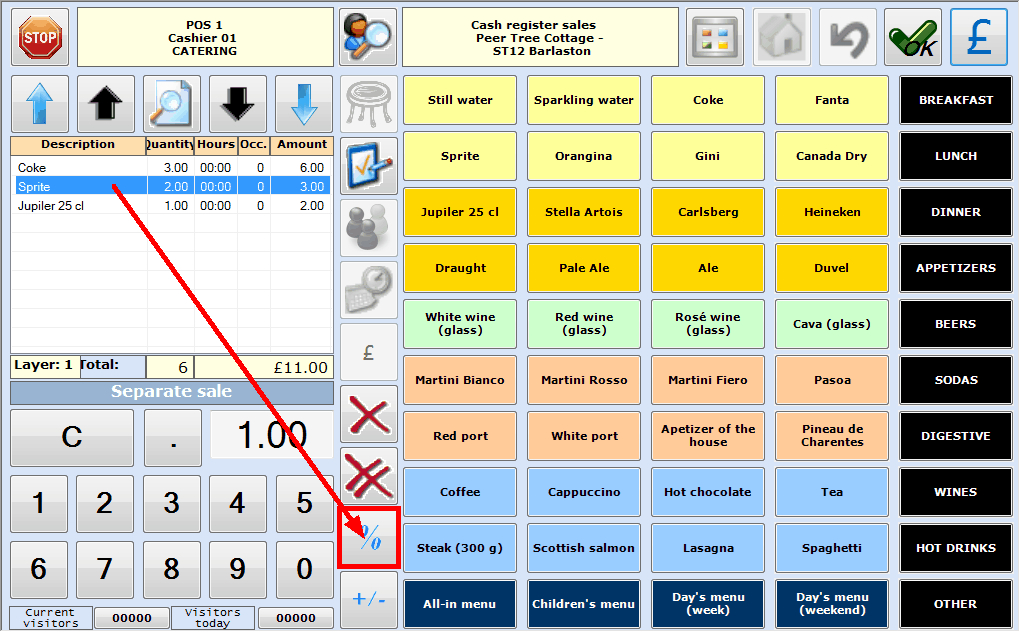
Standard POS layout vs. simplified POS layout
Next, the desired discount percentage can be entered.
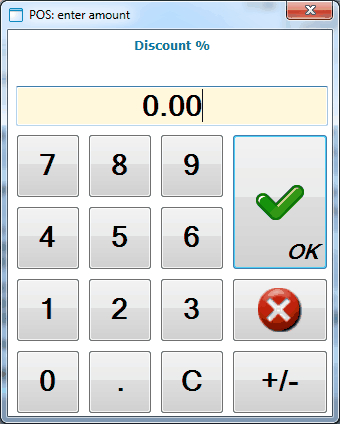 |
If you have entered the discount percentage, you have to click on the big OK button and the discount will be applied to the selected article line.
Note
It is possible to define on point of sale level that a description (reason) has to be given if a discount is allowed on an article, for example:
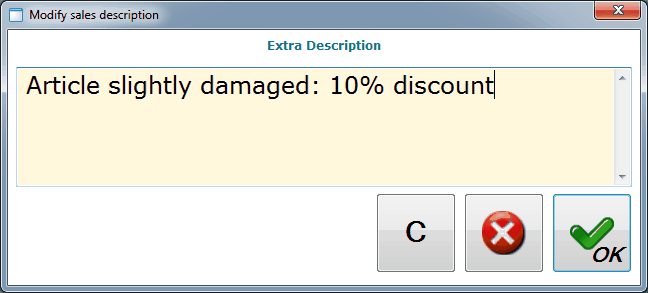 |
This obligatory description is saved as a remark to the sale (in function of logging/history).
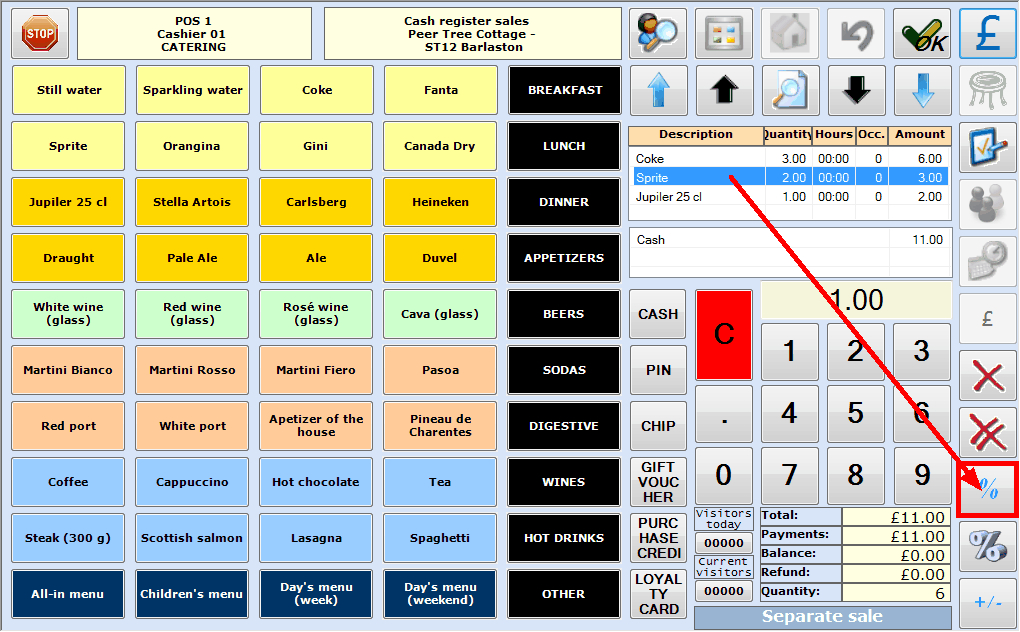
Global discount
As opposed to an article discount discussed in the previous topic, a global discount is always applied to the entire sale and not to the selected article line.
In order to allow a global discount in the standard POS layout, you have to click on in the payment screen and enter the desired percentage:
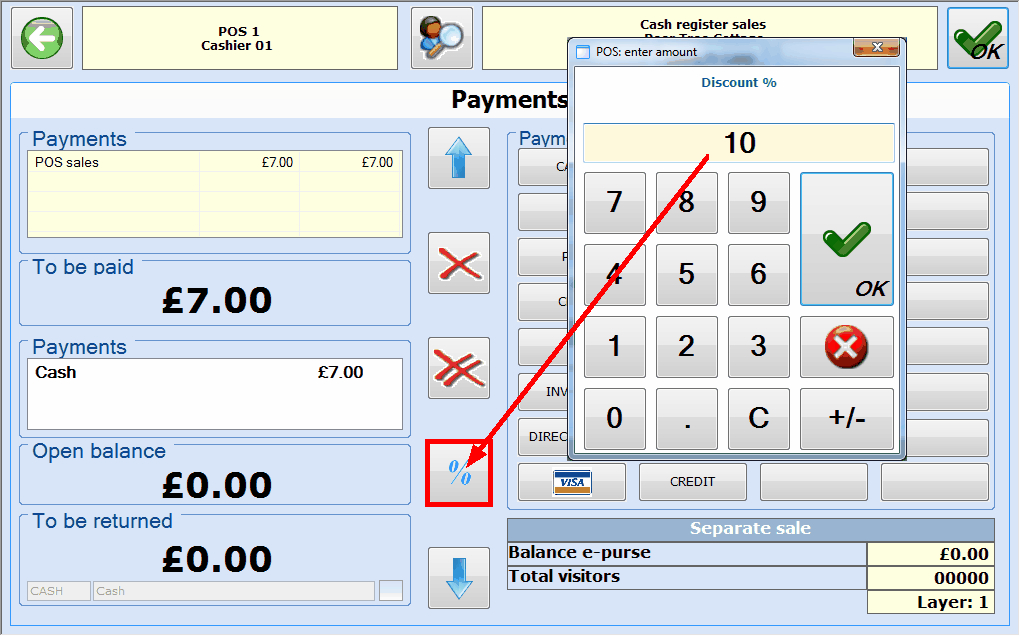 |
In order to allow a global discount in the simplified POS layout, you have to click on  and enter the desired percentage.
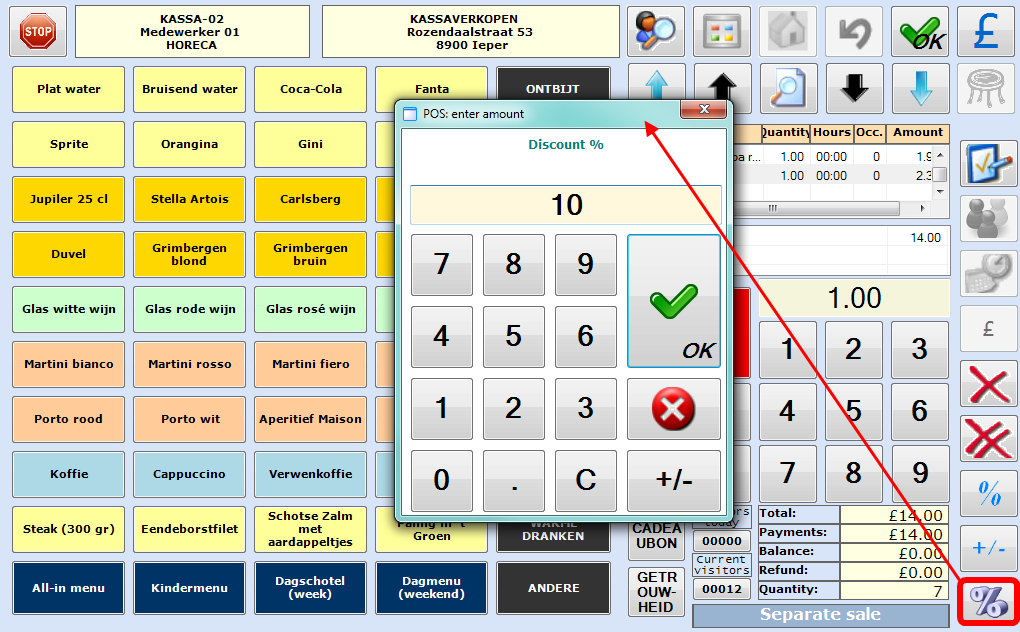 |
If you have filled in the discount percentage, you have to click on the big OK button and the discount will be applied to the entire sale.
Sale with options
If you select an article with options in the selection screen, the following window will appear in which you can select the desired option, for example:
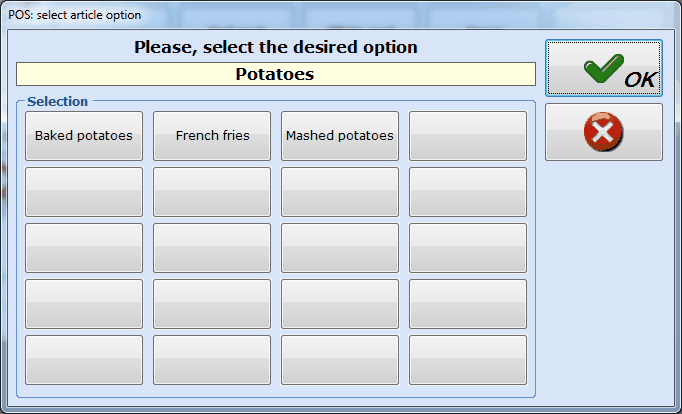 |
After selecting the desired option, the selection screen will reappear and you will notice that the chosen option(s) for the article are shown below the article and (if required) charged.
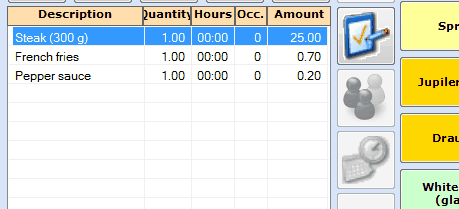 |
Registering a sale with options is done in the exact same way as described under Separate sale.
Sale with obligatory description
If you choose an article in the selection screen that requires an obligatory description, the following window will appear:
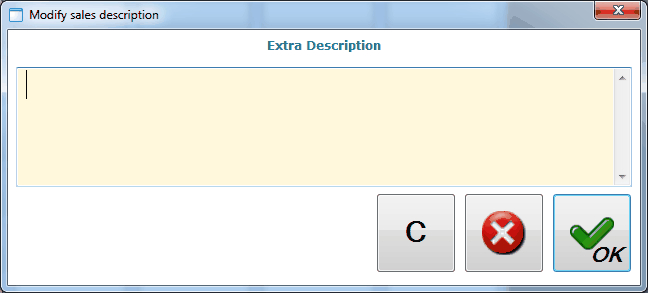 |
After filling in the obligatory description, you will notice that an asterisk is depicted next to the chosen article.
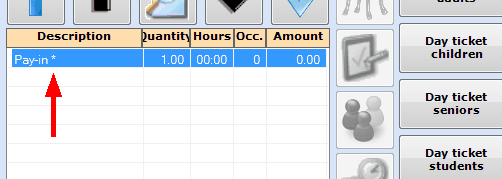 |
Note
The obligatory description is always saved as a remark under the sale in question and can thus be consulted by clicking on Sales > Visualisations > Sales (see manual 'GENERAL > Sales'Sales.
The obligatory description you have filled in can be modified if required by clicking on  after which you have to confirm the quantity before the window Modify sales description will reappear.
Registering a sale with obligatory description is done in the exact same way as described under Separate sale.
Sale with obligatory sales customer
After selecting the desired article, for which a sales customer is obligatory, the following message will appear:
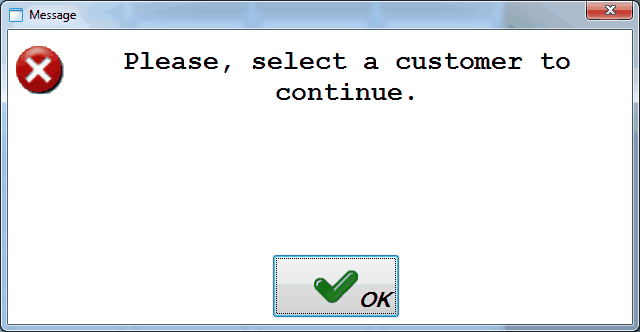 |
Once you have confirmed by clicking on , and dependent on the employee parameters (see manual 'GENERAL - Employees'Employees), either a complete customer overview will be shown, either a simplified customer screen, allowing you to select the correct customer.
Entire customer overview
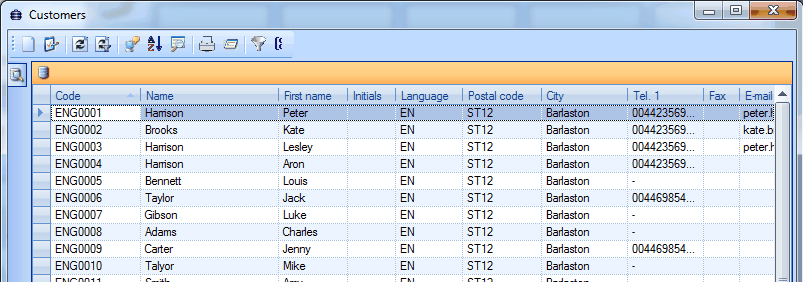 |
Simplified customer screen
 |
Simplified customer screen
Different actions are possible in the simplified customer screen:
Find customer
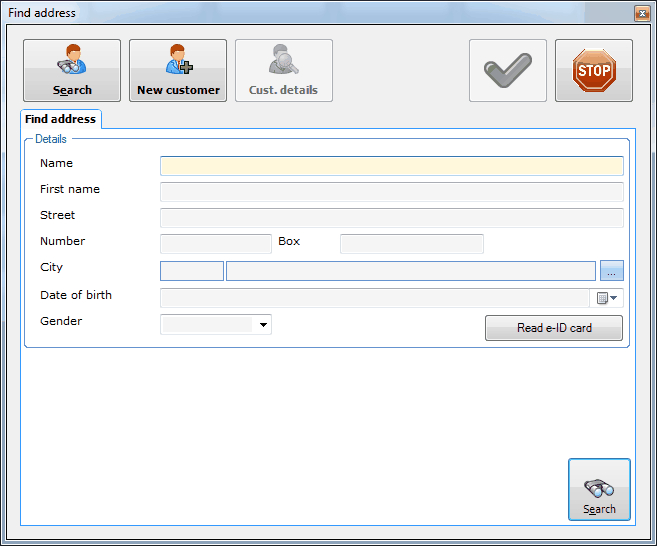
If the simplified customer selection screen opens, the tab Find address appears by default. This tab allows you to search for the desired customer on the basis of some criteria. Moreover, it is possible to search for a customer on the basis of eID (license Integration with eID-reader required).
|
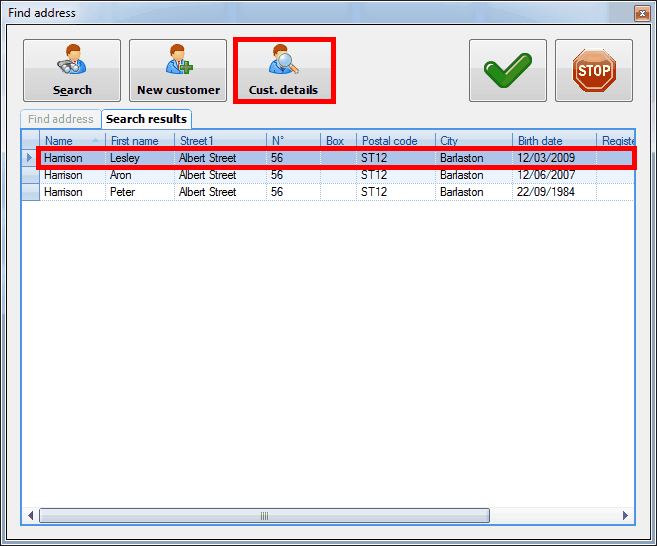
If you have filled in the data, press  and the tab Search results will appear showing all the results that meet your search criteria and allowing you to select the desired customer.
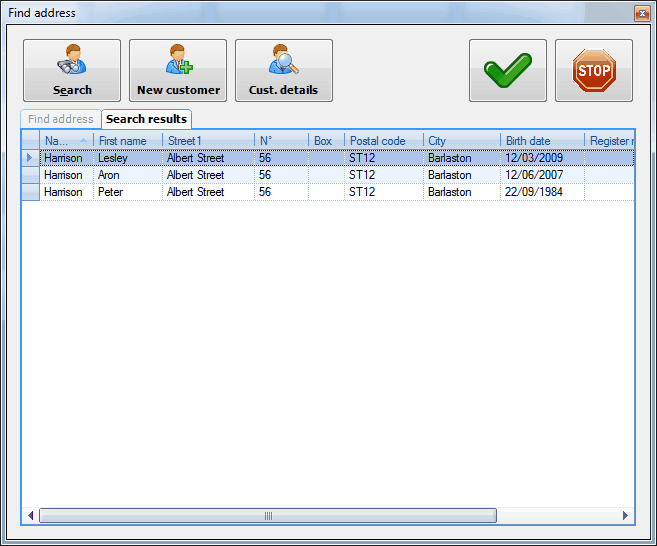 |
New customer
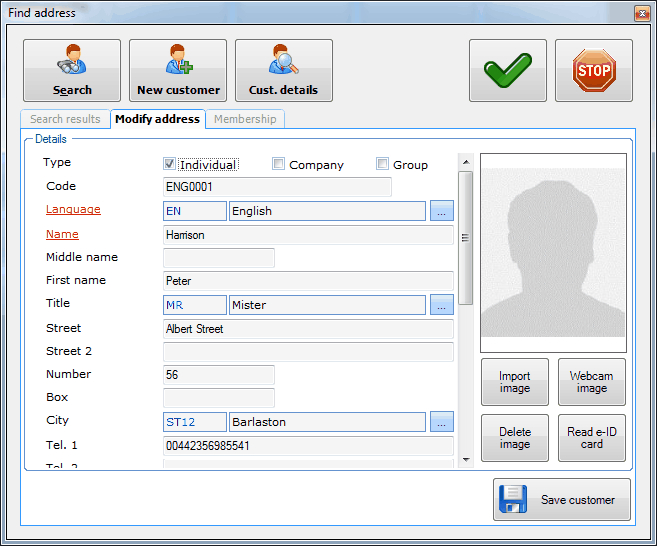
If the simplified customer selection screen opens, there is a button at the top of the window that allows you to create a new customer. After pressing the button New customer, the tab Modify address appears with the defined fields (see manual 'GENERAL - Customers'Customers).
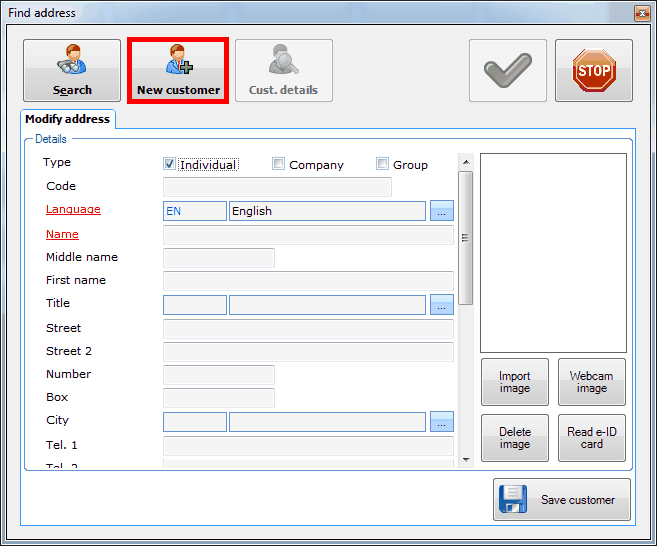 |
It is also possible to link an existing image (or picture) to the new customer or to take a new picture and link it using the available webcam (licence Integration with webcam required).
If you have filled in all (obligatory) data or imported them with eID (licence Integration with eID-reader required), you can save the customer by clicking on the button Save customer.
Warning
If you create a customer that already exists in the system, the following message will appear:
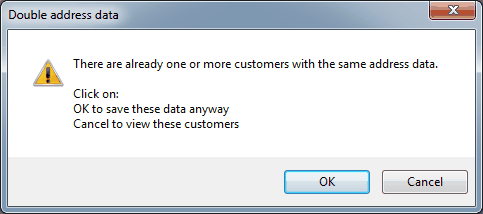 |
If you click onOK, the new customer will be created anyway (double customers), if you click on Cancel, the customer that is already in the system will be called up.
Customer details
If you have selected a customer in the simplified customer selection screen, you can call up the details by clicking on the button Cust. details.
 |
An overview of the details of the selected customer will appear in which you can make modifications if required.
 |
Under the tab Membership you will find an overview of all cards and membership of the chosen customer.
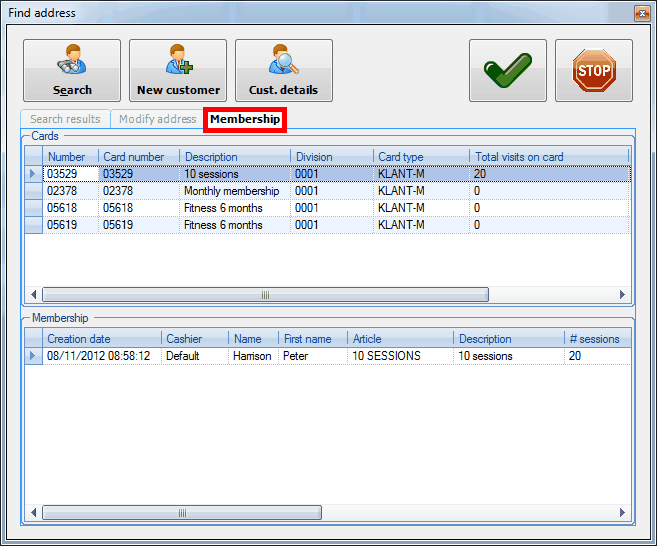 |
Sale with sales zone
Note
The possibility to use many of the buttons and functions mentioned may depend on certain parameters, employee authorization and point of sale settings. This is why the following description will generally be limited to the functional use of the buttons and actions.
For detailed explanations on the settings and parameters that influence the principle of sales per table, we refer to Sales, Employees and Managementthe manuals in question, for example 'GENERAL - Sales', 'GENERAL - Employees' and 'POS - Management'.
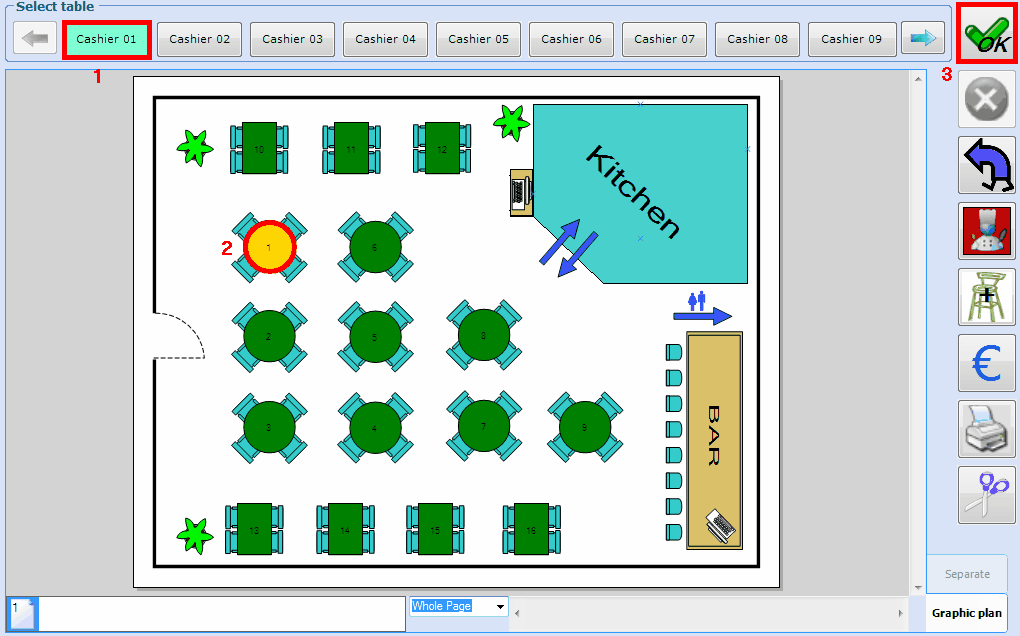
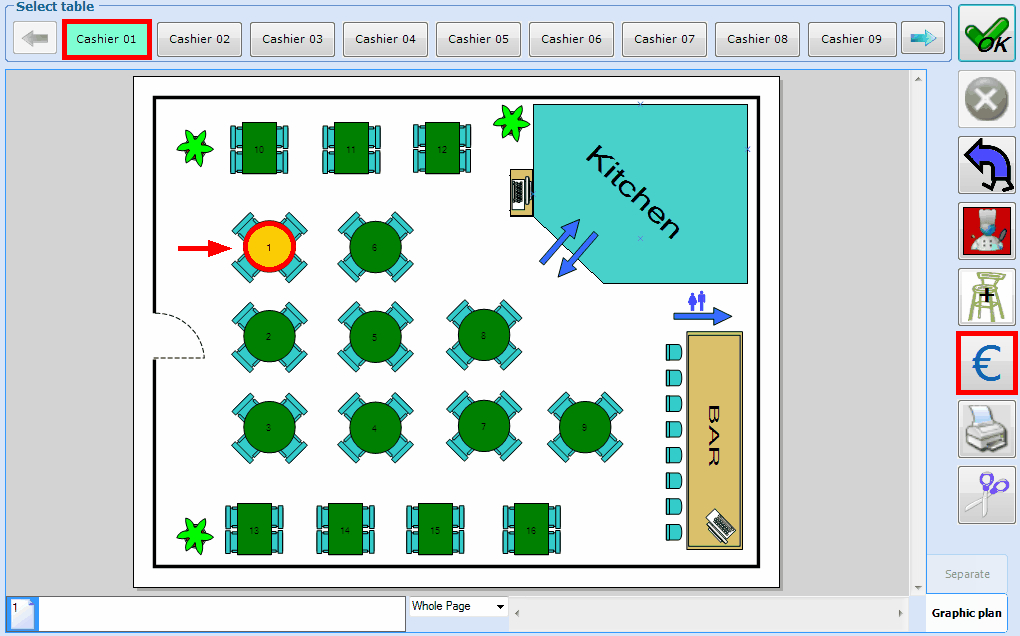
Overview sales zone
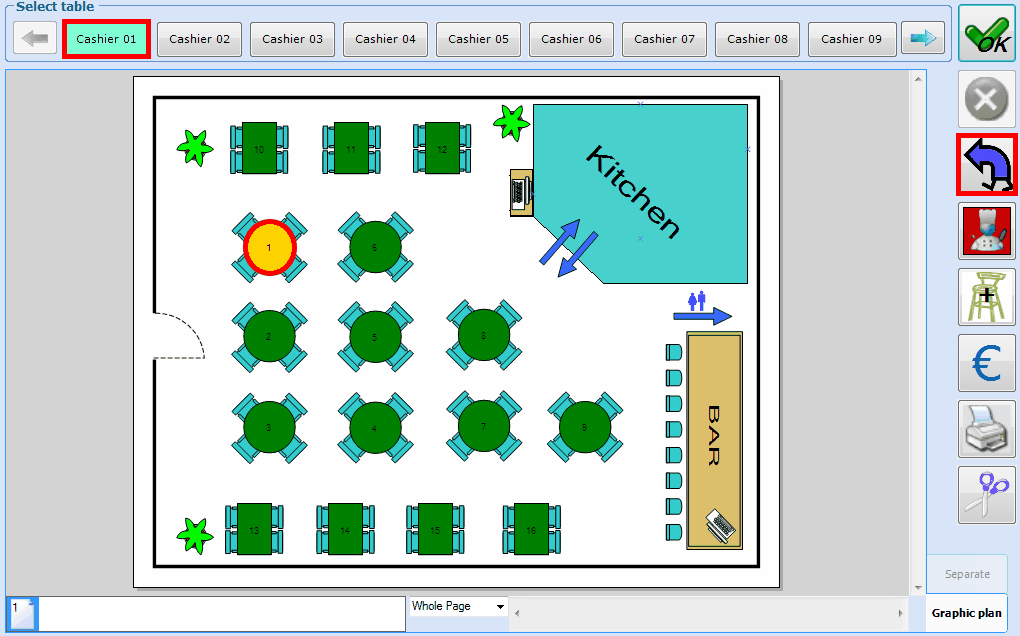
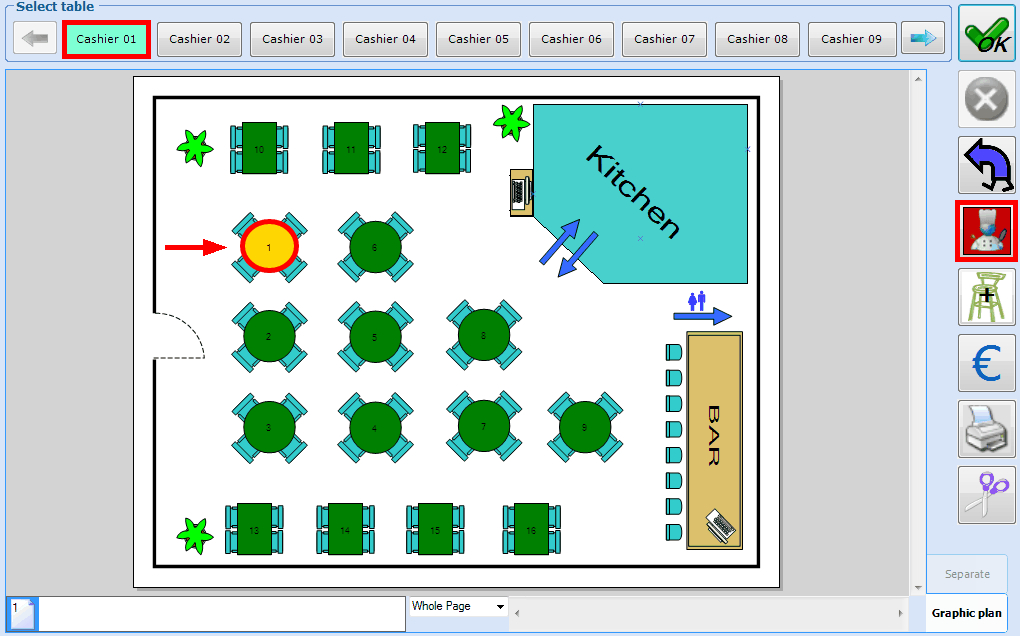
A sales zone is a graphic overview of the room/zone in which tables and/or chairs can be found. It is also called the "table plan" and this form of sales is mainly used in restaurants and bars.
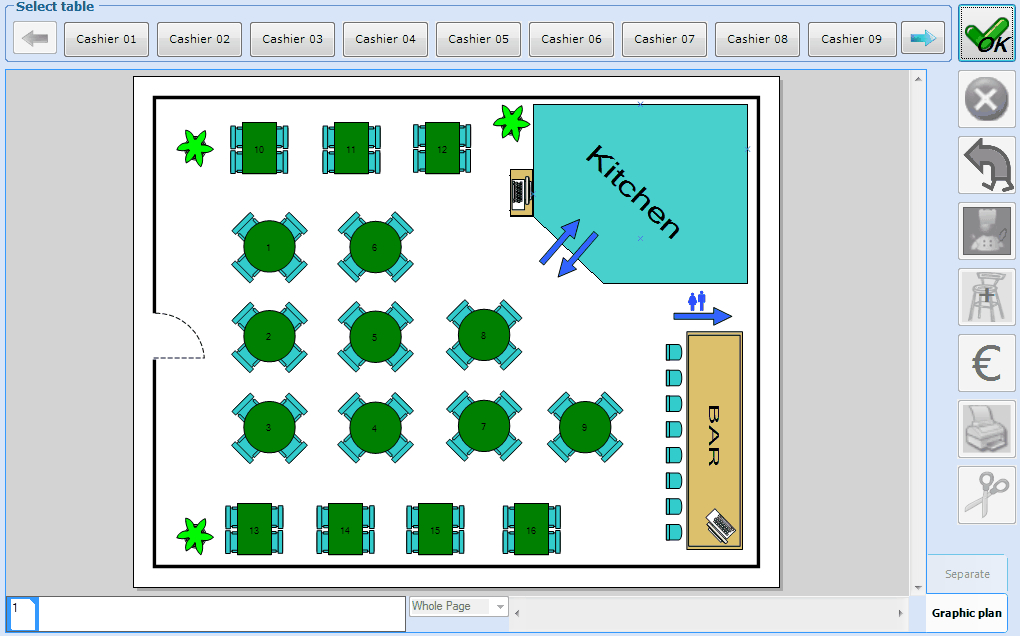 |
Centrally in this window you can find the graphic table plan, at the top there's a list of available employees and on the right you can find a number of specific buttons.
| Previous employee. |
| Next employee. | ||
| After the selection of a (fictive) table, continue to the selection screen. |
| Close the window. | ||
| Move (fictive) table. |
| Print kitchen message. | ||
| New separate sale. |
| Settle/pay. | ||
| Print bill. |
| Split up table. |


The colour of the tables/chairs in the sales zone can differ according to the following key:
| Free table. | |
| Selected table. | |
| Attributed table: Table for which sales have already been registered. | |
| Table for which a bill has already been printed manually ( |


Sales per table
First select the employee in the sales zone and choose a table to which you want to sell articles. You can do so by clicking in the right order on the desired employee, de desired table and then on  .
.
 |
Note
If you select a table that has already been attributed to another employee, and dependent on the rights per employee, the following message may appear:
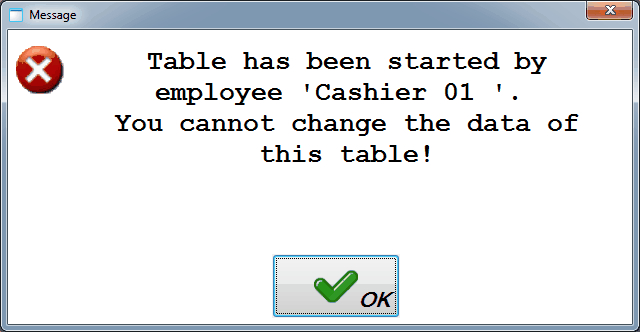 |
Select the articles to be sold in the selection screen. The selected articles will appear in the list with chosen articles and the various buttons will allow you to modify the selected article, for example: increase the quantity, allow a discount, modify +/- sign, …
Below the article overview in the selection screen, you can also see which table has been selected before.
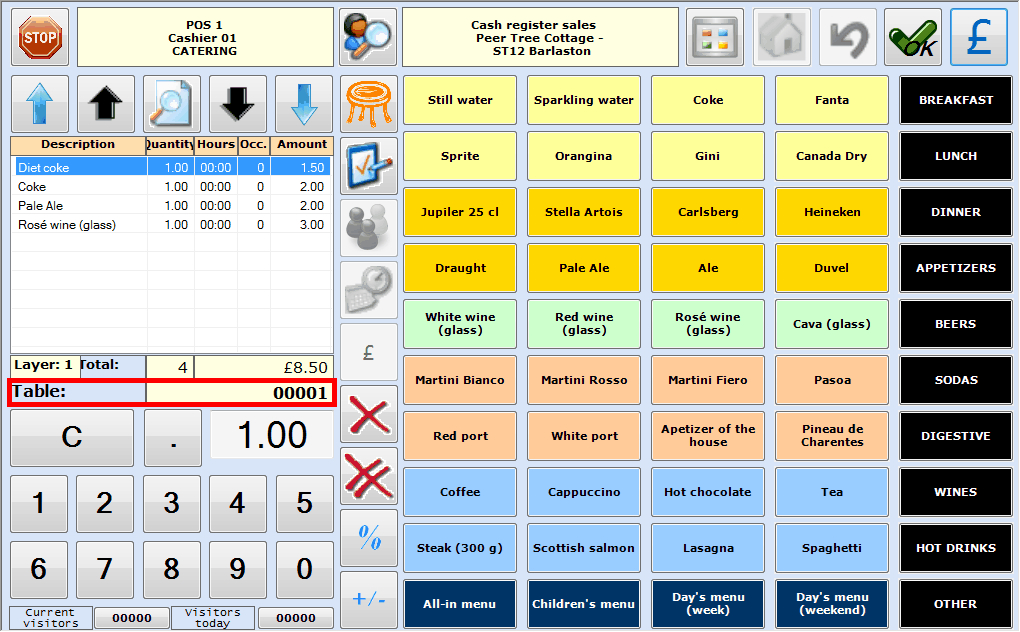 |
Next, you can click on to register the sale on the table previously selected and return to the sales zone.
For an explanation on how to really pay for the registered sale, we refer to: Settle a table.
Separate sale
If you want to register a sale without selecting a table (if this is allowed), you have to click on  or after having selected the employee in the sales zone.
 |
Indicate the articles to be sold in the selection screen. The selected articles will appear in the list with chosen articles and the different buttons will allow you to modify a selected article, for example: increase the quantity, allow a discount, modify +/- sign, …
In the selection screen you can also see that it is a separate sale.
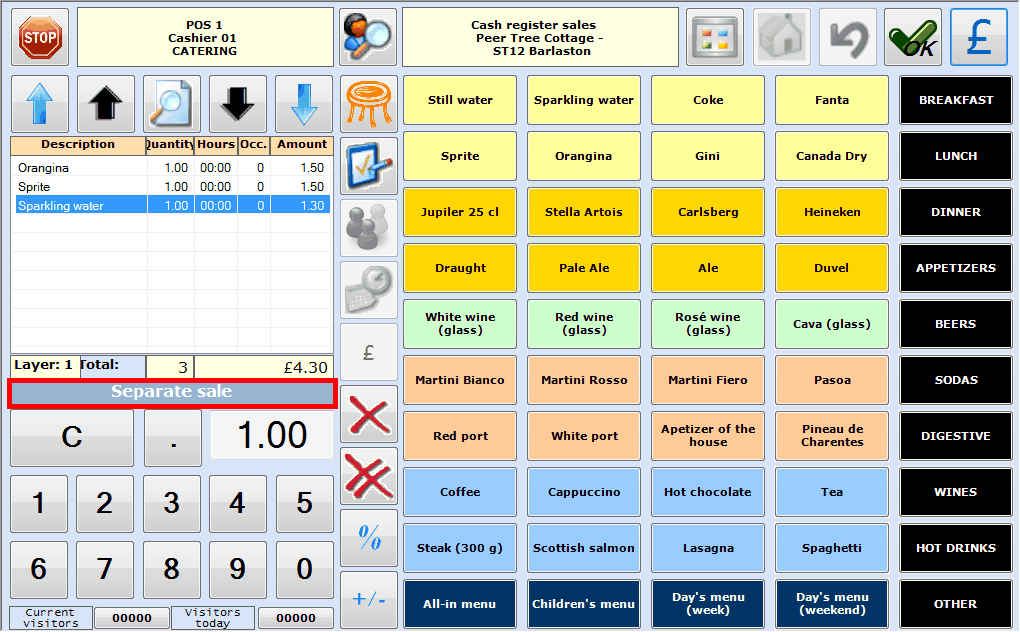 |
Next, you can click on to register the sale, fill in an additional description if required and return to the sales zone.
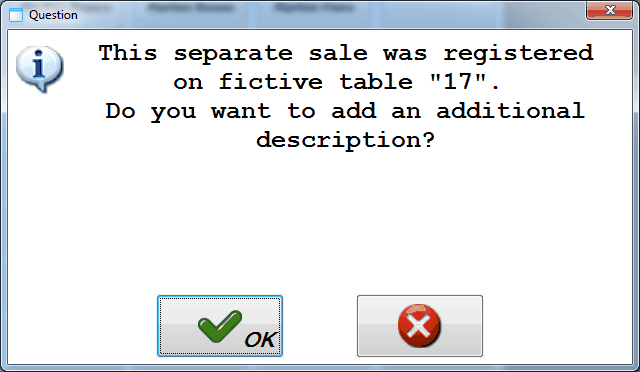 |
If you want to register an additional sale on a fictive table, you have to click on the tab Separate after the selection of an employee in the sales zone.
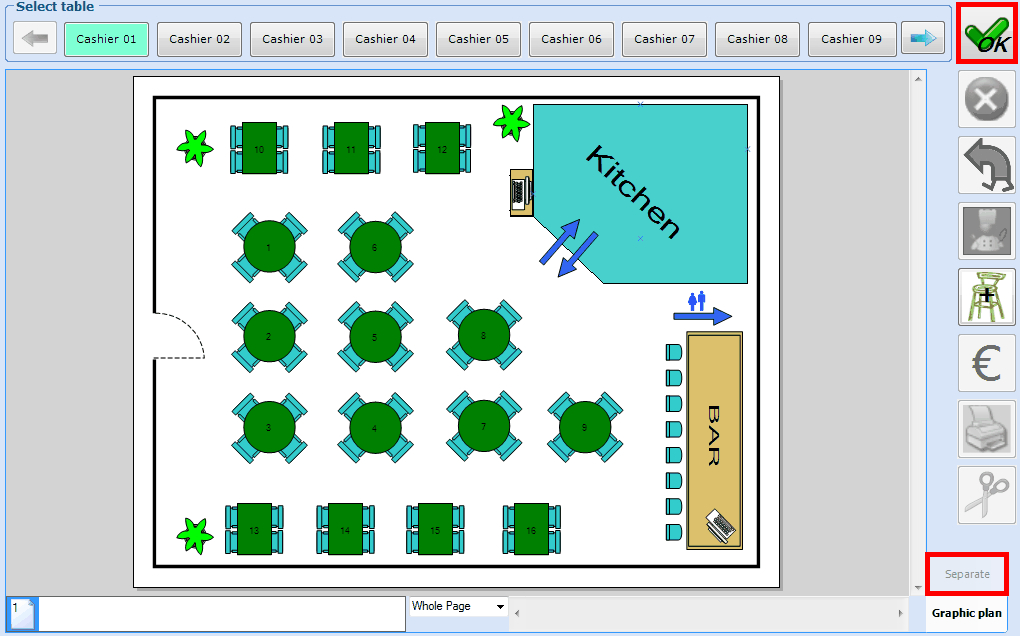 |
After reselecting the correct employee (upper row of buttons) you can then select the desired fictive table and click on to register additional sales.
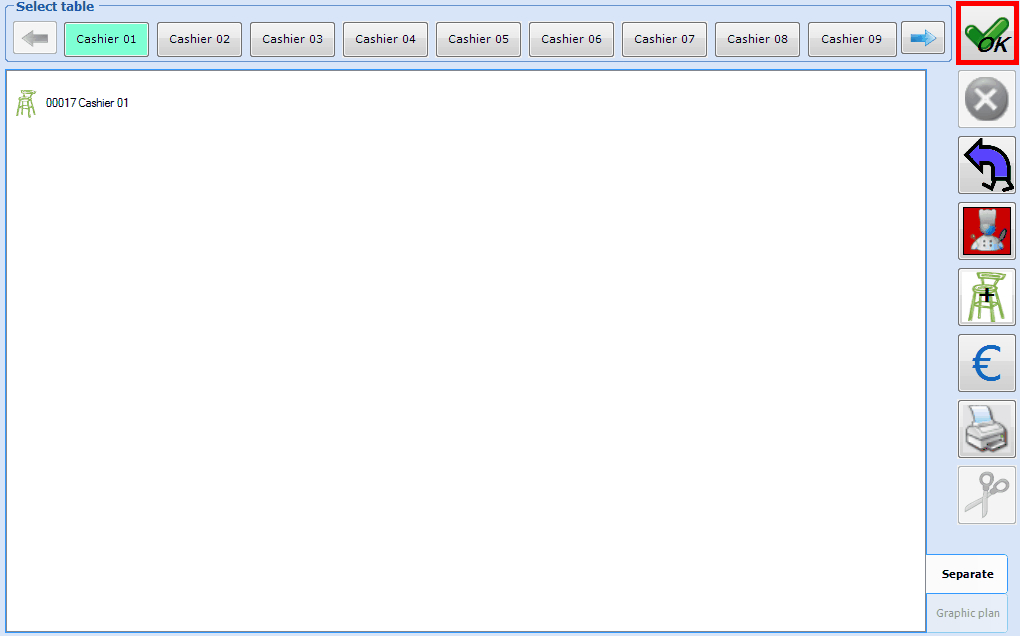 |
For an explanation on how to really pay for the registered sale, we refer to: Settle a table.
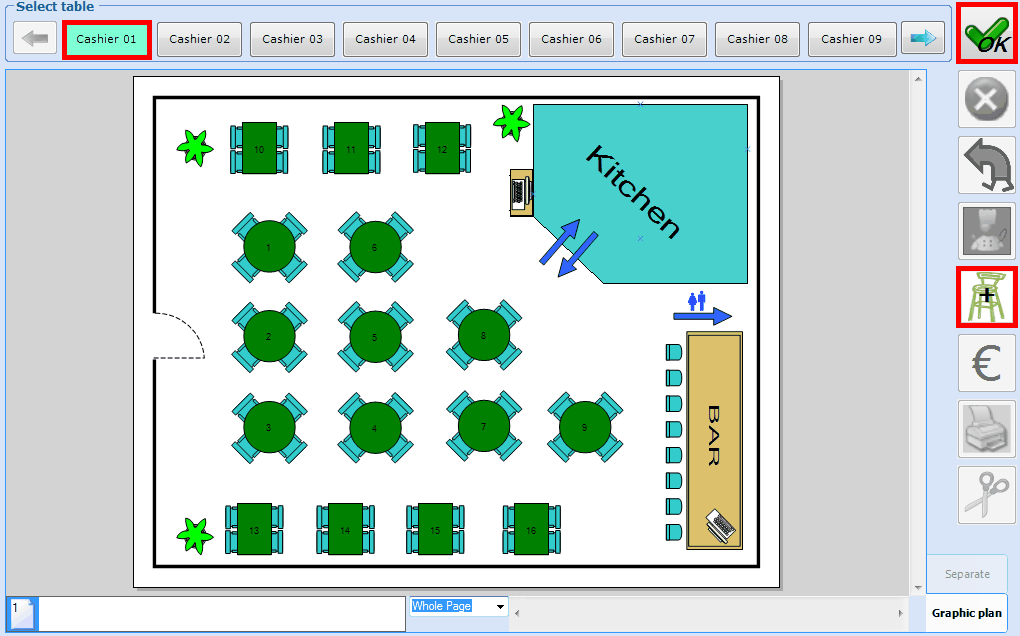
Table transfer
You can move the sales of a certain table to another table by clicking on  after the selection of the employee and the table to be moved. If you wish so, sales can be transferred to a table that has already been taken (join tables) and/or to a table in another sales zone.
 |
The window below will appear:
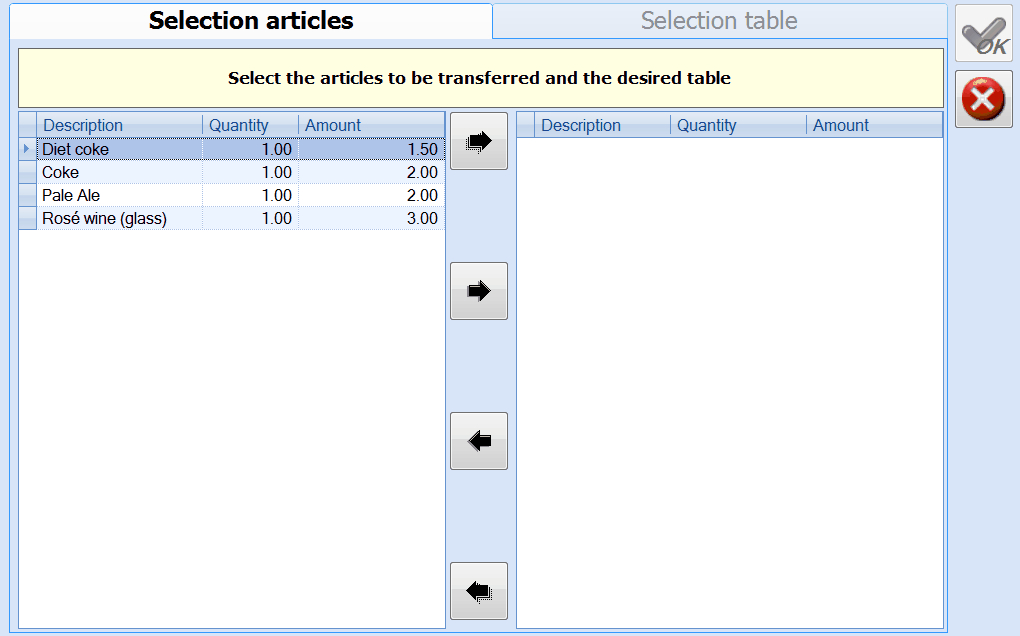 |
The aim is to first move the articles in question from the selected table to the right part of the window. If you click on the button  only the selected article is moved, and by clicking on the button
  all articles of the current table are moved in one go.
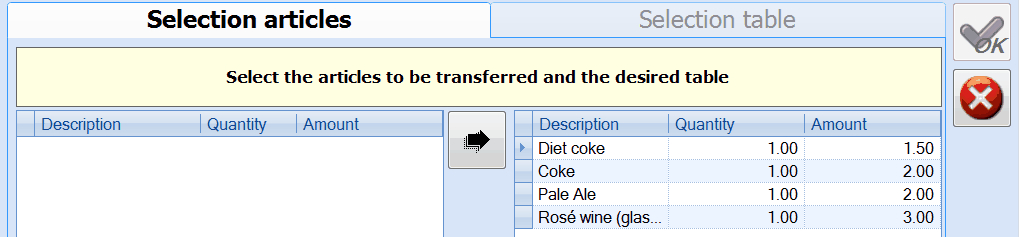 |
Note
Should you have moved the wrong articles by mistake, it is still possible to correct this by means of the buttons  or
or  , which allow you to move the articles back to the left part.
Once you have chosen the articles to be moved (and if these are thus present in the right part of the window), you can click on the tab Selection table.
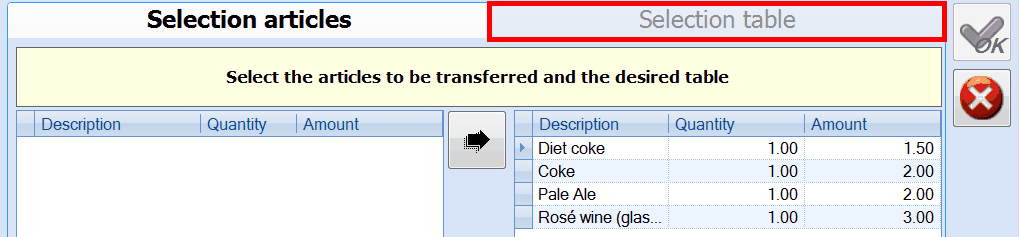 |
Next, you will be able to first select the right (target) sales zone (tab), if required, after which you can select the new table.
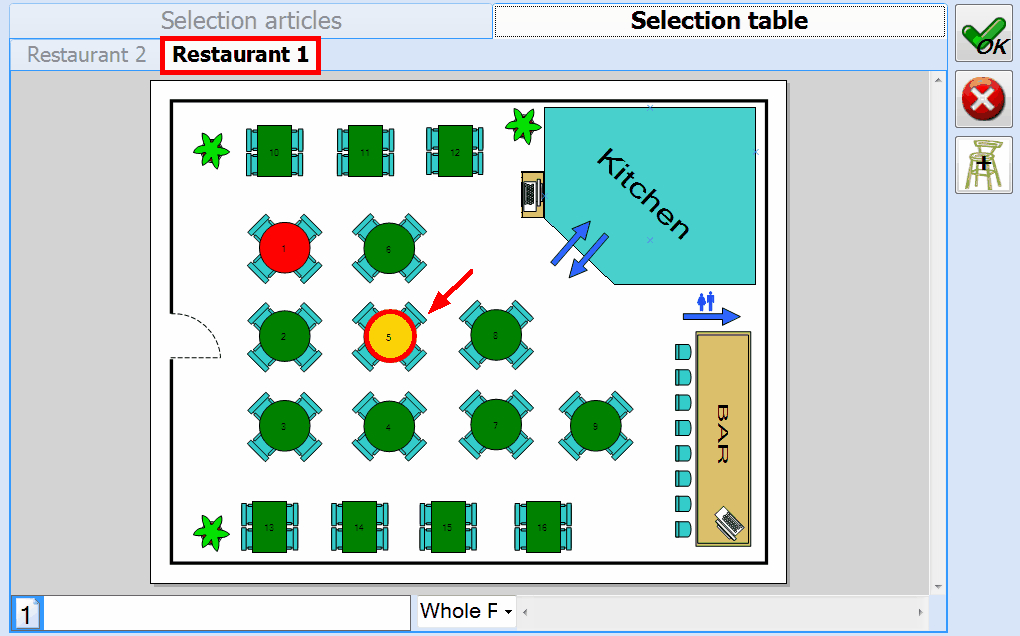 |
If the owner (linked employee) is not changed and thus remains responsible for the target table, you can click on to confirm the table transfer.
If, however, the owner is changed (for example in case of transfer to another sales zone), the new owner can first be selected under the tab Selection owner.
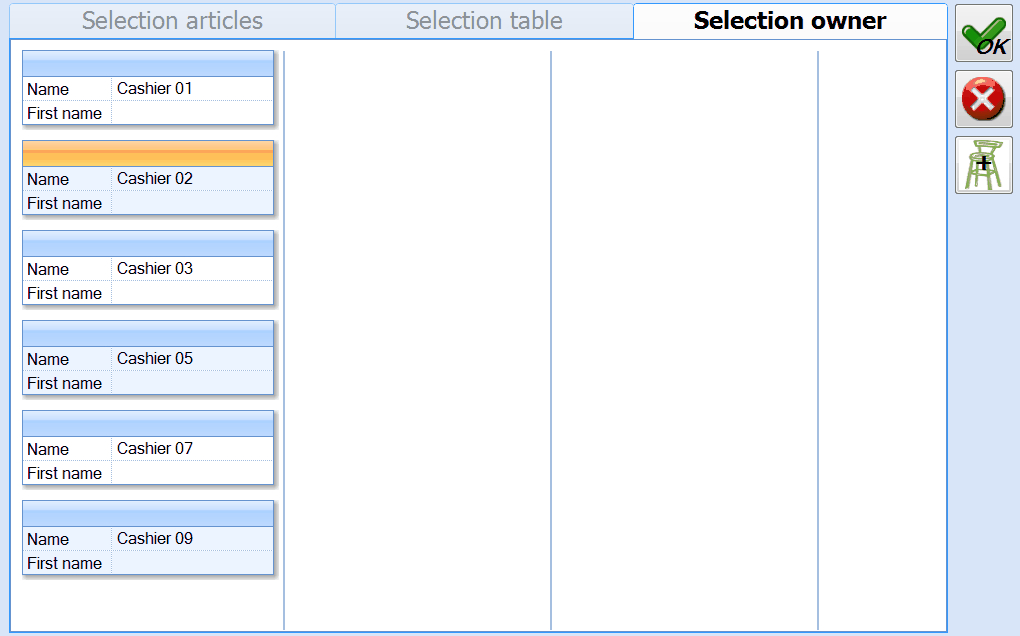 |
Note
The tab Selection owner is only available in case of a transfer to a table in another sales zone (table plan) and/or if the current employee has sufficient rights to modify attributed tables (usually the manager).
Only employees that have already started (opened) a POS shift are shown in the window above.
If you want to make a transfer to a table already taken, you will also be able to split up the table after confirmation of the table transfer (with
). See also next paragraph.
Split up a table
If new customers want to have a seat at a table that is already taken by other customers, it may be useful to "split up" the table.
If you want to split up a certain table that has already been taken, you have to click on  after having selected the cashier and the table to be split up.
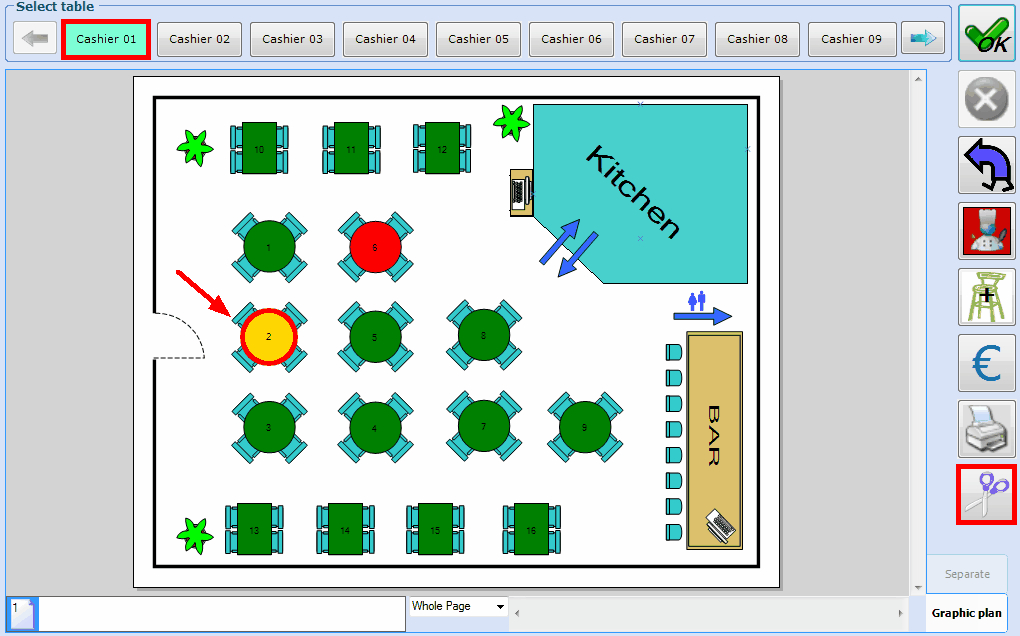 |
The window Modify sales description will appear in which a description of the table split-up in question can be filled in, for example:
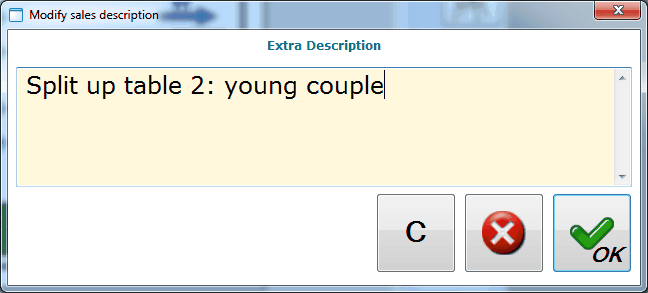 |
See next page.
If you have confirmed the description (), the selection screen will appear, allowing you to select the articles for the current part of the table. In such cases, it is indicated that the current table is split up.
 |
Once a table has been split up, a specific window will appear each time you want to add a registration to the table in question (selection on table plan), allowing you to select the desired part of the table.
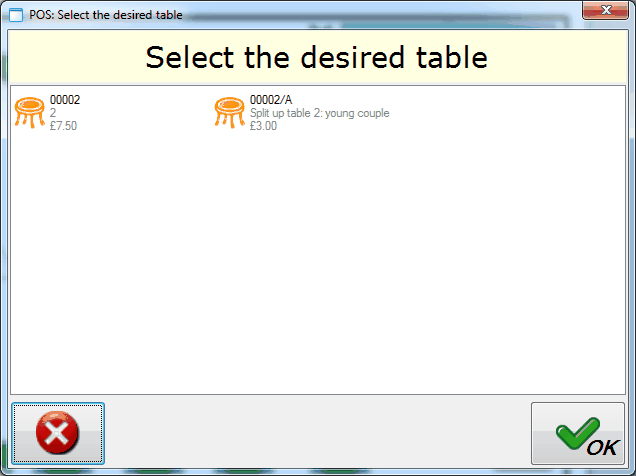 |
In this way, further sales can be made per partial table, or partial tables can be settled separately.
Print kitchen message
If a table has ordered articles that have to be prepared in the kitchen, the employee can at any time and per table send a kitchen message to the kitchen.
 |
For this purpose you have to select the correct employee and the desired table, click on  and select the desired kitchen message you want to send to the kitchen.
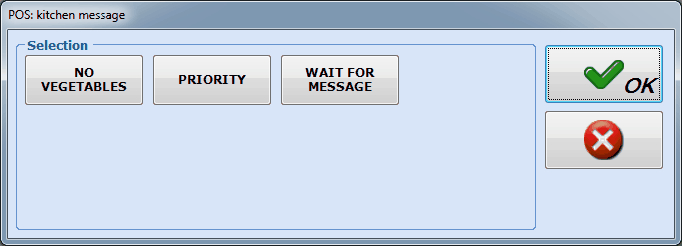 |
After selecting the desired kitchen message and clicking on the chosen kitchen message is printed on the kitchen printer.
Settle a table
Settling a certain (part of a) table can be done in two different ways.
First payment way
If you use the first way to settle a table, the entire sale linked to the selected table (or part of the table if split up) is settled.
First select the employee and then the table you want to settle in the sales zone and click on .
|
Click on in the upper right-hand corner of the selection screen or press <Enter> to continue to the payment screen.
 |
In the payment screen you can select the desired payment method(s) and click on or press <Enter>. The sale will be registered and a receipt will be printed as we have explained under separate sale.
 |
Second payment way
The second way to settle a table allows you to settle a certain table (or part of a table) partially if required. Settling a table completely is of course also possible using the second way.
First indicate the employee and then the table you want to settle in the sales zone and click on .
 |
The payment screen below will appear:
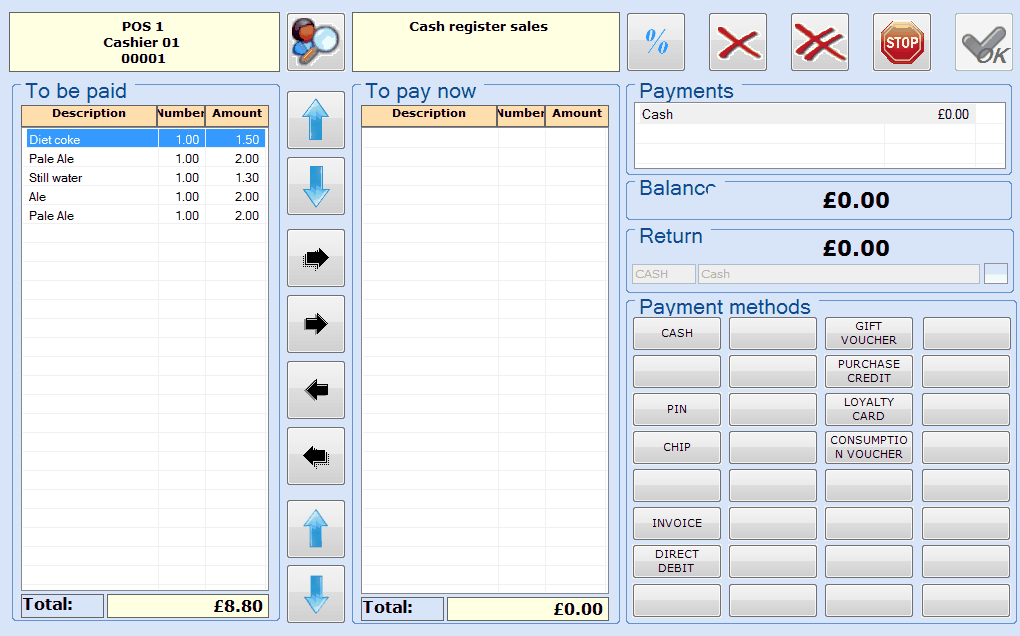 |
This window consists of 3 parts:
The remaining articles To be paid
The articles To pay now
The payment part
The remaining articles To be paid can be moved to the list of articles To pay now by means of the arrows.
| Select the previous article in the To be paid part. | |
| Select the next article in the To be paid part. | |
| Move all articles of the To be paid part to the To pay now part. | |
| Move one unit of the selected article from the To be paid part to the To pay now part . | |
| Move the selected article from the To pay now part to the To be paid part. | |
| Move all articles from the To pay now part to the 'To be paid' part. | |
| Select the previous article in the To pay now part. | |
| Select the next article in the To pay now part. |


If you have moved the desired (or all) articles to be settled to the overview on the right, you can select the payment method and settle the sale by clicking on or pressing <Enter>, as is the case for a regular sale.
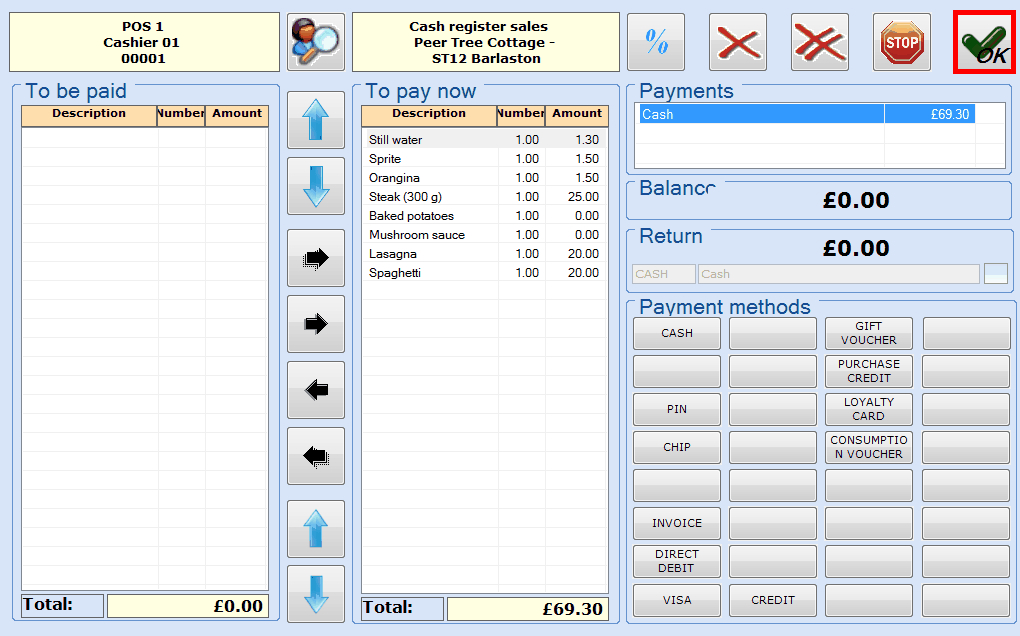 |
Print ticket
If you want to settle a table, the employee can always print the bill per table.
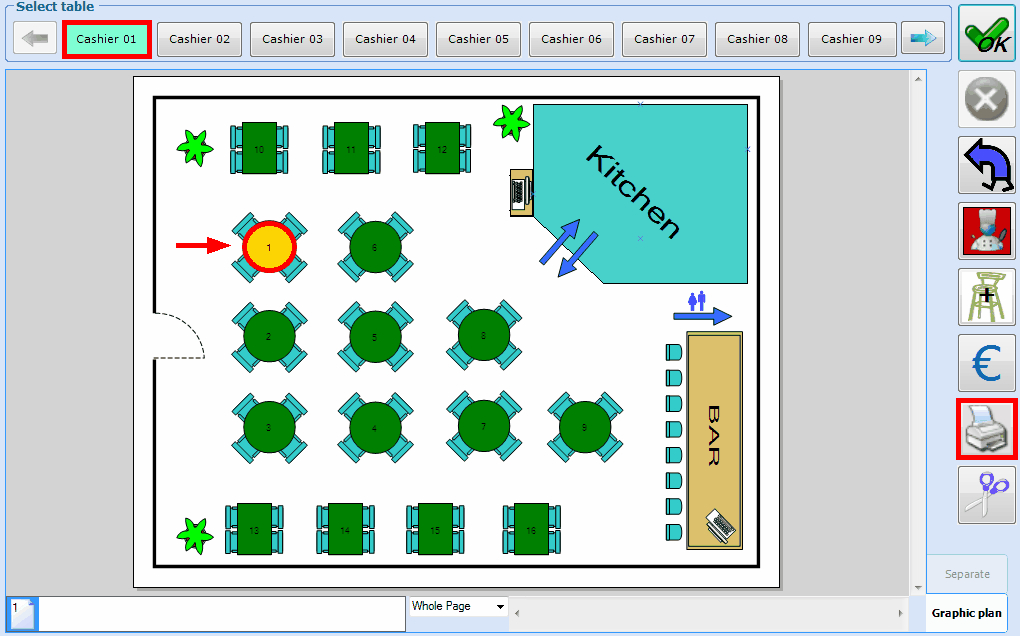 |
Sale on credit
In case of a sale on credit, the amount of the current sale is linked to a card with which the customer can pay the amount due later at the cash register.
Select the articles to be sold in the selection screen following the actions described for a separate sale. Click on in the upper right-hand corner or press <Enter> to continue to the payment screen, choose a payment method with credit processing (see manual 'GENERAL - Management'Management) and click on in the upper right-hand corner or press <Enter>.
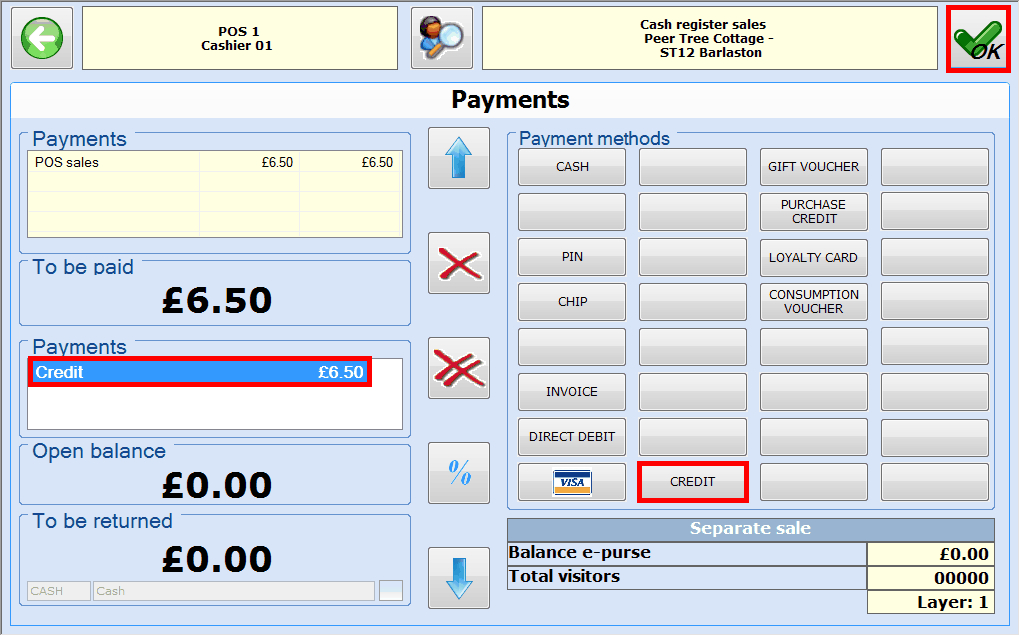 |
After finishing the financial part, a card still has to be scanned to which the credit will be linked. For this purpose, the window POS: pay by credit card below will appear after clicking on or pressing <Enter>.
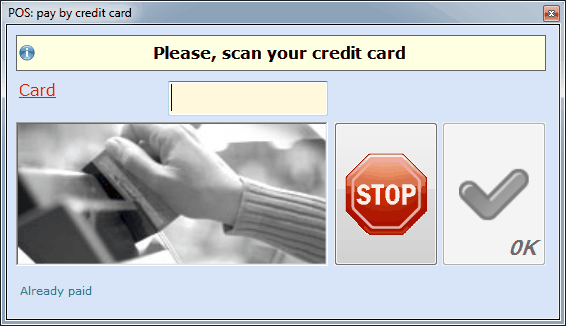 |
After scanning the credit card, the card number in question and the status of earlier articles sold on credit will appear.
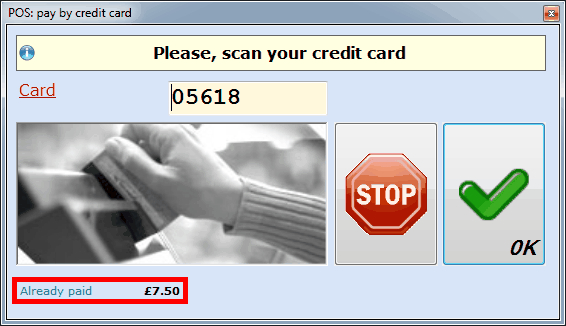 |
Finally, you can confirm the transaction by clicking on or pressing <Enter>.
Note
Instead of scanning the card, it is also possible to select the card by filling in the card number and hitting the <Tab> key.
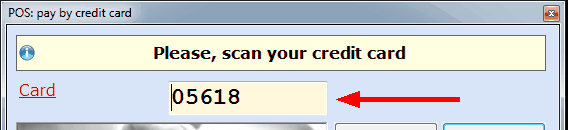 |
Settle a sale on credit
Sales on credit can also be settled using the POS module.
Warning
Paying sales on credit is IMPOSSIBLE with the simplified POS screen.
The possibility to pay for outstanding credit has to be set up on point of sale level.
In order to settle outstanding credit, you immediately have to click on in the upper right-hand corner of the selection screen or press <Enter> to continue to the payment screen.
 |
Click on the tab Credit in the payment screen:
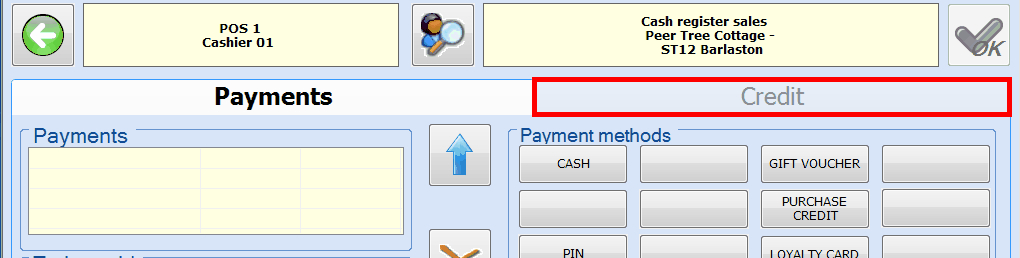 |
Under the tab Credit you have to fill in the credit card number (or scan the card) you want to settle, after which the outstanding credit will appear in the form of an article list:
 |
Next, you can reselect the tab Payments.
 |
Select the desired payment method (it is possible to split up the amount over several payment methods) and click on or press <Enter> to register the sale.
Cancel ongoing sale
As long as the sale has not been finalized (paid), you can correct or cancel it using the available button functions to avoid registering a refund.
Delete selected item from the basket (1)
Delete all items from the basket (2)
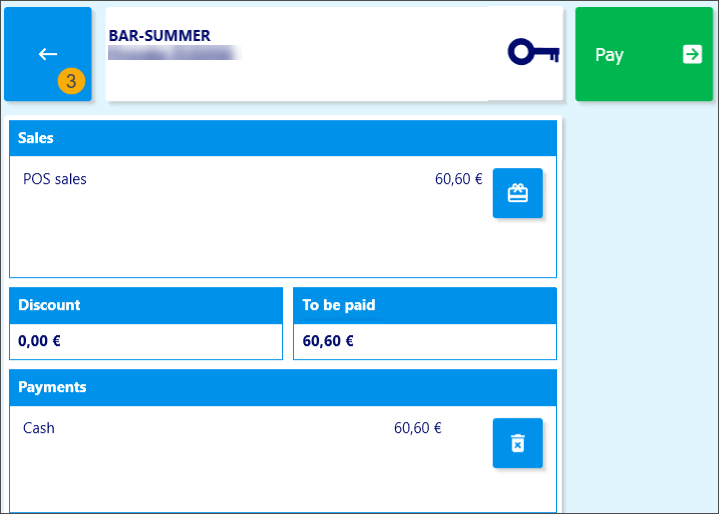
Return from the payment screen to the basket (3)
Pay-in / Pay-out sales
A "Pay-In" or "Pay-out" article is an article for which an amount is respectively put in the cash register or taken out of it. A possible example of a Pay-In is the profit of a drinks vending machine. A possible example of a Pay-out is a cashier that needs an amount out of the cash register to do certain external purchases, for example stamps.
After the selection of the Pay-In or Pay-out article, the following window will appear:
|
This window obliges you to fill in a description, which is usually an explanation why this article was hit. The description you fill in is not immediately checked but only saved. It is advised to make clear internal agreements as to which description has to be filled in for certain cash register transactions!
Once you have filled in the obligatory description, you have to click on .
It is important to know that this article often does NOT have a fixed price, in other words: the price is usually entered by the cashier. This can be done by clicking on  .
.
 |
After clicking on the following window will appear in which you can fill in the exact amount:
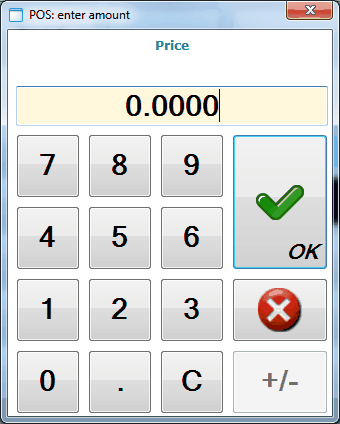 |
If you have filled in the amount, you can click on OK.
Further processing is also done in the same way as described under Separate sale.
Sales overview
To consult POS sales that have already been registered within the current shift, click on  in the selection screen.
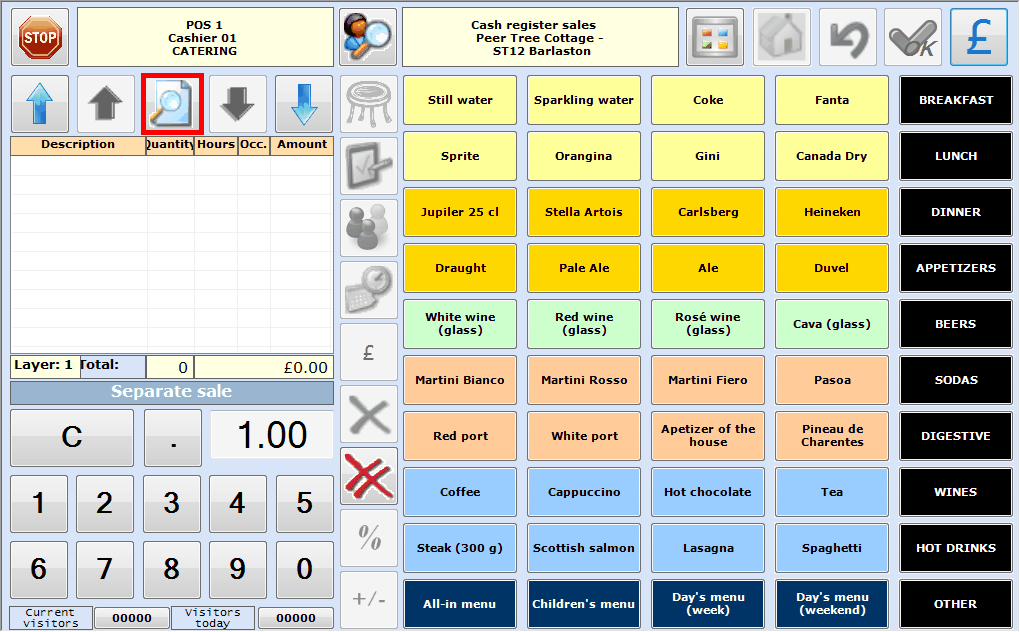 |
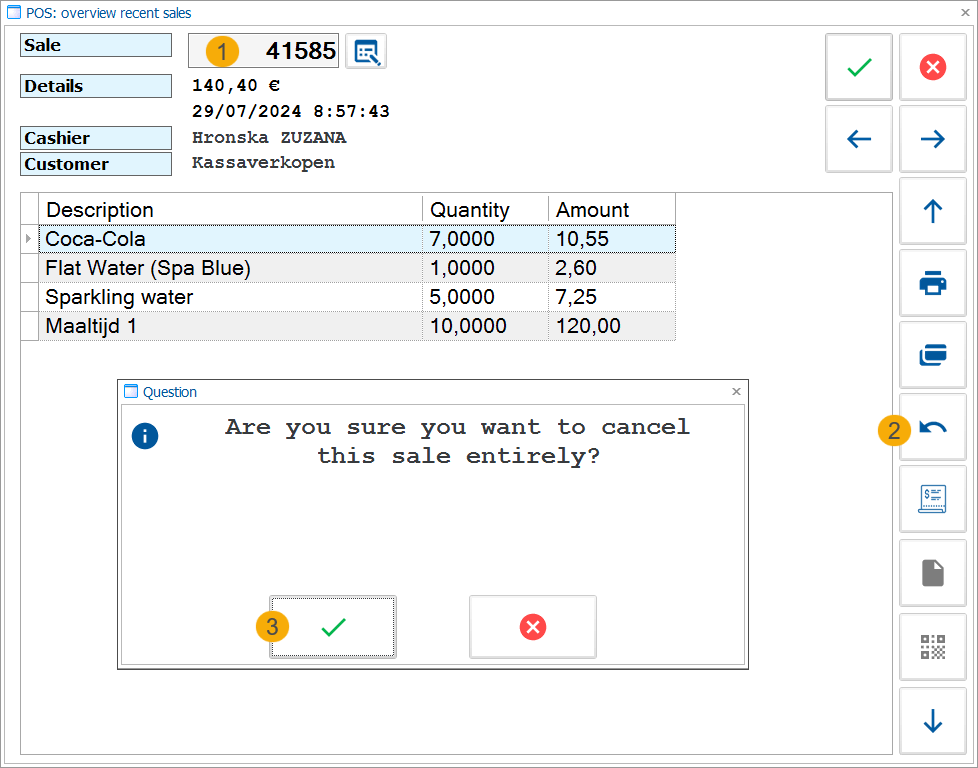
The window POS: overview recent sales will appear.
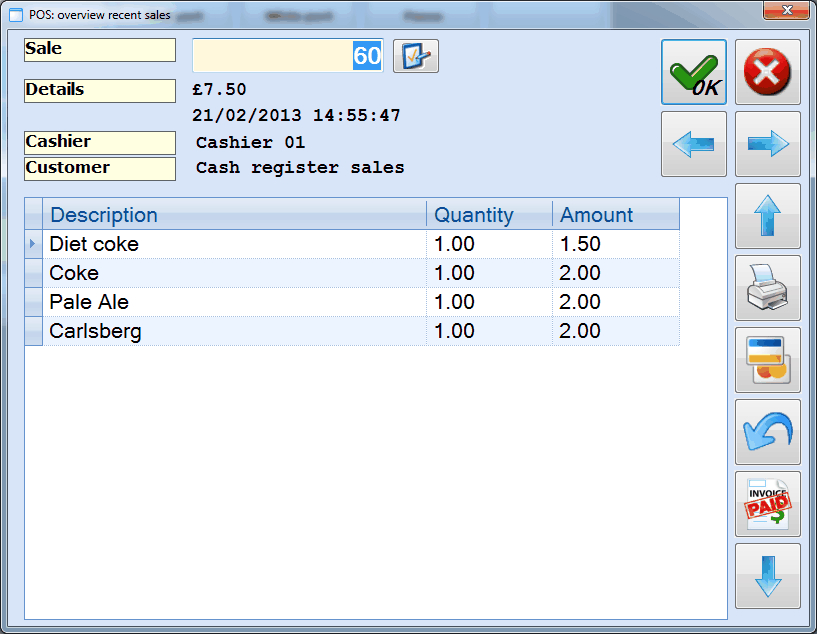 |
If you open this window, the last sales number will appear on top together with the amount to be paid, the date, hour, cashier and customer of this last sale, completed with a detailed overview of the articles sold in this sale.
On the right the following buttons are available:
| Confirm sales number (as an alternative for <Tab> or <Enter>). | |
| Close window. | |
| ||
| ||
| One sales line up. | |
| ||
| ||
| Cancel entire sale / register refund. | |
| ||
| One sales line down. |


Find sale
Note
Depending on specific authorisation settings on the employee level, the number of previous sales that can be consulted in the overview may be limited.
A registered POS sale can be searched for in two different ways.
By immediately filling in the sales number.You can do so by filling in the number in question in the field and by pressing <Enter>, <Tab> or clicking
 afterwards.
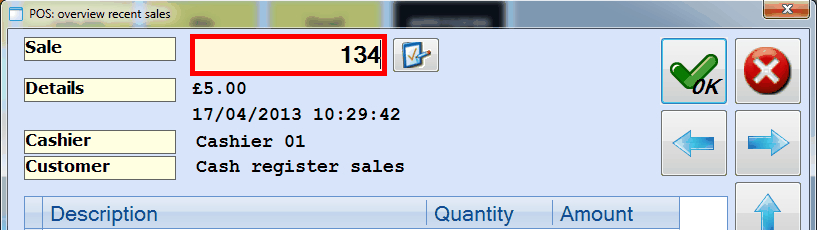 |
It is also possible to fill in the sales number by clicking on  .
.
By navigating through the list of sales using the right and left arrow (

 ).
).
Print copy ticket
In order to print a copy ticket of a certain POS sale, you first have to search for the desired sale and then click on  .
.
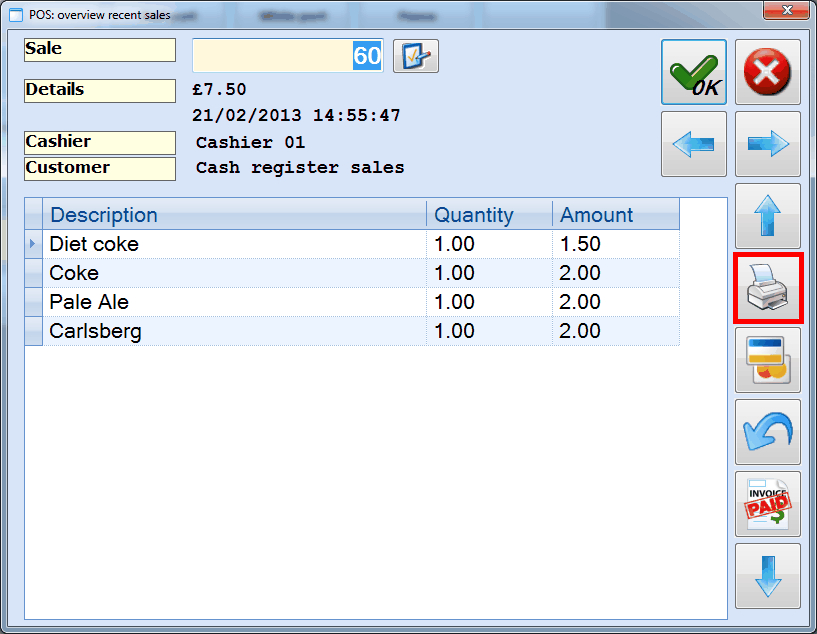 |
Note
If it has been defined for one or several of the articles that a kitchen or bar ticket also has to printed, the system will ask you if you want to print these tickets as well while printing a copy ticket.
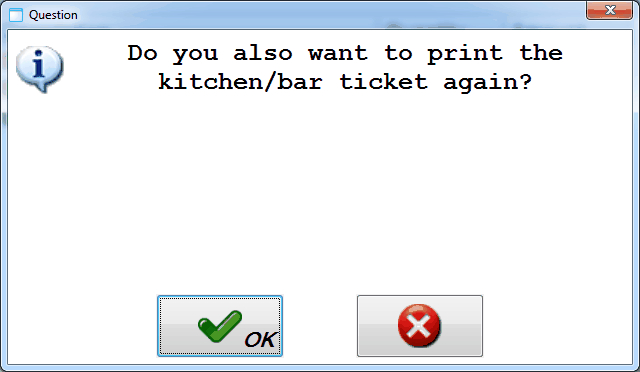 |
Modify payment method
In order to modify the payment method of a certain POS sale, you first have to search for the desired sale and then click on  .
.
 |
The current payment method is marked in the window below and, if required, you can select another payment method.
 |
It is advised to first delete the current (automatically marked) payment method(s) by clicking on  before selecting the new payment method(s). As is the case for a regular sale, it is also possible to split up the amount in question over several payment methods.
If you have modified the payment method, you have to click on  to confirm.
Create cash paid invoice
A cash paid invoice is in fact a payment certificate in the form of an invoice, as opposed to a normal invoice that is usually sent later to the customer and still has to be paid.
Note
It is only possible to create a cash paid invoice for sales that have already been paid for (in cash, with PIN/CHIP, ...). You will thus not be able to create a cash paid invoice for sales that are paid for with a "normal" invoice, direct debit, ...
In order to make a cash paid invoice of a sale, you first have to search for the desired sale and then click on  .
.
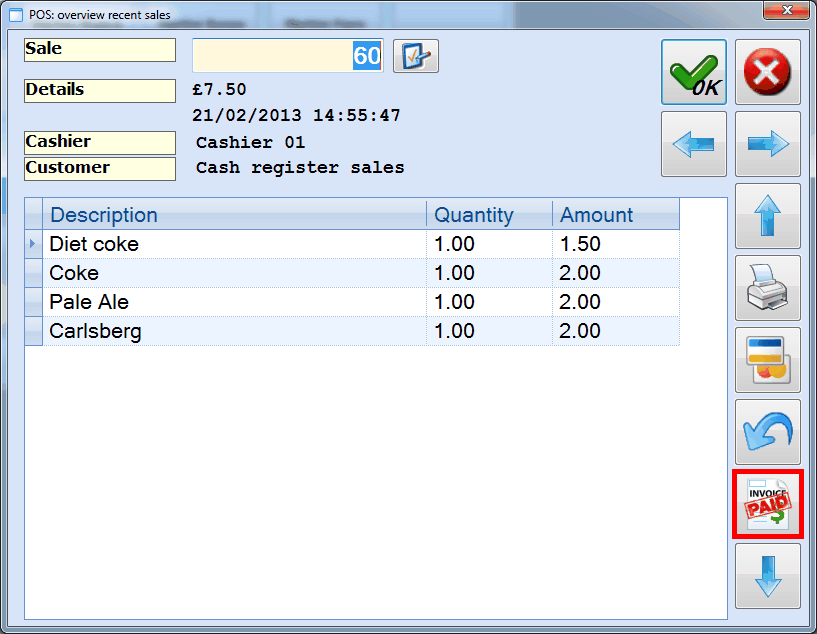 |
If the registered sale has not yet been linked to a customer, the system will ask you to do so in function of the cash paid invoice with the following message:
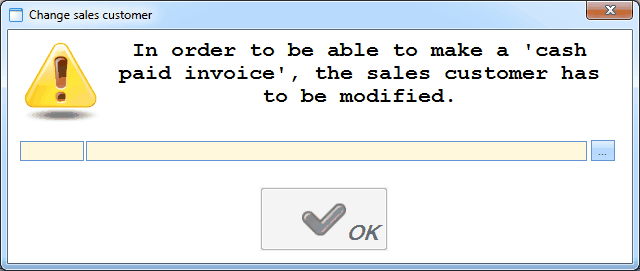 |
Finally, you have to confirm the question below to start the creation of the cash paid invoice.
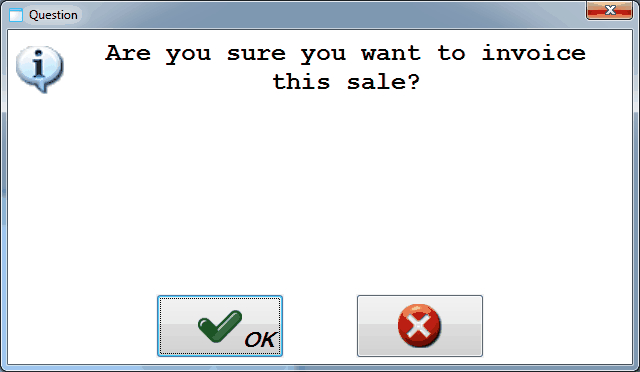 |
Correct or refund finalized sale
Registering a correction or refund involves recording a “negative” sale to cancel a previously registered sale. This is necessary when a sale is recorded by mistake or when a customer returns an item for a refund.
To correct or refund finalized sales, you have the following options:
Ensure the cashier has the authorization to work with negative article quantities and process negative sales total.
General > Basic data > Employees > Employees > open employee card > tab Cashier data > Authorisation > POS > activate settings:
Ensure the cashier has the authorisation to refund sales.
General > Basic data > Employees > Employees > open employee card > tab Cashier data > Authorisation > POS > select an option for the setting:
May refund sales: Total refund, Partial refund or Total refund without modifications
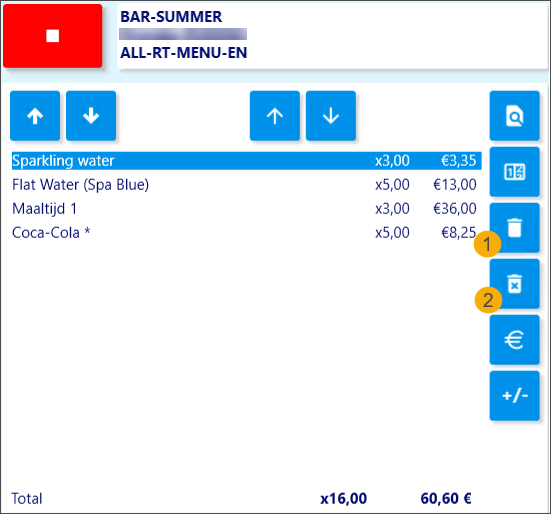
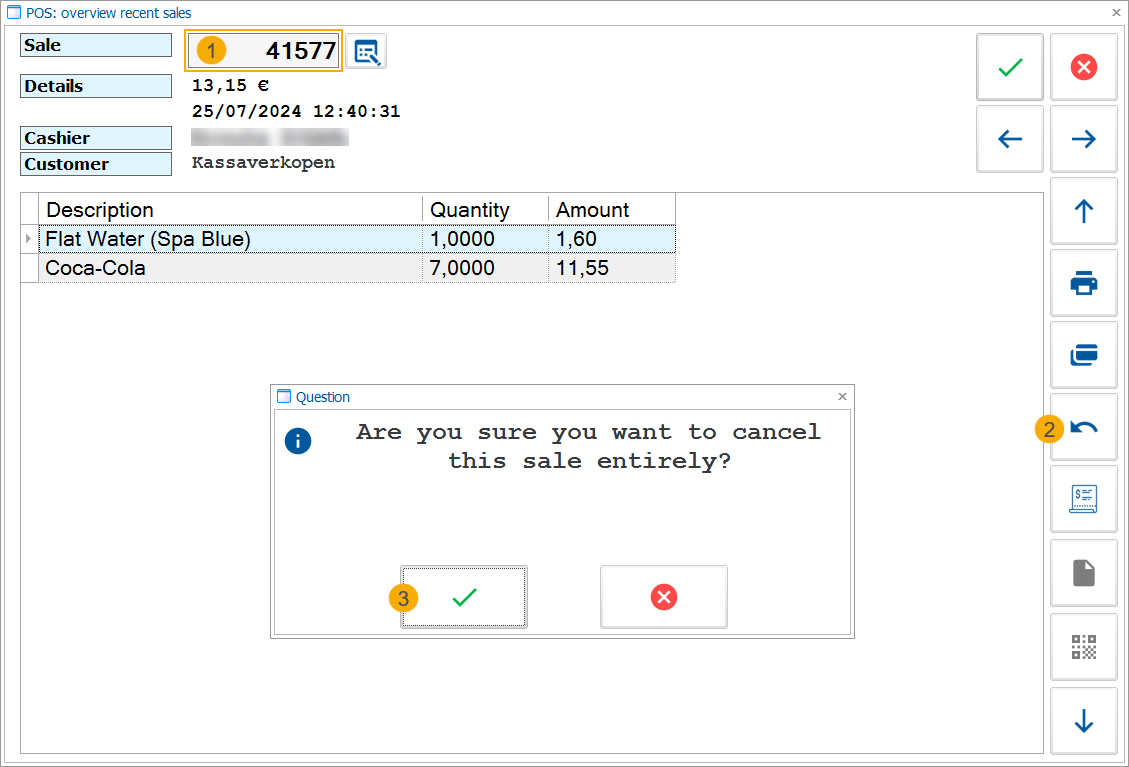
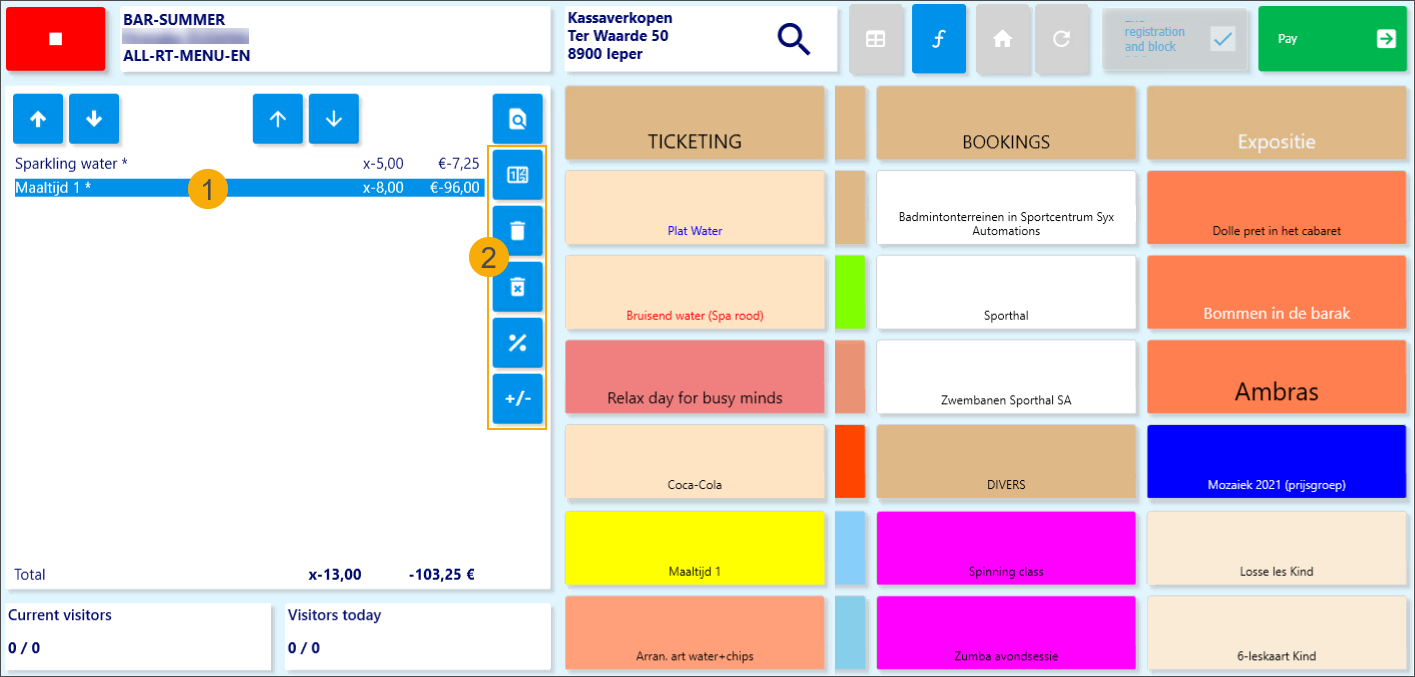
On your cash register screen go to the Sales overview
 and look up the relevant sale (1). Then click the Cancel sale button (2) and confirm (3).
Depending on the type of refund, the flow may differ.
Total refund
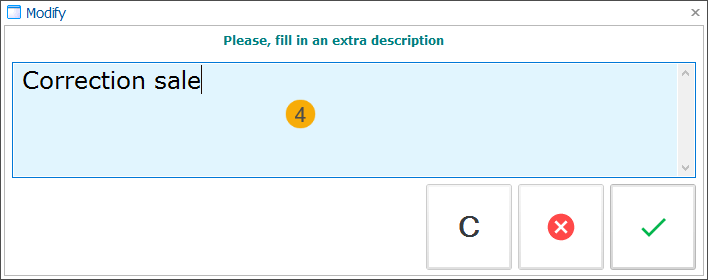
If configured, enter the mandatory extra description (4) and confirm. This description is applied automatically to each sales line.
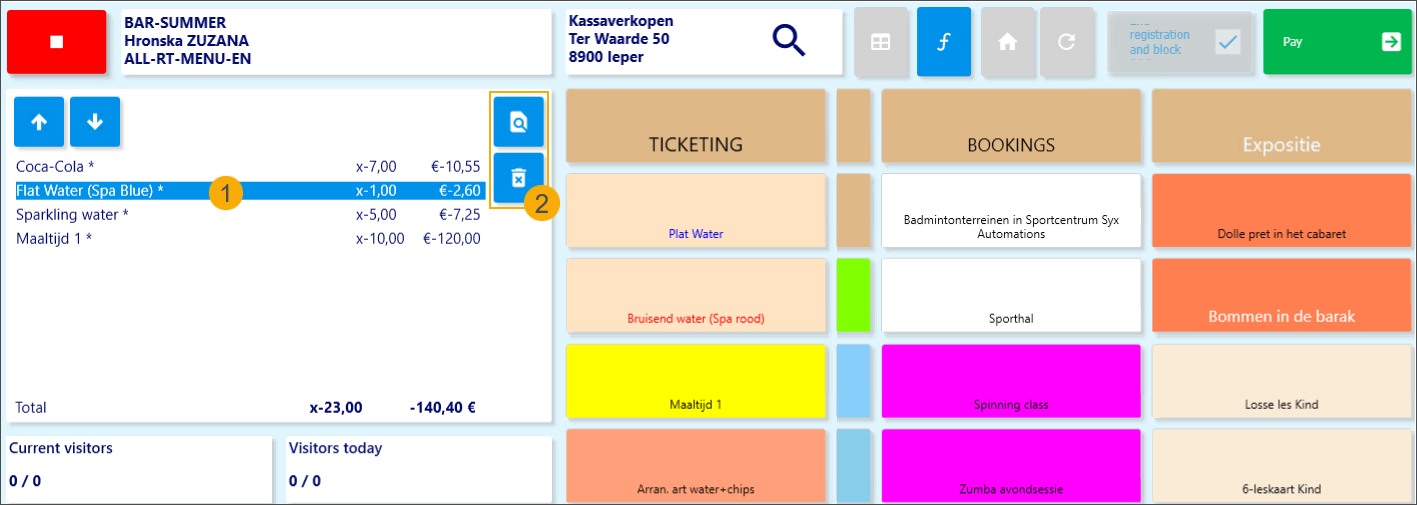
All articles from the original sale are added to the basket with a negative quantity and an asterisk is displayed next to each article to indicate the extra description (1).
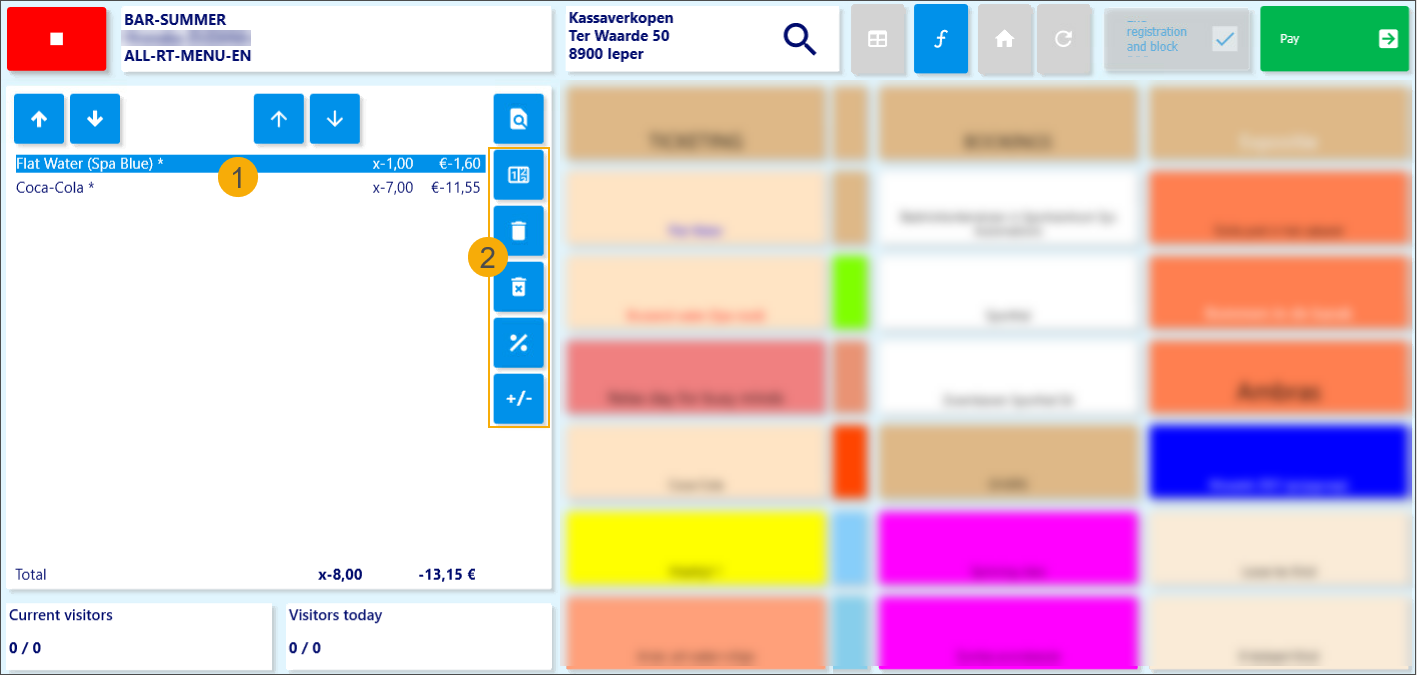
This refund option allows additional basket modifications (2): change the quantity, remove and add new articles, and give discounts.
Partial refund
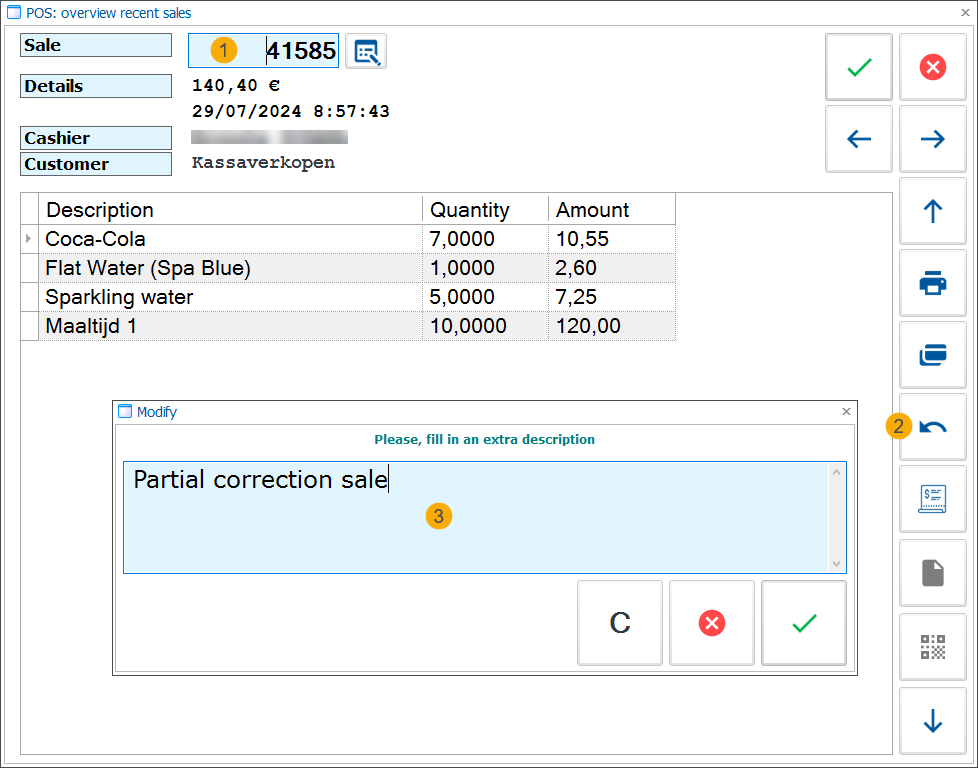
If configured, enter the mandatory extra description (3) and confirm. This description is applied automatically to each sales line.
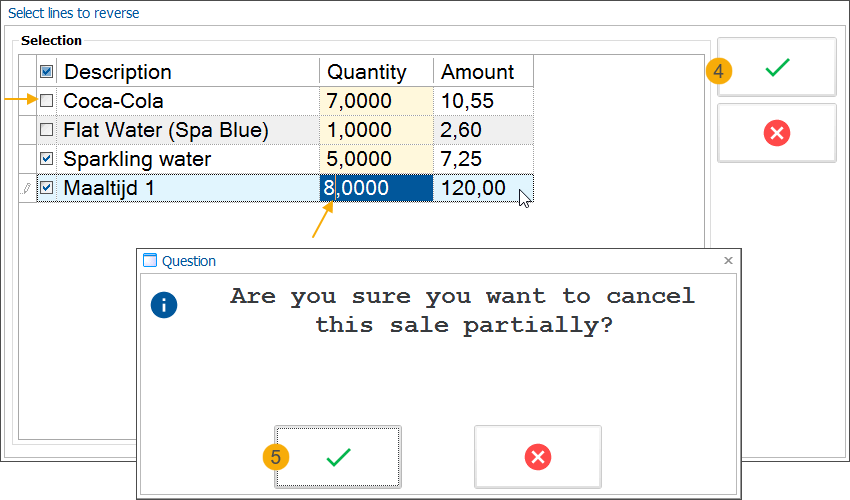
Next, choose which articles and quantities you want to refund: deselect the articles you wish to exclude from the refund and adjust the quantity (if needed) of the articles that need to be refunded. Confirm your selection (4,5).
Only the articles and quantities to be cancelled are added to the basket with a negative quantity. An asterisk is displayed next to each article to indicate the extra description.
This refund option also allows additional basket modifications (2): change the quantity, remove and add new articles, and give discounts.
Total refund without modifications

If configured, enter the mandatory extra description (4) and confirm. This description is applied automatically to each sales line.
Only the selected articles and quantities from the original sale are added to the basket with a negative quantity. An asterisk is displayed next to each article to indicate the extra description (1).
This refund option does not allow any further modifications (2).
Note
To activate the mandatory description pop-up, go to Sales admin > Settings > Points of sale > open point of sale detail > tab General > activate setting: Description mandatory in case of a negative sale.
Process the payment further the same way as a regular sale.
To cancel an ongoing refund flow, click the Delete all items
 button.
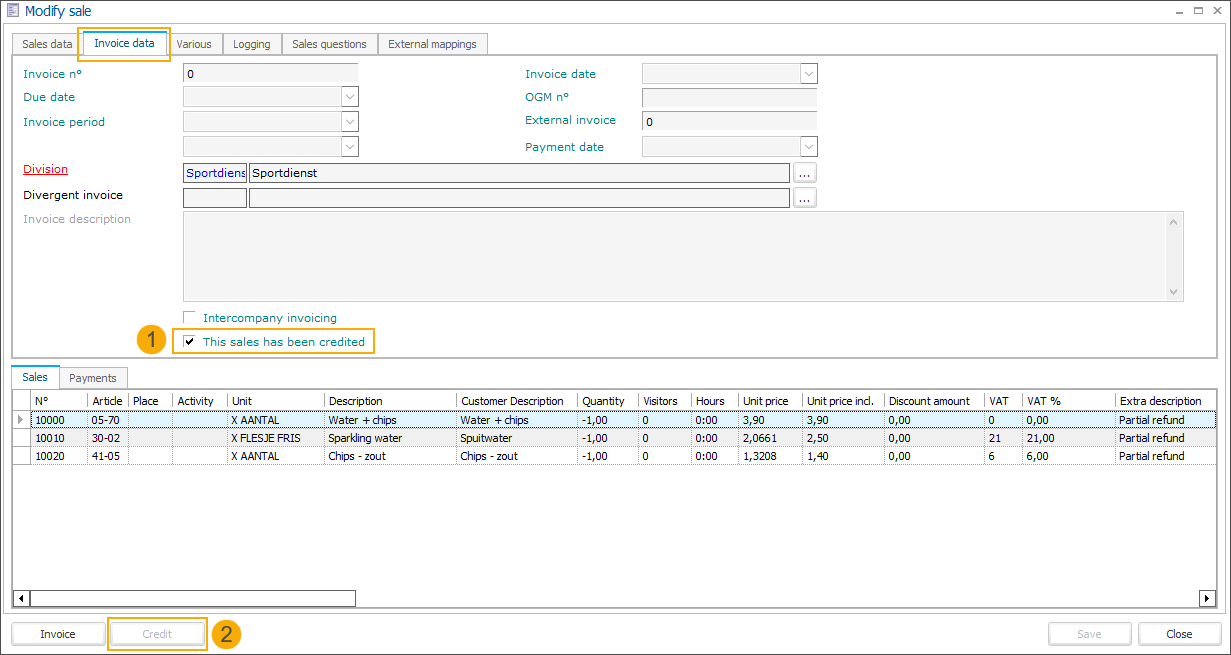
In Backoffice, the refund can easily be traced in Sales history (Sales admin > Visualisations > Sales).
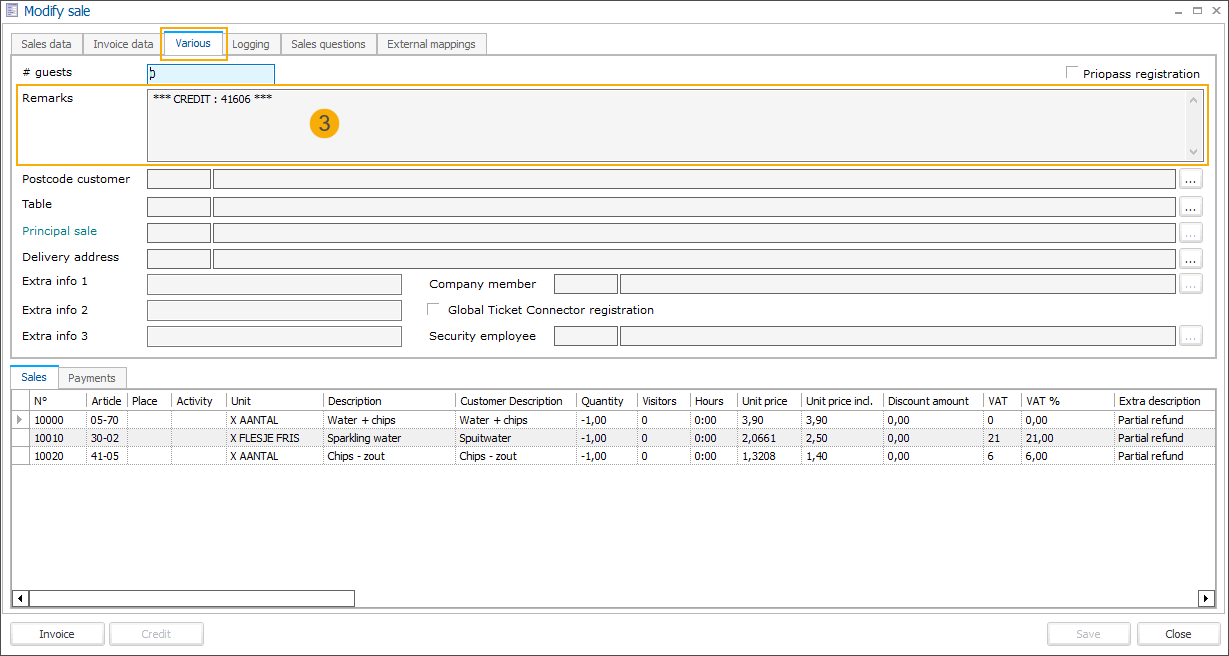
In the sale detail on the tab Invoice data: The option This sales has been credited is checked and read-only (1) and the function Credit is disabled (2).
In the sale detail on the tab Various: The information about the original sale is provided in the field Remarks.
Ensure the cashier has the authorization to work with negative article quantities and process negative sales total.
General > Basic data > Employees > Employees > open employee card > tab Cashier data > Authorisation > POS > activate settings:
Add the articles you want to refund to the basket and adjust the quantity of each article to negative, using the function Modify number/option (1) or clicking the button Modify to positive/negative (2).
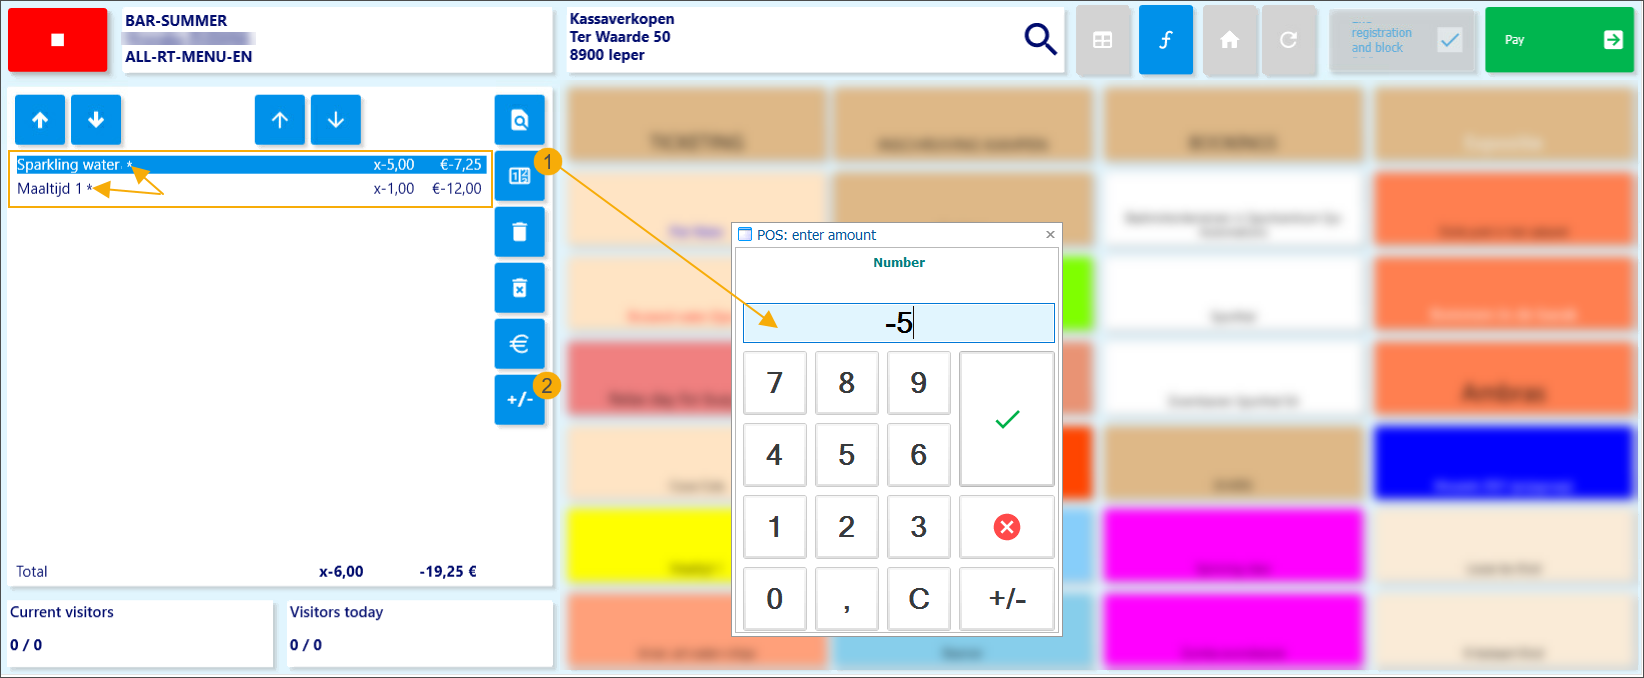
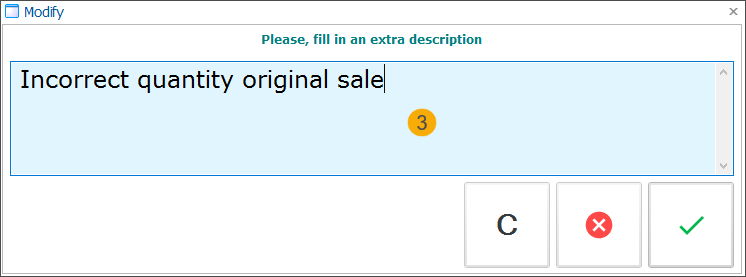
If configured, modifying each article's quantity to negative will trigger a pop-up where the cashier can enter a reason or explanation (3). A small asterisk next to the article indicates that an extra description has been added to the sales line.
Note
To activate the mandatory description pop-up, go to Sales admin > Settings > Points of sale > open point of sale detail > tab General > activate setting: Description mandatory in case of a negative sale.
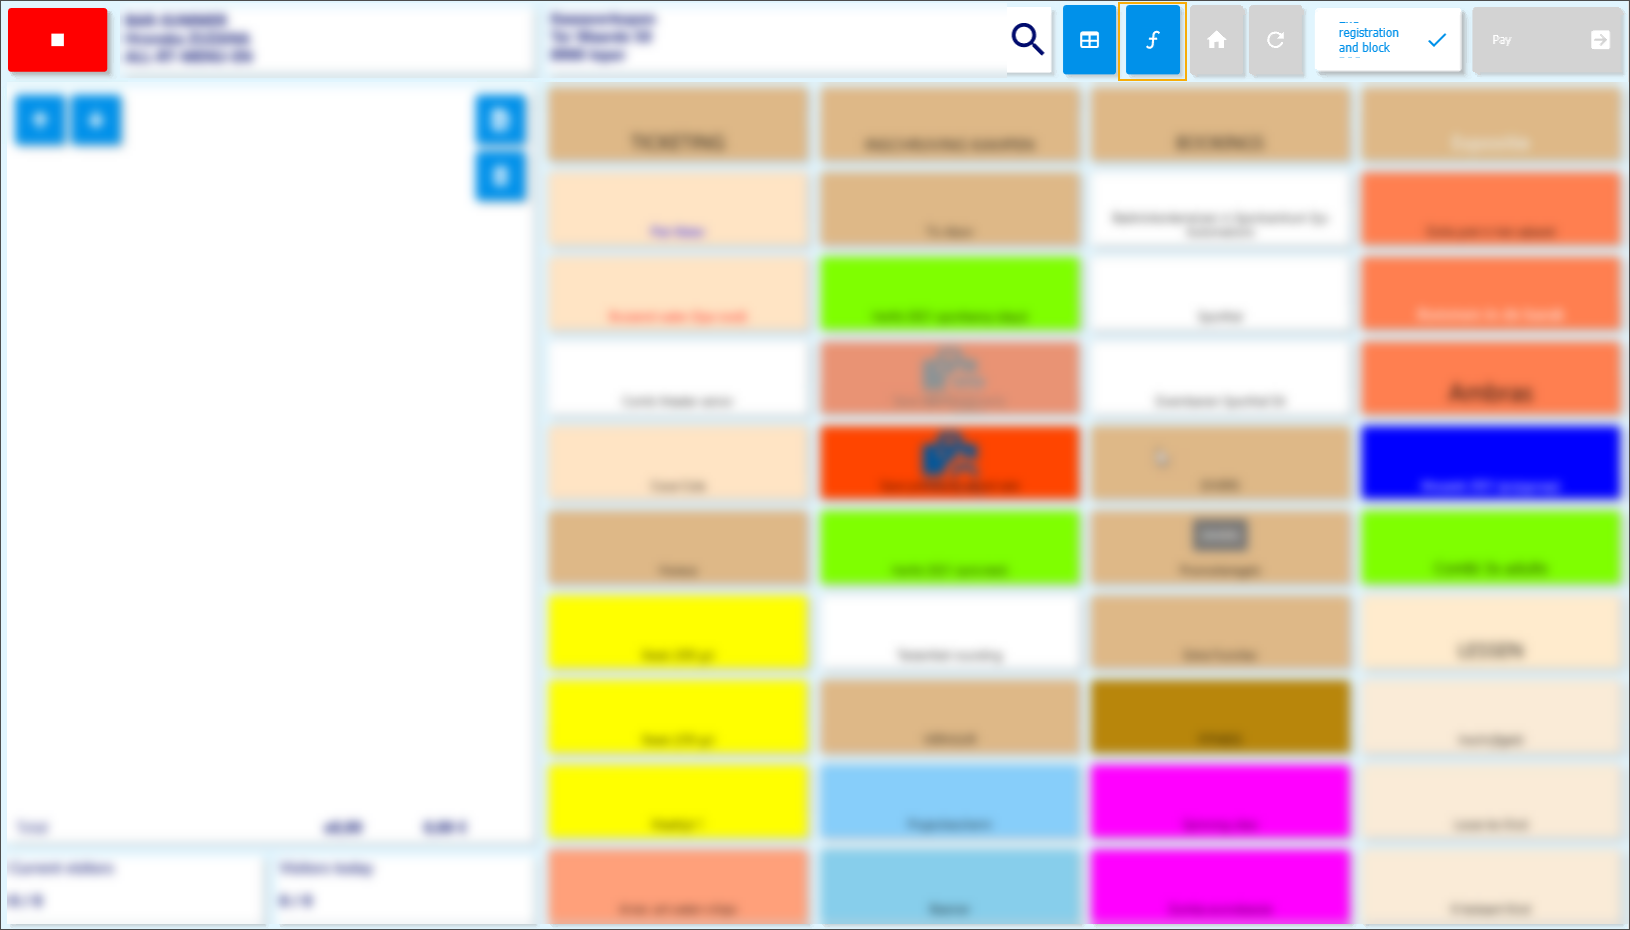
Process the payment further the same way as a regular sale.
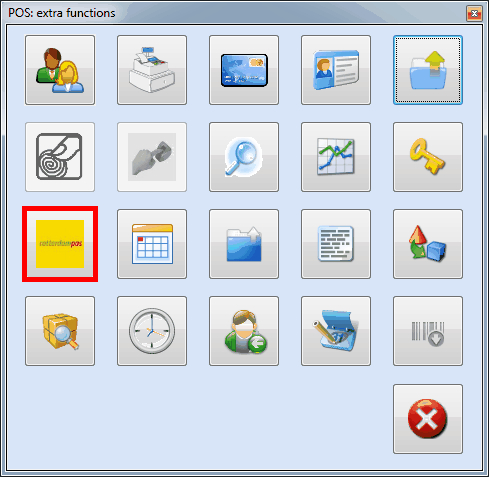
Extra POS functions
In addition to the basic functions available on the POS window, the Recreatex POS module offers many specific, "extra" POS functions.
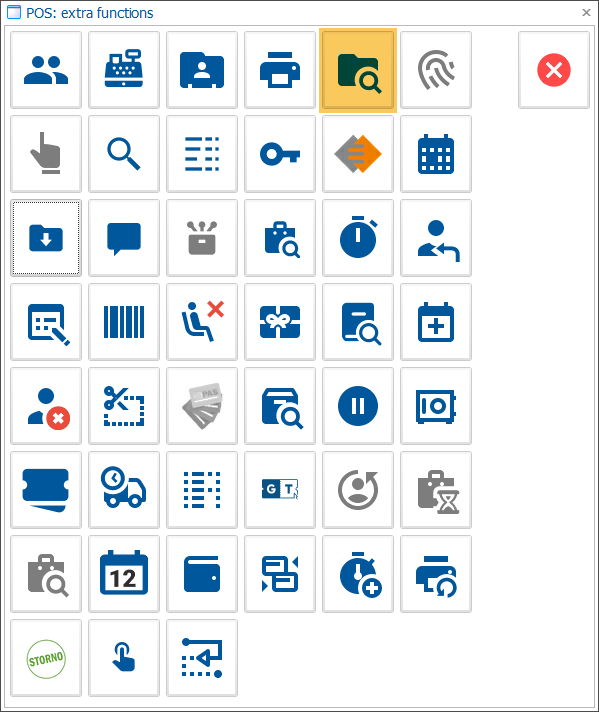
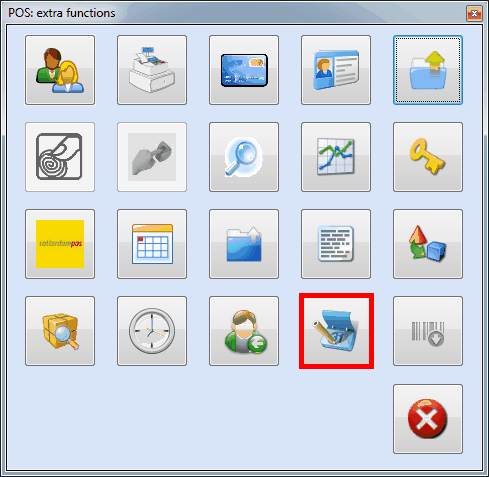
To consult the extra functions click the icon  on your POS selection screen. Typically the icon is positioned at the top of the screen but its position may vary depending on the design of your POS screen.
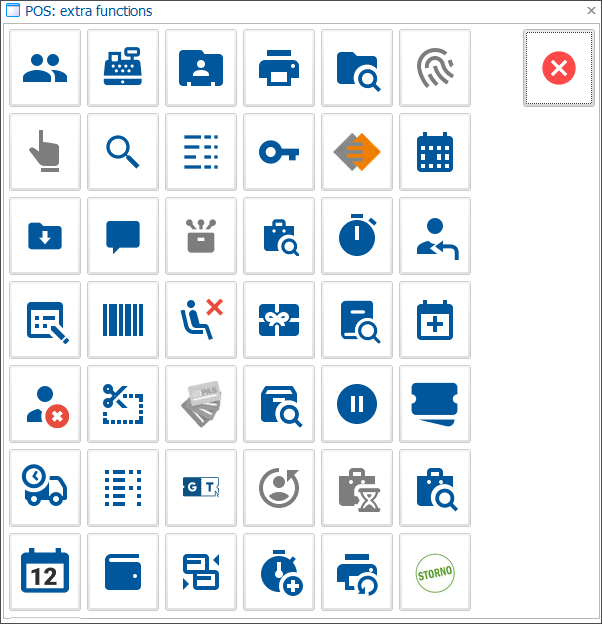
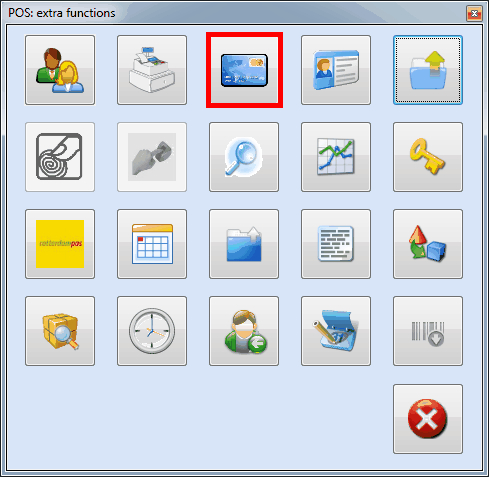
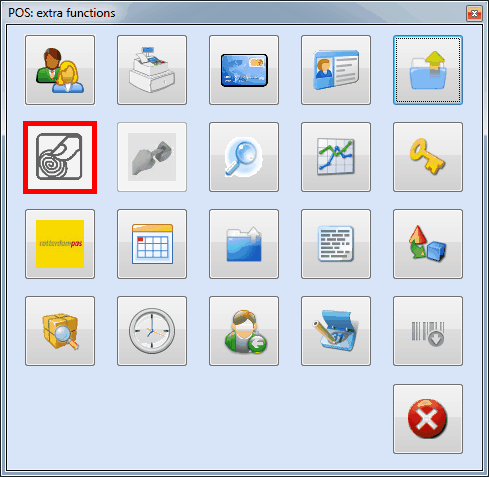
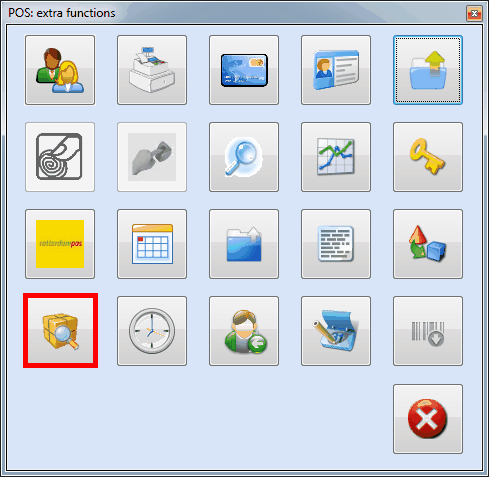
The window POS: extra functions will appear.
Note
The possibility to use some of the extra POS functions depends on the Recreatex module(s) of which you dispose.
Overview of the extra POS functions:
 | Visitors overview |  | Open cash drawer | |
 | Find customer card (without card). |  | Print card | |
 | Find articles files management. |  | Black list - scan fingerprint. | |
 | Find membership/customer card using fingerprint. |  | Find article. | |
 | Article stock |  | Change authorization | |
| Find advantages loyalty card. |  | Find exhibitions on the calendar. | |
 | Find exhibition visit |  | Add remark to current sale. | |
 | Sell at purchase price. |  | Find rental orders. | |
 | Settle access per minute. |  | Call up previous customer. | |
 | Find ticketing event. |  | Import bar codes scanned offline. | |
 | Close window. |  | Get digital wallet info |

Visitors overview
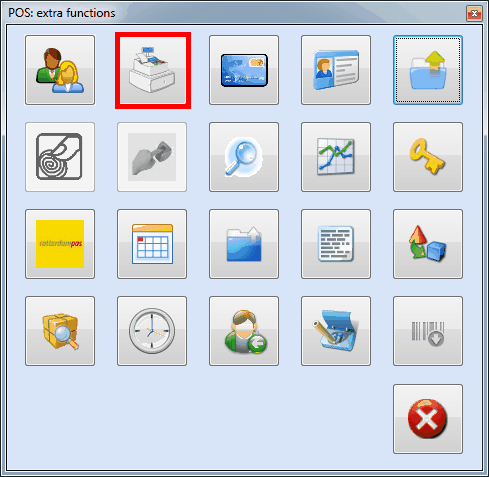
In order to call up an overview of the visitors of the current day (today), you have to click on  in the window POS: extra functions.
 |
Note
If you have defined in the POS module that visitor numbers have to be visualised on the POS screen, you can also call up the overview of visitors by clicking on the button that shows the current number of visitors.
 |
The window POS: visitors overview will appear.
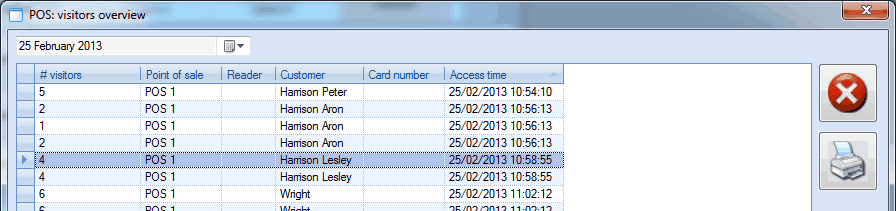 |
If required, the data in the window POS: visitors overview can be called up for another day by selecting the desired date at the top of the window. The data can also be printed by clicking on  .
.
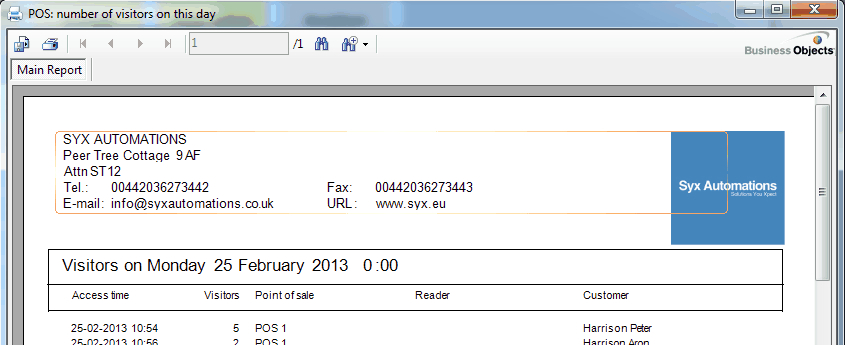 |
Open cash drawer
In order to open the cash drawer at any time and independent of a POS sale, you have to click on  in the window POS: extra functions. (licence Integration with POS cash drawer required)
 |
Warning
Opening the cash drawer in this way is always registered in a specific logging.
Find customer card (without card)
In order to find the card(s) of a customer without the card being offered/scanned, you have to click on  in the window POS: extra functions. (module Membership required)
 |
The window POS: find customer card will appear.
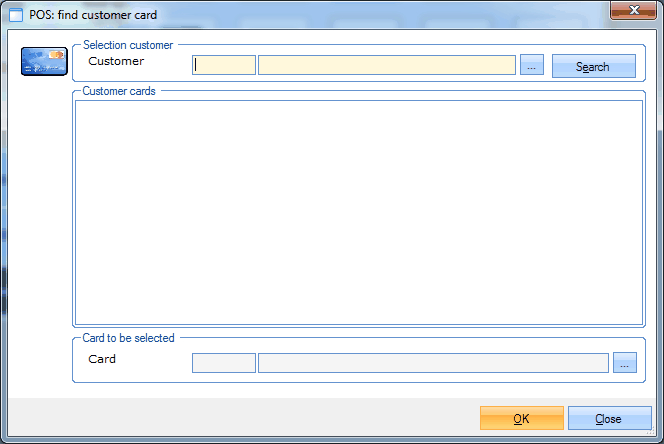 |
This window allows you to search for a customer card in three different ways:
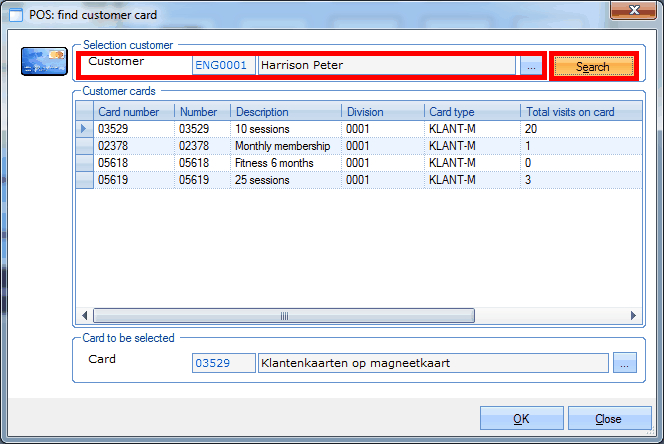
Either you first specify the desired customer and click on Search. In this case all cards linked to the customer will appear in the overview Customer cards. Next, you can select the desired card from the list by double-clicking on the line in question, or by clicking on the line in question followed by OK.
 |
Either you immediately click on Search (without filling in a customer). In this case, all cards that are present in the system will appear. Next, you can select the desired card from the list by double-clicking on the line in question or by clicking on the line followed by OK.
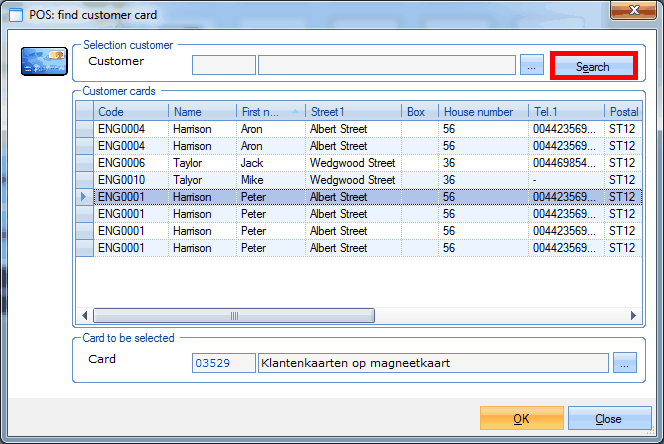 |
Either you manually fill in the card number in the section Card to be selected and click on OK.
 |
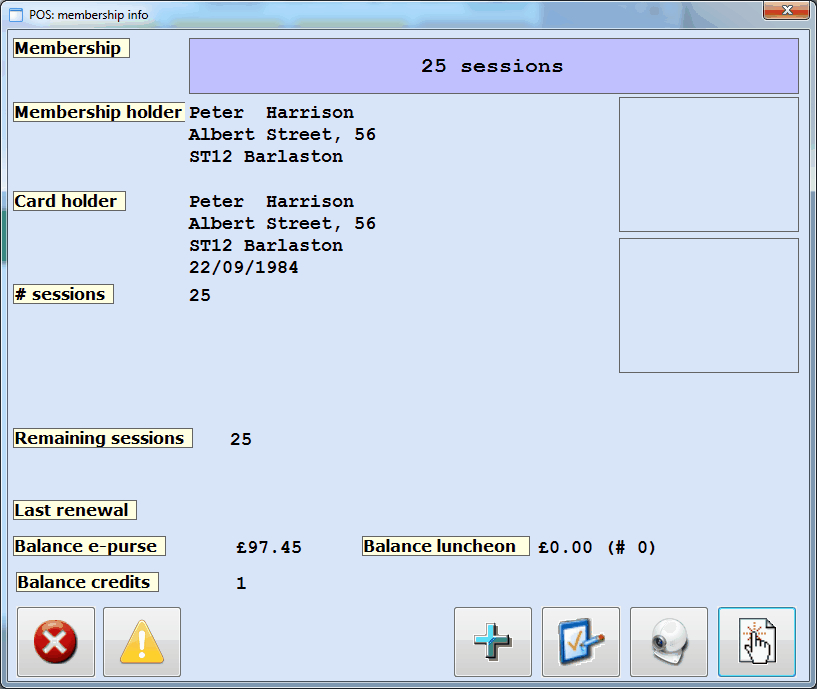
Irrespective of the method used, the window POS: membership info will immediately appear once you have confirmed by clicking on OK (and if the card is known by the system, for example:
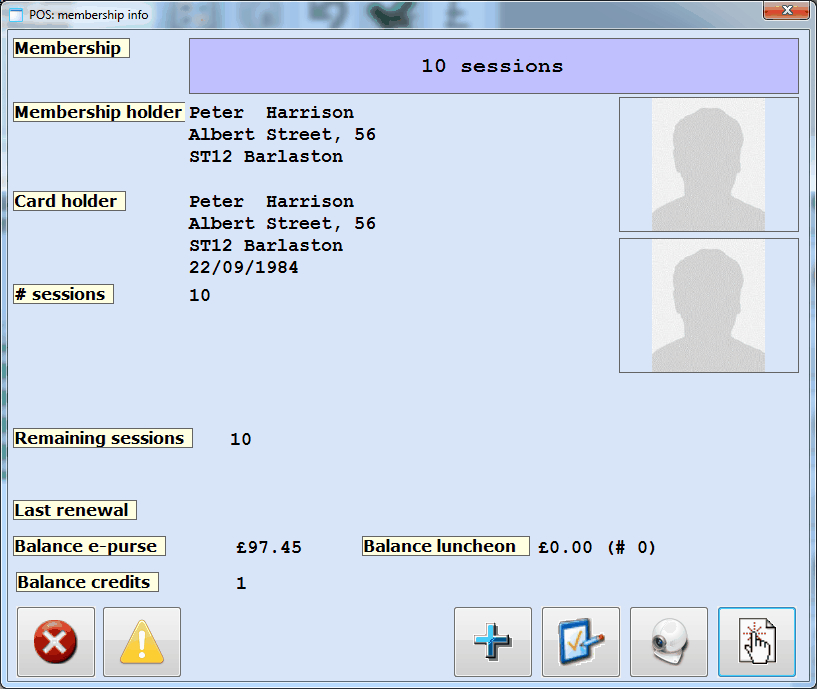 |
See also chapter Membership.
Print card
If cards are printed by the infrastructure itself, these can not only be printed during the purchase of an article, but if required also before/afterwards using the function below.
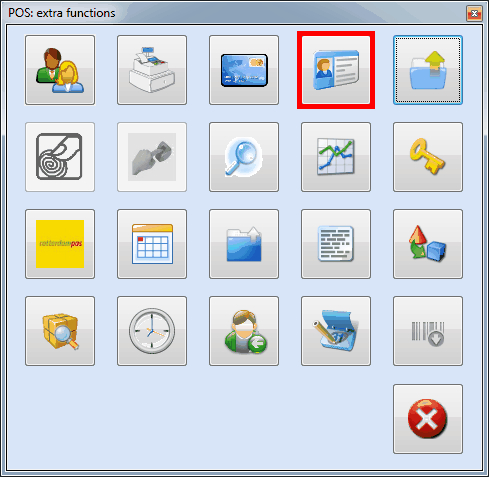
In order to print a card for a certain customer, you first have to select the desired customer in the selection screen.
 |
Click on  afterwards and choose for
  in the window POS: extra functions. (module Integration with card printer required)
 |
If a picture/image has already been linked to the selected customer, the customer card is printed on the appropriate printer. If, however, no picture/image has been linked yet to the selected customer and dependent on a parameter, the following question may appear and, if required, allow you to print the customer card anyway.
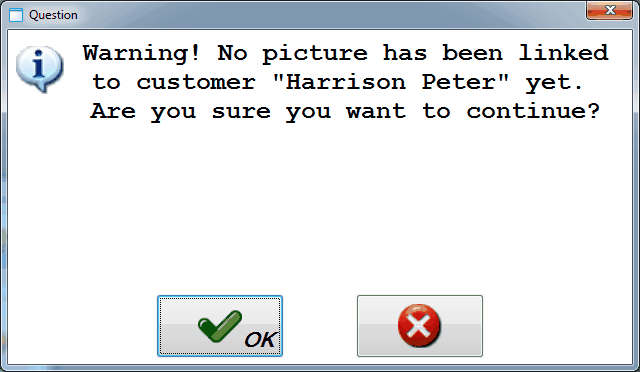 |
See also chapter Membership.
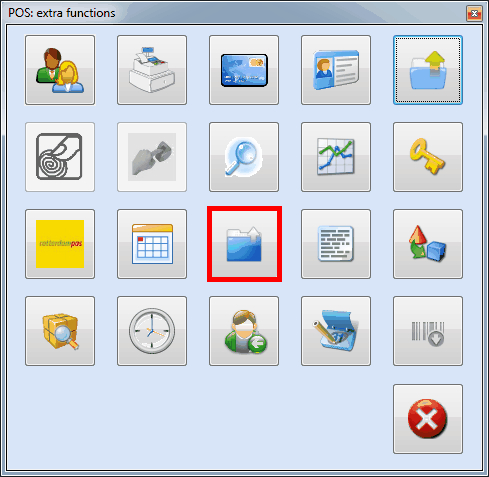
Find articles file management
This function allows you to call up articles, bookings and/or services that have been ordered as part of a file (module Files) in the cash register to settle them (completely or partially).
 |
See chapter Files.
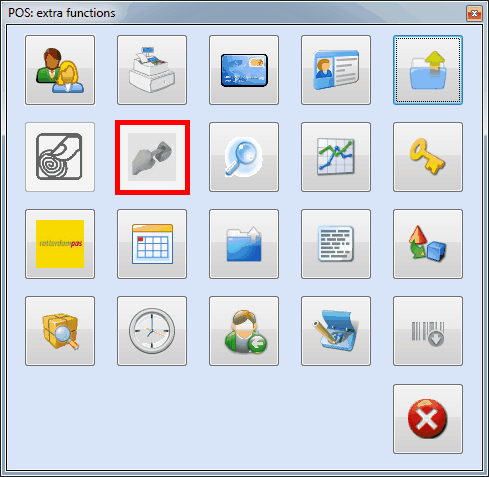
Black list: scan fingerprint
If you want to check if a customer is on the black list or not, you can click on  in the window POS: extra functions. (module Integration with SAGEM USB fingerprint required)
 |
The window Biometric registration will be opened and the customer can place his/her finger(s) on the scanner.
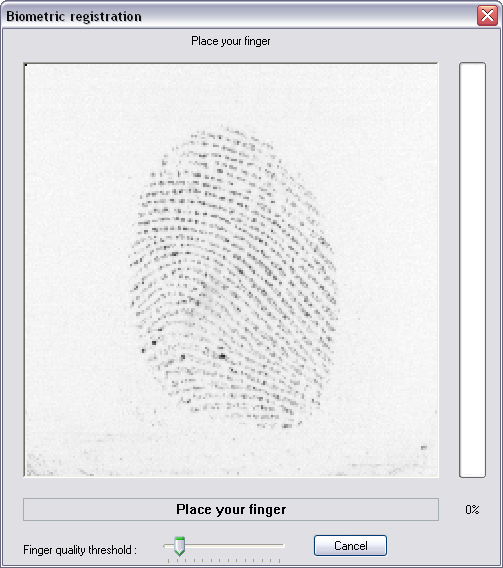 |
If the fingerprint can be clearly registered and if the customer is not on the black list, the following message will appear.
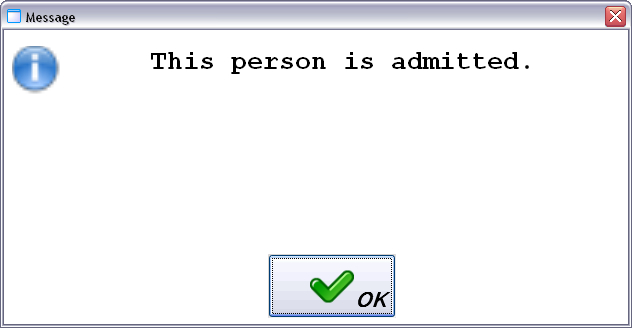 |
If the customer is, however, on the black list, the message below will appear.
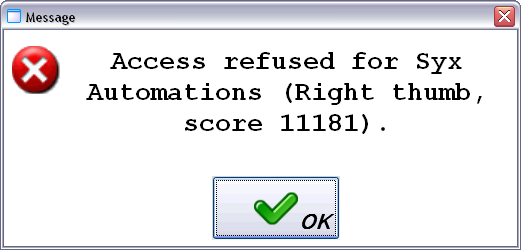 |
Next, you will be able to check another customer or to stop.
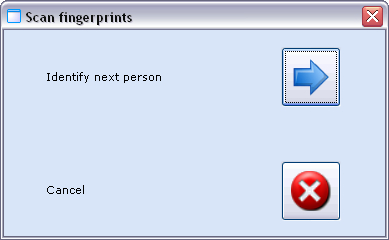 |
Find customer card (by fingerprint)
In order to find a customer card on the basis of a fingerprint, you have to click on in the window POS: extra functions. (modules Membership and Integration with SAGEM USB fingerprint required)
 |
Warning
If you want to use this option, the Access control parameters have to be filled in correctly. (see manual 'Access control')
The window Biometric registration will appear.
|
If the fingerprints have been scanned, the window POS: membership info will appear.
 |
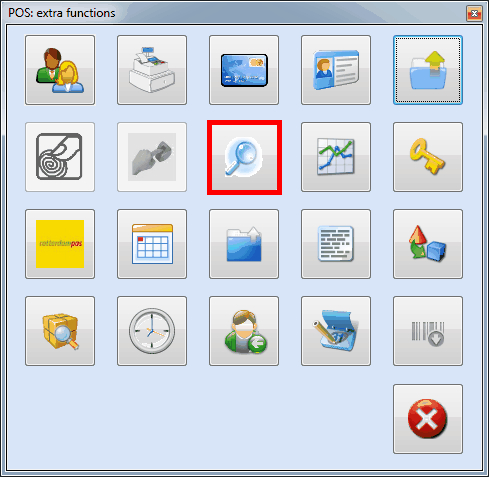
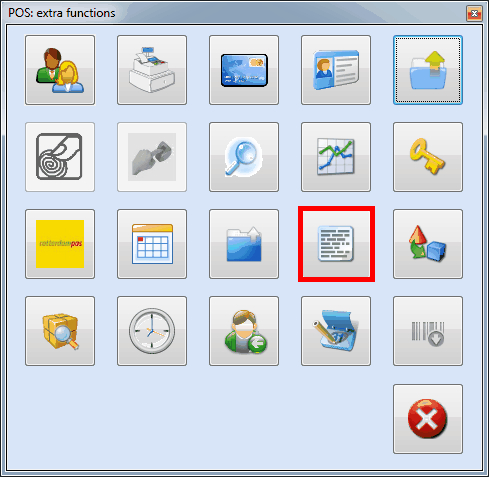
Find article
If a certain article can not immediately be found in one of the POS menus of the selection screen or if scanning the article's bar code gives no result, it is still possible to search for the article manually by clicking on  in the window POS: extra functions.
 |
The window Articles will appear.
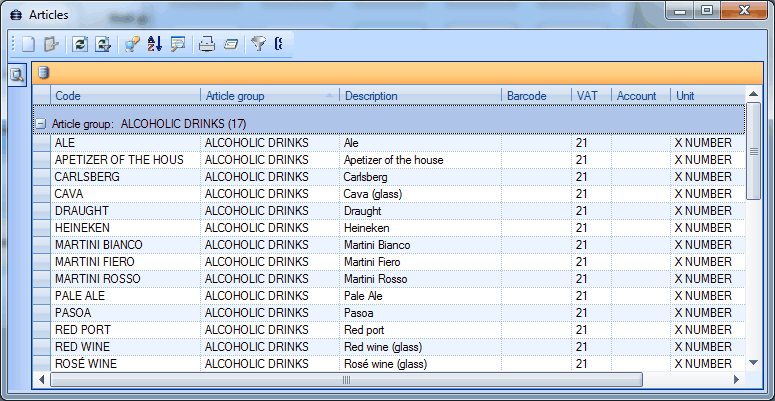 |
Warning
This window only contains the articles that are part of the sales list linked to the point of sale or, if no sales list has been specified, all articles on the current POS menu. (see Sales and Managementmanual 'GENERAL - Sales' and 'POS - Management)
This window allows you to search for and select the desired article after which the article will be added to the list of chosen articles in the selection screen.
Article stock
If you want to check if and where an article is still in stock, you can find the desired article, article group or warehouse by clicking on  in the window POS: extra functions. (module Stock required)
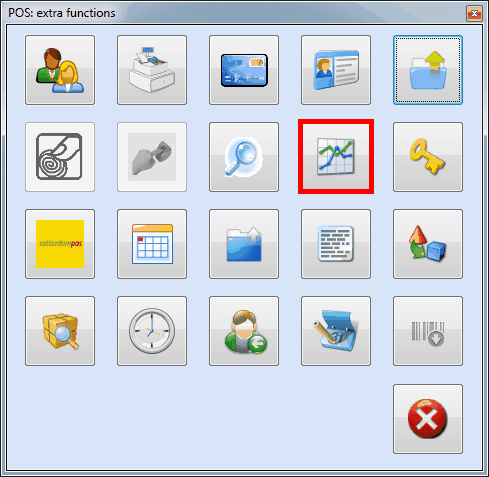 |
The window Overview current stock will appear.
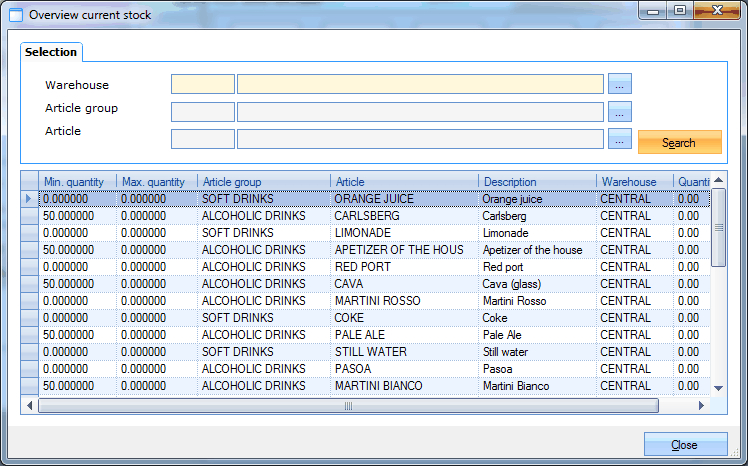 |
In this window you can search for the desired warehouse, article group and/or article so that you can see the current stock.
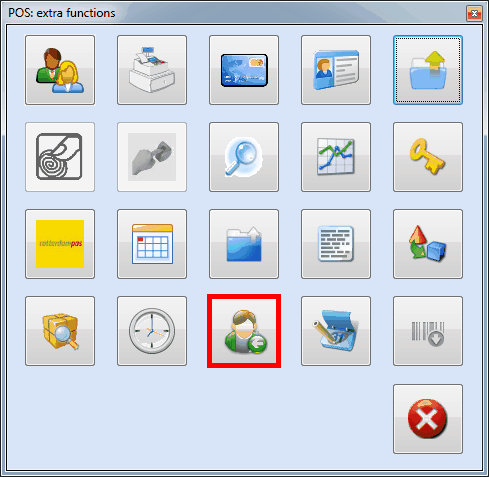
Change authorisation
In order to temporary log in as another cashier (for example a responsible), you have to click on in the window POS: extra functions.
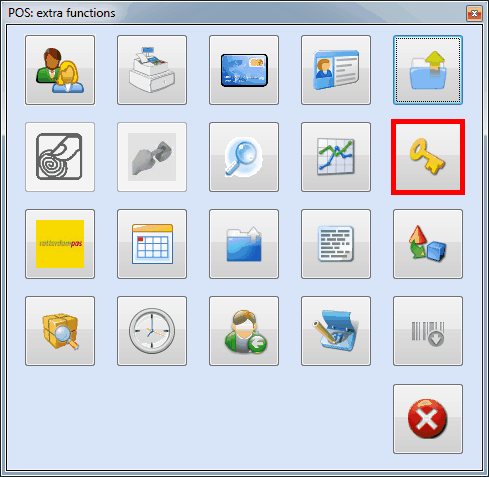 |
The window POS: select employee will appear.
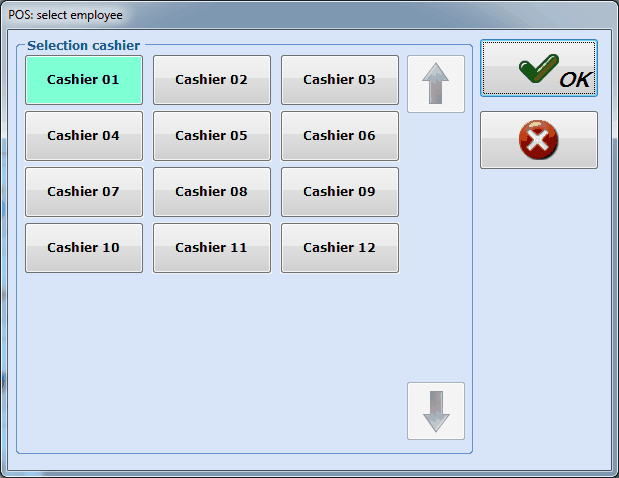 |
This window allows you to select the desired cashier which will temporarily give you the rights of this cashier. If you work with the authorisation of another cashier, this is visible on the left of the POS window.
 |
Warning
This authorisation expires after one sale.
If you register a sale under authorisation, this sale will be recorded on the name of the initial (original) cashier and thus not on the name of the temporary cashier.
Advantages loyalty card
In order to call up the advantages of a loyalty card, you have to click on in the window POS: extra functions. (module Rotterdampas required)
 |
The window Scan loyalty card will appear.
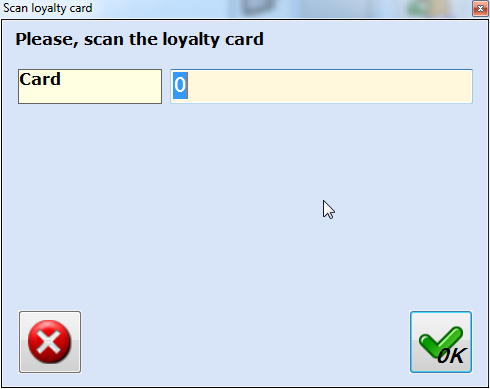 |
In this window you have to scan the loyalty card of which you want to consult the possible advantages.
 |
See also Rotterdampasmanual 'ROTTERDAMPAS'.
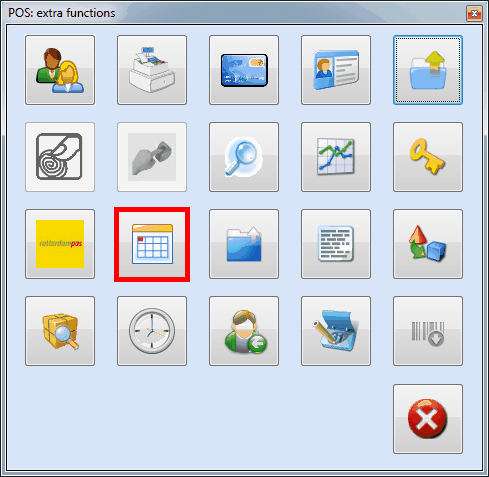
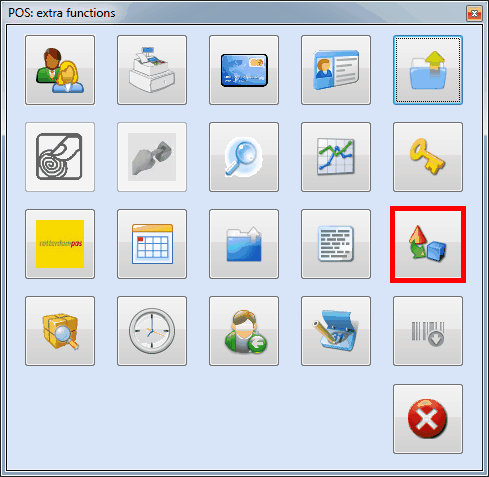
Exhibitions calendar
This function allows to call up the general exhibitions calendar, mainly in function of registering visits for exhibitions that can not be found on one of the buttons on the POS screen.
 |
See chapter Exhibitions > Select exhibition.
Find exhibition visit
This function allows to call up exhibition visits in the cash register that have been registered in the Exhibitions module in order to settle them (completely or partially).
 |
See chapter Exhibitions > Find exhibition visit (extra POS function).
Remark current sale
If you want to add a remark to the current sale, you have to click on  in the window POS: extra functions.
 |
The window Modify sales description will appear.
 |
Note
As apposed to a sale with an obligatory description (see Register a sale > Sale with obligatory description), a sale with an added remark as described above will not be visually marked in the list of chosen articles.
Sell at purchase price
Note
The possibility to sell at purchase price is defined on employee level.
A customer always has to be specified in case of a sale at purchase price (customer obligatory).
In order to register sales at purchase price, you have to click on  in the window POS: extra functions.
 |
If no specific sales customer has been selected yet, the system will ask you to do so in function of the sale at purchase price by means of the following message:
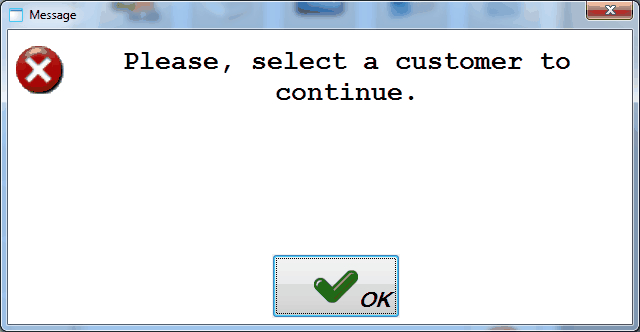 |
After the selection of the sales customer, you will temporarily be able to sell at purchase price. If you are selling at purchase price, this is visualised by means of a specific, flashing symbol next to the sales customer:
 |
Warning
This setting expires after one sale.
Find letting orders
This function allows to call up registered letting orders in the cash register, mainly with the intention to register returns.
 |
See paragraph Letting > Find letting orders (extra POS function.
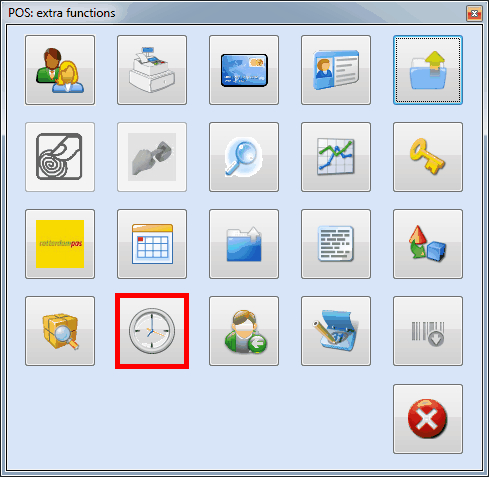
Settlement access per minute
If you work with a system according to which the customer has to pay extra if he has exceeded the allowed time when he leaves the infrastructure, you can charge this extra time by clicking on  in the window POS: extra functions.
 |
The window Settlement access per minute will appear.
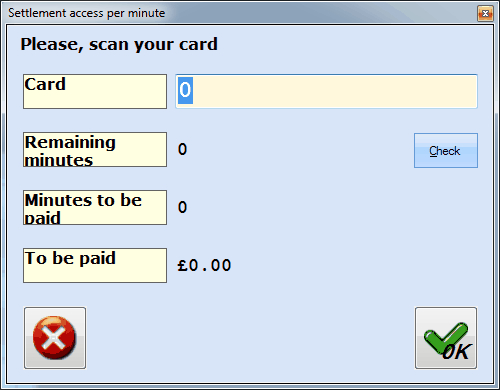 |
After scanning the customer's card (or entering the card number, followed by Check), you will either see next to Remaining minutes that the customer still has time left or next to Minutes to be paid that the customer has exceeded the allowed time and in the last case the amount that will be charged for the extra time.
In order to settle the extra time, you have to click on  , after which the amount to be paid will be added to the list of chosen articles in the selection screen.
Previous customer
After a payment (or booking) the sales customer is normally changed again into the default POS customer. It is, however, possible that another sale/booking immediately has to be registered on the same (non-default) customer, for example if this customer wants to make a new order/booking after the settlement of the previous sale. In such cases, the function Previous customer allows you to quickly re-select this customer in the POS, without having to search for the customer again.
 |
Find ticketing event
If the cashier is for example not able to immediately find the required event on the POS menu, the function Find ticketing event offers a quick alternative to search for an event.
 |
See chapter Ticketing > Selection event.
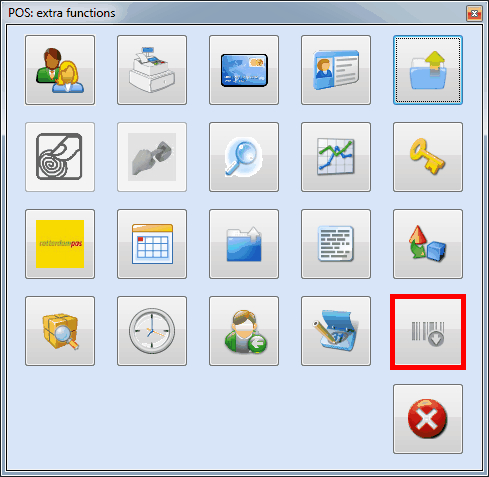
Import offline scanned bar codes
This function allows to synchronise articles that have been scanned with the specific OfflineBarcodeScanner application (for Motorola MT2070/2090 scanners) with the POS, after which the scanned articles can be chosen in the POS screen.
 |
Procedure:
Place the scanner in the cradle linked to the PC (basis station).
Wait until a connection has been made between the PC and the scanner (message ActiveSync).
Click on
 in the extra POS functions.
Afterwards, the import processing of the scanned bar codes will appear:
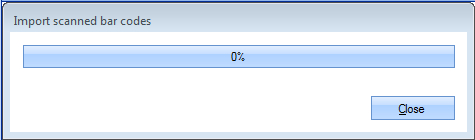 |
After correctly importing the bar codes, the required articles are added to the POS screen:
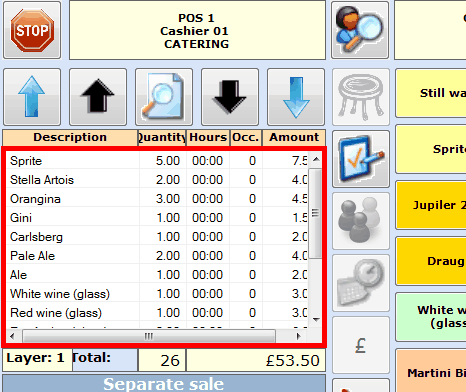 |
Note
If the message No information was found on the appliance appears, this means that either nothing has been scanned yet, either the bar codes have not been saved in the scanner yet (manual action).
 |
Get digital wallet info
Go to POS > Cash register sales > Extra functions > Get digital wallet info
This extra function allows cashiers to look up digital wallets and handle various digital wallet transactions.
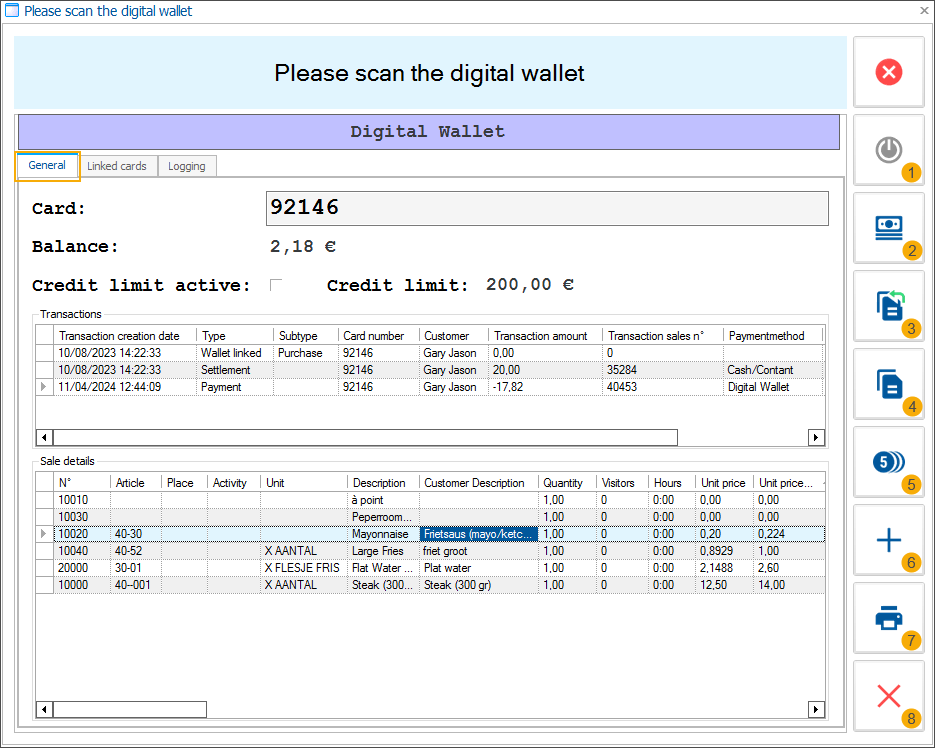
Credit activation (1)
For digital wallets with the post-paid credit system, a separate credit activation is still possible using this function.
Settle amount (2)
Option to allow the customer to retrieve the remaining amount or pay the outstanding credit of his/her digital wallet at the cash register.
Transfer digital wallet (3)
Possibility to transfer a digital wallet to a different carrier at the cash register;
Share digital wallet (4)
Possibility to share the same digital wallet on multiple carriers, e.g. with family members.
Transfer balance (5)
Possibility to transfer an amount from one digital wallet to another, e.g. if a customer wants to put the whole amount of 2 separate digital wallets on a single digital wallet.
Add amount to wallet (6)
Possibility to top up the digital wallet.
For detailed information, see Top up Digital wallet
Print wallet overview (7)
Cashiers can print an overview of digital wallet transactions for a preconfigured number of days (setting Print transactions overview of last ...x day(s)).
For detailed information, see Print digital wallet transactions overview.
Remove wallet from card (8)
Close down POS
In order to close the cash register, you have to click on  in the left upper-hand corner. Dependent on the general POS parameters, the following question may appear.
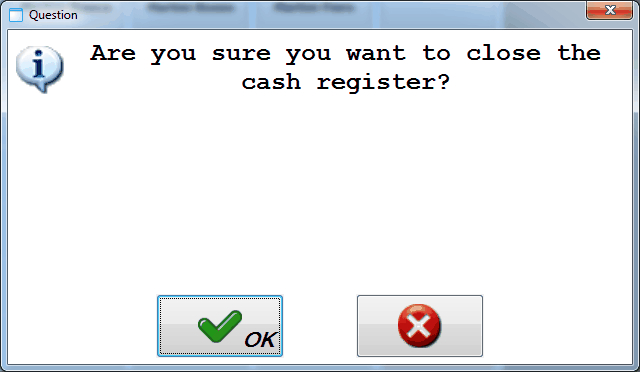 |
If you really want to close the cash register, you have to click on after which the window POS: select cashier & menu will reappear.
If you also want to close the shift of the selected employee, you have to click on  .
.
 |
If you have clicked on the window Enter money counted appears that allows you to count and enter the money you have received per available payment method before closing the POS shift.
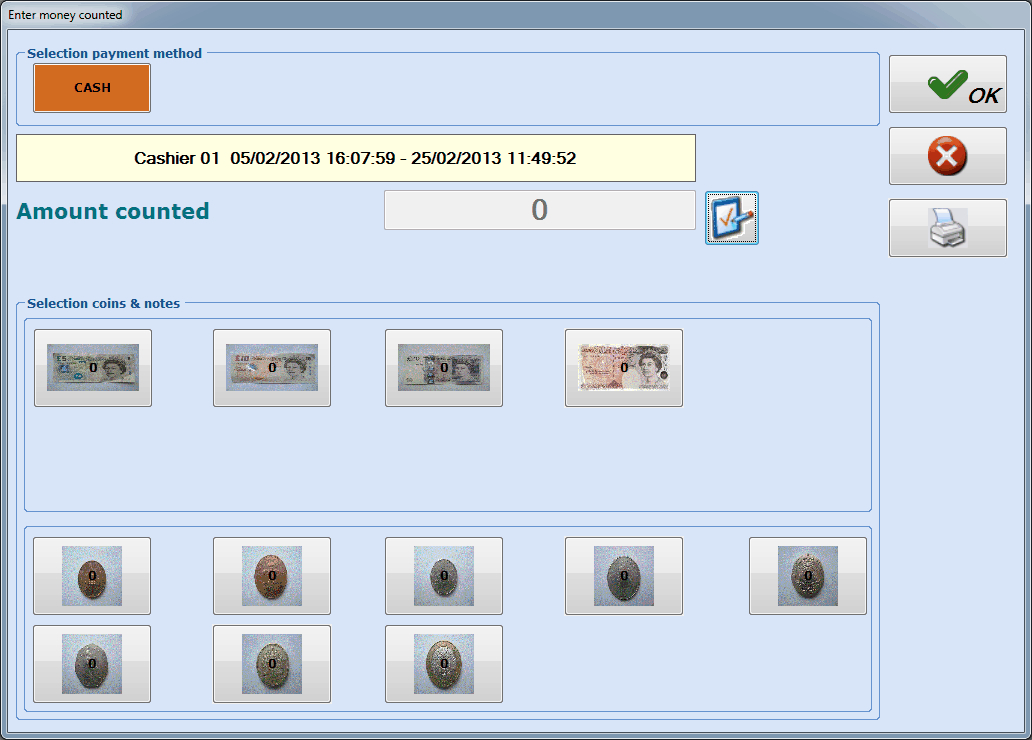 |
You can enter the amount of money counted in two different ways:
you can either click on
and fill in the total amount of money receivedeither you click per currency unit on the corresponding button and enter the number of coins/notes received for the selected currency unit. Once you have entered the different coins/notes, the total amount is calculated and visualised next to Amount counted.
Closing the POS shift can also be done in two different ways:
you can either click on
in the window Enter money counted. If you click then on for the question below, the POS shift will be closed without printing a cash register report.
 |
either you click on
 in the window Enter money counted after which a cash register report will printed. The question below will appear and if you click on
  the cash register report will be printed again.
 |
On the cash register report you can see an overview of all receipts.
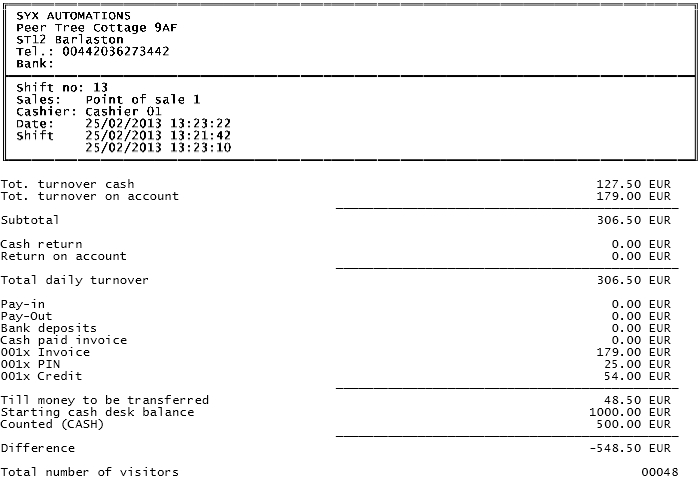 |
Warning
The Total number of visitors on the cash register report concerns the number of visitors within the closed POS shift.
If the POS shift has been closed, the window POS: Select cashier & menu will reappear.
Close POS automatically
In some situations, it is useful to have the cash register close down automatically for security reasons. You can configure a timer that will start to count down when no action is detected on the cash register screen. When the timer runs out, the cash register is locked.
For more information on how to configure the auto-close basket timer, see Close cash register automatically after x seconds.