Settings
Determining the settings mainly concerns creating and managing the underlying data lists that are used throughout Recreatex. These lists can be called up when filling in all sorts of data cards. It is thus very important to create correct and complete lists in order to be able to use the system as efficiently as possible.
You can find the settings related to articles under General > Basic data > Articles > Settings.
The following settings are available:
Article groups
Article groups serve as categories that allow you to subdivide articles into logical groups. Often it is possible to apply settings to a whole group of articles at once instead of one by one which allows you to work faster and efficiently.
In Recreatex, go to General > Basic data > Articles > Article groups to open the overview of all article groups.
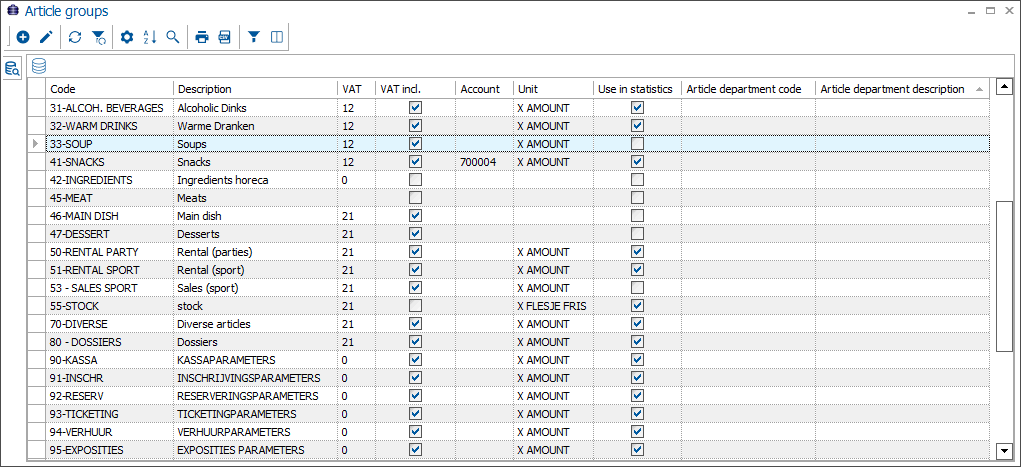 |
To create, modify or delete article groups use the available framework functionality.
The article group card consists of the following tabs:
Details
In the tab Details, you fill in all general information of the article group.
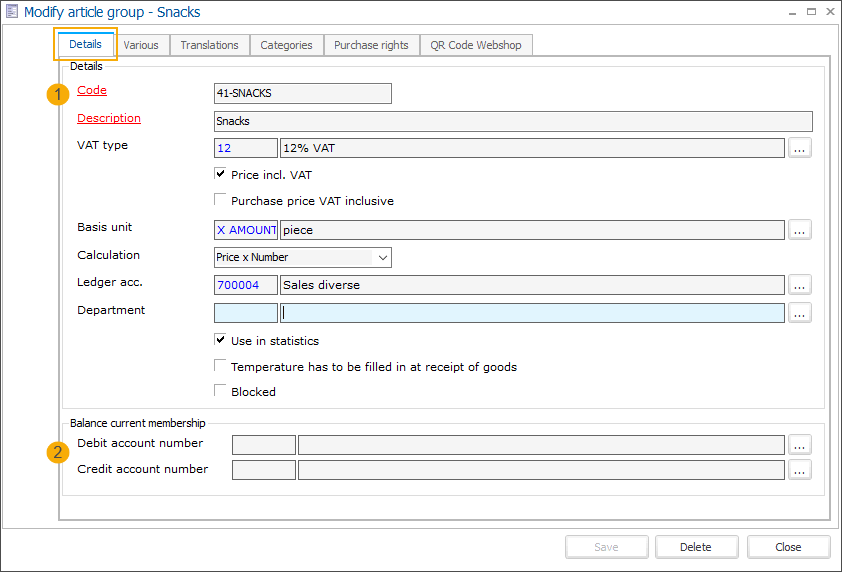 |
Code | The mandatory code must be unique and preferably descriptive enough so that you can identify the article group easily. |
Description | A description of the article group is mandatory. |
VAT type | Specify the default VAT type for this article group. |
Price incl. VAT | This option allows you to specify if the selling price of the articles in this group is including VAT or excluding VAT. |
Purchase price VAT inclusive | This option allows you to specify if the purchase price of the articles in this group is including VAT or excluding VAT. When you create a new article and fill in the article group then the value of this setting on the article group level will be copied to the article level (tab Purchase). |
Basis unit | Here you can define the default unit of the articles within this article group. |
Calculation | Here you can determine how the total price of the articles within this article group will be calculated.
|
Ledger acc. | All articles within this article group will be recorded on this ledger account number. |
Department | This is the article department with the linked cost place and analytical account on which this article has to be recorded. |
Use in statistics | Here you can indicate if the article group should be included in the various statistics. |
Temperature has to be filled in at receipt of goods | |
Blocked | Possibility to block an article group. The article group will no longer be available in the list but can be visualized using the right-click function and selecting the option Incl. blocked. |
Debit account number | The account number on which a positive balance of outstanding membership has to be recorded. |
Credit account number | The account number on which a negative balance of outstanding membership has to be recorded. |
Note
These are default values applied automatically to new articles but can still be modified afterwards individually on the article level.
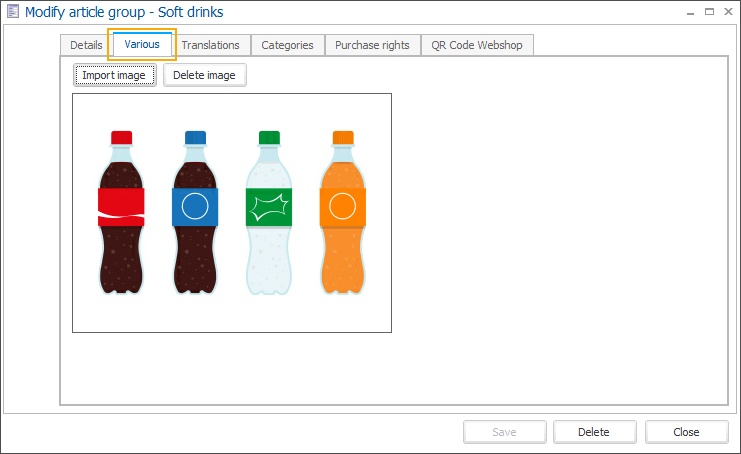
Various
Under the tab Various you can add an image to the chosen article group.
 |
Translations
Under the tab Translations you can add a description of the article group in other languages. These translations can be used e.g. by QR ordering app to display as product categories or on the Self-service kiosk (License Self-service kiosk required).
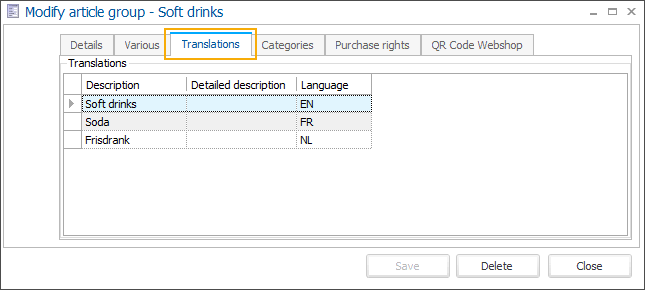
To create, modify or delete article group translations use the existing framework functionality.
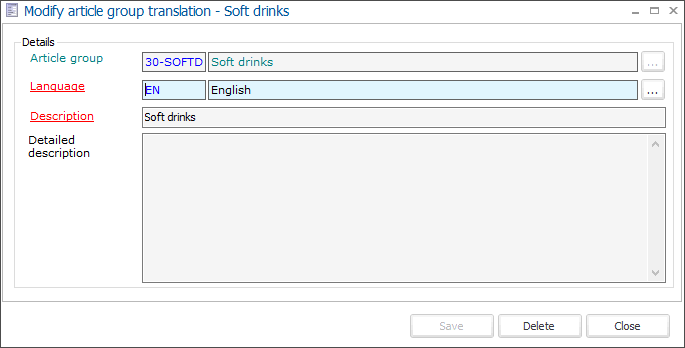
Article group | The article group for which you want to create or modify the translation is filled in automatically and cannot be changed here. |
Language | The language in which you want to fill in the description of the article group. |
Description | The translation of the chosen article group. |
Detailed description | The translation of the detailed description of the chosen article group. |
Categories
Article categories allow for additional flexibility when grouping articles. As you can put an article in one or several categories, you can also link an article group to multiple article categories.
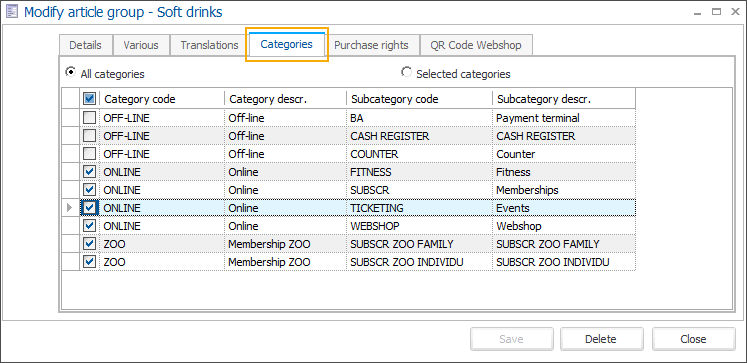
In the overview, use the radio buttons to show All categories or only the Selected categories.
To create, modify or delete article categories, see Article categories
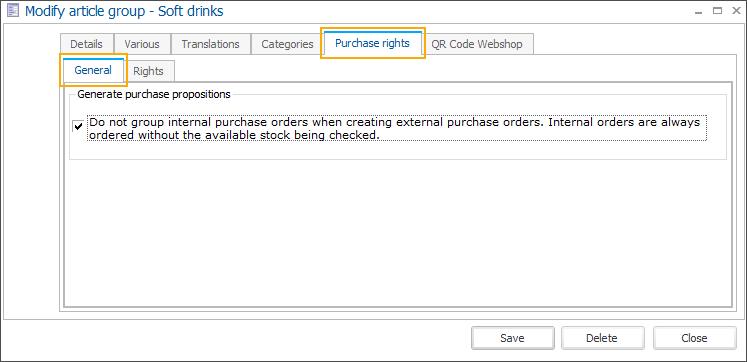
Purchase rights
The tab Purchase rights only applies if you work with specific processes in the Recreatex module Purchase.
In the subtab General you can indicate whether...
In the subtab Rights you can then indicate on the article group level which departments (employees) can buy articles belonging to this article group.
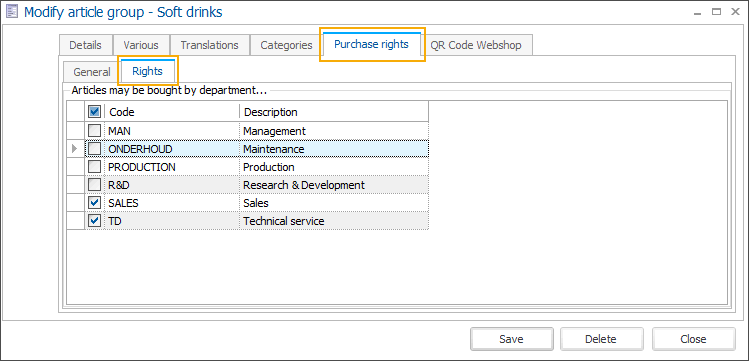
To create, edit or delete additional departments, go to General > Basic data > Employees > Settings > Departments or use the framework functionality directly in the Modify article group screen.
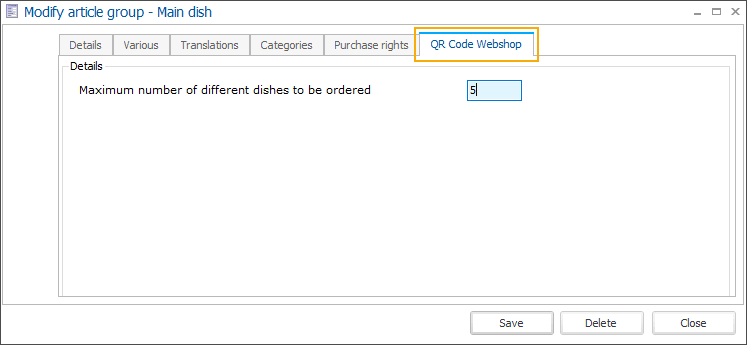
QR code webshop
If you are using the QR ordering app in your catering facility, in this tab you can limit the number of articles (typically dishes or drinks) that can be ordered per article group (category) within one order.
Units
With this setting, you create and manage all units necessary for the sale and purchase of your articles.
In Recreatex, go to General > Basic data > Articles > Settings > Units to open the overview of all units.
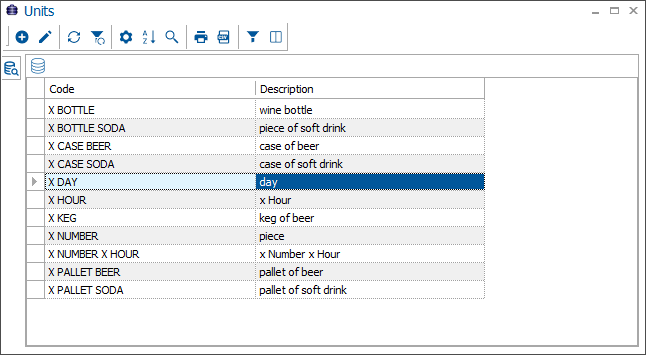
To create, modify or delete units use the available framework functionality.
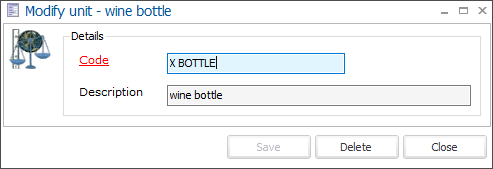
Code | The mandatory code must be unique and preferably descriptive enough so that you can identify the unit easily. |
Description | A description of the unit is recommended. |
Statistical codes
With this setting, you can manage statistical codes that can be linked to articles with the purpose of generating statistical reports based on your business's needs e.g. the sales report Day/month results.
In Recreatex, go to General > Basic data > Articles > Settings > Statistical codes to open the overview of all statistical codes.
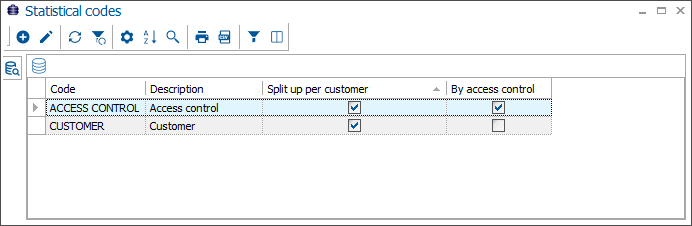
To create, modify or delete statistical codes use the available framework functionality.
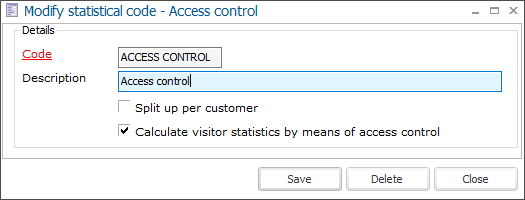
Code | The mandatory code must be unique and preferably descriptive enough so that you can identify the statistical code easily. |
Description | A description of the chosen statistical code is recommended. |
Split up per customer | Select this option if you want to split up the data per customer |
Calculate visitor statistics by means of access control | Select this option if the number of visitors has to be calculated using access control. |
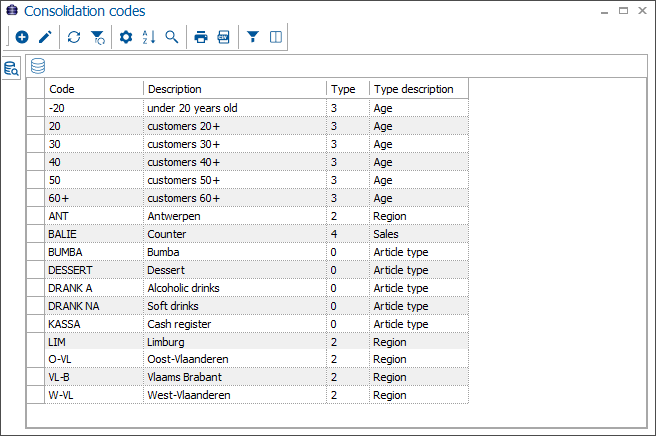
Consolidation codes
With this setting, you can manage the codes that allow you to group articles with the purpose of determining the revenue, e.g. the sales report Consolidated turnover and visitors
In Recreatex, go to General > Basic data > Articles > Settings > Consolidation codes to open the overview of all consolidation codes.
To create, modify or delete consolidation codes use the available framework functionality.
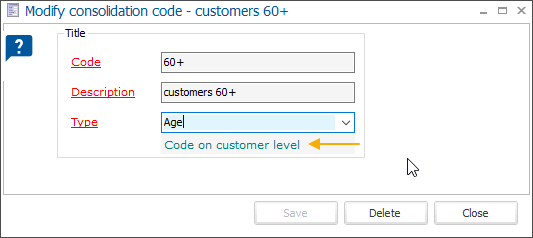
Code | The mandatory code must be unique and preferably descriptive enough so that you can identify the consolidation code easily. |
Description | A description of the consolidation code is mandatory. |
Type | There are 5 types of consolidation codes that can be linked either on the customer or the article level. This information is indicated in blue whenever you select a type.
You link the consolidation codes in the tab Finances on the address card or the article card. |
Options
With this setting, you can manage the options that can be linked to your articles. These are mainly used for catering purposes, e.g when selling a steak you can choose to include hot sauces, dressing, potatoes and so on as options to choose from.
In Recreatex, go to General > Basic data > Articles > Settings > Options to open the overview of all options.

To create, modify or delete options use the available framework functionality.

Code | It is advised to choose a relevant code so that you can immediately derive from the code which option is concerned. |
Description | A description of the chosen option. |
Mandatory choice |
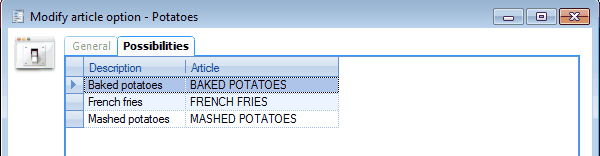
In the tab Possibilities you can determine the different possibilities for the selected option.
 |
You can create, modify or delete these items at all times.
(see manual 'FRAMEWORK' Framework)
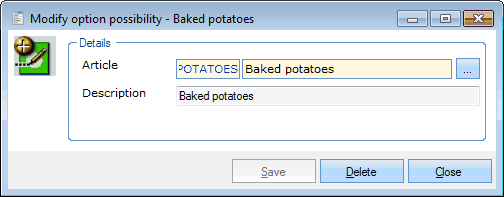 |
Article | If you want to, you can link an existing article to the option. This article will then be added to the calculation of the total amount of the article. |
Description | A description of the possibility for the selected option. |
Article categories
Both articles as article groups can be put into one or several categories(see also chapter 'The article card, paragraph 'Categories' and chapter 'Settings', paragraph 'Article groups').
Go to General > Basic data > Articles > Settings > Article categories.
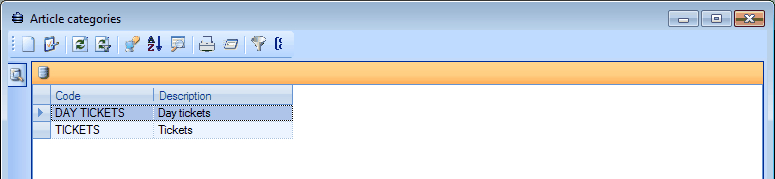
The current list of article categories will appear.
 |
You can create, modify or delete article categories at all times.
(see manual 'FRAMEWORK' Framework)
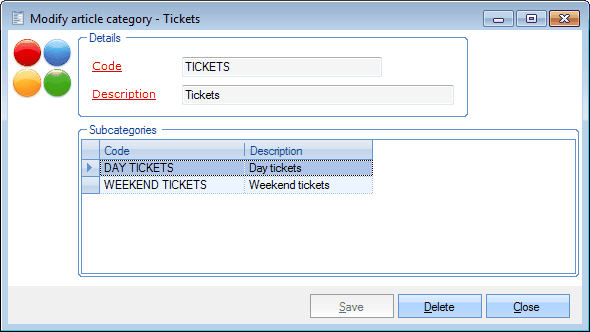 |
If you have filled in the code and the description of the category, at least one subcategory will be required.
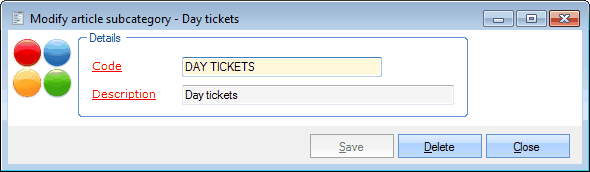
You can create, modify or delete subcategories at all times.
(see manual 'FRAMEWORK' Framework)
 |
Loyalty code link
In this selection window you can link different articles to a loyalty code. This link is only used in function of the Rotterdampas. (module Rotterdampas required)
Go to General > Basic data > Articles > Loyalty code link.
The selection window below will appear.
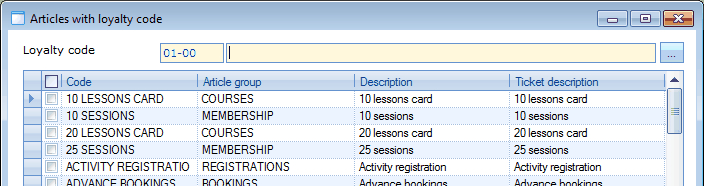 |
If you have chosen the desired loyalty code, an overview will appear of all articles that can be linked to the chosen code.
For more information on the loyalty code link, we refer to Rotterdampas the manual 'ROTTERDAMPAS'.
Rights per division
By defining Rights per division you can limit the access to certain articles per division (service). In this way, it is for example possible to prevent employees from the one division to consult/modify articles from another division.
Go to General > Basic data > Articles > Rights per division.
The window below will appear.
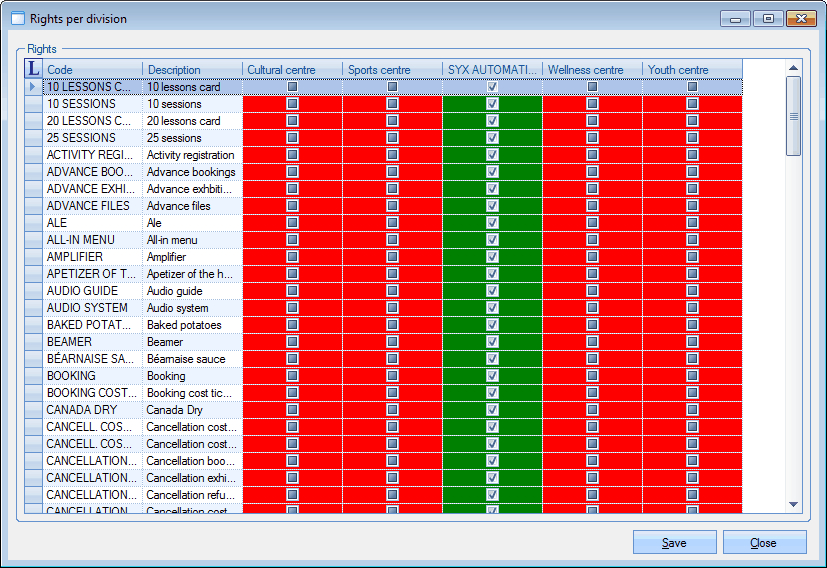 |
You can modify the rights for each article by ticking off the selection boxes in the column of the division in question.
The following rights can be set up per article and per division:
Green means All rights. If set up like this, the users of that division have all rights to consult and modify the article.
Grey means Only reading rights. If set up like this, the users of that division can only consult the article, not modify it.
Red means No access. If set up like this, the users of that division can not even consult the article. The article will in other words not appear in the article lists of the users within that division.
Caution
The rights per division will only be applied if a specific parameter is defined correctly. (see also manual 'General - Management'Management)