Settings
Determining the settings mainly concerns creating and managing the underlying data lists that are used throughout Recreatex. In other words, these are the lists that can be called up when filling in all sorts of data cards. It is thus very important to create correct and complete lists in order to use the system as efficiently as possible.
The settings for the customer part can be found under General > Basic data > Customers > Settings.
The following settings are available:
Customer groups
Customer groups allow you to subdivide different customers into groups with equal interest.
Go to General > Basic data > Customers > Settings > Customer groups.
The current list of all customer groups will appear.
 |
You can create, modify or delete customer groups at all times using the framework functionalities.
(see manual 'FRAMEWORK' Framework)
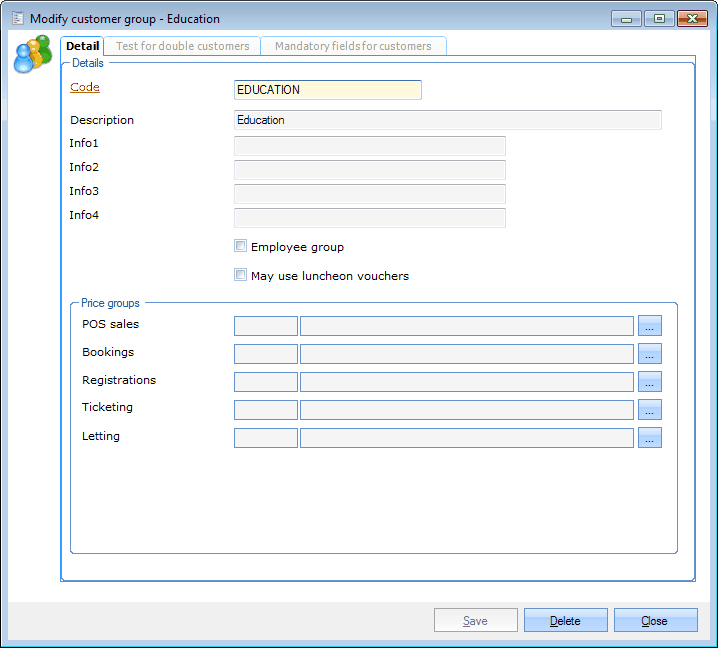 |
Code | Is unique and mandatory. It is advised to choose a relevant code so that you can immediately derive from the code which customer group is concerned. |
Description | A description of the chosen customer group. |
Info 1, Info 2, Info 3, Info 4 | These are extra information fields in which you can fill in additional information. |
Employee group | If a customer group consists of employees only, you can define this by ticking off this option. |
May use luncheon vouchers | It is possible to define on customer group level that the persons belonging to the customer group may use luncheon vouchers (value credit articles) or not. If not ticked off, luncheon vouchers can not be sold to members of the customer group and these members will thus not be able to pay with luncheon vouchers. |
Section 'Price groups' | In this section you can determine which price groups will be used by default for customers within the different ReCreateX modules. |
If you wish so, the tab Test for double customers allows you to activate a control system that avoids the creation of double customers in the system.
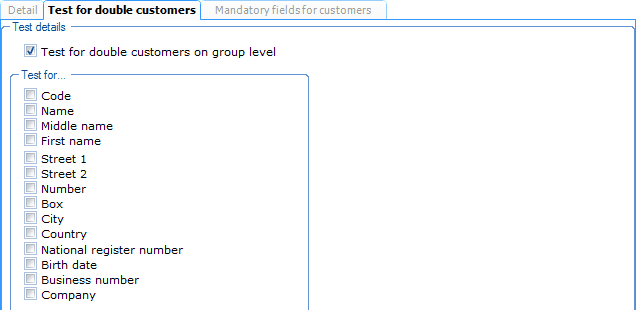 |
In order to activate the control system for double customers, you have to tick off the option Test for double customers on group level.
Once the option is ticked off, it is possible to select specific fields that have to be tested when creating new customers within the current customer group.
Note
A control system for double customers can also be activated within the basic parameters of ReCreateX (see manual 'GENERAL - Management'Management). For customers that are not subdivided into a customer group, these parameters will be used (if set up). If you, however, want to apply the control system on customer group level, you can set up these parameters per customer group.
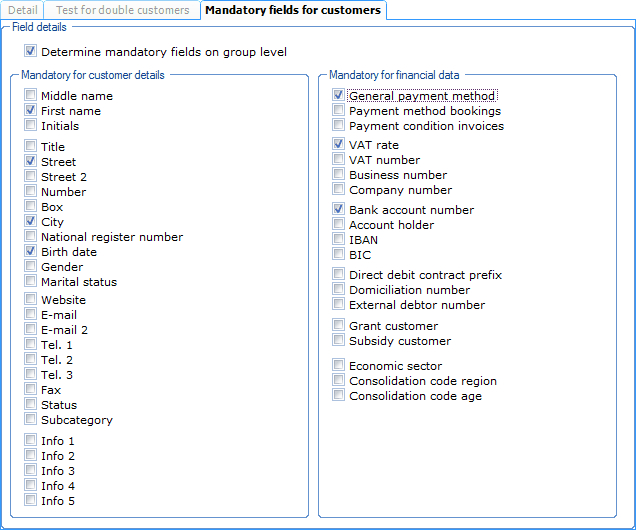
In the tab Mandatory fields for customers you can set up which extra fields (in addition to the fixed fields and those that may have been set up by the administrator) are obligatory when creating/modifying a customer within the current customer group.
In order to activate the system of mandatory fields, you have to tick off the option Determine mandatory fields on group level.
Once the option is ticked off, it is possible to select the specific fields that have to be obligatory when creating/modifying customers within the current customer group.
 |
Warning
The mandatory fields that have been set up on customer GROUP level have got nothing to do with the mandatory fields that have been set up on employee level for the creation of new customers in the simplified customer selection window in the POS module (see Employees and POS - Usemanual 'GENERAL - Employees' and 'POS - Use'). For the simplified customer selection window the obligatory fields are in fact determined per customer TYPE.
Age groups
Age groups allow you to subdivide different customers into groups based on their age.
Go to General > Basic data > Customers > Settings > Age groups.
The current list of all age groups will appear.
 |
You can create, modify or delete age groups at all times using the framework functionalities.
(see manual 'FRAMEWORK' Framework)
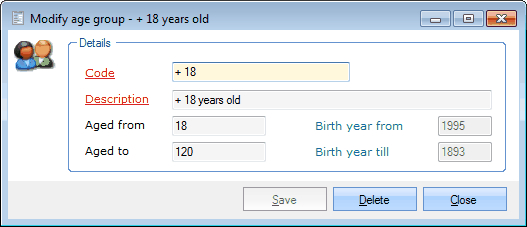 |
Code | Is unique and mandatory. It is advised to choose a relevant code so that you can immediately derive from the code which age group is concerned. |
Description | A description of the chosen age group. |
Aged from | The minimal age of the chosen age group. |
Aged to | The maximal age of the chosen age group. |
In addition to the ages, the automatically calculated birth years also appear.
Customer categories
In order to set up and send well-addressed mailings, customers can be linked to one or several subcategories. The Customer categories group the subcategories that can be found in the tab Subcategories of the customer card. For example a category clubs containing the subcategories volleyball club, basketball club, football club, ...
Go to General > Basic data > Customers > Settings > Customer categories.
The current list of all customer categories will appear.
 |
You can create, modify or delete customer categories at all times using the framework functionalities.
(see manual 'FRAMEWORK'Framework)
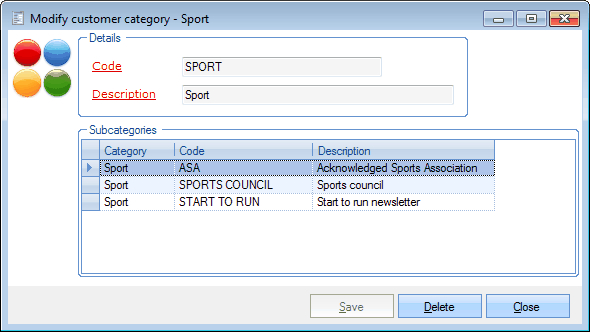 |
Code | Is unique and mandatory. It is advised to choose a relevant code so that you can immediately derive from the code which customer category is concerned. |
Description | A description of the chosen customer category. |
If you have clicked on 'Save', it is possible to create, modify or delete customer subcategories.
(see manual 'FRAMEWORK' Framework)
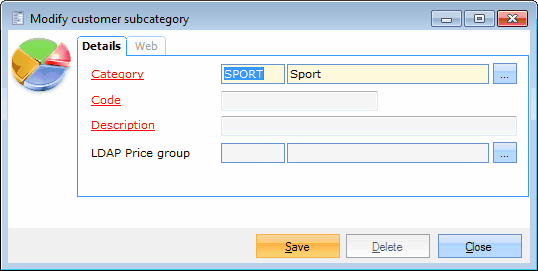 |
Category | The category in which you create/modify the subcategory. |
Code | Is unique and mandatory. It is advised to choose a relevant code so that you can immediately derive from the code which subcategory is concerned. |
Description | A description of the chosen subcategory. |
LDAP price group | If you wish so, you can link an LDAP price group here. (module Rotterdampas required) |
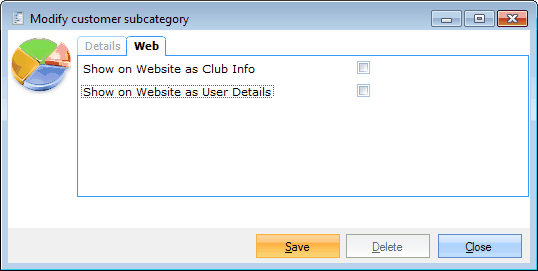 |
In the tab Web you can determine whether these data have to be shown on the website as Club Info and/or User details. (module WEB required)
Statuses
Under Statuses you will find an overview of all possible statuses that can be linked to a customer. A customer's status(es) can prevent the customer from making certain bookings in Recreatex.
Go to General > Basic data > Customers > Settings > Statuses.
The current list of all statuses will appear.
 |
You can create, modify or delete statuses at all times using the framework functionalities.
(seemanual Framework)
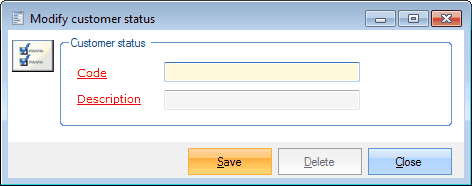 |
Code | Is unique and mandatory. It is advised to choose a relevant code so that you can immediately derive from the code which status is concerned. |
Description | A description of the chosen status. |
Titles
Under Titles you will find an overview of all titles that can be linked to a customer and as which the customer wants to be addressed.
Go to General > Basic data > Customers > Settings > Titles.
The current list of all titles will appear.
 |
You can create, modify or delete titles at all times using the framework functionalities.
(see manual 'FRAMEWORK'Framework)
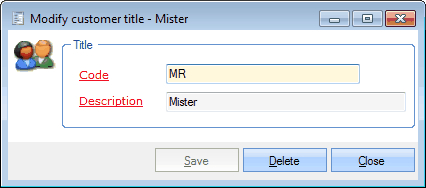 |
Code | Is unique and mandatory. It is advised to choose a relevant code so that you can immediately derive from the code which title is concerned. |
Description | A description of the chosen title. |
Discounts
Under Discounts you will find an overview of all possible discounts (in the form of 'discount cards' - see also chapter 'The customer card', paragraph 'Discounts'Discounts) that can be given to customers if they register for one or several activities. (module Registrations required)
Go to General > Basic data > Customers > Settings > Discounts.
The current list of all discounts and/or discount cards will appear.
 |
You can create, modify or delete discounts at all times using the framework functionalities.
(see manual 'FRAMEWORK' Framework)
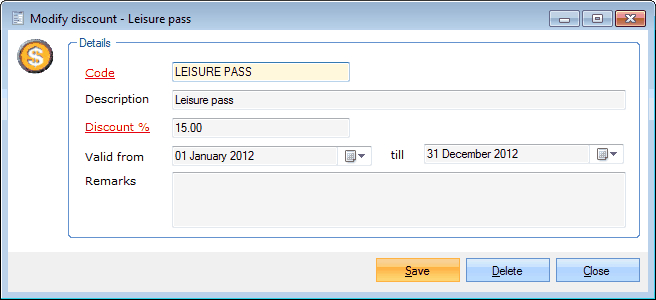 |
Code | Is unique and mandatory. It is advised to choose a relevant code so that you can immediately derive from the code which discount is concerned. |
Description | A description of the chosen discount. |
Discount % | The discount percentage you want to allow. |
Valid from ... till | The period in which the discount is valid. |
Remarks | Extra information concerning the discount. |
Loyalty cards
Under Loyalty cards you will find an overview of all possible loyalty cards that can be linked to one or to several customers (module Registrations required). A loyalty card can be compared to a trading stamp book. If a customer has participated the required number of times to an activity that is linked to a specific loyalty card, you can reward that customer.
Go to General > Basic data > Customers > Settings > Loyalty cards.
The current list of all loyalty cards will appear.
 |
You can create, modify or delete loyalty cards at all times using the framework functionalities.
(see manual 'FRAMEWORK'Framework)
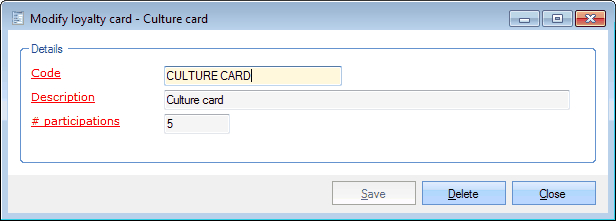 |
Code | Is unique and mandatory. It is advised to choose a relevant code so that you can immediately derive from the code which loyalty card is concerned. |
Description | A description of the chosen loyalty card. |
# participations | Is mandatory. Here you have to choose the required amount of participations. |
Price groups
Price groups allow you to link several customers to a certain price category/tariff.
If you wish so, price groups are valid for all modules and can be set up differently per customer and per module.
Go to General > Basic data > Customers > Settings > Price groups.
The current list of all price groups will appear.
 |
You can create, modify or delete price groups at all times using the framework functionalities.
(see manual 'FRAMEWORK' Framework)
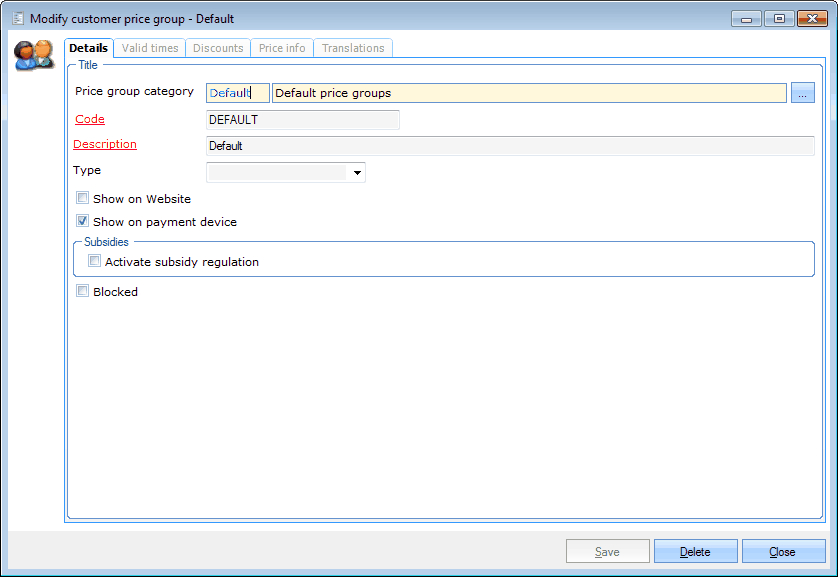 |
Price group category | The category in which you subdivide the chosen category. | |
Code | Is unique and mandatory. t is advised to choose a relevant code so that you can immediately derive from the code which price group is concerned. | |
Description | A description of the chosen price group. | |
Type | The module to which the price group will apply:
Select the blank setting if the price group is not limited to a certain module. | |
Show on Website | This option allows you to determine if the price group may be visible on the website or not. (module WEB required) | |
Show on payment device | This option allows you to determine if the price group may be visible on the payment device. (module POS terminal required) | |
Activate subsidy regulation | This option allows you to determine if the price group is part of the subsidy regulation. | |
Blocked | If this price group is no longer active, you can block it. |
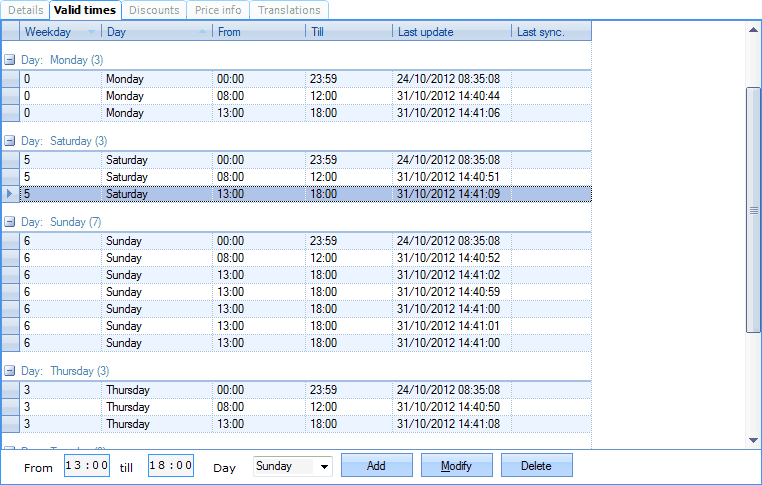
Under the tab Valid timesyou can determine in which periods the price group is valid.
 |
Under the tab Discounts it is possible to link discounts.
Note
Discounts linked to price groups are only taken into account in case of sales in the Recreatex modules POS and Sales (under Visualisations > Sales). In case of sales that are, for example, linked to a facility booking (in the module Facility bookings), the discount linked to the price group will thus not be applied.
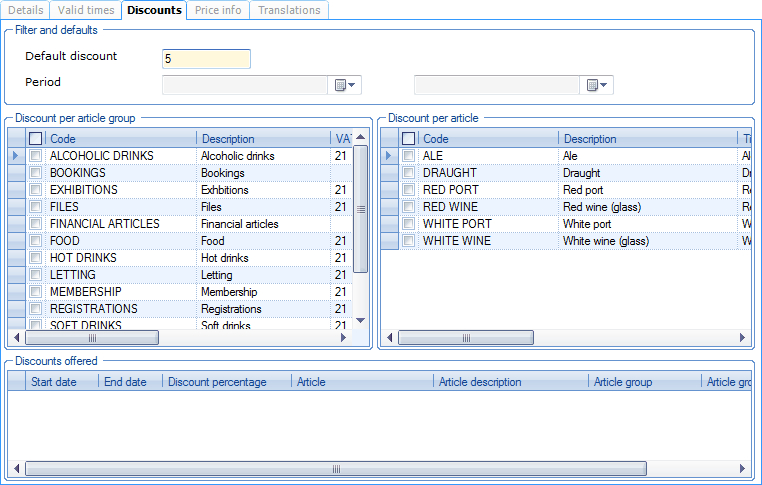 |
There are two ways to allow discounts. Either you fill in a default discount and a period on top of the window and select an article group and/or article for which the discount has to be given.
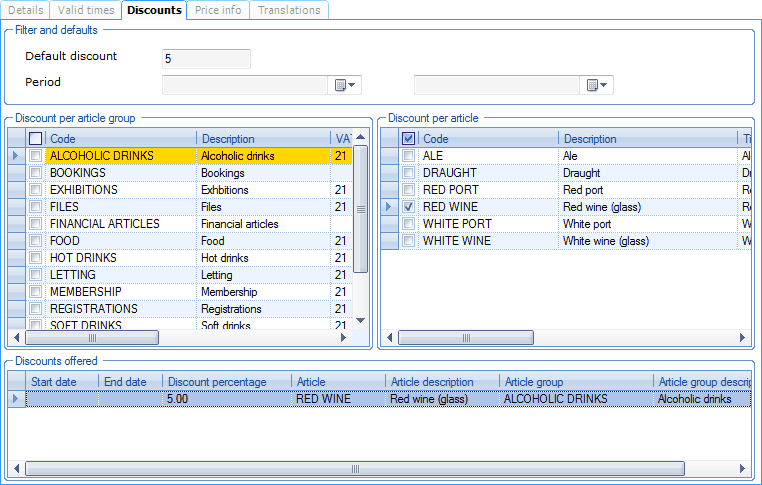 |
If you choose to allow a discount for a complete article group, you have to tick off the desired article group in the section Discount per article group.
If you choose to allow a discount for one or several articles, you have to tick off the desired article in the section Discount per article and you will notice that the article group to which the selected article belongs is marked in yellow in the section Discount per article group.
Either you can create, modify or delete (divergent) discounts on articles or article groups in the section Discounts offered. (see manual 'FRAMEWORK' Framework)
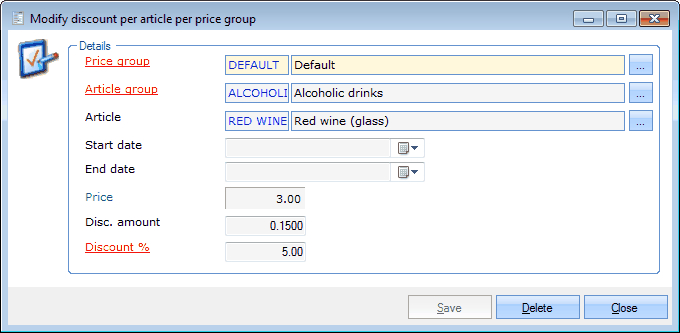 |
Price group | The price group to which the discount applies. |
Article group | The article group to which the discount applies. |
Article | The specific article within the article group to which you link a discount. |
Start date | The start date as of which the discount applies. |
End date | The end date until which the discount applies. |
Price | If you link the discount to a specific article, the article price is shown here for your information. |
Disc. amount | If you link the discount to a specific article, you can fill in a fixed discount amount instead of a discount percentage. In this case, the Discount percentage will automatically be calculated. |
Discount % | Here you can fill in the discount percentage for the chosen article group or the specific article. If you link the discount percentage to a specific article, the value of Discount amount is automatically calculated and filled in. |
In the tab Price info you can specify the price group in a more detailed way.
 |
In the tab Translations you can modify the name of the price group in the desired language.
 |
You can create, modify or delete translation at all times using the framework functionalities.
(see manual 'FRAMEWORK' Framework)
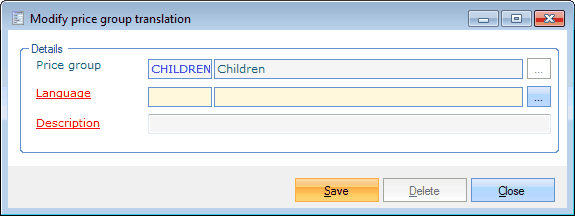 |
Price group | The currently chosen price group (indicative). |
Language | The language in which the price group is shown. |
Description | The translated description of the price group. |
Price group categories
Price group categories allow you to group the different price groups in categories.
If you, for example, register an exhibition visit at the POS, you will first see the price group categories and only afterwards the price groups. (see POS - Use manual 'POS - Use')
Go to General > Basic data > Customers > Settings > Price group categories.
The current list of all price group categories will appear.
 |
You can create, modify or delete price group categories at all times using the framework functionalities.
 |
Code | Is unique and mandatory. It is advised to choose a relevant code so that you can immediately derive from the code which price group category is concerned. |
Description | A description of the chosen price group category. |
Price info
Price info is a more detailed specification of the customers or customer groups that are part of a certain price group.
Go to General > Basic data > Customers > Settings > Price info.
The current list of all price info will appear.
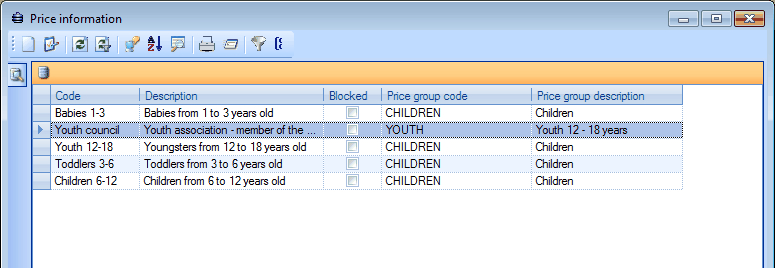 |
You can create, modify or delete price info at all times using the framework functionalities.
(see manual 'FRAMEWORK'Framework)
 |
Price group | The price group you want to link to the chosen price info. |
Code | Is unique and mandatory. It is advised to choose a relevant code so that you can immediately derive from the code which price info is concerned. |
Description | A description of the chosen price info. |
Payment conditions
A payment condition is always linked to an invoice and contains the term of payment for the invoice that has to be respected by the customer.
Go to General > Basic data > Customers > Settings > Payment conditions.
The current list of all payment conditions will appear.
 |
You can create, modify or delete payment conditions at all times using the framework functionalities.
(see manual 'FRAMEWORK' Framework)
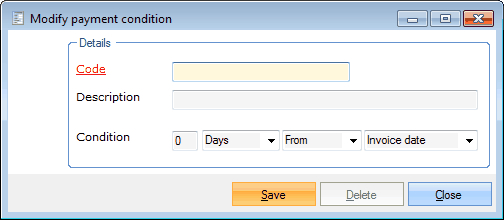 |
Code | Is unique and mandatory. It is advised to choose a relevant code so that you can immediately derive from the code which payment condition is concerned. |
Description | A description of the chosen payment condition. |
Condition | Here you determine the term of payment of the invoice. |
Subsidy categories
Subsidy categories allow you to link several customers to a certain subsidy category/tariff.
Go to General > Basic data > Customers > Settings > Subsidy categories.
The current list of all subsidy categories will appear.
 |
You can create, modify or delete subsidy categories at all times using the framework functionalities.
(see manual 'FRAMEWORK'Framework)
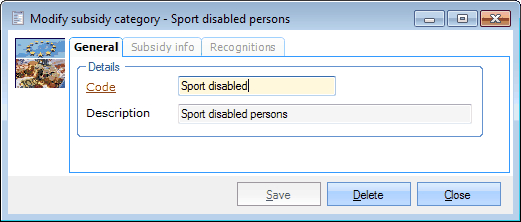 |
Code | Is unique and mandatory. It is advised to choose a relevant code so that you can immediately derive from the code which subsidy category is concerned. |
Description | A description of the chosen subsidy category. |
In the tab Subsidy info you can make extra information divisions for the chosen subsidy category.
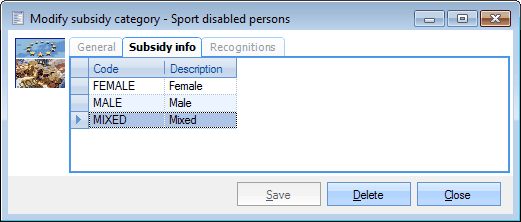 |
You can create, modify or delete subsidy information at all times using the framework functionalities.
(see manual 'FRAMEWORK' Framework)
 |
Subsidy category | For your information, it is indicated to which subsidy category you want to link the information. |
Code | Is unique and mandatory. It is advised to choose a relevant code so that you can immediately derive from the code which subsidy information is concerned. |
Description | A description of the chosen subsidy information. |
In the tab Recognitions you can define the different recognitions with their linked subsidy percentage.
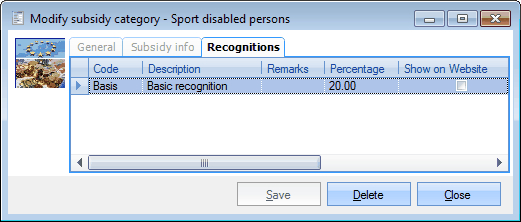 |
You can create, modify or delete subsidy recognitions at all times using the framework functionalities.
(see manual 'FRAMEWORK' Framework)
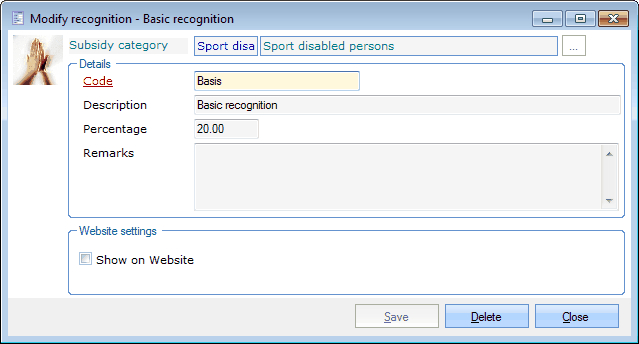 |
Subsidy category | For your information, it is indicated to which subsidy category you want to link the recognition. |
Code | Is unique and mandatory. It is advised to choose a relevant code so that you can immediately derive from the code which recognition is concerned. |
Description | A description of the chosen recognition. |
Percentage | The subsidy percentage for the chosen recognition. |
Remarks | If you wish so, you can add additional information on the recognition. |
Show on website | This option allows you to indicate whether this recognition may be visible on the website or not. |
Economic sectors
Economic sectors allow you to subdivide different customers for the link with the accounting system Policy and management cycle of ALFA.
Go to General > Basic data > Customers > Settings > Economic sectors.
The current list of all economic sectors will appear.
 |
You can create, modify or delete economic sectors at all times using the framework functionalities.
(see manual 'FRAMEWORK' Framework)
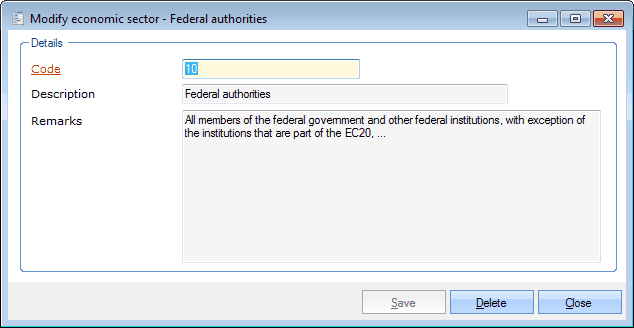 |
Code | Is unique and mandatory. It is advised to choose a relevant code so that you can immediately derive from the code which economic sector is concerned. |
Description | A description of the chosen economic sector. |
Remarks | Additional information concerning the chosen economic sector. |
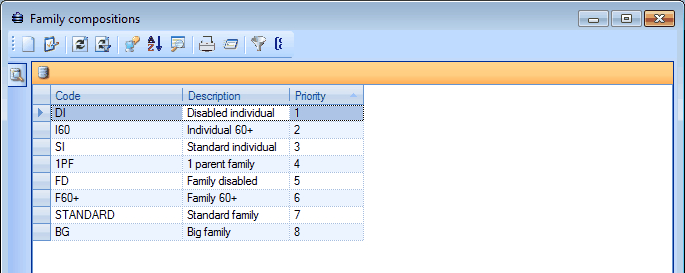
Family compositions
Under Family compositions you can define all possible family compositions that are automatically calculated and attributed when managing customers - on the basis of the customer's relations and only for the head of the family.
Go to General > Basic data > Customers > Settings > Family compositions.
The current list of all family compositions will appear.
 |
You can create, modify or delete family compositions at all times using the framework functionalities.
(see manual 'FRAMEWORK' Framework)
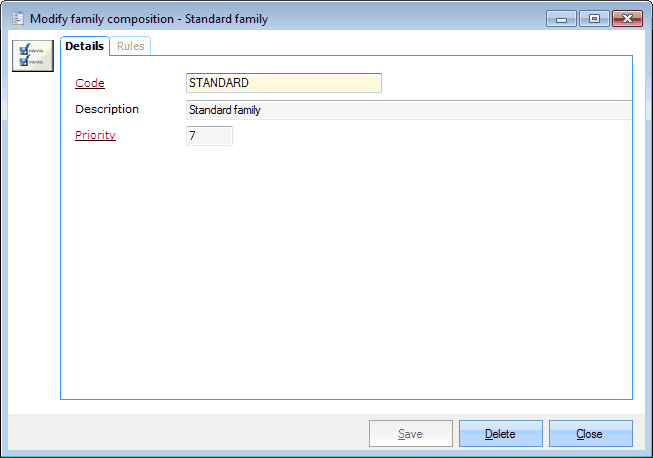 |
Code | Is unique and mandatory. It is advised to choose a relevant code so that you can immediately derive from the code which family composition is concerned. |
Description | A description of the family composition. |
Priority | The order according to which the family compositions have to be checked during the calculation of the family composition. |
In the tab Rules you can specify the conditions that have to be met by the customer and his/her relations to be linked to the given family composition.
 |
You can create, modify or delete family compositions rules at all times using the framework functionalities.
(see manual 'FRAMEWORK'Framework)
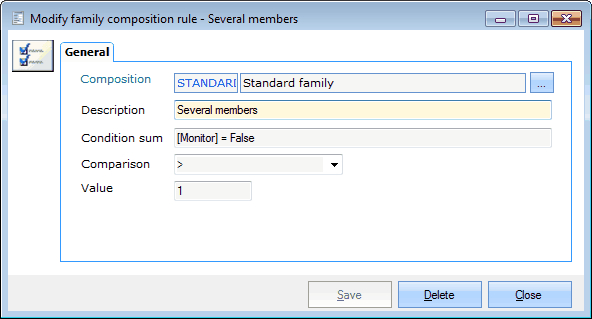 |
Composition | The chosen family composition. |
Description | A description of the rule of the chosen family composition. |
Condition sum | The condition that has to be met by the customer and his/her relations in order to meet the rule of the chosen family composition. The control fields are: | ||
| |||
Different control fields can be combined in a single condition by using the AND or OR commands. Each control field of the condition has to be followed by a true or false statement. | |||
Comparison | The comparison of the value compared to the given condition. | ||
Value | The number of family members that meet the comparison with the given condition. |
In order to clarify the logic of the family composition rules, you can find two examples of possible family compositions below.
A Standard family, by which we mean a family with two parents and at least 1 child but maximally 2 children, can be defined using the following rules:
 |
A Disabled family, by which we mean a family with two parents and at least 1 disabled family member, can be defined using the following rules:
 |
