Create a registration
In Recreatex, there are four different ways to make a registration:
Registrations (comprehensive)
The Registrations overview (comprehensive) allows to look for registrations that have already been made and to register one or several participants for one specific activity or activity day (part).
Go to Activities > Registrations > Registrations (comprehensive).
 |
The window below will appear:
 |
In the section Selection you can determine the period and possibly the customer of which you want to call up the registrations and after clicking on  all the registrations that meet your selection will appear in the section Registrations.
You can create, modify or delete registrations at all times.
(see manual 'FRAMEWORK'Framework)
 |
Note
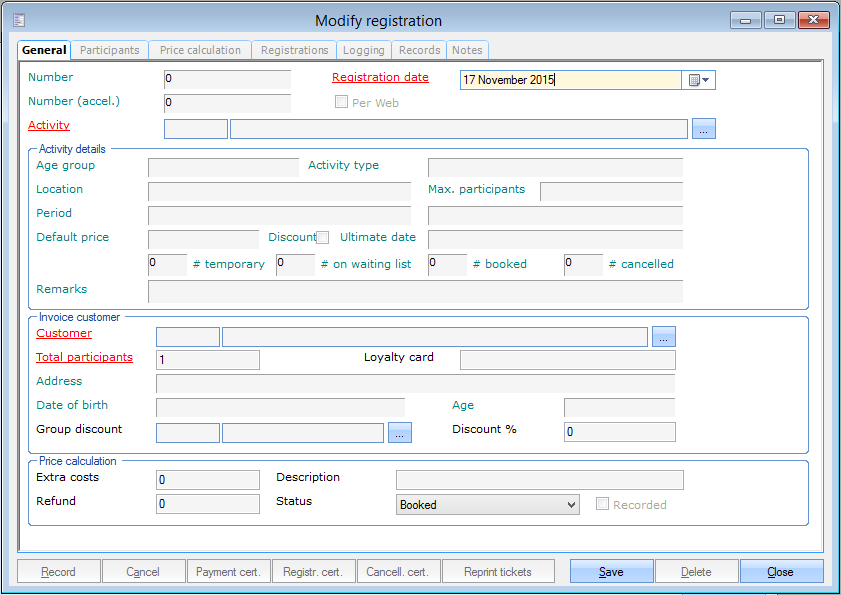
The window Modify registration (comprehensive) can also be opened by clicking on  in the ReCreateX tool bar
General
Under the tab General all basic data of the registration have to be filled in.
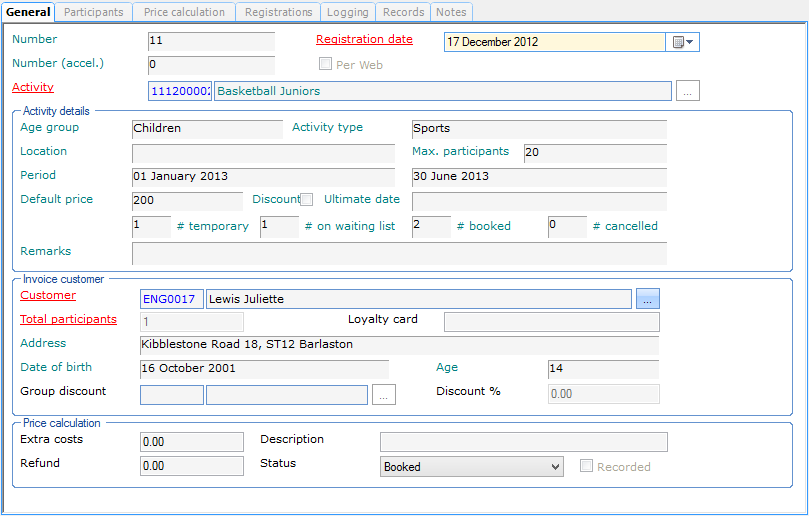 |
Here you can determine the general data of the registration.
Number | The unique registration number of this registration. The registration number is automatically created after saving the registration. |
Number (accelerated) | The unique accelerated registration number, linked to this registration (only if the registration has been made through Accelerated registration). |
Activity | The activity for which you want to register. |
Registration date | The date on which you want to register. |
Per web | This field indicates whether the registration has been made on the website or not. |
In the section Activity details all activity information is shown in function of the selected activity. These data have been determined when creating the activity and can not be modified here.
Age group | The required age group for the chosen activity. |
Activity type | The activity type. |
Location | The location where the chosen activity will take place. |
Max. participants | The maximal number of participants allowed for the chosen activity. |
Period | The period in which the chosen activity will take place. |
Default price | The default price of the chosen activity. |
Discount | This field indicates if possible discounts of the participant apply to the chosen activity. |
Ultimate date | The ultimate registration date for the chosen activity. |
# temporary | The number of Temporarily booked registrations for the chosen activity. |
# on waiting list | The number of registrations on the Waiting list for the chosen activity. |
# booked | The number of Booked registrations for the chosen activity. |
# cancelled | The number of Cancelled registrations for the chosen activity. |
Remarks | The detailed description of the chosen activity. |
In the section Invoice customer you can find all data concerning the invoice customer:
Customer | The customer who pays for the registration. | ||
Total participants | The number of participants, linked to the current registration. | ||
Loyalty card | If the invoice customer has a customer card, you can scan/fill in a customer card here after which the invoice customer, the address, the date of birth and the age will be automatically filled in.
| ||
Address | The invoice customer's address. (informative) | ||
Date of birth | The invoice customer's birth date. (informative) | ||
Age | The invoice customer's age. (informative) | ||
Group discount | It is possible to grant a group discount when several participants are registered. (see Registrations - Managementmanual 'REGISTRATIONS - Management') | ||
Discount % | The discount percentage linked to the given Group discount, or the discount percentage you want to link to this registration. |
 | The group discount as well as the discount percentage can also be set up on participant level, if required. (see Add, modify or delete participants) |
In the section Price calculation you can define possible additional costs.
Extra costs | Possible extra costs for this registration. |
Description | A description of the possible extra costs (for example administrative costs). |
Refund | An amount you want to deduct immediately at registration. |
Status | The status of the registration:
| |||
Recorded | This field indicates whether the registration has already been recorded or not. |
Finally, at the bottom of the window, the automatically generated OGM number of the registration is visualised.
 |
participants
Under the tab Participants you can see all the participants of the chosen activity and, if required, add, modify and/or delete participants. Moreover, you can tick off/link the activity day(s) (parts) and possible options for each participant.
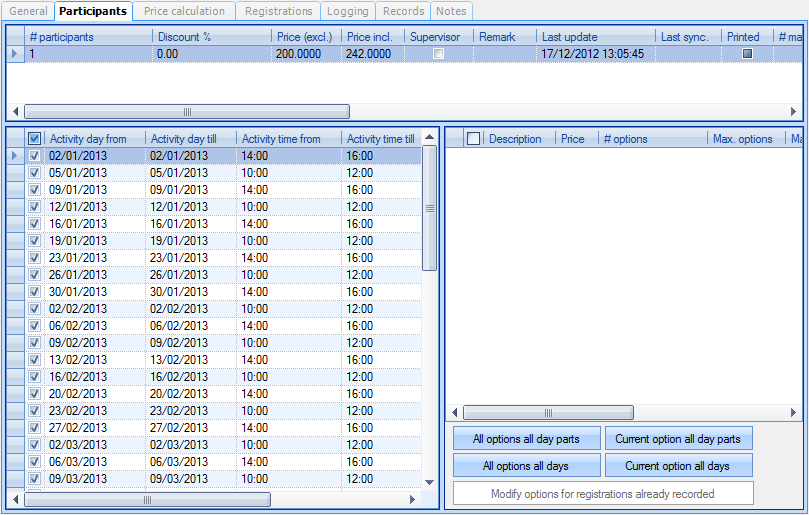 |
 | In case of a new registration, the first participant is always the invoice customer specified in the previous tab. |
In the upper part of the window you will see all participants that are linked to the current registration.
 |
You can add, modify or delete participants at all times.
(see next paragraph)
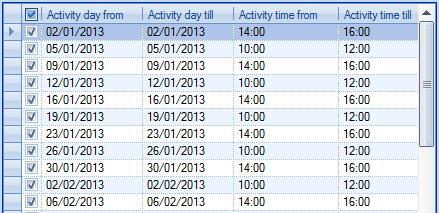
If the activity for which is registered consists of several activity days or day parts, you can tick off the activity day(s) (parts) for which is registered, or deselect them if you want to exclude periods from the registration.
 |
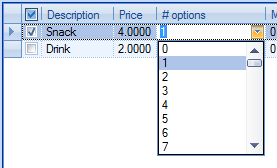
Moreover, you can link possible options to the current registration.
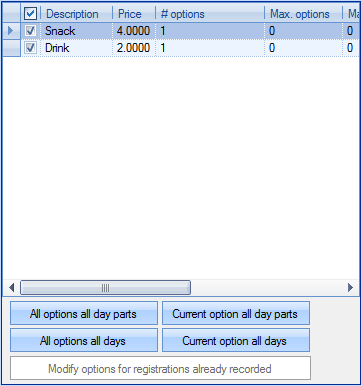 |
 | After selecting an option you can still modify the suggested quantity (1).
|
Attributing options is also possible using the following buttons:
| For the selected participant all options are added to all day parts. | |
| For the selected participant all options are added to all days. In other words: if one day consists of several day parts, the options will only be added to one of these day parts. | |
| For the selected participant the selected option is added to all day parts. | |
| For the selected participant the selected option is added to all days. In other words: if one day consists of several day parts, the selection option will only be added to one of these day parts. | |
| The data of a recorded registration can no longer be modified. This button, however, allows you to still change the options for the current participant. |
 | If you choose to add the current option to all days (parts), ReCreateX does not take into account the ticks. Only the selected option (arrow before the option) will be linked to other days (parts). |
Add, modify or delete participants
Within a registration you can always add, modify or delete participants in the overview of participants. (see manual 'FRAMEWORK'Framework)
If a participant is added or modified, the detailed window Modify participant registration will appear.
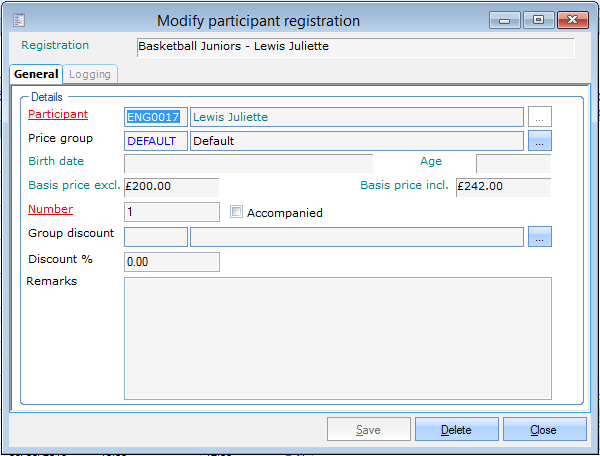 |
Under the tab General you can fill in/modify all data for the (new) participant:
Participant | The participant's name |
Price group | The price group you want to link to the participant. The price group linked to the customer is suggested by default. (see Customersmanual 'GENERAL - Customers') |
Birth date | The participant's birth date. (informative) |
Age | The participant's age. (informative) |
Basis price excl. | The price of the activity excluding VAT. (informative) |
Basis price incl. | The price of the activity including VAT. (informative) |
Number | The number of persons the participant wants to register. In this way, participants that are not known in the system as customers can also be registered. |
Accompanied | By this you indicate that the current participant has to be accompanied (for example accompanier disabled persons). |
Group discount | The group discount you want to grant to the participant. |
Discount % | The discount percentage linked to the given Group discount, or the discount percentage you want to link to this participant. |
Remarks | Additional remarks on the participant. |
Under the tab Logging you can consult all registered actions concerning this participant.
 |
 | If you want to delete a participant, you always have to open the desired participant card, if not you would delete the complete registration, including all participants. |
Price calculation
Under the tab Price calculation you can consult the calculation of the total price.
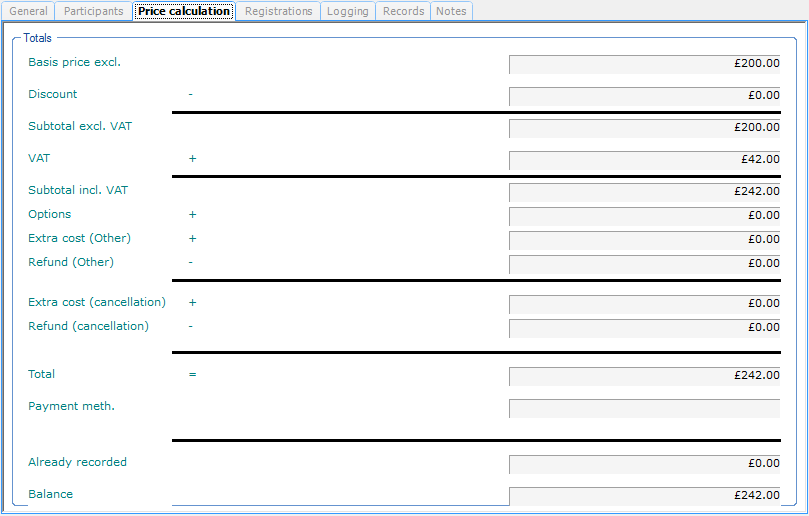 |
Registrations
Under the tab Registrations you will find an overview of all registrations that have already been made for the chosen activity.
 |
Logging
Under the tab Logging you can see which actions have been taken for this registration.
 |
Records
Under the tab Records you can see if and when the selected registration has been recorded/paid.
 |
 | A recorded registration can no longer be modified or deleted, unless the record line is deleted first. |
Notes
Under the tab Notes you can fill in additional information concerning the selected registration. If required, this information can also be modified after recording the registration.
 |
Linked memberships
If you have configured registration article(s) of the type membership for an activity, to provide the customer with an automatically generated and printed access ticket or an access membership linked to a carrier (e.g. card or wrist band), you will find the memberships linked to each activity registration in the tab Linked memberships.
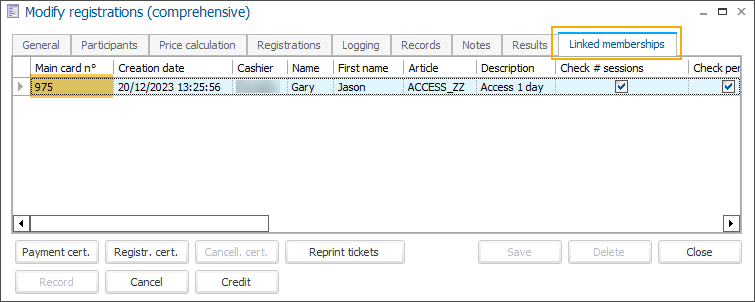
For additional information, see Provide access tickets/memberships when customers register for an activity.
Loyalty pass
Using a Loyalty pass you can register one or several participants for one or several activities, without the possibility, however, to select possible options and without the possibility to pay immediately.
Go to Registrations > Registrations > Loyalty pass.
 |
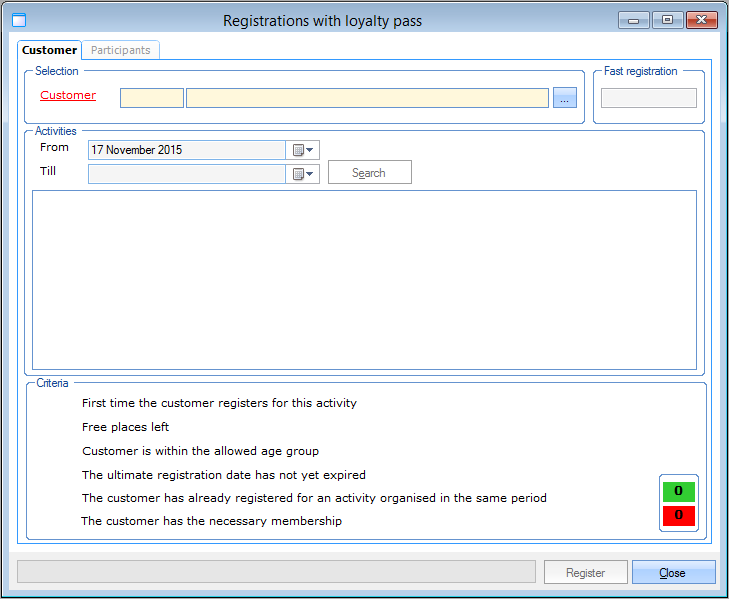
The window below will appear:
 |
See next page.
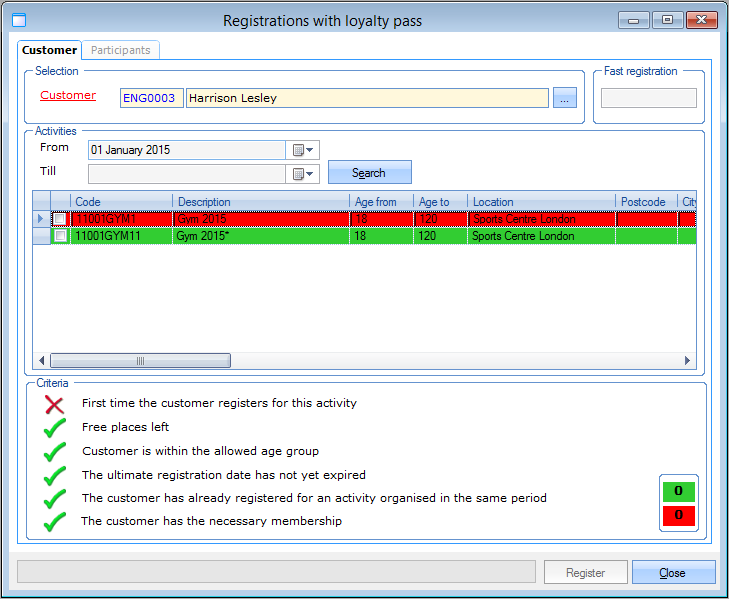
Under the tab Customer you can determine who you want to register for one or several activities. After selecting the desired customer, an overview of all future activities will immediately appear.
 |
 | The given customer is also the invoice customer. |
If you, however, only want to see the activities of a certain period, you can fill in the desired period on top of the section Activities and click on  .
.
In order to register a participant for one or several activities, you can either tick off the desired activity in the list or fill in the code of the desired activity in the section Fast registration and click on <Enter>.
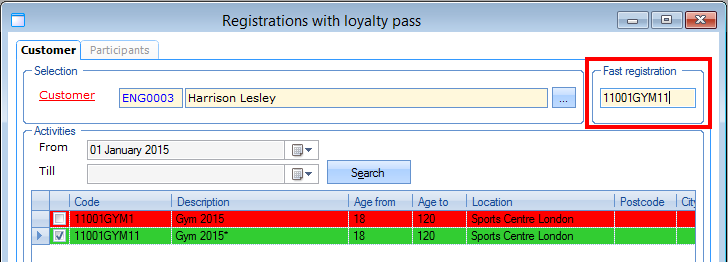 |
If you select an activity, you can see in the section Criteria if the desired registration meets all required conditions and you will see an overview of the status of all currently selected (ticked off) activities.
 |
In the green box you can see for how many activities the conditions are met, the red box shows you how many registrations do not meet the conditions.
If you want to register several customers or participants for all selected activities you can define all desired participants and/or the number of participants under the tab Participants .
 |
You can add, modify or delete participants at all times. (see manual 'FRAMEWORK'Framework)
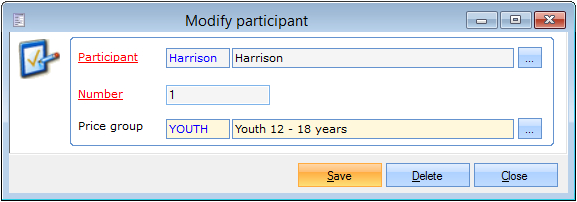 |
If you add and/or modify participants, you can also specify the price group to be respected per participant, so that the correct tariff will always be charged per participant.
The price group linked to the customer will be respected by default.
(see Customersmanual 'GENERAL - Customers')
After selecting the desired activities and specifying the desired participant(s), you can confirm the registration by clicking on  . A confirmation will appear.
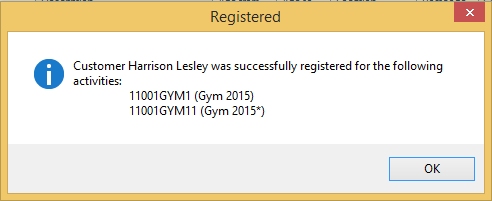 |
 | If a registration with loyalty pass is confirmed, a separate registration will be made per activity, each of which will include all given participants. |
Accelerated registrations
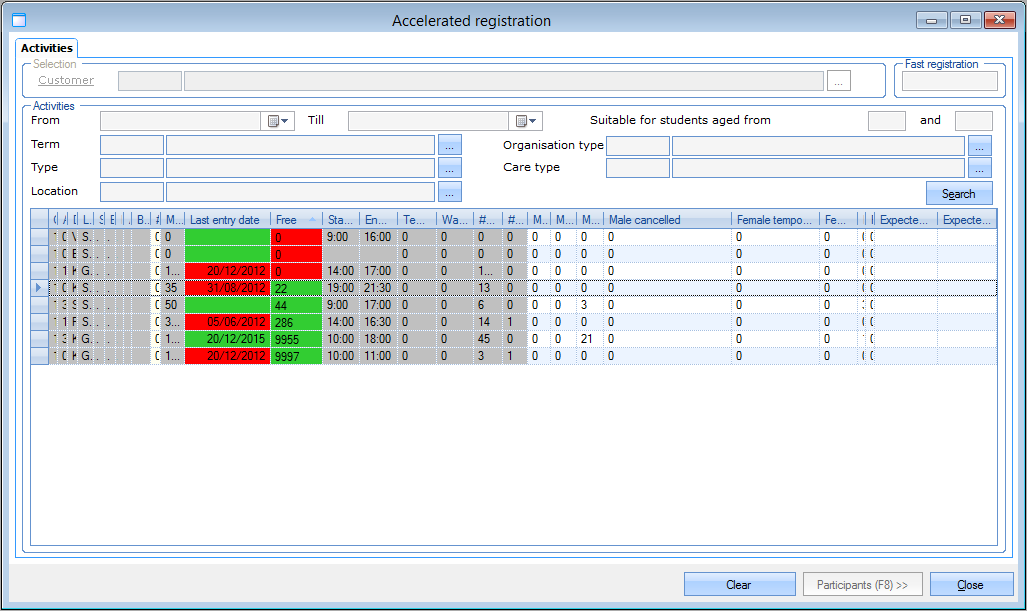
Accelerated registrations allow you to register one or several participants for one or several activities.
Go to Registrations > Registrations > Accelerated registration.
 |
The window below will appear:
 |
 | The window Accelerated registration can also be opened by clicking on |
This window gives an overview of all future activities for which you can register, with indication of the final registration date, the number of free places and the number of persons on the waiting list.
 | Only the activities that were created with the possibility to register on activity level are shown. (see Registrations - Managementmanual 'REGISTRATIONS - Management') |
If you, however, only want to see the activities of a certain period, for a certain age and/or type, you can fill in the desired period, the right age or the desired type on top of the section Activities and click on  .
.
 | Dependent on the parameter settings, filling in the customer is obligatory or not in case of accelerated registrations. The specific setting of these parameters also determines who will be the invoice customer in case several participants are registered. (see Registrations - Managementmanual 'REGISTRATIONS - Management') |
In order to register a customer for a certain activity, you have to fill in the activity code in question in the section Fast registration in the right upper-hand corner (or, if applicable, scan the activity barcode in question (after clicking in the code field) and confirm by hitting the <Enter> key.
 |
The activity in question will be marked automatically in the activities overview and the number of participants will be changed into 1.
 |
If required, you can change the number of participants that have to be registered for this activity.
If you hit the <Enter> key again, the given number of participants will be confirmed for the activity in question.
If you immediately want to register the same customer for another activity as well, you simply repeat the procedure described above. The activities for which one is currently registering, are always marked in yellow.
 |
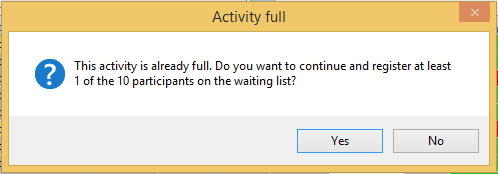
 | If you want to register for an activity for which there are no more (or no sufficient) free places available, the system will ask you if the extra number of participants may be registered for the waiting list:
|
 | If you click on the button |
If you have chosen the activity(s) and the participant(s) you have to click on  at the bottom of the window in order to specify all participants per activity in the second part of the accelerated registrations window. In order to go back to the first window (activities) once you are in the second one, you can click on the button
  .
.
In order to specify the (first) participant of the selected activity(s) (or in order to deviate from the suggested customer), you simply fill in the (first letters of the) customer's surname. The customer window will appear and the system will automatically navigate to the customer(s) with this name, which allows you to quickly find the desired customer/participant. Finally, you have to confirm you choice by hitting the <Enter> key.
 |
If you have to specify several participants, you have to hit the <Enter> key once again after filling in the first participant after which the next participant line will automatically be selected allowing you to fill in the surname of the second participant. Repeat this method until all participants have been specified.
 | The invoice customer of the current registration is usually the first participant specified. Dependent on specific parameters, however, this might be configured otherwise and the invoice customer might be the customer you have selected in the first window (activities). |
If a desired participant is not yet present in the customer file you can still add the customer by clicking on  and afterwards on
  in order to include the new customer in the selection. It is also possible to call up the data of an existing customer by clicking on the button
  .
.
 | If you want to fill in or modify the price group of a certain participant, you can proceed in the same way as you do for specifying the participant (fill in + <Enter>). |
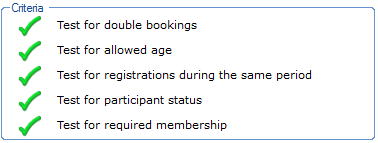
If you select a participant, you can see in the section Criteria if this customer meets all the necessary conditions for registration:
 |
 | If (one of) the participant(s) does not meet certain conditions for registration, the parameter settings will determine if it will be possible to effectively make the registration or not. (see Registrations - Managementmanual 'REGISTRATIONS - Management') |
Moreover, the sections Activity days, Options per activity day and Status allow you to respectively consult/select the activity days (in function of the selected activity), determine the options per activity and see the status of the selected activities. For a more detailed explanation on the activity days and the possible options for registration, we refer to Registrations (comprehensive).
In order to finalise the registration(s), you have to click on  <F8>, after which you might be able to immediately pay for the registration(s) (dependent on the parameters).
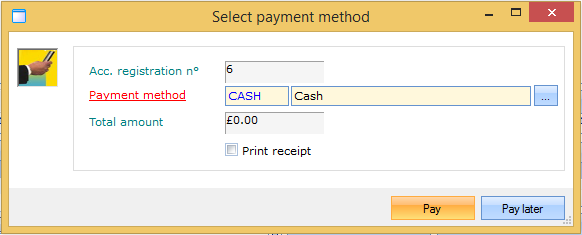 |
If you want to pay immediately, you can simply select the desired payment method, indicate if you want to print a receipt or not and click on  .
.
If you want to pay later, click on  .
.
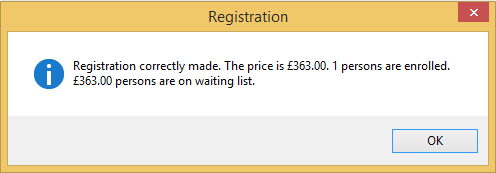
After paying for registration(s) or not, a message will appear indicating that the registration was correctly executed.
 |
 | Dependent on the defined parameters, a separate registration will be generated for each participant or not. |
Daily registrations
Day registrations allow you to quickly and efficiently register one participant for one activity day (part) of one certain activity.
Go to Registrations > Registrations > Daily registrations.
 |
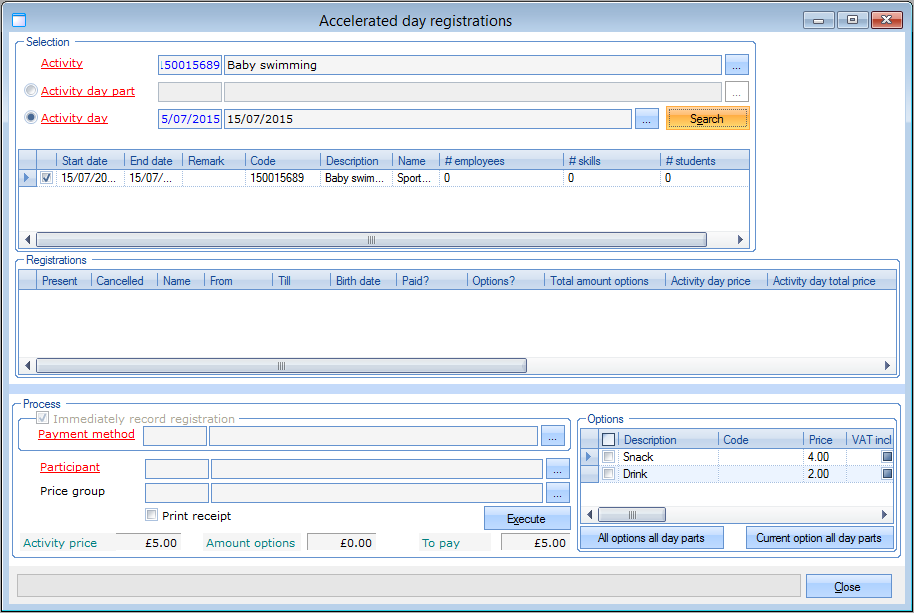
The window below will appear, in which you have to select the desired activity, activity day (part) and click on  , after which all participants that are already registered for the selected activity and activity day (part) will be listed.
 |
 | Only the activities that have been created with the possibility to register on activity day level will be shown. (see Registrations - Managementmanual 'REGISTRATIONS - Management') |
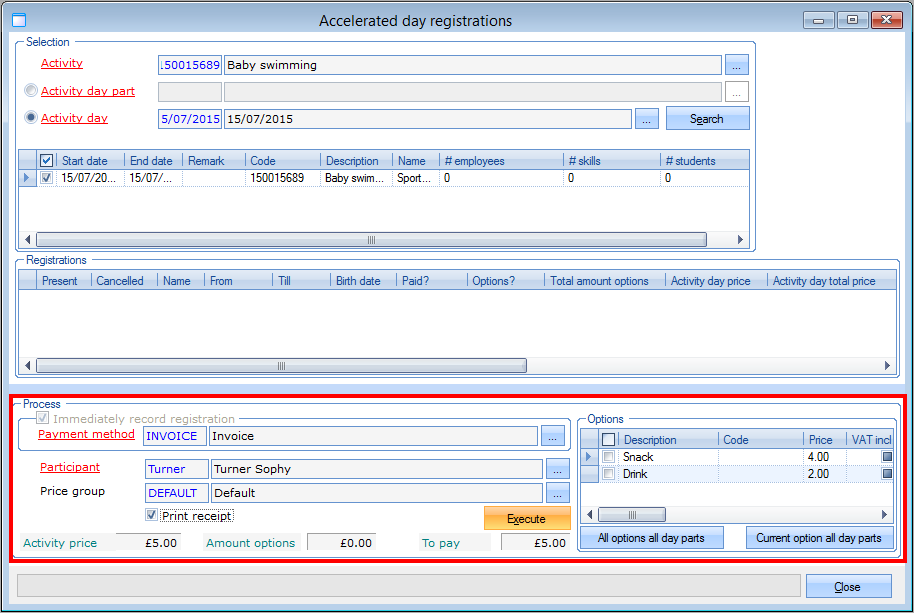
In order to register a customer, you have to select the desired participant and price group in the section Process, indicate if you want to print a receipt or not and if options have to be added or not, and afterwards click on  .
.
 |
 | The possibility to immediately record the day registration depends on a parameter setting. (see Registrations - Managementmanual 'REGISTRATIONS - Management') |
After processing the registration, the selected participant will be added to the section Registrations and the fields participant and price group will be cleared again so that you can continue with the next registration for the same activity and/or activity day (part).

