Visualisations
Under Visualisations you can always call up overviews of certain data within the current Recreatex module.
Go to General > Basic data > Employees > Visualisations.
The following visualisations are available:
Task planning
Task planning gives you a graphic overview of all tasks of all employees, in the function of the selected working groups.
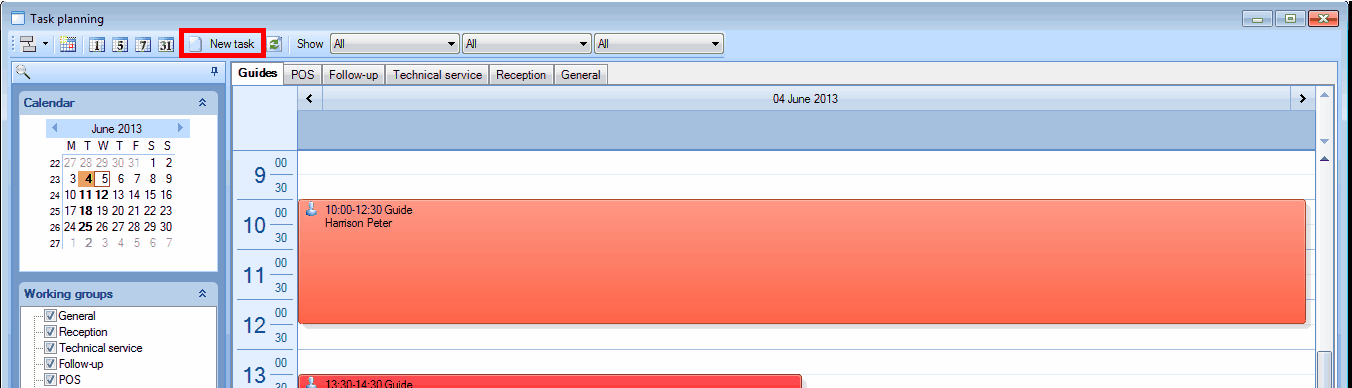
Go to General > Basic data > Employees > Visualisations > Task planning.
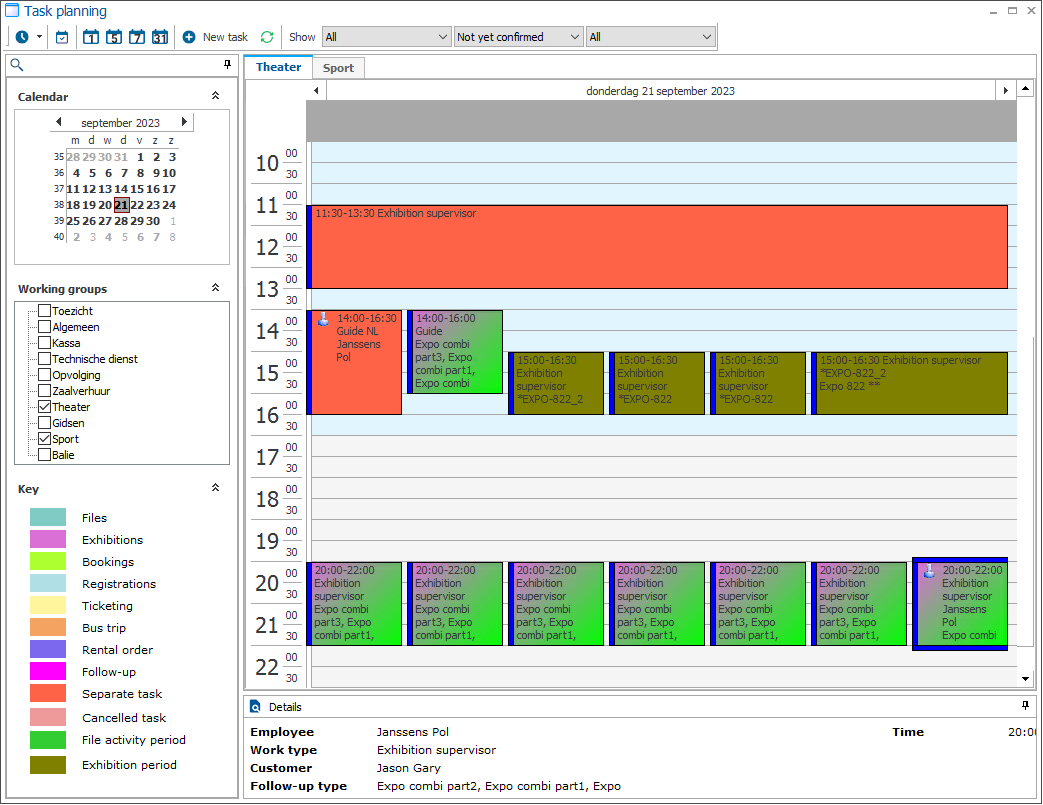
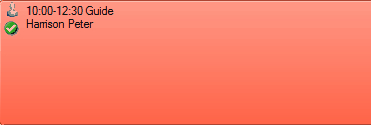
In the task planning overview, the created tasks are visualised in time blocks. Each time block shows the duration and work type of the task. Moreover, the symbol  is used to indicate that an employee has already been linked to the task and the symbol
  to indicate that the task has been confirmed for (or by) the employee.
If you move the cursor over a certain task, the detailed information about the task in question appears at the bottom of the task planning screen.
 |
Note
The partial window with the detailed task information can be fixed to, or detached from the graphic task planning window by means of the buttons  /
/ . If the partial window of details is detached, it will disappear from the screen, but can always be opened again by clicking on the button Delete that, in that case, can be found in the lower left-hand corner of the task planning window.
By means of the different buttons in the toolbar, you can modify the layout of the planning according to your wishes, create new tasks and/or refresh all task planning data.
 |
| This button allows you to set up the time scale of the task planning, in other words the size of the time division visualised. The time division can be modified from 1 minute to 60 minutes. | |
| Show the current day. | |
| Limit the task planning overview to 1 day. | |
| Limit the task planning overview to a working week. | |
| Limit the task planning overview to a week. | |
| Show the entire month. | |
| Create a new task. | |
| Refresh the data in the task planning overview. | |
| The option Show allows you to filter the tasks visualised. The first button allows you to visualise all tasks, only the tasks not yet planned or only the tasks already planned in the task planning overview. The second button allows you to visualise all tasks, only the tasks not yet confirmed or only those already confirmed in the task planning overview. The third button allows you to visualise all tasks, only the not cancelled tasks or only the cancelled ones in the task planning overview. |


The calendar allows you to select one or several days to be visualised in the task planning overview.
Days that contain tasks, are marked in bold in the calendar.
 |
Note
If you continue pressing the <Shift> button while selecting 2 non-consecutive days, the period in between those days will also be selected.
If you continue pressing the <Ctrl> button, you can select several non-consecutive days by clicking on them.
A period of consecutive days can also be selected by clicking on the left mouse button and dragging the cursor over several days.
Moreover, you can select (tick off) the working groups of which you want to call up the tasks.
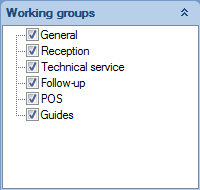 |
The selected (ticked off) working groups are then visualised as tabs above the task planning overview, allowing you to consult the tasks of the working group in question at all times.
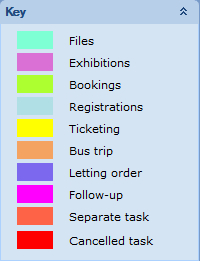
Finally, you will find a key that explains the colours linked to the tasks.
 |
Assign a task
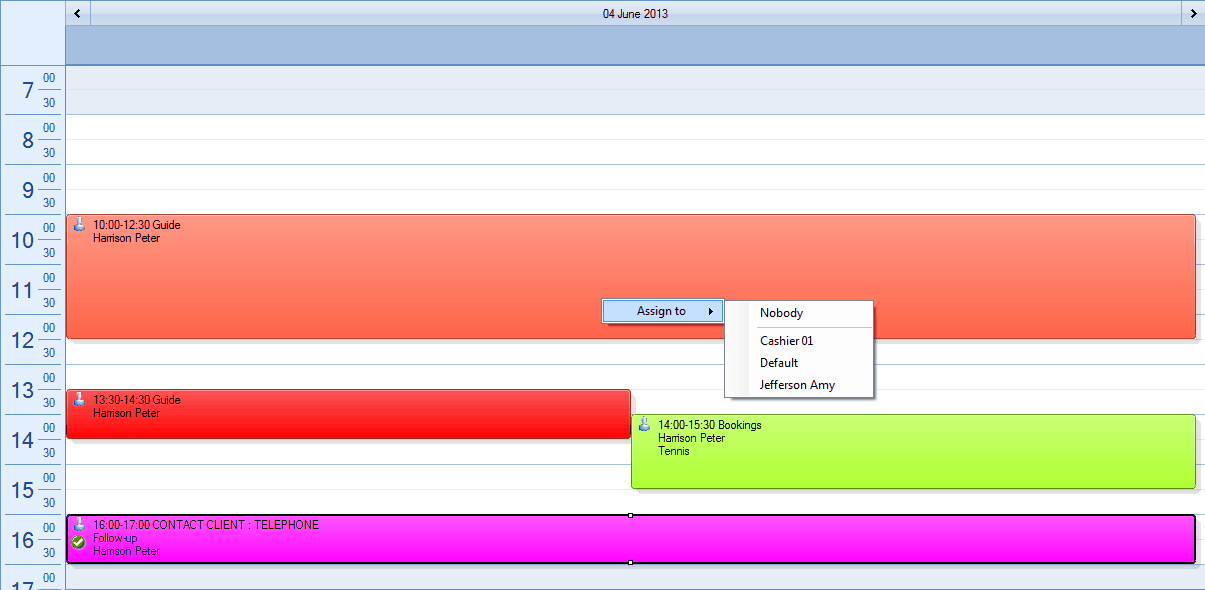
A task can be assigned to an employee in three different ways.
The first way is by clicking with the right mouse button on the task in question, after which you will be able to choose one of the employees that qualify for the current work type AND that are available (in function of their availability periods + no other tasks planned yet in the same period).
 |
The second way is by double-clicking on the task in question, after which the window Modify task per employee will appear, in which you can not only modify the task data if required but also link an employee to the task.
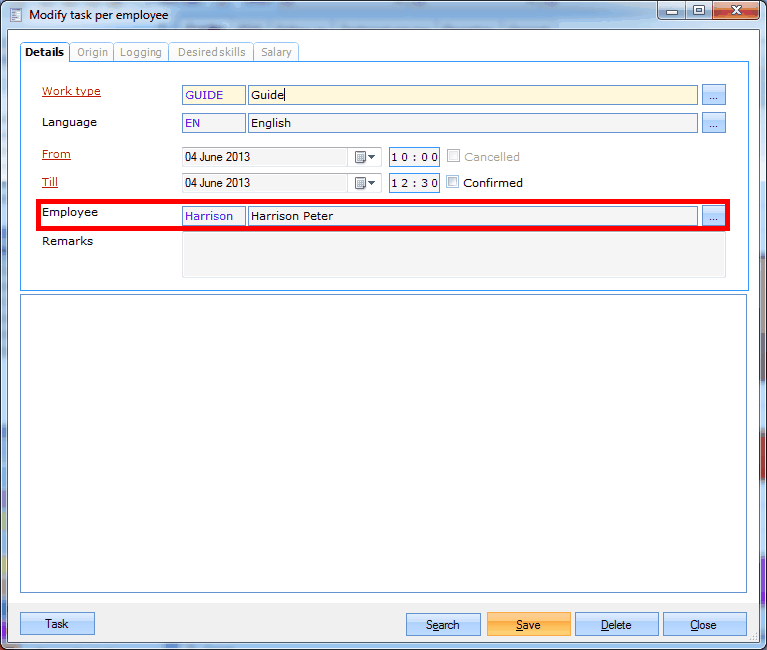 |
Note
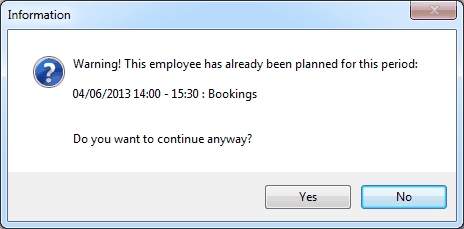
If you link an employee in the window Modify task per employee, you will, as apposed to assigning a task by clicking on the right mouse button in the graphic overview (see above), see an overview of all employees. This allows you to select an employee that is not available. In this case, the message below will appear, however, if you try to save the task:
 |
The third way is by clicking on the button Search at the bottom of the window. In this way, you will see an overview of all employees that qualify for the chosen work type AND that are available (in function of their availability periods + no other tasks planned yet in the same period).
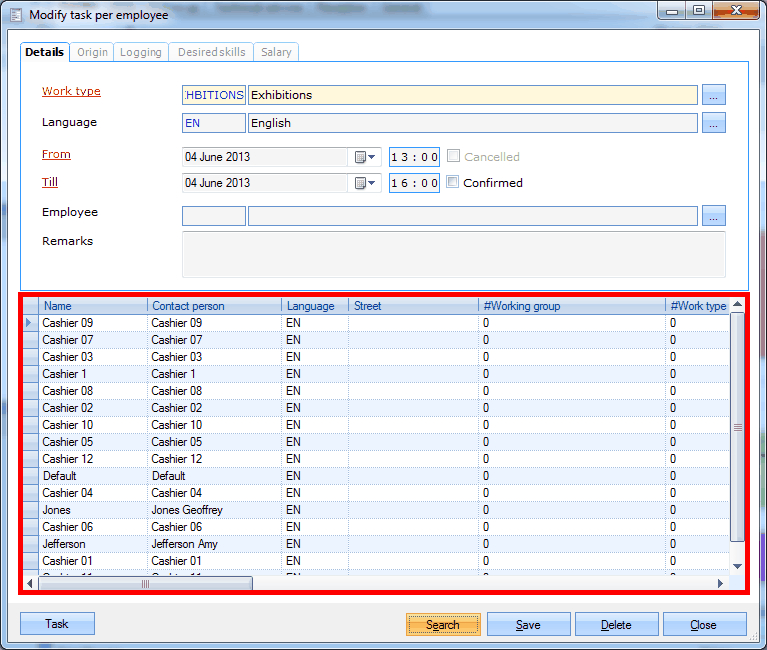 |
By double-clicking on the desired employee in this list, the employee will be linked to the current task.
Note
A task that has been assigned to an employee is marked with the symbol in the task planning overview.
Confirm a task
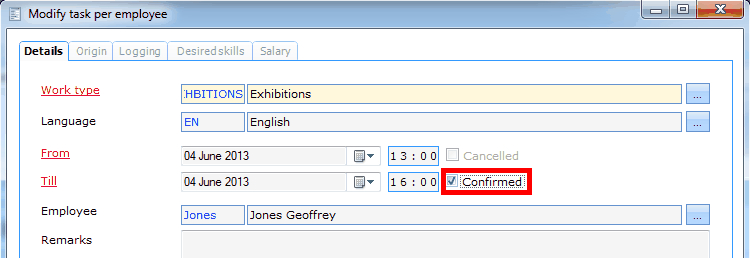
If you want to confirm the linked employee for a certain task, you have to double-click on the task in question, after which the window Modify task per employee will appear, in which you can then tick off the box next to Confirmed.
 |
Note
If the employee has confirmed his/her task in the online task planning, this task will be considered as confirmed in Recreatex as well.
A task with a confirmed employee is marked with the symbol in the task planning overview.
 |
Create a new task
If you want to create a new separate task, you can do so by clicking on the button New task.
 |
The window Modify task per employee will appear that contains several tabs. In any case, you first have to fill in the tab Details and click on Save before you will be able to modify the other tabs.
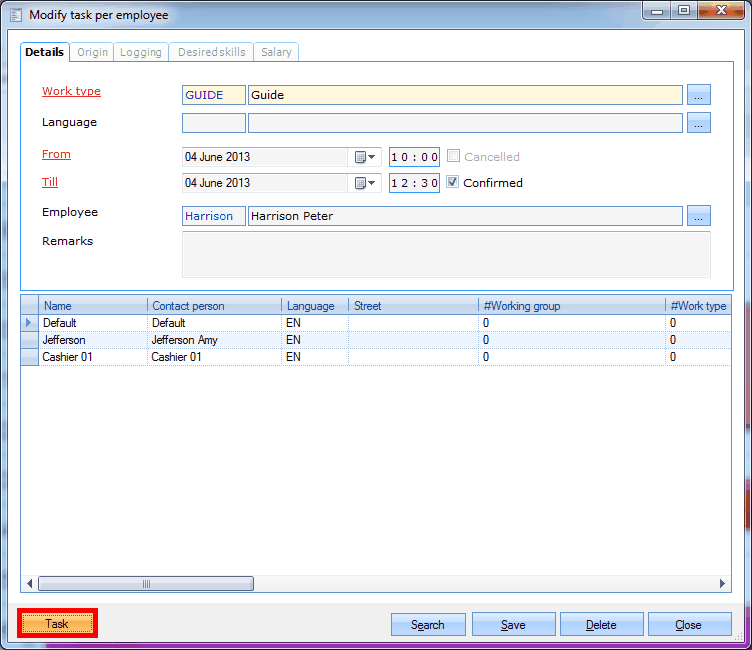
Details
In the tab Details you can fill in all general information on the task.
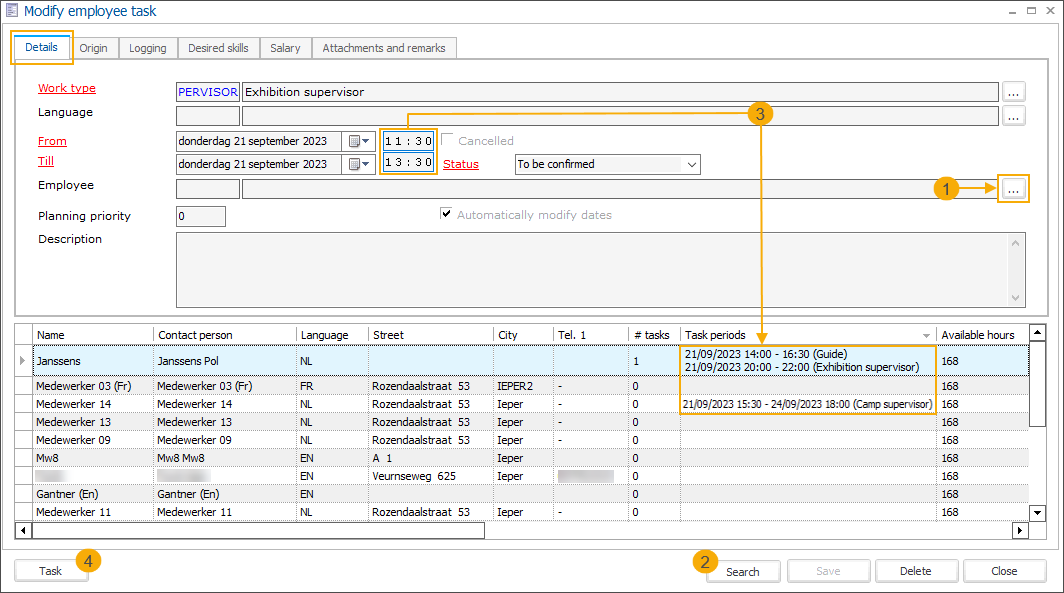
Work type | The work type that has to be executed. |
Language | The language the employee has to know. |
From ... Till ... | The period in which the task has to be executed. |
Cancelled | Indicates if the task has been cancelled or not. |
Status | The possibility to confirm the chosen task. If the employee has confirmed his/her task in the online task planning, the task will be considered as confirmed in Recreatex as well. |
Employee | Link an employee to the task:
TipUse the framework functionality to add the column Task periods (3) to the overview to show each employee's tasks already scheduled for the same day. This can be tasks that start and end on the same day or tasks that start on the same day but end on another day. This additional information will help you align employees' planning and fit in additional tasks without creating unnecessary gaps in their schedules. |
Planning priority | |
Automatically modify dates | |
Description | Here you can provide additional information on the task. |

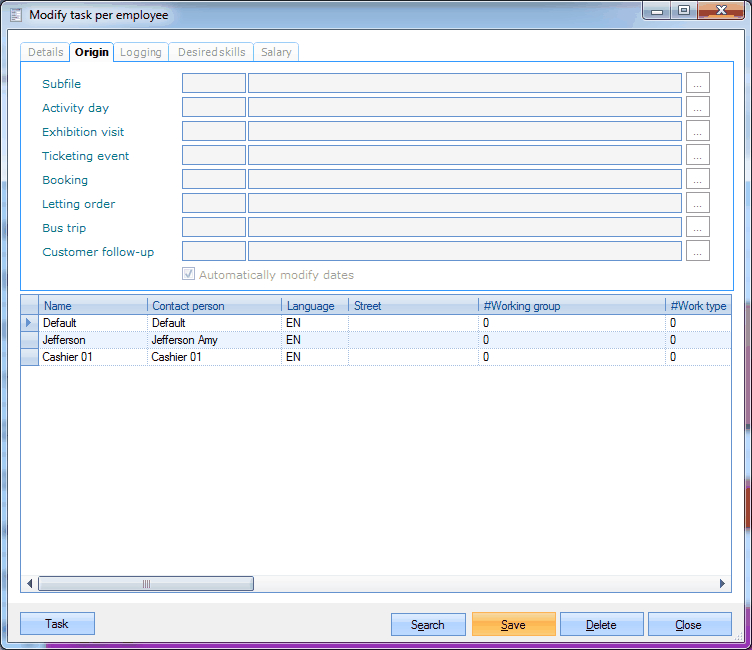
Origin
In the tab Origin you can see where the task has originally been created. If it is a separate task, nothing is filled in here.
 |
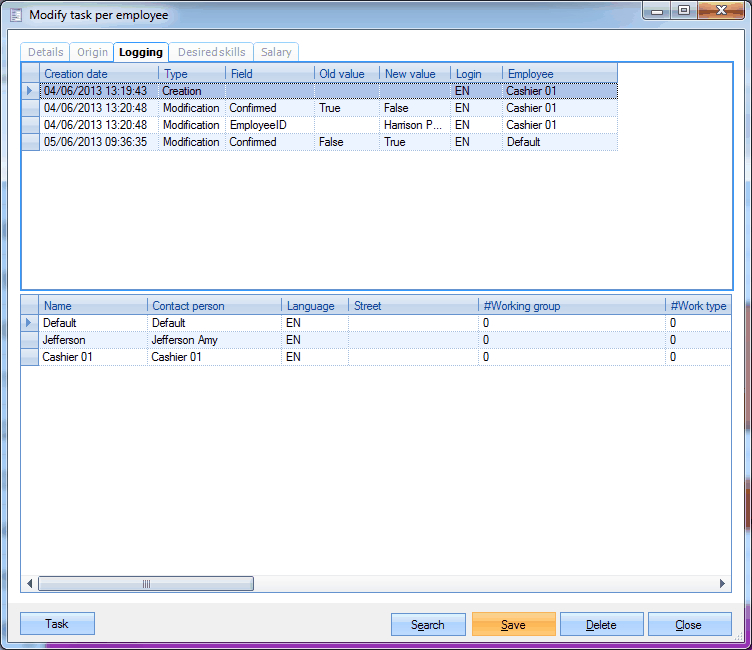
Logging
In the tab Logging you can see what has been modified on the task.
 |
Desired skills
In the tab Desired skills it is possible to select additional skills the employee needs to have.
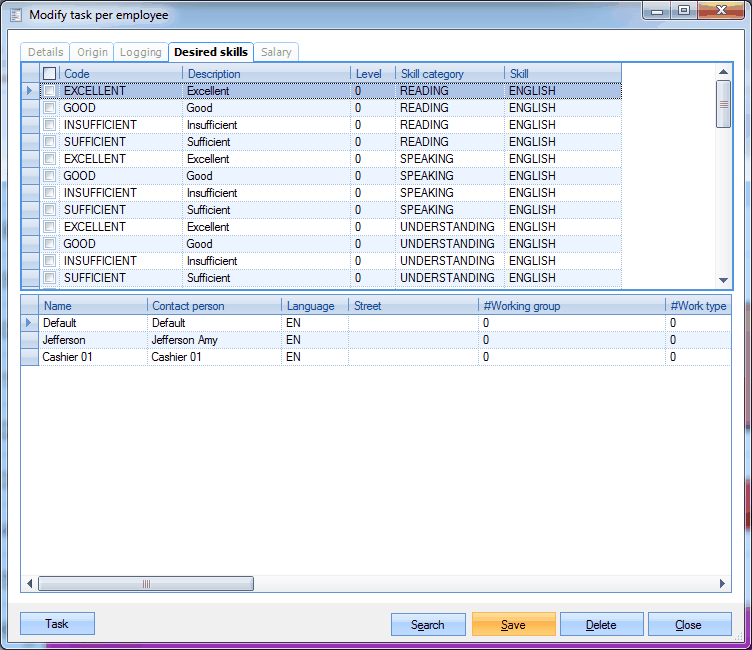 |
If you indicate or delete the desired skills for a task, it is possible to use the button Search again in order to call up a correct list of appropriate/available employees.
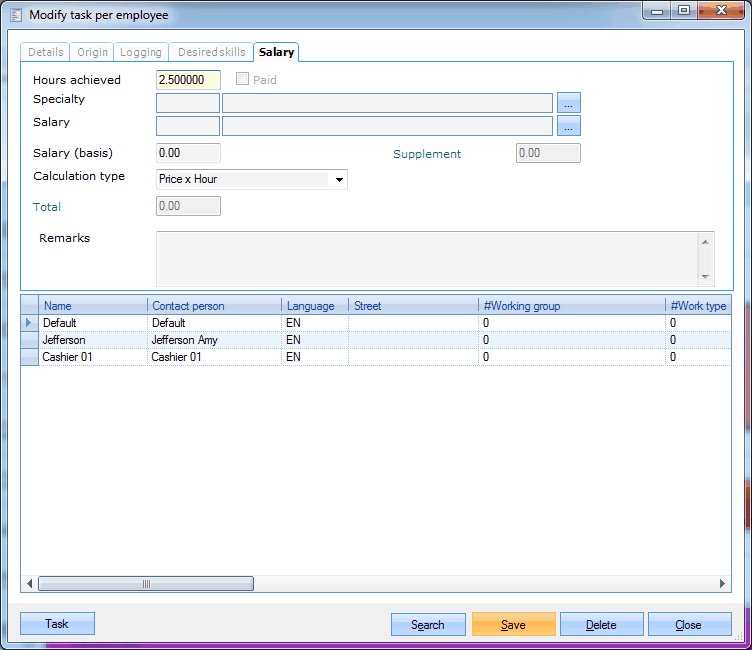
Salary
In the tab Salary it is possible to define how this task will be remunerated.
 |
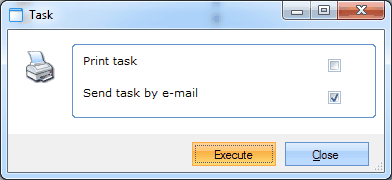
Print/send a task
If a task has been created and if you want to print or mail this task to the employee, you have to click on Task in the lower left-hand corner of the window Modify task per employee.
 |
Next, the window Task will appear in which you can choose to print and/or send the current task to the current employee.
 |
Cancel/delete a task
Note
If you delete a task that has already been assigned to an employee, the task will be cancelled and will remain present in the system as a cancelled task (and in the task planning overview if you have defined that cancelled tasks have to be visualised as well).
If, however, no employee has been linked yet to the task, the task will effectively be deleted from the system.
If you want to cancel/delete an existing task, you have to click on Delete in the window Modify task per employee.
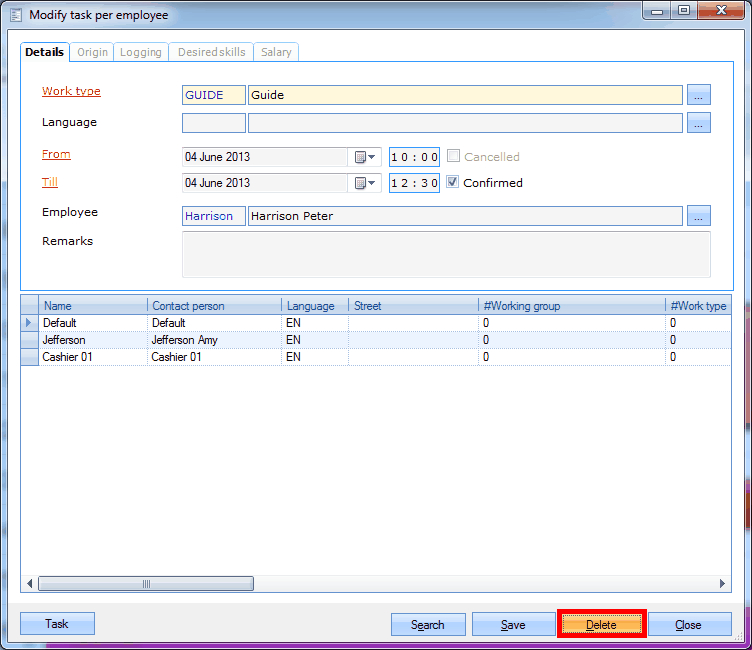 |
The message below will appear:
 |
After confirmation of the message, the task will be cancelled/deleted.
Graphic overview of tasks
The Graphic overview of tasks gives you a graphic overview of all tasks of all employees.
Go to General > Basic data > Employees > Visualisations > Graphic overview of tasks.
The window below will appear.
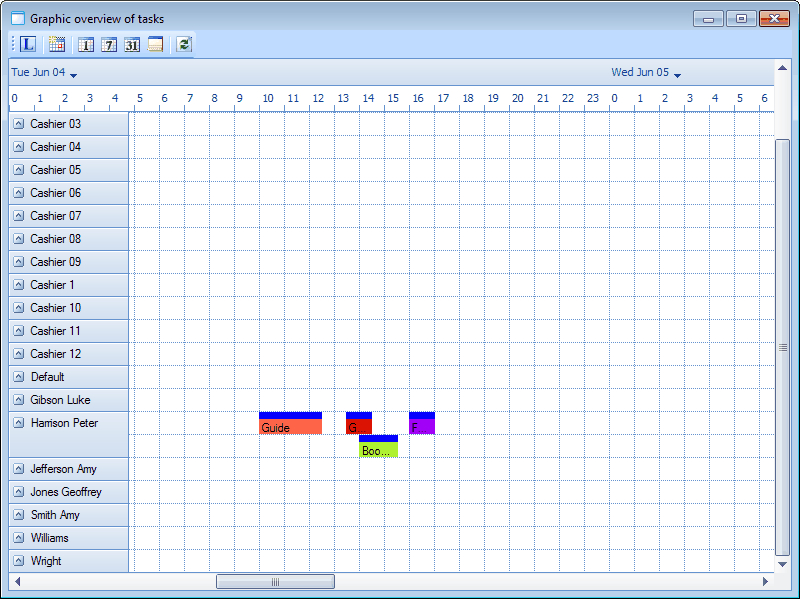 |
By using the different buttons in the toolbar, you can set up the visualisation of the planning according to your wishes, consult the key and/or refresh the task data (see Task planning).
The task overview allows to open the details of a certain task by double-clicking on the task in question.
The window Detail employee task planning will appear:
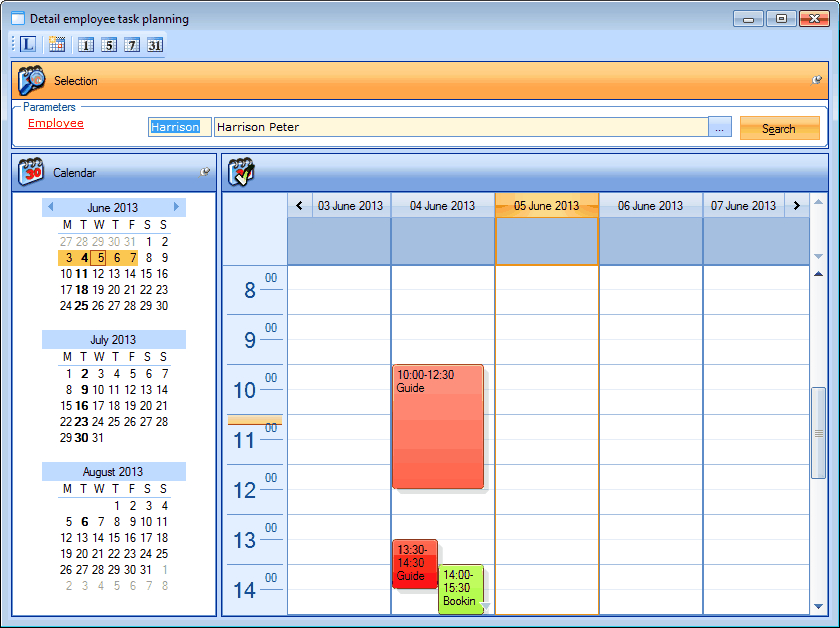 |
In this window as well, you can set up the visualisation of the planning according to your wishes using the different buttons in the toolbar and/or consult the key (see Task planning).
You can also consult the planning of another employee by choosing the desired employee in the section parameters, while you can also search for a certain date by selecting the desired date in the calendar overview.
Textual overview of tasks
The Textual overview of tasks gives you a textual overview of all tasks of all employees.
Go to General > Basic data > Employees > Visualisations > Textual overview of tasks.
The window below will appear.
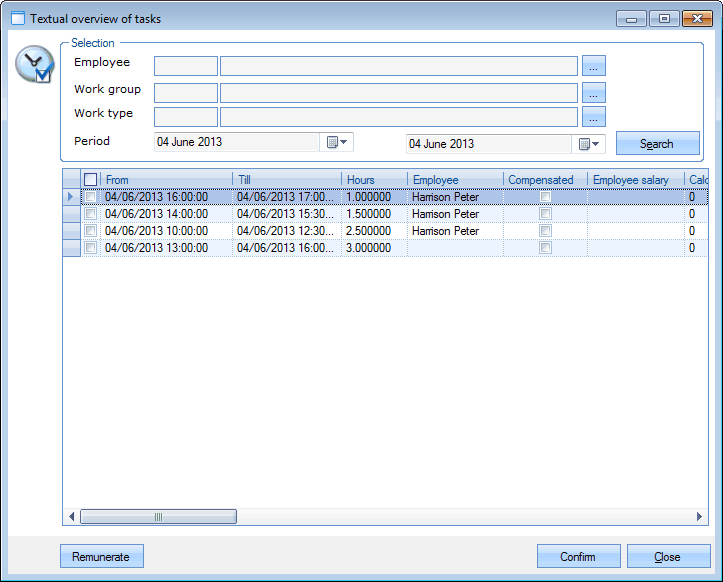 |
Initially, all planned tasks of the current day are listed.
In the section Selection you can filter per employee, per work group, per work type and per period.
 |
If you click on Search all tasks that meet the given search criteria will be visualised.
By clicking on Confirm you can confirm the selected tasks of one or several (ticked off) employees.
It is also possible to create a new task using the framework functionalities (<F2>, or right clicking followed by New).
Remunerate employee tasks
If you click on Remunerate you can indicate the selected tasks of one or several (ticked off) employees as Remunerated (paid).
Note
A task will only be indicated as remunerated if the following conditions are met:
Remuneration data (salary) have to be linked to the employee/task.
A bank account number has to be linked to the employee.
After you have clicked on Remunerate the window below will appear:
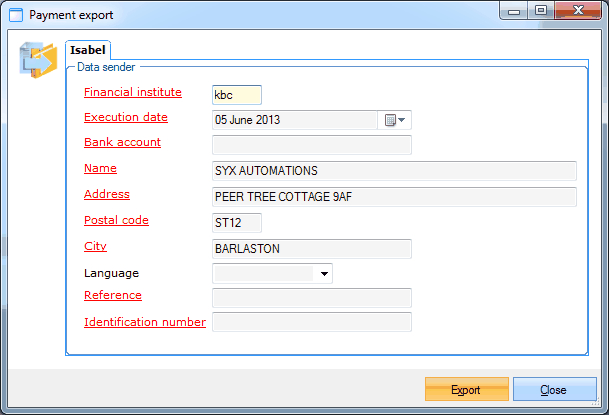 |
This window is only important if you, as an organisation, work with Isabel for managing payments. If you have filled in the transaction data and clicked on Export, you will first have to specify a file location before a text file (.txt) will appear that can be used to execute the financial transaction of the employee remuneration with Isabel.
Note
If you do not use Isabel, you can simply click on Close in the window Payment export, by means of which the tasks in question will still be indicated as Paid.
Performances/employee
The visualisation Performances/employee gives you a textual overview of all performances per employee or per (registration) activity.
Go to General > Basic data > Employees > Visualisations > Performances/employee.
The window below will appear.
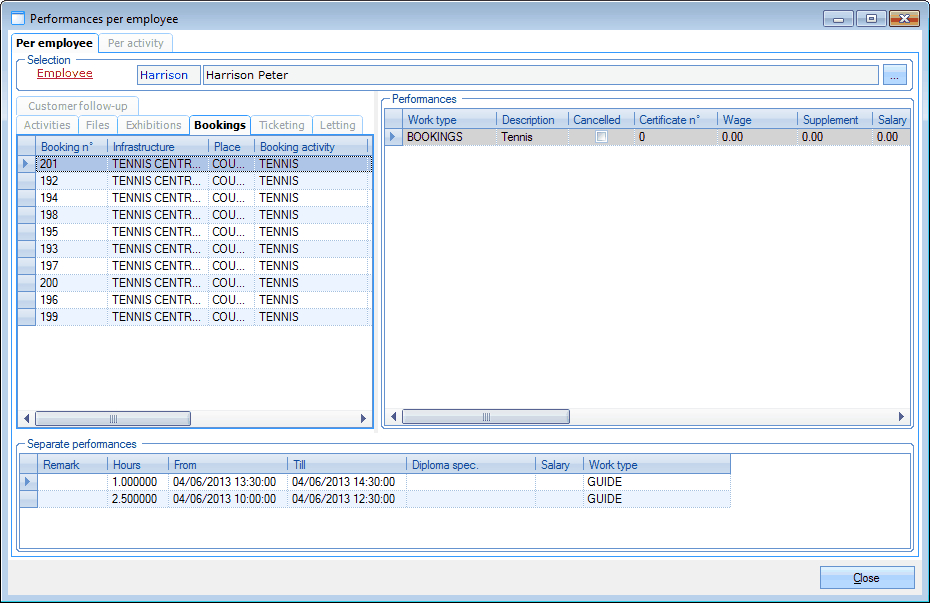 |
In the section Selection you can filter per employee or per activity.