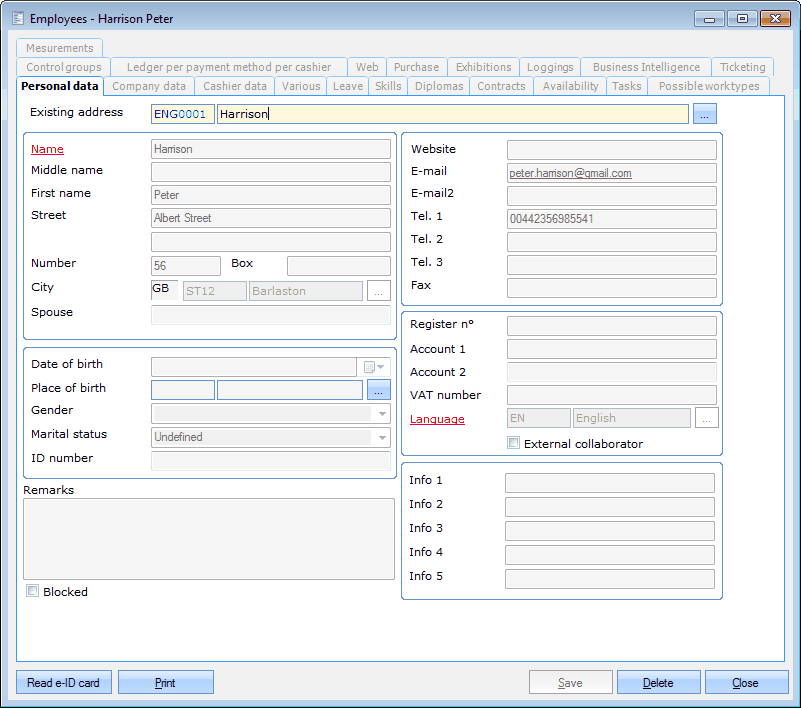
The employee card
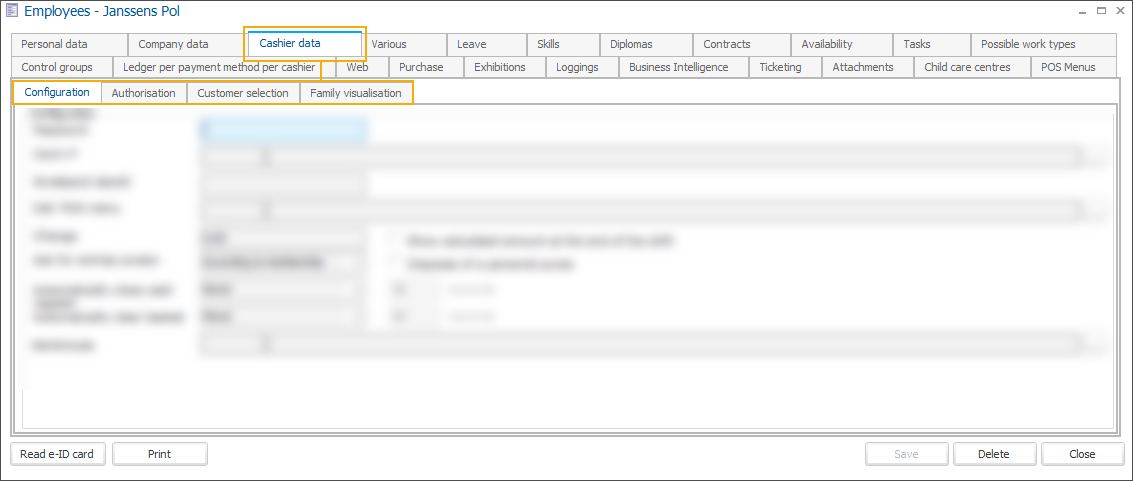
If you create a new employee or consult an existing employee, you always do so on the basis of the employee card. You can find an example of an employee card below.
 |
It is advised to always first fill in the tab Personal data and click on Save before filling in the other tabs.
Personal data
In the tab Personal data you can consult/fill in all personal data of your employee.
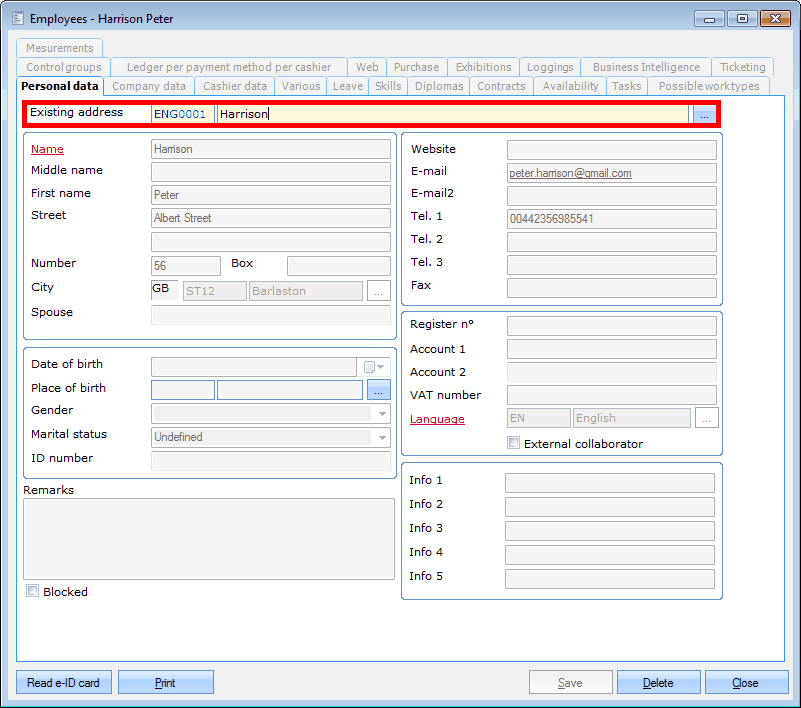
If you create a new employee, it is possible to use the data of an existing customer using the field Existing address.
 |
Warning
If you want to modify the Personal data of an existing employee that is linked to a customer card (Existing address), you will only be able to modify these data in the customer card itself and not in the tab Personal data of the employee card. You can, however, immediately go to the customer card by clicking on the linked customer name and pressing <F3>. (see manual 'FRAMEWORK'Framework)
Note
The data in the tab Personal data are the same as those in the tab General of a customer card. A more detailed explanation on these data can be found in the manual 'GENERAL - Customers'Customers.
The only setting that is different from the customer card is External collaborator by means of which you indicate that this employee does not work within your organisation. This can, for example, be an external guide.
Company data
In the tab Company data you can consult/modify all data concerning the employee within the company.
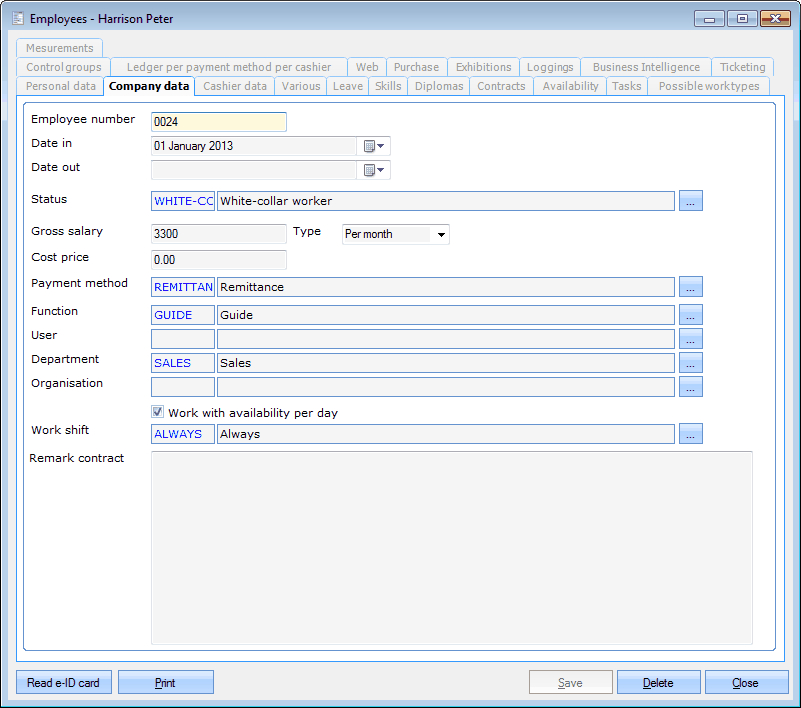 |
Employee number. | The internal number that is given to the employee within your organisation. | |
Date in | The date on which the employee has been employed. | |
Date out | The date on which the employee has stopped working for the organisation. | |
Status | The employee's status. | |
Gross salary | The employee's salary. | |
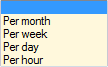
Type | The way in which the gross salary is described.
| |
Cost price | Here you can fill in the effective cost price of the employee. | |
Payment method | The way in which the employee has to be paid. | |
Function | The function held by the employee. | |
User | The Recreatex user linked to this employee. | |
Department | The department in which the employee is active. |
Organisation | The organisation for which the employee is active. |
Work with availability per day | If you tick off this option, you will be able to specify the days and the hours on which the employee is available in the tab Availability and the task planning of this employee will be done on the basis of availabilities instead of shifts. |
Work shift | Here you can choose a certain work shift for the employee. This work shift will then be used for the task planning of the employee. |
Remark contract | Here you can add additional information on the employee's contract. |
Cashier data
In the tab Cashier data you can consult/modify the settings concerning the use of the POS by your employee.
Configuration
In the tab Configuration you can define the default settings of the employee for working with the POS.
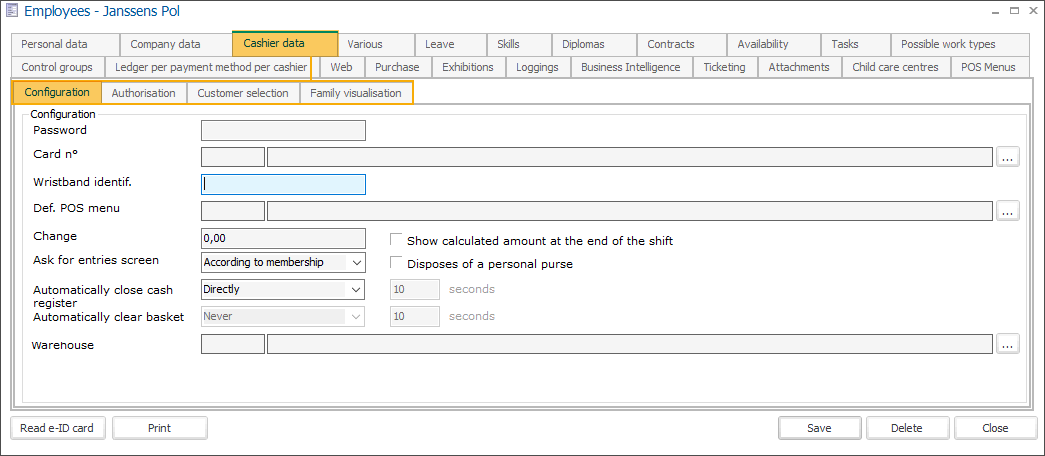
Password | This is the code the employee has to fill in to start a POS shift. This code can only consist of ciphers. This code is asked for if the option Identification by PIN Code is active in the POS parameters. | |
Card n° | This is the number of the card that is linked to the employee. If the option Identification by card is active in the POS parameters, the cashier will be able to connect to the POS module by scanning his/her card. | |
Wristband identif. | This value is only required if wristband identification numbers are really used. Currently, wristbands are linked to Cards within the Recreatex system. | |
Def. POS menu | If you select a certain POS menu here, this menu will be suggested by default if this employee starts up the POS. | |
Change | This is the default amount of change of which the current cashier disposes. | |
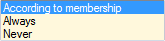
Ask for entries screen | This selection allows you to determine whether the sessions screen of a membership has to be called up.
If you select According to membership, the setting of the sold article will be respected. (see also manual Articles) | |
Automatically close cash register* | This selection allows you to determine if the POS has to be closed automatically after a sale or not. There are 3 configuration options:
| |
Automatically clear basket | To be able to activate this setting, first set Automatically close cash register* to Never
This functionality is not available when working with a table plan (standard and modern POS menu layout). | |
Show calculated amount at the end of the shift | If you tick off this option, the calculated amount will be visualised if the POS shift is closed. | |
Disposes of a personal purse | If you tick off this option, the POS shift is saved per cashier and not per cashier per point of sale. This is commonly used for catering, where each employee disposes of his/her own purse and several points of sale and only 1 POS shift per employee is used. | |
Warehouse | If it is advisable to update the current stock after each sale, you can fill in the warehouse of which the current stock has to be updated, for example catering, ... |
Authorisation
In the tab Authorisation you can determine which actions can be done by the employee (cashier) within Recreatex backoffice modules (General, Bookings) and when using POS (cash register), mPOS and mStock.
POS
In this tab, you can find all authorisation options related specifically to the POS (cash register).
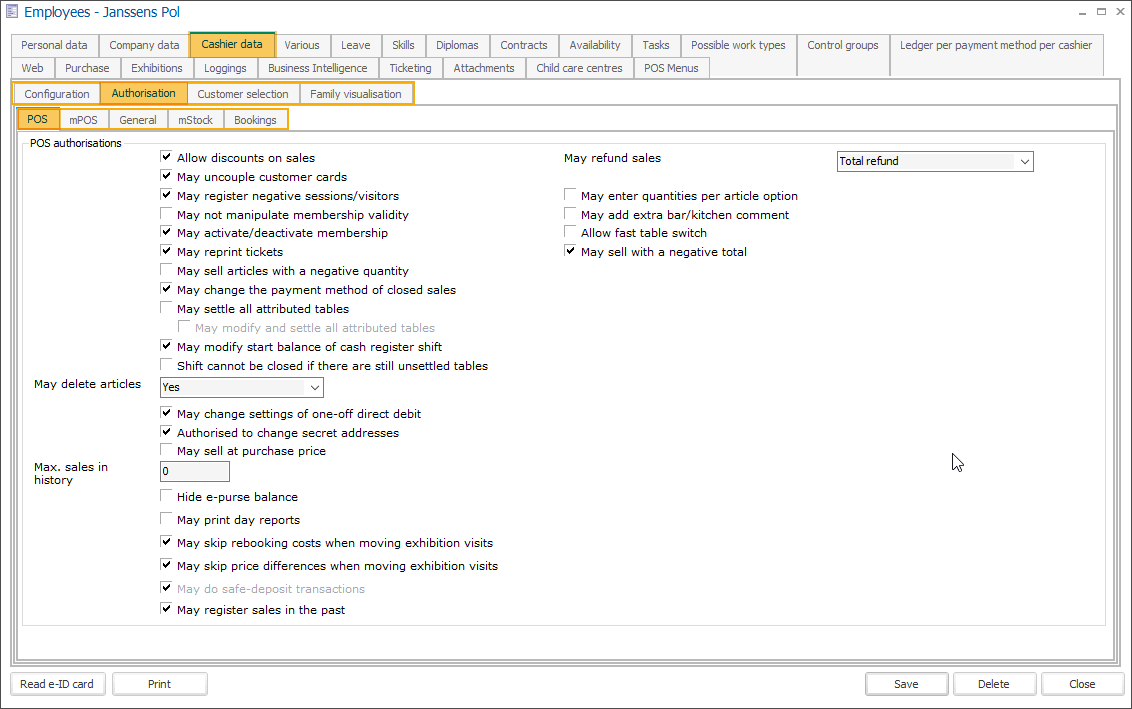
Allow discounts on sales | If this option is ticked off, the cashier can allow discounts on sales. WarningThe possibility to allow discounts on sales also depends on the point of sale settings. (see Sales and POS - Use) | |
May uncouple customer cards | This option allows you to determine if the employee may uncouple customer cards or not. | |
May register negative sessions/visitors | This option allows you to determine if the cashier may revalue x sessions and visitors after a sale without having to register a sale. Such actions can indeed always be found in the manipulations of the membership. | |
May not manipulate membership validity | This option allows you to determine if the cashier may modify membership validity after or during the sale. | |
May activate/deactivate membership | This option allows you to determine if the cashier may activate/deactivate a membership or not. | |
May reprint tickets | This option allows you to determine if the cashier pay reprint POS tickets or not. | |
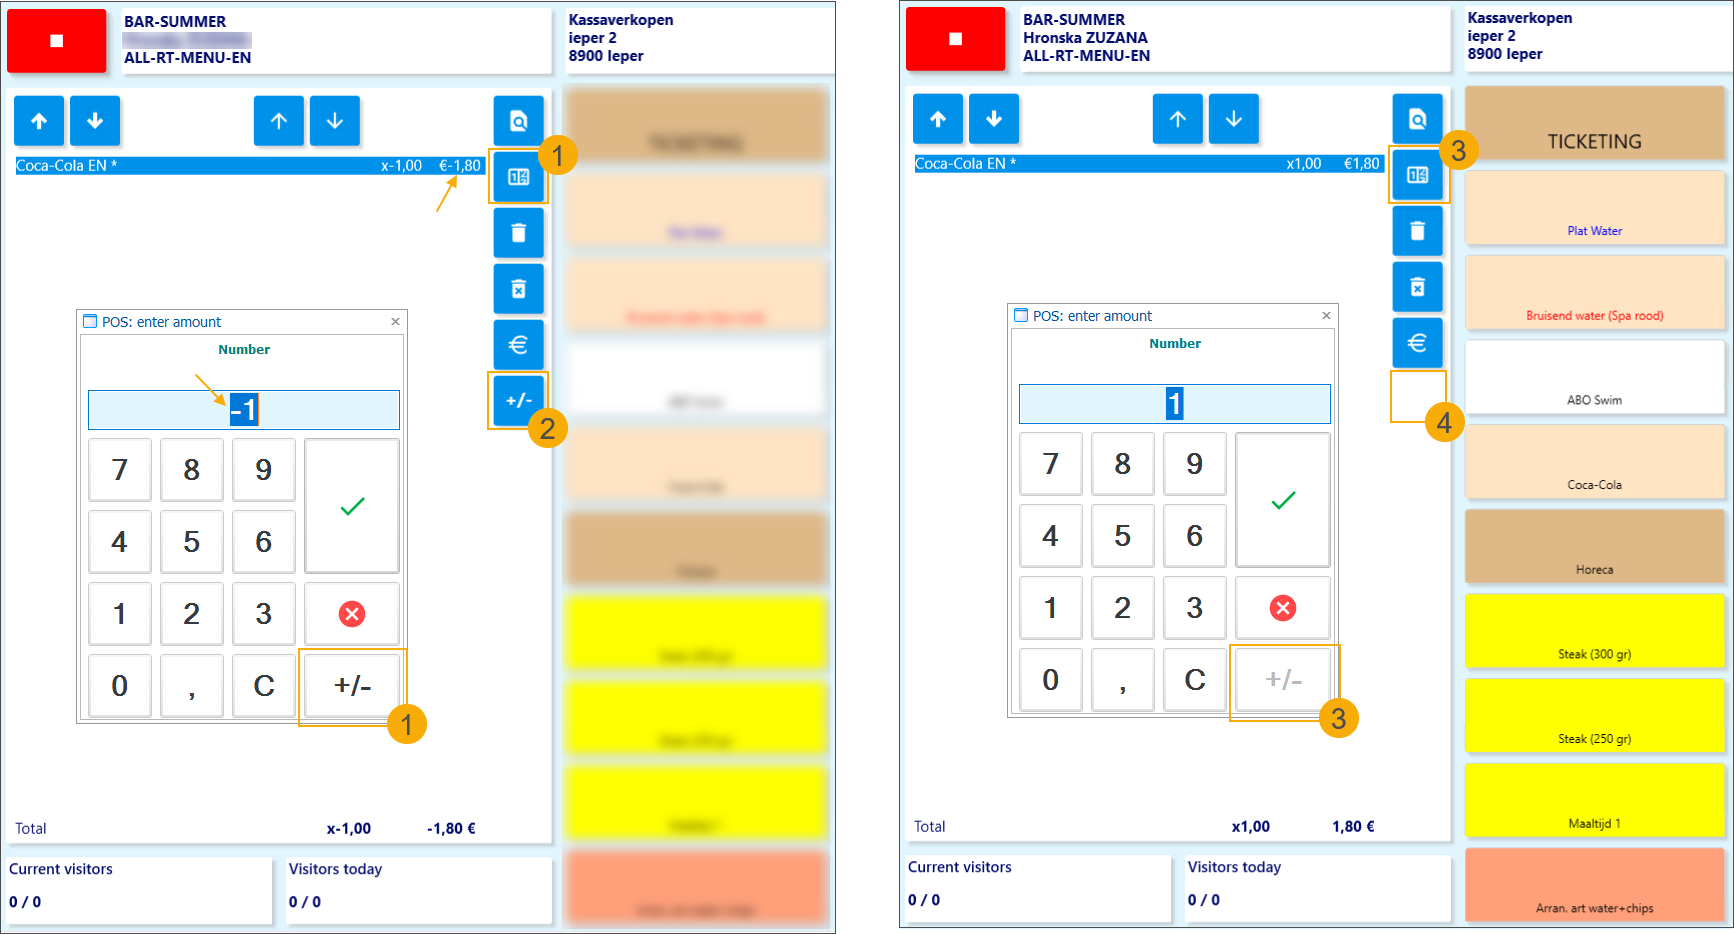
May sell articles with a negative quantity | This option allows you to determine whether the cashier may sell articles with negative quantity or not.
 | |
May change the payment method of closed sales | This option allows you to determine if the cashier may change the payment method of previous sales or not. | |
May settle all tables | This option allows you to determine if the cashier may settle tables that are attributed to other employees or not. | |
May modify and settle closed tables | This option allows you to determine if the cashier may modify and settle tables that are attributed to other employees or not. WarningThe possibility to settle and modify attributed tables also depends on the general POS parameters. (see POS - Management manual) | |
May modify start balance of cash register shift | This option allows you to determine if the cashier may modify the start balance of the POS shift or not. | |
Shift can not be closed if there are still unsettled tables | This option allows you to determine if the cashier may close his/her POS shift or not if there are still unsettled tables. | |
May delete articles | This option allows you to determine if the cashier may delete articles that have already been selected from the list of chosen articles.
| |
May change settings of one-off direct debit | This option allows you to determine if the cashier may change the start period, the frequency and the number of withdrawals in case of sales with payment method direct debit. | |
Authorised to change secret addresses | This option allows you to determine if the cashier may change the data of a customer that has been defined as secret address. | |
May sell at purchase price | This option allows you to determine if the cashier may register sales at the purchase price. | |
Max. sales in history | This option allows you to determine how many sales the cashier can consult by clicking on the button Sales overview. | |
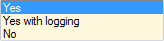
May refund sales | Specify, whether the cashier may refund sales or not:
| |
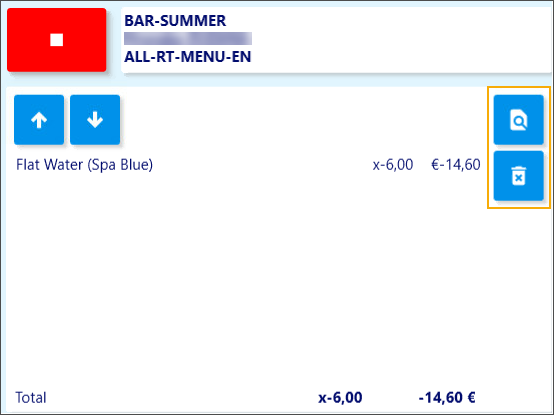
May sell with a negative total | If this setting is active, the cashier is allowed to process sales that have a negative total amount. ImportantThe setting May sell articles with a negative quantity must be active to allow the cashier to add articles with a negative quantity to the basket. If deactivated, a blocking message will be displayed (2) when the cashier clicks the Pay button (1) at the POS. 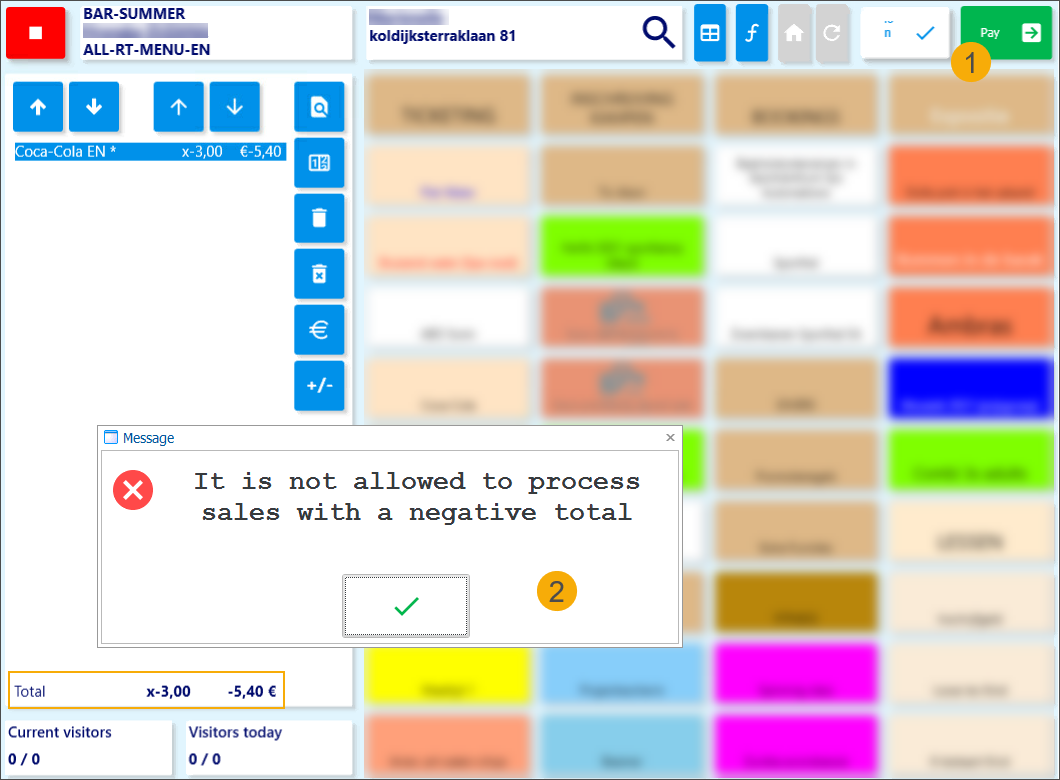 Default: active TipIf deactivated and combined with the active setting May sell articles with a negative quantity (active), you can allow the cashier to add articles with a negative quantity to the basket but only as long as the total amount remains positive. 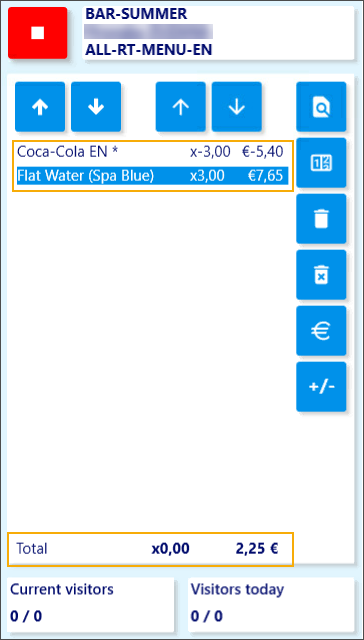 This can be useful if you want to allow to make corrections but prevent the cashier from taking money from the cash register. |

Customer selection
In the tab Customer selectionyou can determine if the chosen employee has to use the simplified customer screen or not (see manual 'POS -Use'POS - Use).
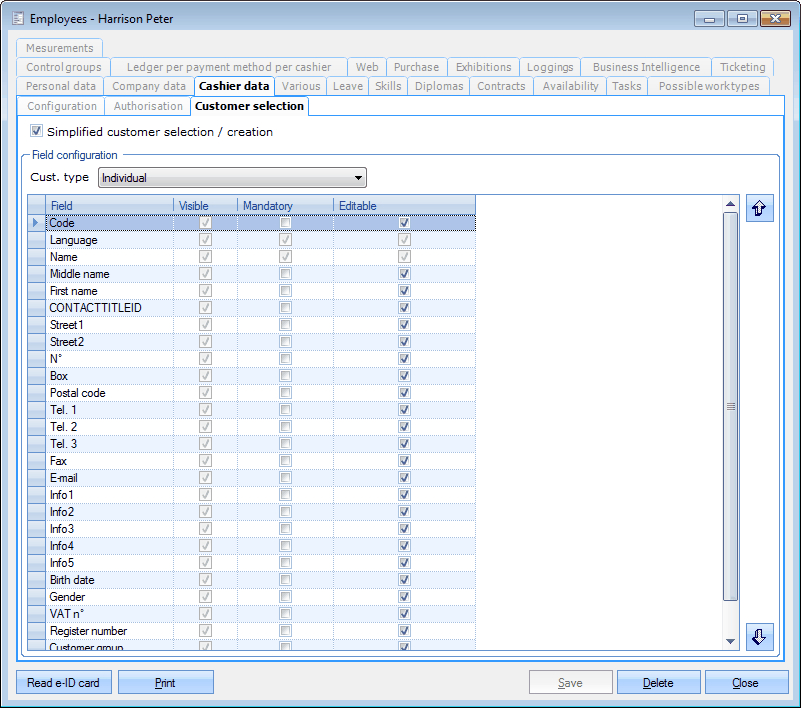 |
In the section Field configuration you can determine for each address type which fields have to be shown in the simplified customer screen, define which of these fields are obligatory and if these fields can be modified by the cashier or not (column Editable).
Warning
Defining certain fields as obligatory or not only influences the simplified customer screen. In other places in Recreatex the obligatory fields have either been internally determined by the software, either by your system administrator (in SydAdmin).
The fields indicated as obligatory here, consequently neither influence the fields that may have been defined as obligatory on customer group level (see manual 'GENERAL - Customers'Customers).
Various
In the tab Various you can import a picture of your employee and define his/her knowledge of languages. The knowledge of languages is used in function of task planning, mainly in the files module, where you will be able to filter available employees on the basis of their language knowledge in the files wizard.
 |
Warning
If the employee is linked to a customer card, you will only be able to change/import the picture in the customer card itself.
Leave
In the tab Leave you can indicate the days of leave of your employee.
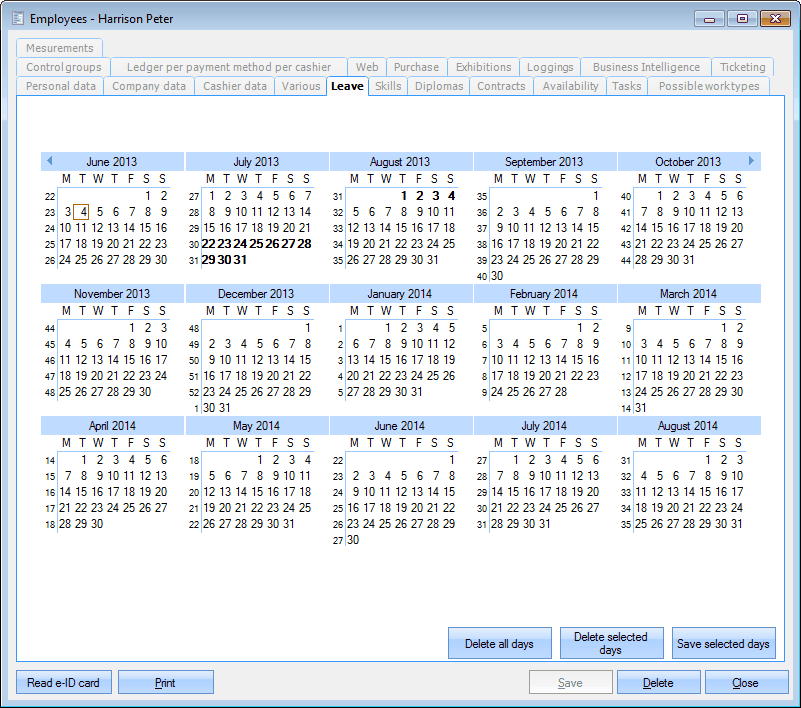 |
You can do this by clicking on the days of leave in question, followed by Save selected days. Saved days of leave are marked in bold.
Note
If you continue pressing the <Shift> button while selecting 2 non-consecutive days, the period in between the days will also be selected.
If you continue pressing the <Ctrl> button, you can select several non-consecutive days by clicking on them.
A period of consecutive days can also be selected by clicking on the left mouse button and by dragging the cursor over several days.
Skills
In the tab Skills you can indicate the skills your employee has.
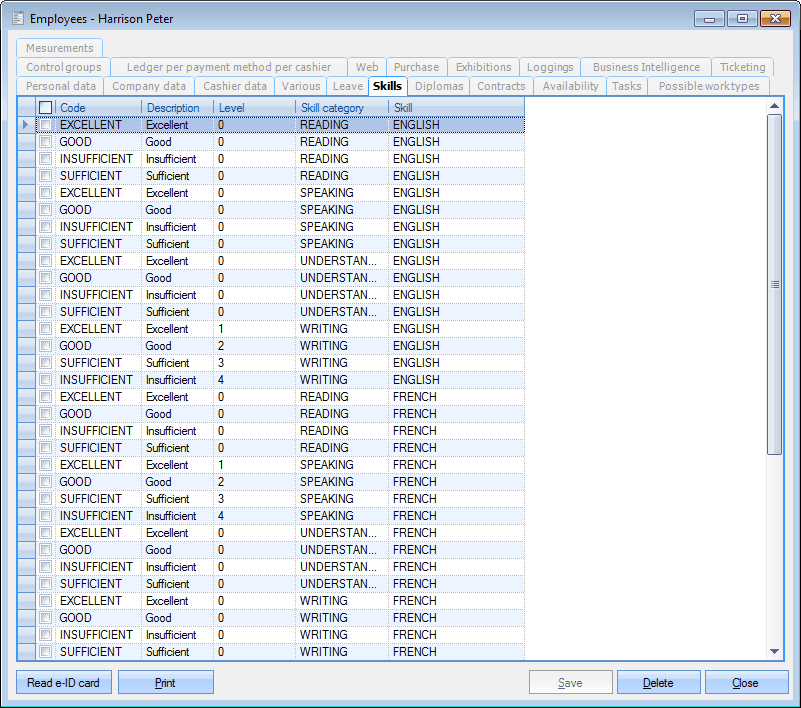 |
Skills can be linked by ticking off the selection box in question.
Diplomas
In the tab Diplomas you can indicate of which diplomas your employee disposes.
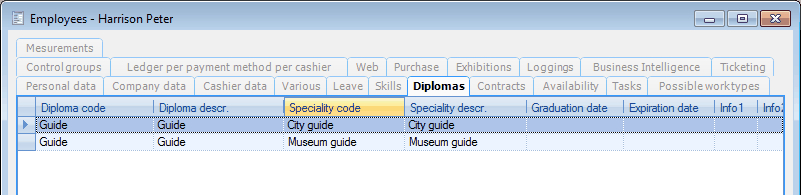 |
You can create, modify or delete diplomas at all times.
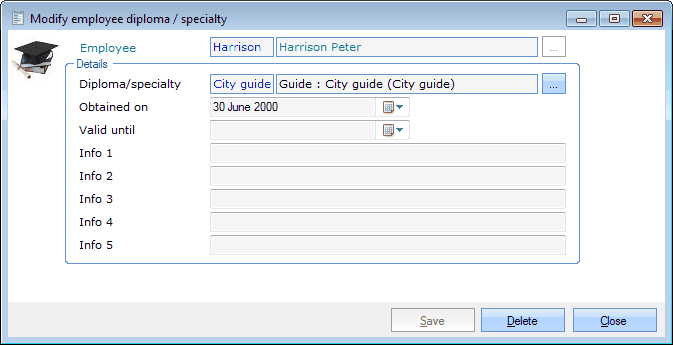 |
Diploma/specialty | Here you can select the diploma obtained by the chosen employee on the basis of the chosen specialty. |
Obtained on | The date on which the chosen employee has obtained the chosen diploma. |
Valid until | Here you can define until when the diploma obtained by the chosen employee is valid. |
Info | These are additional information fields. |
Contracts
In the tab Contracts you can define which contracts have been entered into with the employee.
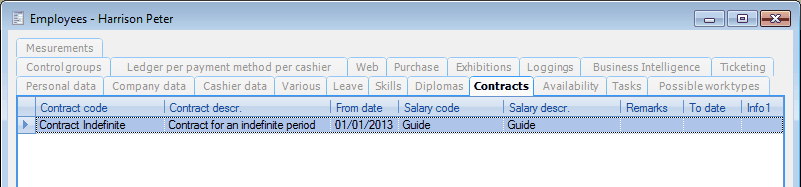 |
You can add, modify or delete contracts at all times.
Tab General:
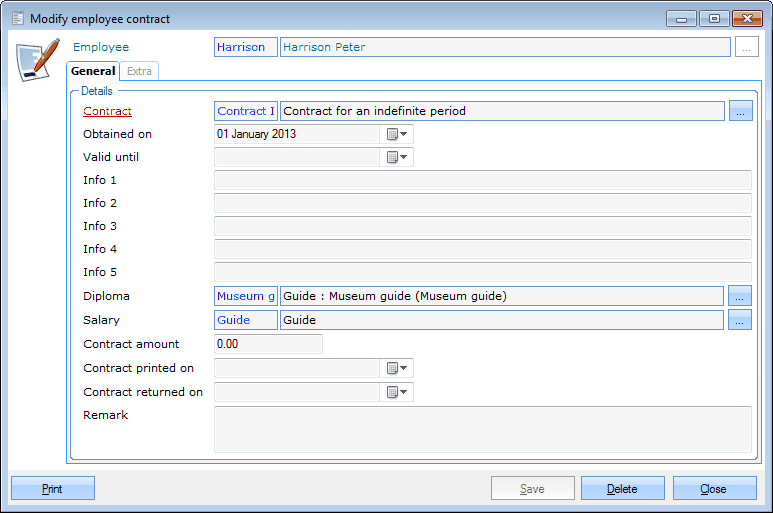 |
Contract | Here you can determine which contract has been entered into with the employee. |
Obtained on... Valid until... | The period during which the chosen contract is valid/applicable. |
Info | These are additional information fields. |
Diploma | The diploma linked to the chosen contract. |
Salary | The salary agreed upon, linked to the chosen contract. |
Contract amount | The amount that will be paid to this employee if he/she executes the current contract. This setting is generally used for contracts that are not linked to a salary, for example with an external collaborator. |
Contract printed on | The date on which the contract has been printed. |
Contract returned on | The date on which the contract has been returned. |
Remark | If required, you can add remarks concerning the contract. |
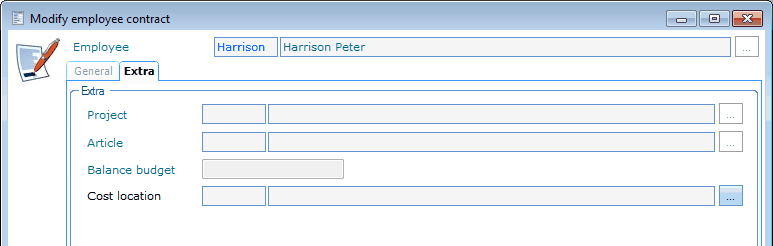
Tab Extra:
The tab Extra is only relevant if the functionality Production planning (module Ticketing) is used. See manual Production planning (available on demand).
 |
Availability
If you have decided for the current employee to Work with availability per day (setting in the tab Company data), the tasks of this employee will be planned in function of the availability instead of the work shift.
In the tab Availability you will see a list of the days on which the employee is available.
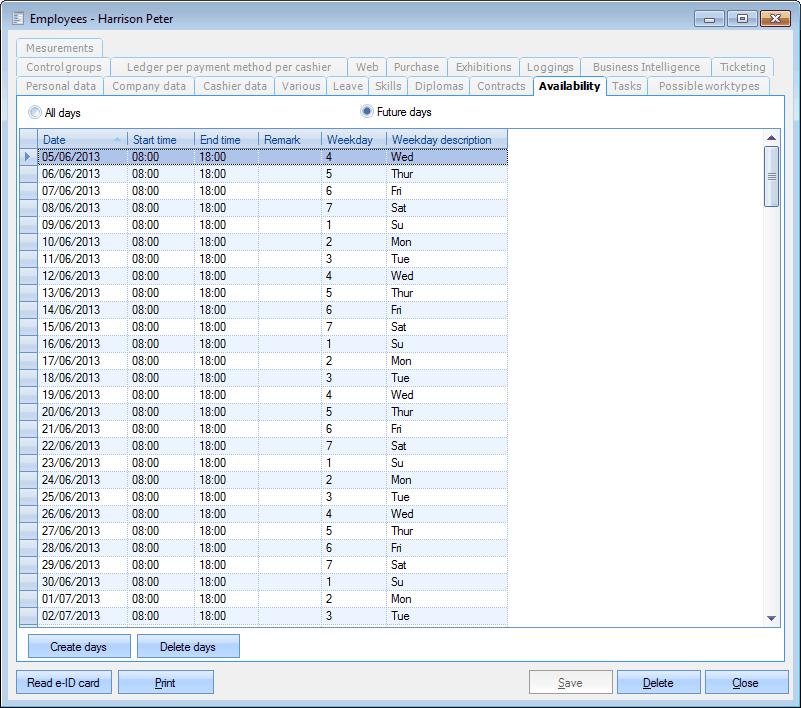 |
Initially, only the future days (including the current day) are listed, but you can also choose to list all available days.
If you want to add available days, you have to click on Create days.
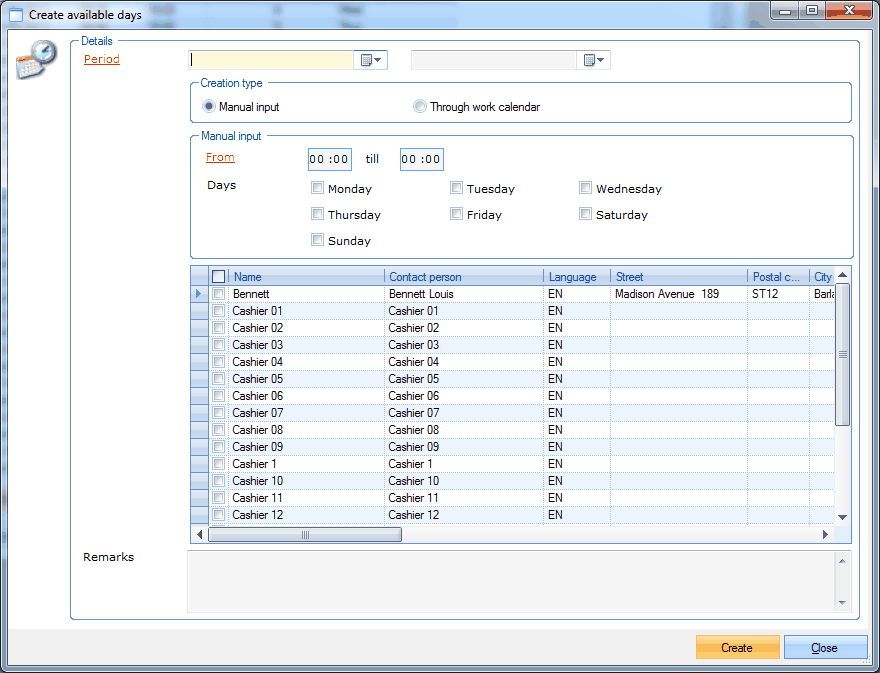 |
Period | You can create available days within a defined period by choosing an end and a start date. |
Creation type | Here you can choose to generate the available days on the basis of a Manual input or Through a work calendar. In case of Manual input you can determine the days and hours yourself in the part Manual input, and in case of input Through work calendar the available days are generated on the basis of the work shift that is currently linked to the employee (tab Company data). |
Manual input | If you have chosen for Manual input as Creation type you can define the available hours and days here that will be generated. |
Employees | The current employee is ticked off by default in the overview of employees. If you wish so, however, this overview also allows you to select other employees for whom the same availability days have to be created. |
Remarks | If you wish so, you can add remarks to the available days. |
If you have defined the period, you can click on Create to generate the list of available days.
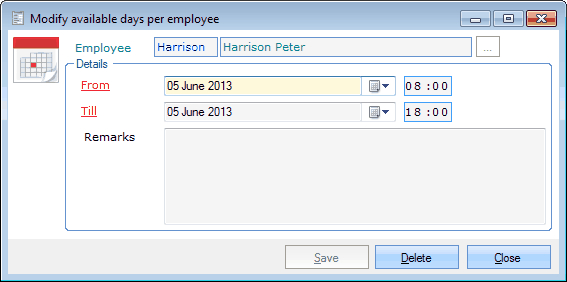
In the list of available days, you can also manually create, modify or delete days.
(see manual 'FRAMEWORK'Framework)
 |
Note
If you want to delete several created periods (days), you can click on Delete days in the tab Availability. Next you will be able to define the periods to be deleted, in accordance with generating periods using Manual input. Do take into account that the system will only delete the periods that exactly meet the given criteria.
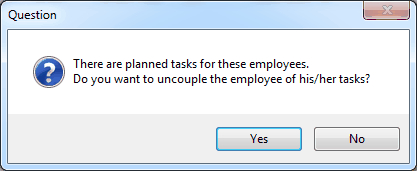
If you add or delete availability days, the system will first check if tasks have already been planned for the employee. If yes, you will be able to disconnect these tasks from the employee.
 |
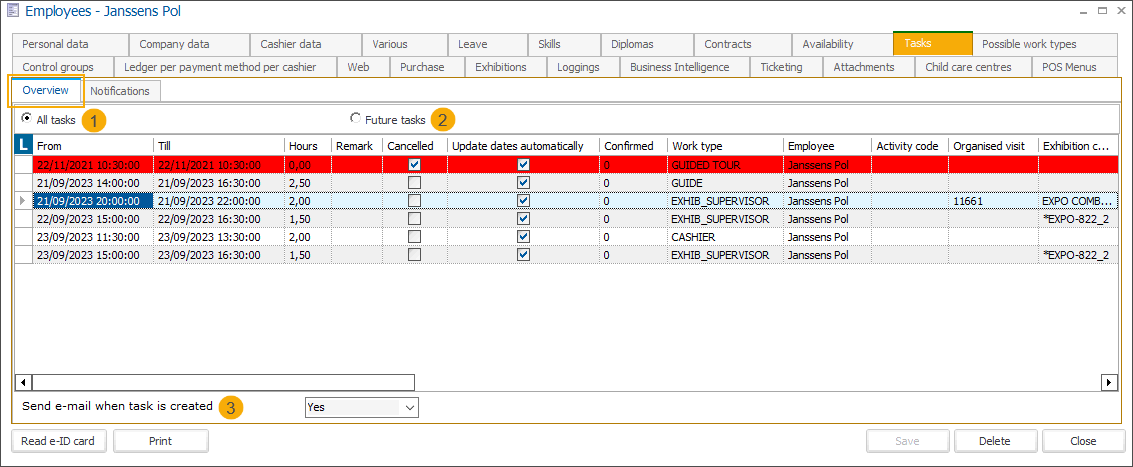
Tasks
In the tab Tasks you find an overview of all tasks that have been attributed to the current employee.
In the subtab Overview, you can choose to display All tasks including the expired ones (1) or only display Future tasks including the current day and later (2).
Below the overview of tasks, you can also indicate if an e-mail has to be sent to the employee in question if a task is created (3).
Note
If needed, you can modify a certain task in the overview by double-clicking on that task, or by clicking on the task, followed by <Enter>.
For more information on task planning and management see Task planning.
Possible work types
In the tab Possible work types you will find an overview of all possible work types for which the employee is qualified.
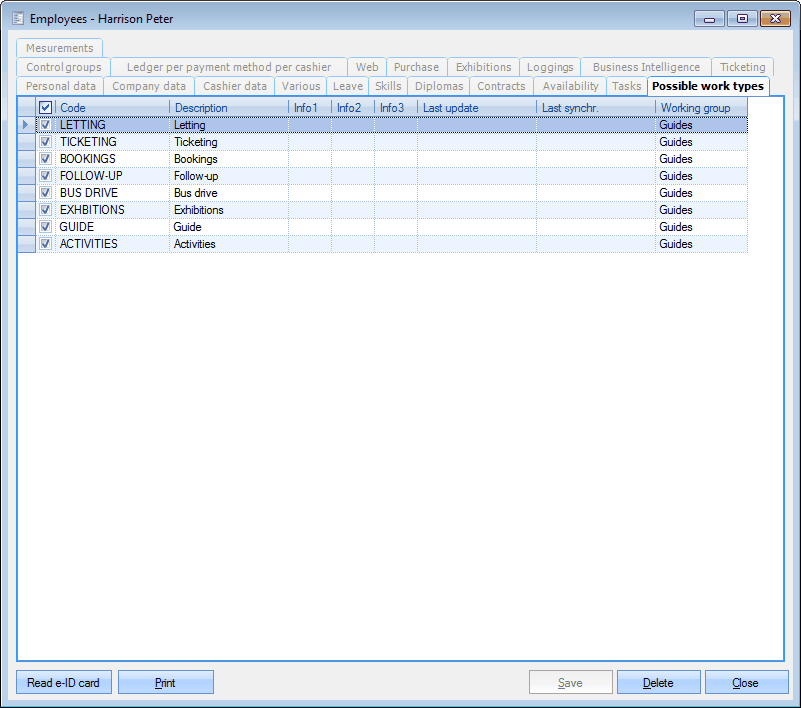 |
Here you can determine (tick off) for which work types the current employee qualifies and can be called up. The possible work types are taken into account when planning tasks.
Control groups
In the tab Control groups you will find an overview of all possible control groups for which the employee can be responsible. Control groups are only used if one works with the Recreatex control mechanism (for example in the modules Files, Web: Scenarios, Purchase and Ticketing).
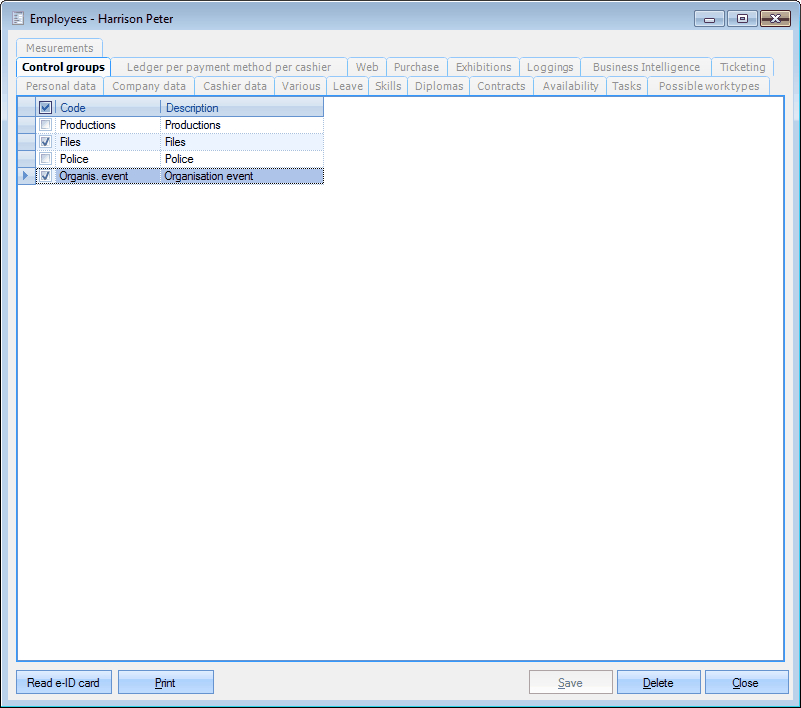 |
Here you can determine (tick off) for which control groups the current employee can be called up. This selection is then taken into account in the different control processes in Recreatex.
Ledger account per payment method per cashier
In the tab Ledger per payment method per cashier you can simply define a ledger account number for the current cashier (employee) and payment method.
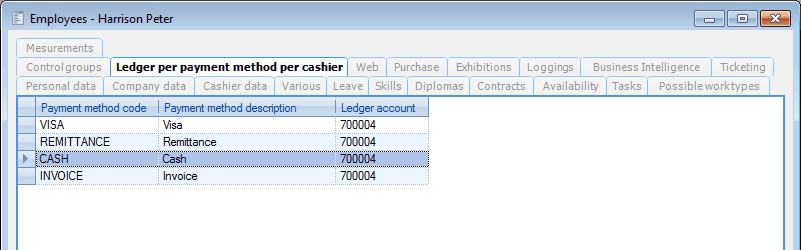 |
You can create, modify or delete ledger accounts per cashier at all times.
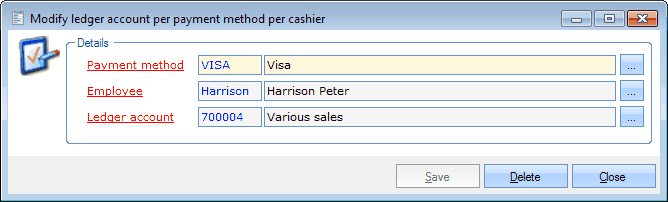 |
Payment method | The payment method to which you want to link a ledger account number. |
Employee | The employee to which you want to link a ledger account number. |
Ledger account | The ledger account number you want to link to the chosen employee and payment method. |
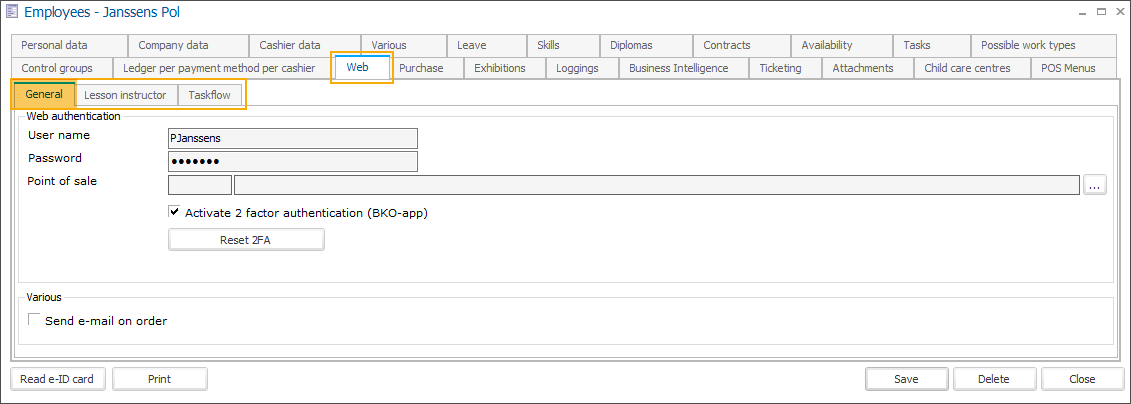
Web
In the tab Web you can create a login and a password with which the current employee can have access to the different online modules of Recreatex. If required, you can also link the employee to a default (web) point of sale.
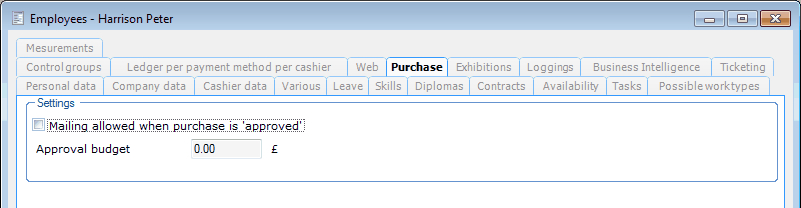
Purchase
In the tab Purchase you can determine if the employee will receive an e-mail or not if his/her order form (module Purchase required) has been approved. If you want to you can also link a default approval budget to the employee (in function of the control process in the module Purchase).
 |
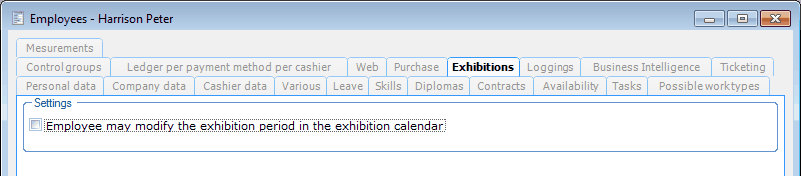
Exhibitions
In the tab Exhibitions you can define if the current employee may modify exhibition periods in the exhibition calendar or not. (module Exhibitions required)
 |
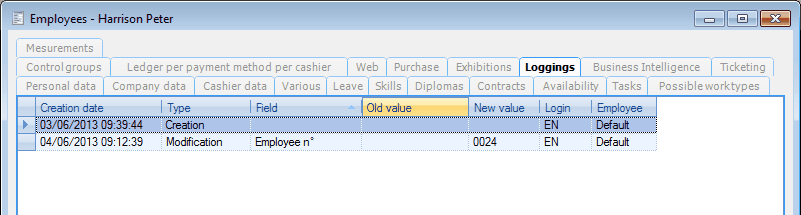
Logging
In the tab Loggings you will find an overview of all registered modifications of the employee data.
 |
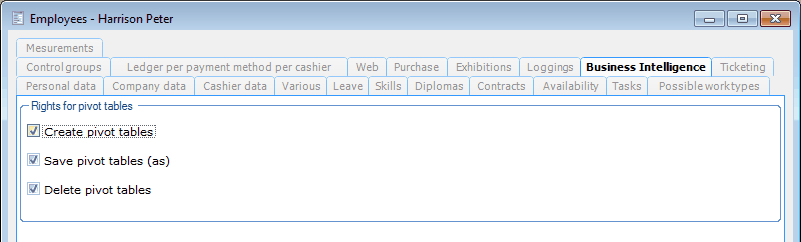
Business intelligence
In the tab Business Intelligence you can define which rights are attributed to the current employee in function of the Recreatex module Business Intelligence.
 |
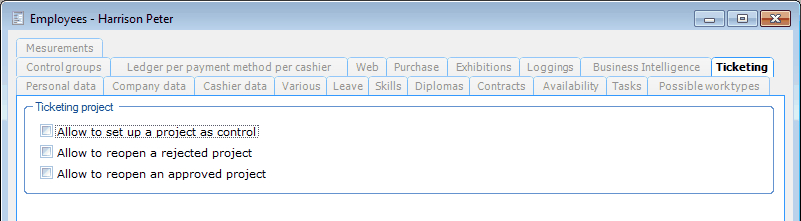
Ticketing
In the tab Ticketing you can define which rights are attributed to the current employee in function of the Recreatex module Ticketing, more specifically on the level of production planning.
 |
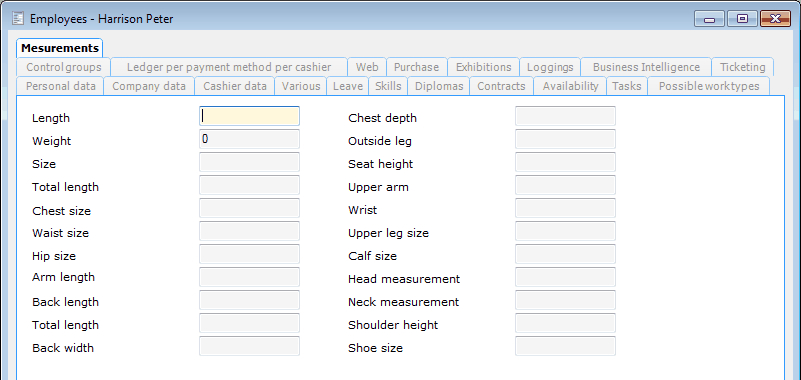
Measurements
In the tab Measurements the sizes of the clothes of employees can be filled in. These sizes are mainly used for the link with the production planning in the Recreatex module Ticketing (for example for theater costumes), but can for example also be used for keeping sizes in function of work clothes.
 |