Membership
Note
The functionalities described in this chapter only apply if you have a license for the Membership module.
In this part the integration of memberships in the Recreatex POS is explained, such as the sale, renewal, transfer/copy and disconnection of membership cards.
Membership sales
Selling a membership article (for example a 50 sessions card) is equal to a Separate sale. In case of membership articles, however, the system will often ask you to specify a sales customer and to link a card to the membership sold.
After the selection of the desired article, for which a sales customer is required, the following message will appear:
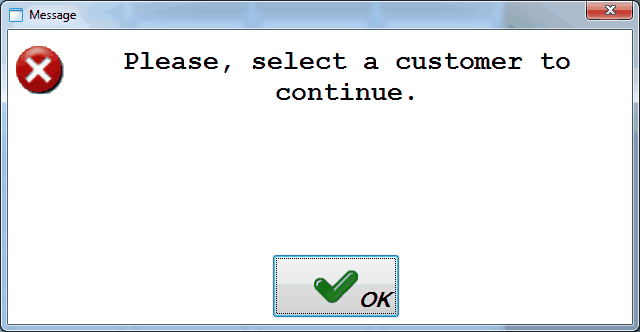 |
If you click on  you can select the desired Sales customer(see also 'Register a sale > Sale with obligatory sales customer'), after which the selected article is added to the list of chosen articles.
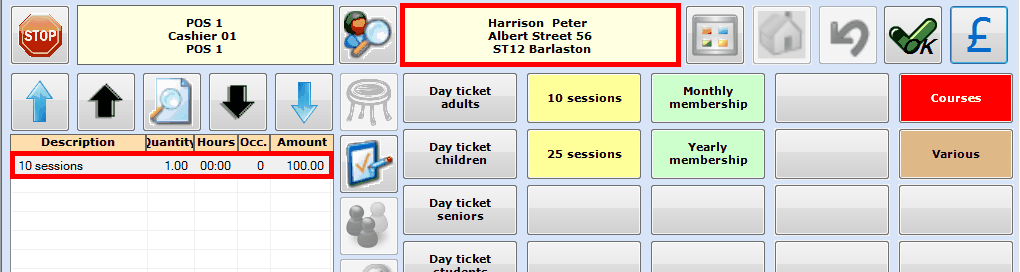 |
In order to finish the membership sale, you have to click on  in the selection screen or press <Enter> to continue to the payment screen.
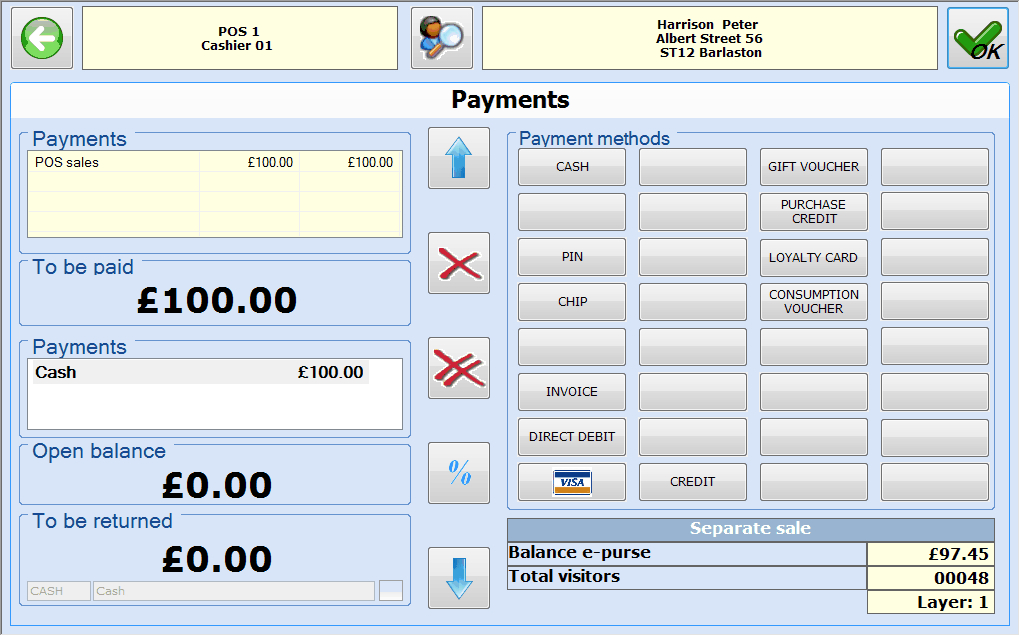 |
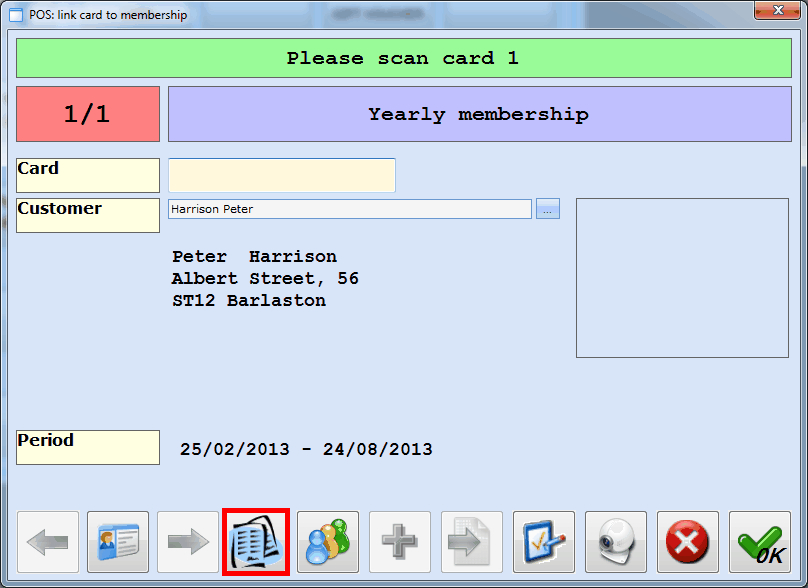
Once the financial part has been finished, you still have to link a card to the sold membership article. For this purpose the window POS: link card to membership will appear after you click on  or press <Enter>.
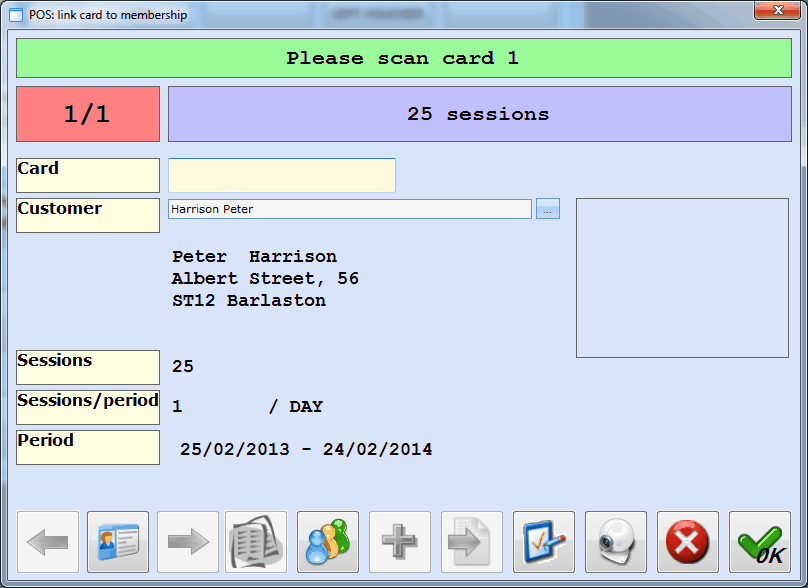 |
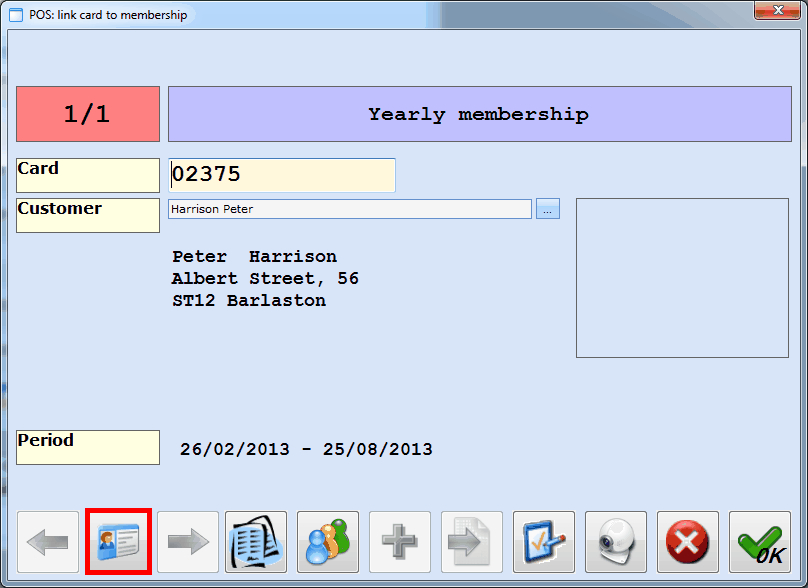
If this window appears, the desired customer card can be scanned and the scanned card number will be visualised in the same window.
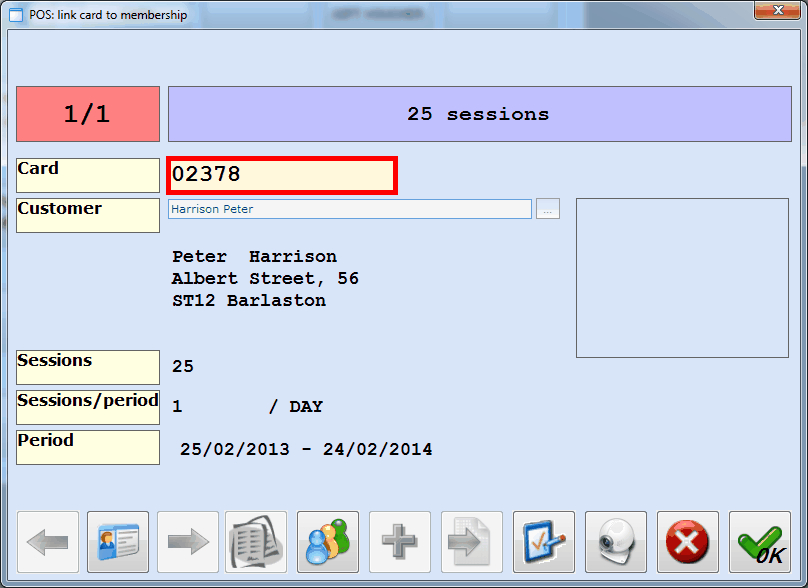 |
Click then on after which the sale will be registered, the membership created and a receipt printed.
If several membership articles have been selected in the selection screen, the system will either (dependent on the parameter settings) automatically go to the next membership after scanning the card, or you will either be able to select the next membership by clicking on  .
.
Note
It is possible to link several membership articles to the same card by each time scanning the same card. (see also Next membership same card)
Take picture
If you sell a membership article, you can also take and save a picture of the sales customer (or modify the existing picture) using the available Webcam by clicking on  in the window POS: link card to membership. (license Integration Webcam required)
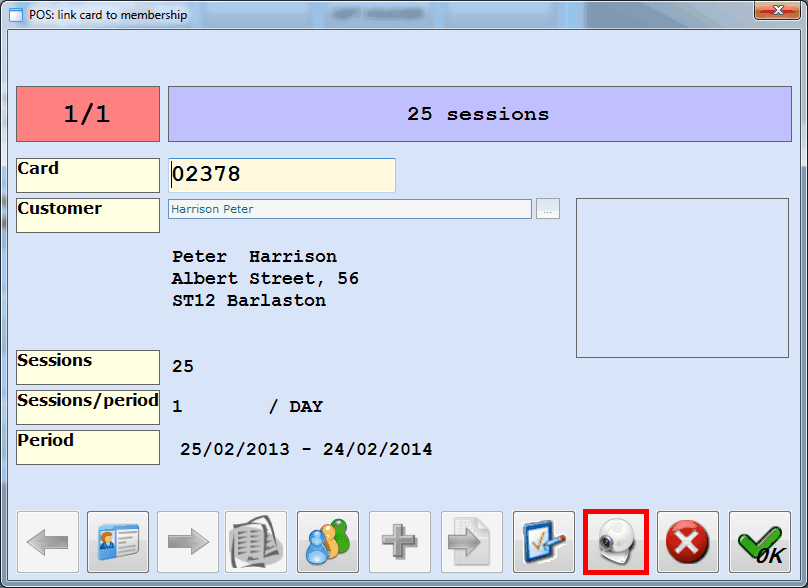 |
The window Take picture will appear allowing you to take a picture of the sales customer by clicking on  and then on .
The saved picture will be visualised in the window POS: membership info and also saved in the customer card of the customer in question.
 |
Membership details
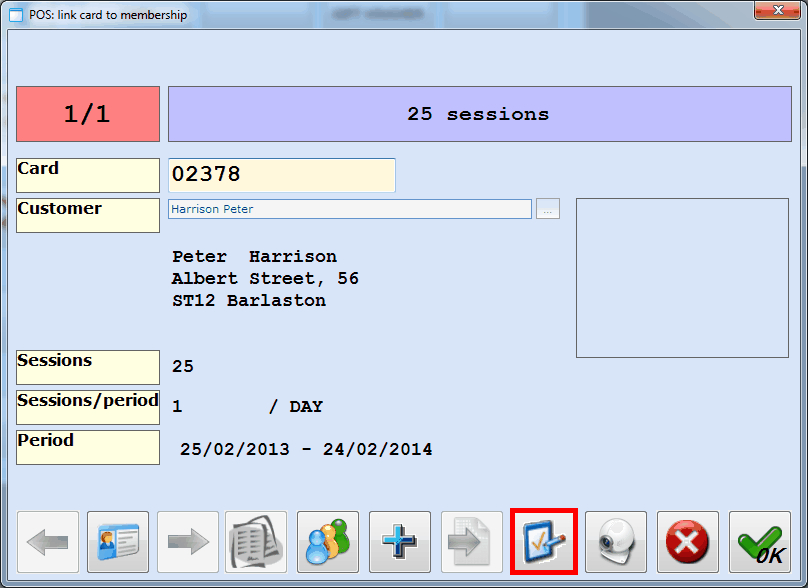
If you want to call up the details of the current membership, you can do so by clicking on  in the window POS: link card to membership.
 |
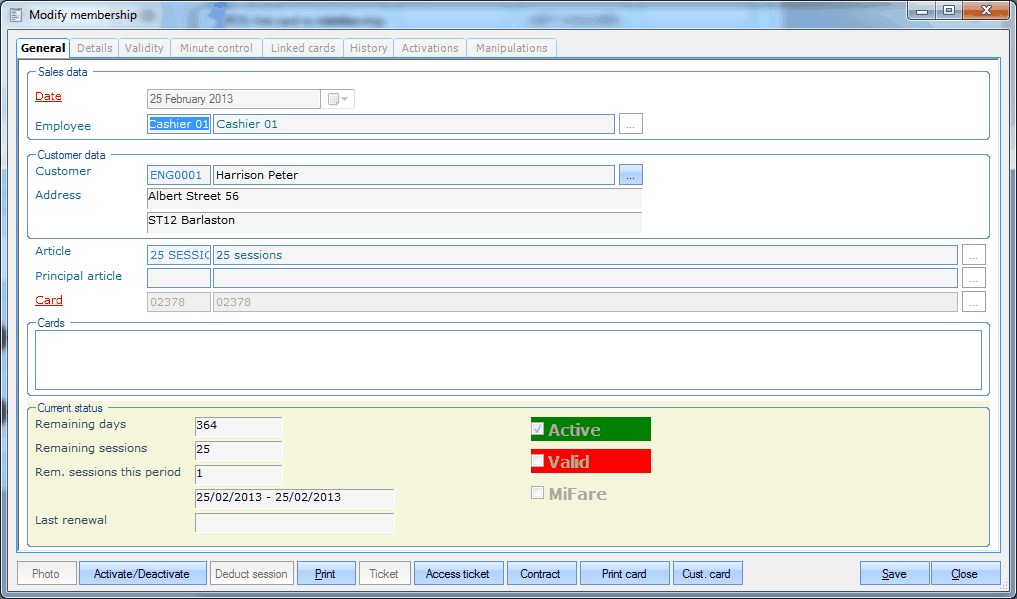
The window Modify membership will appear in which you can, if required, make changes.
 |
Note
A more detailed explanation of this window can be found in the manual 'MEMBERSHIP'the chapter Membership.
If you close the window Modify membership, the window POS: link card to membership will reappear.
Next membership same card
In Recreatex it is possible to link several membership articles to the same card. (license Multi membership required)
One way to do this is by repeatedly scanning the same card when linking different membership articles in the window POS: link card to membership. (see Membership sales)
It is, however, also possible to scan a card and to link all other membership articles to the scanned card in one go by means of the button  .
.
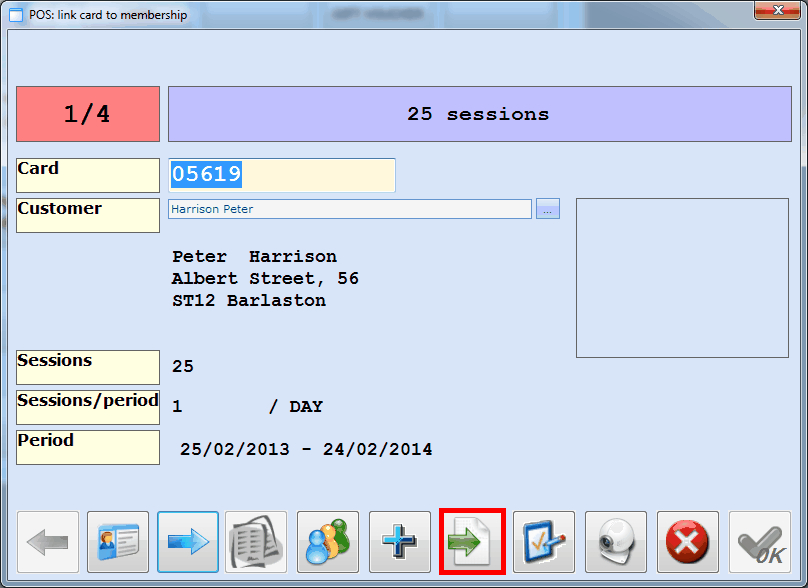 |
Dependent on the parameter settings, you can do this in two different ways:
If the Recreatex parameters have been set up to go automatically to the next membership after scanning a card in the window POS: link card to membership, you first have to click on
 to return to the previous membership article and then click on to link all other membership articles to the card already scanned.
If the Recreatex parameters have been set up NOT to go automatically to the following membership article after scanning a card in the window POS: link card to membership (and thus stays on the current membership), you can immediately click on
to link all remaining membership articles to the card already scanned.
If you click on all chosen membership articles are immediately linked to the first scanned card and the system will automatically navigate to the last membership article selected in the window POS: link card to membership.
 |
Renew membership
If you sell a membership article and scan a card that has previously already been linked to the same sales customer and the same membership article, the message below will appear:
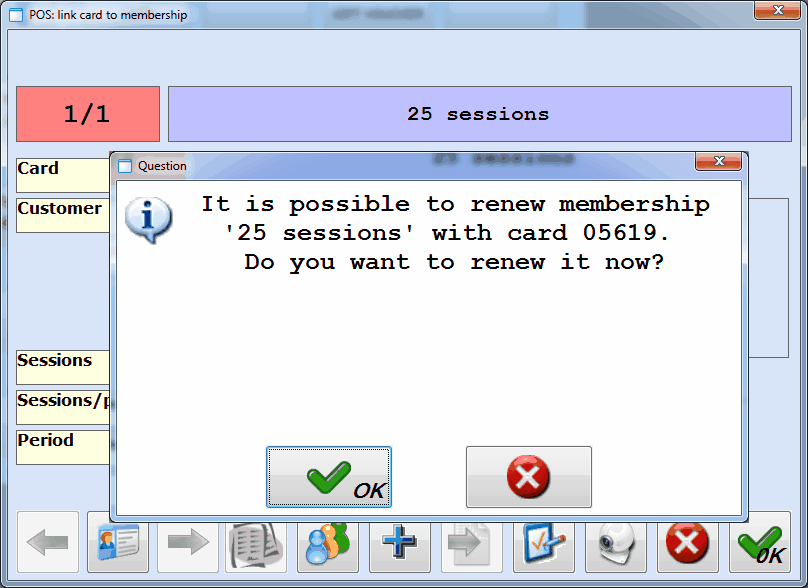 |
If you answer on the question above, the extra mention RENEWAL will appear as you can see in the window below and if you click on the sale will be registered, the membership renewed and a receipt printed.
 |
If you answer  on the question for renewal, and if you click then on , the membership already linked will NOT be renewed and the new membership article will be linked to the card as an extra membership. (license Multi membership required)
Warning
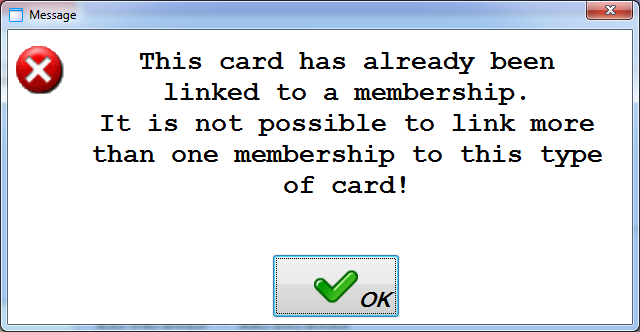
If you do not dispose of the license Multi membership it is not possible to link several membership articles to the same card and the message below will appear:
 |
If you answer on the question for renewal but still want to renew a membership previously linked to the same card with the new membership article, you can do so by clicking on  . If several membership articles that can be renewed are already present on the scanned card at renewal, the window below will appear in which you can indicate the desired membership and click on to indicate which membership you want to renew.
 |
Add extra card
If you sell a membership article and want to link several cards to the membership, you have to click on  in the window POS: link card to membership.
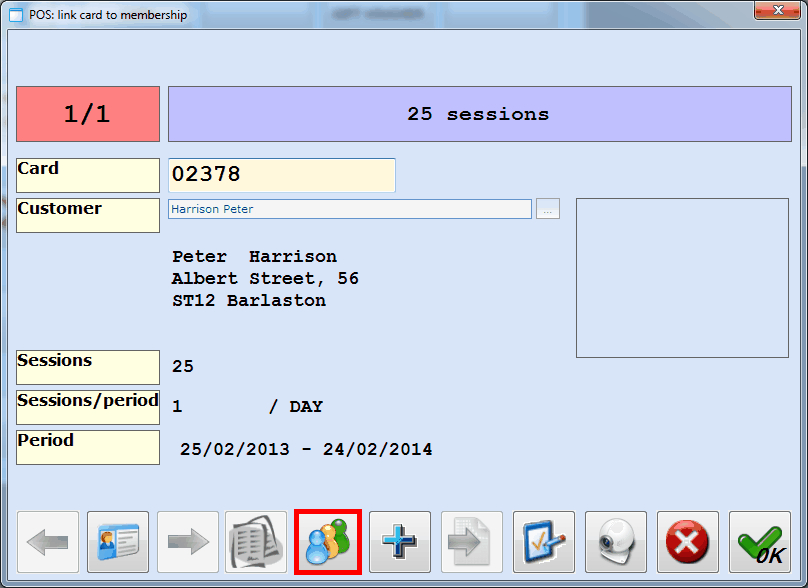 |
The window POS: add extra card will appear allowing you, as indicated, to scan or manually enter the new card(s) one by one.
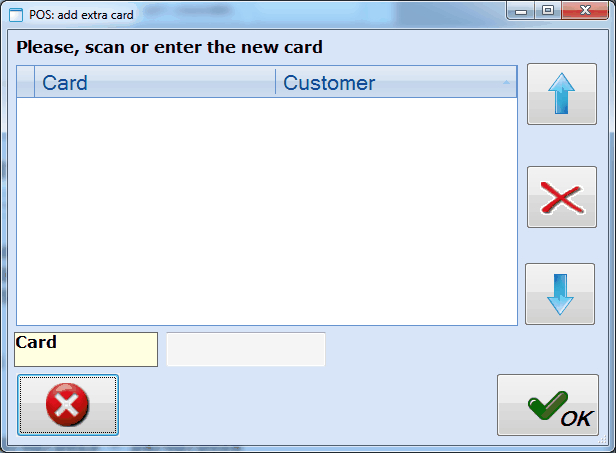 |
Each time a (new) card is scanned, the message below will appear allowing you to link the (new) card to the same (current) sales customer or to link it to a new customer.
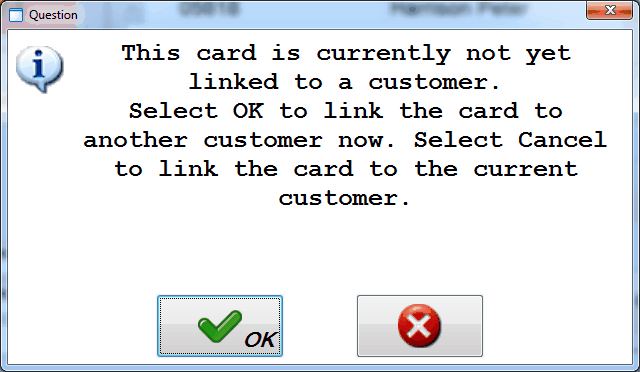 |
Note
If a card is scanned that has already been linked to a customer, the message above will not appear and the current card holder will be taken.
If you have scanned all extra cards, all of them will be visualised in the window POS: add extra card and you will be able to click on to return to the window POS: link card to membership.
Direct debit processing
If you have chosen a membership article with Direct debit processing, you can call up the direct debit contract by clicking on  in the window POS: link card to membership.
 |
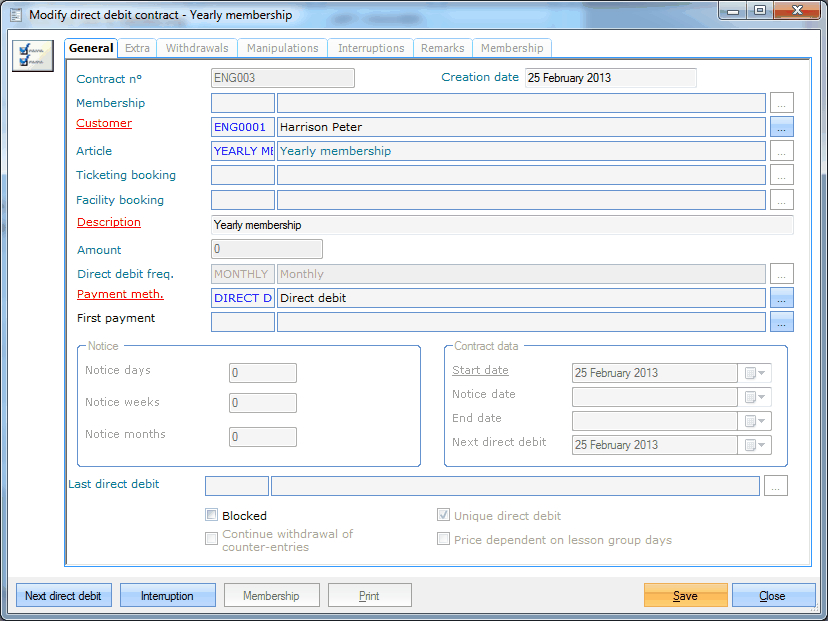
The window Modify direct debit contract will appear in which you can, if required, make changes.
 |
Note
A more detailed explanation of this window can be found in Incassothe manual 'DIRECT DEBIT'.
If you close the window Modify direct debit contract, the window POS: link card to membership will reappear.
Print card
If cards are printed by the infrastructure itself, you can immediately print a card when linking a card to a membership.
In order to print a card for the selected sales customer, you have to click on  in the window POS: link card to membership. (module Integration with card printer required).
 |
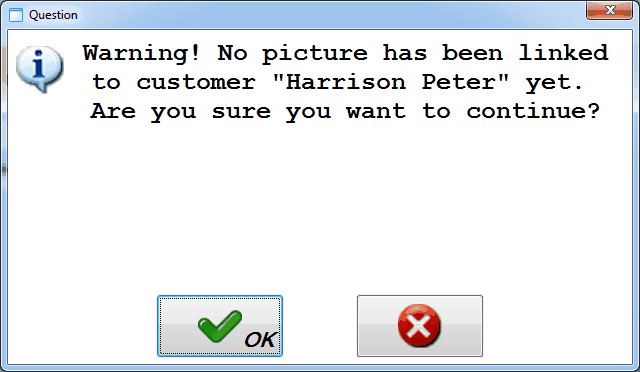
If a picture/image has already been linked to the selected customer, the customer card is printed on the appropriate printer. If, however, no picture/image has been linked yet to the selected customer and if it has been defined in the membership parameters that in such cases a message has to be given, the question below will appear allowing you, if required, to print the customer card anyway.
 |
Correction or refund of a membership
The registration of a correction or refund of a membership article is done in the same way as a correction or refund of a regular article (see General > Registration of a correction or refund), in which case a "negative" sale is in fact registered for the membership article that has to be reversed. In this case as well, you can do this by entering a negative number (via ), changing the amount into a negative one (via  ), or by cancelling the entire sale (via Sales overview).
 |
Further settlement is done in the same way as described under Membership sales.
If the financial part has been finished, a membership article still has to be deleted from a card. For this purpose, the window Select membership to be deleted will appear after you have clicked on or pressed <Enter> in the payment screen.
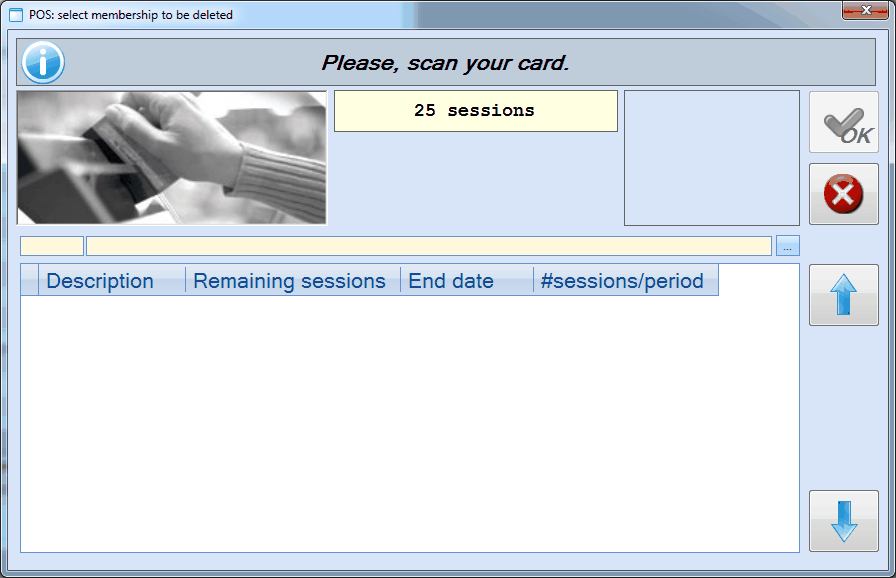 |
If this window appears, you can scan the desired customer card and the scanned card number will be visualised in the same window.
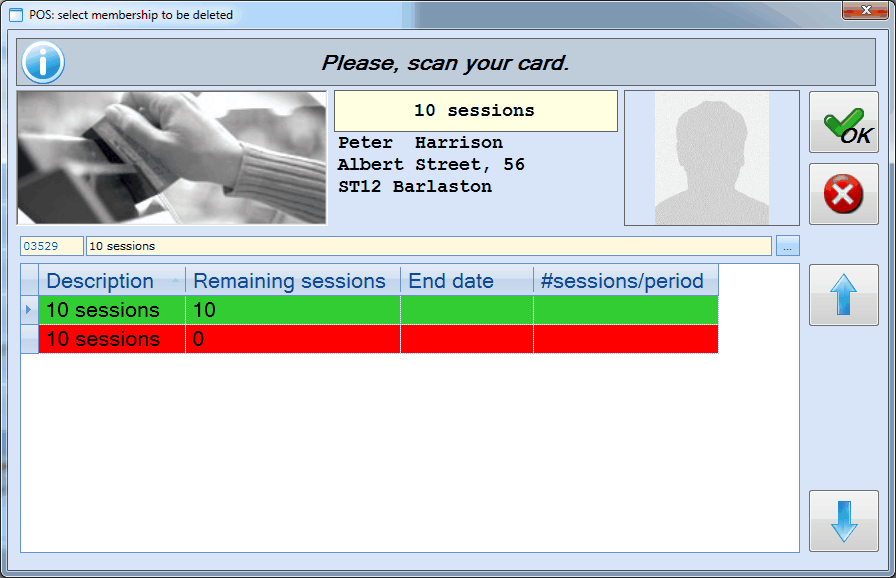 |
If several membership articles are present on the scanned card, you have to select the membership article you want to delete and click on after which the sale will be registered and the membership deleted.
Consult membership
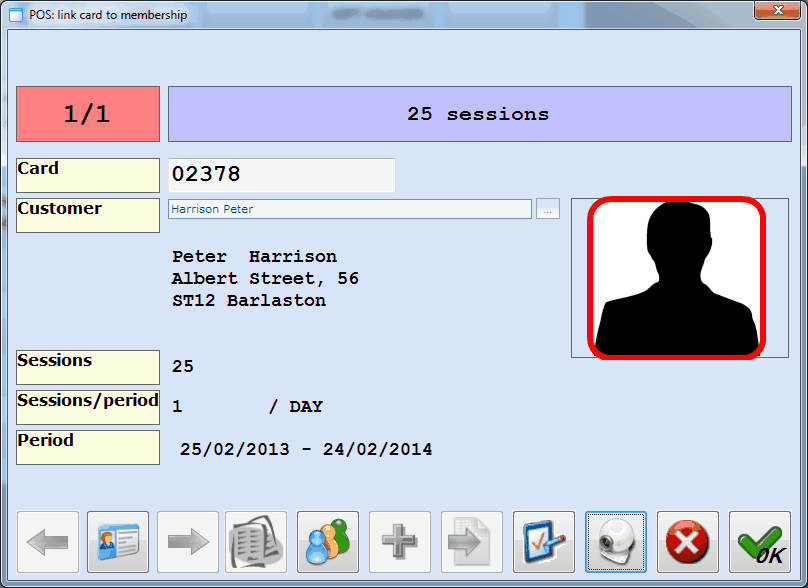
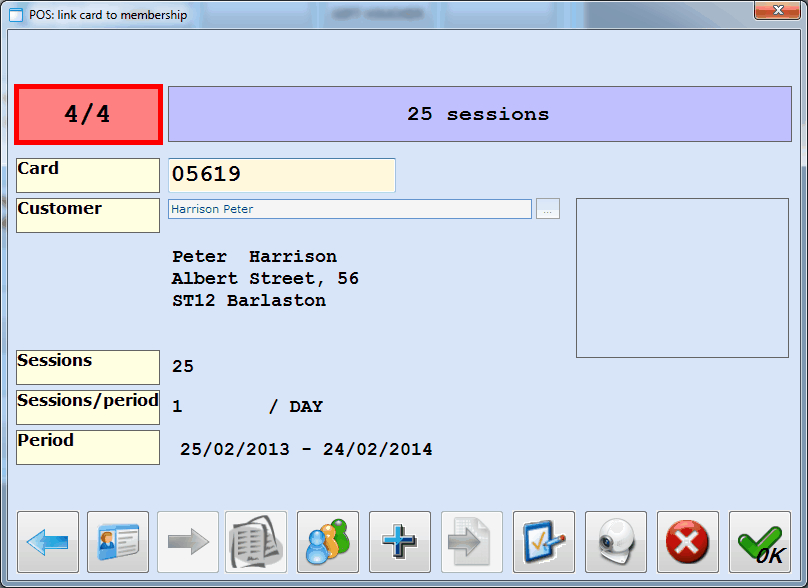
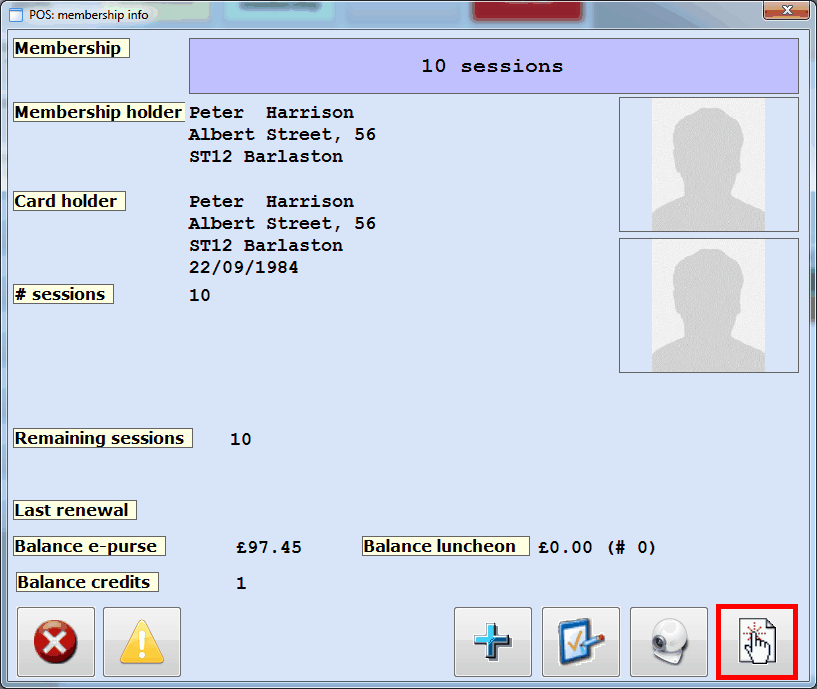
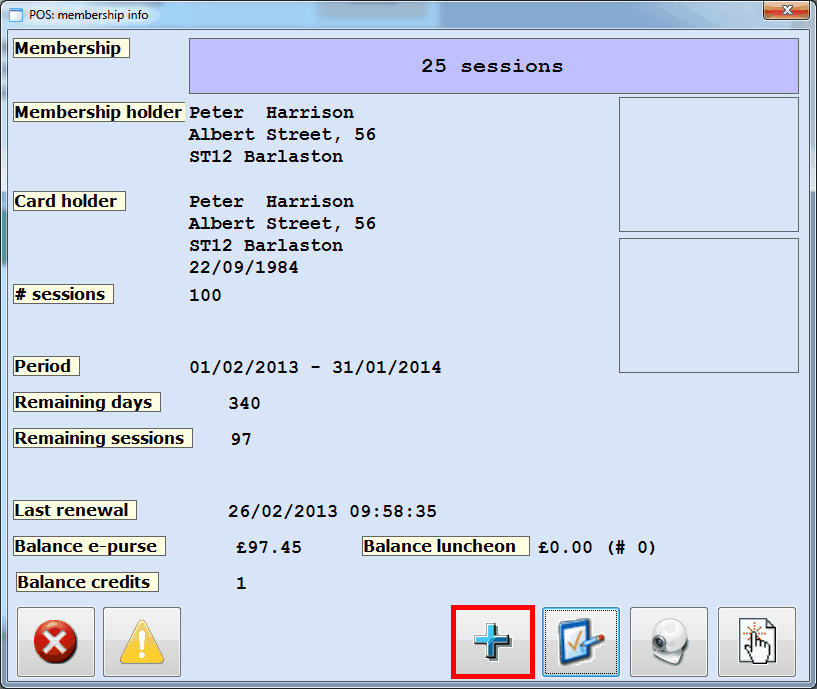
To consult a membership, scan a previously linked card. If only one membership is linked to the card, the window POS: membership info will appear.
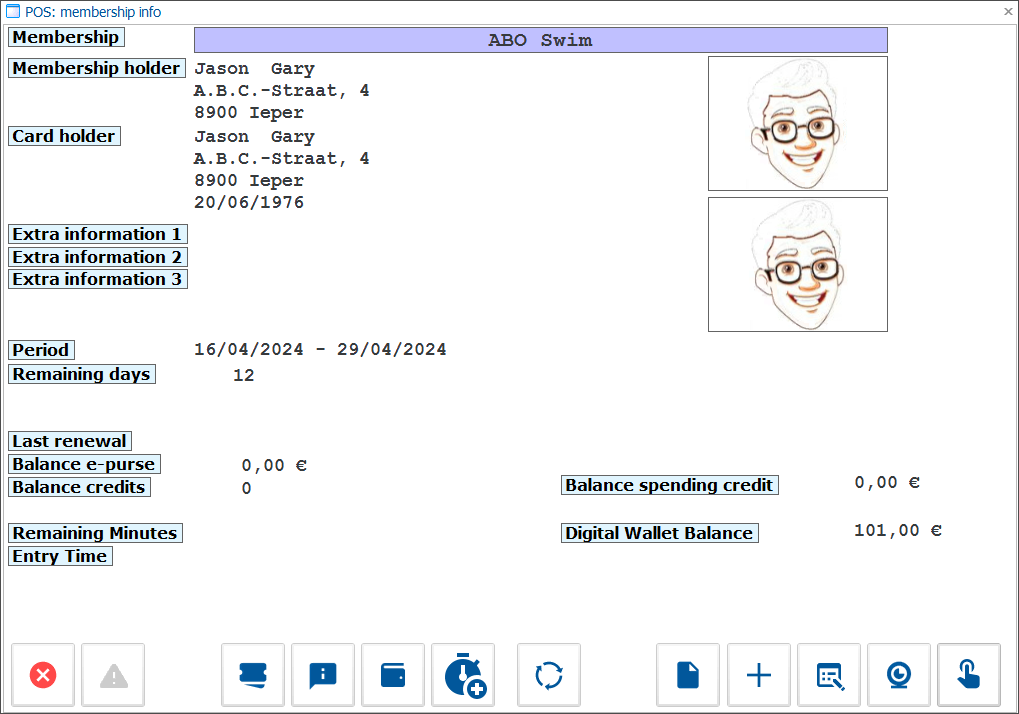
The information displayed on this screen depends on the configuration of each membership and may therefore vary:
Membership
This is the name (description) of the membership
Membership holder
The customer linked to this membership
Card holder
The owner of the card to which the membership has been linked.
Extra information 1, 2, 3
Period
The validity period of the membership
Remaining days
# sessions
The total number of sessions bought
Remaining sessions
The remaining number of sessions on this membership.
Last renewal
Balance e-purse
Balance credits
Remaining minutes
Shows the remaining time of the current visit.
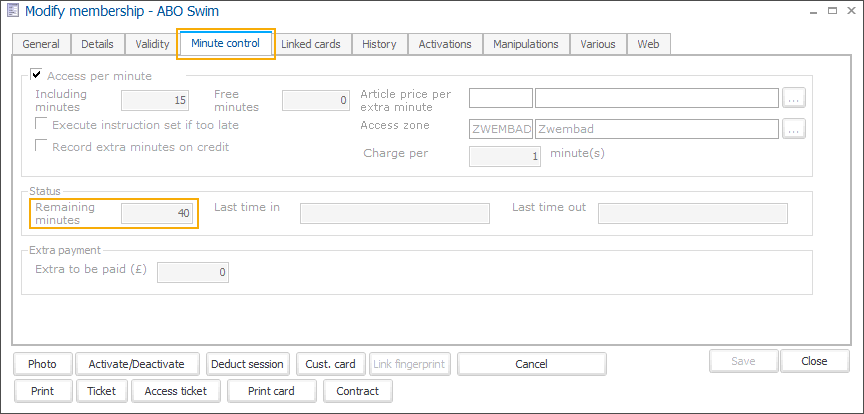
The same information can be found when modifying a membership in the backoffice: Modify membership screen > tab Minute control > Remaining minutes.
Entry time
Shows the full date and time of the latest entry using this membership.
The same information can be found when modifying a membership in the backoffice: Modify membership screen > tab Minute control > Last time in.

Balance spending credit
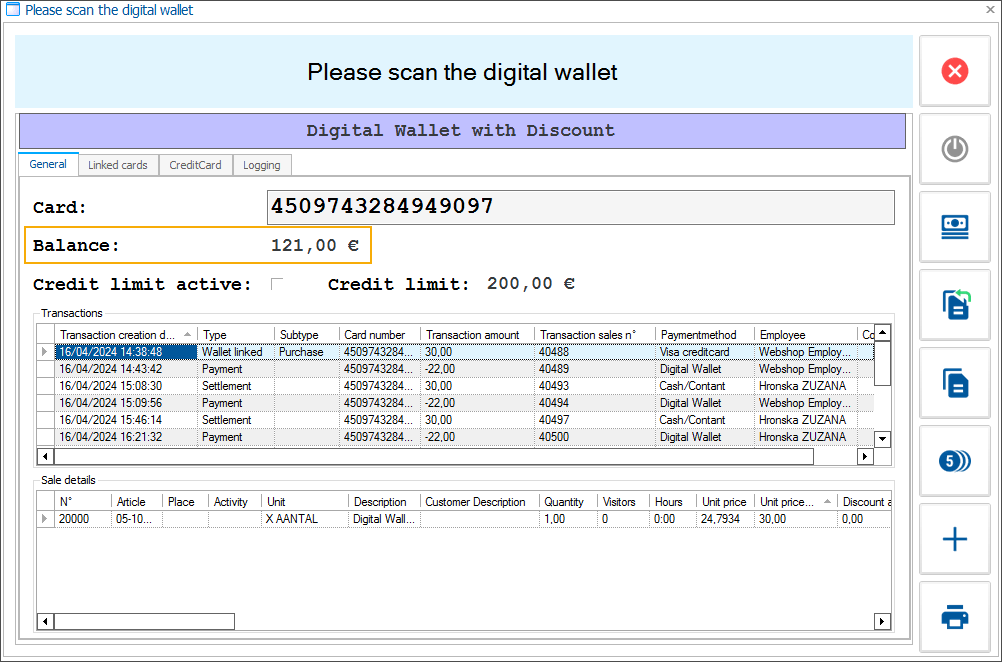
Digital wallet balance
If a digital wallet is linked to this card, the balance of this digital wallet will be displayed here.
You can find the same information in the field Balance when using the function Get digital wallet info

The following functions are available at the bottom:
 | Close window. |
 | Call up/consult remarks concerning the card holder. |
 | Print entry ticket. This button is only available if it has been defined on the article level that an access strip has to be printed. |
 | |
| Get digital wallet info |
 | If the visit time with this membership is tracked using the minute control function, the cashier can extend the visit with extra minutes using this button. 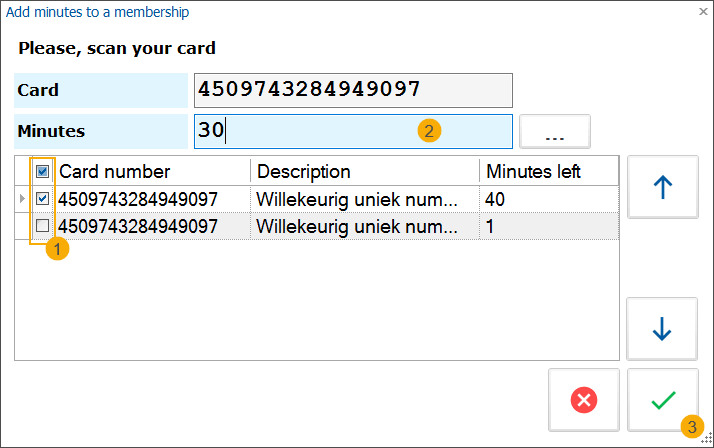 |
 | If multiple memberships are linked to the current card, it is possible to cycle through these memberships using this function. |
 | Consult direct debit contract. This button is only available if the membership in question in one with direct debit processing. |
 | Renew membership. |
 | Call up/consult membership details. |
 | Take a picture of the card holder. |
 | Register a visit and/or deduct a session. |
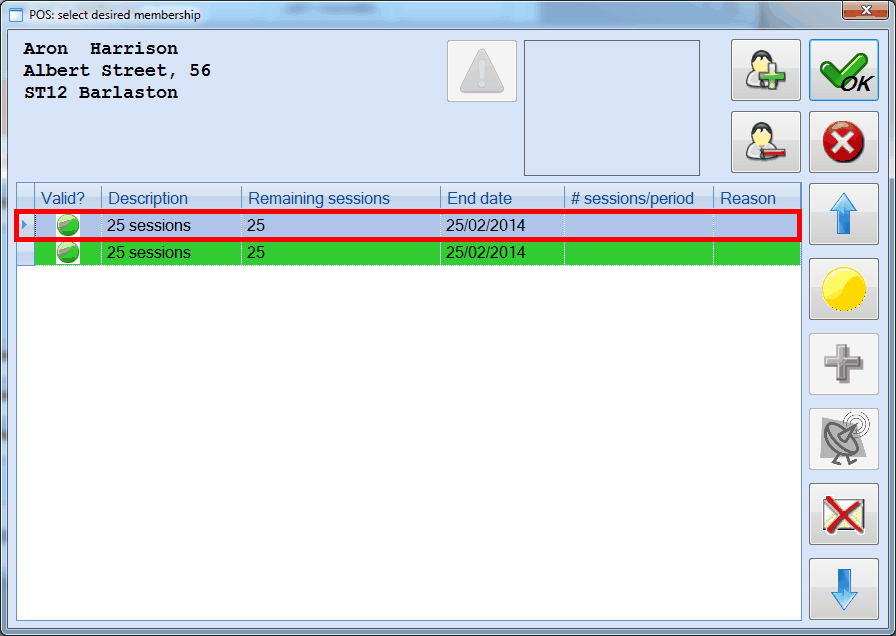
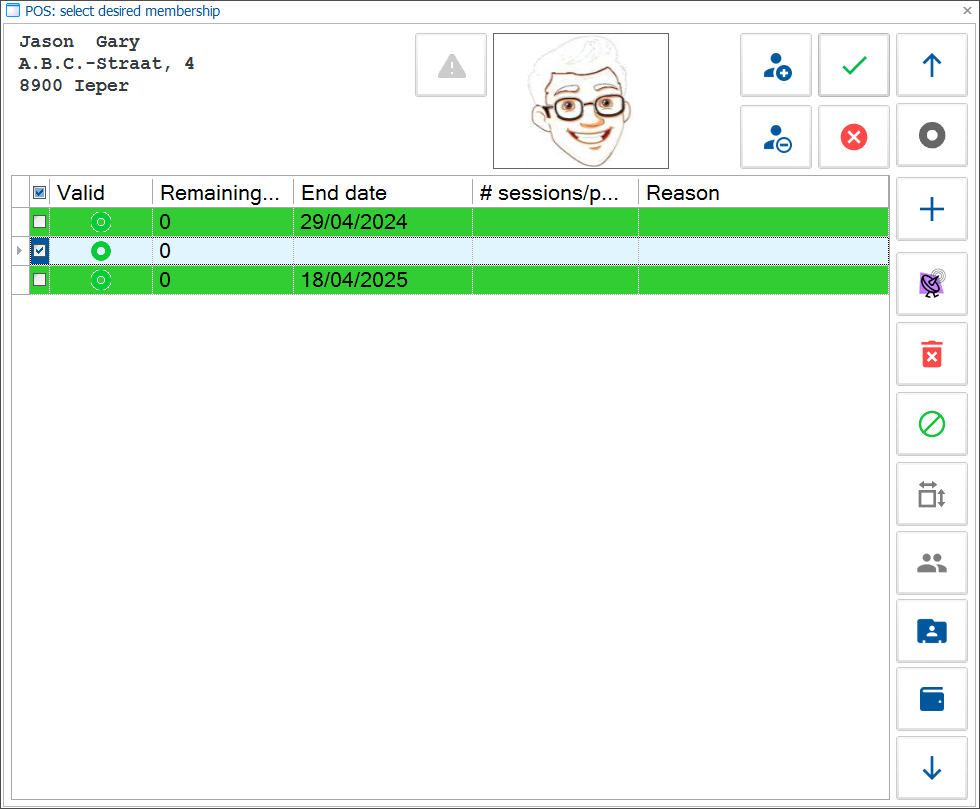
If you click on or scan a card with several membership articles, or scan a card without valid membership articles, the window POS: select desired membership will appear.
Note
Non-valid membership articles are NOT visualised in this window by default. If you also want to see the non-valid membership articles click the button  .
.
The window POS: select desired membership also has the following buttons:
| Call up/consult remarks concerning the card holder. |  | Activate selected membership. |
 | Deactivate selected membership articles. |  | Open window POS: membership info. |
| Close window. |  | One membership line up. |
  | Visualise only valid/all membership articles. | | Renew selected membership articles. |
 | Move / copy selected membership articles. |  | Disconnect card. |
 | One membership line down. |
Register a visit
If you have scanned a card with only one valid membership article or after selecting a valid membership article in the window POS: select desired membership, the window POS: membership info will appear and allow you to register a visit by clicking on  or pressing <Enter>.
 |
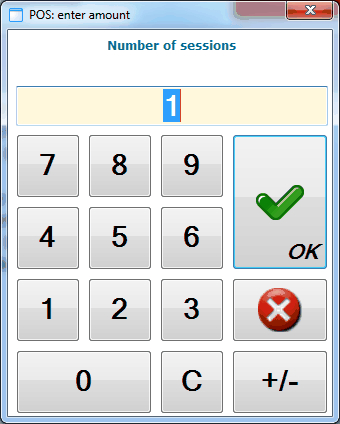
If a card with several sessions is concerned (for example 25 sessions), a session/turn will be deducted as well. In case of cards with several sessions, it is also possible to define that the number of sessions/visits to be registered has to be specified each time a visit is registered. If this setting has been activated, the window below will appear and the cashier will be able to specify how many visits/sessions have to be deducted. Fill in the desired number of visits/sessions and click on  or press <Enter>.
 |
Take picture
If you scan a card with only one valid membership or after selecting a valid membership in the window POS: select desired membership, the window POS: membership info will appear in which you can click on to take a picture of the sales customer (or modify the existing picture) using the available webcam. (module Integration with Webcam required).
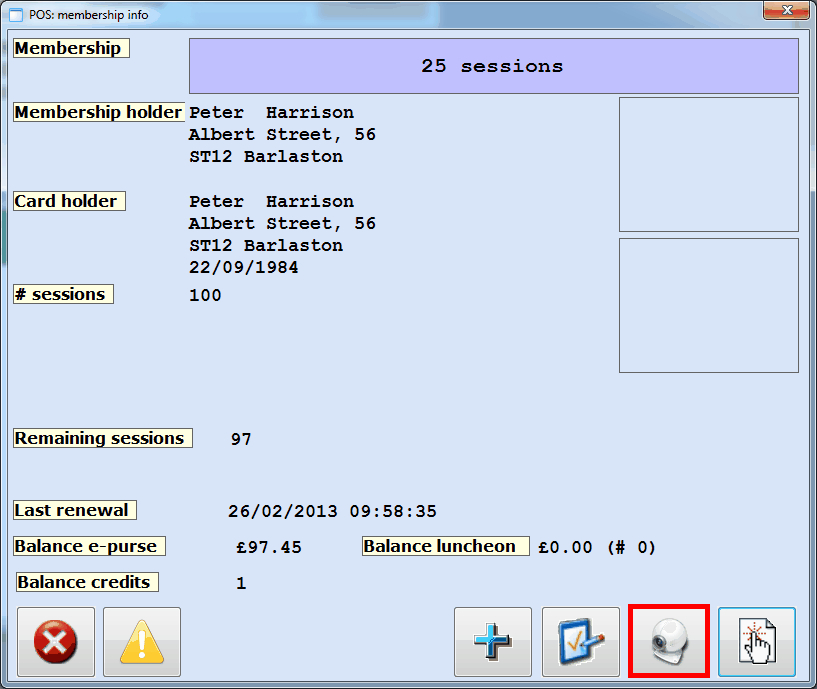 |
The window Take picture will appear and you will be able to take and save a picture of the card holder by clicking on and then on .
The picture taken will be visualised in the window POS: membership info and also saved in the customer card of the customer in question.
Change validity / sessions
If you scan a card with only one valid membership or after selecting a valid membership in the window POS: select desired membership, the window POS: membership info will appear in which you can click on to call up all detailed membership data.
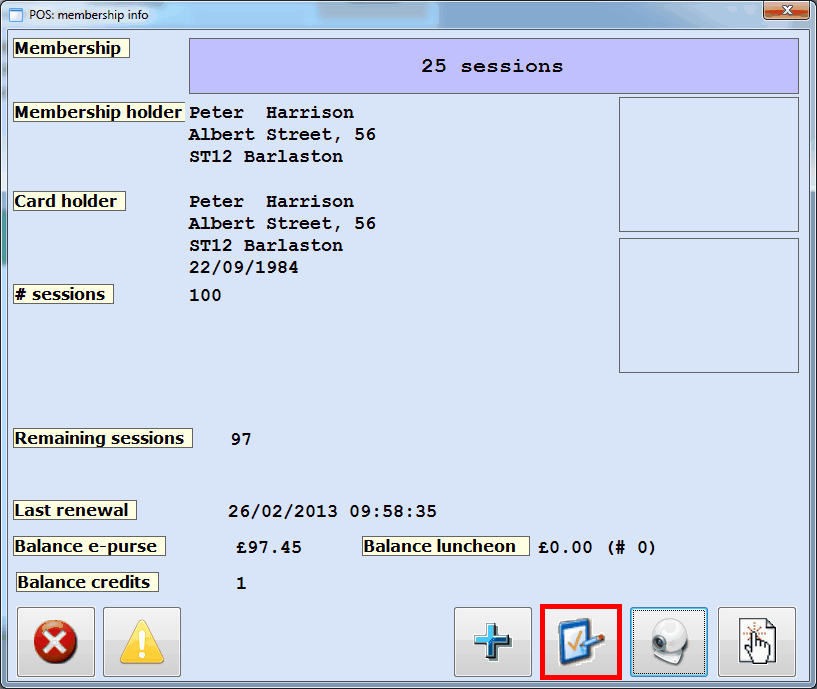 |
In this way you can search and modify a number of data and change the number of sessions and / or membership validity.
In order to modify the number of sessions and/or the validity period, you first have to click on the tab Validity. Under this tab, you can modify the number of sessions and/or validity period.
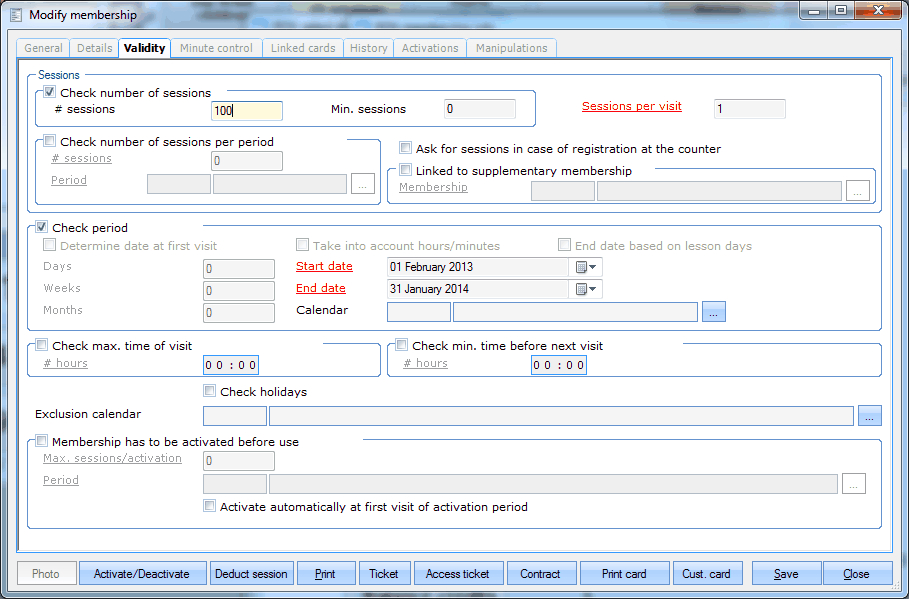 |
Warning
If you want to change the number of sessions, you have to take into account the number of sessions / visits already registered.
For example: If someone had a 10 sessions card, with 6 remaining sessions and you registered one visit too many, you have to INCREASE the number of total sessions sold on the card with the number of sessions you want to give back, or 10+1=11. By increasing the total number of sessions sold, the system will increase the remaining number of sessions to 7, since 4 visits had already been registered and 10-4=6 and 11-4=7.
Renew membership
If you scan a card with only one valid membership article or after selecting a valid membership article in the window POS: select desired membership, the window POS: membership info will appear in which you can click on to renew the current membership.
 |
If you, however, scan a card with several membership articles or invalid/expired membership articles, the window POS: select desired membership will appear in which you will also be able to click on to renew the selected (ticked off) membership. It is also possible to tick off several membership articles and to renew them in one go.
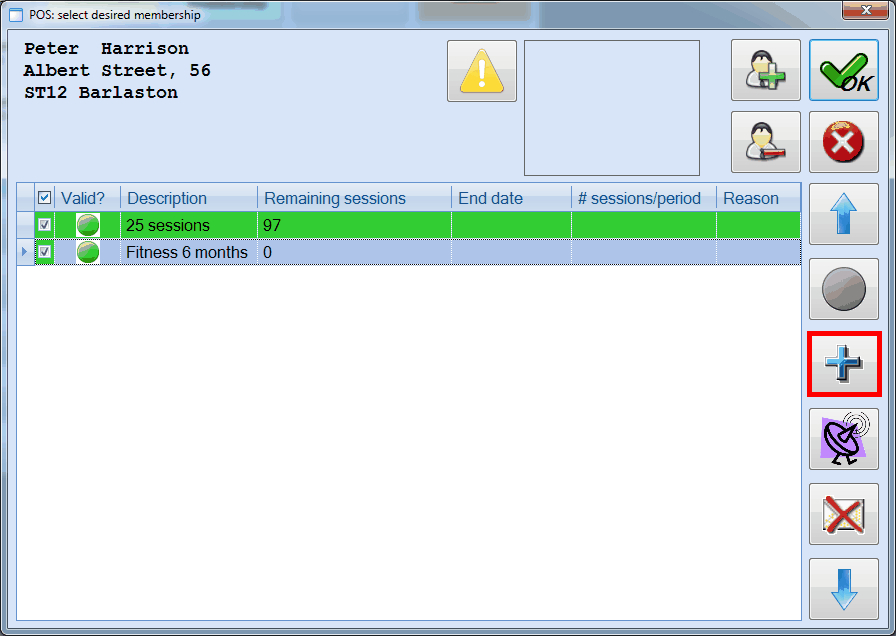 |
Tip
To visualise ALL or only the valid membership articles, you can click on or  .
.
Warning
Clicking on leads to nothing more or less than selecting the same article and the same customer in the selection screen. In other words, a new sale of the membership article in question is generated.
The further settlement of a renewal is done in the exact same way as the sale of a new membership, meaning that the window below will appear in which you only have to click on .
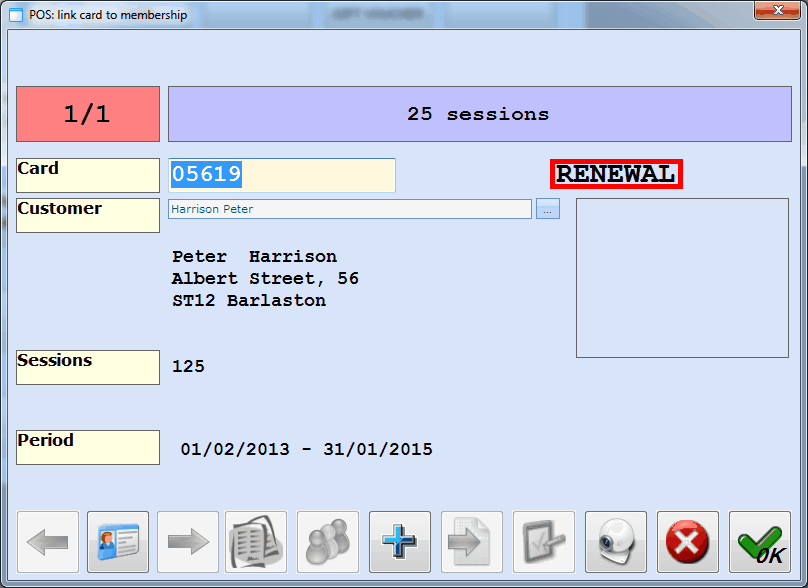 |
After confirmation of the renewal, the membership can, if required, be consulted again and you will be able to see that the desired membership was correctly renewed.
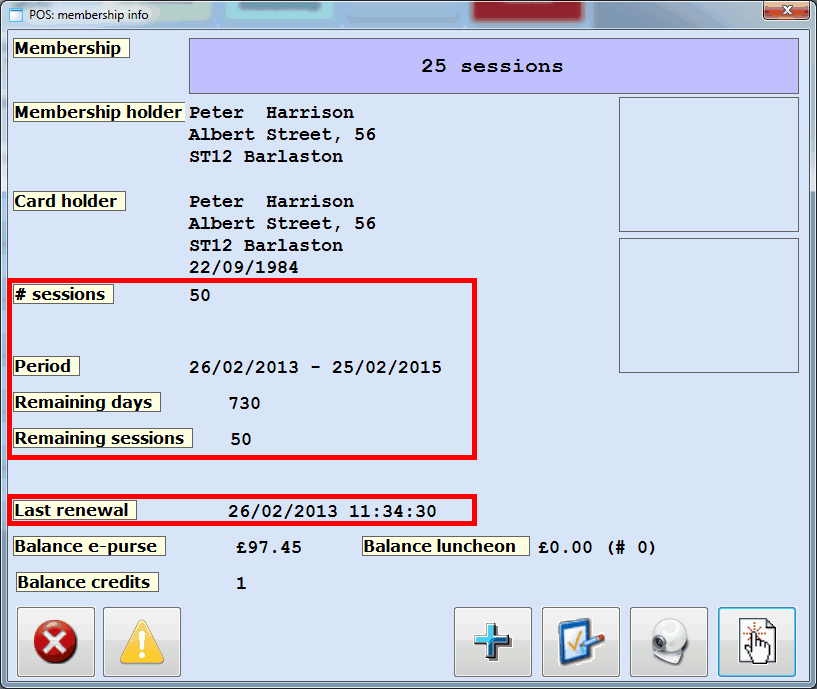 |
Note
The Number of sessions that is visualised is the total number of sessions/turns that has been sold to the customer for the current membership. The Remaining sessions indicate the number of sessions/turns that effectively remain on the current membership.
Increasing the remaining number of sessions / or extending the period always depends on the membership parameters.
Cancel membership renewal and undo the cancellation
The cashier has the possibility to cancel a customer's membership that is in use, e.g. if the customer does not want to renew the membership anymore.
If the membership is cancelled, the cashier can revert the cancellation so that the customer can use/renew the membership. This is especially useful if the customer e.g. cancels the membership by accident via the Webshop.
Important
To be able to use this functionality at the POS the following POS parameter must be active: Allow to undo membership cancellations.
On the POS screen, go to extra functions
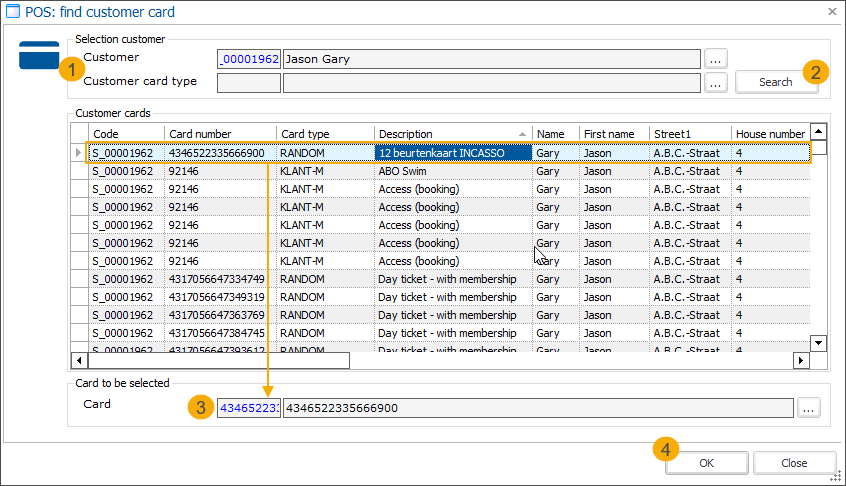
 and select the Find customer card function
  .
.Select the customer and/or the card type (1) to narrow down the search (2), then select the relevant card (3) and click OK (4).
Depending on the number of memberships available on the card and the particular membership you are looking for, you may want to display all or only the valid memberships (1).
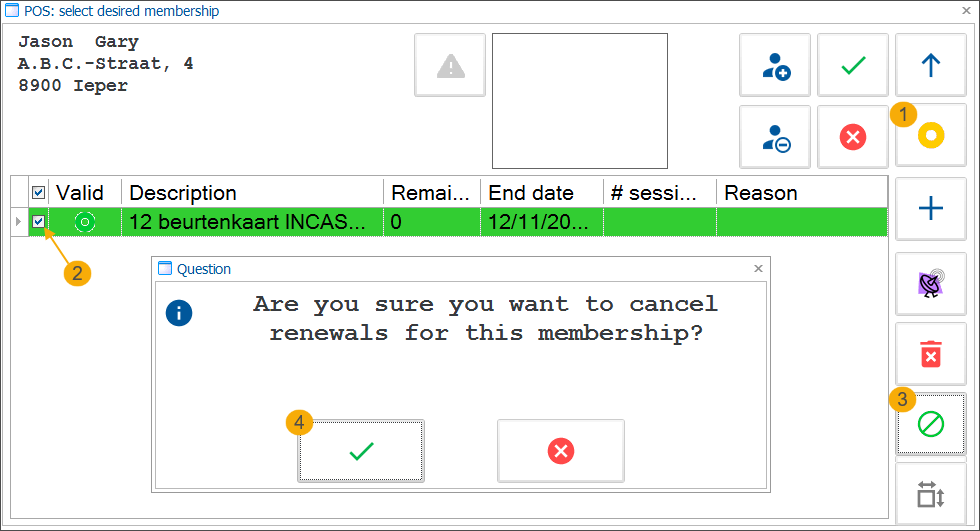
Select the membership (2) and click the Cancel membership renewals function (3). Then confirm the cancellation (4).
the renewal functionality is now disabled:
→ 
the membership is cancelled:
 →
→  (the red icon remains active to allow reverting of the cancellation).
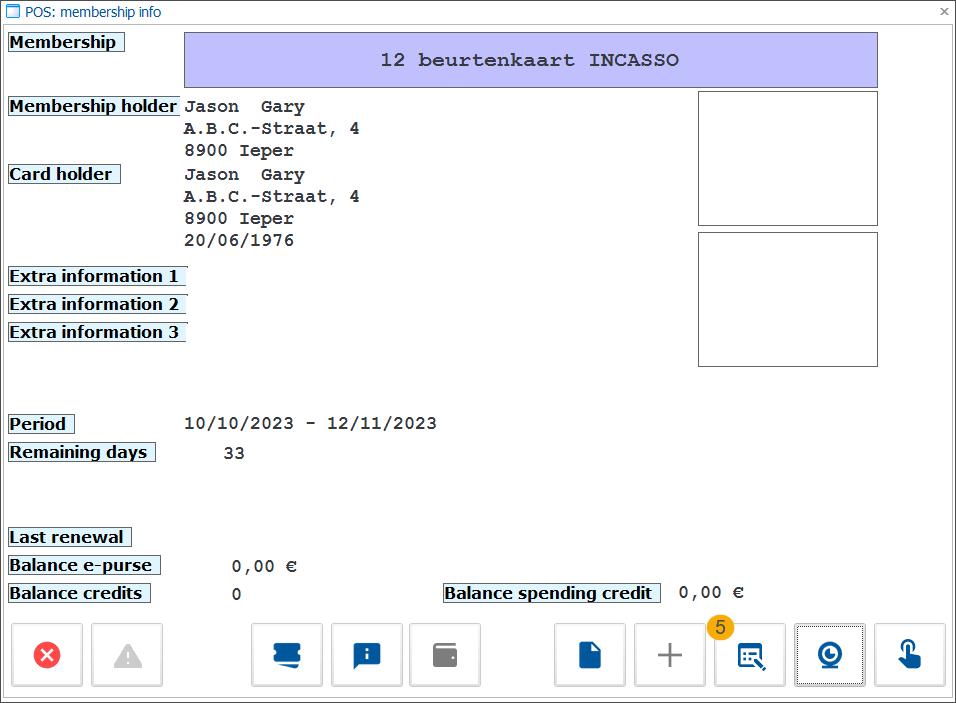
As an alternative, you can also double-click on the membership to open it and select the option Detail membership
(5) which will open the membership detail window in the Recreatex backoffice application and allows you to access all membership backoffice functions, including the cancel membership option.
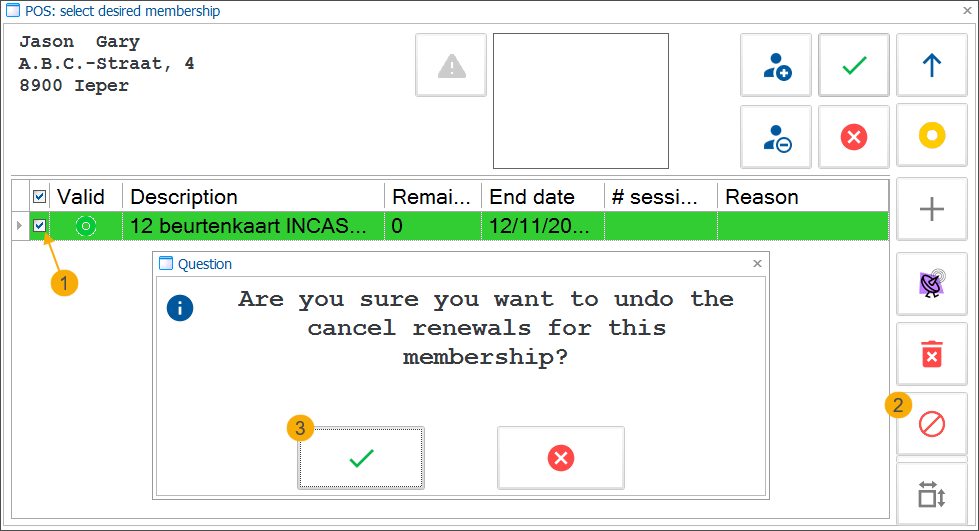
To revert the cancellation of a membership, look up the relevant membership (see steps 1 and 2 above). Select the membership (1) and click the Undo membership cancellation function (2) followed by a confirmation (3).
the renewal functionality is active again:
→ the cancellation is reverted and the membership is back in use:
→
In the same way as cancelling the membership, you can also undo the cancellation by opening the membership detail window in the Recreatex backoffice application and using the undo membership cancellation function from there.
Tip
This functionality is also available in the Backoffice application and for the customers on the Webshop. You can find additional information here: Undo membership cancellations.
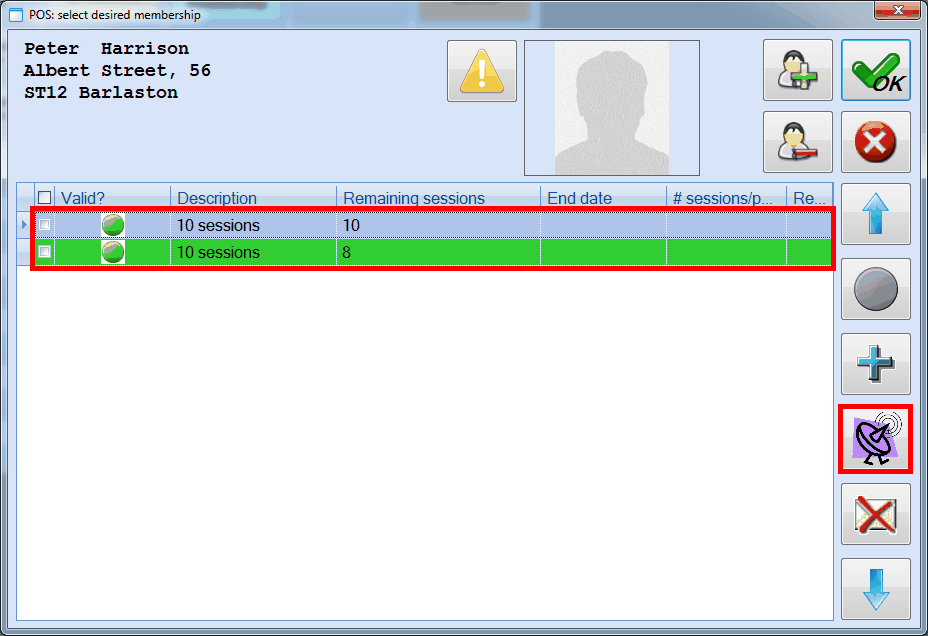
Move / copy membership
If the customer has lost his/her card or if the customer wants to have an extra card, you can scan or search for the card and tick off one or more membership articles in the window POS: select desired membership and then click on  to move or copy the ticked off membership articles to another (new) card.
 |
The window POS: copy/move membership from/to card will appear.
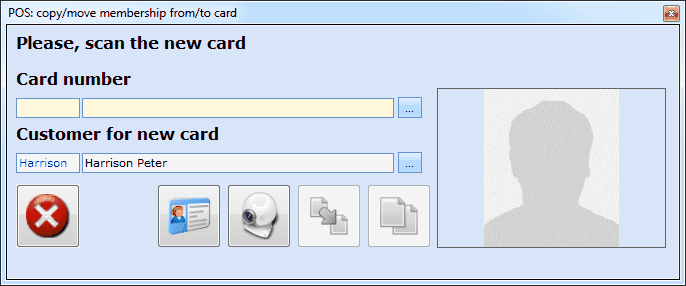 |
After scanning or entering the (new) card, you can move the selected membership articles to the (new) card by clicking on  or copy them to the (new) card by clicking on
  .
.
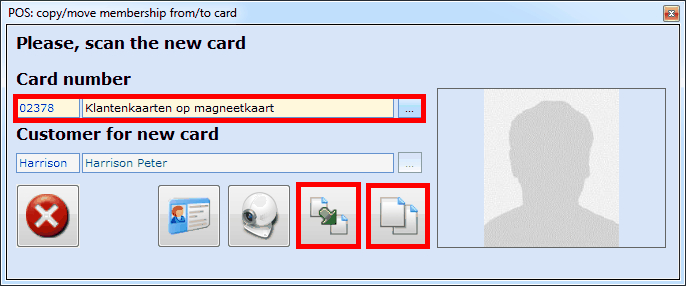 |
Moreover, it is possible to link the new card to another (new) customer in order to link each card to its respective card holder.
Finally, the following buttons are available:
| Close window. | |
| Print card. | |
| Take/modify picture (new) card holder. |

Warning
If you move a membership article, the membership article is transferred from the current card to the new card. This means that, if the original card contained only one membership article, this original card will hold no more membership articles after the transfer and will thus be empty. Do take into account that the card is not yet disconnected from the customer at that moment. If required, you still have to disconnect the card from the customer (see 'Disconnect card').
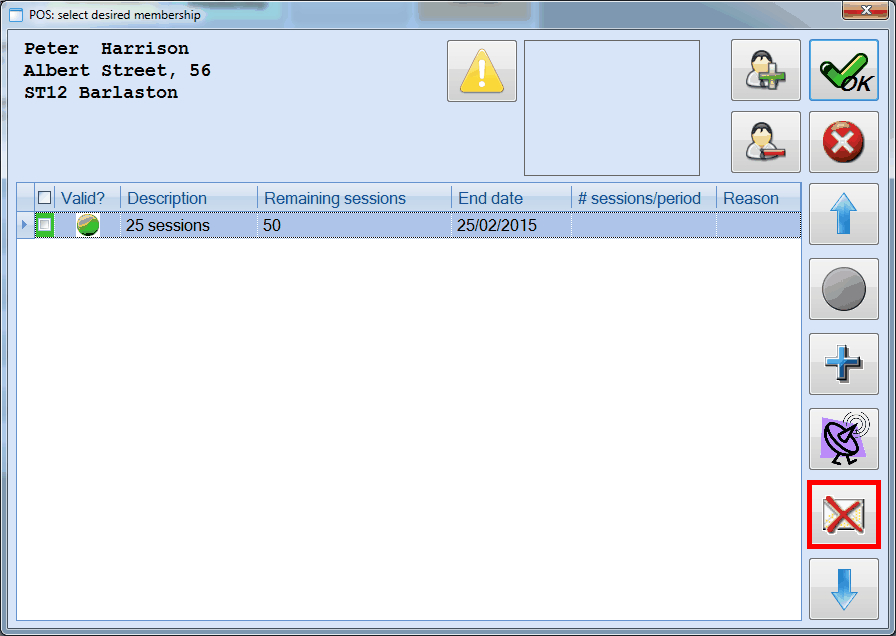
Disconnect card
If you disconnect a card, the link between the card and the customer is deleted. This can be necessary if the customer does not want to renew his/her membership and returns his/her card, or if an empty card still linked to the customer remains after the transfer of membership articles. Disconnecting cards is thus also an action that is necessary to make previously used cards available again for sale.
After scanning or searching the card, you can disconnect the card from the customer by clicking on  in the window POS: select the desired membership.
 |
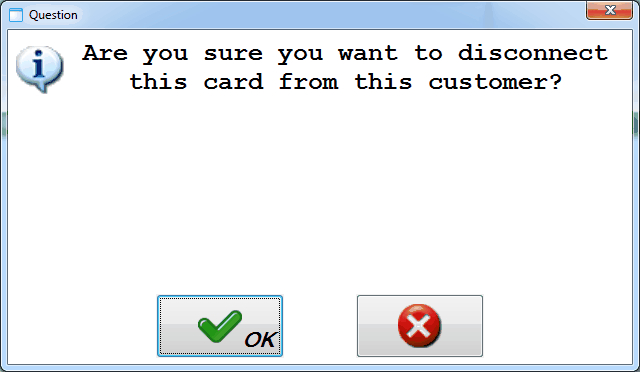
If you disconnect a card, the question for confirmation below will appear:
 |
Warning
If you disconnect a card, the card will be disconnected from the customer and his/her membership, but the customer will REMAIN present in the system. It is thus not required to recreate the customer if he/she buys another (new) membership.
Activate / deactivate membership
If it is advisable to activate/deactivate one or several membership articles of a customer in case of illness, misbehaviour or loss of the card, ... you first have to search the customer card which can always be done by scanning the linked card or searching the membership based on the customer name.
through 'Selection desired membership'
After scanning or searching the card, you can select the desired membership articles to be deactivated/activated by ticking them off in the window POS: select desired membership.
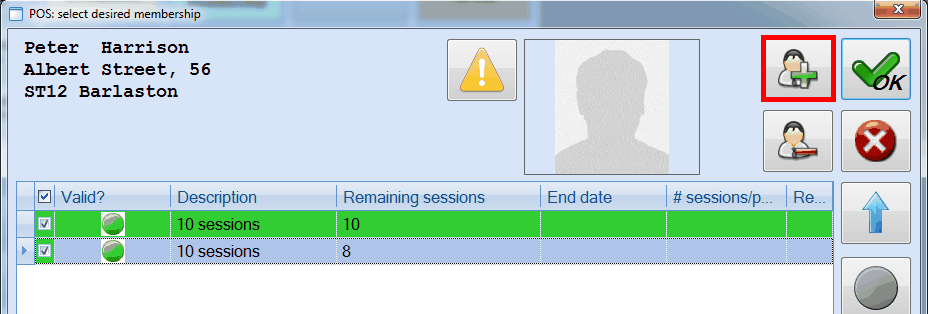 |
You can deactivate the selected membership articles by clicking on  or activate them by clicking on
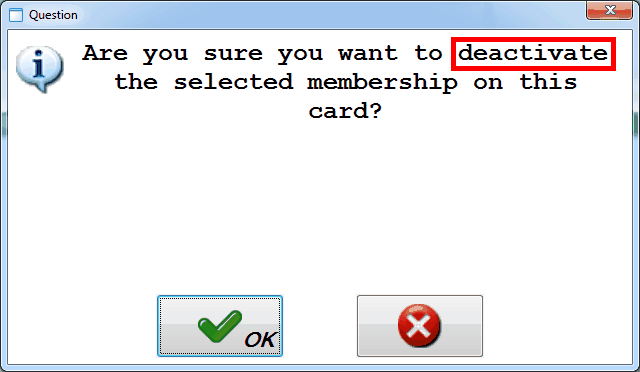
  . Activating/deactivating one or several membership articles always has to be confirmed.

If you activate/deactivate you always have to fill in a reason.
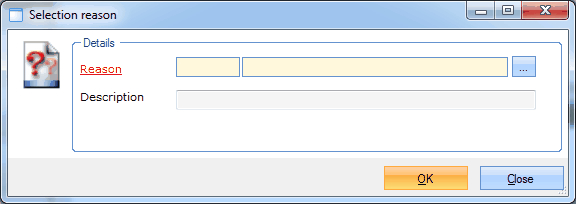 |
If you have filled in the reason, you have to click on OK at the bottom of the window Selection reason and close the window POS: select desired membership. If the membership is then consulted again, you will be able to see that the activated/deactivated membership article can no longer or again be used.
through 'POS: membership info'
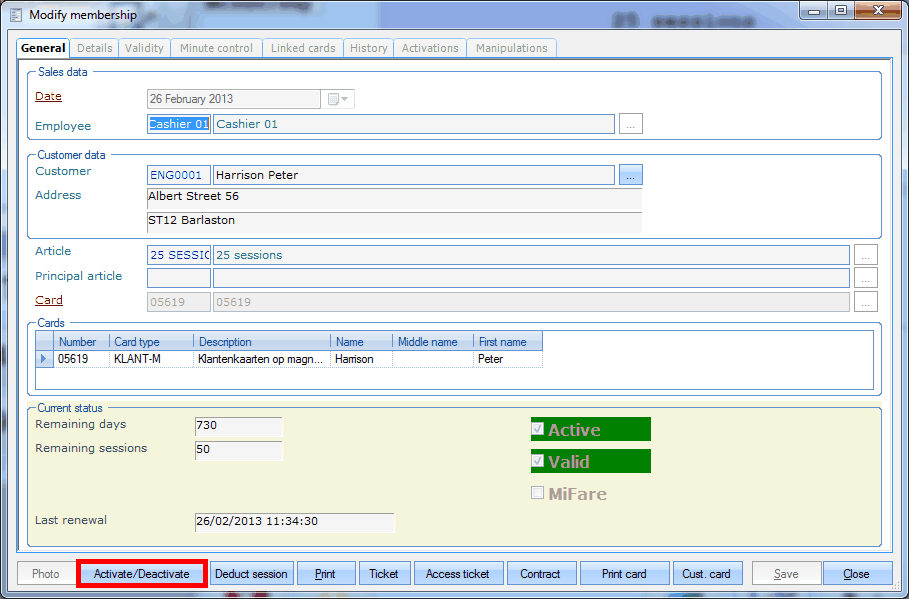
After scanning or searching the card, you can click on in the window POS: membership info to call up all detailed membership data.
|
At the bottom of the window Modify membership you can click on Activate/Deactivate to activate/deactivate the membership so that the membership can no longer or again be used.
 |
If you activate/deactivate a membership, you will always have to specify a reason.
|
Once you have filled in the reason, you can click on OK at the bottom of the window Selection reason and close the windows Modify membership, POS: membership info and POS: select desired membership. If the membership is then consulted again, you will be able to see that the activated/deactivated membership is no longer or again valid.
Activate membership for use
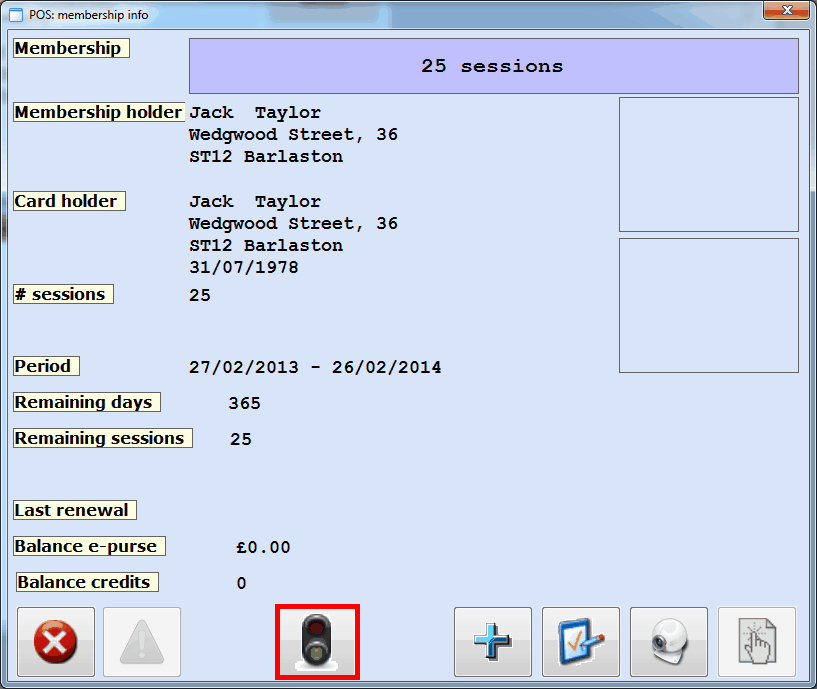
If you have indicated for the validity of the membership that the Membership has to be activated before use, the customer is obliged to report to the counter to activate his/her membership.
After scanning or searching the card, you can activate the membership for use by clicking on  in the window POS: membership info.
 |
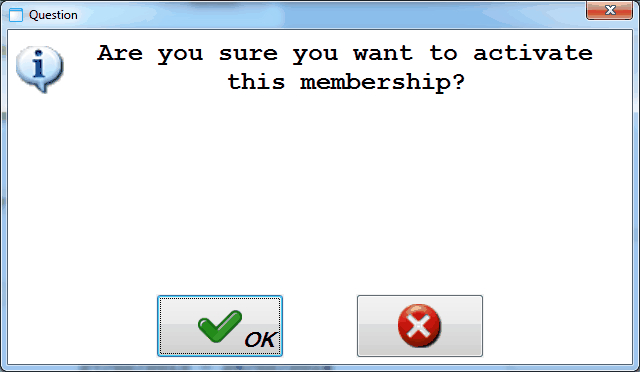
If you Activate the membership for use, you will have to confirm the action and after confirmation the customer will have x times access within the defined period.
 |
Warning
The number of accesses per period is a sum of both ENTRANCES and EXITS but a visit is only registered at the first entrance. Visits will never be registered for the other accesses. This method is for example used in case of lesson cards for which one or several parents also use the lesson card to have access in order to accompany the child to the changing room.