Toolbar
When you log in to Recreatex you may have a general toolbar available under the menu bar.

The toolbar shortcuts provide quick access to different Recreatex functions. This is very useful for frequently used functions, especially if they are hidden deeper in the menu structure of the application and thus more difficult to remember.
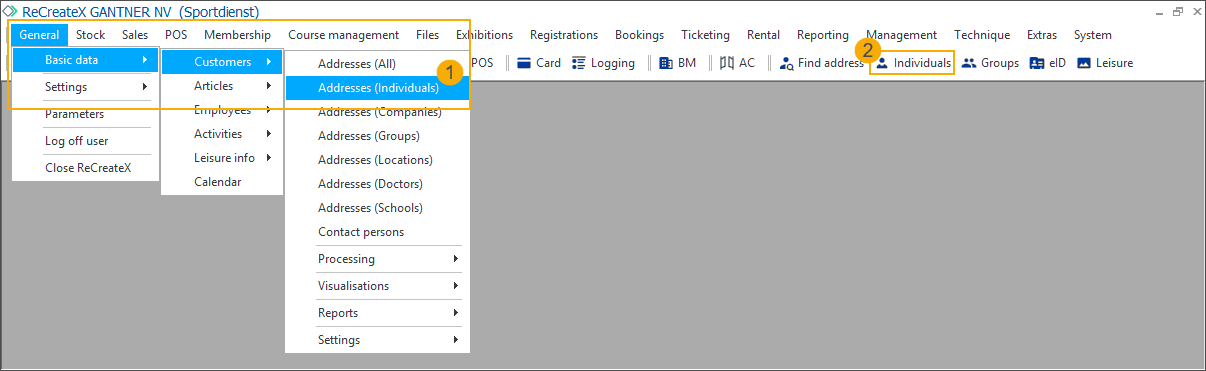
For example, replace the long path to the overview of customers (individuals) (1) with a single button on the main toolbar (2):
The main toolbar is fully configurable and can consist of multiple smaller toolbars divided by a double vertical line.
Add, remove and order the toolbars
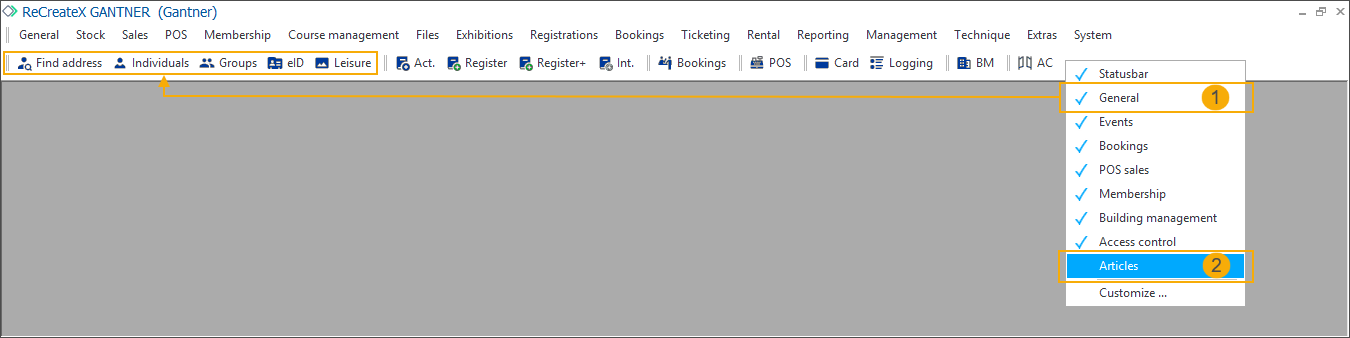
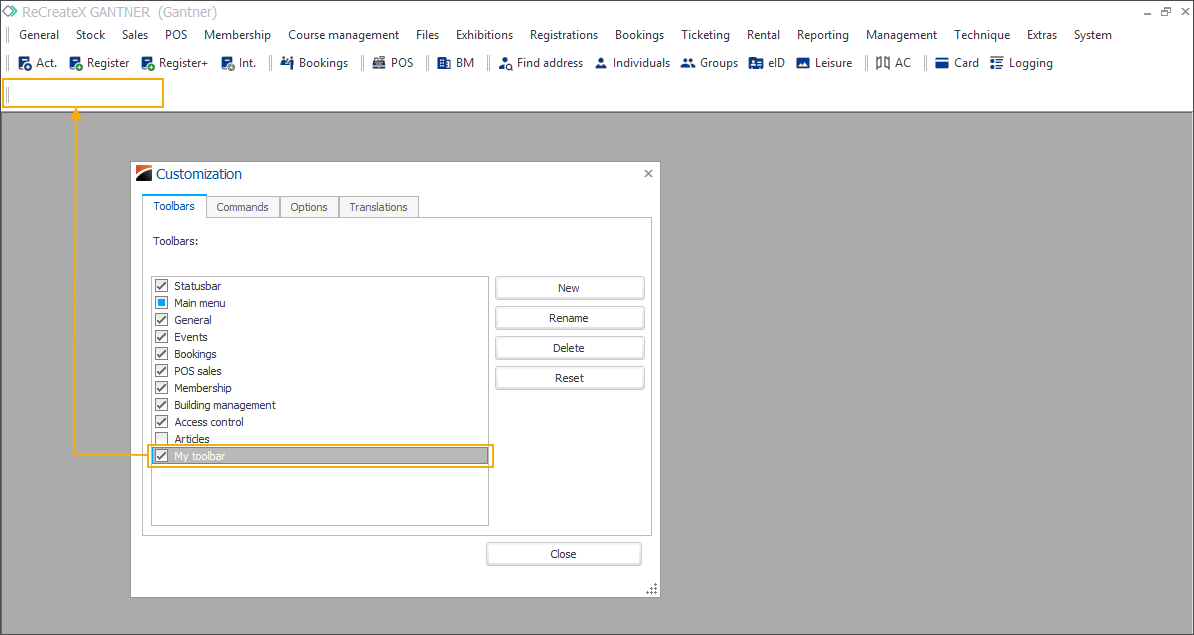
Right-click anywhere in the toolbar to show the list of all available toolbars. The currently displayed toolbars are marked with a checkmark (1). Toolbars without a checkmark are currently not displayed on the main toolbar (2).
Click on the toolbar that you want to add or remove.
To move and order the toolbars, left-click and hold the double vertical line that marks the beginning of the toolbar (1). Then drag the toolbar to the desired position (2) (left, right, to another row or pop-out).
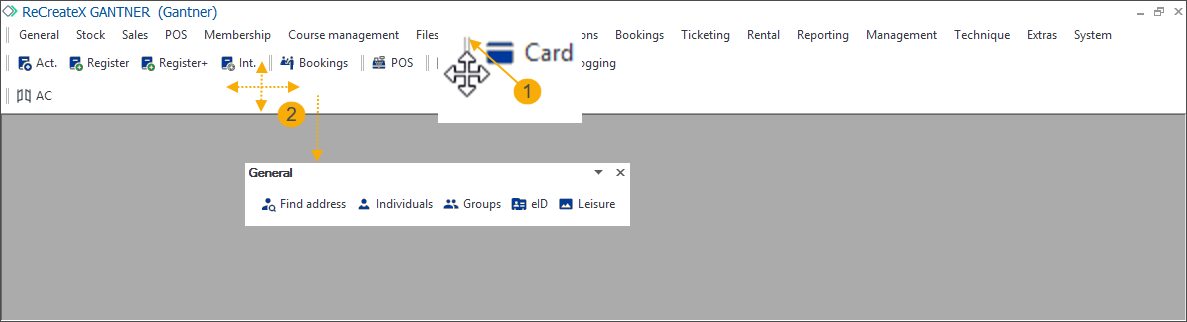
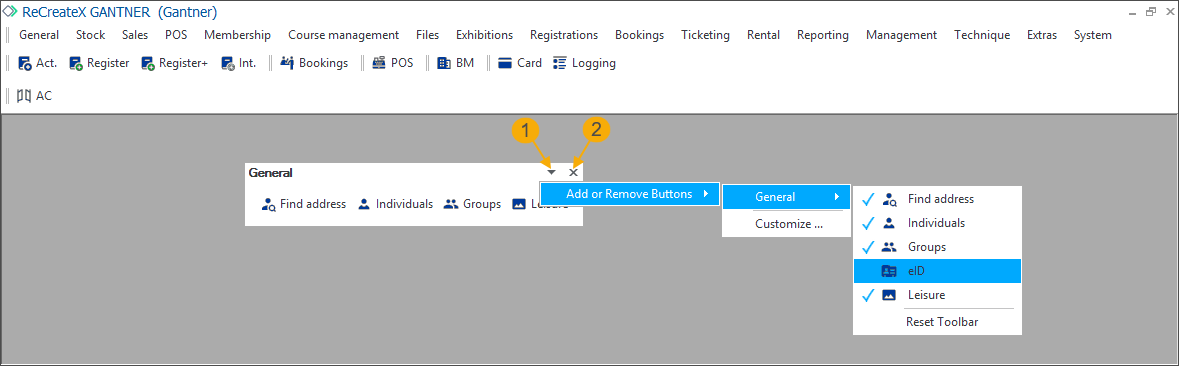
When you pop out a toolbar, you can easily adjust it by clicking the black arrow in the top-right corner (1). Then go to Add or remove Buttons > (toolbar name) and select or remove functions (buttons) from this toolbar.
To remove the toolbar from the screen click the cross icon in the top-right corner (2).
Create and customize a new toolbar
Right-click anywhere on the main toolbar to show the list of all available toolbars and select the option Customize at the bottom of the list. In the Customization window, go to the tab Toolbars, click New (1) and enter the name of your toolbar (2). Then click OK (3).
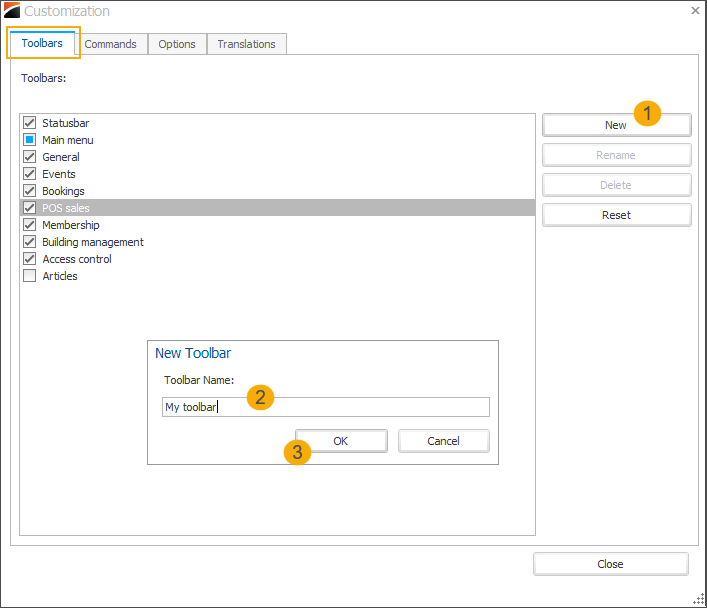
The new toolbar has been added to the list and to the main toolbar (empty).
To add the functions (buttons) to your toolbar go to the tab Commands. You can select a category (1) and then pick from the available functions but you can also use the search fields (2) to directly type in the category or function you are looking for.
When you have found the desired function, left-click to grab and drag the function to the toolbar (3). Notice that the mouse pointer shows the stop icon
 while dragging. When the icon changes to the plus sign
  , you are in the correct position and can drop the function onto the toolbar.
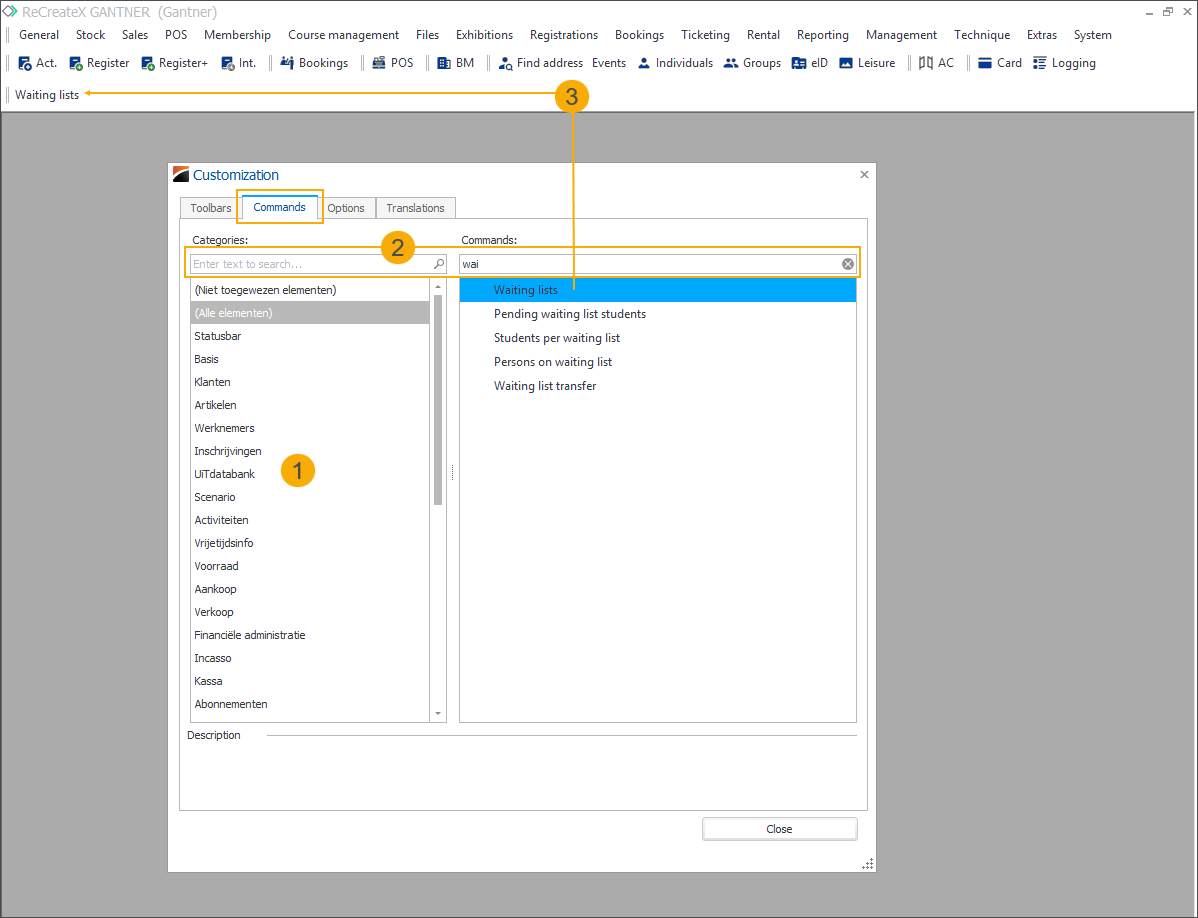
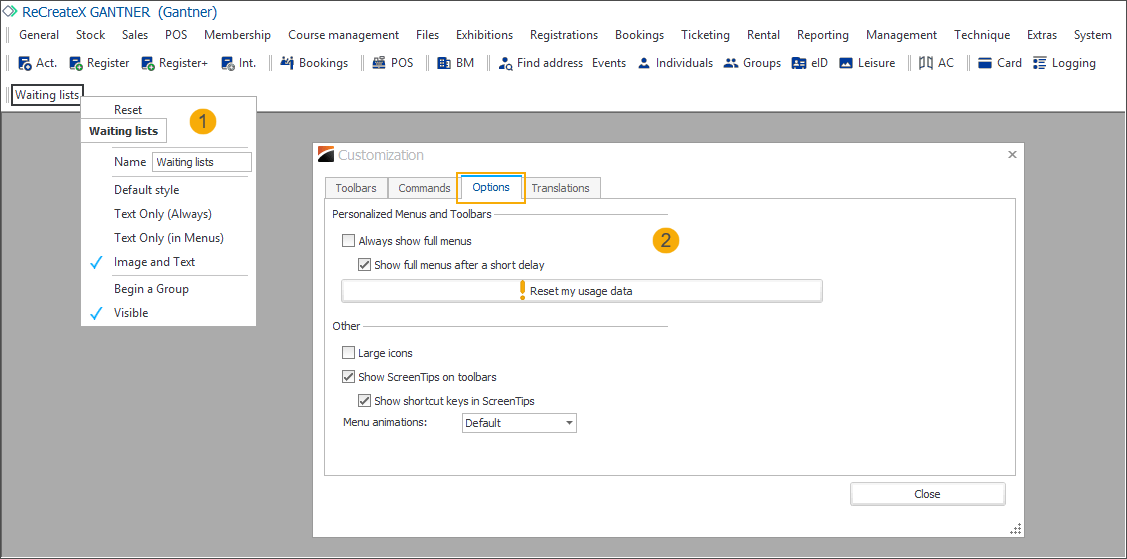
Right-click on the added function to access the menu with options to remove, rename or further adjust the layout and style of the button. (1)
Note
This right-click menu (1) is only available while the Customization window is open.
In the tab Options (2) of the Customization window, you can define some layout options that apply to the whole Menu bar and Toolbar.
Be careful when using the option Reset my usage data (!) as this can also delete other personal user settings, not just the adjustments of the toolbar.
In the tab Translations of the Customization window, you can add custom translations for certain Recreatex objects. We advise requesting the assistance of your Gantner consultant if you intend to use this function.