Functional
Items & Options
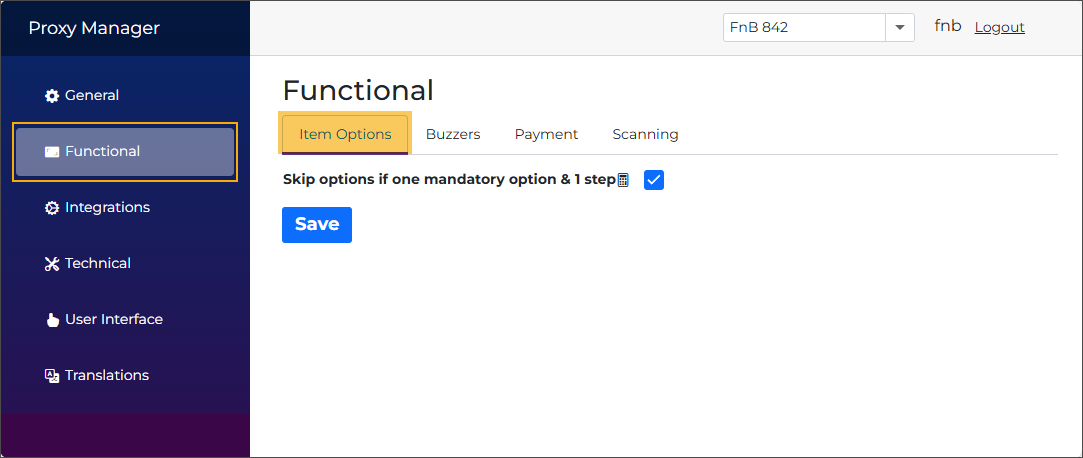
Skip options if one mandatory option & 1 step
If an article (product) has only one mandatory option with a single selectable possibility, the behaviour is as follows:
Enabled (default): No options icon is shown on the product tile (1). Clicking the product tile automatically adds the product and its mandatory possibility to the basket, with any linked price included in the total (2).
Customers can see the mandatory possibility in the basket overview (3).
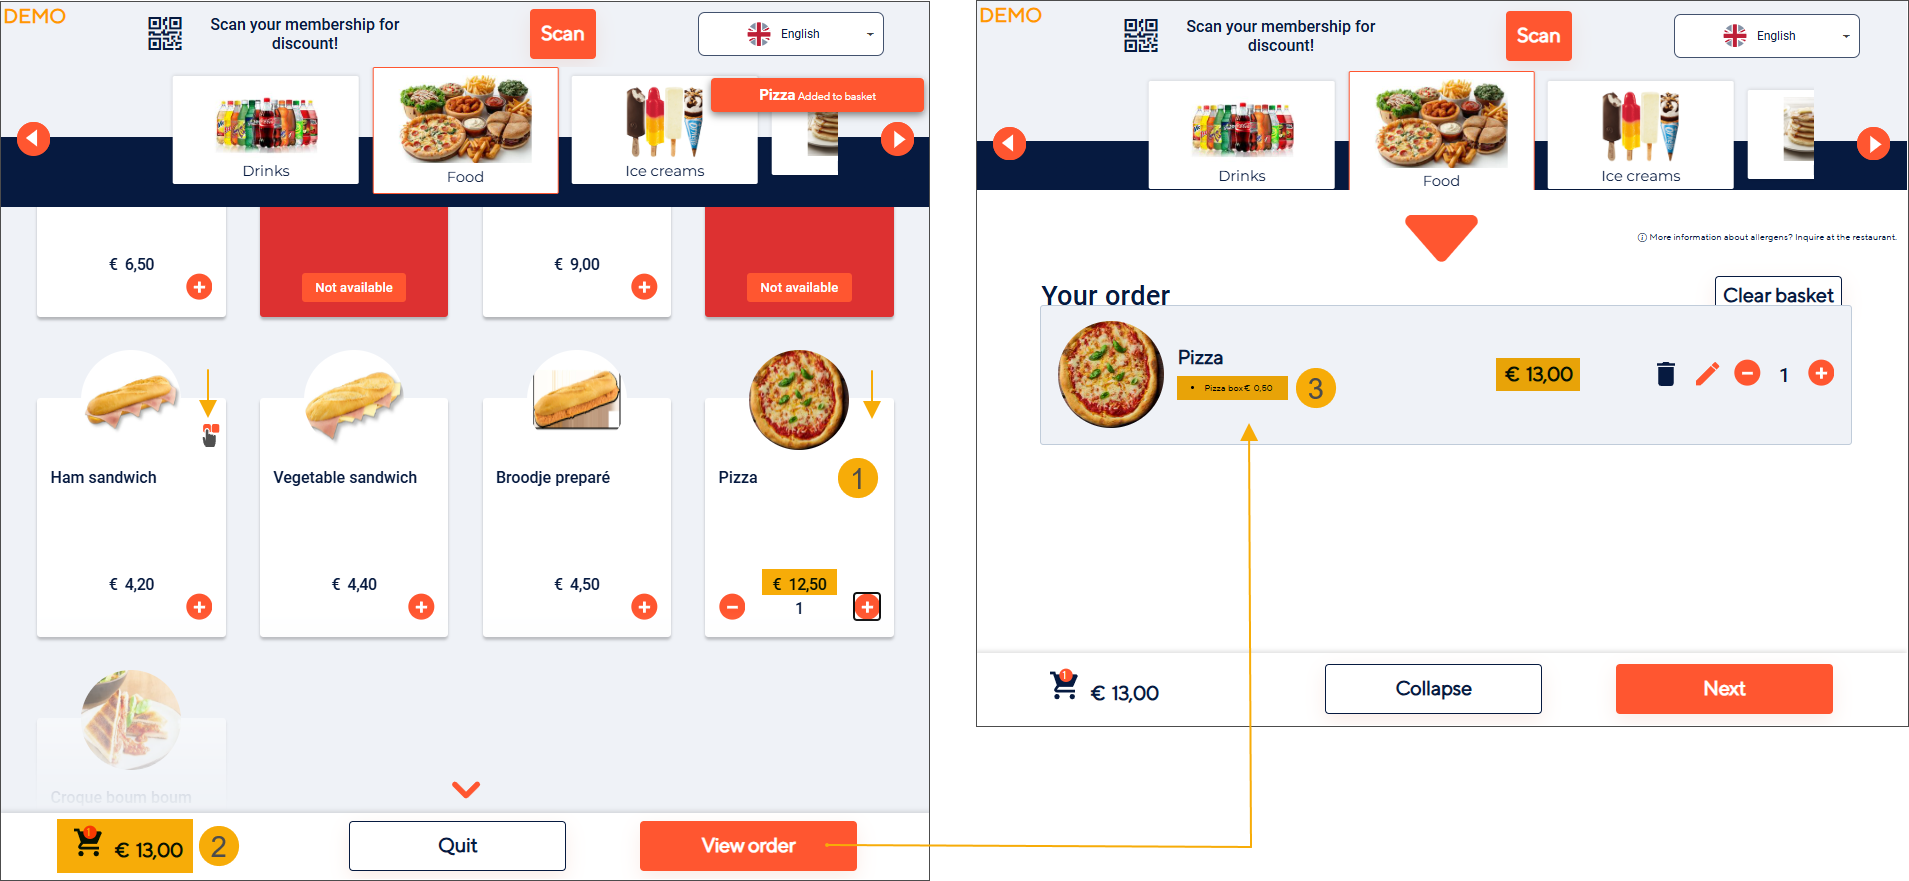
Note
If a mandatory possibility has a price, you can choose to display it in the order overview for greater transparency by enabling the following setting:
F&B Manager > User Interface tab > setting Show option prices in basket
Disabled: The product tile shows an icon indicating that the article includes additional options (1). Clicking the product tile opens the option step (2), where the single possibility must be selected (3) before proceeding (4).

Skip validation of stock
If your sales items are configured as stock articles in Recreatex backoffice you can choose to skip the stock validation and allow items to be sold even when the article stock is zero in Recreatex.
Prerequisites
The relevant articles are configured as stock articles in Recreatex backoffice
The parameter Allow negative balance is enabled under General > Parameters > Stock > section Web
Enabled: No stock validation is performed. The article can be sold, and a sales line is created in Recreatex even though the stock level is 0. After the sale, the stock is updated, resulting in a negative value.
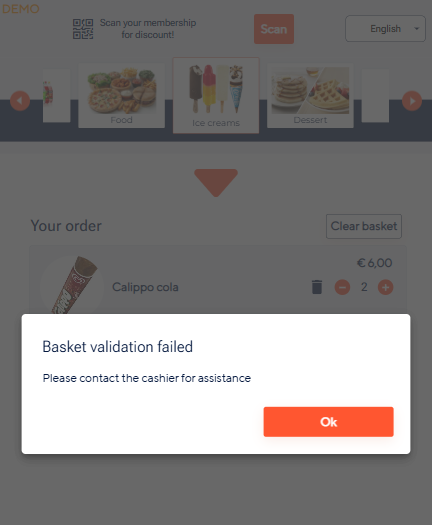
Note
If the parameter Allow negative balance is not enabled, the kiosk displays a validation error when the customer attempts to confirm the basket and proceed to payment.
Disabled (default): Stock validation is performed. If the article's stock level is 0, the article will not appear in the kiosk menu.
Buzzers
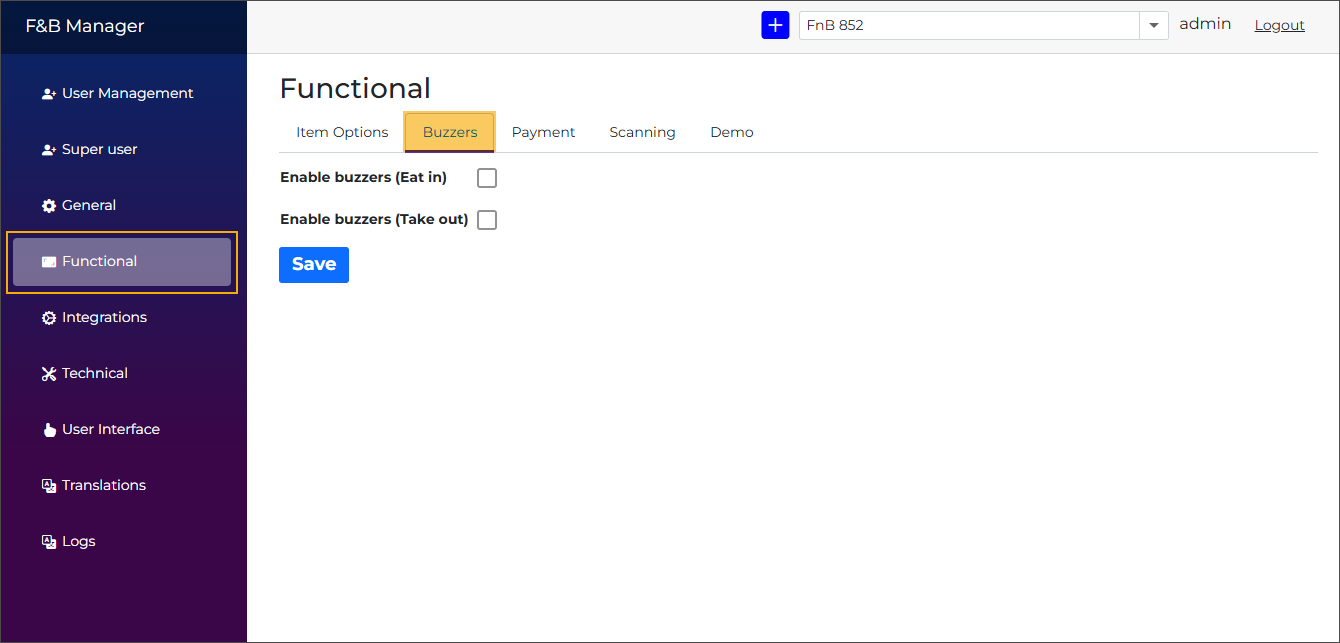
Enable buzzers (Eat in)
Enabled: A screen prompting the customer to enter a buzzer number (3 & 4) appears in the Eat-in ordering flow (1) after clicking Checkout (2) and before proceeding to payment.
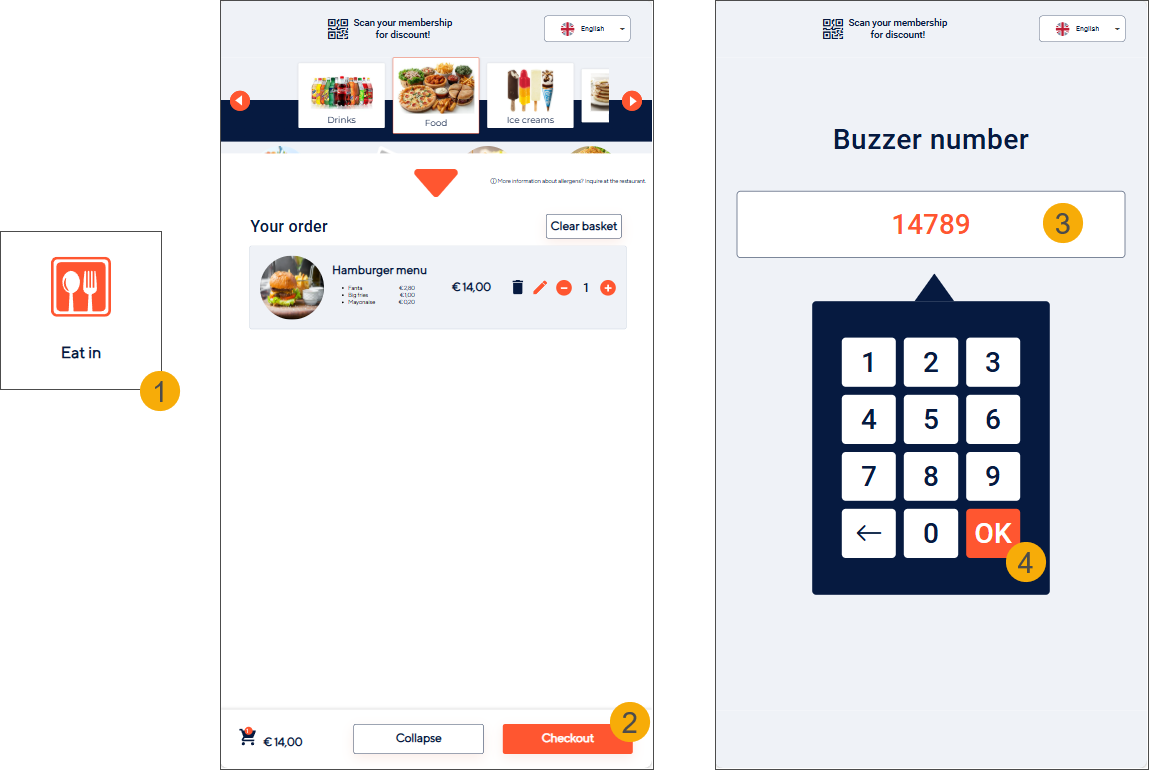
The buzzer number serves as an order number assigned to the customer and is used to track the order within the Recreatex order processing flow. It is entered in Recreatex in the token number field.
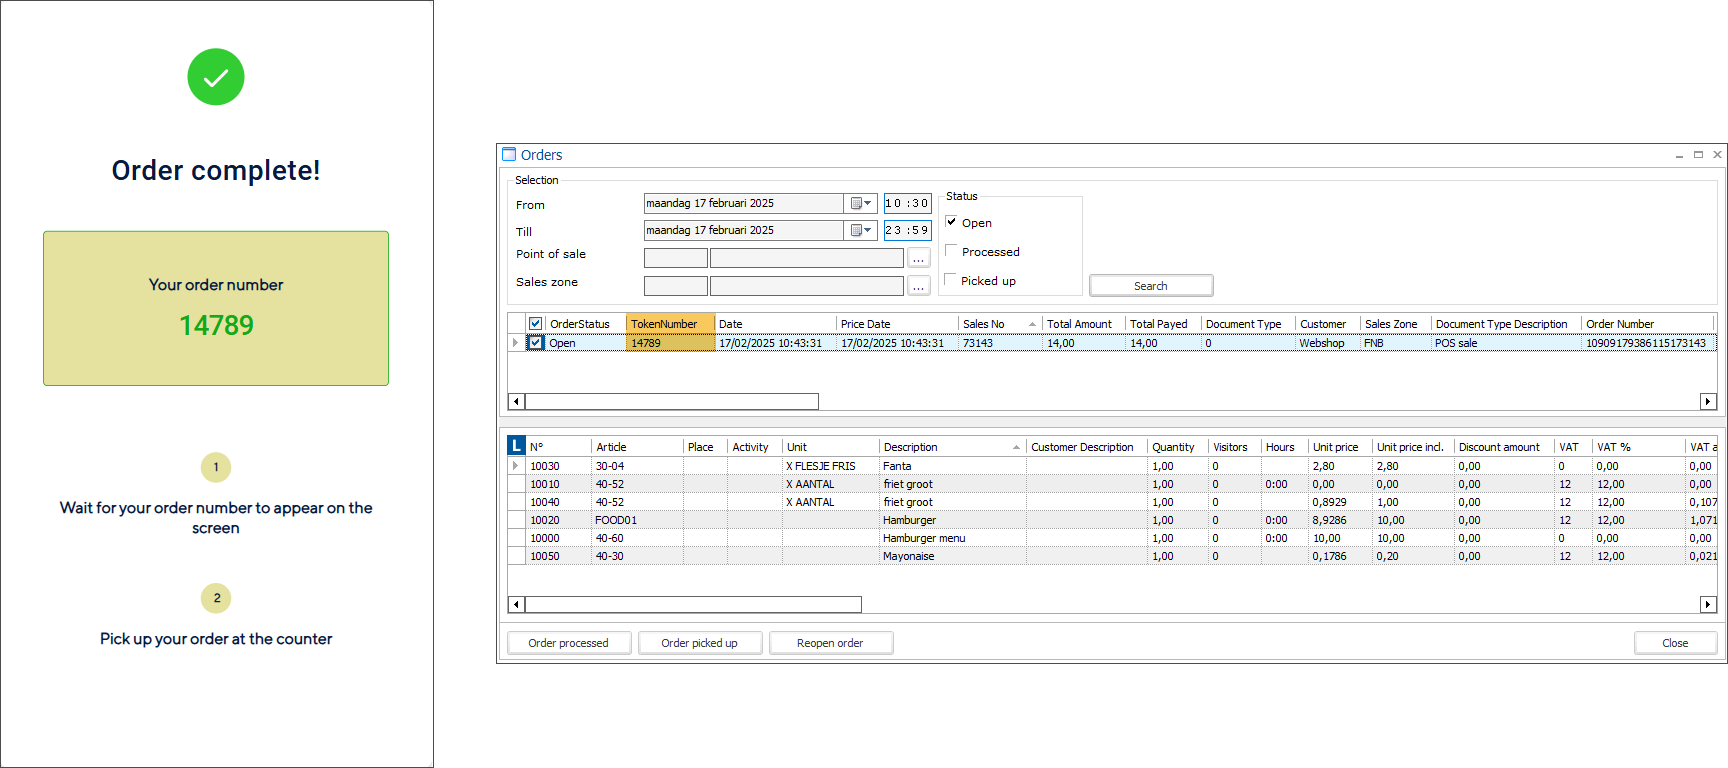
Disabled: The order number is automatically assigned through the token number functionality activated on the sales zone (tab General).
For more information, see Configure ordering functionality.
Enable buzzers (Take out)
Enabled: A screen prompting the customer to enter a buzzer number (3 & 4) appears in the Take-out ordering flow (1) after clicking Checkout (2) and before proceeding to payment.
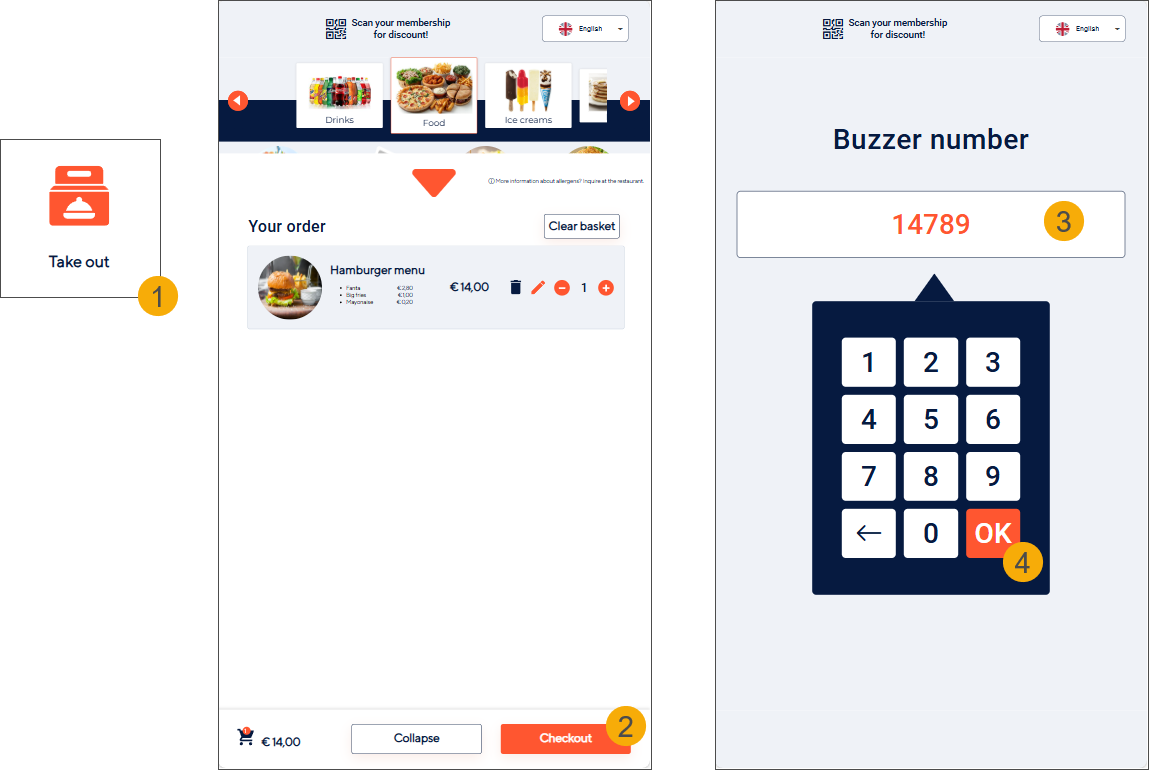
The buzzer number serves as an order number assigned to the customer and is used to track the order within the Recreatex order processing flow. It is entered in Recreatex in the token number field.
Disabled: The order number is automatically assigned through the token number functionality activated on the sales zone (tab General).
For more information, see Configure ordering functionality.
Translations
F&B Manager > Translations
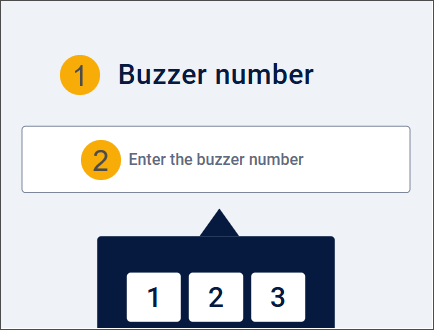
To customise and translate the screen title (1) and the placeholder (2), use the following translation keys:
fnbKiosk.buzzerNumber
fnbKiosk.enterBuzzerNumber
Payment
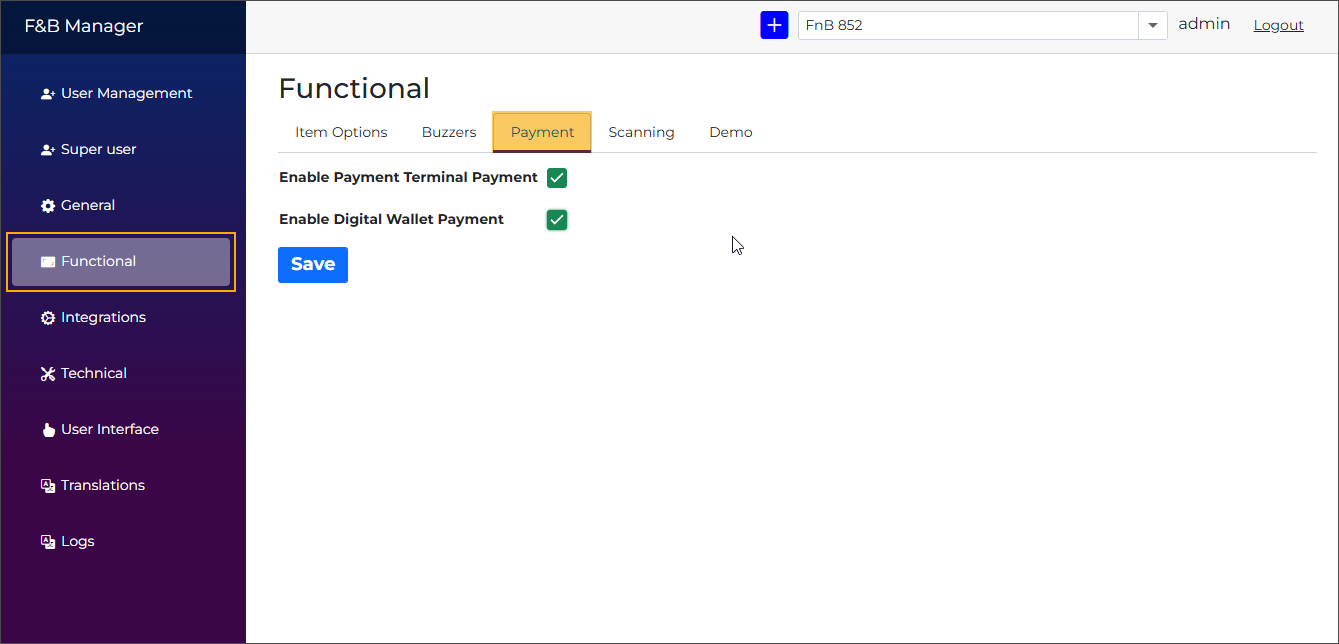
Configure available payment methods for kiosk customers:
No payment method configured: The kiosk displays an Out-of-service screen.
Only digital wallet payment configured: The kiosk goes directly to the digital wallet payment screen.
Only payment terminal payment configured: The kiosk goes directly to the payment terminal screen.
Both payment methods configured: The kiosk first displays the payment selection screen, allowing the customer to choose.
Enable payment terminal payment
When enabled, the payment terminal payment option is shown as a clickable tile on the payment selection screen (1). Clicking the tile initiates the payment terminal payment flow (2).
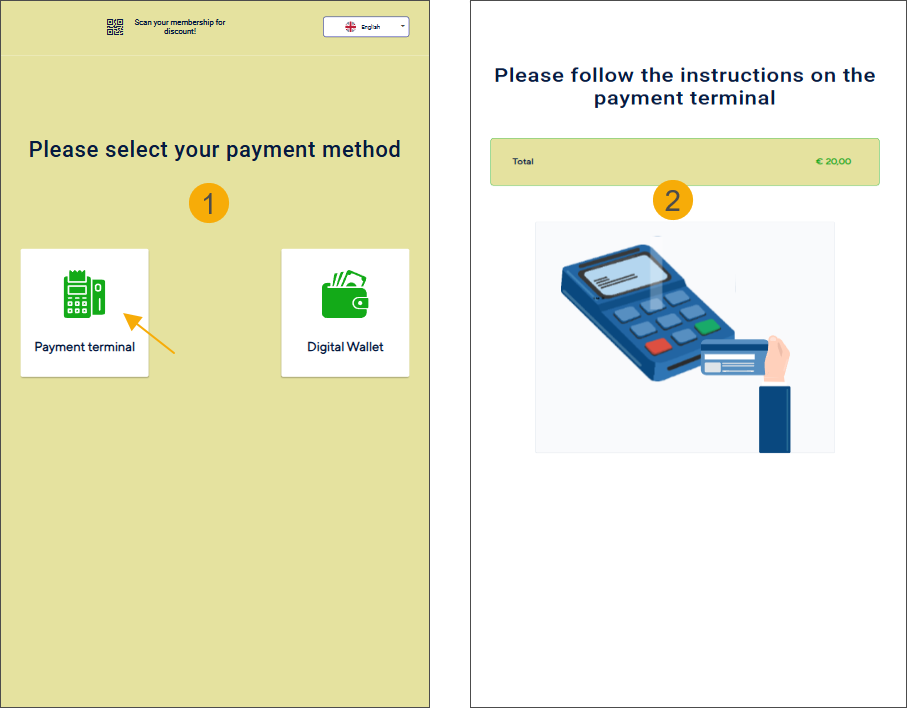
If this is the only configured payment method, the payment selection screen (1) is skipped, and the payment terminal screen (2) is shown immediately.
Enable digital wallet payment
When enabled, the digital wallet payment option is shown as a clickable tile on the payment selection screen (1). Clicking the tile initiates the digital wallet payment flow (2).
Once initiated, the scan functionality waits up to one minute for the user to scan their digital wallet card before timing out. Only digital wallet cards can be scanned by the attached scanner device during this process.
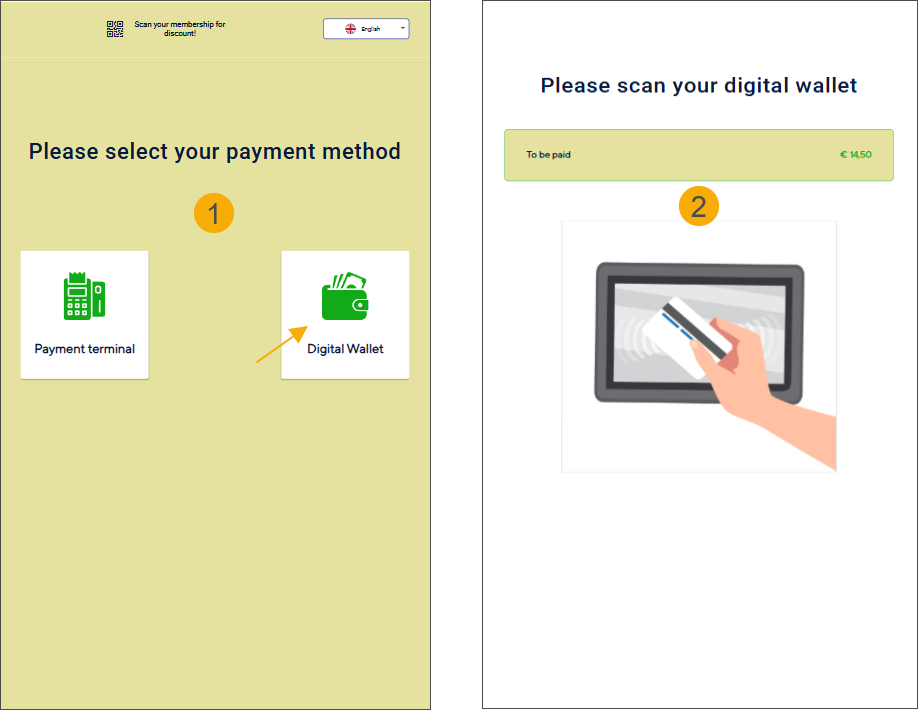
If this is the only configured payment method, the payment selection screen (1) is skipped, and the digital wallet payment screen (2) is shown immediately.
Processing transactions with a zero total amount
In certain situations, a sale may result in a total amount of zero:
Selling articles with a price of zero (free items).
Applying discount codes that give a 100% discount.
Using vouchers with enough balance to fully cover the purchase amount.
When the total amount of a sale is zero, the kiosk skips the payment flow. After selecting Checkout, the kiosk immediately displays the Order complete screen while still correctly recording the sale in Recreatex.
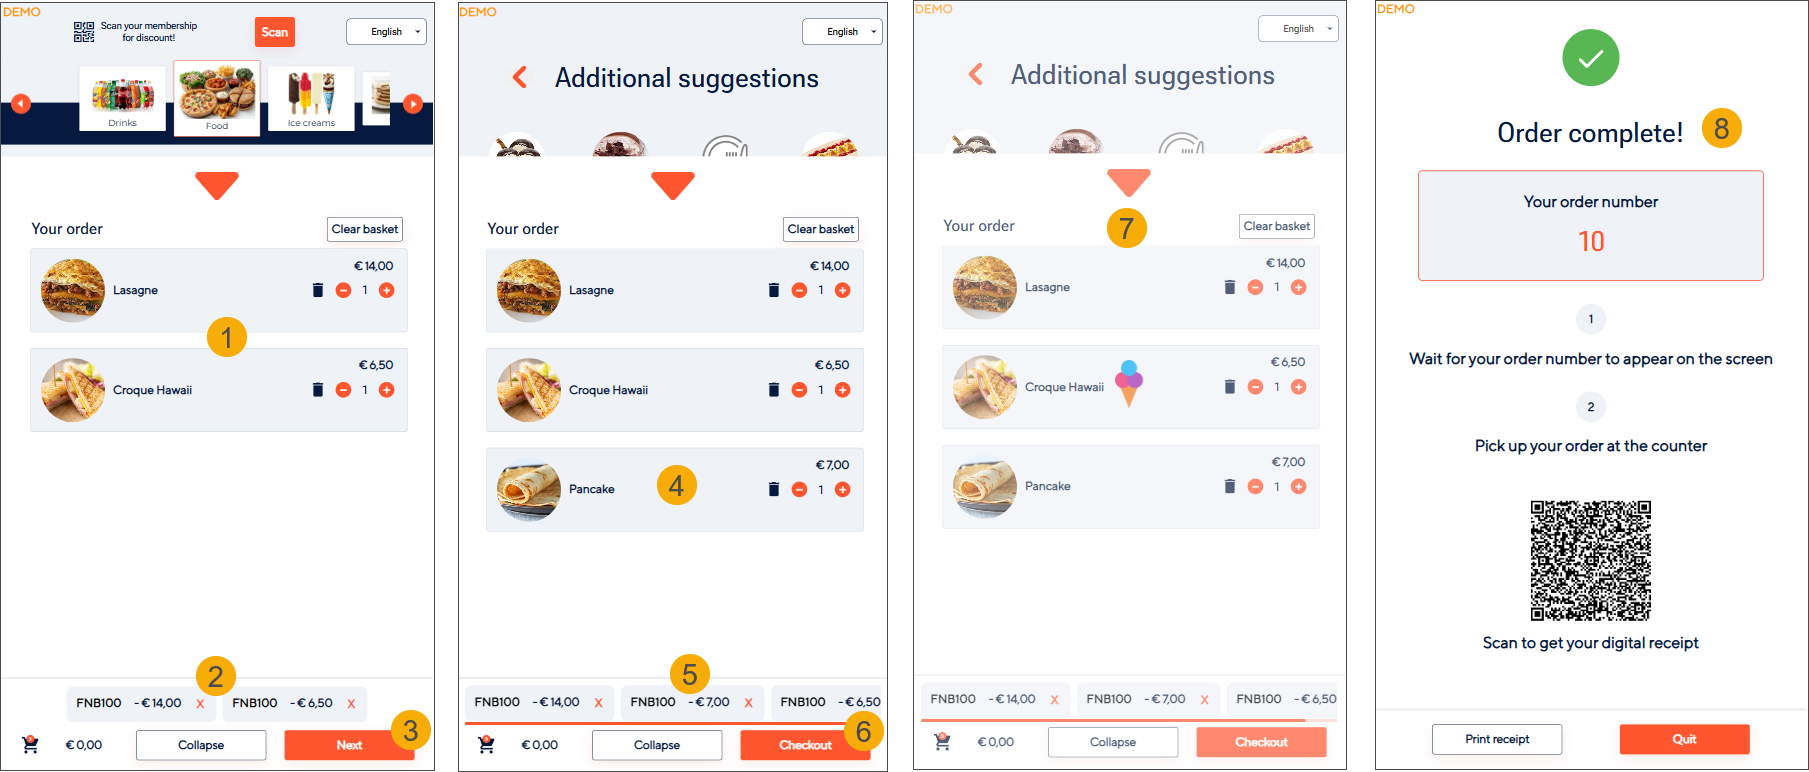
The customer selects the items (1), applies a 100% discount code (2), and continues by clicking Next (3).
Additional suggestion is selected (4) and the 100% discount is applied automatically (5). The customer then proceeds to Checkout (6).
The system processes the order (7).
The Order complete screen is displayed (8), with no payment flow shown.
Scanning
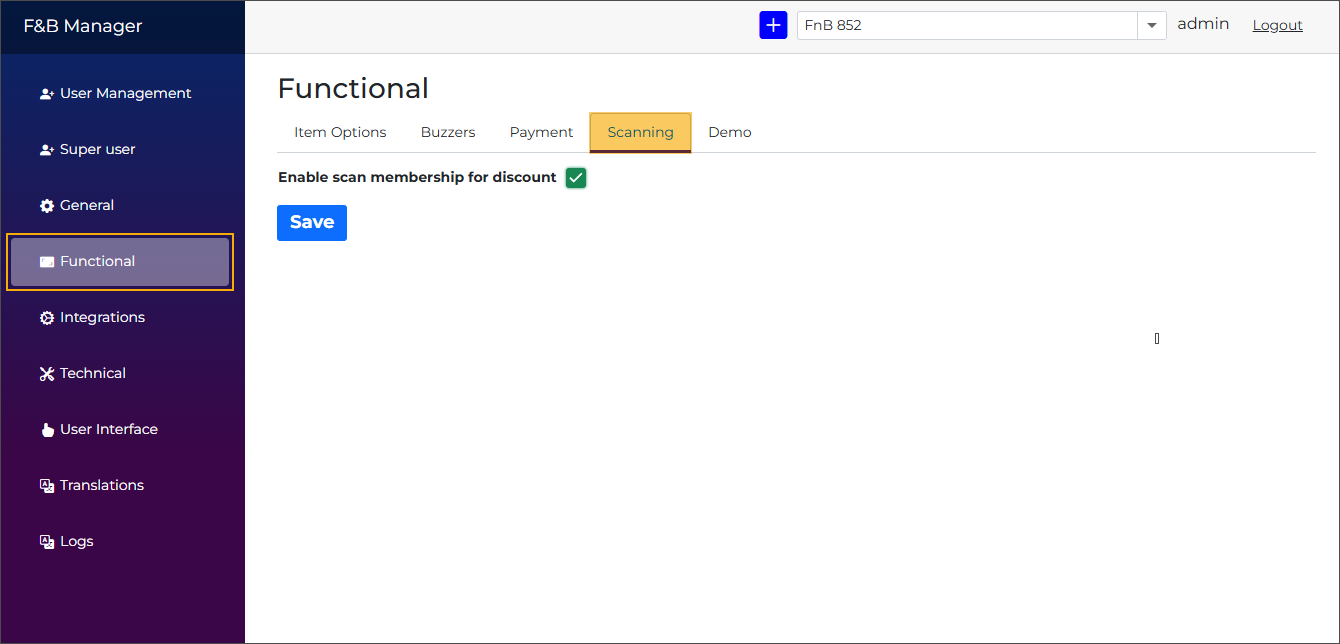
Enable scan membership for discount
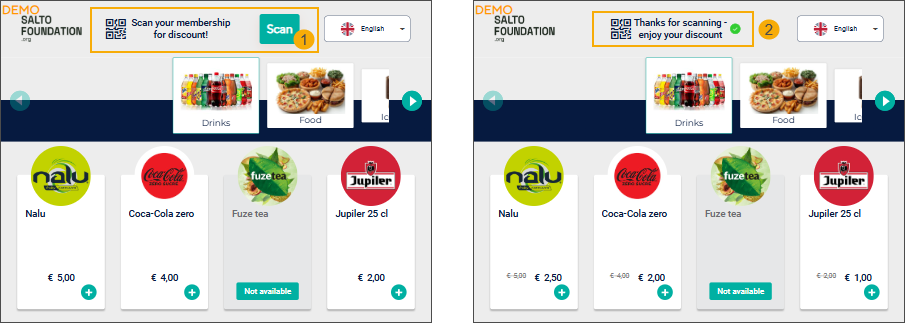
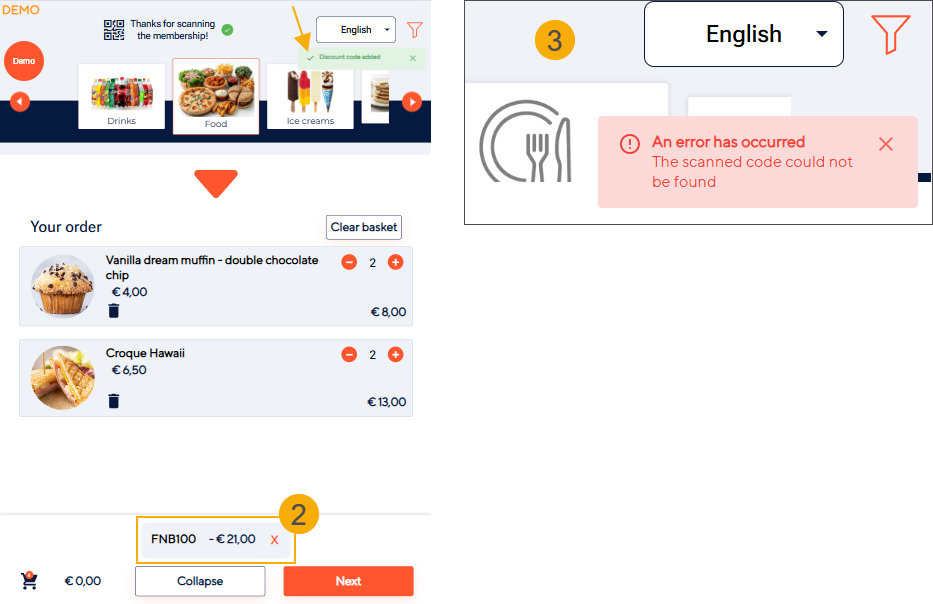
When this option is enabled, customers can scan their membership cards using the connected scanner to receive discounts. Scanning is available on the Home screen (1), product selection screens (2), and payment selection screen (3).
Welcome screen: Displays a message and an animated arrow at the bottom, directing customers to the scanner device.
See also the settings Language button colour and Language button text colours to customise the element and text colours.
Product and payment selection screens: Show the message in the header.

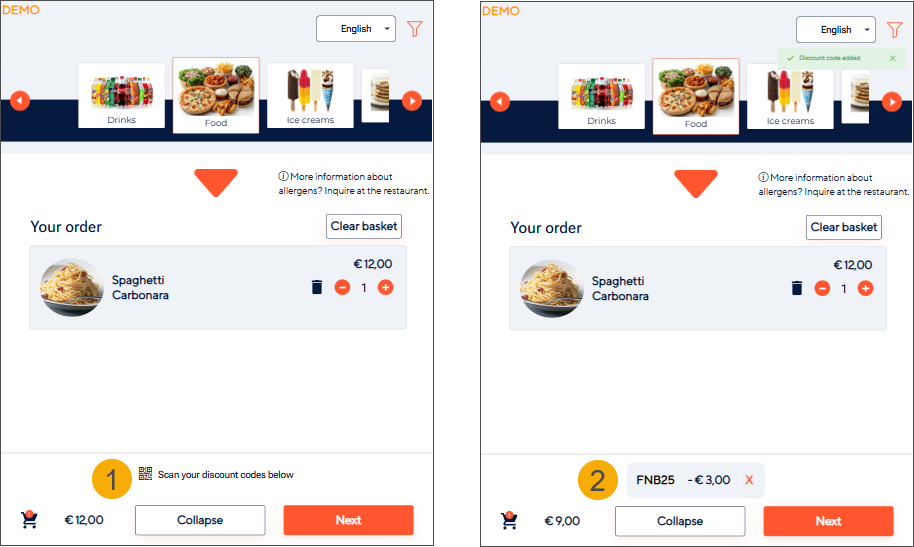
Enable scan discount code
When this option is enabled, customers can scan available discount codes to apply discounts using the connected scanner. A message is shown in the basket below indicating that discount codes can be scanned (1).
Once the discount code is scanned:
It is displayed in the basket as a label showing the discount code name and discount value. (2)
When a discount code applies to multiple items, the basket displays the code only once and shows the combined discount total.
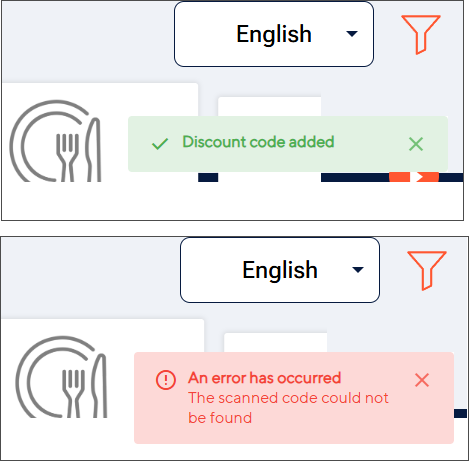
A toast notification appears in the top-right corner of the kiosk screen:
Success notification (green) if the code is valid.
Failure notification (red) if the code is invalid or cannot be applied.
The discount code can be removed by clicking the X button on the label.
Demo
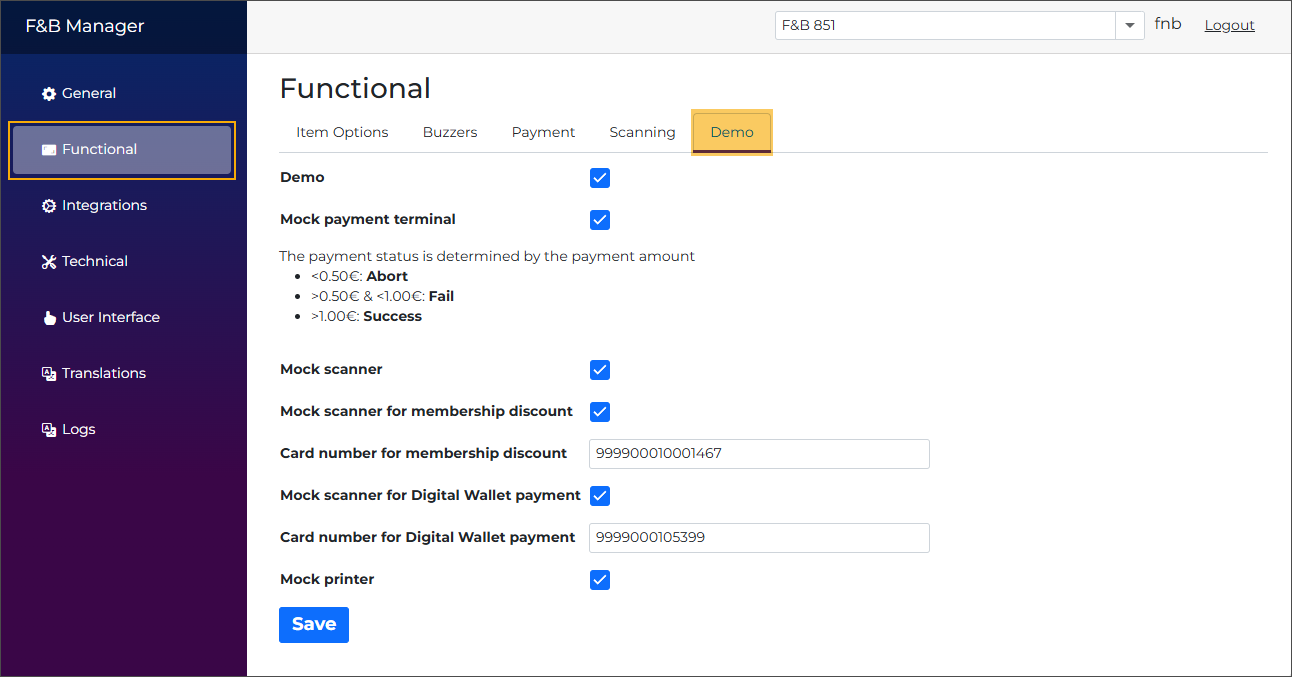
Demo
Activates demo mode for the Vintia Order Kiosk.
When demo mode is enabled:
The related simulation settings for the payment terminal, scanner, and printer can be activated independently.
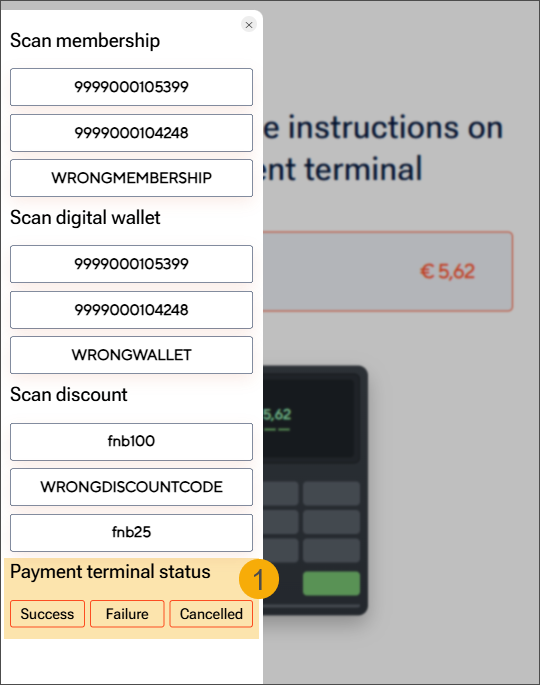
All kiosk screens display a floating, draggable Demo button (1) available on every screen. The button snaps to the left or right side of the display. Clicking the button opens an overlay (2) that provides:
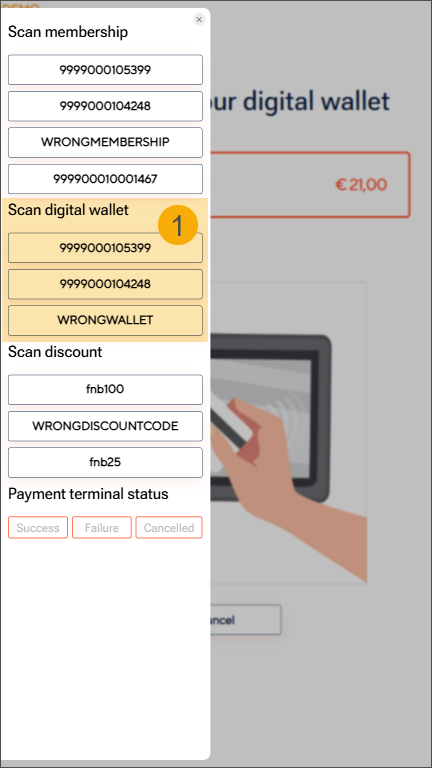
Access to all configured memberships, digital wallets, and discount codes, displayed as buttons to simulate scans on the relevant pages.
Controls to simulate payment terminal outcomes (Failure/Cancelled/Success), only enabled on the payment screen.

Mock printer
Allows simulation of printer behaviour. If a printer is connected, it will be bypassed. The Print receipt button can be used during testing without causing the kiosk application to crash.
Mock payment terminal
Allows simulation of payment terminal behaviour. If a physical payment terminal is connected, it will be bypassed.
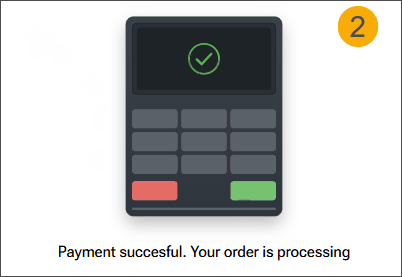
On the payment screen, clicking the Demo button opens an overlay with options to simulate payment terminal responses (1): Success (2), Failure (3), and Cancelled (returns to the product selection screen). The selected option determines the outcome of the simulated payment process.
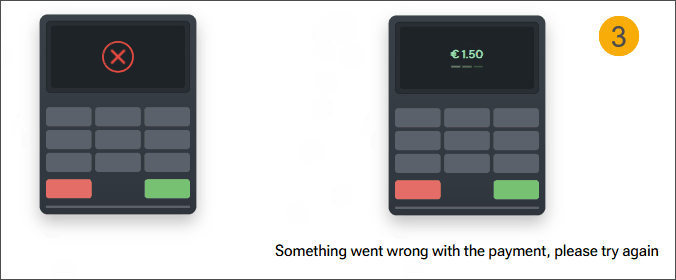
The simulation includes a timeout after three consecutive 10‑second intervals.
If no response is received within 10 seconds, the terminal assumes the payment has failed.
After three consecutive timeouts, the payment is cancelled, and the user is redirected to the article overview page.
This mirrors the behavior of the actual terminal, which follows the same process but with a longer timeout (3 × 30 seconds).
Mock scanner
Allows simulation of scanner behaviour for membership discounts, digital wallet payments, and discount codes. If a physical scanner is connected, it will be bypassed.
Card number for membership discount
Specify the card numbers to use when simulating a membership scan (e.g., to apply a discount).
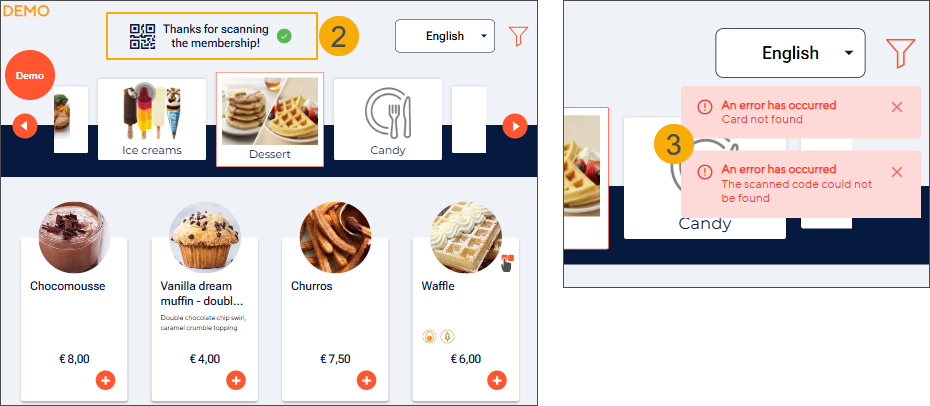
Clicking the Demo button opens an overlay where you can select one of the configured membership cards (1) in the Scan membership section.
When the membership is successfully scanned, the header text changes from “Scan your membership for discount” to “Thanks for scanning your membership.” This confirmation remains visible on relevant screens (e.g., product selection and basket). (2)
If the membership card is invalid, a toast error notification (red) is displayed. (3)
Important
The Demo menu is available on all screens, but membership scan simulation only works on the Welcome screen and the Product and Payment selection screens, in line with the actual kiosk flow.
Card number for digital wallet payment
Specify the card numbers to use when simulating a digital wallet scan.
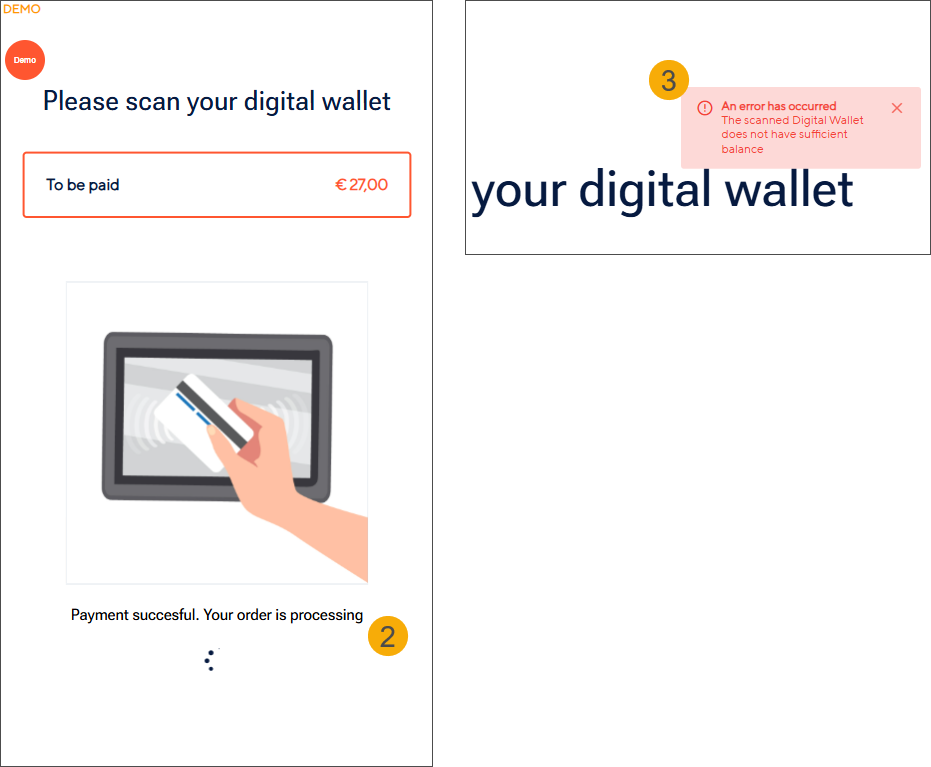
Clicking the Demo button opens an overlay where you can select one of the configured digital wallets in the Scan digital wallet section (1).
Successfully scanning a digital wallet automatically triggers a payment simulation. (2)
If the digital wallet is invalid, a toast error notification (red) is displayed. (3)
Important
The Demo menu is available on all screens, but digital wallet scan simulation only works on the digital wallet payment screen, in line with the actual kiosk flow.
Discount code
Specify the discount codes to apply when simulating the scanning flow.
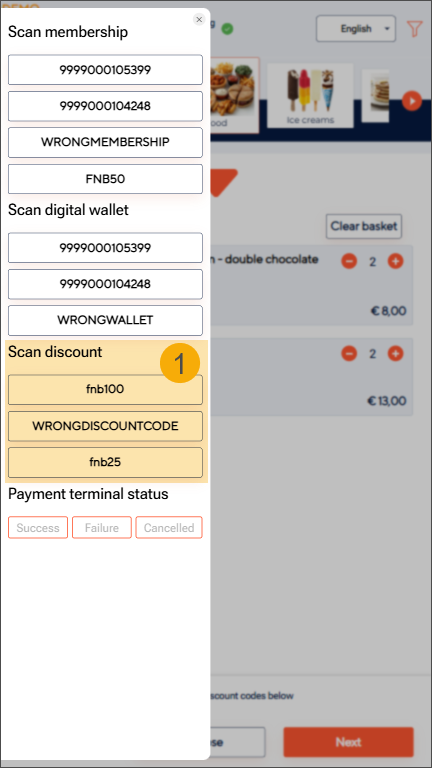
Clicking the Demo button opens an overlay where you can select one of the configured discount codes (1).
Simulated scanning flow is triggered:
The discount code is displayed in the basket as a label showing the discount code name and discount value(2)
A toast notification appears in the top-right corner of the kiosk screen:
Success notification (green) if the code is valid.
Failure notification (red) if the code is invalid or cannot be applied. (3)
The discount code can be removed by clicking the X button on the label.
Important
The Demo menu is available on all screens, but discount code scan simulation only works on the Additional suggestions screen and in the basket overview, in line with the actual kiosk flow.
Receipt

Define how customers receive their receipts after completing a purchase.
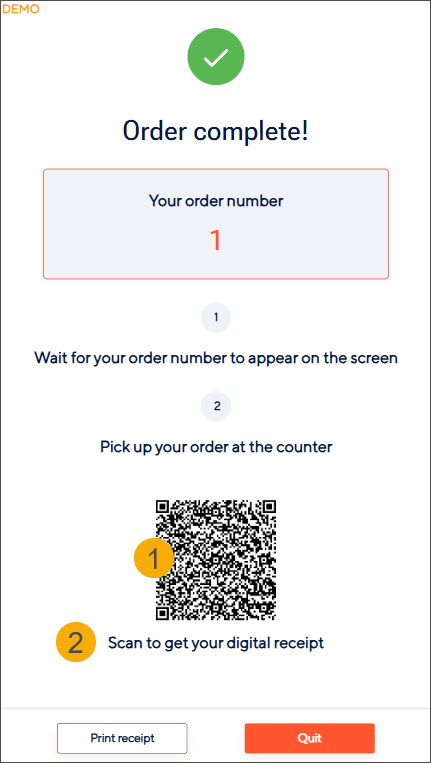
Enable QR code for digital receipt
When enabled, a QR code for the receipt (1) is displayed on the Order complete screen. The text Scan to get your digital receipt appears below the QR code (2). The page remains open for 20 seconds (instead of the default 10 seconds) before closing automatically.
Receipt printing
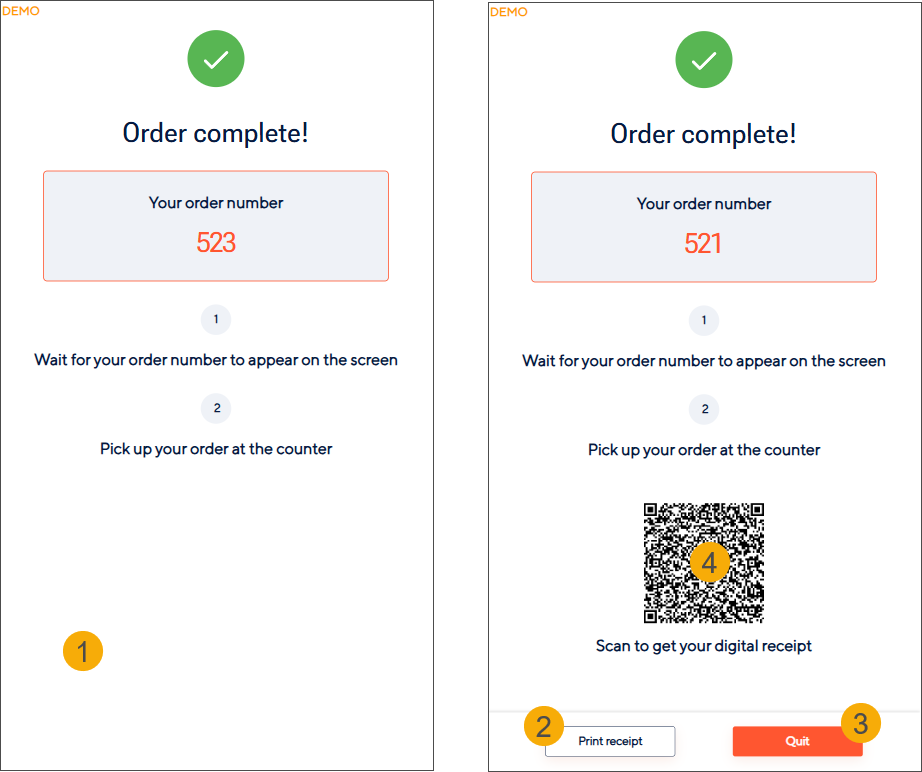
Automatic (default): When this option is enabled, no buttons are displayed on the Order complete screen (1), and the physical receipt is printed automatically.
Manual: When this option is enabled, the Order complete screen displays two buttons:
Print receipt (2): Prints a physical receipt and closes the Order complete screen.
Quit (3): Closes the Order complete screen without printing.
This option allows the customer to choose whether to print a physical receipt or exit without printing. It can be combined with the Enable QR code for digital receipt feature (4), providing an alternative way for customers to access their receipt without printing. The Quit button is the primary action, so the preferred flow is for the customer to either scan the QR code for a digital receipt or quit if no receipt is required.