Recreatex back office
In this part, we describe the entire management of waiting lists and lesson groups and the follow-up of students within Recreatex. This chapter thus contains the functionalities below:
Manage waiting lists/lesson groups
Transfer students
Course management tool
Manage stickers
An extensive offer of reports and visualisations (participant lists, a graphic overview of lesson groups, ...)
...
Waiting lists
For managing waiting lists, go to Swimming courses > Waiting lists.
In the overview of all waiting lists, you can choose to visualise the waiting lists of the current division only or of all divisions.
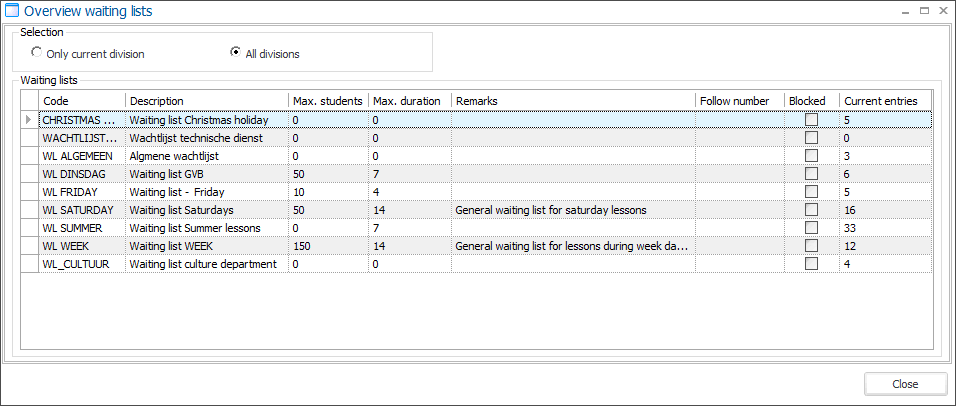
You can create, modify or delete waiting lists using the existing framework functionality.
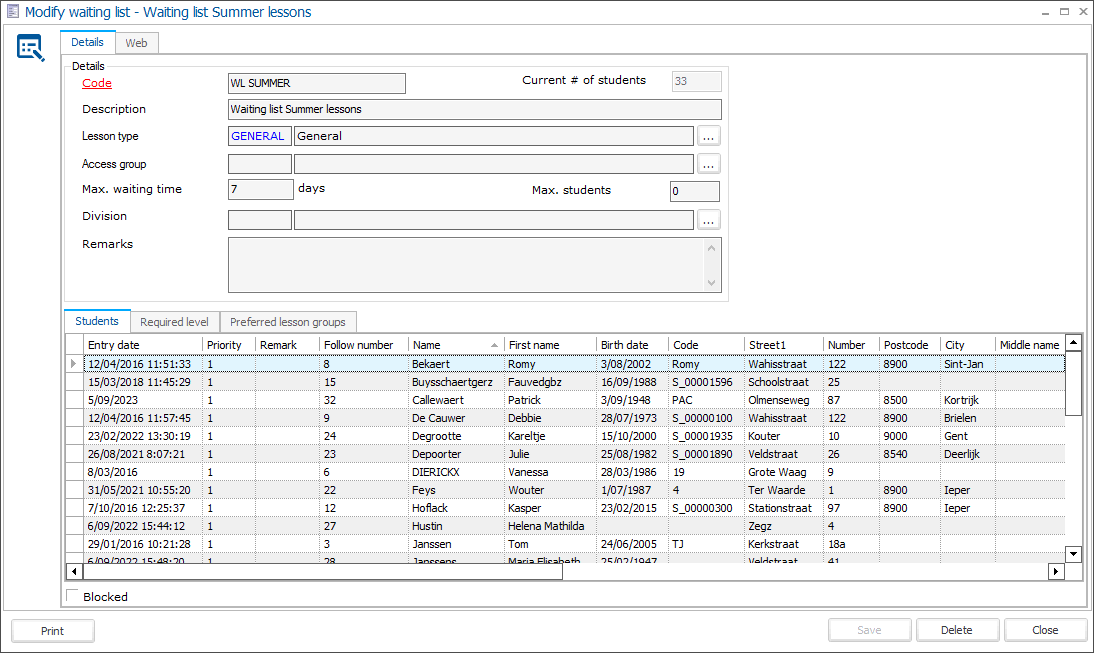
In addition to the sections Details and Web, this window also has several tabs in which you can manage all students on the waiting list, the levels required to register for the waiting list and the preferential lesson groups linked to the current waiting list.
Details
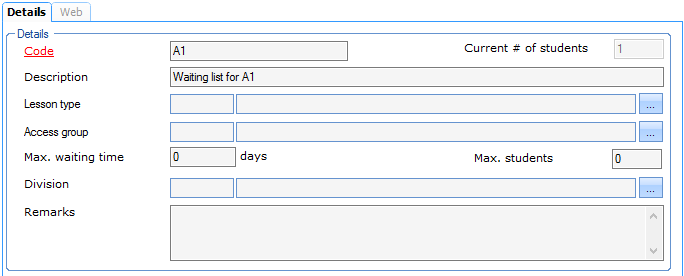 |
In the section Details, you provide the general characteristics of each waiting list.
Code | Is unique and obligatory. It is advised to choose a relevant code so that you can immediately derive from the code which waiting list is concerned. |
Description | The description of the waiting list. |
Current # of students | The current number of students on this waiting list. (informatively) |
Lesson type | The lesson type linked to the waiting list. (see also: Lesson types) |
Access group | If you work with access control, you can fill in the access group here that determines where and when access is granted to the customers registered on the waiting list. |
Max. waiting time | The maximal waiting time for this waiting list. |
Max. students | The maximum number of students allowed on this waiting list. |
Division | The division to which you want to link the current waiting list. |
Remarks | Extra information concerning the current waiting list. |
Students
The tab Students shows all customers currently registered for the waiting list.
 |
Using the available framework functionality you can always add customers to the waiting list or delete customers from the waiting list and/or modify specific data concerning the registration.
 |
Tip
The fastest way to register customers for a waiting list is via the cash register. (see manual POS - Use)
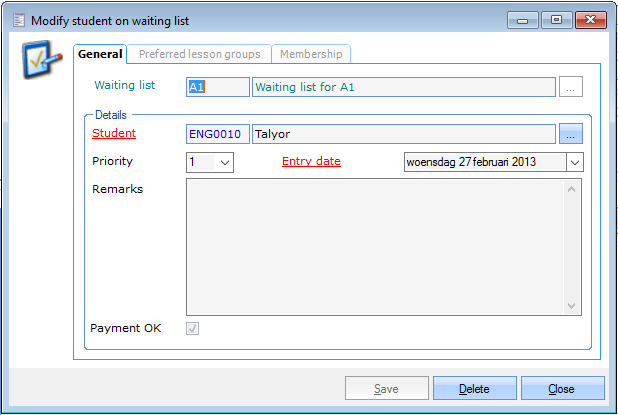
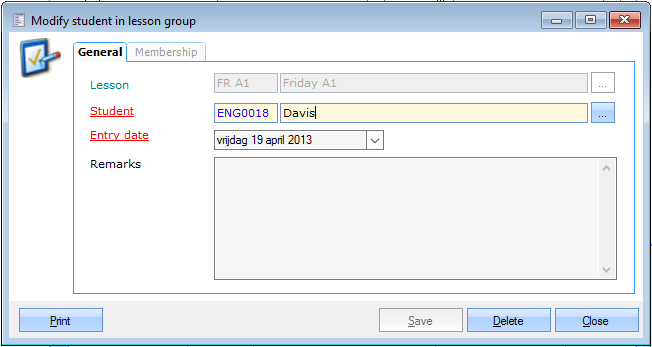
General
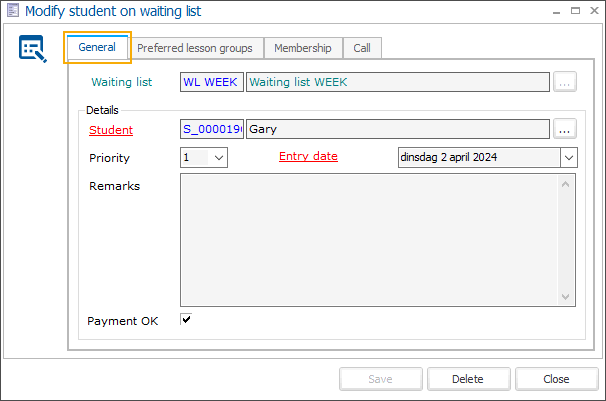
Waiting list | The waiting list on which the student is/was registered. |
Student | The student you want to register for the selected waiting list. |
Priority | The priority of the registration. (from 1 to 9, 1 being the highest priority) |
Entry date | The date when the student is/was registered on the waiting list. |
Remarks | Remarks concerning the registration of the student on this specific waiting list. When a student declines a waiting list call using the confirmation link in the waiting list call email and adds a remark, this remark will also appear in this field. 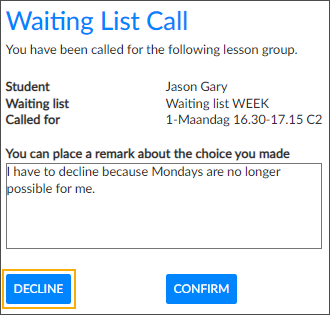 |
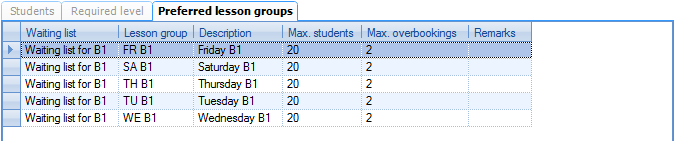
Preferred lesson groups
The tab Preferred lesson groups offers an overview of all lesson groups and allows you to tick the lesson group(s) the customers would prefer when being registered for or transferred to a lesson group.
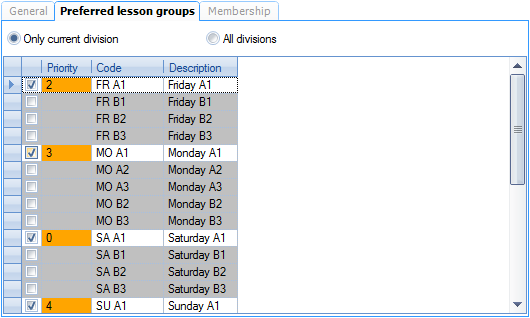 |
If you select a lesson group, the field Priority will be marked in orange. If you click in the orange field afterwards, you can select the desired priority (from 0 to 9, 0 being the highest priority).
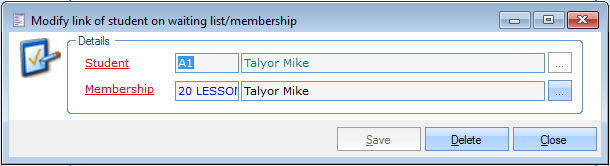
Membership
The tab Membership gives you an overview of all memberships that are linked to the registration of the customer on this waiting list and with which access is granted or not.
 |
Using the Framework functionalities you can always link memberships (already sold to the student) or disconnect memberships from the registration.
 |
Required levels
In the tab Required levels you can specify which level(s) the customer must already have obtained to be able to register for the selected waiting list.
 |
You can link a new required level to the waiting list in question or consult the levels already linked.
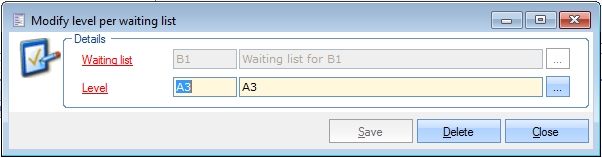 |
Waiting list | The waiting list to which you want to link the level. |
Level | The level customers must already have obtained to be able to register for the selected waiting list. |
For an explanation on how to create levels, we refer to Settings > Levels
Preferred lesson groups
In the tab Preferred lesson groups you can link the lesson groups that the customer can select as preferences when registering for the selected waiting list.
 |
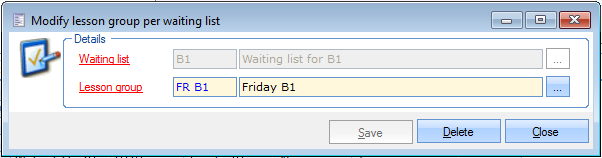 |
Waiting list | The waiting list to which you want to link the (preferred) lesson group. |
Lesson group | The lesson group you want to link to the selected waiting list as possible preferred lesson group. |
For an explanation on how to create and manage lesson groups, we refer to Lesson groups.
Web
Under the tab Web, you can define the price article for registrations made on the website.
 |
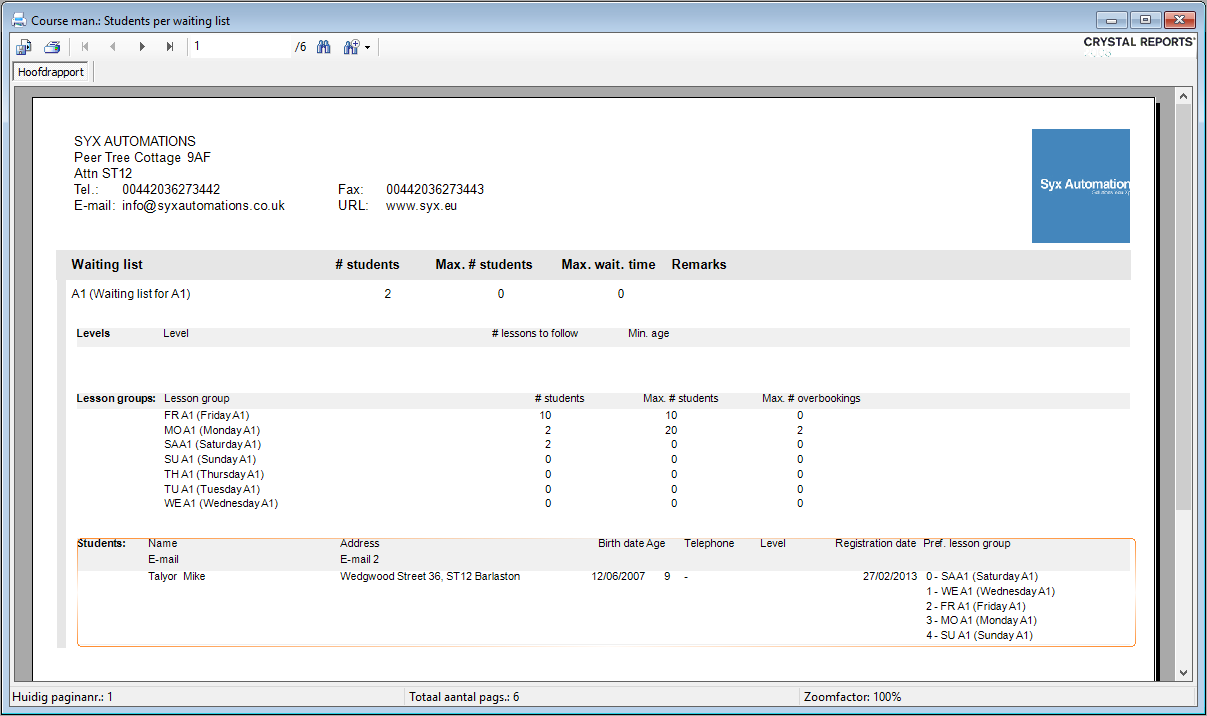
In the left lower-hand corner of the window Modify waiting list you can click the button Print to generate the report Students per waiting list.
 |
Lesson groups
For managing lesson groups, go to Swimming courses > Lesson groups.
The overview below will appear in which you can choose to visualise the lesson groups of the current division only or of all divisions.
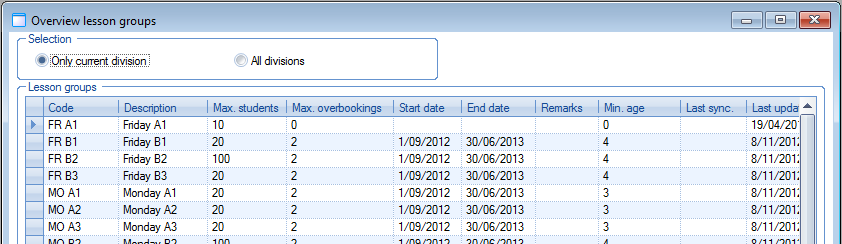 |
Using the Framework functionalities, you can create, modify or delete lesson groups.
 |
In addition to the section Details, this window has a number of tabs in which you can manage further details concerning the lesson group.
Details
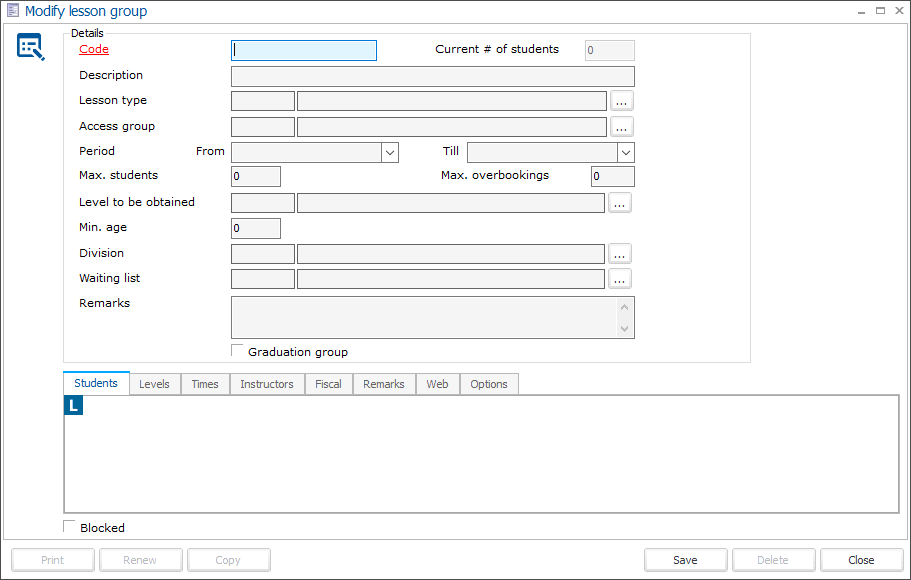 |
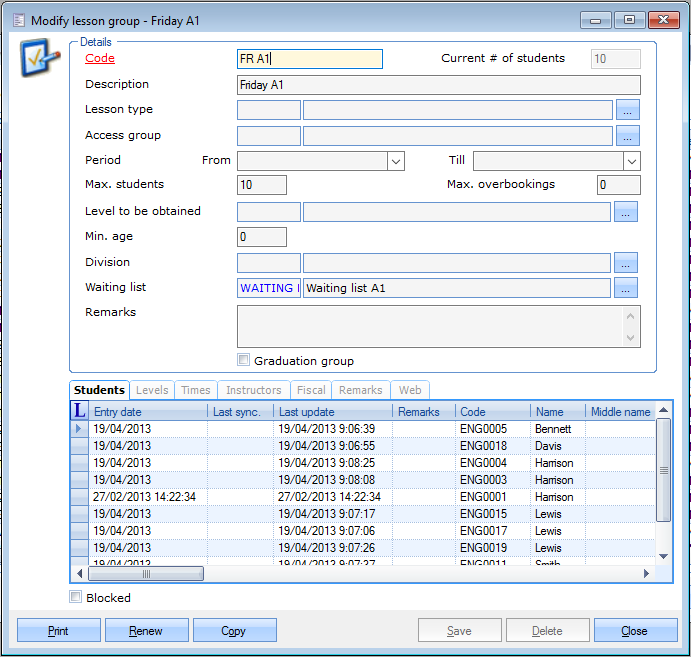
In the section Details, you can fill in all specific characteristics of the lesson group.
Code | Is unique and obligatory. It is advised to choose a relevant code so that you can immediately derive from the code which lesson group is concerned. |
Description | The description of the chosen lesson group. |
Current # of students | The current number of students in this lesson group. (informatively) |
Lesson type | If you select a lesson type, a number of data of the lesson type in question are taken over in the lesson group, for example allowed level, maximal number of students, times and instructors. (see also: Lesson types) |
Access group | If you work with access control, you can fill in the access group here that determines where and when access is granted to the customers registered for this lesson group. |
Period | The period during which the lessons of this lesson group take place. (see also: Lesson groups > Times) |
Max. students | The maximal number of students allowed in this lesson group. (overbookings are still possible) |
Max. overbookings | The maximum number of overbookings allowed on top of the maximum number of students determines the maximum number of students. |
Level to be obtained | The level that is obtained when students pass this lesson group. |
Min. age | The minimal age required for this lesson group. |
Division | Fill in the division on which the lesson group has been created. To allow other divisions to access this lesson group, apply the Rights per division which can be activated in the parameters. |
Waiting list | The waiting list linked to this lesson group |
Remarks | Extra information concerning this lesson group |
Graduation group | Here you can indicate if the lesson group is a graduation group (i.e. diploma is handed over if students pass) |
Exclusion calendar | Link an exclusion calendar to a lesson group to prevent customers from unsubscribing or registering for catch-up lessons on regular lesson days when classes are not taking place, e.g. due to bank holidays. A blocking message is shown when trying to sign out or register a catch-up lesson on a day marked in the linked exclusion calendar. 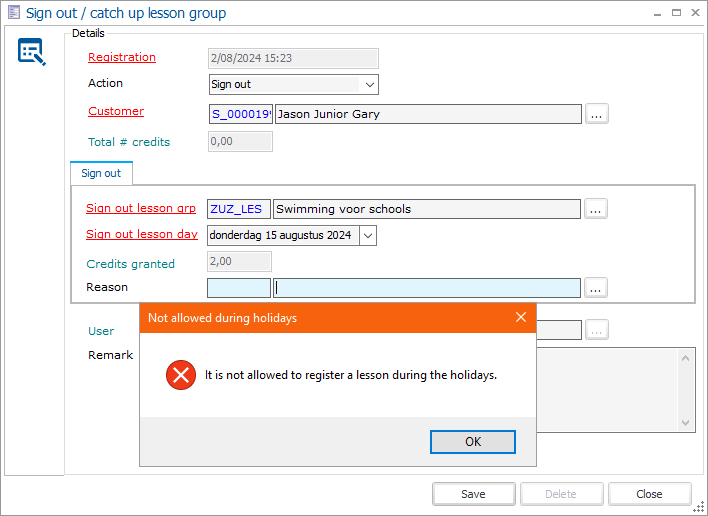 When calling waiting list students, the exclusion calendar linked to a lesson group is considered in the calculation of the nearest possible start date. To create an exclusion calendar, see Calendars. |
Finally, you can indicate at the bottom of the window if the lesson group is blocked or not.
Students
In the tab Students all the students that are registered for this lesson group are listed.
 |
Using the Framework functionalities you can always add customers to the lesson group or delete them and/or modify specific data concerning the registration.
 |
Tip
The fastest, most simple and clearest way to register customers for a certain lesson group is using the cash register. (see manual POS - Use)
General
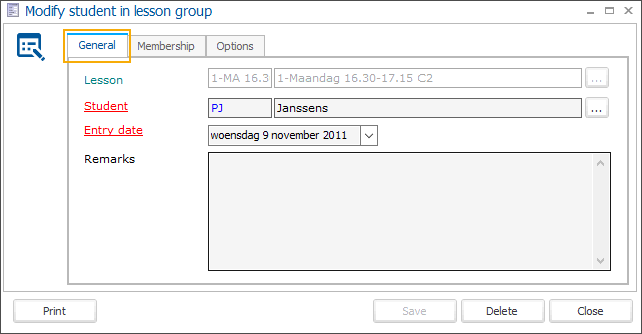
Lesson group | The lesson group for which the student is/was registered. |
Student | The student you want to register for the selected lesson group. |
Registration date | The registration date of the student into this lesson group. |
Remarks | Extra information concerning the registration of this student for this lesson group. When a student accepts a waiting list call using the confirmation link in the waiting list call email and adds a remark, this remark will also appear in this field. 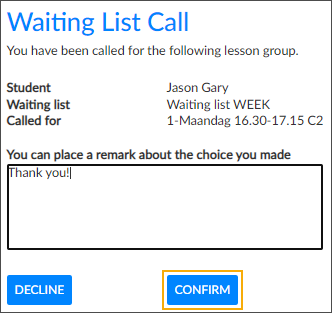 |
Membership
The tab Membership gives an overview of all memberships that are linked to the registration of the student for this lesson group and with which access is granted or not.
 |
Using the Framework functionalities you can always link memberships (already sold to the student) or disconnect memberships from the registration.
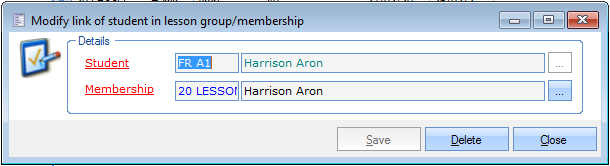 |
Student | The student that is registered for this lesson group. |
Membership | The membership of the student that is linked to the lesson group. |
Levels
In the tab Levels you can specify which level(s) the customers must already have obtained to be able to register for the selected lesson group.
 |
You can link a new required level to the lesson group in question or consult the levels already linked.
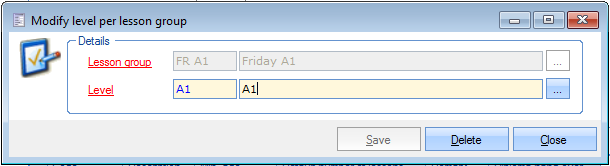 |
Lesson group | The lesson group to which you want to link the level. |
Level | The level customers must already have obtained to be able to register for the selected lesson group. |
For an explanation on how to create levels, we refer to Settings > Levels
Times
In the tab Times you can specify when the lessons of this lesson group take place during the Period specified before. (see Lessson groups > Details)
If you want to you can call up an overview of all lesson times of all lesson groups using the visualisation Lesson groups calendar.
You can add lesson times in the tab Times or the tab Graphic.
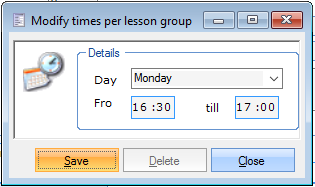
Tab Times:
 |
Using the Framework functionalities you can always add, modify or delete times.
 |
Tab Graphic:
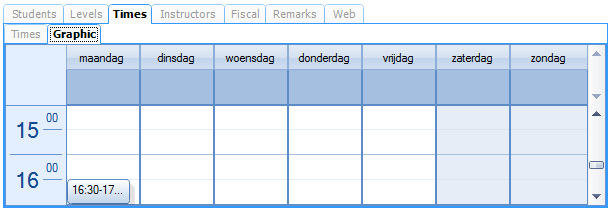 |
You can add times by selecting one or several time blocks and by hitting the <Enter> key.
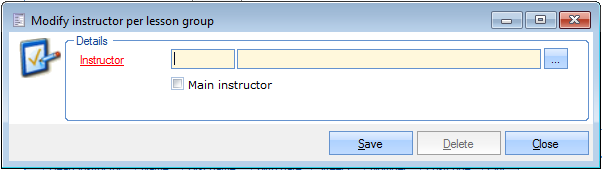
Instructors
In the tab Instructors you can consult all instructors for the selected lesson group and add new ones.
 |
Using the Framework functionalities you can always add, modify or delete instructors.
 |
Tip
It is advised to first create all instructors as employees before linking them to a lesson group. (see manual GENERAL - Employees)
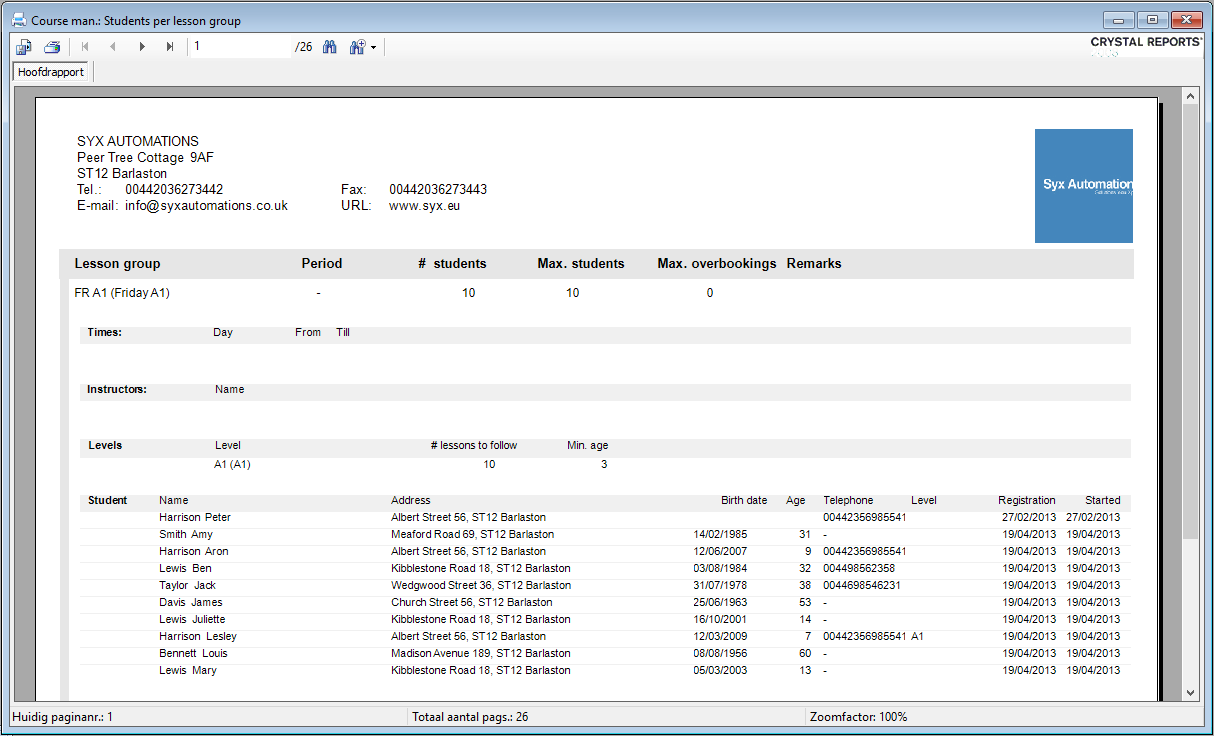
At the bottom of the window Modify lesson group, you can click on the button Print after which the report Students per lesson group will be generated.
 |
Renew
At the bottom of the window Modify lesson group, you can click on the button Renew to open the window below, allowing you to renew all lesson memberships, linked to the students in this lesson group, in one go.
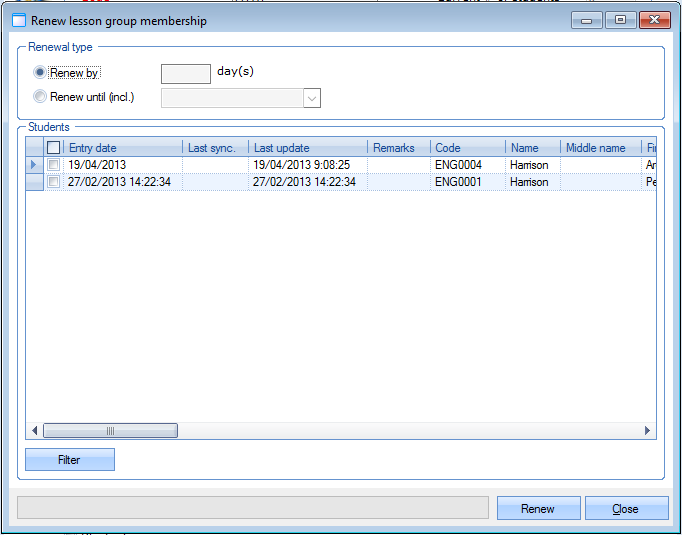 |
Tick the students of which you want to renew the lesson memberships and determine the period with which the membership has to be renewed. You can either choose a fixed number of days, either choose for renewal until a fixed end date.
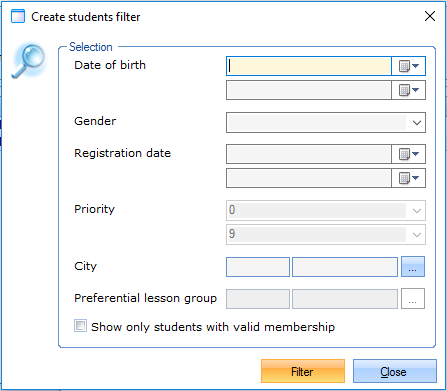
The button Filter allows you to filter the overview of students. Fill in the required filter criteria and hit the button Filter.
 |
After selecting the desired students and filling in the desired type of renewal, you can click on Renew in the window Renew lesson group membership. All lesson group memberships of the selected students will be renewed according to the chosen type of renewal.
Copy
At the bottom of the window Modify lesson group, you can click on the button Copy to copy the current lesson group.
The following message will appear:
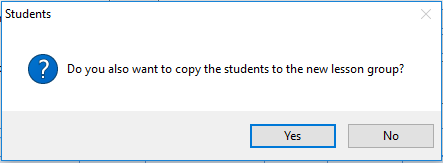 |
Here you can decide if you also want to copy the registered students of the lesson group to the new lesson group.
Warning
If you decide to also copy the students, you have to take into account that these students will be registered for several lesson groups after copying.
The lesson group will then be copied and immediately visualised. You will see an asterisk (*) after the lesson group code, which indicates that the current lesson group is a copy of the previous one.
 |
You can now modify the data of the copy and click on the button Save to save the new lesson group as such.
Processing possibilities
Course management tool
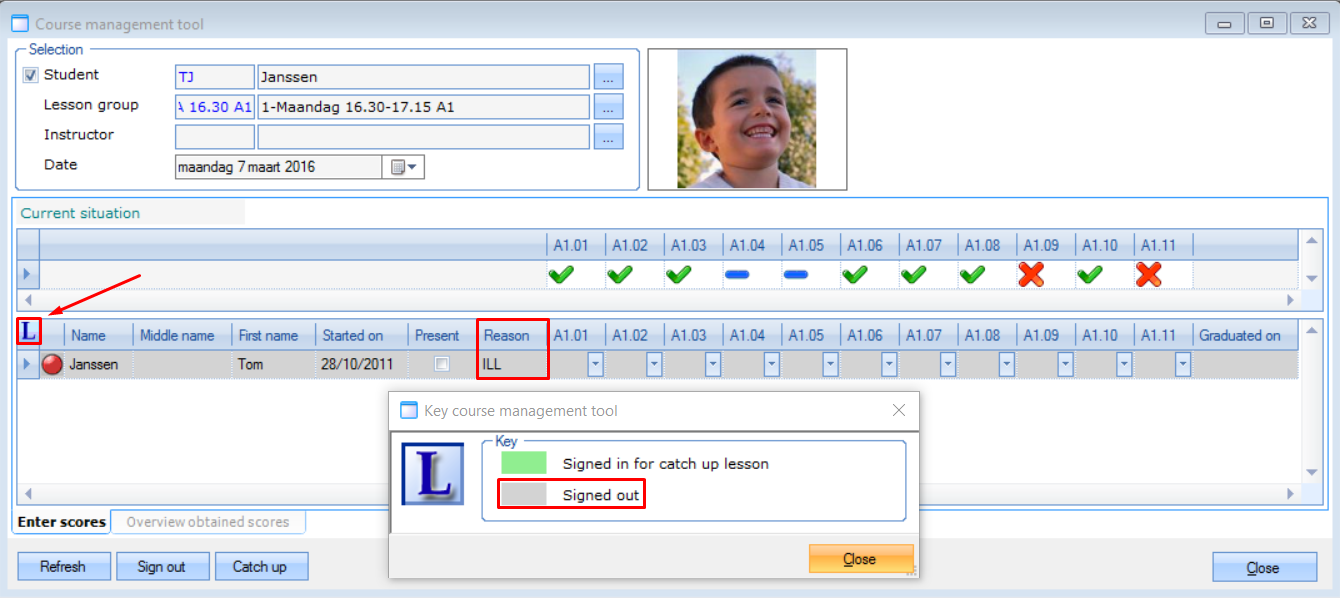
The course management tool allows you to manage the students' presence and lesson scores per lesson group.
Go to Swimming courses > Processing > Course management tool.
 |
In this window you can select the lesson group, student and date for which you want to manage the lesson scores:
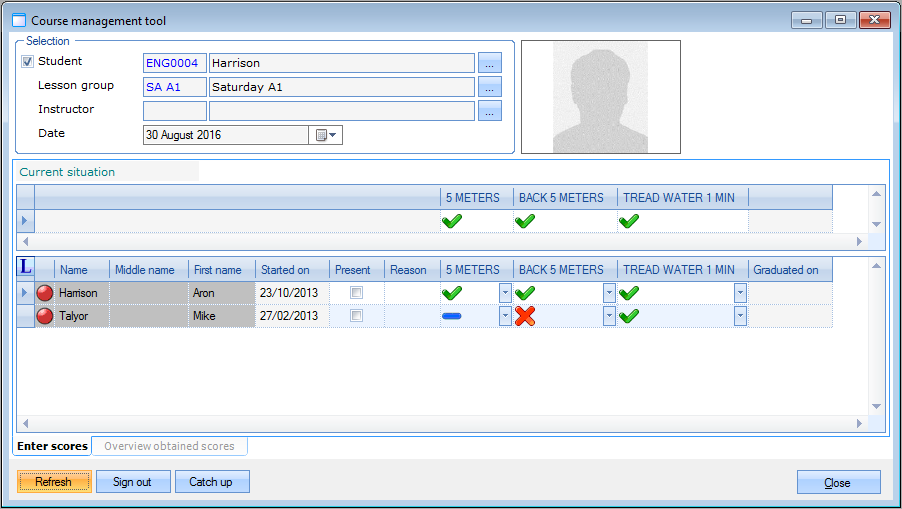
If you fill in the desired selection criteria, all students in the selected lesson group are automatically visualised and the current data can be consulted/entered per student in the tab Enter scores:
Current situation: Here you can see the current or most recently entered lesson scores of the selected student.
Visitor registration: The little ball in the left column indicates if a visit was registered for the student in question (green) or not (red).
Started on: The date on which the student was registered for the first time for a waiting list or a lesson group.
Present or absent: The instructor can note the presence or absence of the student and in case of absence also fill in a reason.
Lesson score per standard: The instructor can fill in the lesson score per student and per standard for the level to be obtained. The instructor can choose between Insufficient, Almost sufficient and Sufficient, each option having its own symbol.
 |
Graduated on: If the student passes the lesson group and if a date is filled in under Graduated on, the current level of the student will automatically be modified into the Level to be obtained of the lesson group.
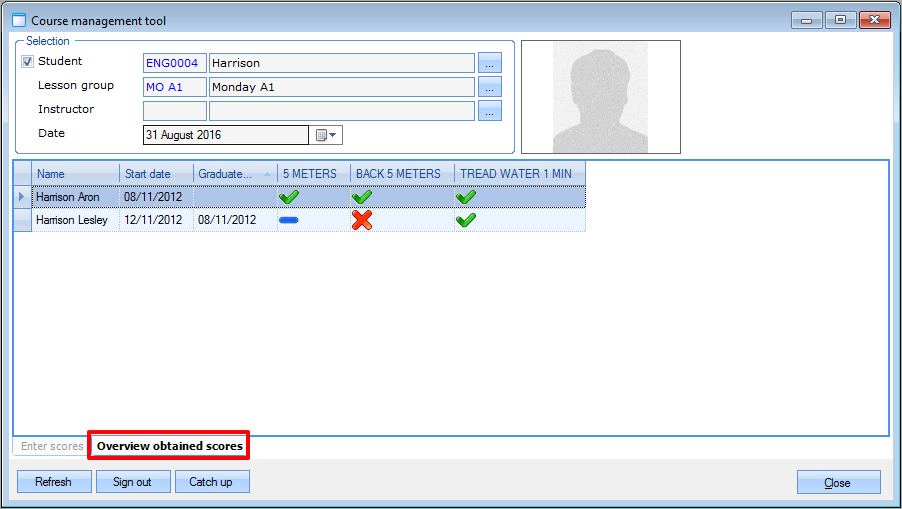
If you want to consult previous lesson scores, you have to select the tab Overview obtained scores.
 |
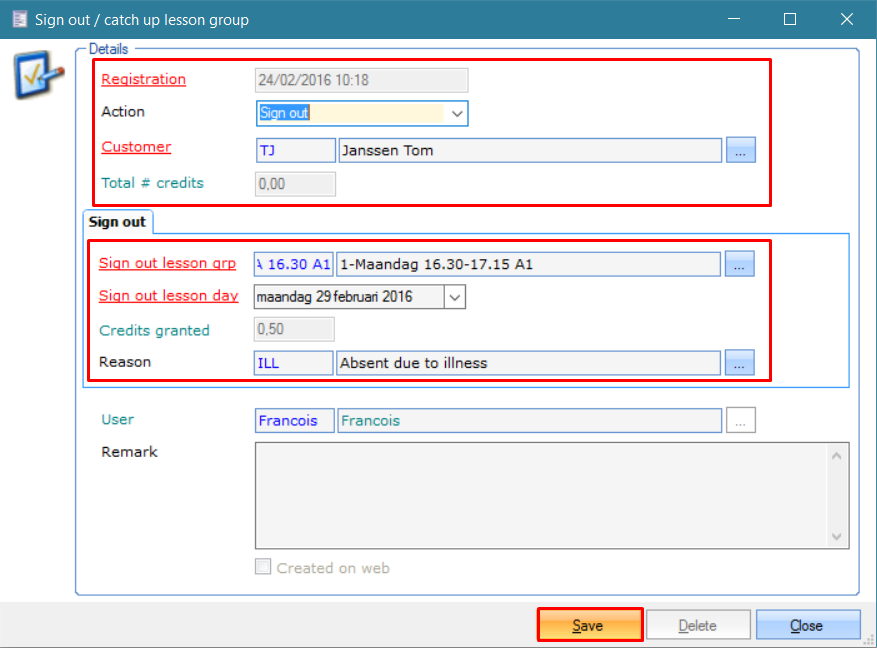
The button Sign out at the bottom of the window allows you to sign out of a lesson group.
The window Sign out / catch up lesson group will open. The fields Action and Customer are already filled in but can still be changed if necessary. The fields Sign out lesson grp and Sign out lesson day are mandatory, the field Reason is optional. Press Save to make the changes permanent and press Close to exit. Credits will be added automatically if the modification is done within the previously defined parameters.
 |
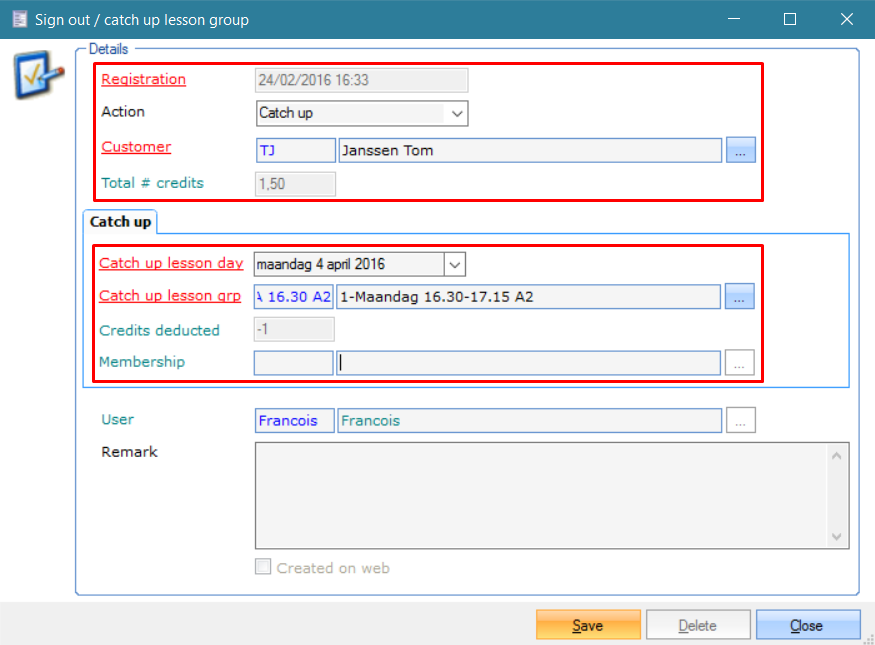
The button Catch up at the bottom of the window allows you to register for a catch-up lesson group.
To be able to register for a catch-up lesson, the customer must meet a number of requirements:
The customer needs to have enough credits. Credits are earned by unsubscribing from lessons within the set time frame (see Parameters).
A date in the future needs to be selected.
The same swimming level needs to be selected.
There needs to be availability.
The selected lesson date must match the times/periods of the selected lesson group
The customer needs to have a valid membership for the selected day.
The window Sign out / catch up lesson group will open. The fields Action and Customer are already filled in, but can still be changed if necessary. The fields Catch up lesson day and Catch up lesson grp are mandatory. Press Save to make the changes permanent and press Close to exit. Credits will be subtracted automatically.
 |
If a customer has been signed out from a lesson day, the corresponding record will have a gray background in the Course management tool and the reason for the absence is displayed. Similarly, the background will be green if a customer has subscribed for a catch-up lesson.
 |
Transfers
The transfer window allows you to transfer/move one or several customers from a waiting list/lesson group to another waiting list/lesson group.
Go to Swimming courses > Processing > Transfers.
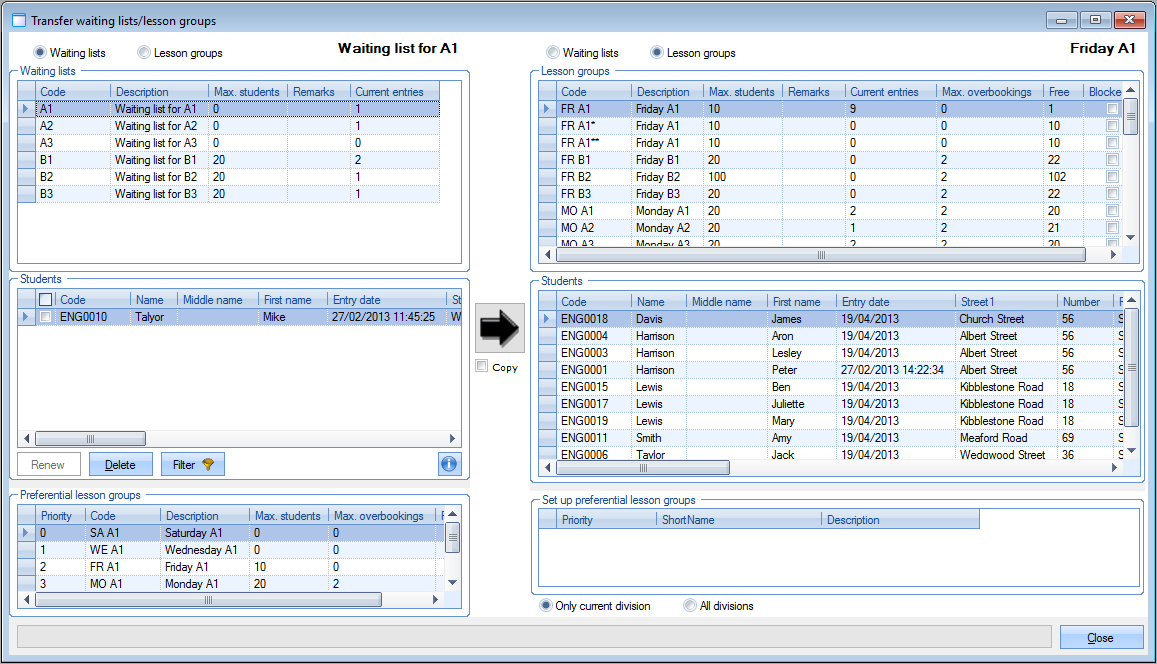 |
In the left part of the window you can:
determine if you want to call up the customers on a waiting list or the participants of a lesson group.
if you select a waiting list, you will see all customers on that waiting list in the section Students and all preferred lesson groups and linked priority of the selected customer on the waiting list in the section Preferred lesson groups.
if you select a lesson group, you will see all participants of the lesson group in the section students.
Since transferring students is always done from the left to the right half, the right half only allows you to:
determine if you want to call up the customers on a waiting list or the participants of a lesson group.
consult all customers on a waiting list in the section Students after selecting the waiting list in question.
consult all participants of a lesson group in the section Students after selecting the lesson group in question.
If you want to move customers, you have to select the desired waiting list/lesson group customer(s) in the left part of the window, while you select the waiting list/lesson group to which the customer(s) has/have to be transferred in the right part of the window. Finally, click on  to effectively move the customer(s).
Warning
Moving customers/students is always done from the waiting list/lesson group in the left part of the window to the waiting list/lesson group in the right part.
In order to find, transfer and manage lesson group customers more quickly, you can use the following possibilities:
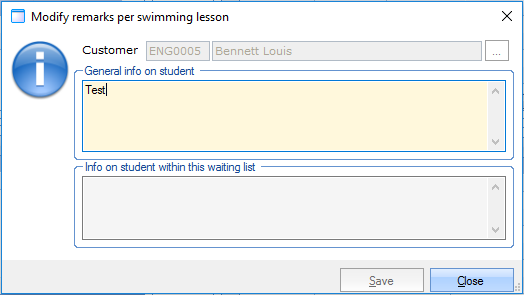
Remark: All students for which waiting list and/or lesson group remarks have already been filled in, are marked in blue.
 |
The waiting list and/or lesson group remarks can always be consulted/modified by selecting the desired customer and clicking on
 .
.
 |
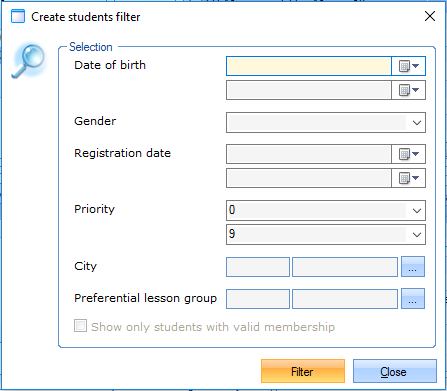
Filter: If you click on the button Filter, you can define a filter using one or several criteria for the customers on a waiting list or participants of a lesson group. If you click on
 you can delete a filter you have applied.
 |
Renew: The button Renew allows you to renew all lesson group memberships, linked to the students in this lesson group, in one go. (see 'Lesson groups > Renew')
Delete: The button Delete allows you to delete all selected (ticked) students in the current waiting list/lesson group.
Note
Calling up lesson group customers at the cash register is also done using this window, since all required information (preferences, telephone, ...) can be found in this window. When calling up students it is useful to immediately transfer the students to the correct lesson group. In this way, the first lesson card sold is automatically linked to the correct lesson group. (see manual 'POS - Use')
Warning
If customers that are called up are not immediately transferred to the correct lesson group, you will not only have to indicate the correct lesson group when/after selling the first lesson card, but you will also have to delete the customer from the waiting list. Customers are in fact never automatically deleted from a waiting list when selling a lesson card!
Stickers per student
This processing possibility allows you to give one or more stickers to one or more students of a certain lesson group.
Go to Swimming courses> Processing > Stickers per student.
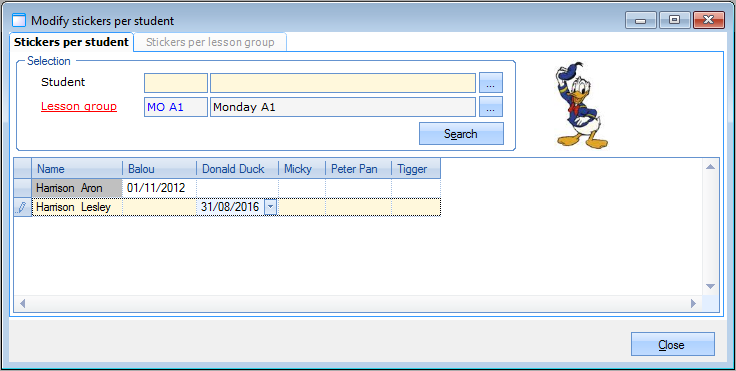 |
In the tab Stickers per student you can attribute/manage individual stickers per student in a certain lesson group. Choose the lesson group and possibly the student of which you want to manage the stickers, then click the button Search. All students that meet the given selection criteria will appear.
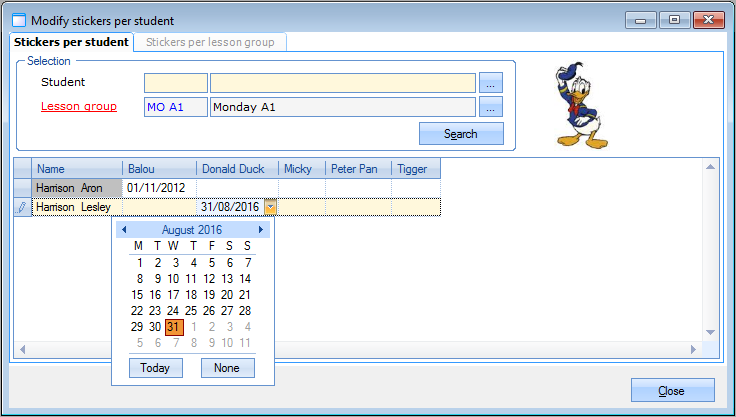
You can attribute stickers by clicking on  next to the desired student and the sticker to be attributed and by selecting the date on which the sticker is attributed.
 |
In the tab Stickers per lesson group you can give a certain sticker to several (or all of the) students within a certain lesson group.
Choose the lesson group to which a sticker has to be attributed as well as the type of sticker you want to attribute, then click the button Search. All students that meet the given selection criteria will appear. If you want to, you can also choose a date.
You can effectively attribute the sticker to the desired students by selecting those students and clicking on Apply.
Pre-invoicing
Under Pre-invoicing you can prepare all registrations for waiting lists that have not immediately been recorded for invoicing. All these registrations are in other words recorded as invoice, after which you can effectively invoice the pre-invoiced registrations for waiting lists later using the module Invoicing(see manual 'INVOICING').
Go to Swimming courses > Processing > Pre-invoicing.
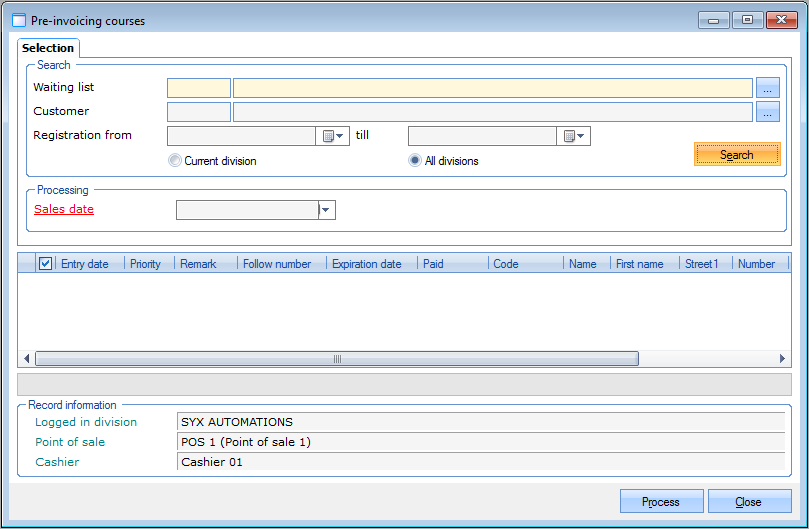 |
In this window, you can call up the registrations for waiting lists to be pre-invoiced by filling in some criteria and clicking on the button Search.
Fill in the sales date, tick the registrations you want to prepare for invoicing and click the button Process. All selected registrations will automatically be pre-invoiced, in other words prepared for effective invoicing by means of Sales > Invoicing > Invoicing.
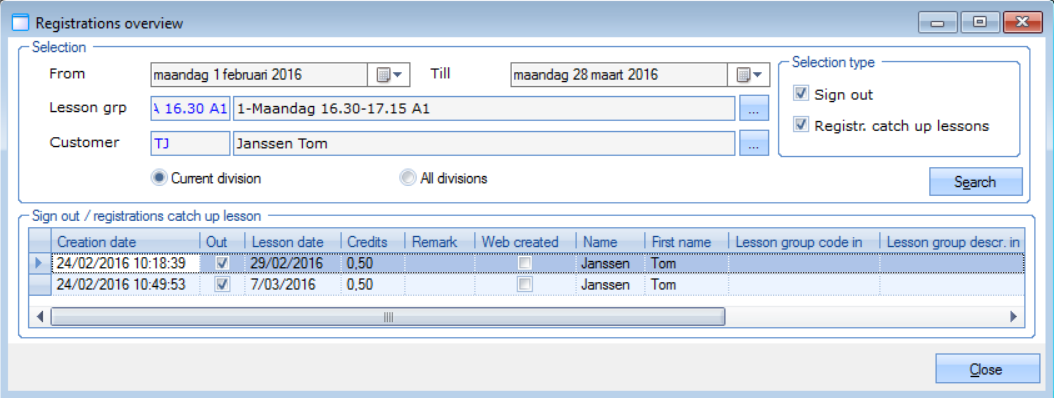
Sign out/catch up lesson days
The processing option Sign out/catch up lesson days offers an overview of unsubscription and catch-up lesson entries in the system based on search criteria.
Go to Swimming courses > Processing > Sign out/catch up lesson days.
The modification possibilities for the records displayed in this window are:
Adding a remark to records pertaining to past events
Deleting or modifying records pertaining to future events
Creating a new record: sign out of a lesson or subscribe for a catch-up lesson (see also Processing possibilities > Course management tool)
After every modification credits will be added or subtracted automatically if the modification is done within the previously defined parameters.
 |
Visualisations
By going to Swimming courses > Visualisations, you can quickly call up overviews of certain data within the course management module.
Course management history
This visualisation gives you an overview of the course management history within a certain period and if you want to, of a certain instructor.
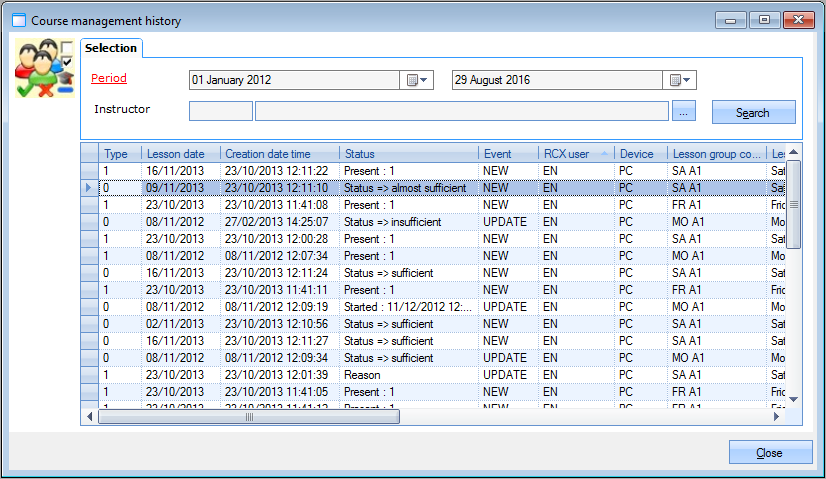 |
In this window, you can see the different records that have been created (presences, lesson scores, ...), who has created them, for which student, which lesson group, ...
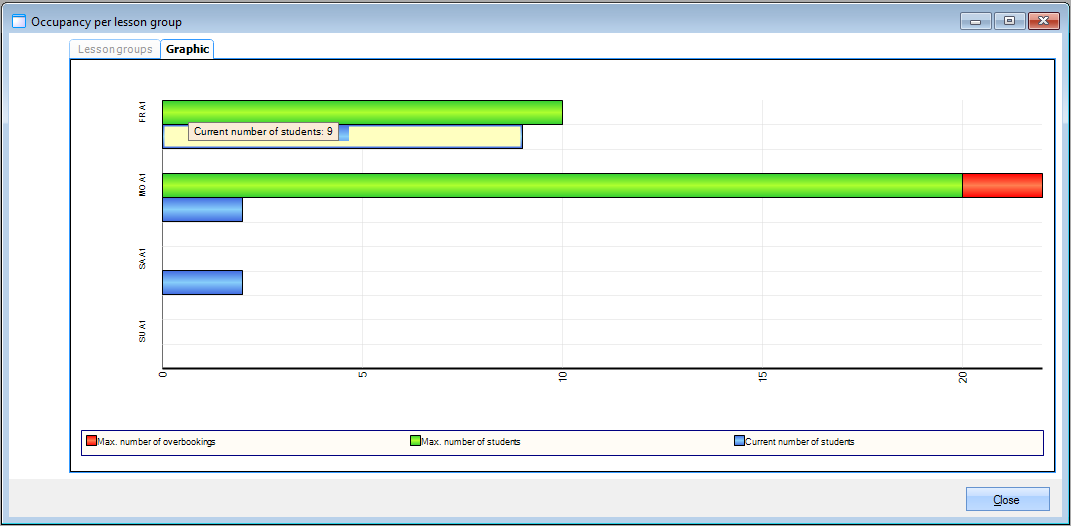
Occupancy lesson groups
This visualisation gives you a graphic overview (diagram) of the occupancy degree per lesson group, indicating the max. number of students, the allowed number of overbookings and the current number of students.
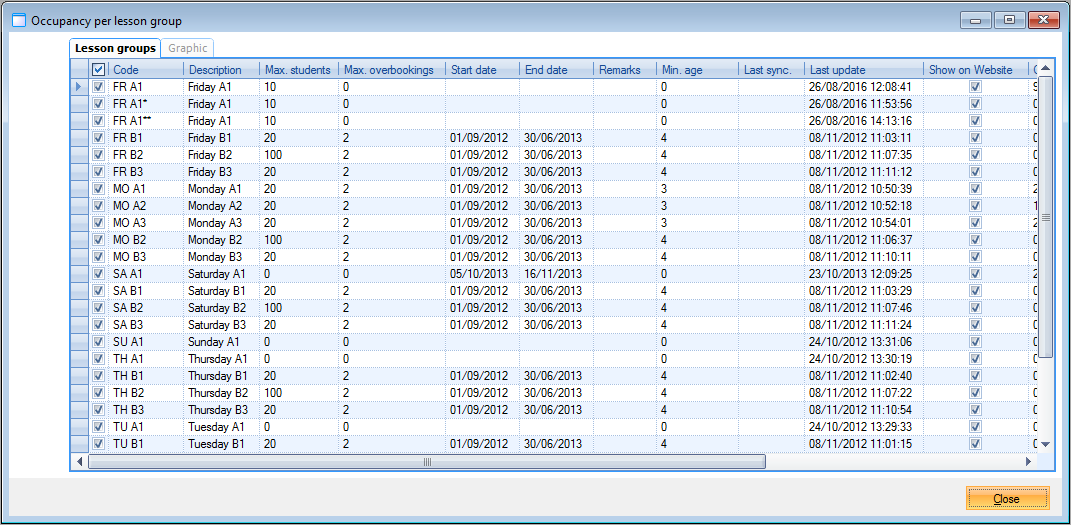 |
Select the lesson group(s) of which you want to call up the occupancy degree in the tab Lesson groups. The occupancy degree of the selected lesson groups will be visualised under the tab Graphic.
 |
Lesson groups calendar
This visualisation is in fact a calendar of all lesson times of one or several lesson groups.
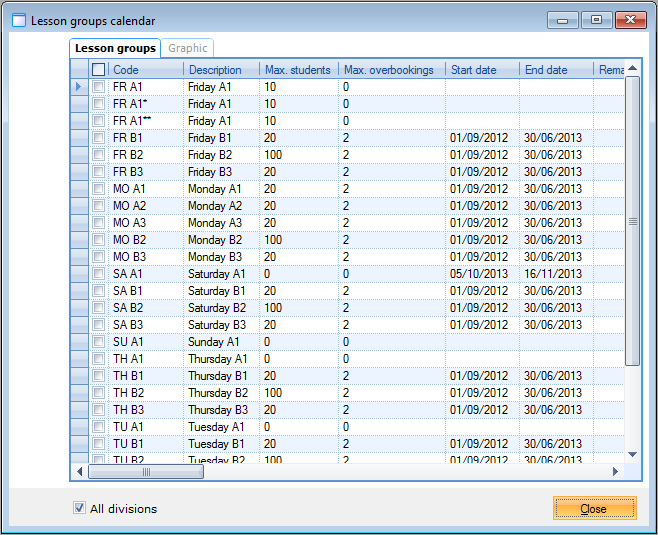 |
Select the lesson group(s) you want to include in the calendar overview in the tab Lesson groups. The calendar overview of the selected lesson group(s) will then be available under the tab Graphic.
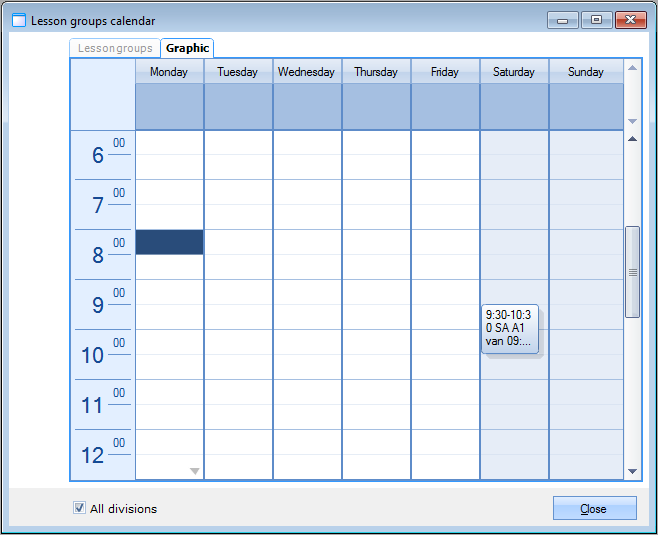 |
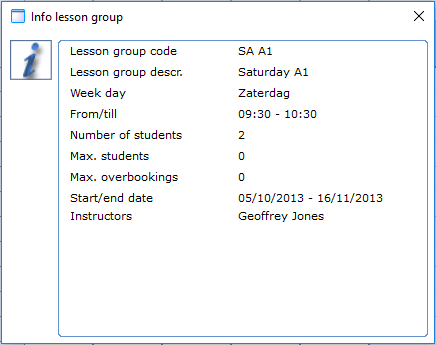
If you double-click on one of the lesson times of a lesson group, you can see more information on the selected lesson group.
 |
Student information card
This visualisation gives you an overview of all lesson information on one specific student.
 |
In the section Selection, you can choose the student of whom you want to call up the information card.
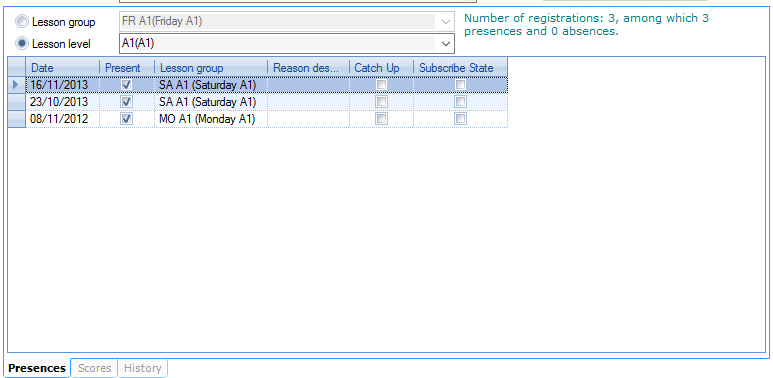
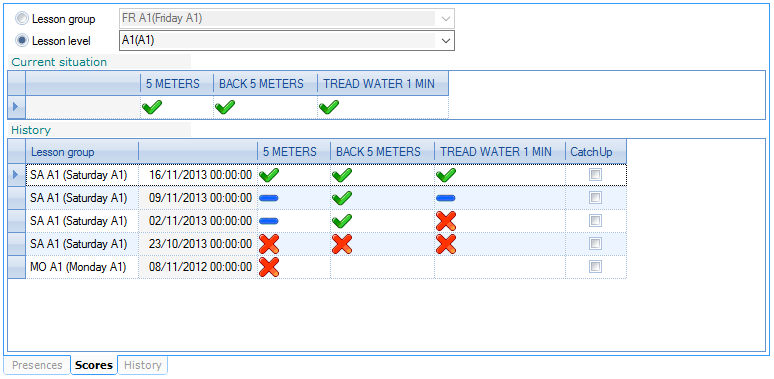
If you have selected the desired student, all information on that student will appear (taken over from the address card). You will also see all presences and all lesson scores, as well as the lesson history per lesson group in the lower part of the window.
 |
 |
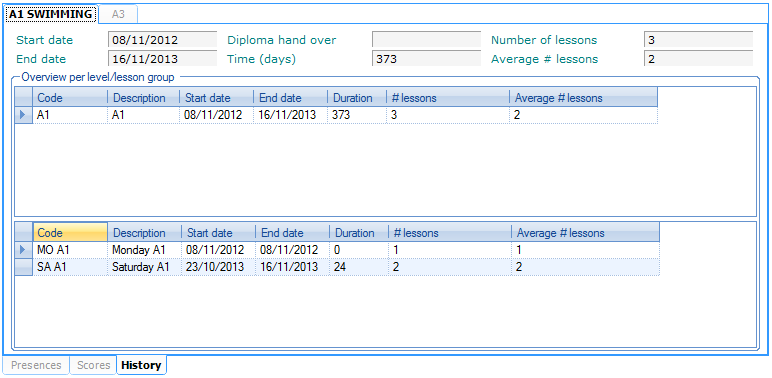 |
Lesson groups per instructor
This visualisation gives you an overview of all lesson groups per instructor.
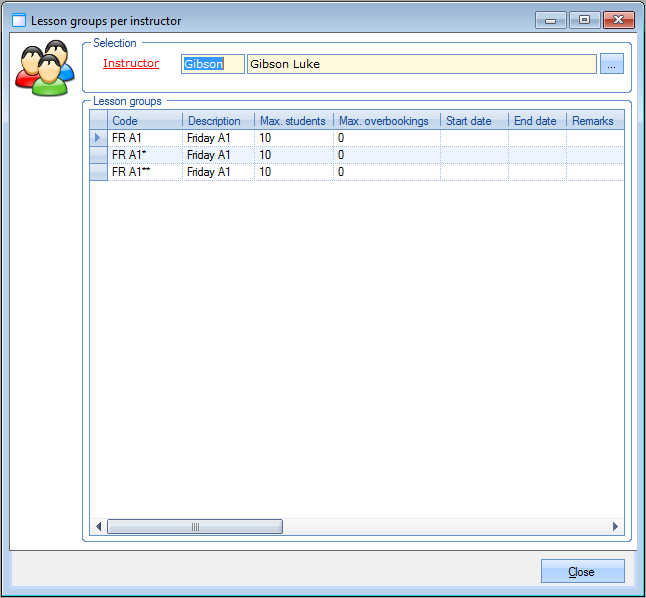 |
If you have selected the desired instructor, all lesson groups to which the selected instructor has been linked will be listed.
Pending waiting list students
This visualisation gives you an overview of all pending registrations for waiting lists that have been created through the webshop but that have not (yet) been finalised.
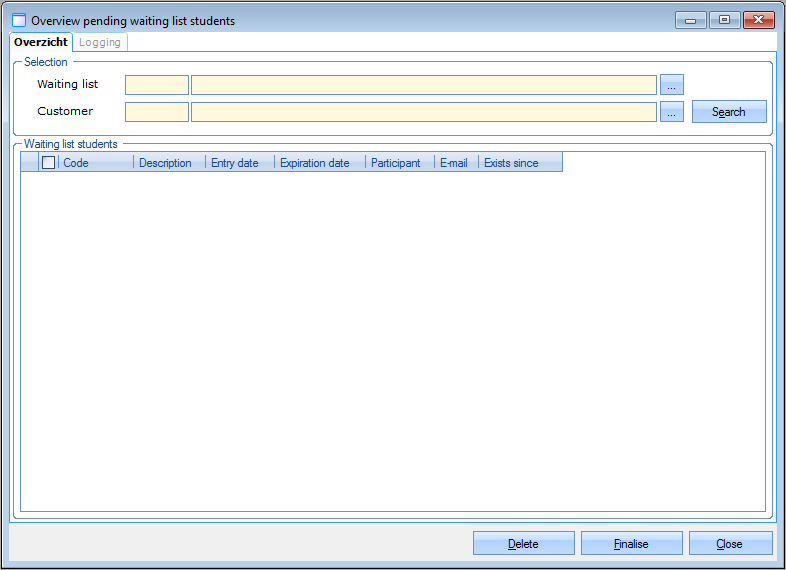 |
You can look for pending web registrations per waiting list and/or per customer.
The buttons at the bottom of the window allow you to delete these pending web registrations or to finalise them.
Reports
By going to Swimming courses > Reports it is possible to generate different documents and reports from within the course management module.
Students per waiting list
The report Students per waiting list offers an overview of all persons per waiting list (with possible preferential lesson groups per waiting list and remarks and effective preferential lesson groups per registered student) based on the selection criteria you have filled in.
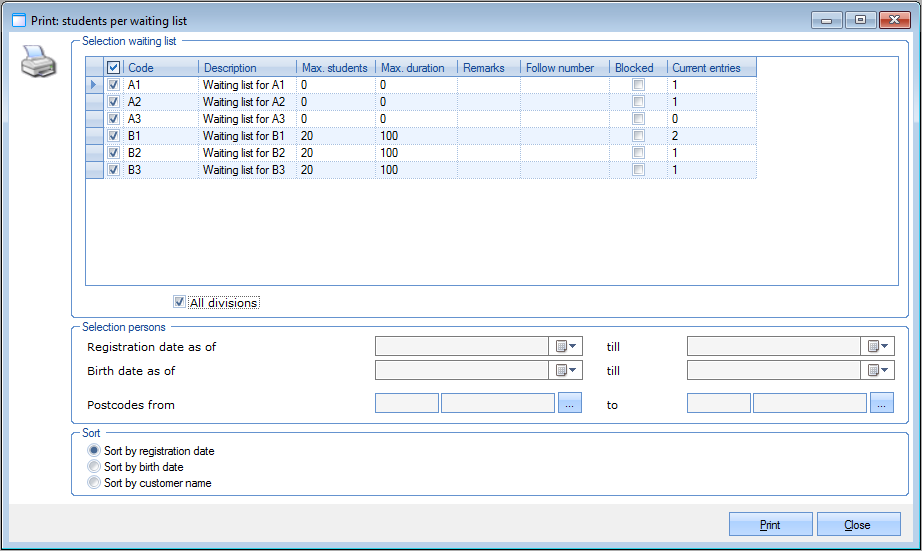 |
You can select the waiting lists you want to see in the report and specify some details concerning the persons to be included. You can also choose a sorting order.
If you have filled in all required selection criteria, click Print to generate the report.
|
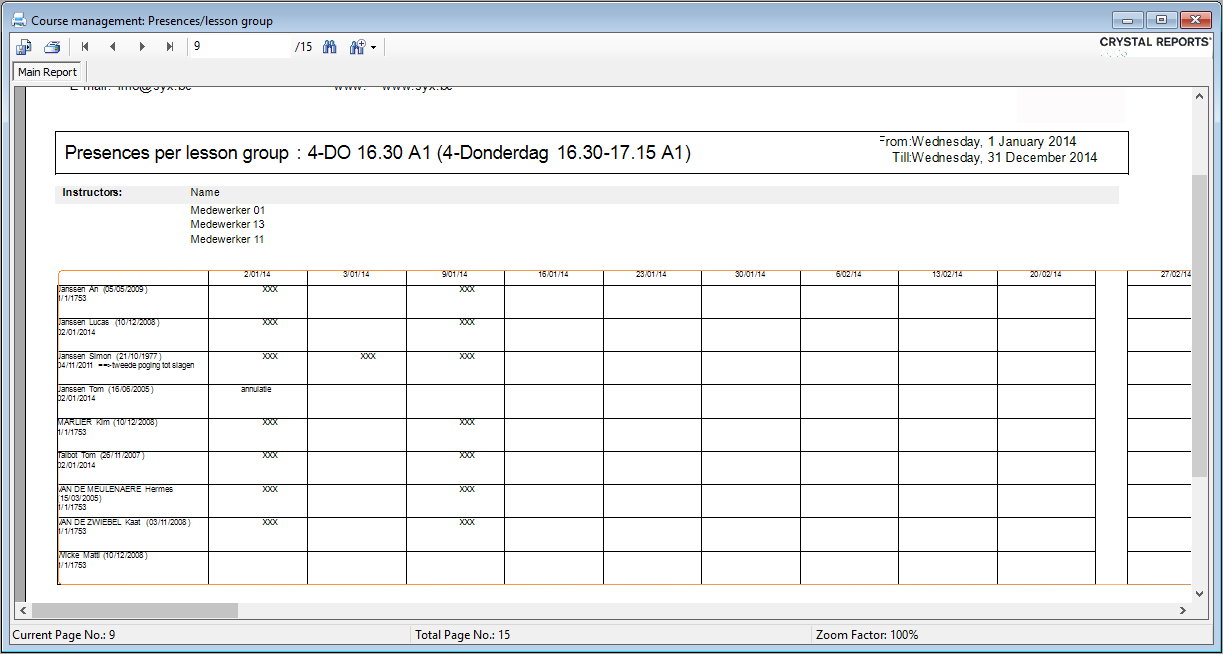
Students per lesson group
The report Students per lesson group offers an overview of all persons per lesson group (with all lesson times and instructors per lesson group and remarks per student) based on the selection criteria you have filled in.
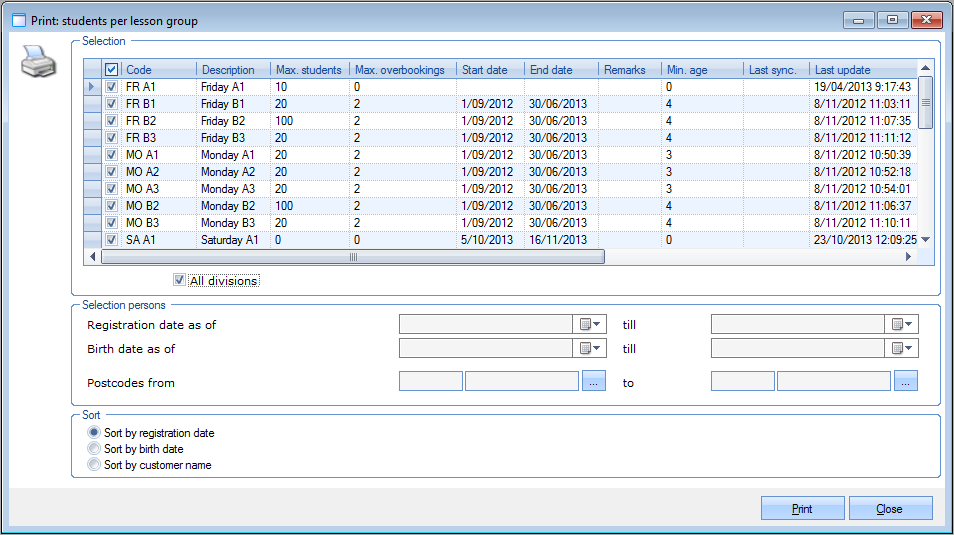 |
You can select the lesson groups you want to see in the report and specify some details concerning the persons to be included. You can also choose a sorting order.
If you have filled in all required selection criteria, click Print to generate the report.
|
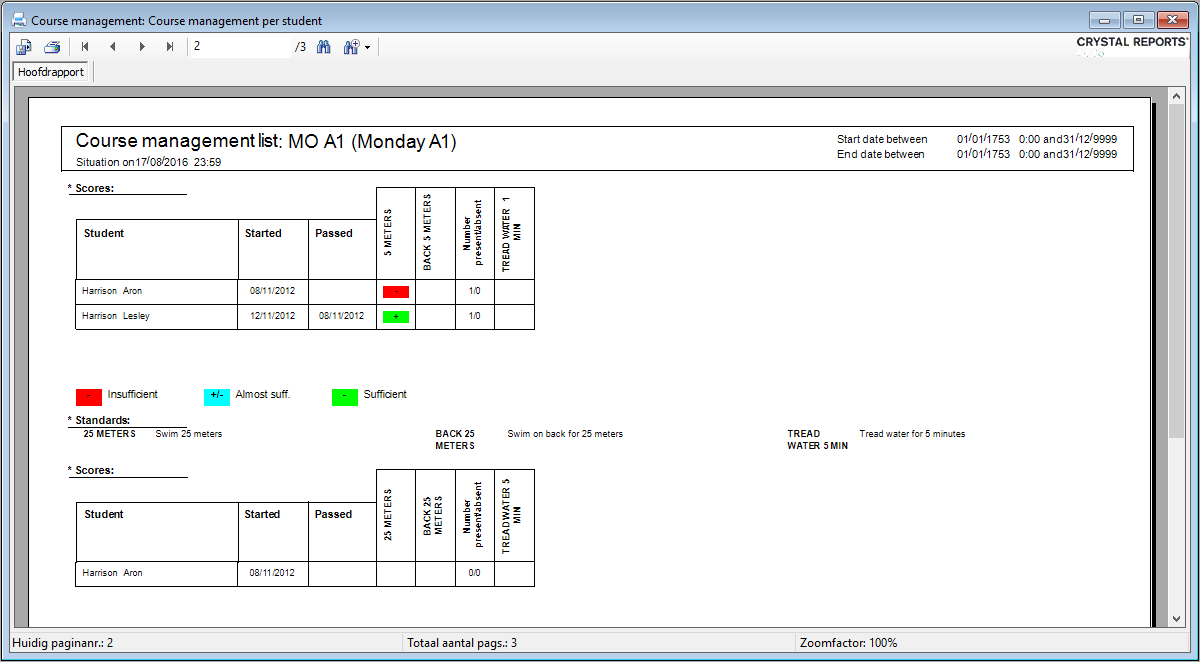
Course management list
The report Course management list offers an overview of all lesson scores based on the selection criteria you have filled in.
 |
You can choose to call up the report for a specific level or for one or several specific lesson groups. Moreover, you can specify some details concerning the data to be visualised.
If you have filled in all required selection criteria, click Print to generate the report.
 |
Students present
The report Students present offers an overview of all presences for one or several selected lesson groups within a certain period.
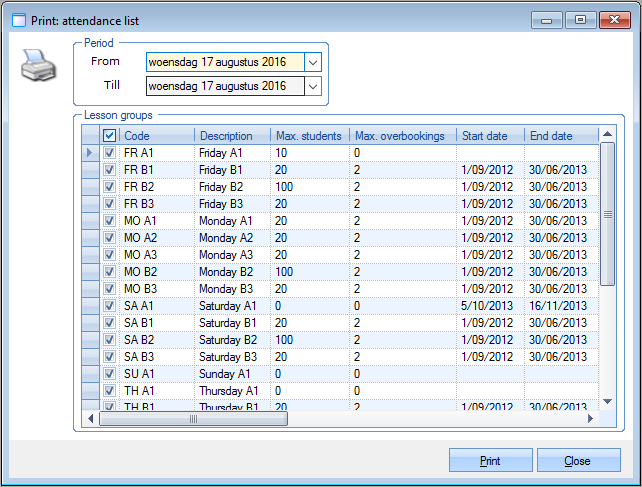 |
If you have filled in all required selection criteria, click Print to generate the report.
 |
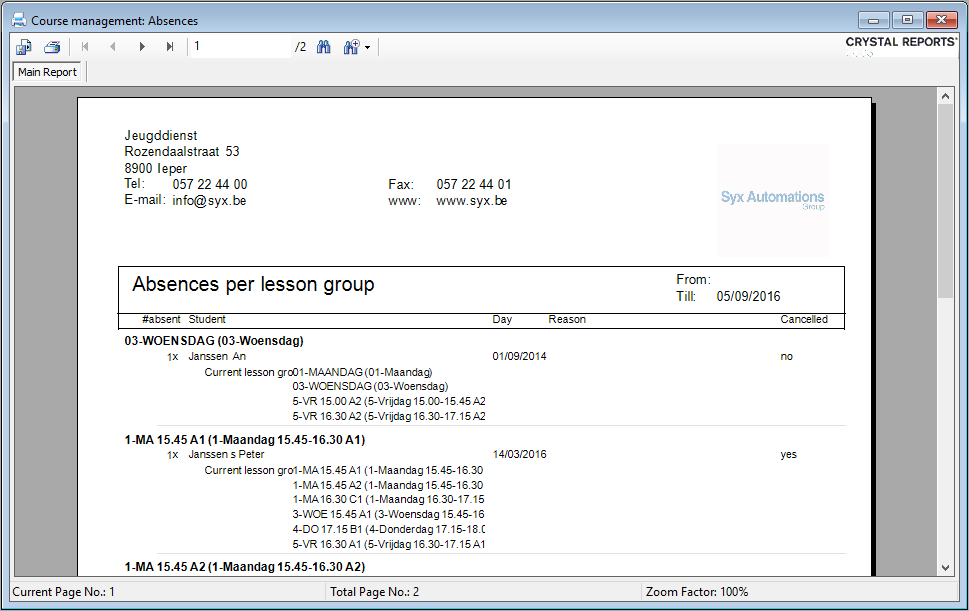
Students absent
The report Students absent offers an overview of all absences for one or several selected lesson groups within a certain period.
Go to Course management > Reports > Students absent.
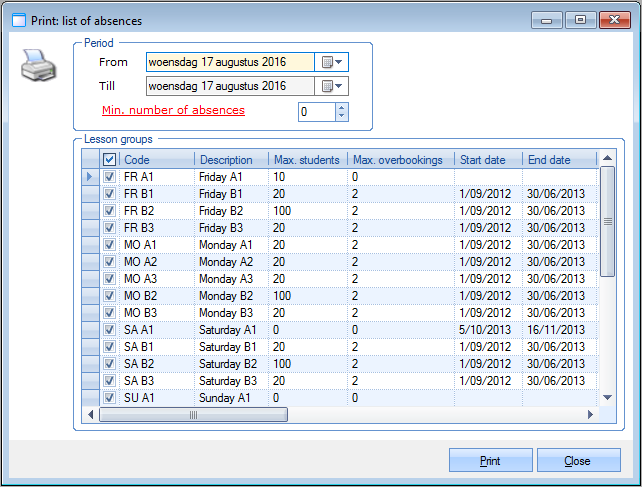 |
If you have filled in all required selection criteria, click Print to generate the report.
 |
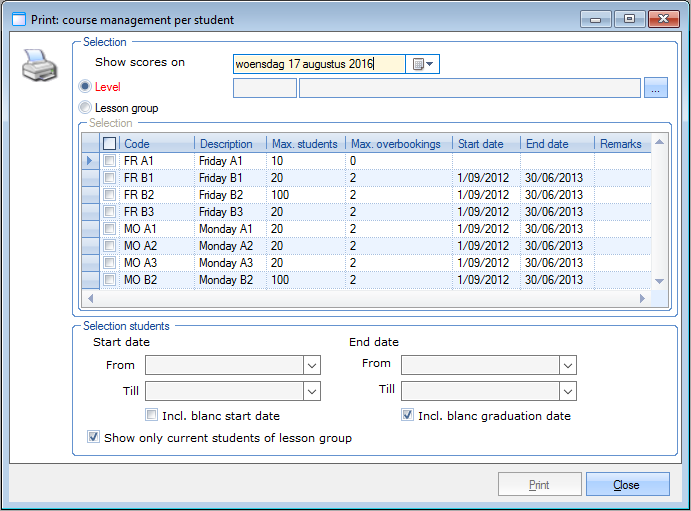
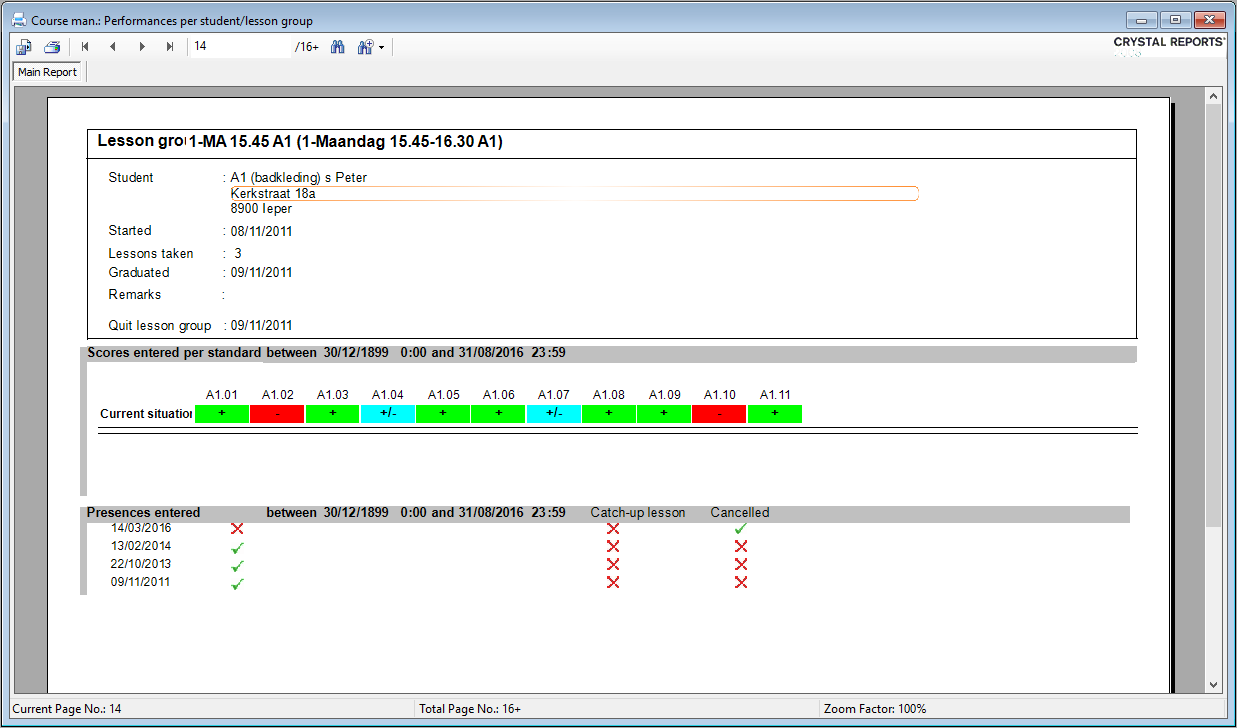
Performances per student
The report Performances per student offers an overview of all performances per student or per lesson group, based on the selection criteria you have filled in.
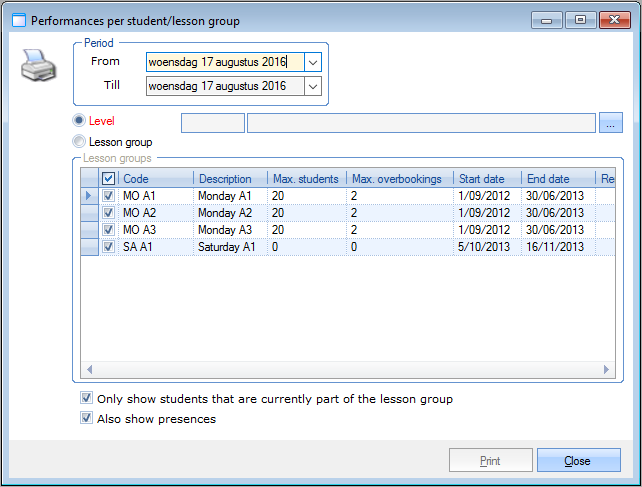 |
You can define the period and choose the level or lesson group(s) of which you want to see the performances. Moreover, you can choose to include only those students that are currently part of the lesson group and to show presences.
If you have filled in all required selection criteria, click Print to generate the report.
 |
Diplomas
The report Diplomas allows you to print all the diplomas of one or all students that obtained the given diploma within a certain period.
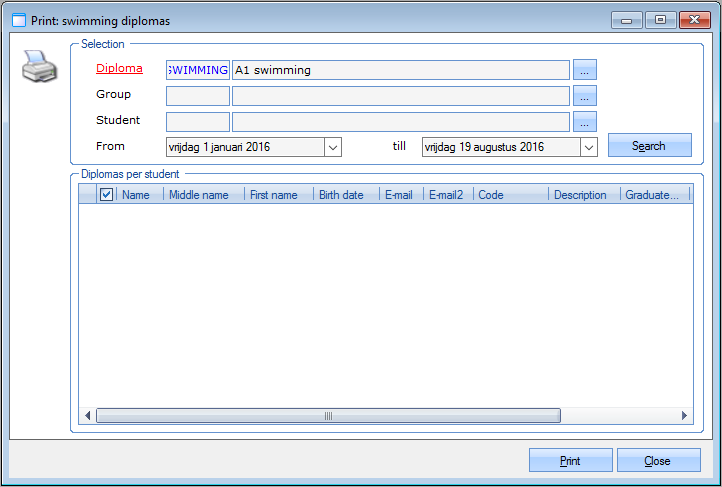 |
In addition to the diploma – that is obligatory – you can also specify the lesson group, student and period of which you want to call up the diplomas. If you have filled in all required selection criteria, you have to click the button Search after which all students that meet the given selection criteria will be listed in the section Diplomas per student.
Select the diplomas you want to print and click Print to generate the desired diplomas.
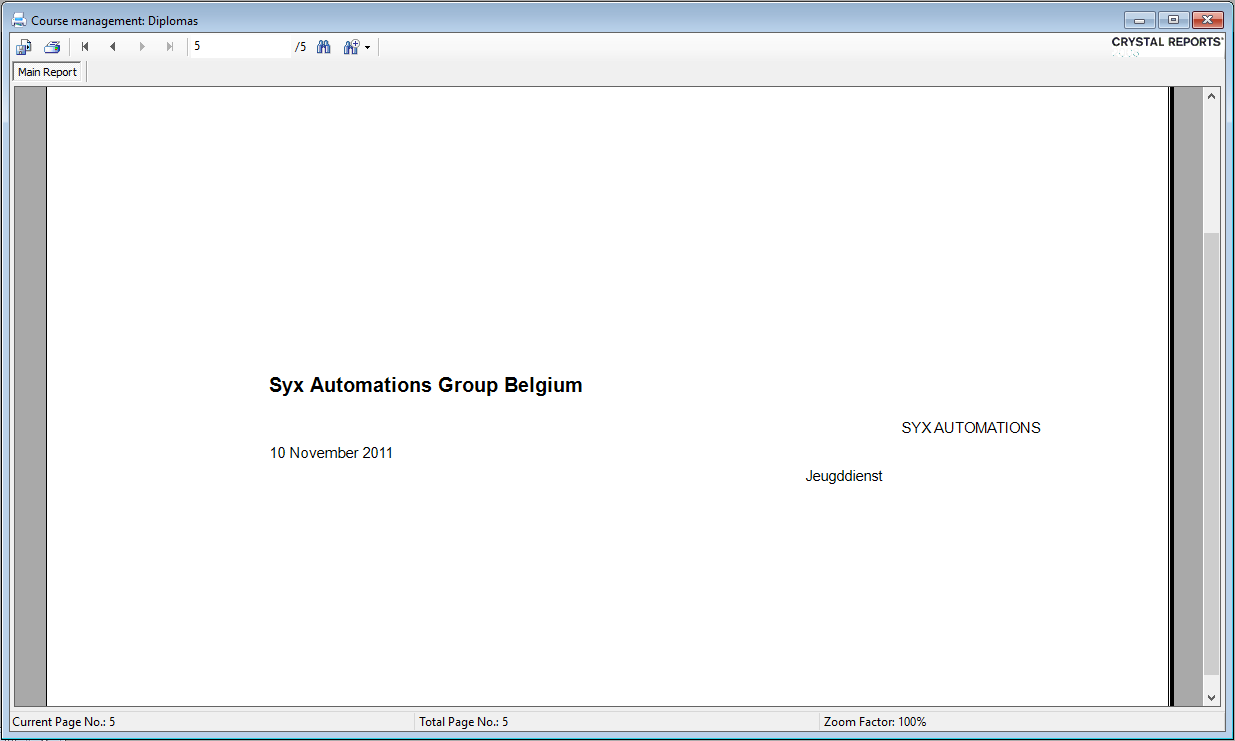 |
Warning
The report shown is only a template that you can modify according to the diploma forms used.
Course management per level
The report Course management per level offers an overview of the current level, the number of lessons per level, the total number of lessons and the presences per student per level for one or several selected levels within a certain period.
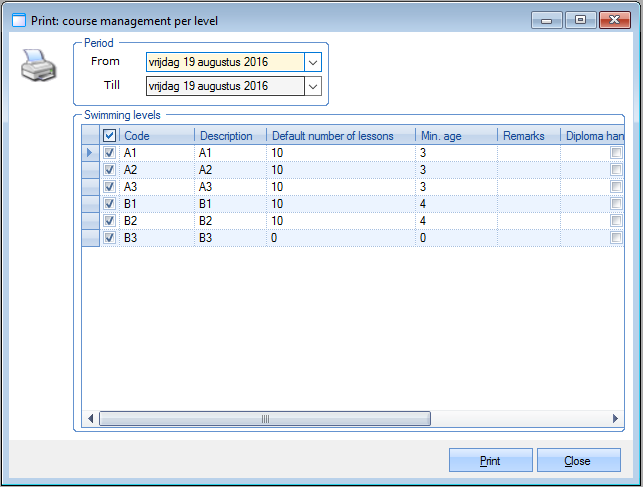 |
If you have chosen the period and selected the levels of which you want the consult the course management list, click Print to generate the report.
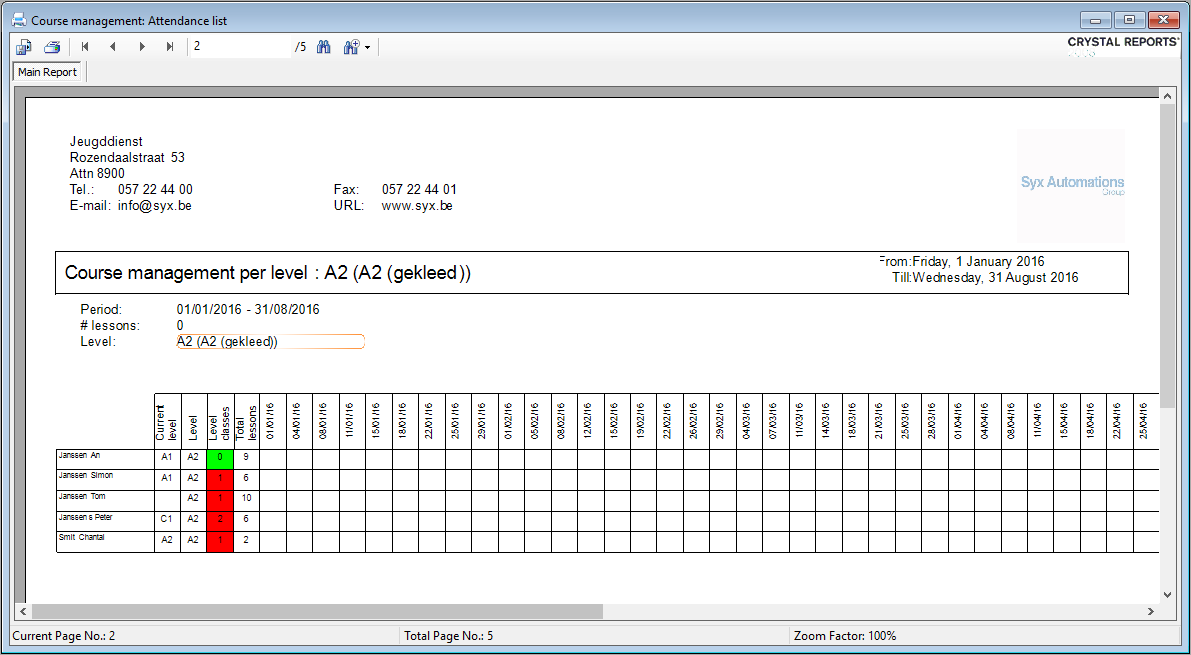 |
Note
The red or green colour indicates if the student has exceeded the preset number of lessons for the current level or not.
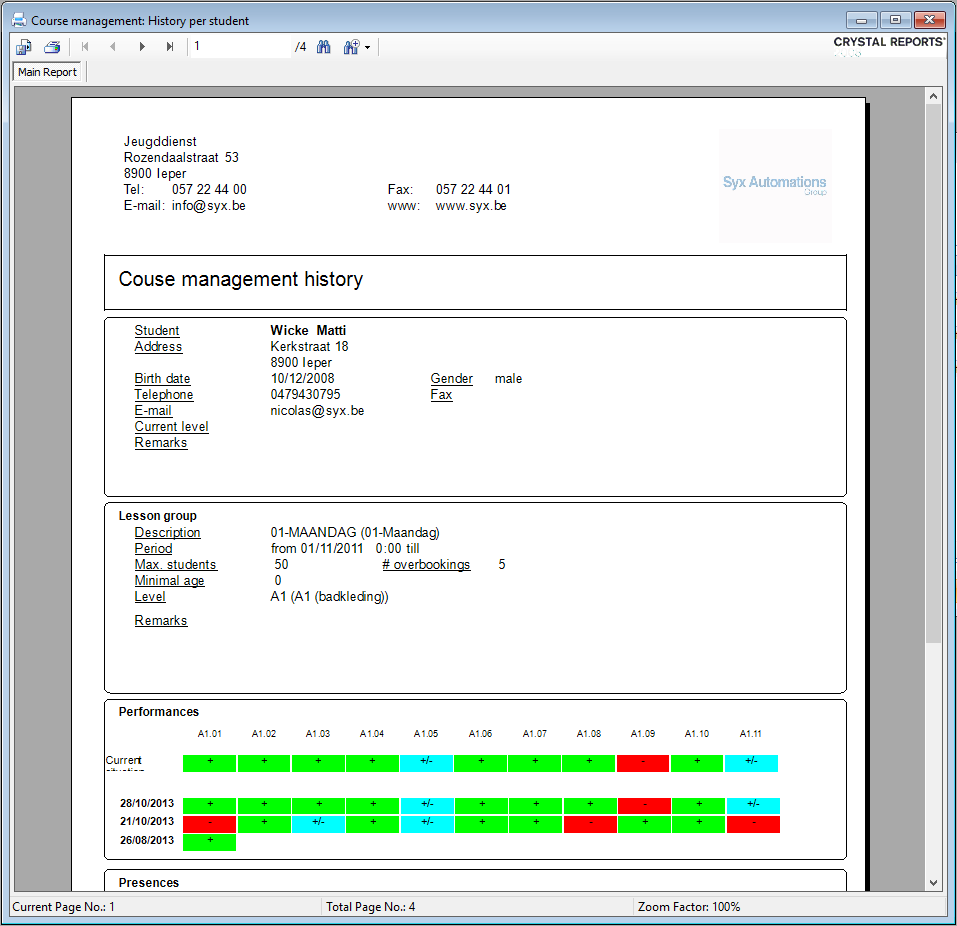
Course management history
The report Course management history offers an overview of all course management information (student info, lesson info, performances and presences) for one specific student, based on the selection criteria you have filled in.
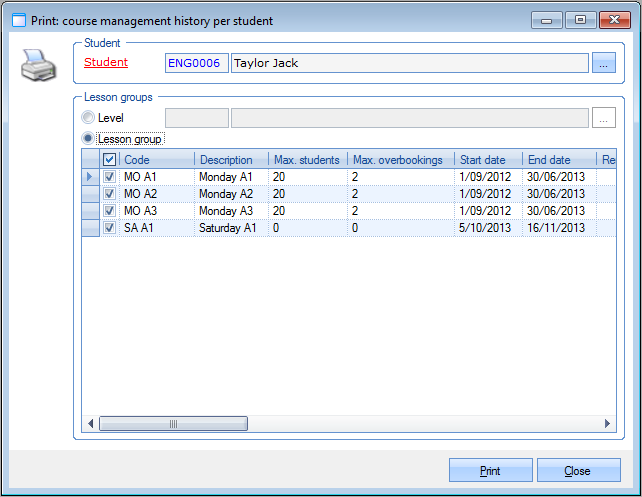 |
Select the student and the level or lesson group(s) of which you want to call up the course management history and click Print to generate the report.
 |
Note
The lesson scores are visualised in the colours green (sufficient), blue (almost sufficient) and red (insufficient).
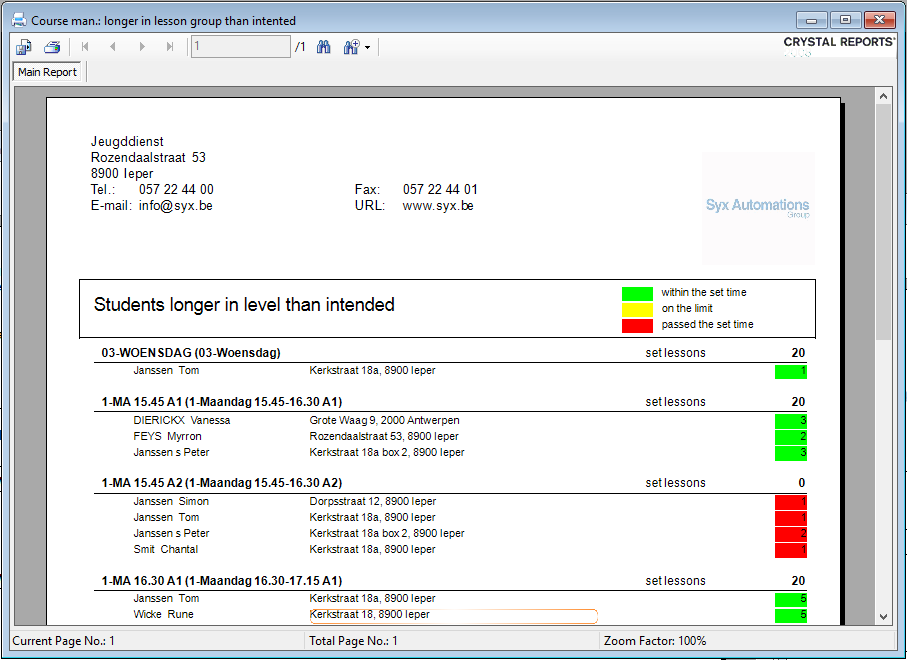
Longer in lesson group than intended
The report Longer in lesson group than intended offers an overview of all students per lesson group that took more lessons than initially intended, based on the selection criteria you have filled in
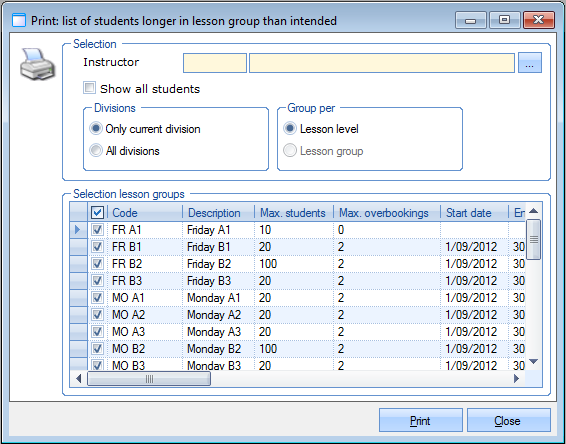 |
You can call up the list for a specific instructor, for the current division only or for all divisions and indicate which lesson groups you want to include in the report. Moreover, you can choose to group the list per level or per lesson group. If you have filled in all required selection criteria, click Print to generate the report.
 |
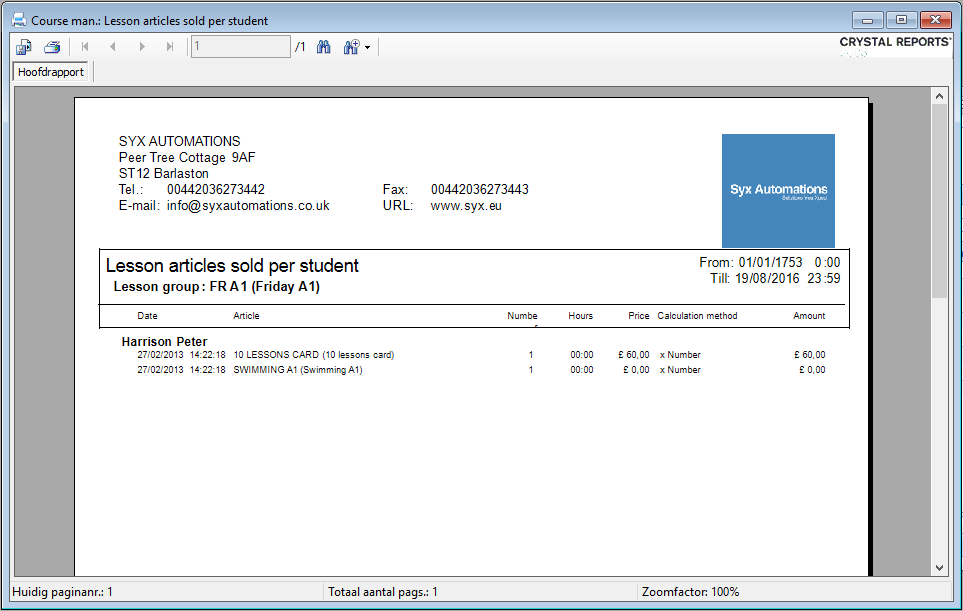
Lesson group articles sold per student
The report Lesson group articles sold per student offers an overview of all lesson group articles sold/renewed to students of a certain lesson group within a certain period.
 |
Fill in the period and lesson group of which you want to call up the articles sold and indicate which lesson group articles you want to include in the report. If you have filled in all required selection criteria, click Print to generate the report.
 |
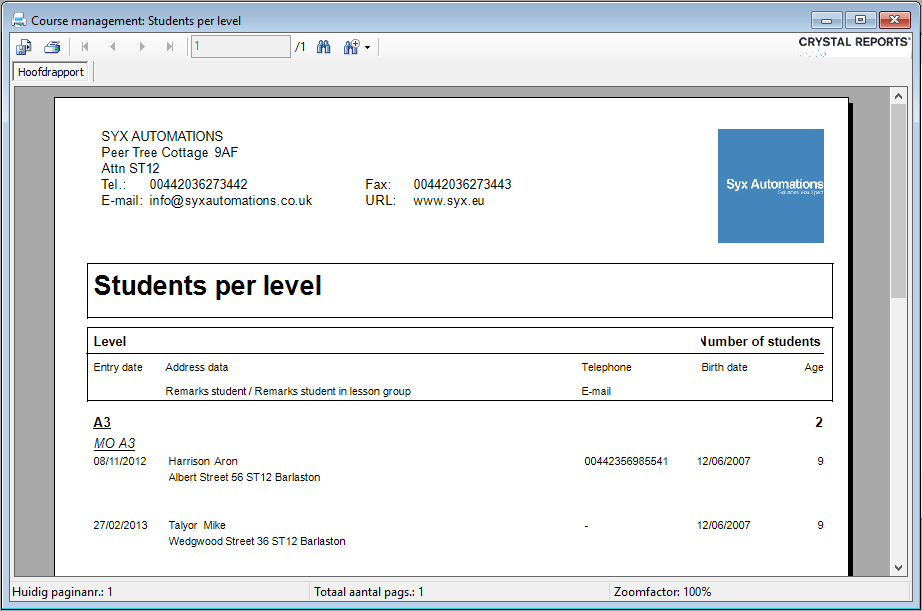
Students per level
The report Students per level offers an overview of the number of students of a certain level.
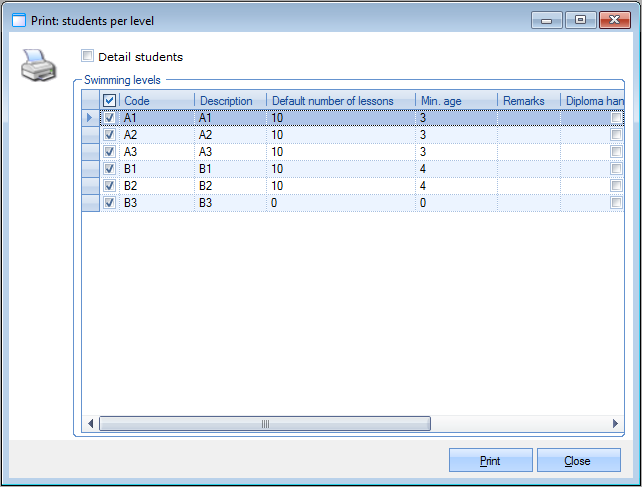 |
Tick the swimming levels of which you want to see the number of students and indicate if you want to include the details of the students or not. If you have filled in all required selection criteria, click Print to generate the report.
 |
Registration certificates
It is possible to print all registration certificates of all students that are registered for a certain lesson group.
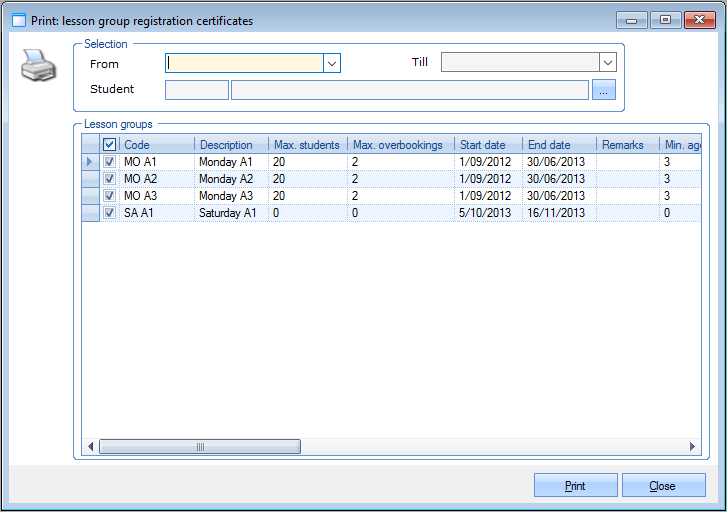 |
You can select the period, the student and the lesson group(s) of which you want to generate registration certificates.
If you have filled in all required selection criteria, click Print to generate the certificates.
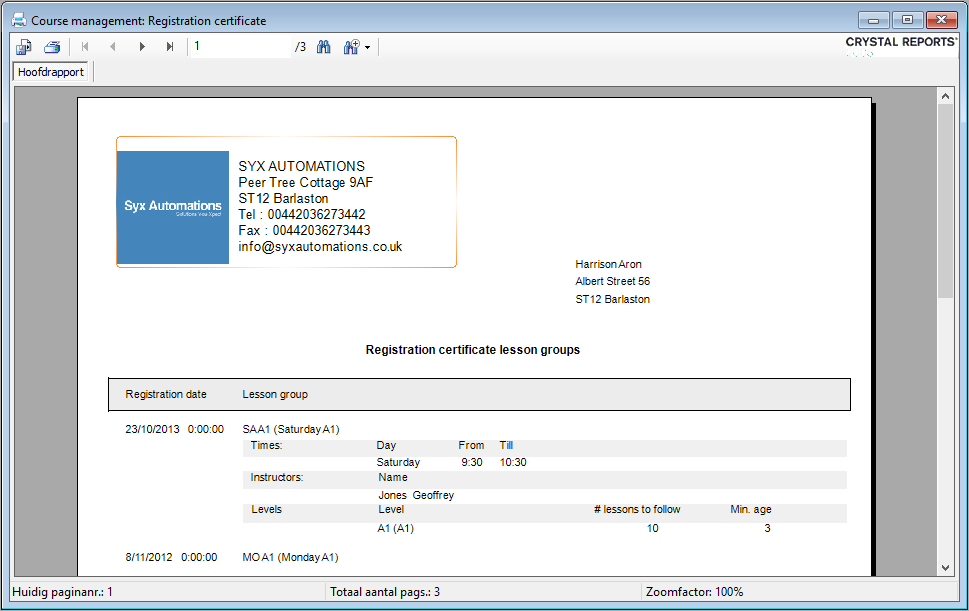 |
Preferred lesson groups
The report Preferred lesson groups allows you to call up a list of preferred lesson groups, based on the selection criteria you have filled in.
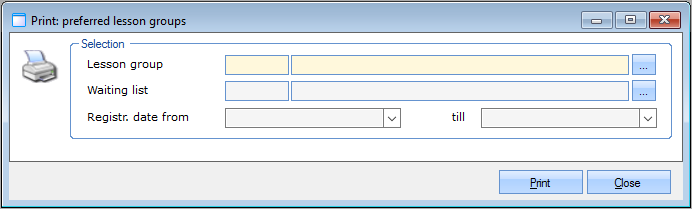 |
You can choose the lesson group, waiting list and registration period of which you want to see the list of preferred lesson groups. If you have filled in all required selection criteria, click Print to generate the report.
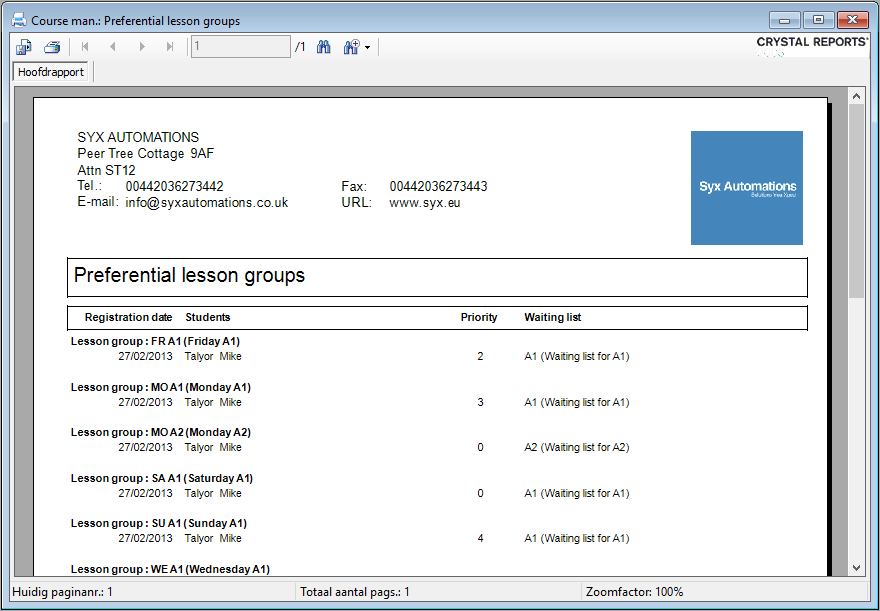 |
Lesson time per diploma
The report Lesson time per diploma gives you an overview of the lesson times per diploma, based on the selection criteria you have filled in.
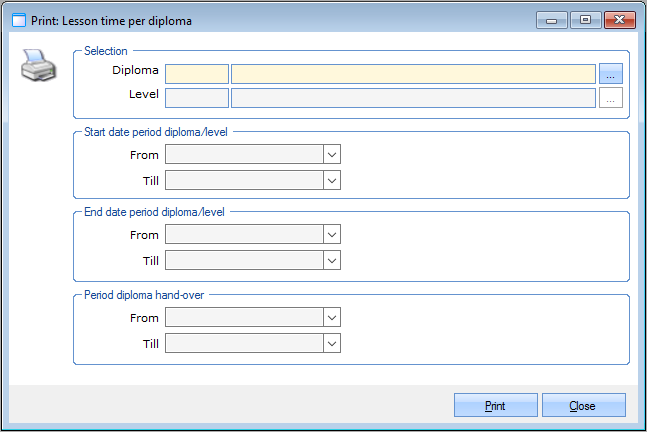 |
You can choose the diploma and level of which you want to see the lesson times, a period of which you want to see the lesson times and a period during which the diploma was handed over.
If you have filled in all required selection criteria, click the button Print to generate the report.
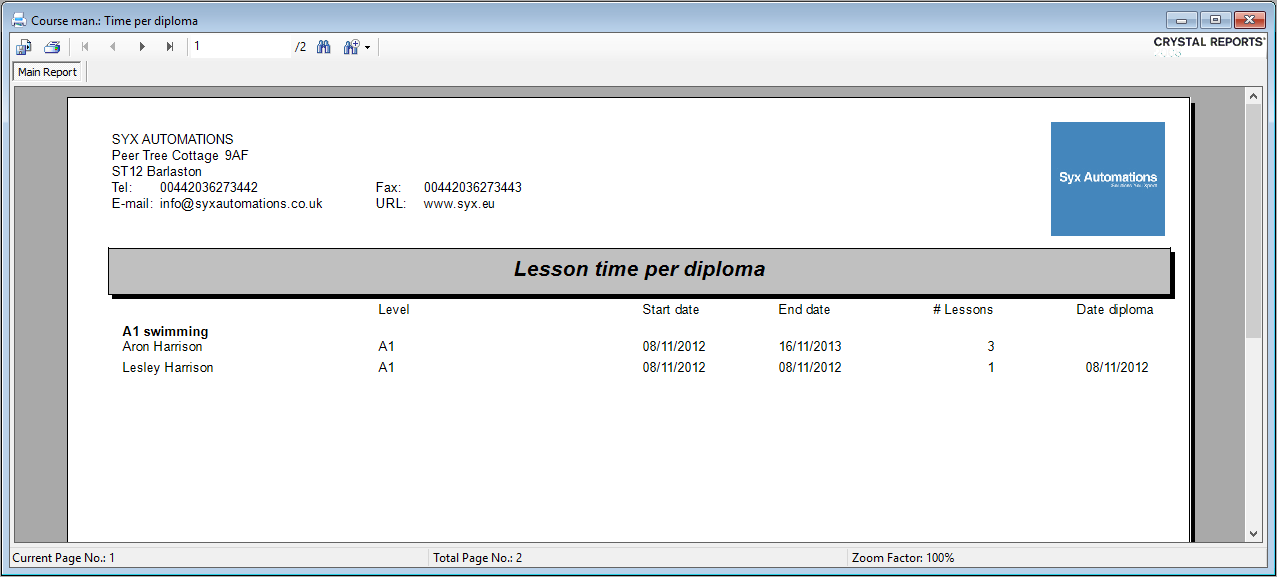 |
Settings
Through Swimming courses > Settings it is possible to manage different underlying lists.
Lesson types
By going to Course management > Settings > Lesson types you can manage the lesson types.
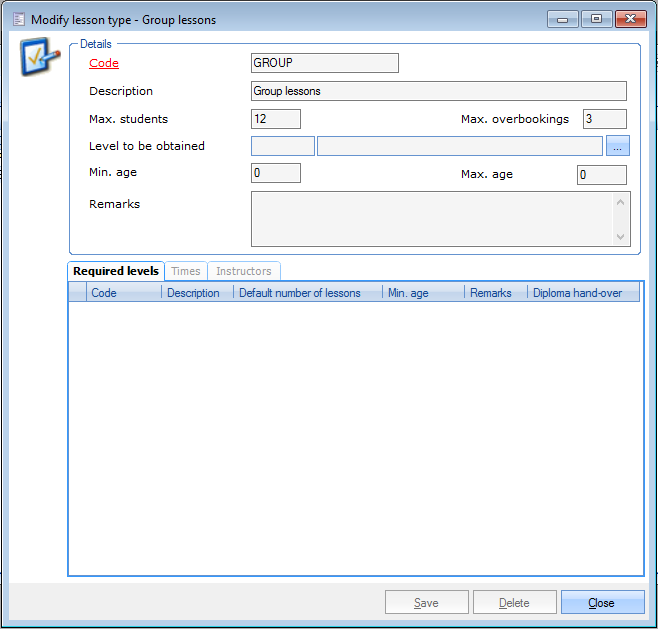 |
Lesson types allow you to categorize lesson groups. When linking a lesson type to a lesson group, some of the data of the lesson type are automatically taken over for the lesson group. Per lesson type, you can define the number of students, the allowed age and level to be obtained.
You can also link the levels that are required to be allowed into the current lesson type, the lesson times and instructors.
Diplomas
For managing the different diplomas that can be obtained by students, go to Course management > Settings > Diplomas.
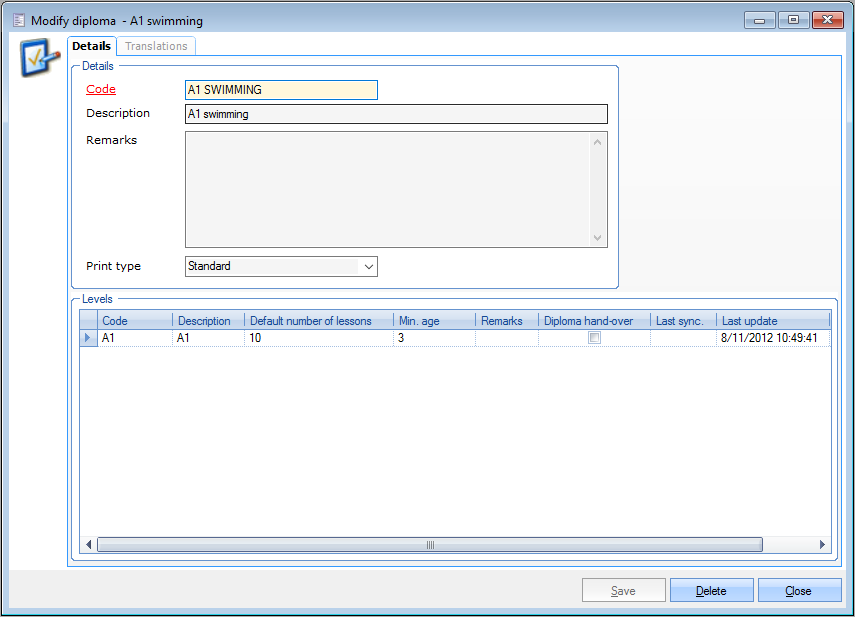 |
In this window, you can fill in some details and link the levels that have to be reached to obtain the current diploma. Under the tab Translations you can also add translations of the current diploma in several languages.
Levels
If you go to Course management > Settings > Levels, you can manage the different levels to be obtained. These levels can then be linked the diplomas.
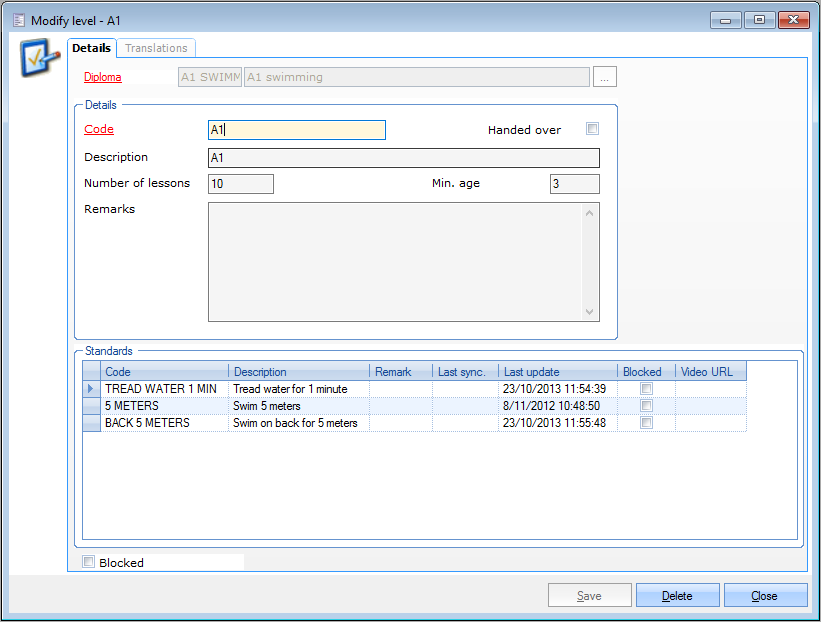 |
Under the tab Details, you have to link the level to a diploma and fill in some additional details, such as the number of lessons and the required age. You can also link the standards that have to be obtained within the current level. Under the tab Translations you can add translations of the current level in several languages.
Standards
By going to Course management > Settings > Standards, you can manage the different standards that can then be linked to the levels.
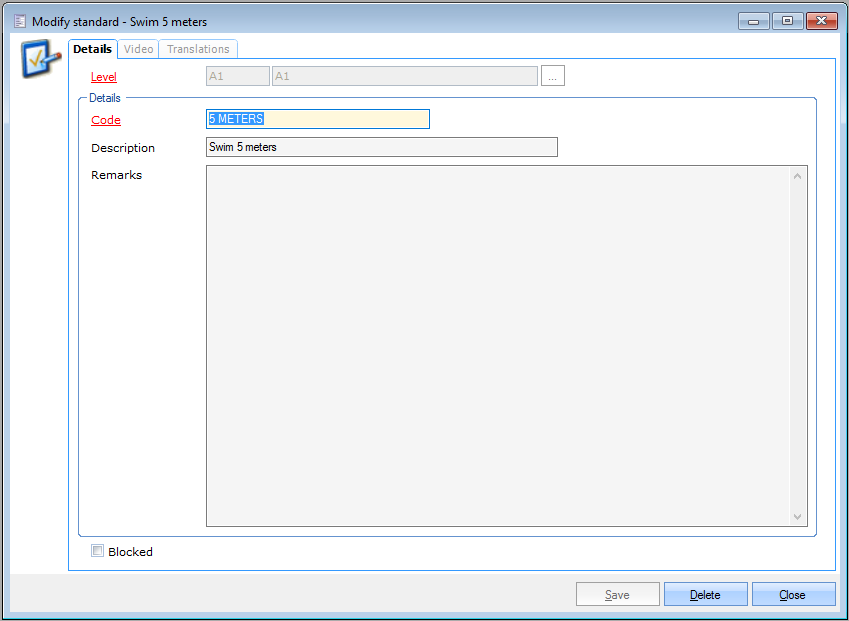 |
In the tab Details, you have to link the current standard to a level and you can add some details. Under the tab Video, you can fill in a URL that leads you to the instruction film of the standard. Finally, the tab Translations allows you to add translations of the current standard in several languages.
Stickers
If you go to Course management > Settings > Stickers, you can manage the different stickers that are given to students per level.
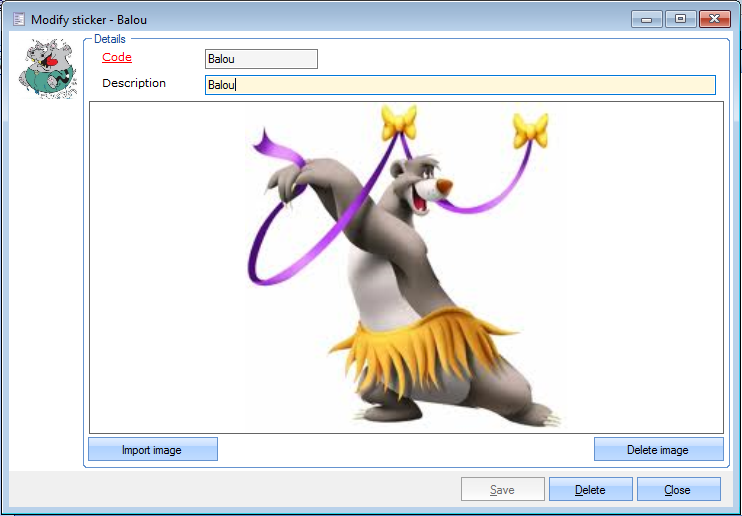 |
Rights per division
Swimming courses > Settings > Rights per division
Limit the access and visibility of lesson groups per division. To apply the rights on the current division, the parameter Use rights per division must be turned on under Swimming courses > Parameters > tab General > section Rights.
Full rights
The lesson groups are visible and can be edited
Read-only
The lesson groups are visible but cannot be edited. All editable fields are disabled and the user cannot save or delete the lesson group.
No access
The lesson groups are not visible.
Note
In a situation when a user has a screen with lesson groups open while another user has adjusted the rights, the list of lesson groups will not be adjusted automatically but when clicking on a lesson group with no access rights an error message will be shown:
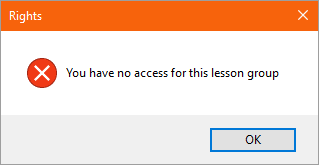
Initially, the Default rights are applied to each newly created lesson group. You can further adjust the rights per lesson group and division by clicking the corresponding tristate checkbox.
The colour coding of each right is explained in the legend.
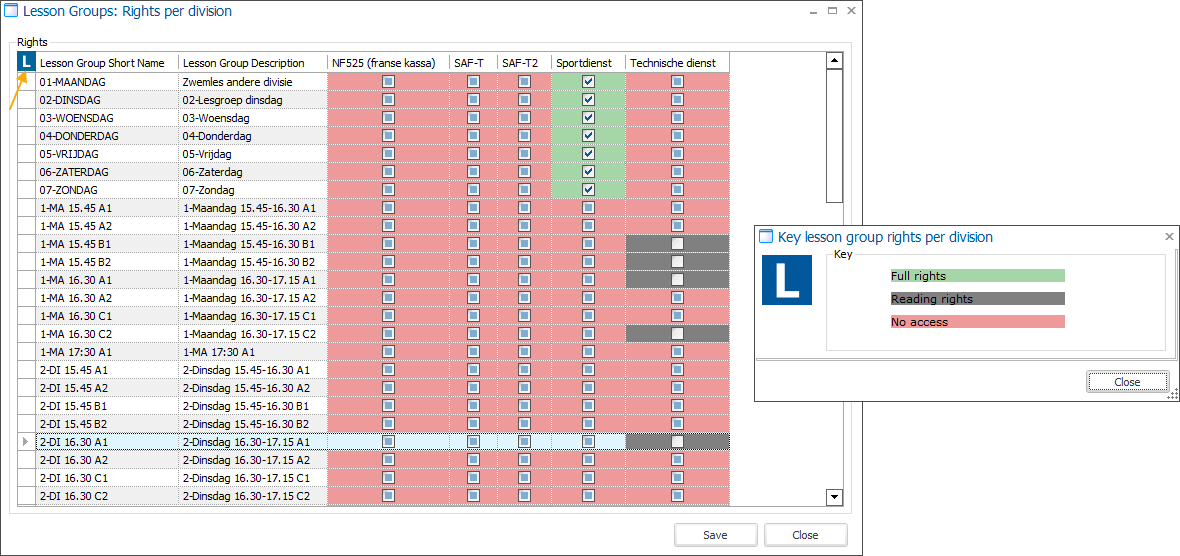
Click Save to apply the changes.
When active, the rights are applied in multiple Recreatex modules to filter out lesson groups that should not be shown.
Swimming courses: settings (call lists), waiting lists, reports, visualisations and processing tools
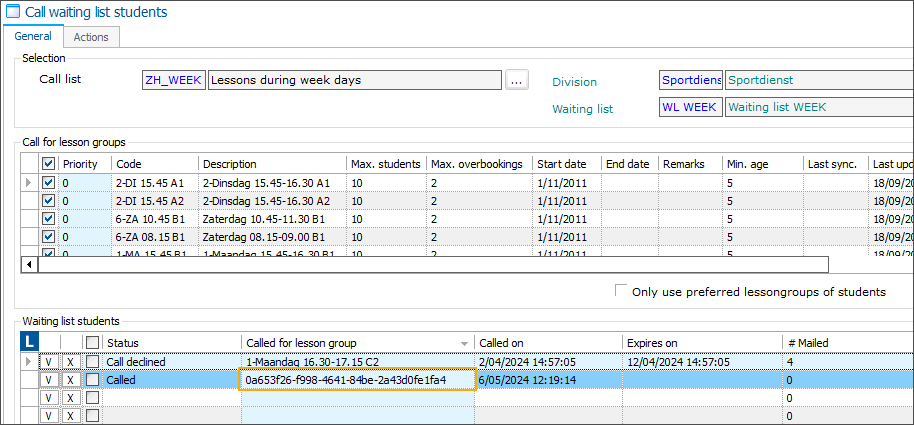
Note
Call waiting list students (processing): in the table overview Waiting list students, the column Called for lesson group will only show a GUID instead of the actual description when a division no longer has access rights for this group.
Default lesson group (parameter): here the full list of groups remains available as this parameter is used across all divisions.
Reporting: Business intelligence (scores, attendance, participants)
General:
On the article card, the tab Lesson groups becomes available for articles of type Lesson group.
On the customer address card, the tab Lessons shows e.g. the current lesson groups of the customer.
Sales admin: Processing of direct debit interruptions
Mailing: When creating a mailing with the selection type Lesson groups
POS: When selling a lesson group article, If only 1 lesson group is found, then this one is shown. If 0 or more than 1 lesson group is available then the default lesson group is shown. There is no check for rights on the default lesson group.
Parameters
Through the parameters, you can configure the basic settings of the course management module.
The parameters can be consulted by going to Swimming courses > Parameters.
The parameters are divided into different tabs:
General
The tab General contains the general parameters of the Swimming courses module.
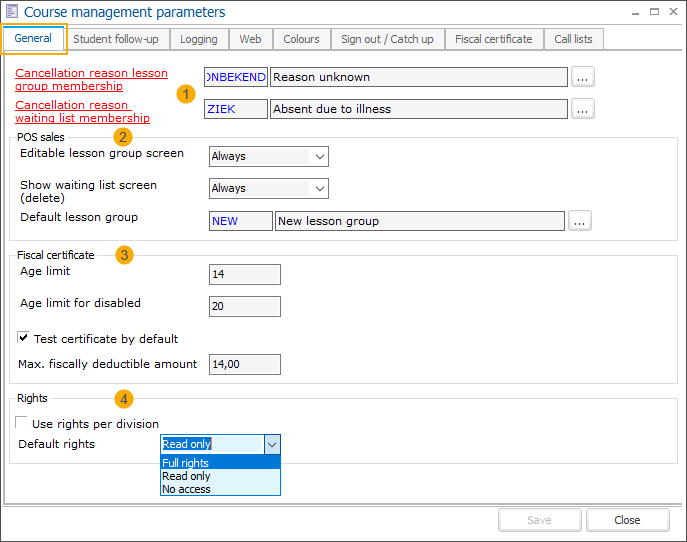
The default cancellation reasons (1) for automatically cancelled lesson group and waiting list memberships (in case the student is transferred) have to be filled in.
In the section POS sales (2) you can define some settings concerning cashier rights during POS sales.
Section Fiscal certificate (3)
Section Rights (4)
Use rights per division: This setting allows you to turn on/off the use of rights per division for the current division. By default, the setting is not active.
With the Default rights option, you specify which rights should be given to all other divisions for each new lesson group created on the current division.:
Full rights - read, edit, etc.
Read only
No access - This option is set as default.
The division on which the lesson groups are created has by default always the full rights.
To further tweak the access individually per lesson group and division, go to Swimming courses > Settings > Rights per division
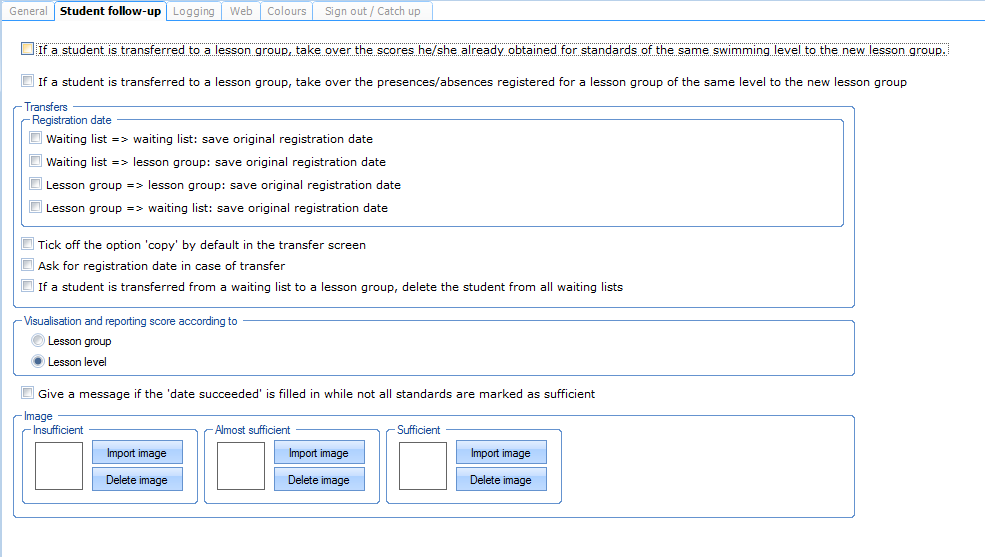
Student follow-up
In the tab Student follow-up, you can define all parameters concerning the course management tool and transfer of students.
At the bottom of the window, you can also import the images or icons you want to show in the lesson scores
 |
Logging
In the tab Logging, all modifications to the course management parameters are logged. You can see which modification has been made, when and by whom.
 |
Web
In the tab Web, you can choose a template that will be used if a customer prints a fiscal certificate through the webshop.
 |
Colours
In the tab Colours, you can define the colours for marking students that are longer in a lesson group/diploma/level than normal.
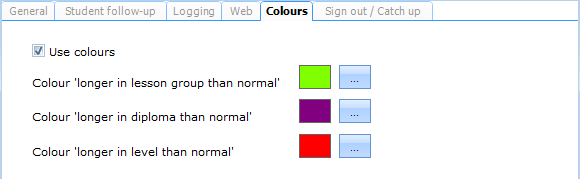 |
The colours you define here are then used in the overview of students within a lesson group.
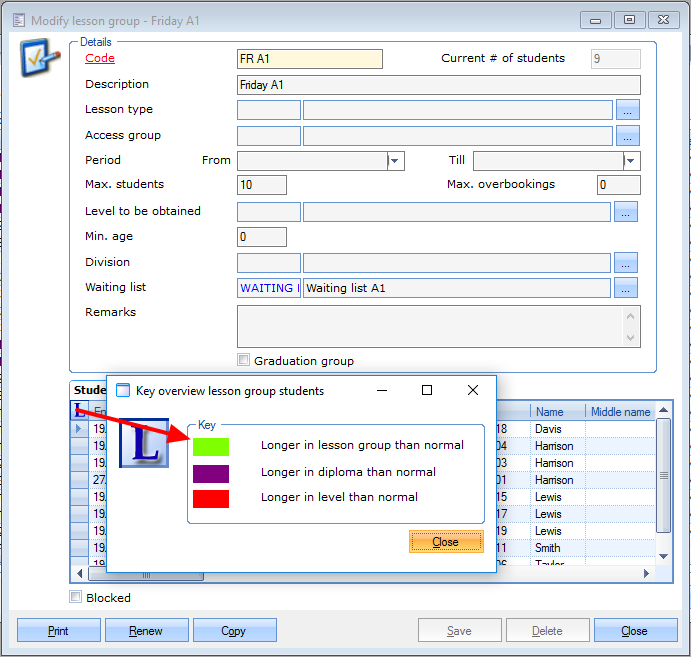 |
Sign out/Catch up
Students can unsubscribe from lesson group days. With each unsubscription they earn credits. They can then use those credits to sign up for a catch-up lesson.
In this tab, you can configure the sign out/catch-up functionality.
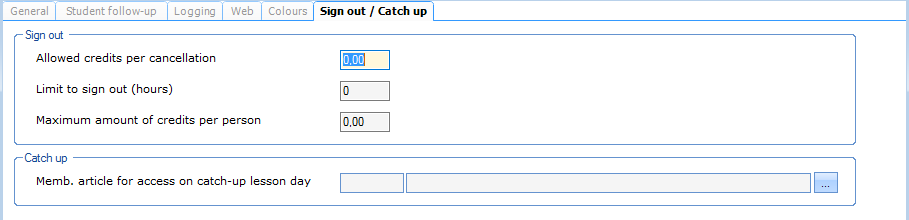 |
In this window, you can specify the amount of credits that is given to students when they sign out and the maximal amount of credits allowed per person. In addition, you can specify until when students can sign out.
In the section Catch-up, you have to select the membership article for access on the catch-up lesson day. This dummy article needs to be defined in advance.Go to General > Basic data > Articles > Articles
on tab Types tick Membership article and Lesson group article
on tab Lesson groups tick all lesson groups