Set Up a Filter
Post-filter
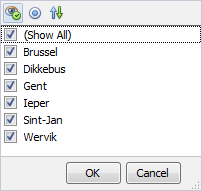
You can place the desired filter fields on your pivot table in the row, column or filter area and by clicking on the filter icon afterwards to set up the filter.
 |
You will then be able to select or deselect all rows, columns or other filter conditions you want to see or not.
 |
Anmerkung
When using the post-filter, all the data of the data source is fetched and loaded but is filtered before visualisation.
The post filter is easier to use when, for example, changing the visualisation on the fly and the data does not need to be reloaded.
Pre-filter
You can also choose to use the Filter window wherein you can define different filter conditions.
 |
Anmerkung
When using the pre-filter, only the data that is compliant with the filter conditions will be shown in the pivot table.
| Add a new condition to this group. | |
| Delete this condition. | |
| If you click this option you can determine the relation between the conditions. Here you can also add a new group or condition, as well as delete the entire filter. | |
| This is the field on which you want to apply the filter. If you click on this field, all fields that are available for the filter will appear. | |
| Here you can determine the condition of the field. | |
| Here you can fill in the value that has to be met by the chosen field. |


Anmerkung
After adding the filter conditions, click Refresh to refresh the pivot with filtered data.
After setting up the filter, you still have to save it by clicking on Save.