Configure article subcategories
The article subcategories are mandatory.
Go to General > Basic data > Articles > Settings > Article categories to open the Article categories overview. Create a dedicated category and all relevant subcategories that will serve as the product categories displayed on the kiosk.
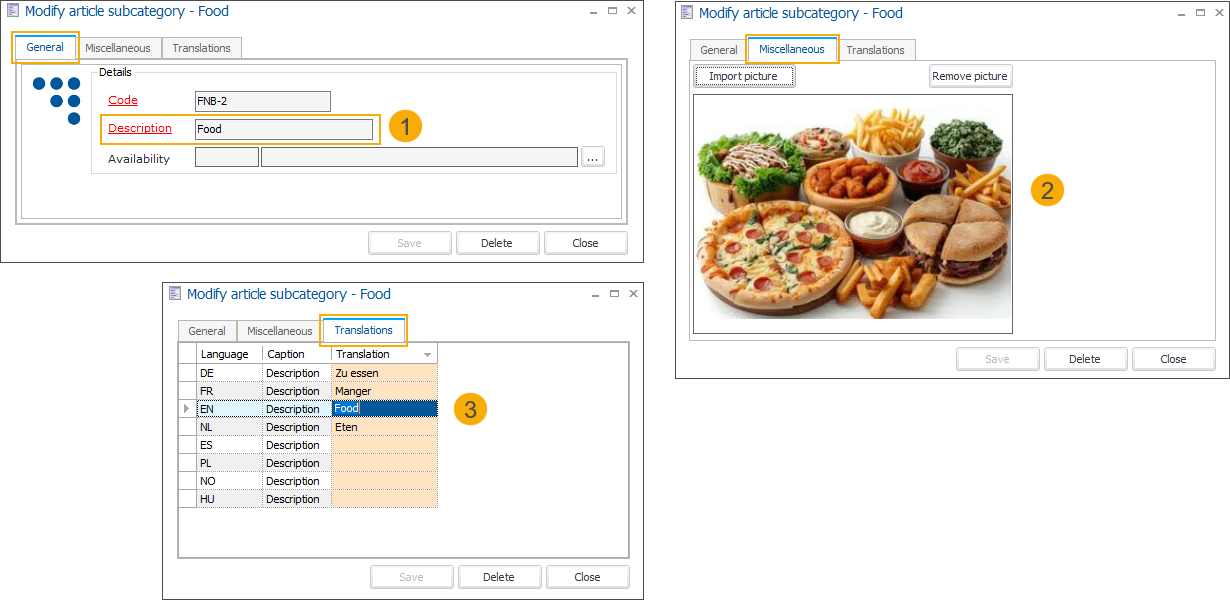
For each subcategory, provide the following elements:
Description: Add an accurate and concise name for each product category. (1)
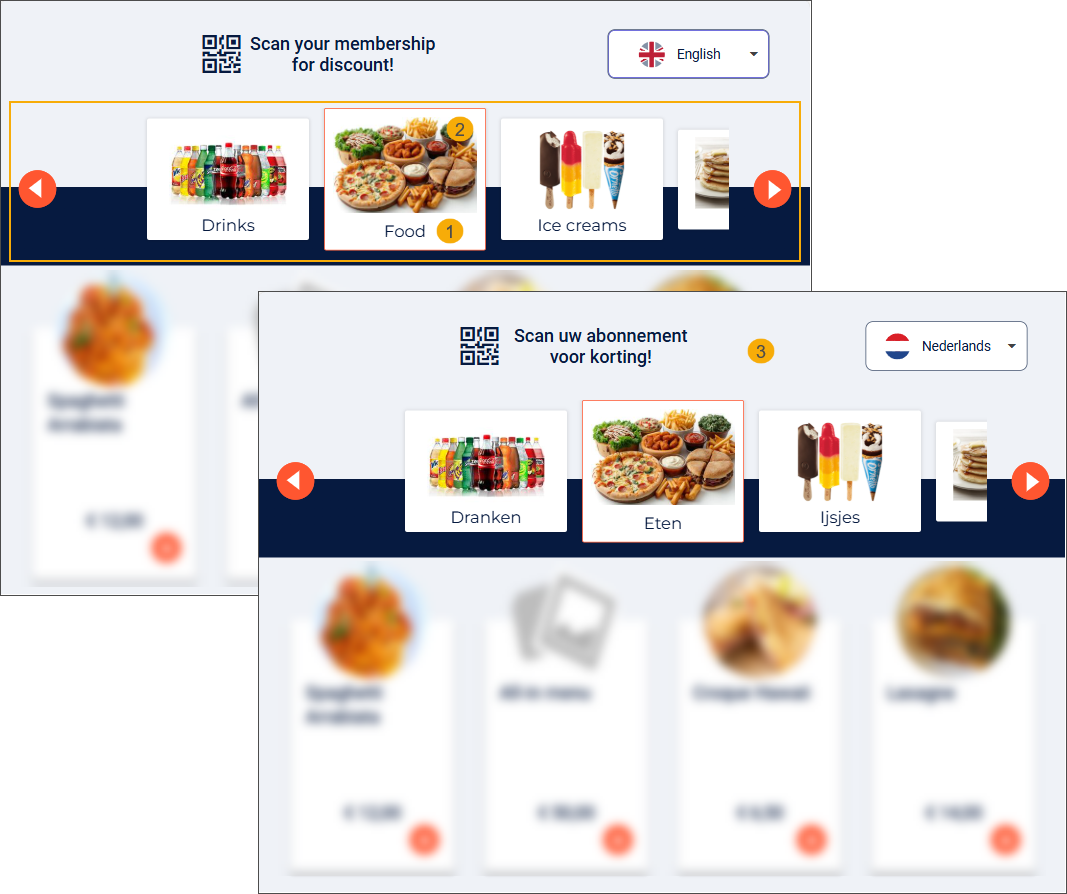
Image: Add an image to visually represent the category (2). If no image is available, a placeholder image will be displayed (4).
Translations: Add translations for all supported languages (3). If a translation is not provided for a particular language in the tab Translations, the kiosk will automatically display the description from the tab General.
To display the relevant product categories, you need to specify the subcategories when configuring the sales zone for your kiosk. The selected subcategories will appear in the product category carousel, displayed at the top of the kiosk screen.

Sorting article categories on the kiosk screen
By default, article categories on the F&B Kiosk are sorted alphabetically (A to Z) based on their Code. To control the display order of subcategories in the kiosk carousel, you can add numeric prefixes to the article category codes (e.g. 01 Drinks, 02 Snacks, 03 Meals, 04 Desserts).
The Code is used only in the backoffice and for sorting purposes. It does not appear on the kiosk screen.
See also Configure sales zone to ensure subcategories are linked correctly and displayed on the kiosk.