Recreatex 6.1.0
Introduction
These release notes contain all new features and modifications for the Recreatex release 6.1.0.0.
New versions
The Recreatex 6.1.0.0 release contains the development tickets and internal optimisations of the following applications and their respective versions:
Recreatex 6.1.0.0
Recreatex WSDL 6.1.0.0
Recreatex WEBSHOP 4.1.0.0
Recreatex BKO web app 4.1.0.0
Recreatex LLV web app 4.1.0.0
Recreatex Vending machine 4.1.0.0
Recreatex Driver 6.1.0.0
What's new
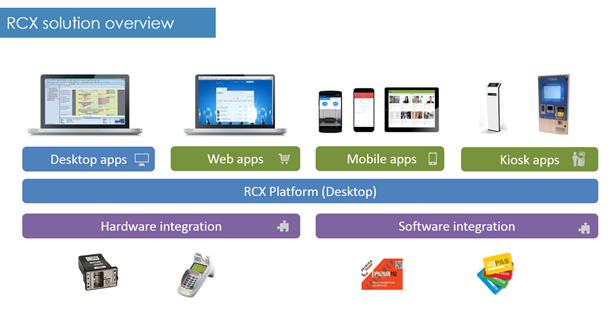
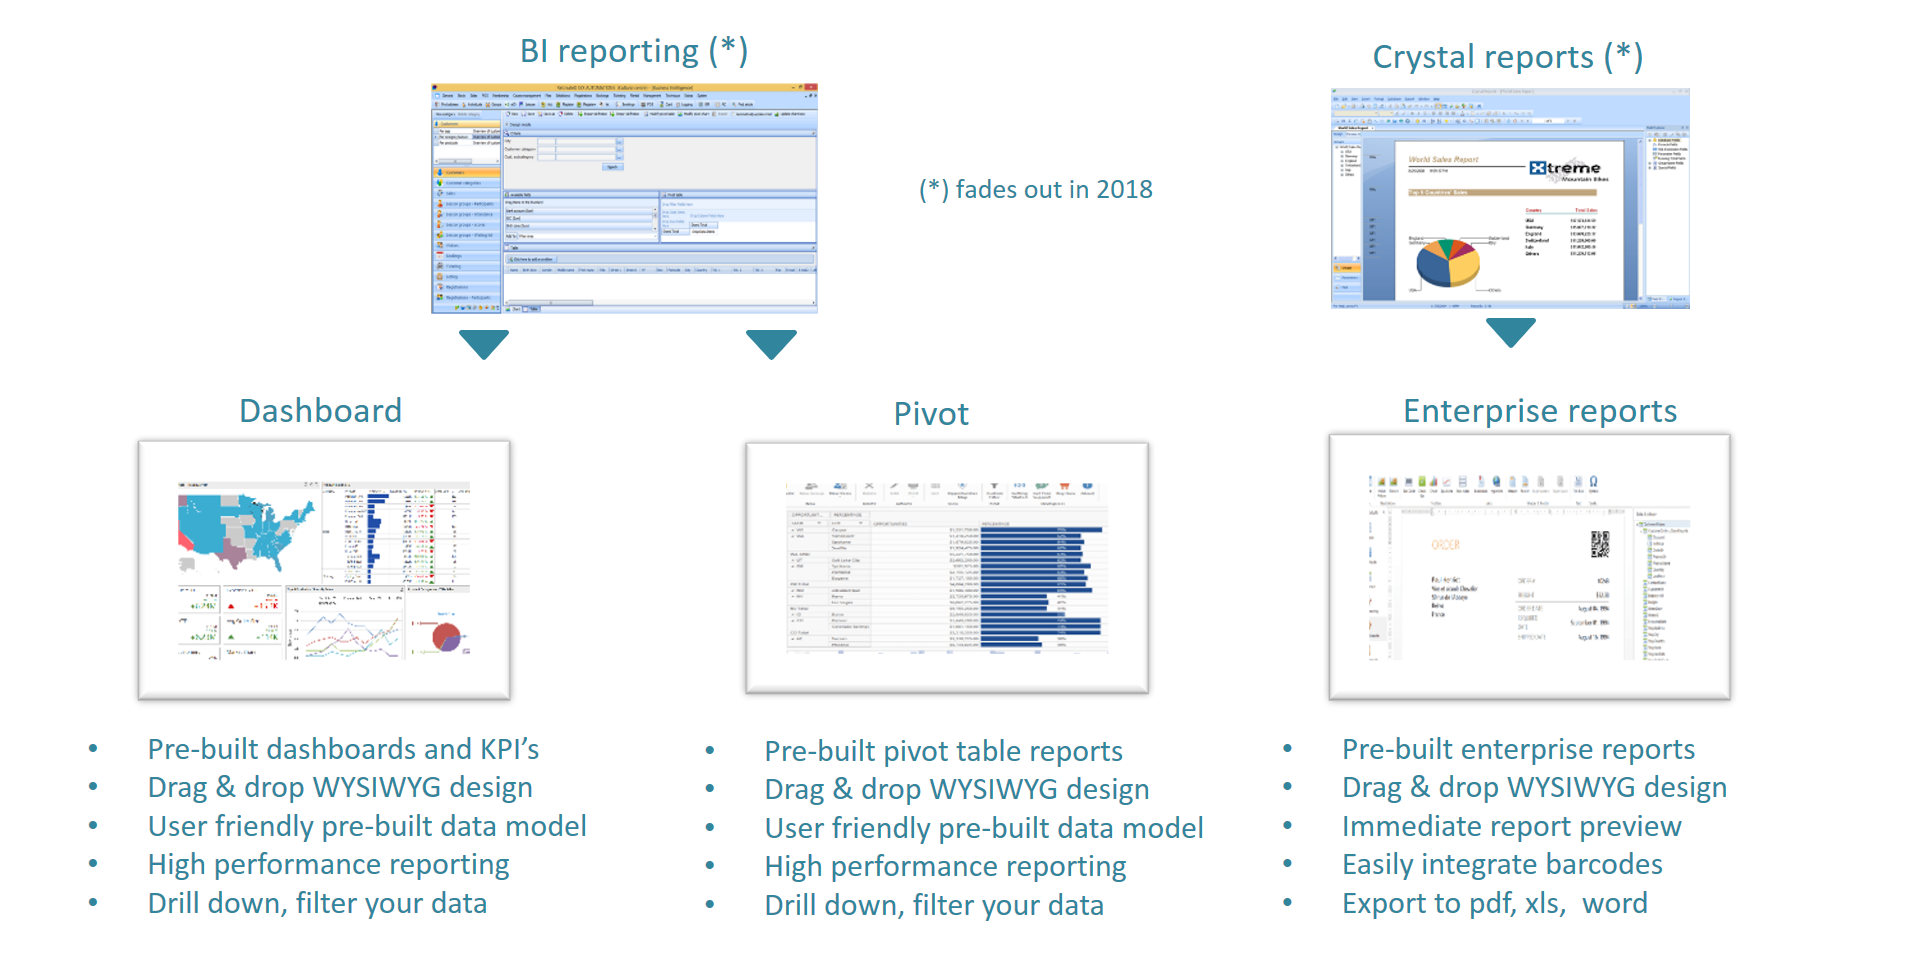
Self-service reporting | A brand new self-service reporting tool enables users to design reports themselves, providing a helicopter view of their key performance indicators. Users can start off with our pre-built dashboards or use our drag & drop visual designer to easily design their own. We designed a user-friendly data model, to easily select the business data you need. It supports OLAP, which guarantees high performance reporting. In a second phase, we will introduce a new enterprise reporting tool as well, that will replace the existing Crystal reports. In 2017, we will gradually introduce these new reporting options . The goal is to fade out the BI reporting tool and Crystal reports completely from 2018 onwards. We intend to remain compatible with existing reports and custom views, to ensure a proper transition. |
Self-service promotion rules | Self-service Promotion rules have been developed in order to add flexibility to the way discounts are awarded to customers in ReCreateX. Self-service promotion rules enable the users to create and adjust their own discount and promotion rules. They will now be available in the modules Exhibitions, Ticketing and Article sales. In the future, this will be gradually extended throughout Recreatex. A similar self-service structure will be developed for the Mailing module. |
Interfaces | The new RMS Interface retail platform provides the possibility to keep the stock management within RMS up to date with sales generated in ReCreateX. |
The new Podiumkunst interface enables the Recreatex user to link halls and events defined in ReCreatex with the corresponding halls and events in Podiumkunst.info. | |
Integrations | New payment terminal integration CCV VX 820 ITS |
Outlook (Office 365) integration | |
Memberships | Increased flexibility to convert and extend family memberships |
mPOS | |
Performance | Key performance improvements throughout |
 |
Detailed information
Reporting
A brand new self-service reporting tool enables users to design reports themselves, providing a helicopter view of their key performance indicators.
Users can start off with our pre-built dashboards or use our drag & drop visual designer to easily design their own.
We designed a user-friendly data model, to easily select the business data you need. It supports OLAP, which guarantees high-performance reporting.
In a second phase, we will introduce a new enterprise reporting tool as well, that will replace the existing Crystal reports.
In 2017, we will gradually introduce these new reporting options. The goal is to fade out the BI reporting tool and Crystal reports completely from 2018 onwards.
We intend to remain compatible with existing reports and custom views, to ensure a proper transition.
 |
New reporting tools can be found at Reporting > Pivot and Reporting > Dashboards.
Data sources
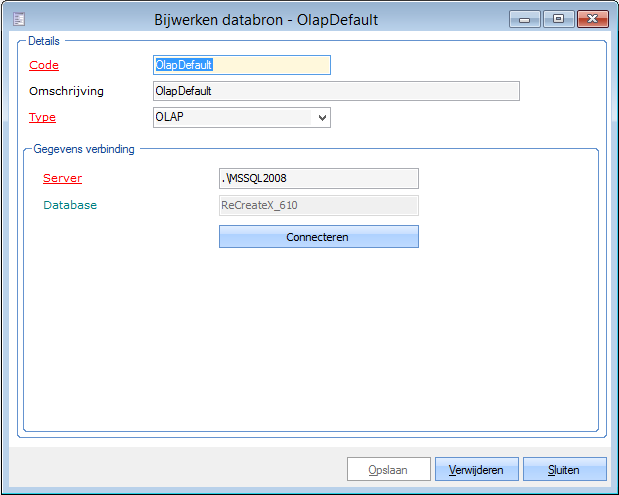
The datasource defines which data you are retrieving from the database to show on your dashboard or pivot grid. It is the link between the data in the database and the visualisations in the dashboards or pivot grids. Go to Reporting > Data sources
There are three types of datasources:
OLAP model
The data to be visualised is stored in a separate location to increase performance
This data is not realtime but day-1 (everything until yesterday)
 |
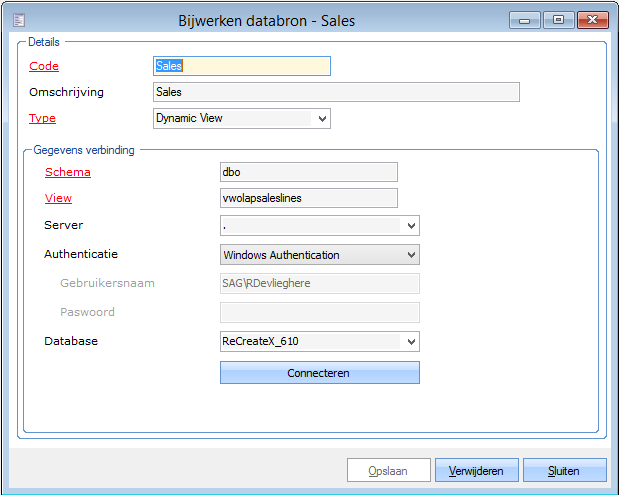
Dynamic view
A view created directly in the SQL database. This will have to be configured by your GANTNER Consultant or GANTNER CSC agent.
 |
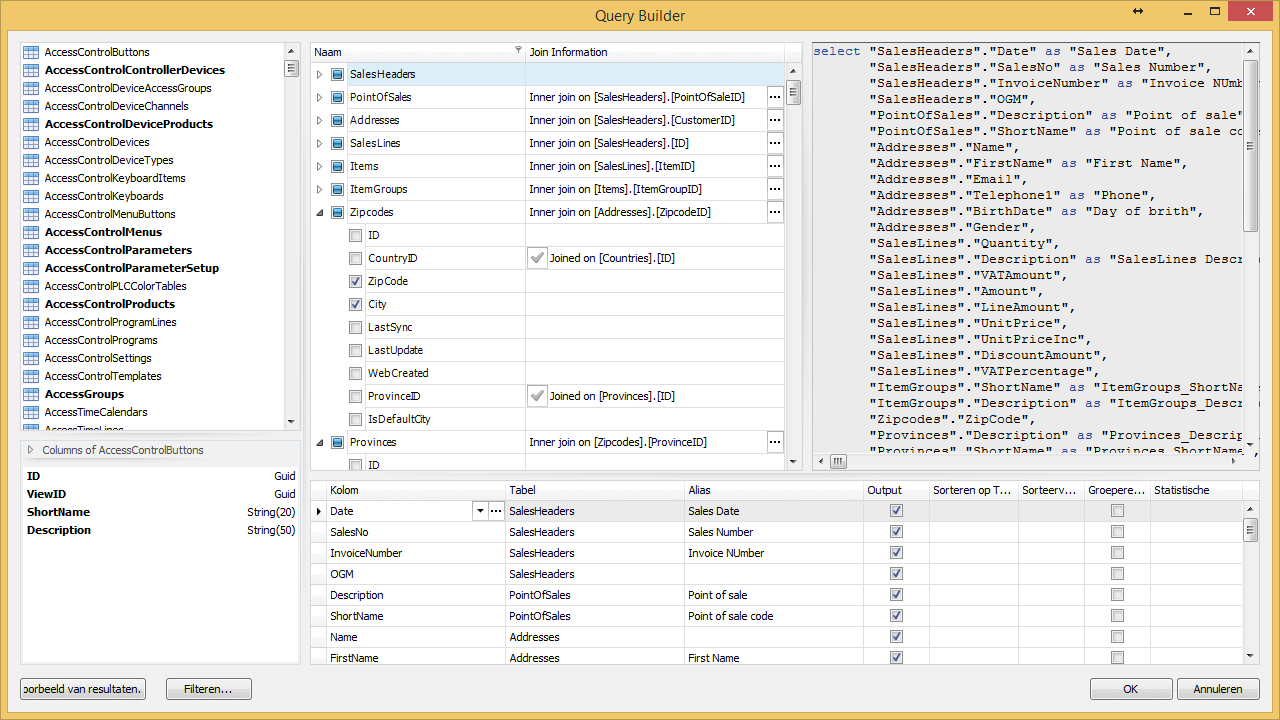
Custom query
With a designer, you can create your own queries to include the data you want to use. This is meant to be used by advanced users only.
 |
Dashboards
Configure
To configure a dashboard, go to Reporting > Dashboards > Configure. Create a new dashboard (F2) or open an existing one. On the tab General, you can configure a code, a description and the datasource to be used.
 |
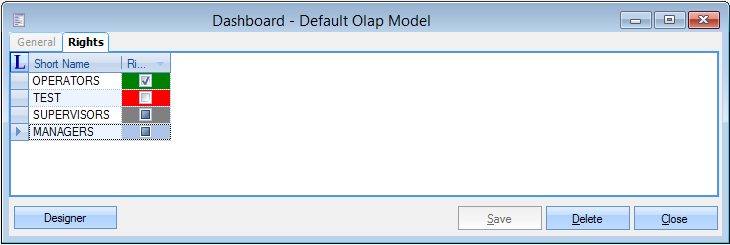
On the tab Rights, you can configure rights to the dashboard for each user group (No access, read-only, full control)
 |
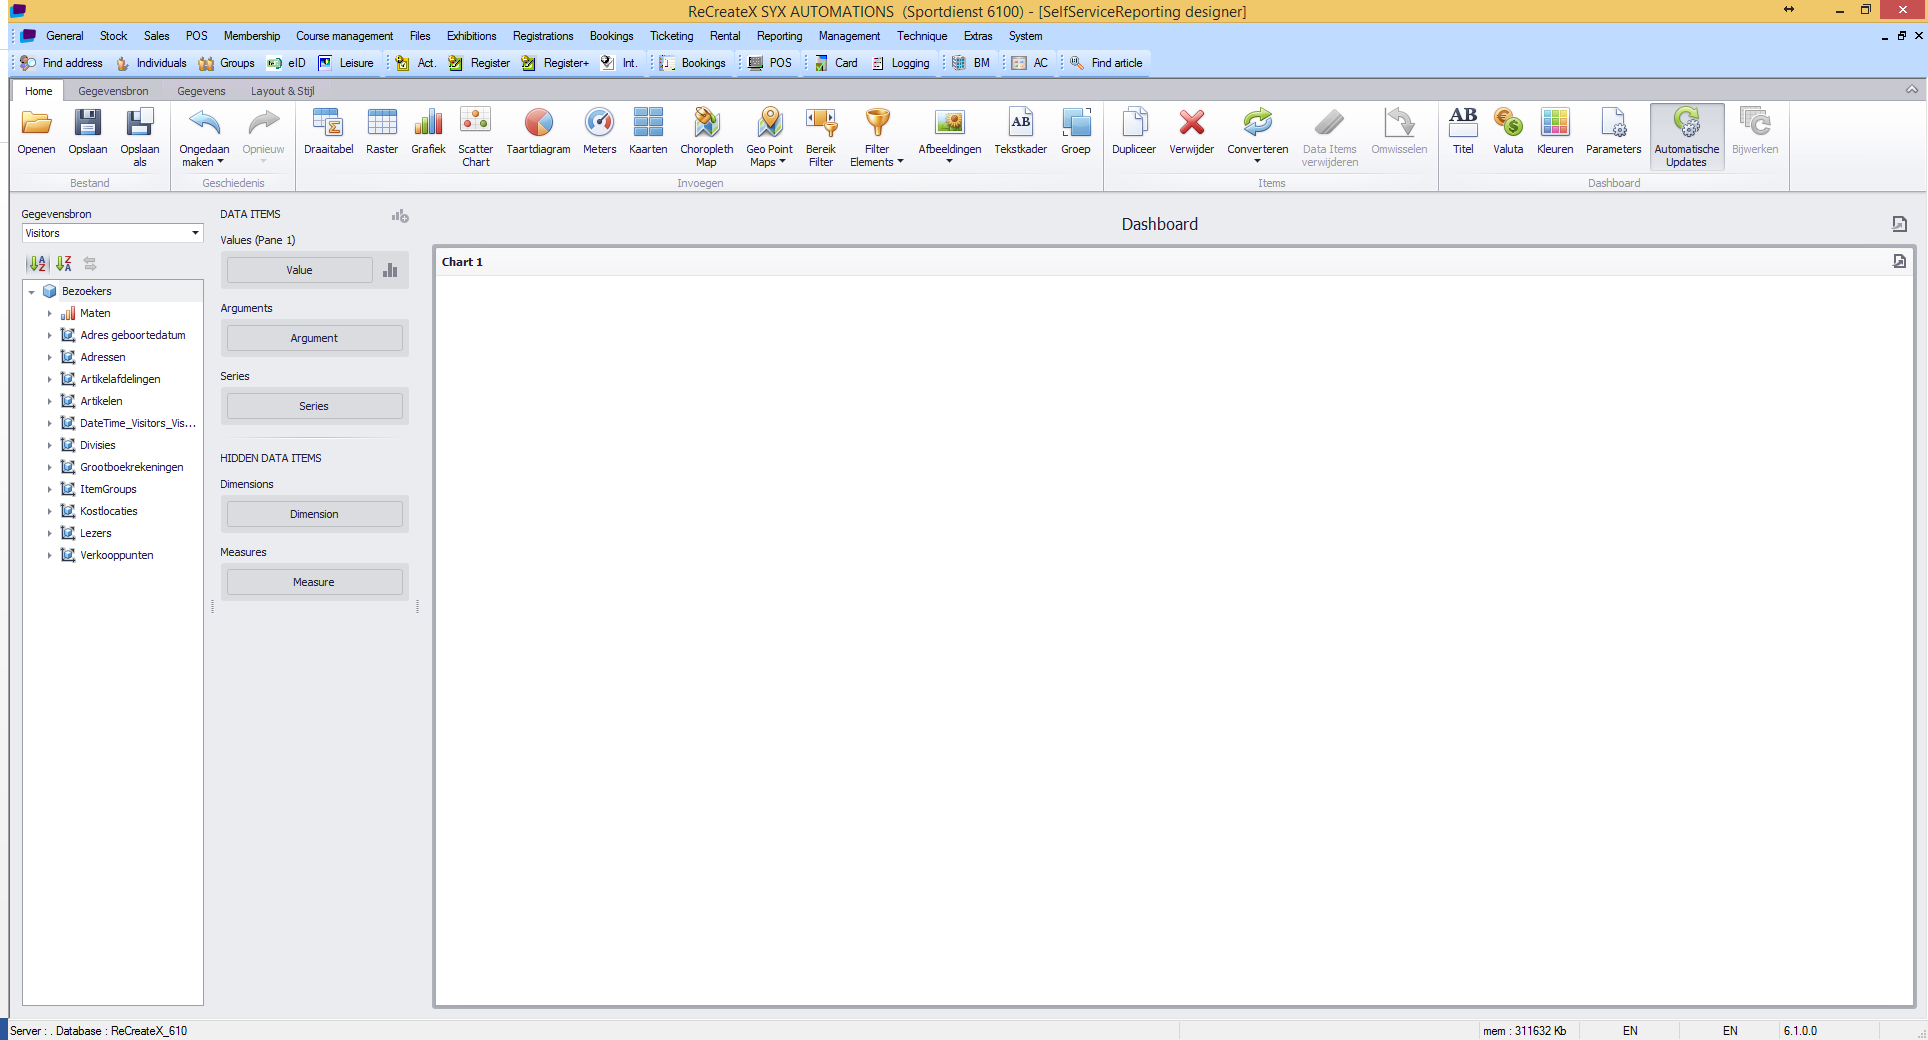
Next, click on the Designer button to start designing your dashboard.
In the Home ribbon, select the type of control you want to use (graph, pie, chart, …)
Select the values you want to show by dragging the field(s) from the Data source to the Values
Select how to visualise or group the data by dragging the field(s) to the Arguments or Series
By using the buttons on the Design ribbon, you can change texts and visualisations.
Buttons on Home ribbon: Open / Save / Save as
Click Open to import an existing file (and then click Save to save it in the database)
When you click Save you will be saving the dashboard in the database
When you click Save as you can save the dashboard as a file
 |
Filters can be applied to the data displayed in dashboard.
Visible filters (can be changed realtime by the viewer) Home ribbon > Filter elements
Add a filter pane by selecting Filter elements or range filter (range filter is not supported for the OLAP model datasource)
Add fields to filter on by dragging the field(s) from the Data source to the Dimensions
This filter will by default impact the data on all other panes. To ignore the filter on a specific pane, you can select that pane and go to the Data ribbon to select Ignore Master Filter
Invisible filters (are configured upfront and cannot be changed by the viewer)
Right-click on the pane and select Edit filter
You can filter the data to visualise based on the available fields
You can add fields to filter on without showing them on the pane itself by dragging the fields to the Hidden data items
Data drill-down: It is possible to show data in a hierarchical way in a drill-down structure.
In the arguments, section add two or more arguments for which you want to configure the drill-down (for example date year – date month)
At first, you will see the data by month
Go to the Data ribbon and enable Drill Down
You will now see the data by year and if you click on the year you will see the data by month for the selected year.
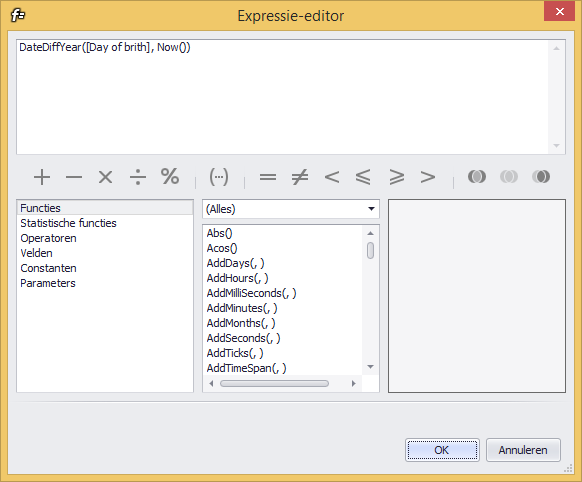
Calculated fields (not supported when using OLAP data source)
Go to the Data Source ribbon and click on Add Calculated Field in order to add calculated fields.
 |
View
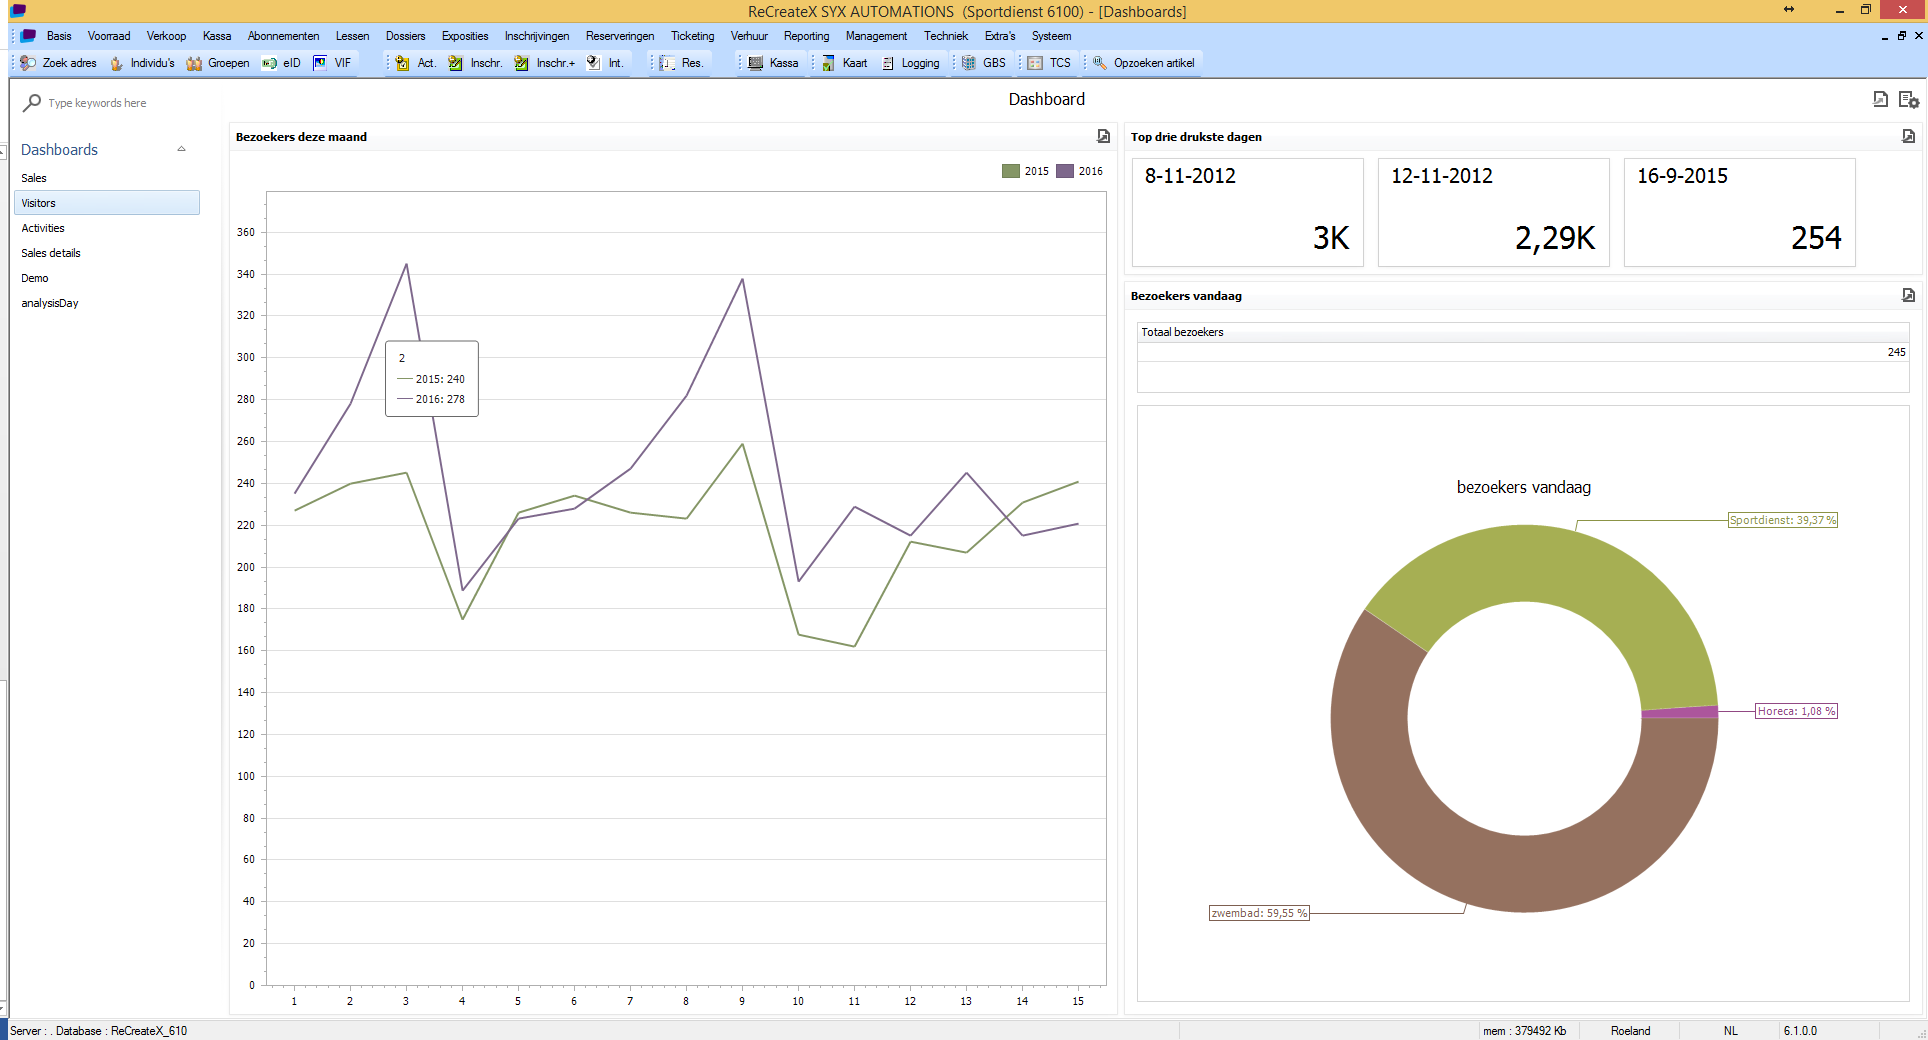
In the viewer, you will see the available dashboards on the left and the visualisation of the active dashboard on the right.
By using the search bar on the top, it is possible to search for specific dashboards by name
You can change the order and categories of the dashboards by dragging and dropping them
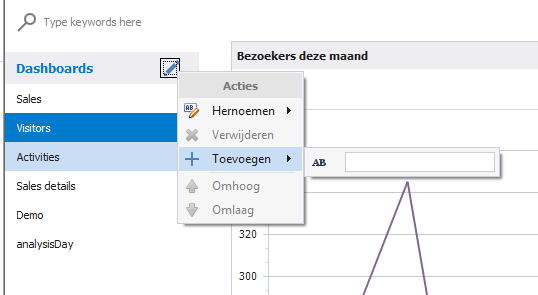
With a right-click in the header of the menu, you can set the menu to Design mode. In Design mode, you can add, remove, rename categories. You can only remove a category if there are no dashboards placed in that category.
This configuration is saved for every Windows user separately (so everybody can place their own favourite on the top or they can create their own groups)
 |
 |
It is possible to export or print separate panes or the dashboard as a whole by clicking on the icon
 in the top right corner of the pane, or by right-clicking anywhere in the pane.
When choosing for Print Preview you can also email the dashboard or pane(s)
If you have full rights on the dashboard, you can go directly to the designer by right-clicking and selecting Edit.
Pivot
Configure
The pivots are the successors of the already existing BI-tool views. The functionality is mostly the same but the layout and data presentation has received an update. Go to Reporting > Pivot > Configure.
Configure code, description and datasource on pivot
Configure rights on the pivots for the user groups (no access, read-only, full control)
View
Go to Reporting > Pivot > View. Lay-out is the same as for dashboards. In the viewer, you have the available pivots on the left and the visualisation of the active pivot on the right.
By using the search bar on the top, it is possible to search for specific pivots by name.
You can change the order and categories of the pivots by dragging and dropping them.
With a right-click in the header of the menu, you can set the menu to Design mode. In design mode, you can add, remove, rename categories.
Create pivot table:
Drag the needed fields to the pivot table (very similar to the BI-tool).
Filter data:
When using OLAP model you can choose your cube (category)
When using a dynamic view or custom query you can create a filter on the data you want to visualise
It is also possible to filter in the pivot table itself by clicking on the filter icon of the desired fields.
 |
Menu
Export data: export the data to one of the supported formats (PDF, CSV, XLS, …)
Import layout: import a previously exported layout
Export the layout to a file (this allows you to copy pivots to other databases)
Save: save the pivot in the database
Design: only load the first 100 records. This increases performance when configuring the pivot table. Disable the design mode the moment you want to visualise the actual data.
Settings
Refresh (reload the data in the pivot table)
Settings
Configure the visualisations of the totals
Rename the different fields
Configure group intervals
Configure display format
Promotion rules
Self-service promotion rules have been developed in order to add flexibility to the way discounts are awarded to customers in Recreatex. Self-service promotion rules enable the user to create and adjust his own discount and promotion rules. At the moment the self-service promotion rules are applicable in the modules Exhibitions, Ticketing and Article sales. In the future, this will be gradually extended throughout Recreatex.
A similar self-service structure will be developed for the Mailing module.
With the module Promotion rules you can:
Design your own promotion rules
Manage several promotion rules
Define how long a rule is valid for
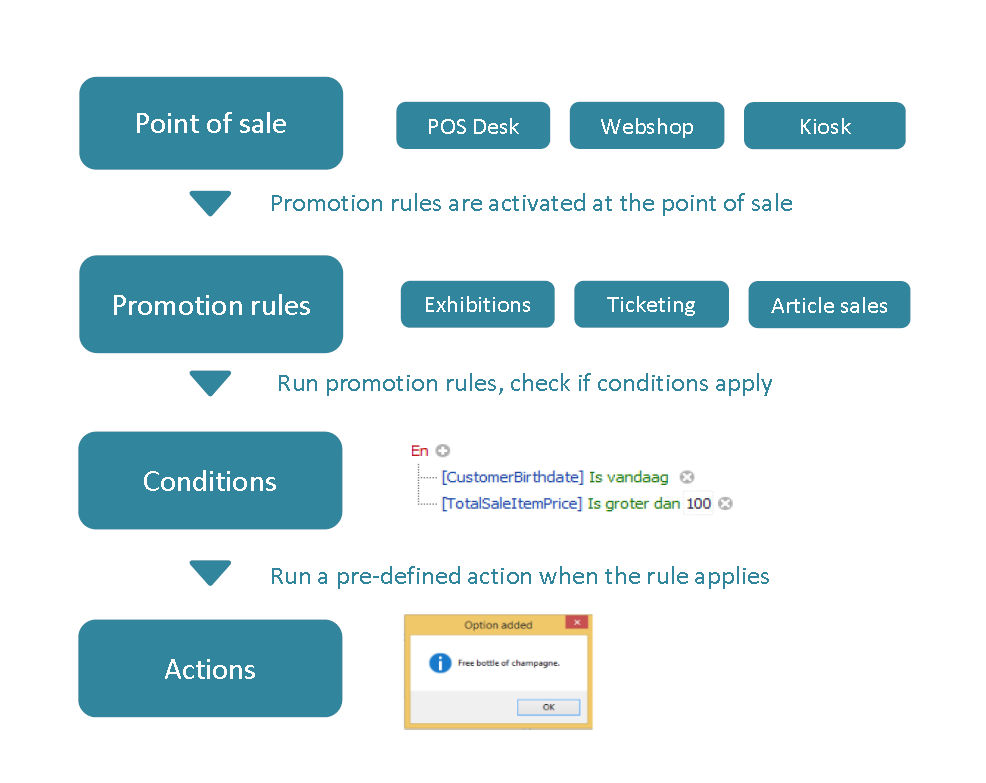
Check rules at the point of sale
Check if a condition applies
Run pre-defined actions (promotions)
Link a rule to a discount code
Edit rules with the built-in data model
Extend data model for custom use
A promotion rule is used to dynamically configure discount rules. The rule consist of a condition and an action. When the condition is met the action is executed.
 |
Condition types
Exhibitions: promotion rules that apply on exhibition visits (on POS, on webshop)
Ticketing: configure promotion rules that apply on culture event tickets (on POS, on webshop)
Article sale: configure promotion rules that apply on article sale (on POS, on Webshop, in files)
It is possible to create new custom types but this should only be done by GANTNER employees or very experienced users with knowledge of the database. These custom types can be exported and imported in other databases.
Rule configuration
Go to Sales > Promotion rules > Promotion rules overview.
When you create a new rule it is by default enabled. You can un-check the rule if you no longer want to process the rules. Please choose a clear description as it will be displayed in a later stage to show which discount rules have been applied.
Notes:
The valid from and valid till applies on the time the rule is checked and not on the time the exhibition visit or culture event takes place.
Priority and Combinable are used to configure the behaviour if the conditions of multiple rules are met. The rule with the highest priority where the condition is met will be executed. If that rule is combinable, it will search for the next priority that is also configured as combinable where the condition is met.
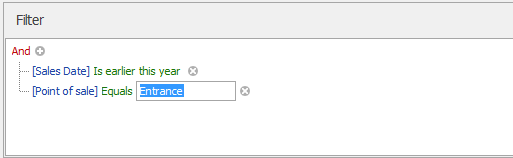
Condition
The type defines when the rules will be triggered and what fields are available in the condition filter. In the condition filter, you configure what conditions need to be met to apply the discount.
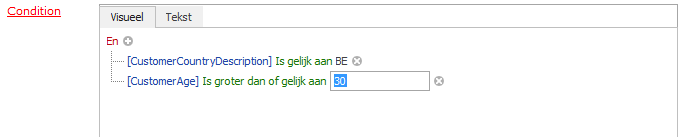 |
Action
In the action, you need to configure what kind of discount you want to give (amount, percentage, …) and to what the discount needs to be applied (on all articles, on the cheapest article, on a specific article, …)
Notes:
On the Point of sale tab you can configure on which point of sales the rule needs to be checked. This is by default on all existing points of sale.
You can copy a rule if you want change small things without removing the original rule.
When you click Delete the rules are removed from the overview but not from the database. Otherwise, it would not be possible to find the loggings of rules that maybe already have been applied.
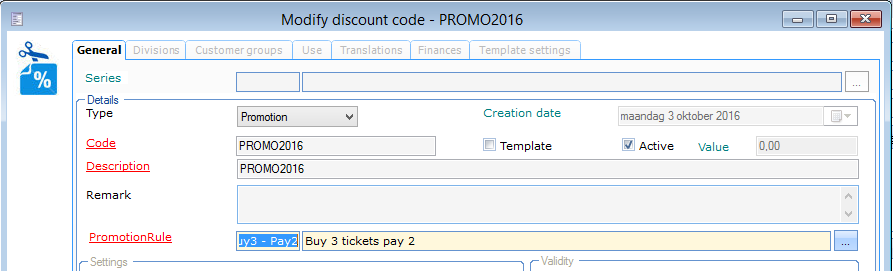
Discount code
It is possible to link a promotion rule to a discount code. If this is the case the rule will only be applied if the user enters that code.
 |
 |
Interface RMS
The interface with the RMS (Resource Management Services) retail platform provides the possibility to keep the stock management within RMS up to date with sales generated in Recreatex. This allows RMS and Recreatex to synchronise on items that are sold to customers but are only collected at a later time.
 |
Bar-code configuration
Scanning of bar-code at POS
Article configuration
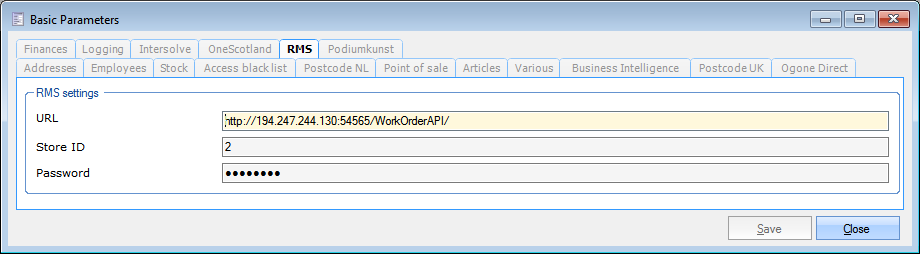
To configure the RMS related parameters, go to General > Parameters > tab RMS. Enter URL, Store ID and Password provided by RMS.
 |
Every article needs to be linked with RMS separately. To configure the link to RMS per article, go to the article card, tab Various and enter the External code.
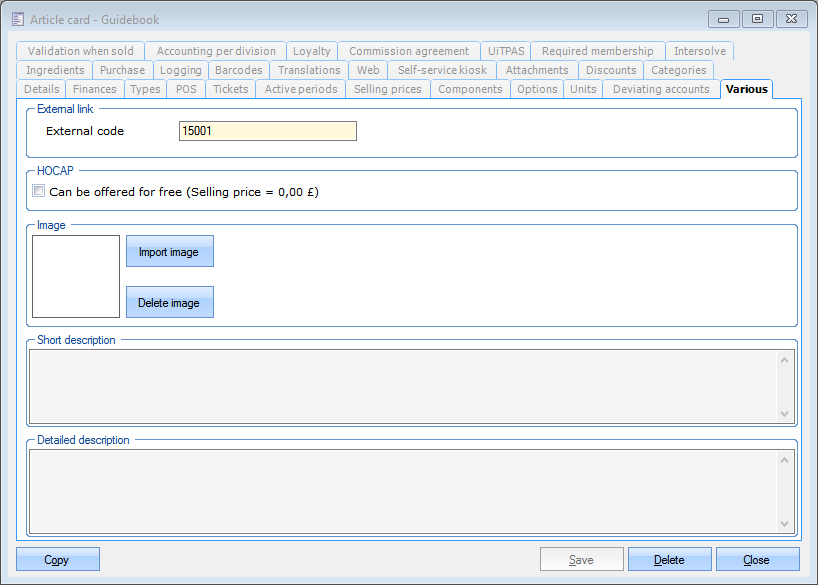 |
If the article is an item that can be collected at a later time, further configuration is needed. Go to the article card, tab Types & check the option Collect the item later.
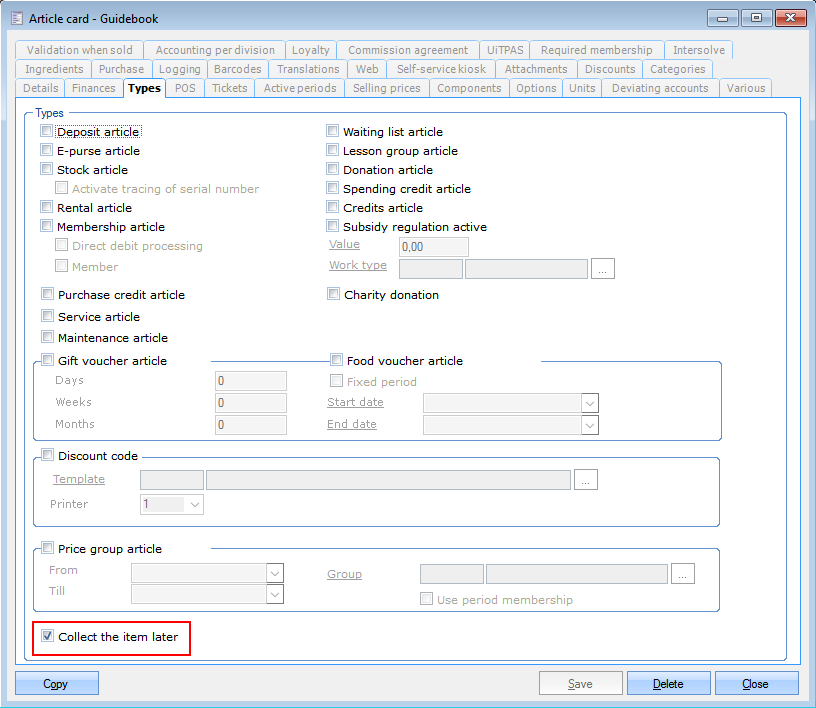 |
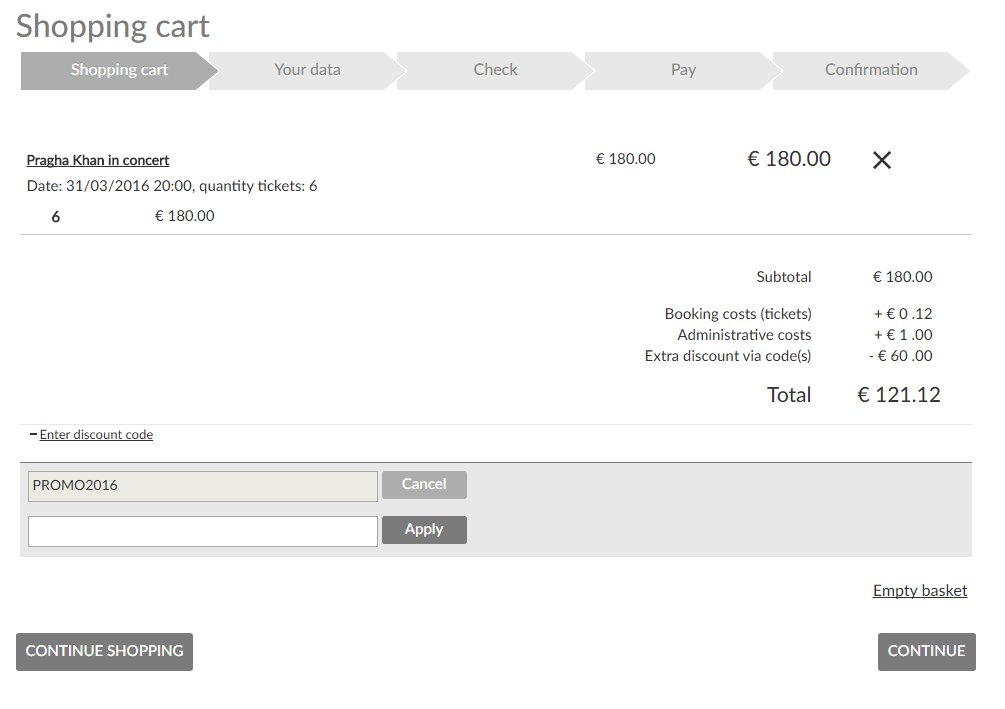
Bar-code configuration
There are two ways for a customer to buy an article that can be collected later: on the web shop or at a Point of sale (POS). In both cases, a bar-code will be generated with which the customer can collect his (her) purchase at a later time. This bar-code can be scanned by RMS and ReCreateX.When a web shop customer buys an article that can be collected later, (s)he will receive a confirmation email with a PDF file which contains a bar-code.
When a customer buys an article that can be collected later at a POS, (s)he will receive a printed bar-code.
For Recreatex to be able to generate a bar-code for an article that can be collected later, a few things need to be configured first.
To be able to print the bar-code at a POS, the printer needs to be configured. Go to System > Settings > Printer settings > tab General and select a printer next to Collect later printer.
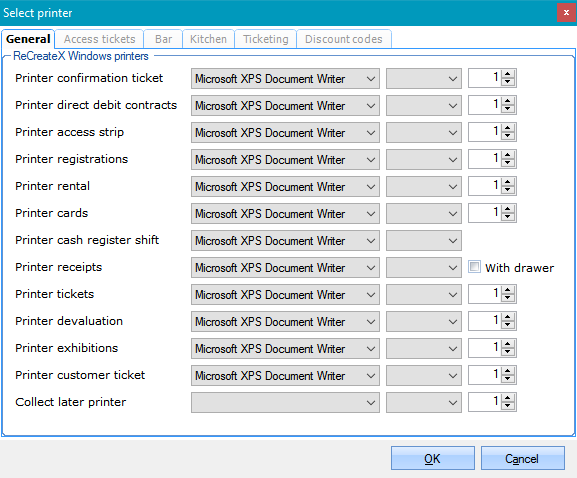 |
A number series needs to be created for the collect later items. Go to General > Settings > Number series and create (F2) a number series (e.g. CollectLater)
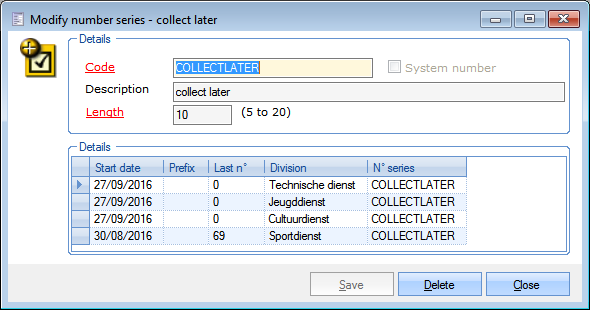 |
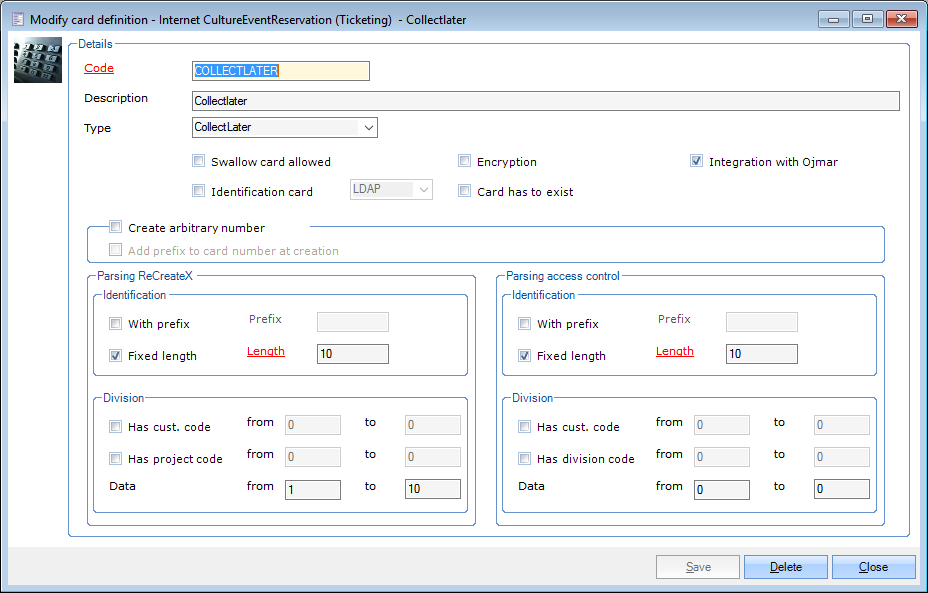
A card definition needs to be defined. A new peripheralstringtype is added in SydAdmin and this should be linked with the new number series. Go to SydAdmin > Management > Devices > Card definitions.
 |
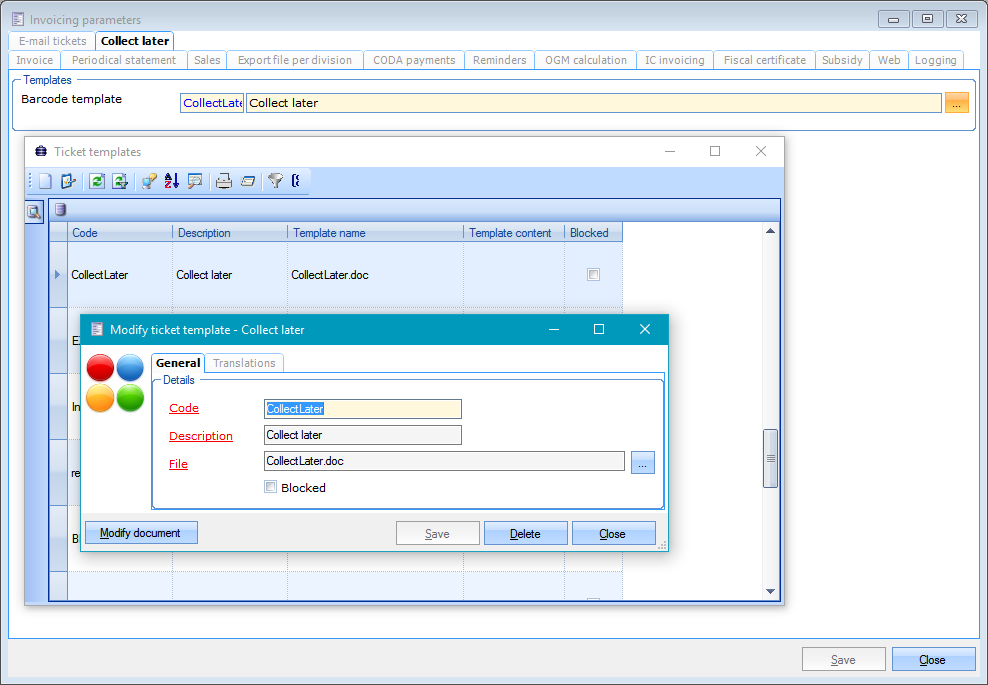
A bar-code template needs to be selected or created. Go to Sales > Parameters > tab Collectlater and create or select a template. Click Save before exiting.
 |
Overview
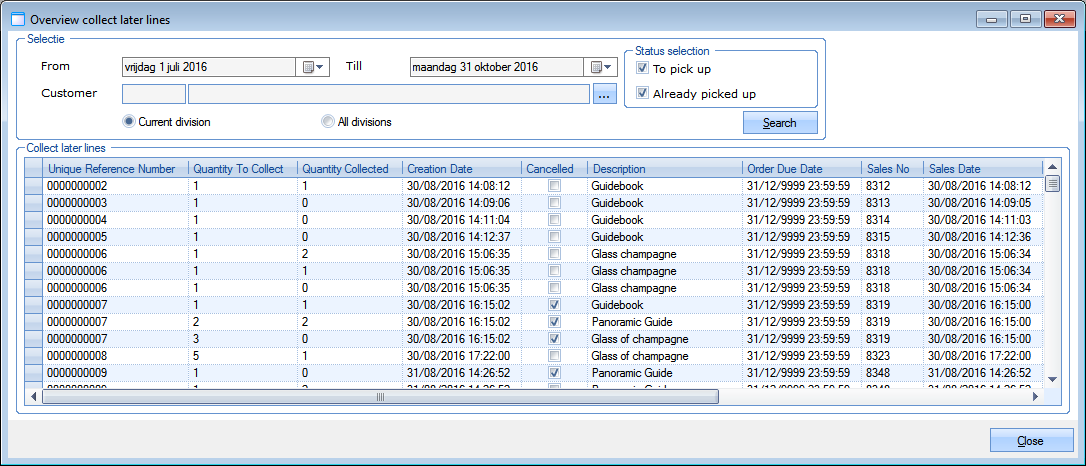
To see an overview of all the Collect later sales, go to Sales > Collect later > Collect later overview. Various selection criteria are available: From ... Till ..., To pick up, Already picked up, ...
 |
Report
To generate reports on the collect later articles, go to Sales > Collect Later > Reports > Overview collect later. Use the various filters to refine your selection and click Print.
 |
Interface Podiumkunst
The interface between Recreatex and Podiumkunst.info allows the Recreatex user to link venues and events defined in Recreatex with the corresponding venues and events in Podiumkunst.info.
 |
To configure the parameter related to Podiumkunst, go to General > Parameters > tab Podiumkunst. Enter URL, Client ID and Client Secret provided by Podiumkunst.info.
 |
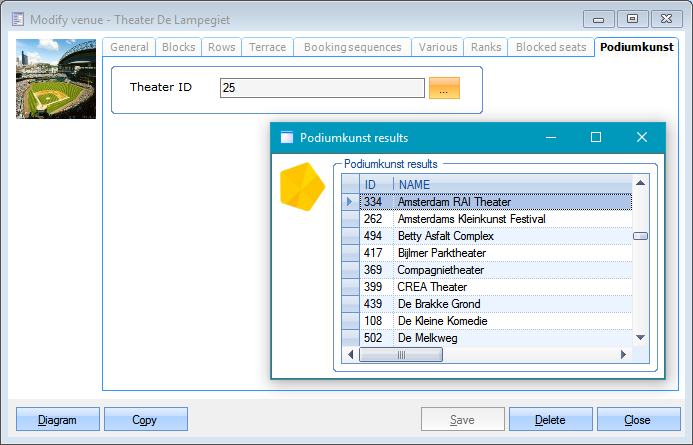
To link a Recreatex Hall with a Podiumkunst Theater, go to Ticketing > Settings > Venues and double-click on a venue. Go to the tab Podiumkunst and click on the button next to Theater ID. A data grid will appear with available venues linked with Podiumkunst. After double-clicking on the correct venue, the Theater ID will be filled in. Click on the Save button.
 |
To link a Recreatex Culture Event with a Podiumkunst Performance, go to Ticketing > Events and select an event. Go to the tab Podiumkunst and click on the button next to Performance ID. A data grid will appear with available performances linked with Podiumkunst. After double-clicking on the correct performance, the Performance ID will be filled in. Click on the Save button.
 |
To manually export the data (ticket sales & revenue) of the linked culture events, go to Ticketing > Processing > Export to Podiumkunst. Enter the dates of the events you want to export and click Search. Next tick the boxes of the events for which you want to export the data and click Export. To consult these results, log into your account on the Podiumkunst website.
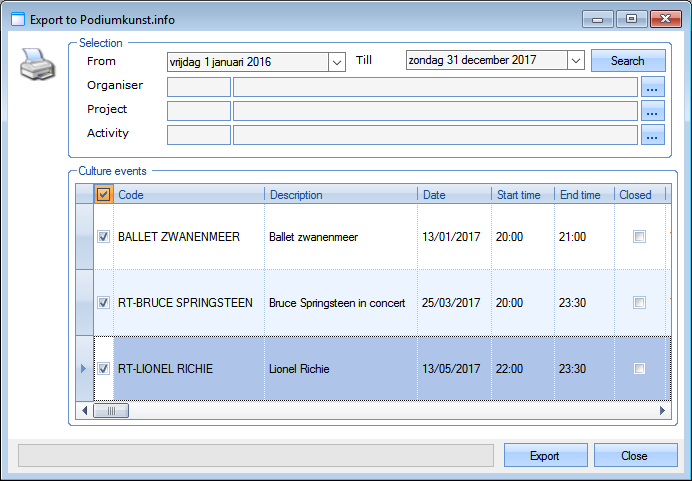 |
 |
Data export of the ticket sales & revenue of the linked culture events can be done automatically on a regular basis. This needs to be configured by GANTNER. Your GANTNER consultant or CSC agent will configure this plugin in SydAdmin.
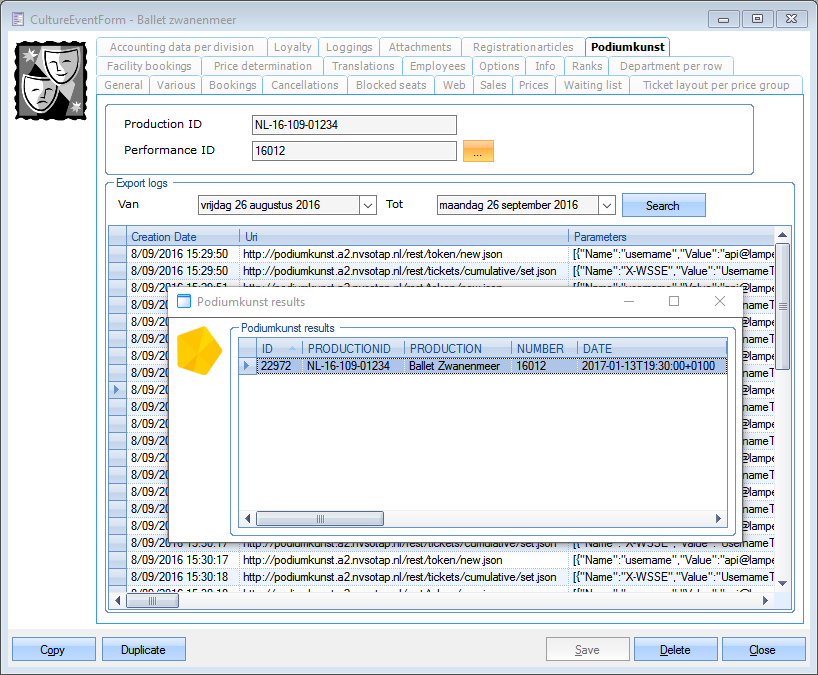
Logging: The communication between Recreatex and Podiumkunst.info is logged. Go to Ticketing > Events and select an event where export has been done; next go to tab Podiumkunst.
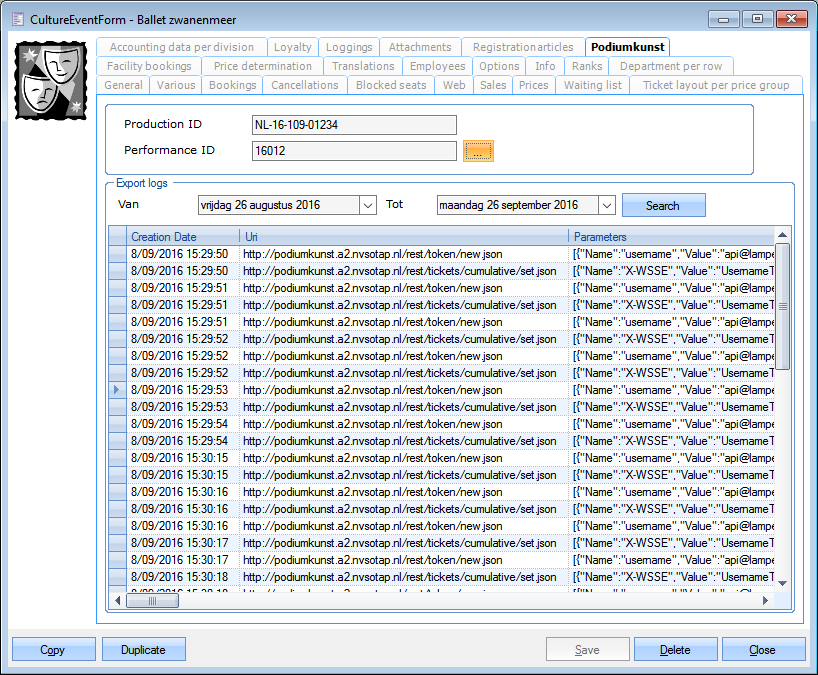 |
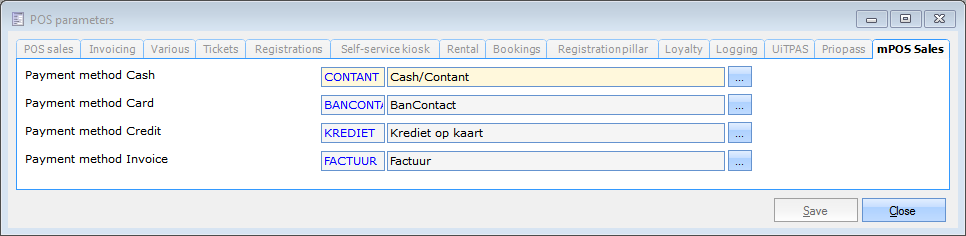
mPOS payment methods
It is now possible to map mPOS payment methods in Recreatex 6.1.0 / mPOS 2.2.0. A new tab has been created to map mPOS payment methods in Recreatex. Go to POS > Parameters > tab mPOS Sales. After an update to Recreatex 6.1.0, this tab must be configured in order to keep using the mPOS application or no payment methods will be available on mPOS.
 |