Purchase orders
Purchase orders can be called up in the window Purchase orders under the menu General > Basic data > Articles > Purchase > Purchase orders.
The selection window Purchase orders will appear.
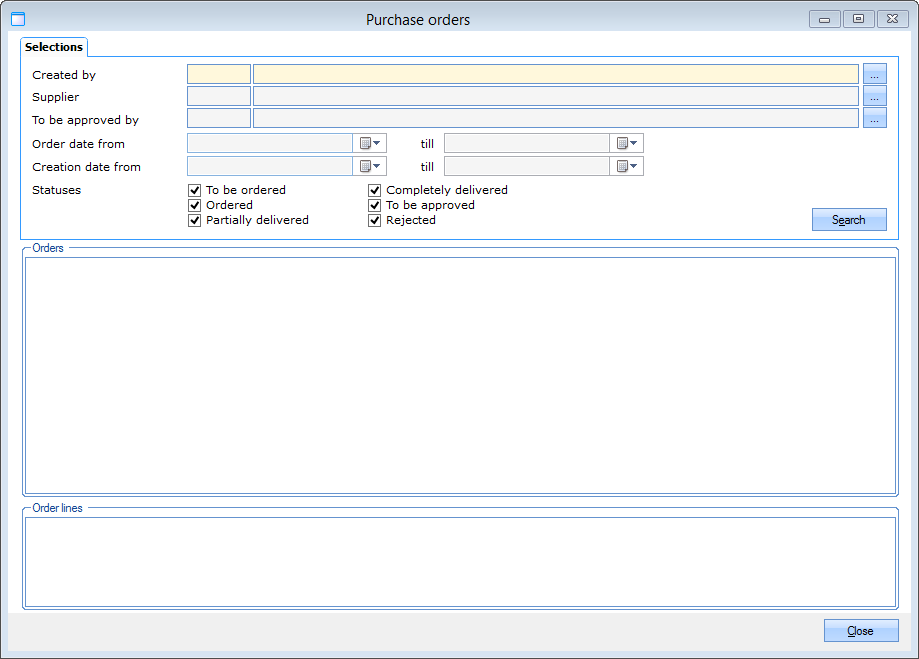 |
This window allows you to call up an overview of all purchase orders. The overview can be limited by filling in various selection criteria:
Created by | The employee who has created the purchase order. |
Supplier | The supplier to whom the purchase order will be sent. |
To be approved by | The employee who has to approve the purchase order. |
Order date | The date on which the status Ordered was linked to the order. |
Creation date | The date on which the order was created. |
Status | The current status of the order. |
If you click on  the list of purchase orders will appear.
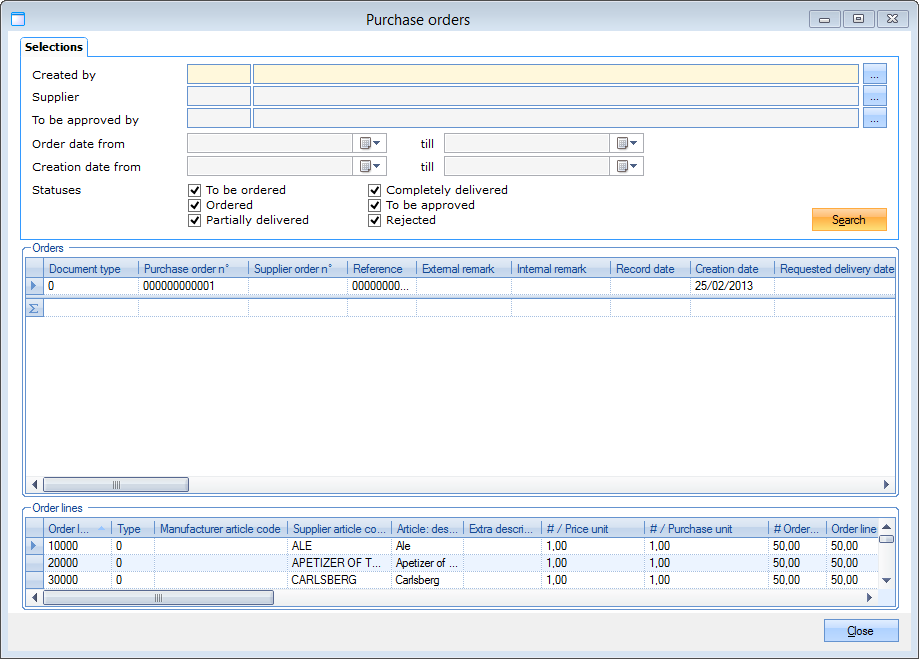 |
In section Orders, a list of purchase orders that meet the given criteria will appear.
In the section Order lines, the generated order lines are visualised in the function of the selected order.
Anmerkung
The window Purchase orders allow you to manually create purchase orders. (see 'Manually create a purchase order')
Modify purchase orders
The window Purchase order is not only used to modify or fill in data of the current purchase order, but also to follow up the purchase order. In other words, this window is used during the entire purchase process, from the order until the registration of the delivery.
You can call up this window from the window Purchase orders, or by opening the detailed data of an existing purchase order (double-clicking on the desired purchase order, or clicking on it followed by <Enter> or <F3>) or by manually creating a new purchase order (see 'Manually create a purchase order').
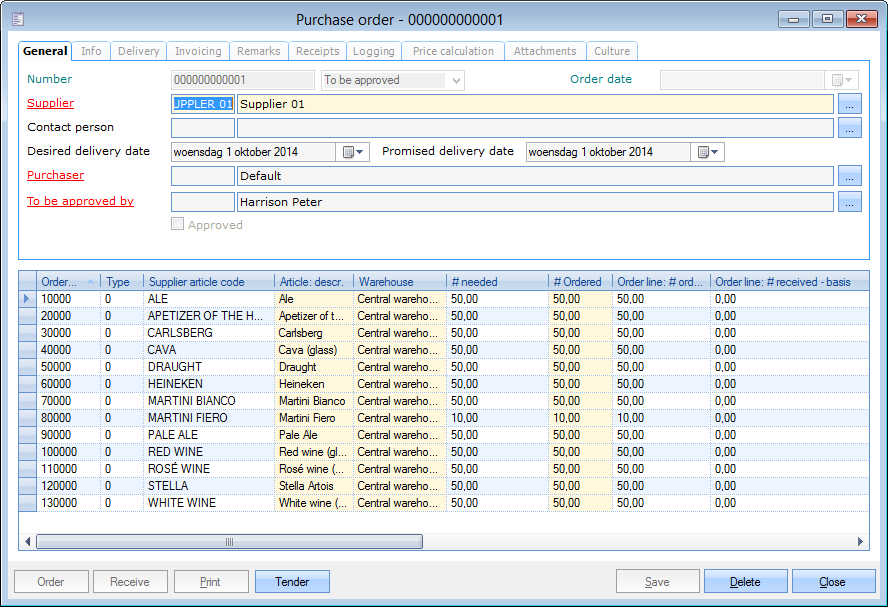
In the window Purchase order there are two important parts:
The upper part, that contains all information related to the order in different tabs.
The lower part, that contains the details (order lines) of the articles to be ordered in a list.
 |
Anmerkung
In the list with order lines, there are also light yellow fields. These are fields of which the value can be modified. This can for example be necessary to modify the quantity ordered, to enter divergent warehouses or to register partial receipts.
Warnung
Dependent on the status of the purchase order and on whether you work with an approval procedure or not (and thus may not have the required rights), it is possible that you can (temporarily) not modify the purchase order (anymore).
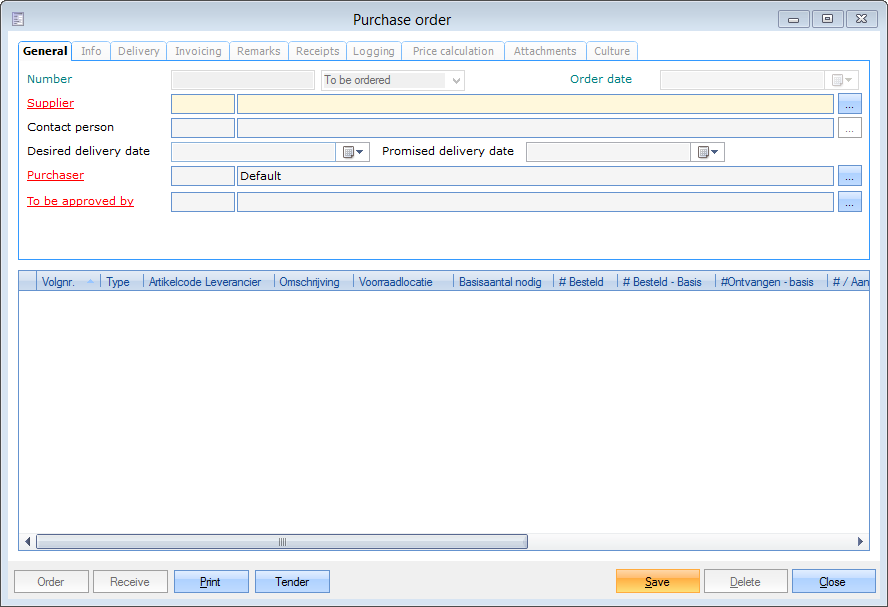
General
Under the tab General, you can find all general data of the current purchase order.
 |
Number | The number of the purchase order, with next to it the current status of the purchase order. |
Order date | Is automatically filled in if you click on the button Order. |
Supplier | The supplier to whom this order will be sent. |
Contact person | The contact person of the supplier. |
Desired delivery date | The date on which the user would like to receive the order. The desired delivery date is copied on the offer and the order form. |
Promised delivery date | The date on which the supplier will deliver the order. This date is purely informative. |
Purchaser | The person who initially created this order. |
To be approved by | If you have chosen to work with an approval procedure in the parameters, you have to fill in the person who has to approve the order here. (see 'Parameters > Approval') |
Info
Under the tab Info, you can find the additional data of the chosen purchase order.
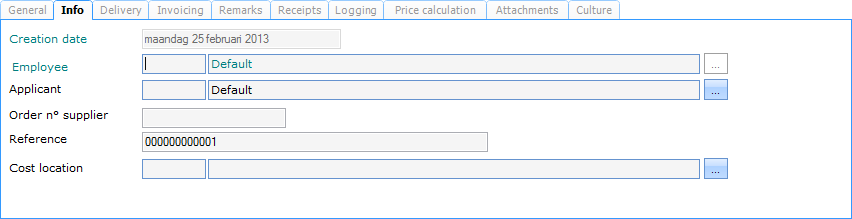 |
Creation date | The date on which the order was created. |
Employee | The employee who has created the order, either through the purchase propositions either manually. |
Applicant | If an applicant is linked to a purchase order, and if the e-mail address of the applicant is filled in, an e-mail will be sent to the applicant at receipt of the goods. This is done using the e-mail template that has been linked within the division parameters of the purchase module. |
Order n° supplier | The number of the order form given by the supplier to this order. This number is purely informative. |
Reference | An arbitrary text field that can be filled in by the user. Initially the order number is taken over here. This reference is printed on the order form as well. |
Cost location | This is the cost location on which this article has to be recorded by the accountancy department. |
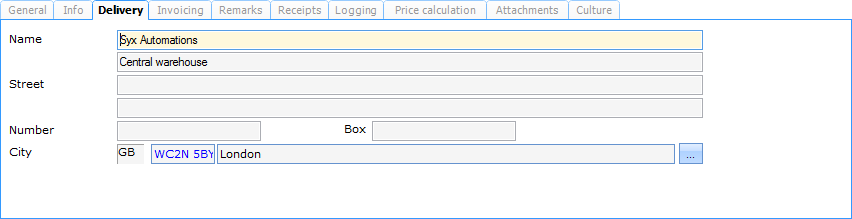
Delivery
The tab Delivery contains the address data of the division and these data will be printed on the order form that is sent to the supplier. They are taken over by default from the purchase parameters and can, if required, still be changed here.
 |
Invoicing
Under the tab Invoicing you can find the data concerning invoicing.
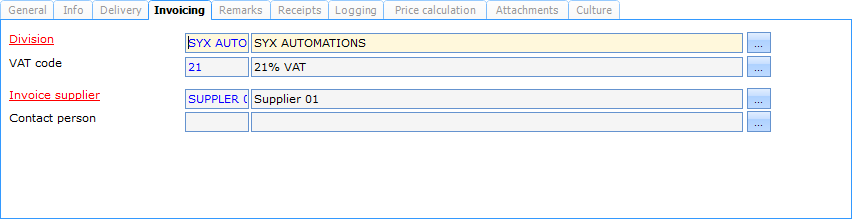 |
Division | The financial division to which this order is linked. |
VAT code | The VAT code that has to be used for each order line of this purchase order. If blank on order level, the VAT code can be filled in separately on each order line. If filled in on order level, this VAT code will be taken over on each order line. This is generally used for orders at a special VAT tariff (intracommunal, co-contractor, ...) |
Invoice supplier | The supplier that will make the invoice and to whom you will have to pay. This is generally the same supplier to whom the order is made, but it is possible that is a different one. |
Contact person | The contact person of the supplier for invoicing. |
Remarks
Under the tab Remarks you can fill in additional information.
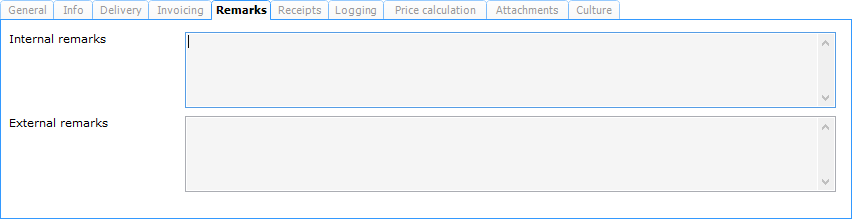 |
Internal remarks | Extra, internal information on the purchase order. The internal remarks are only visible within Recreatex and are not printed elsewhere. |
External remarks | Extra, external information on the purchase order. The external remarks are printed at the bottom of the order form that is sent to the supplier. |
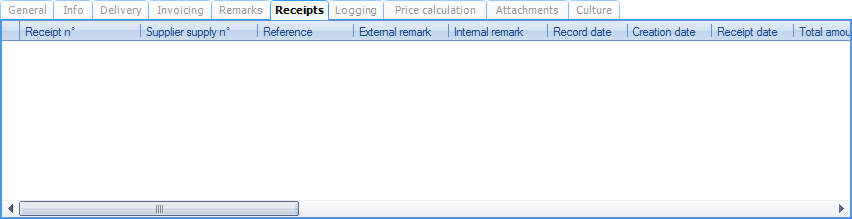
Receipts
Under the tab Receipts, you will see the list of receipts (deliveries) that have been recorded for this order.
 |
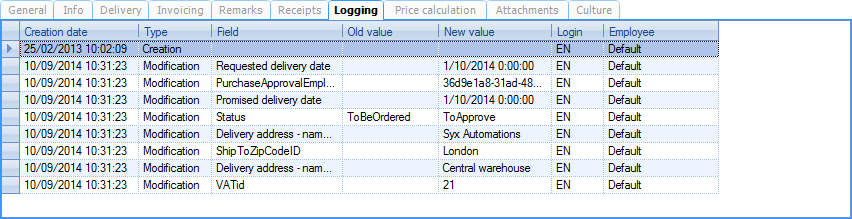
Logging
Under the tab Logging, you will find a chronological overview of the modifications that have been made to this order.
 |
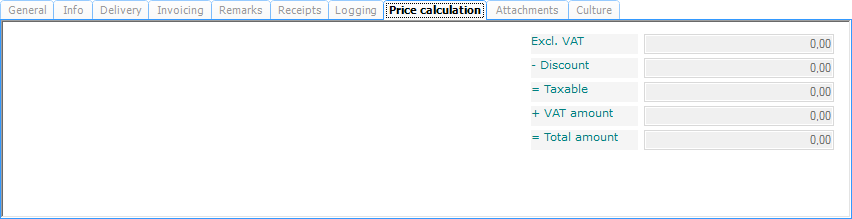
Price calculation
Under the tab Price calculation, you can see the total amounts of the chosen order.
 |
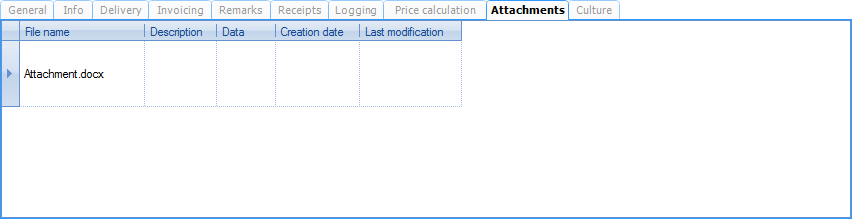
Attachments
Under the tab Attachments, you can link certain files (for example an offer) to the chosen purchase order.
 |
You can always create, modify or delete attachments.
(see manual 'FRAMEWORK'Framework)
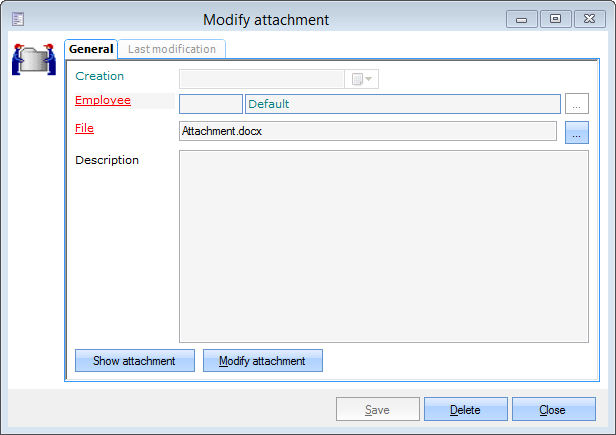 |
General
Under the tab General you can link the attachment and if required fill in an additional description.
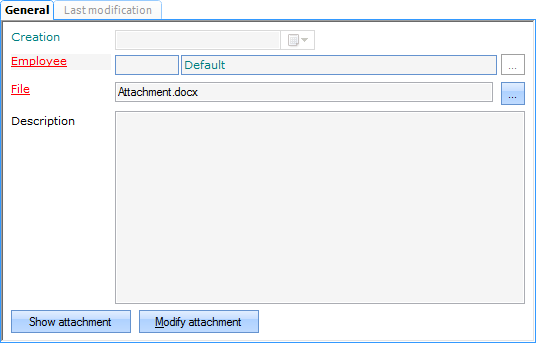 |
Creation | The date on which this attachment was added. |
Employee | The employee who added this attachment. |
File | The reference to the effective attachment. |
Description | If required, it is possible to fill in an additional description here. |
By clicking on Show attachment you can open the attachment. By clicking on Modify attachment you can directly modify the attachment.
Last modification
Under the tab Last modification, you can see who made the last modification to the chosen attachment.
 |
Culture
Under the tab Culture, it is possible to link the purchase order to a cultural project.
 |
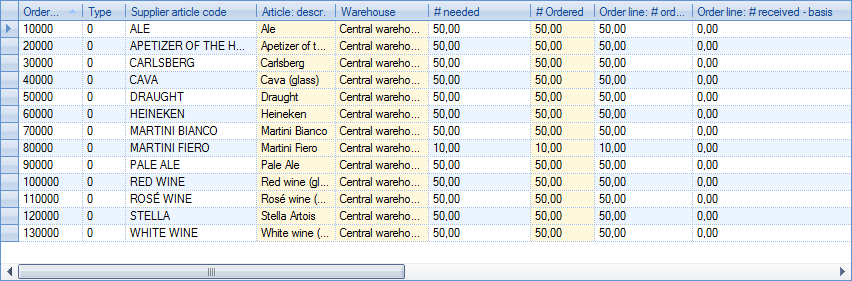
Detail
The list in the lower part of the window contains all order lines of this order.
If an order is created through the purchase propositions, one order line will automatically be created per article and per warehouse. If you create a purchase order manually, you have to create the required order lines yourself.
The yellow fields in the order lines are editable and can be modified if required.
 |
Order lines can be created, modified or deleted using the framework actions.
(see manual 'FRAMEWORK' Framework)
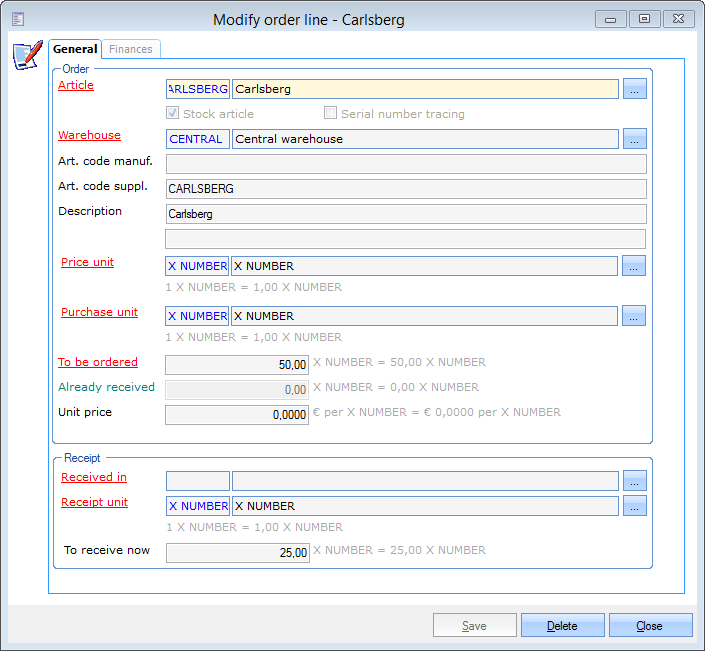 |
General
The tab General is divided into 2 parts. The upper part of the window contains the data that relate to the order.
The lower part of the window contains the data that relate to the receipt.
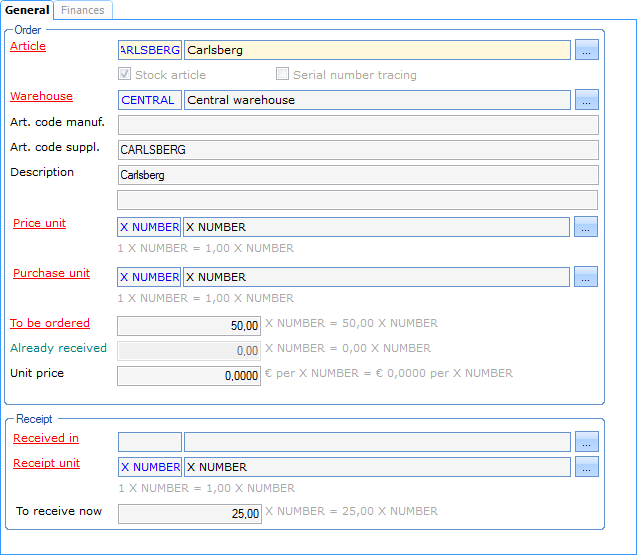 |
Section Order:
Article | The article that is ordered. |
Stock article / Serial number tracing | Here you can see if the current article is a stock article or not and/or an article with serial number tracing. |
Warehouse | The warehouse for which the article is ordered. |
Art. code manuf. | The article code as used by the manufacturer. |
Art. code suppl. | The article code as used by the supplier. This code is usually different from the ReCreateX article code. |
Description | The description of the article. Initially the description of the ReCreateX article file is taken over, but if you wish so you can fill in another description here. |
Price unit | The article unit that is used to determine the total price of this order line. The unit price that is filled in here is the price per price unit. |
Purchase unit | The article unit that is used to place the order with the supplier. The purchase unit is not necessarily equal to the price unit. |
To be ordered | The number of purchase units you want to order. |
Already received | The number of basic units that has already been received. WarnungHere, the basic unit will always be used in order to avoid problems in case of partial receipts. It is for example possible that you first receive 10 PIECES and afterwards 1.5 BOX. |
Unit price | The price of the article (excl. VAT) per price unit. |
Section Receipt:
Warnung
These fields can not be modified as long as the order has not been placed with the supplier. They are in fact intended to record the receipt (delivery) of the purchase order. (see 'Receive a delivery')
Warehouse | The warehouse in which the article is received. This will usually be the warehouse for which the article has been ordered, but it can also deviate, for example when all deliveries are being received in a central location before being transferred to the respective, definitive warehouses. |
Receipt unit | The unit that has been received. It is for example possible that a BOX has been ordered, but that at a first, partial delivery only 2 PIECES are delivered. |
To receive now | The number of receipt units you want to receive. |
Finances
Under the tab Finances , you can fill in the VAT code, the ledger account and the article department of the order line.
 |
Serial numbers
If you have ordered an article of which the option Serial number tracing is active, you will also have to specify the serial numbers at receipt of the order. (see Articles manual 'GENERAL - Articles')
 |
Manually create a purchase order
In addition to automatically creating purchase orders through Generating purchase propositions, it is also possible to create a purchase order yourself.
For that purpose, you first have to call up the list of purchase orders in the window Purchase orders. (see 'Purchase orders')
|
Next, you can create a new purchase order in section Orders.
You can do this for example by clicking with the right mouse button in the list and selecting New. (see manual 'FRAMEWORK'Framework)
Next, a blank window Purchase order will appear, in which you can fill in the data of the new purchase order.
 |
For more information on the data to be filled in, we refer to the part Modify purchase orders of this manual.
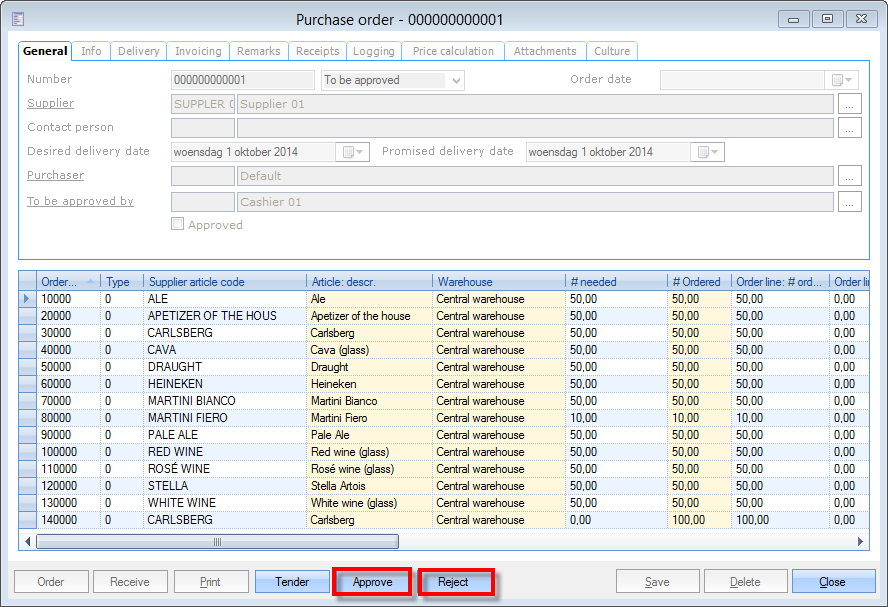
Approve/reject a purchase order
If you have indicated in the parameters that an approval procedure is used, a purchase order first has to be approved before it can effectively be ordered. To approve or reject the purchase order, the chosen employee first has to log in into the system and look for the purchase order after which he/she can approve or reject the order at the bottom of the window.
 |
Warnung
If the purchase order has been approved by the authorised person, the status of the order is changed from To be approved into To be ordered and the purchase order can effectively be ordered, either by the employee who initially created the order, either by the authorised person who approved the order.
If the purchase order has been rejected by the authorised person, the status of the order is changed into Rejected, and the purchase order can no longer be modified nor ordered.
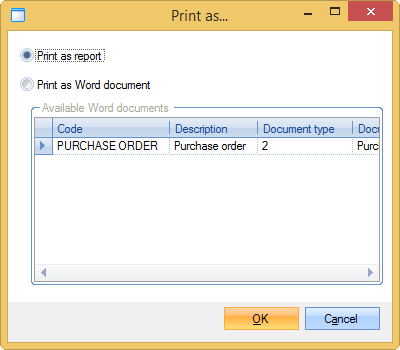
Generate a request for a tender
If you wish so, you can generate a request for tender for the current purchase order, that will then be sent to the supplier.
In order to make a request for a tender for the current purchase order, you have to click on Tender.
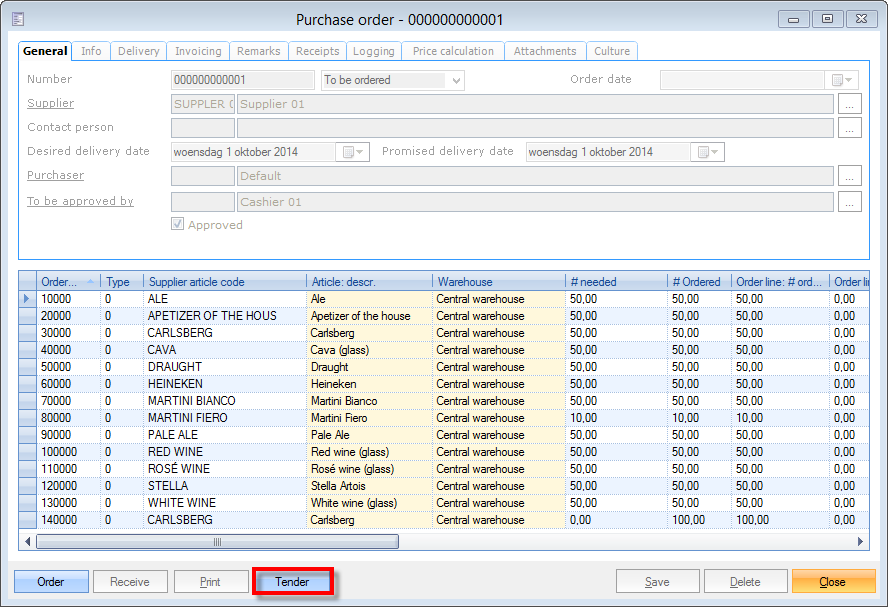 |
If you click on Tender you will be able to choose between a report or a Word template.
 |
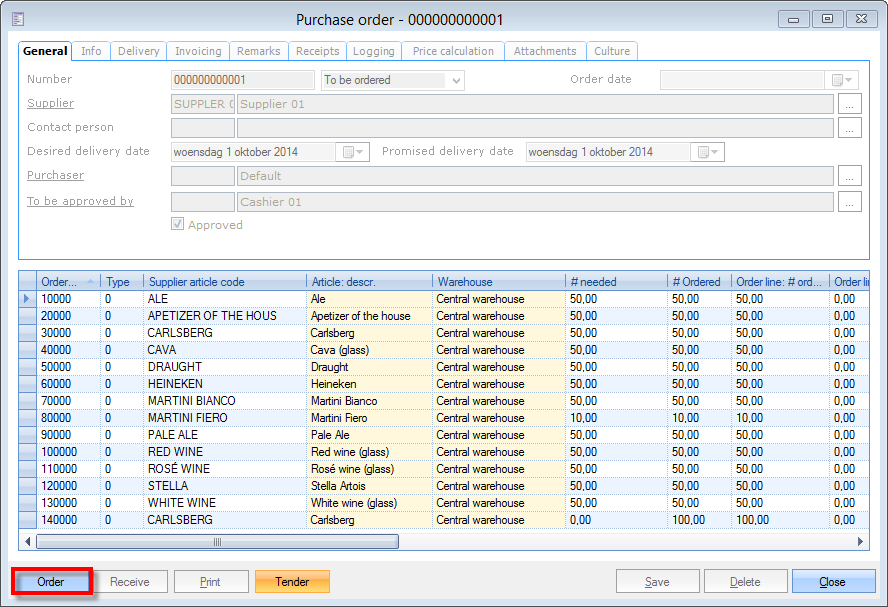
Order a purchase order
If the status of the purchase order is To be ordered, you will be able to order the purchase order by clicking on Order.
 |
Warnung
In fact, this function does nothing more in Recreatex than changing the status of the purchase order to Ordered. It is thus only an indication for the user and indicates for example that the order form has been printed or is ready to be printed. In other words, the purchase is in the order phase at that moment.
If the status of the order is changed into Ordered, the Receipt unit, Warehouse and # to receive now are automatically initialised on the basis of the values that were filled in in the order and can, if required, still be changed before printing the order form in the list or in the detail window of the order line.
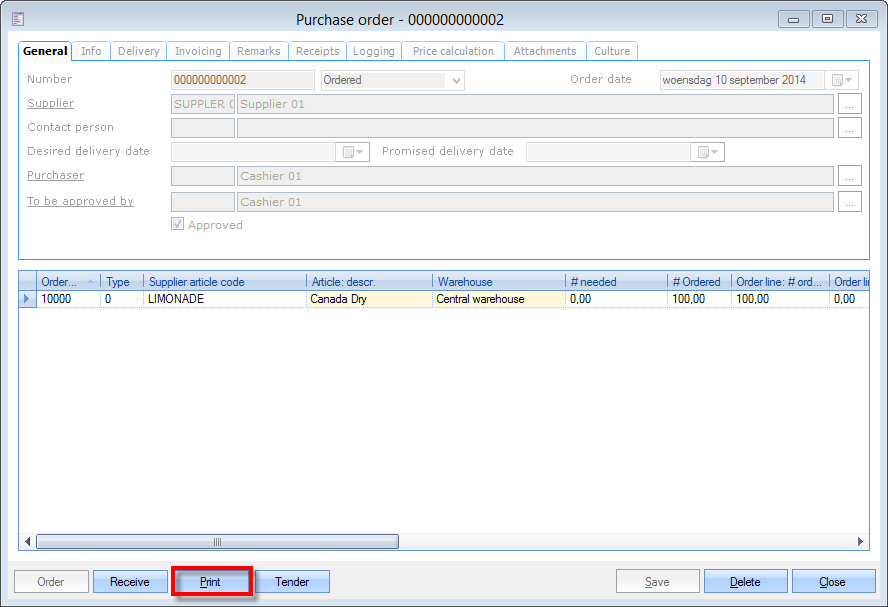
Printing an order form
The order form for the supplier can be printed by clicking on Print.
By means of the existing function in the report window, the order form can then be e-mailed to the supplier or faxed (if a fax printer driver is present on the system).
On the order form, there is no division per warehouse, since the receipt locations are not known by the supplier.
 |
The order form is immediately printed, for example:
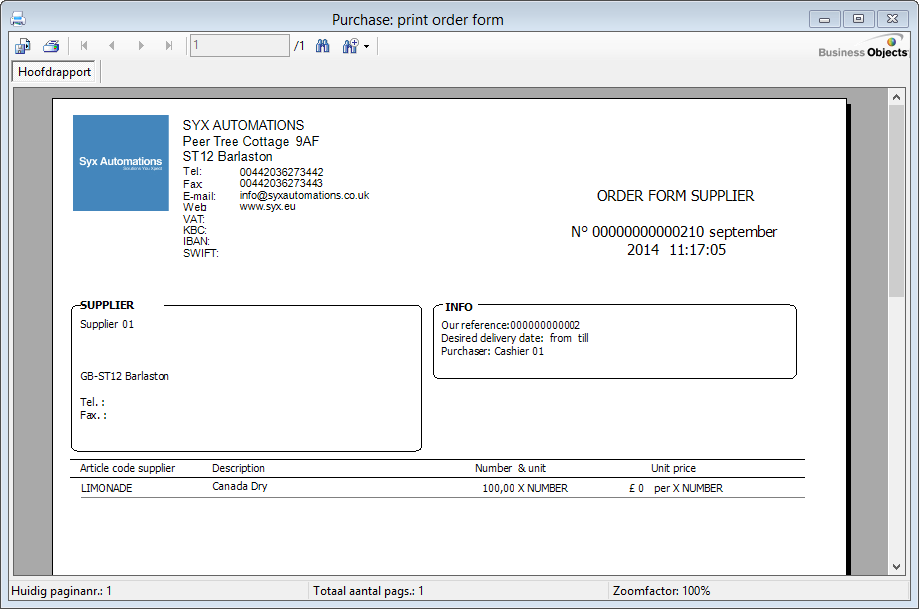 |
Receive a delivery
If a supplier has delivered a certain purchase order, this delivery has to be recorded in ReCreateX.
In this way, the stock of the articles received will also be updated by the quantity received.
If the supplier has completely delivered the purchase order (delivered quantity = ordered quantity), you can immediately click on Receive in the purchase order in question.
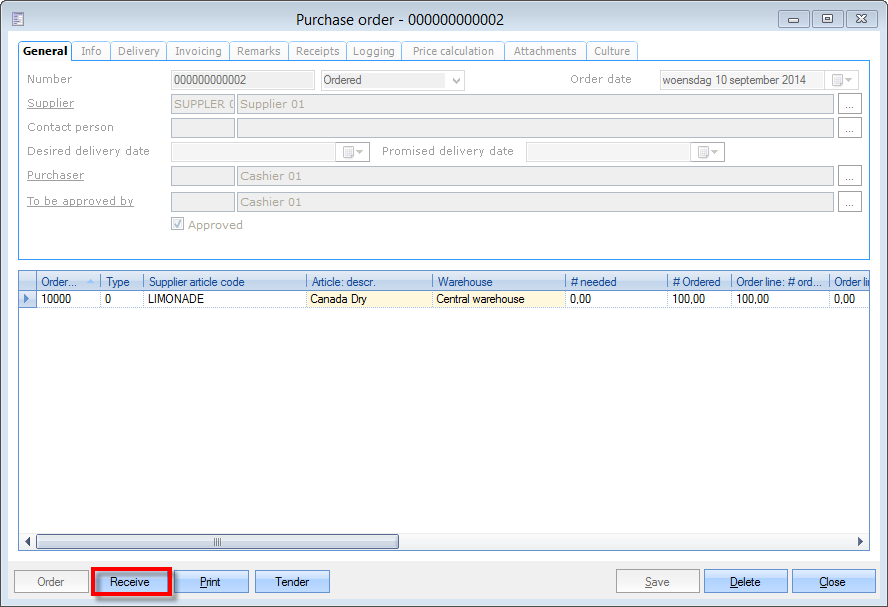 |
If the supplier has delivered the purchase order partially, you can fill in the effectively delivered quantity in the list of order lines under # to receive now before clicking on Receive.
 |
If you want to you can also modify the receipt data in the order line detail.
 |
Anmerkung
In case of a partial receipt, the field # to receive now of the order line will be modified to the outstanding balance.
If the warehouse in the order deviates from the warehouse in which the order was received, a transfer order will automatically be created so that you will know afterwards that the articles still have to be transferred to the other location.
The receipt that is filled in can also be a negative number, for example, if some articles are being returned.
Delete a purchase order
In order to delete a purchase order, you have to click on Delete.
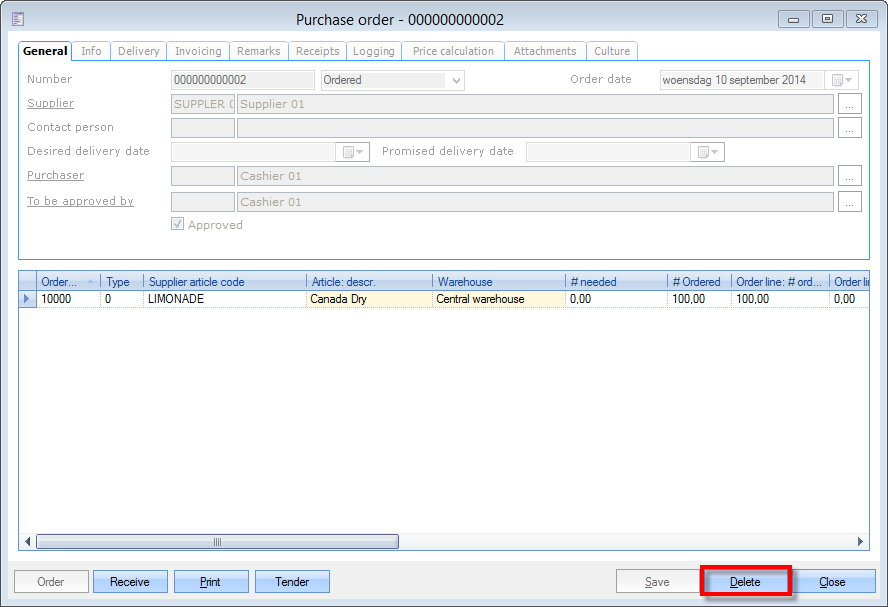 |
Warnung
A purchase order can only be deleted if no receipts have been entered yet. If receipts are already entered, an error message will appear.
If, moreover, you work with an approval procedure, a purchase order can only be deleted by the employee who has created that purchase order (Purchaser).