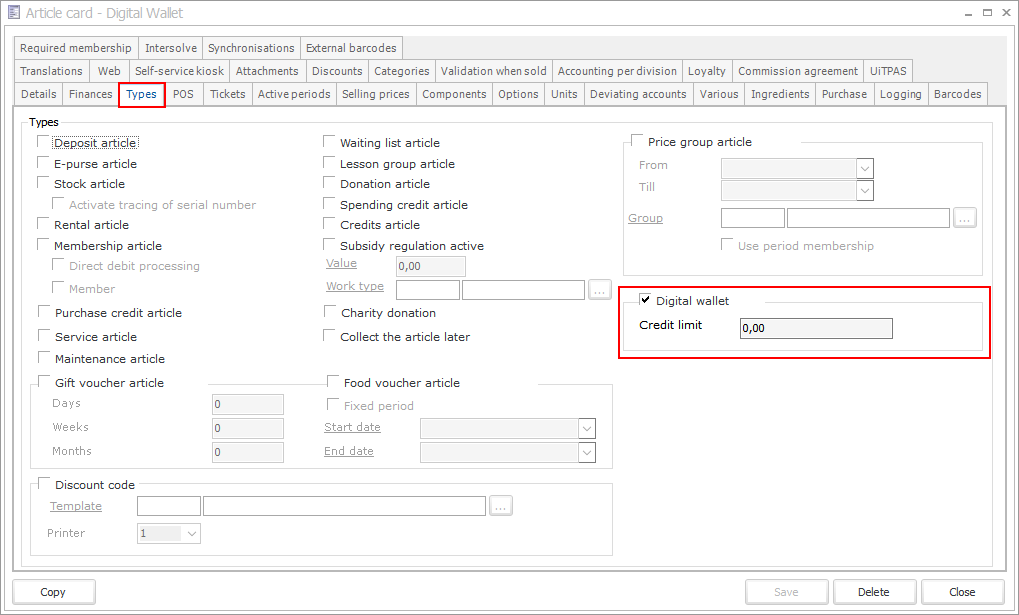
Configure Digital wallet
Create a new article of the type Digital wallet. The Digital wallet can be configured in 2 ways:
Leave the field Credit limit empty = DebitThis is a pre-paid system where the customer puts money into his Digital wallet before the visit starts. Whatever money is left on the Digital wallet after the visit can be reclaimed at the cash register.
Enter an amount in the field Credit limit: CreditThis is a post-paid system where the customer puts all expenses he makes during the visit on the Digital wallet and pays the outstanding credit when he wants to leave. He may be denied to exit as long as there is an outstanding credit.
 |
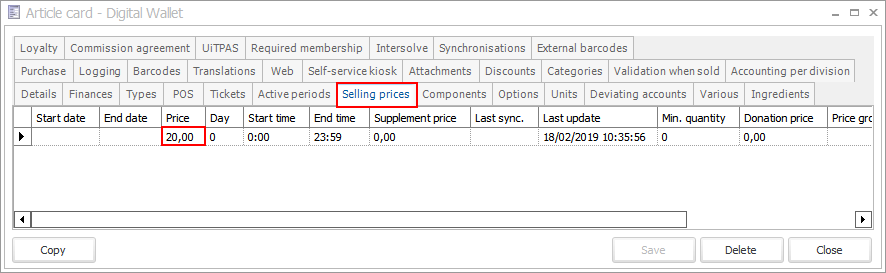
When setting up the Digital wallet in the debit card way, also enter a default selling price. E.g. 20€ The customer will then be able to spend up to 20€ by default and will need to top up if he wants to spend more.
 |
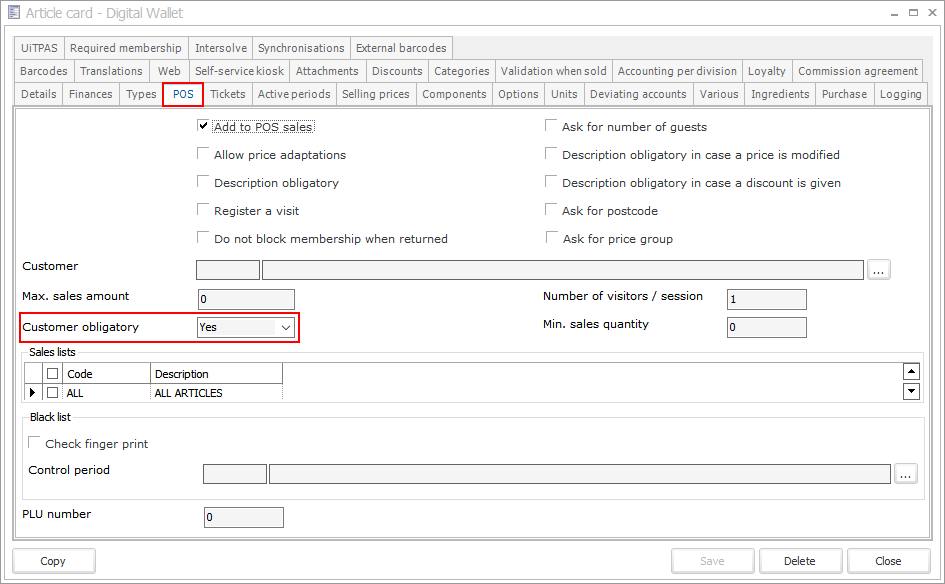
In order to make it easier to follow the transactions that have been made, it is recommended to make the customer obligatory when selling this item.
 |
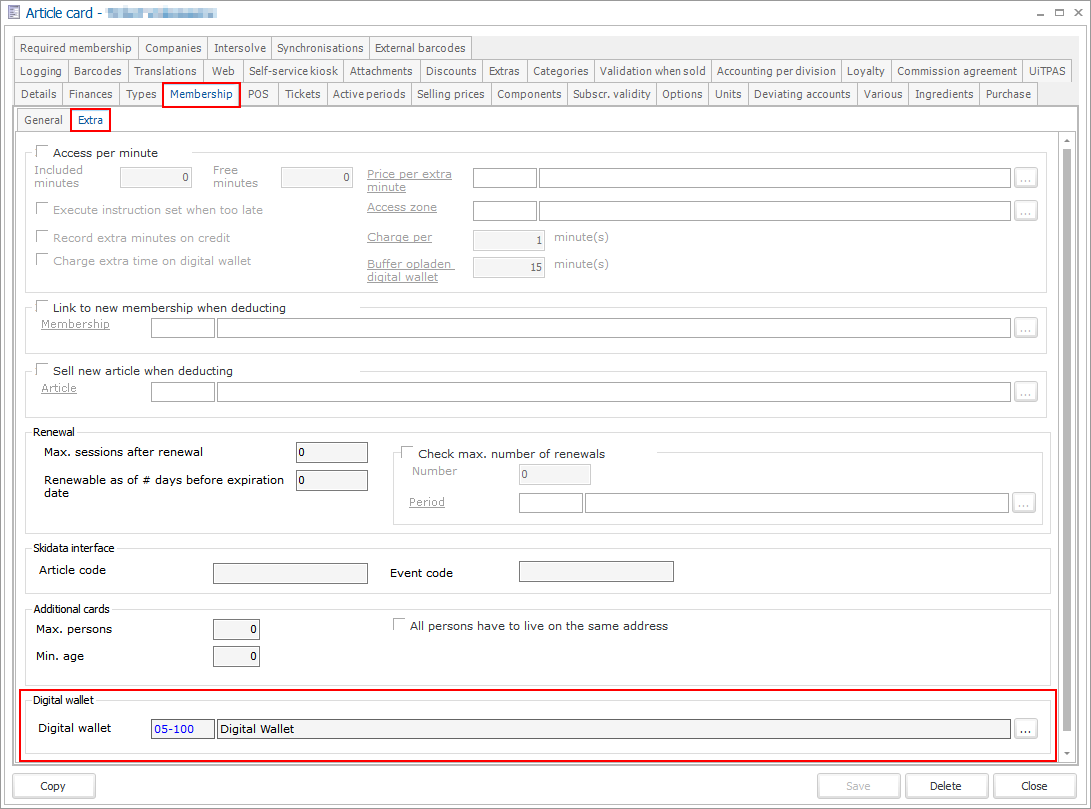
Link the Digital wallet article to the membership articles with which you want to use the Digital wallet functionality. Go to each article card and on the tab Membership, sub-tab Extra link the Digital wallet article. Add those membership articles to your POS.
 |
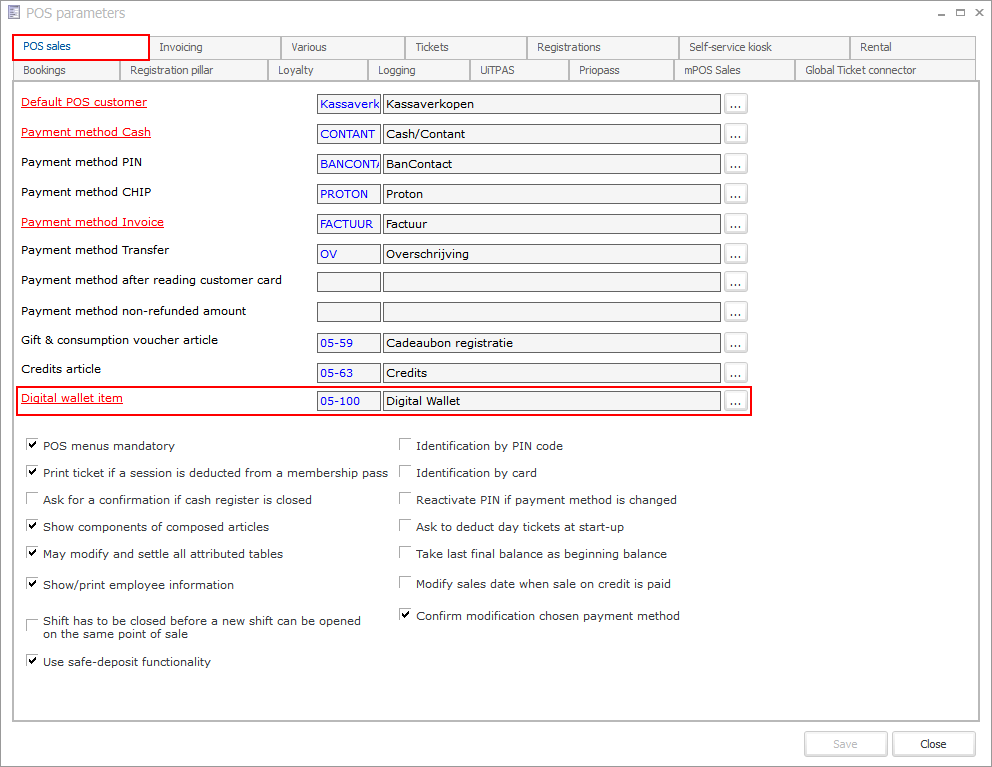
Add the Digital wallet article to the POS parameters.
 |
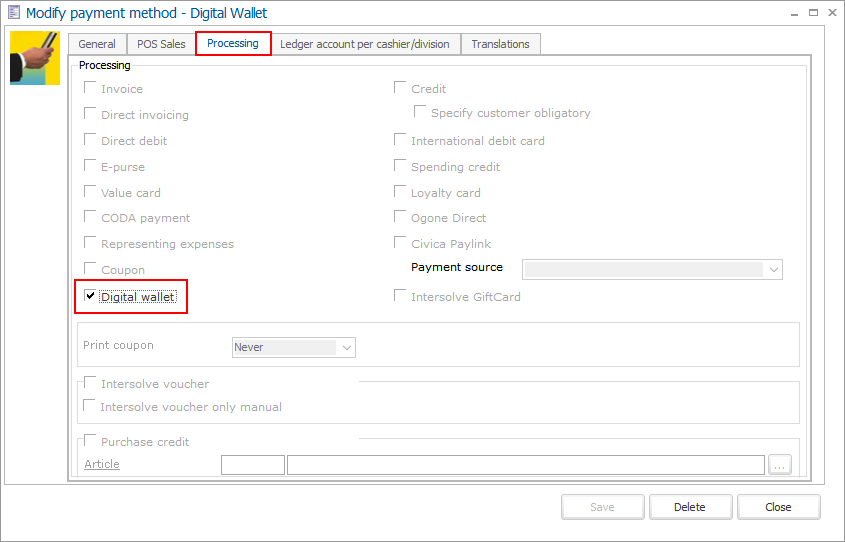
Go to General > Settings > Finances > Payment methods and create a payment method of the processing type Digital wallet.
 |
Go to POS > Settings > POS menus, create a new POS menu and add the following buttons to it:
The button(s) of the membership article(s) with the Digital Wallet attached to it.
The Digital wallet article itself.
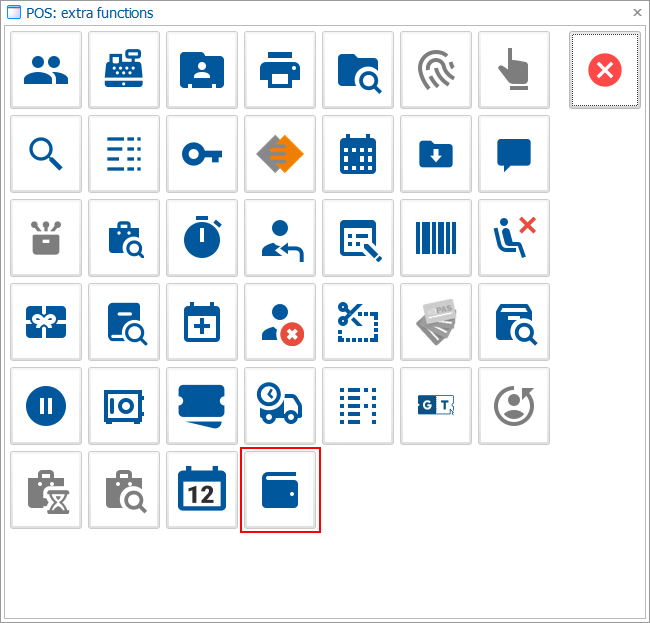
Digital Wallet Information button (see Extra functions tab, recommended)
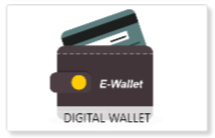
Add the previously created payment method to the POS payment methods. On the POS the button for the Digital wallet payment method will look like this:
 |
Go to Sales > Settings > Points of Sale and open your Point of Sale. Connect your new POS menu to it and set it up locally and you're good to go!
Open your POS and start selling the membership article(s).
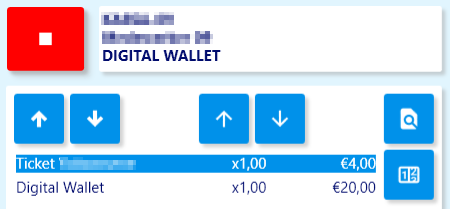
When placing an order for a membership article with an attached Digital wallet, you will see that the Digital wallet article is automatically added to your sale.
 .
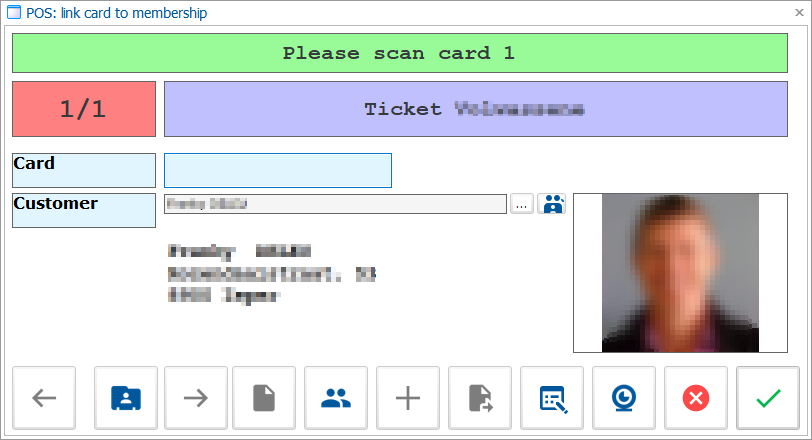
.
Proceed to payment of the membership article and you will be asked to scan the carrier (bracelet, card, ...) on which the membership and its linked Digital wallet will be placed on.
 |
To see more information about the Digital wallet on a carrier (card, bracelet,...) tap the Digital wallet information button or go to Extra functions and scan the carrier.
 |
|
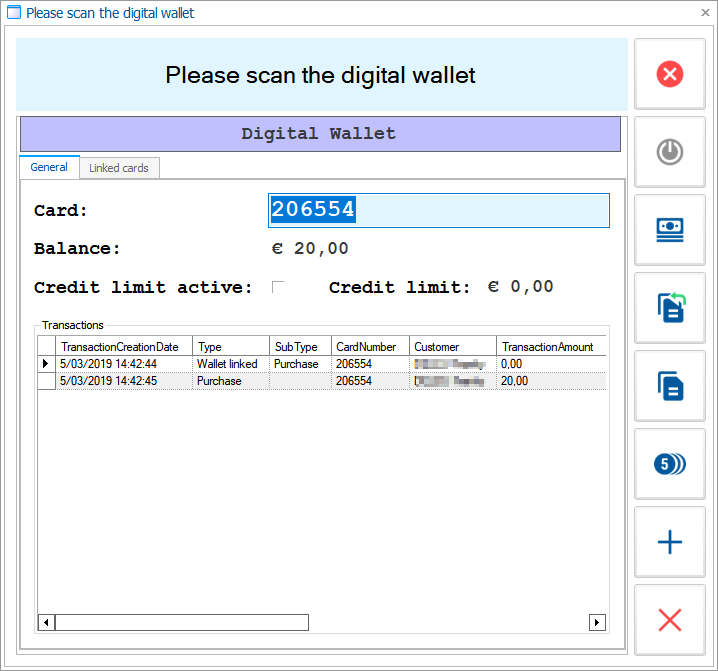
After scanning the carrier, the window Please scan the Digital wallet will appear. Here you can see the current balance on the Digital wallet and all top-ups and purchases that have been made. In case you are using the credit system, the balance amount will be 0 or negative.
 |