Ticketing
Warnung
The functionalities described in this chapter are only applicable if you have a license for the Ticketing module.
In this part the integration of the Ticketing module in the ReCreateX POS is explained, such as selling/booking tickets, calling up and paying for booked tickets and selling ticketing memberships.
Sell/book tickets
Selling or booking tickets at the cash register is equal to a regular sale but is done through is specific process.
Anmerkung
Booking tickets (selling without immediately paying) is only possible if this allowed on the point of sale. (seeSalesmanual 'GENERAL - Sales')
Selection event
Selecting the desired ticketing event can be done in two different ways.
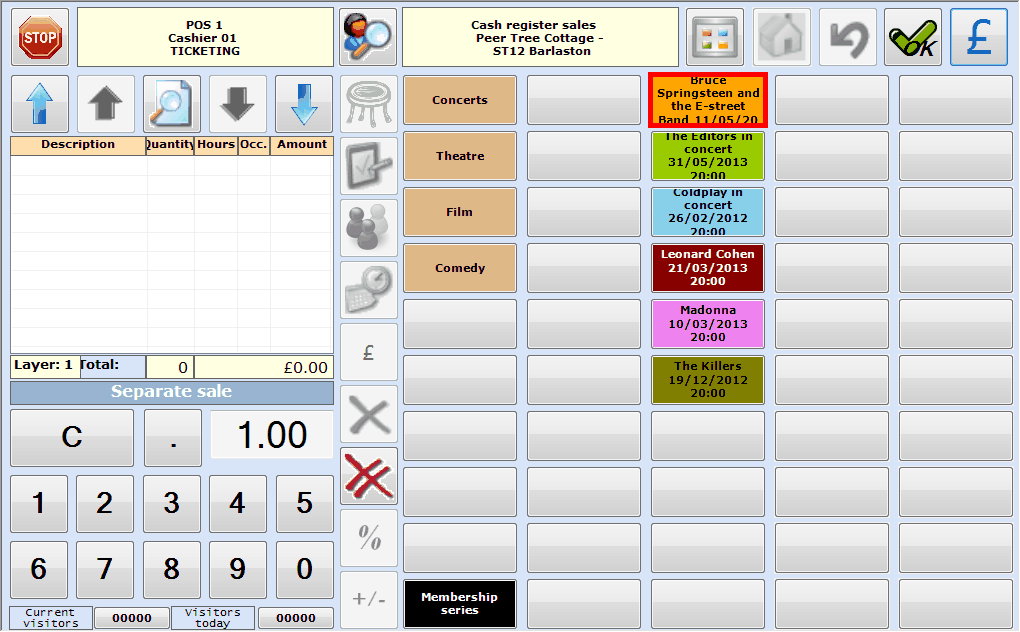
If the event is on the POS menu, you can simply click on the button in question to select the event, for example:
 |
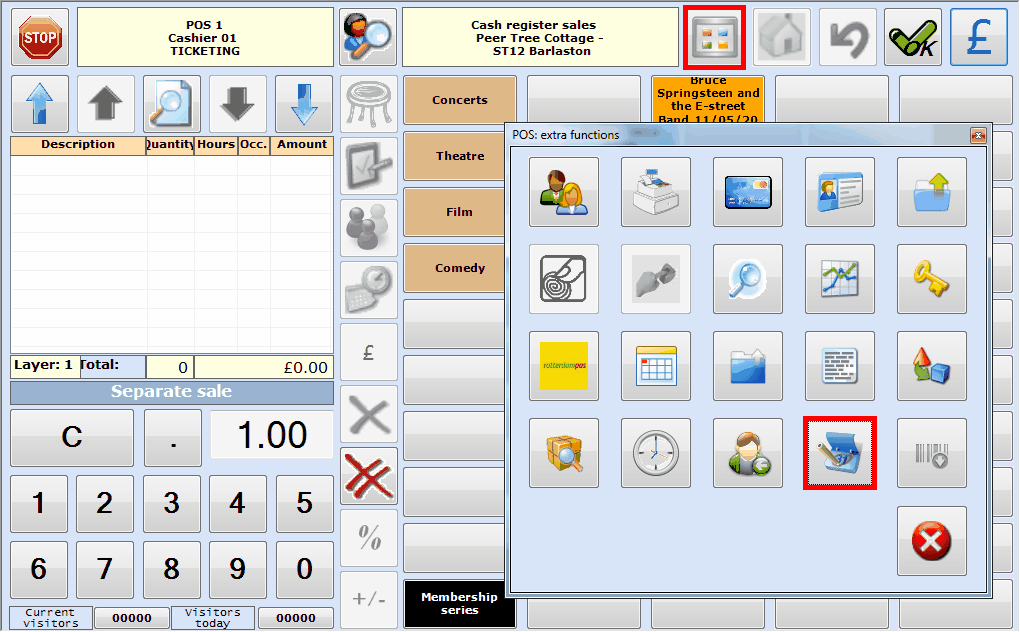
If the event is not on the POS menu, or if you are not able to find it fast enough, you can search for the event using the Extra POS functions > Find ticketing event:
 |
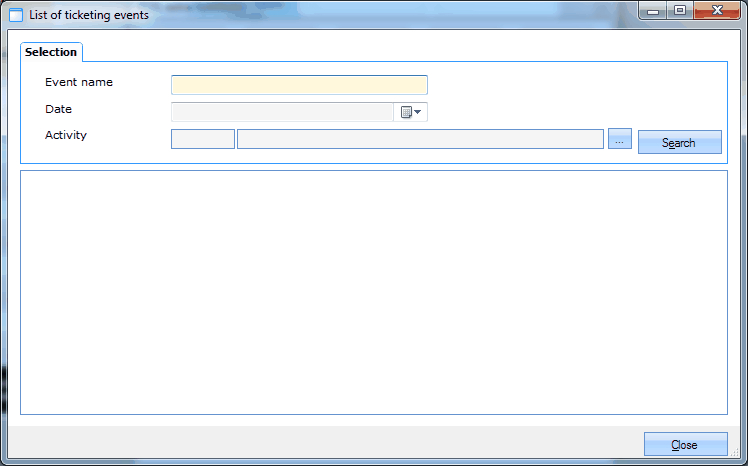
The window List of ticketing events will appear:
 |
If you have filled in one or several selection criteria (name, date, activity) and clicked on  , an overview will appear of the events that meet the search criteria.
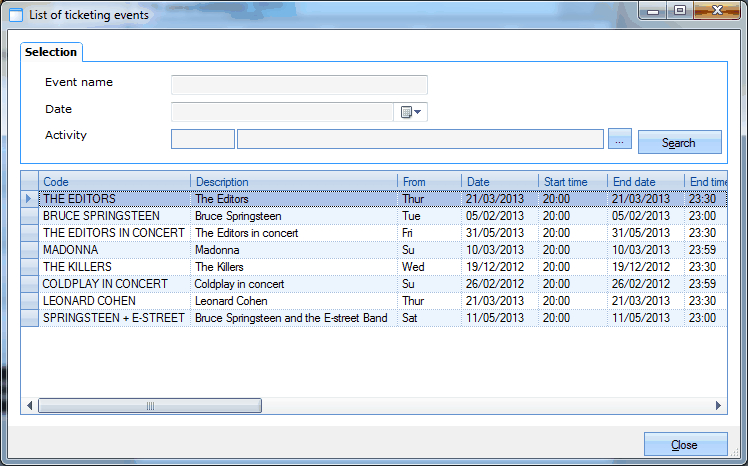 |
Finally, you can select the desired event from the list by double-clicking on the line in question, or by clicking on the line and hitting the <Enter> key.
 | If you want to close the window above without selecting an event, you have to click on |

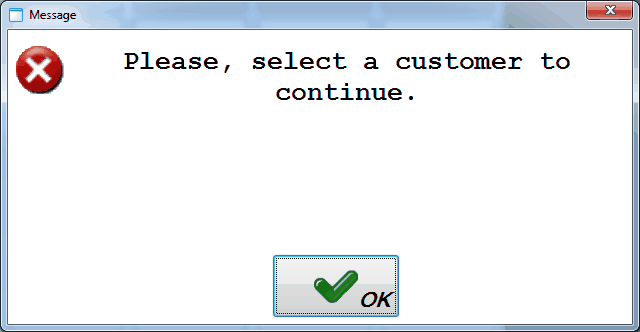
| If it has been defined on event level that tickets can only be sold/booked on customer name (customer mandatory), the following message will first appear after the selection of the event, after which you have to select the correct customer.
|
Irrespective of the method you use, the window POS: select price group will appear after the selection of the event (and if required the customer).
Window 'POS: select price group'
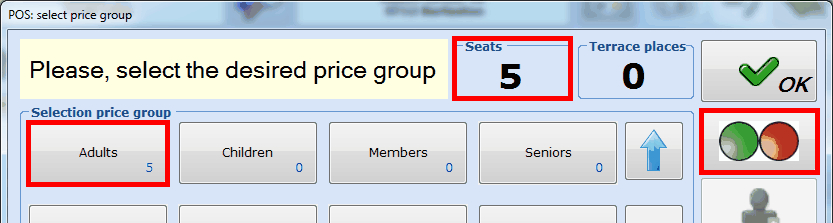
After the selection of the desired event, the window POS: select price group will appear, in which the sale/booking is always registered on the basis of a price group:
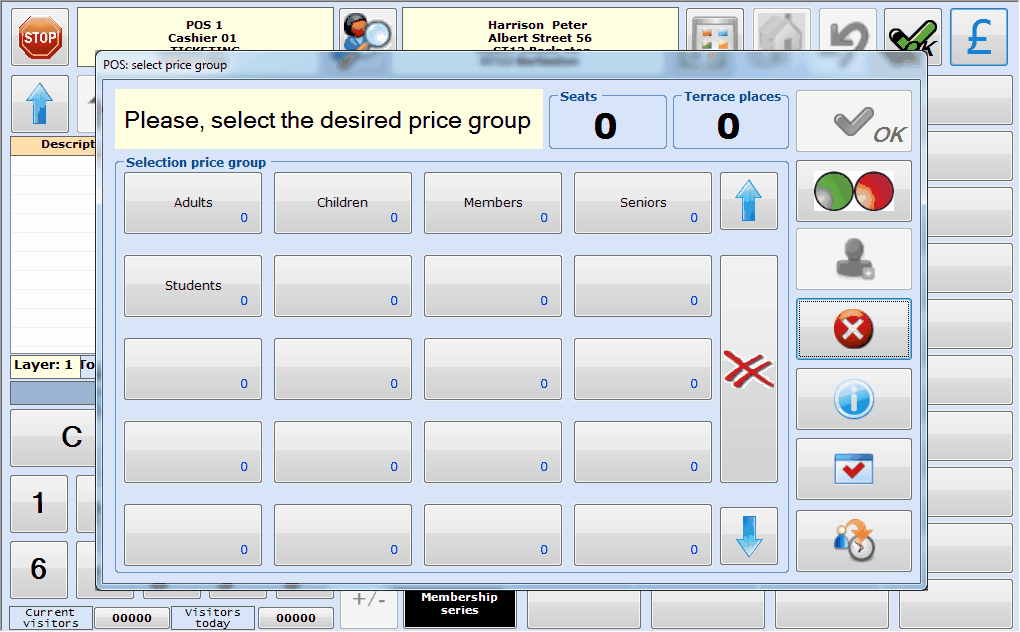 |
| The number of tickets entered per price group is always visualised (in the lower right-hand corner of the button in question) and can, if required, easily be changed by reselecting the price group and re-entering the desired number of tickets. |
The window POS: select price group allows to do several actions:
Booking/selling:
seats, and selecting the desired seats.
seats according to BAS (Best Available Seats; rank system); seats are attributed automatically.
standing places on terrace
seats and standing places
Booking in option
Booking on the waiting list
Only seats
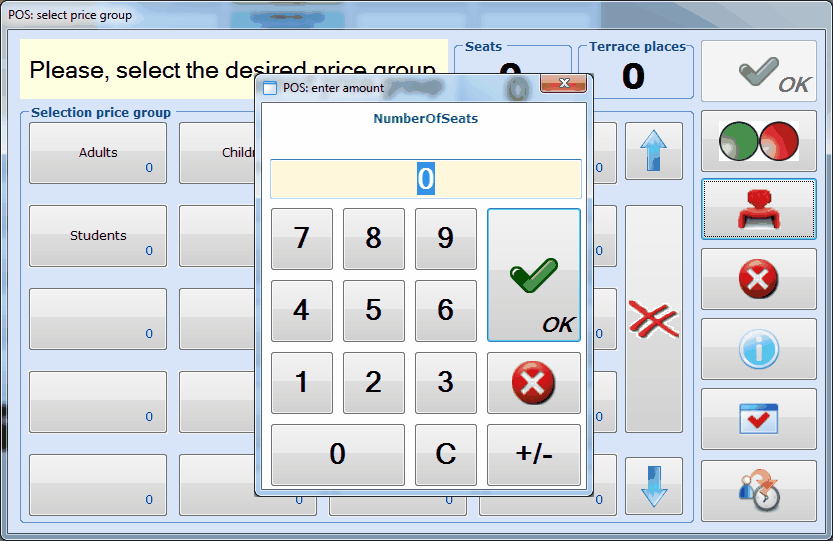
In order to register seats, you first have to enter the desired number after the selection of the desired price group:
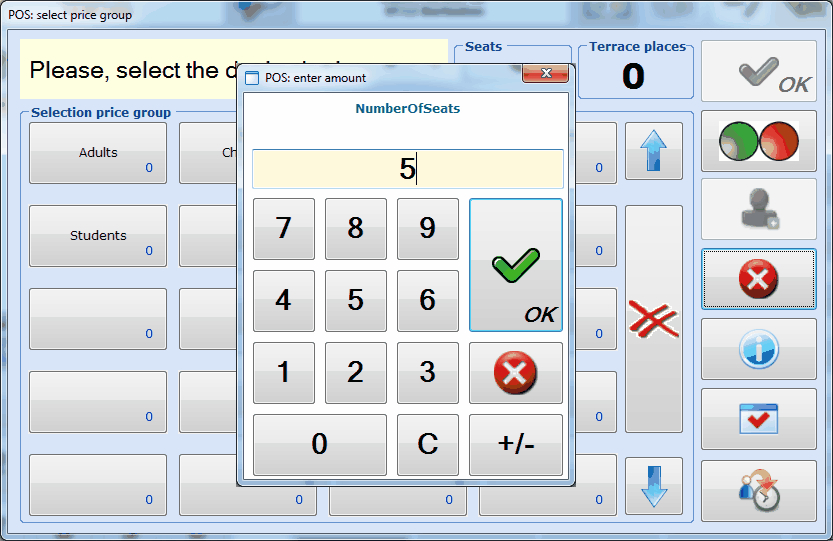 |
If you have confirmed the number of seats by clicking on OK, you can decide if you want to select the seats yourself (based on the customer's preference), or if you want to have the seats automatically selected by ReCreateX on the basis of the defined rank system (Best Available Seats).
Select seats on the venue plan
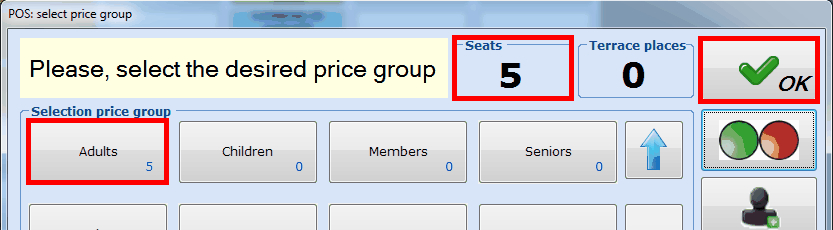
If you want to select seats after the selection of the price group and the number of tickets, you have to click on  in the window POS: select price group. In the example below, five tickets are registered at the tariff for Adults.
 |
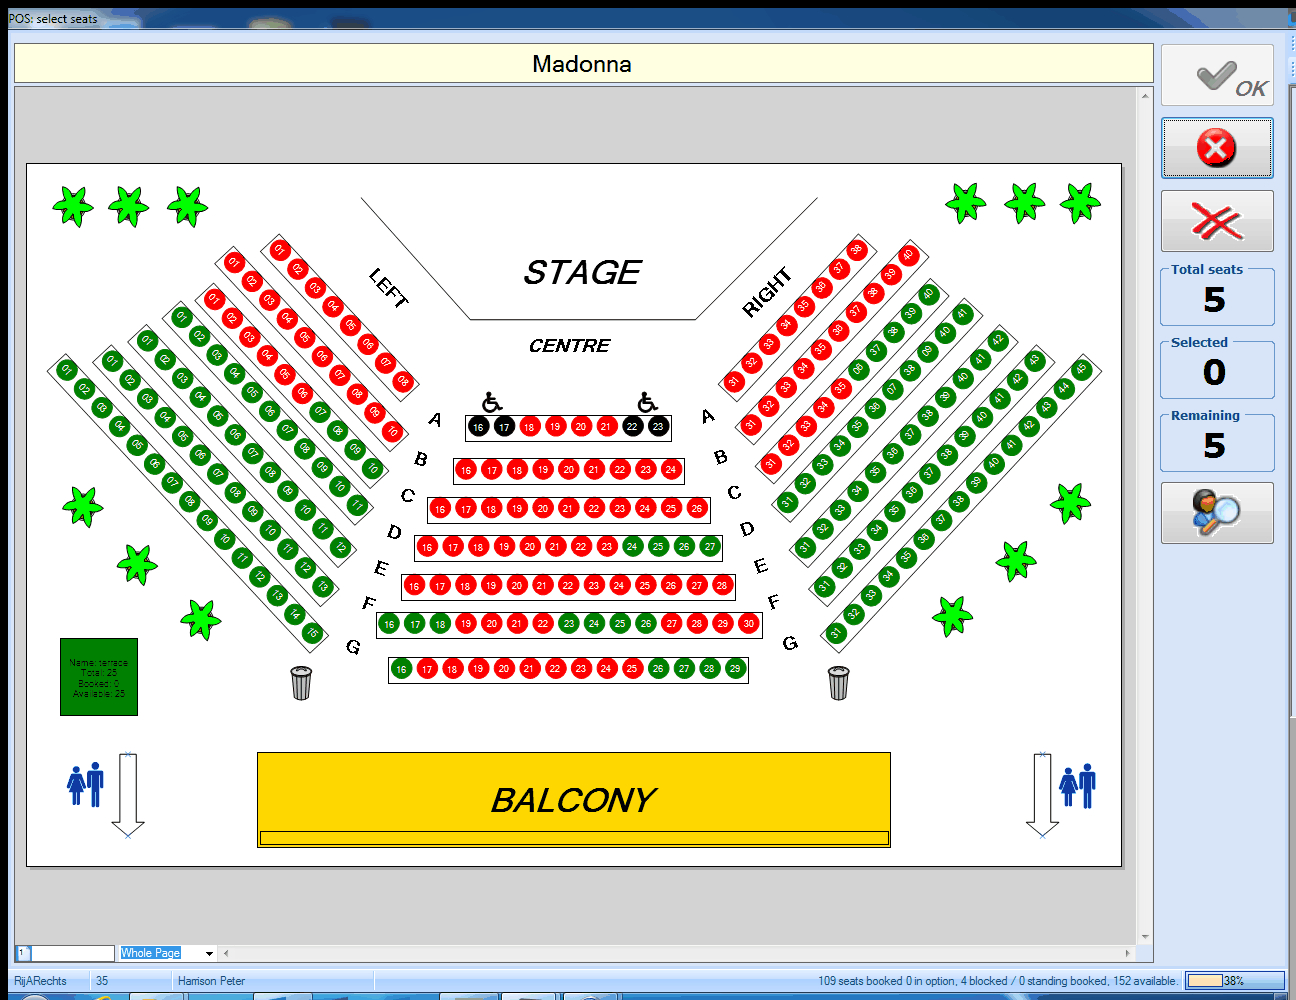
The venue plan will appear in which you can select the desired seats, for example:
 |
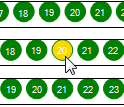
In order to select one seat, you can click with the left mouse button on the desired seat. A selected seat is marked in yellow.
 |
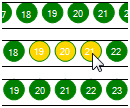
In order to select several seats, you have to continue pressing on the <CTRL> key while clicking on the desired seats, next to each other or not, with the left mouse button. In this case as well, all selected seats will be marked in yellow.
 or
or 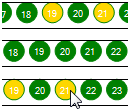
Another way to select several seats (only if they are next to each other) is by drawing a virtual frame around the desired seats. You can do this by clicking on the left mouse button and dragging the cursor over the zone you want to select and finally let go of the left mouse button.
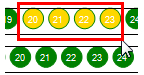 |
If you continue pressing on the <CTRL> key while selecting zones, it is even possible to select several groups of seats within the venue plan.
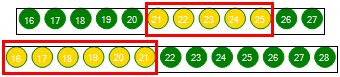 |
| The methods described above can be combined to take both groups of seats as separate seats in one selection. |
If you have selected all desired seats, you have to click on  to continue.
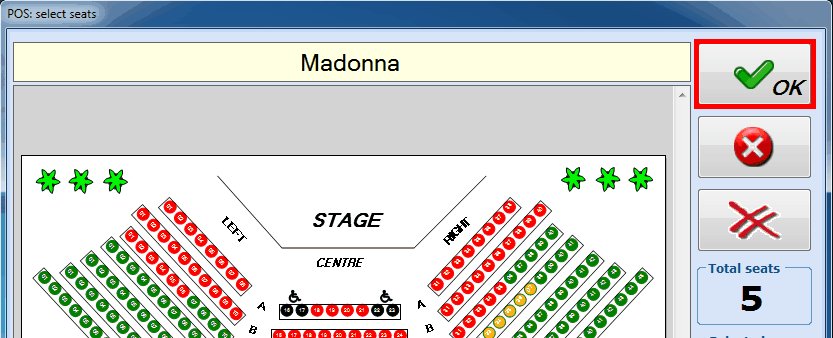 |
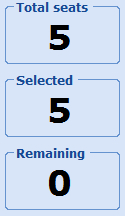
| Only if you have selected as many seats as you have entered before on the basis of a price group, you will be able to continue. The value under Total seats on the right of the window thus has to be equal to the value under Selected and the value under Remaining consequently has to be 0, for example:
|
Moreover, the following buttons are available within the venue plan:
| Close window WITHOUT saving the selected seats. | |
| Deselect all currently selected seats. | |
| Find seats of a certain customer. |

After confirmation of the seat selection () the system either immediately returns to the POS selection screen and the sale/booking can be finished (see paragraph Book/record), either additional actions have to be executed before the sale/booking can be finished (see paragraph 'Extra actions').
Seats in block
In order to make a venue plan more organised, available places are often divided into blocks. A block is in fact only a reference to an underlying venue plan. In the example below the seats of the balcony are organised in such a block.
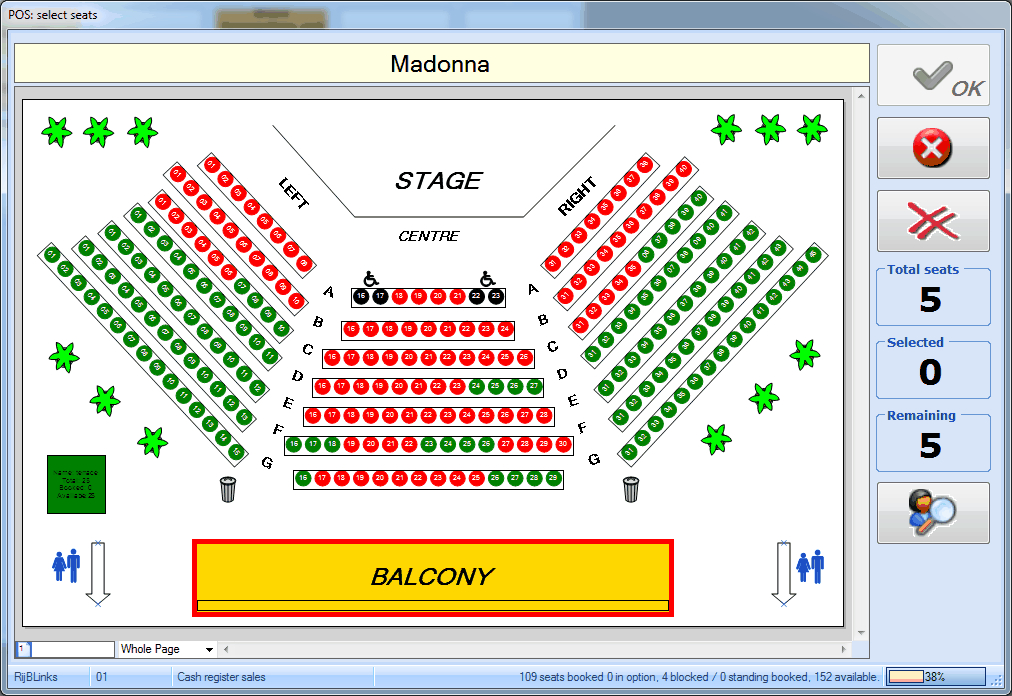 |
You can always call up the contents of a block by double-clicking on the desired block. The plan of the selected block will then appear, for example:
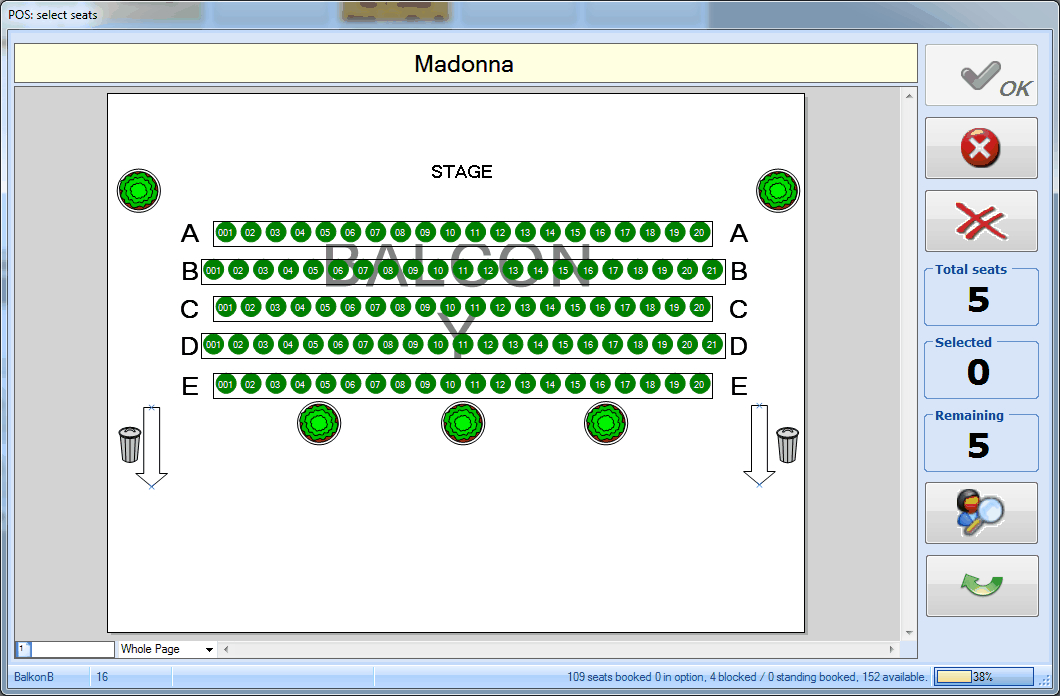 |
Selecting seats in a block can be done in the same way as selecting seats in the general venue plan (see previous paragraph). If you want to return from the block to the main venue plan, you can do so by clicking on the button  , or by hitting the <Backspace> key on your keyboard.
| The current occupancy is visible directly on the block.
|

Unblock seats
It is possible to define on event level that certain seats have to be "blocked",after which these seats can not be sold/booked. Dependent on the blocking code setting, it may be possible to unblock blocked seats in order to sell/book them anyway.
If it is allowed to unblock the seats, you can do so in two different ways, dependent on a specific parameter setting (Automatically unblock blocked seats).
If it is not allowed to unblock several seats in one go, you will have to unblock them one by one. You can do this by clicking with the right mouse button on the blocked seat after which the system will ask you if you want to unblock the selected seat. After the confirmation, you will have free access to the seat.
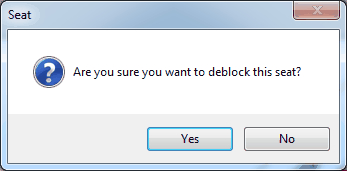 |
If it is, however, allowed to unblock several seats in one go, you can do so by dragging a frame around the seats to be unblocked with the right mouse button. Do pay attention that in this case no confirmation message will appear and that the seats in question will be immediately unblocked.
According to BAS system (ranks)
If you select seats according to the BAS system (Best Available Seats), ReCreateX will determine which seats are chosen on the basis of the ranks defined on venue level. If seats are selected in this way, the venue plan is not used.
If you sell/book tickets according to the BAS system, you only have to click on immediately after the selection of the price group and the number of tickets.
 |
After confirmation, the system either immediately returns to the POS selection screen and the sale/booking can be finished (see paragraph Book/record), either additional actions have to be executed before the sale/booking can be finished (see paragraph 'Extra actions').
Only standing places
If only standing places are booked/sold for the selected event, you first have to click on the button Seat/standing in the window POS: select price group (thus before selecting the price group):
 |
In this way, you indicate that you will sell/book standing places.
Next, you can select the desired price group and fill in the desired number of standing places.
 |
After confirmation of the number, you can click on in the window POS: select price group.
Afterwards, the system either immediately returns to the POS selection screen and the sale/booking can be finished (see paragraph Book/record), either additional actions have to be executed before the sale/booking can be finished (see paragraph 'Extra actions').
| If you want to return to the seats mode, you can click again on the button Seat/standing that on that moment (in terrace mode) will look as follows:
|

Seats and standing places
It is possible to book/sell both seats as standing places within one ticket registration.
In this case, you can work in the same way as when selling seats or standing places separately (see previous paragraphs).
| Take into account, however, that if you want to register both standing places as seats using the venue plan, you first have to specify the number of standing places before selecting the desired seats in the venue plan. After confirmation of the seat selection in the venue plan, the window POS: select price group is in fact automatically closed to continue settling the sale/booking. If you would thus select the seats first, it would no longer be possible to enter the standing places within the same registration. |
In option
A booking in option is registered if the customer is not yet entirely sure if he will effectively book the tickets. Customers having a booking in option will usually be contacted if the number of free seats for the event are running out.
 | It is definitely not the intention that a booking in option is recorded/paid for at registration. If a booking in option is paid for, it is automatically transferred into a definite booking. Consequently, booking in option only makes sense if it is allowed on the current point of sale to register bookings without immediately paying for them. |
Booking in option is equal to the registration of a normal ticket booking/sale. In this case, however, you first have to click on the button In option before further settling the booking:
 |
If you confirm by clicking on the button , the registration will be considered as a booking in option.
On the waiting list
If a certain event is full or if the number of places maximally allowed has been reached, it is possible to register bookings on the waiting list.
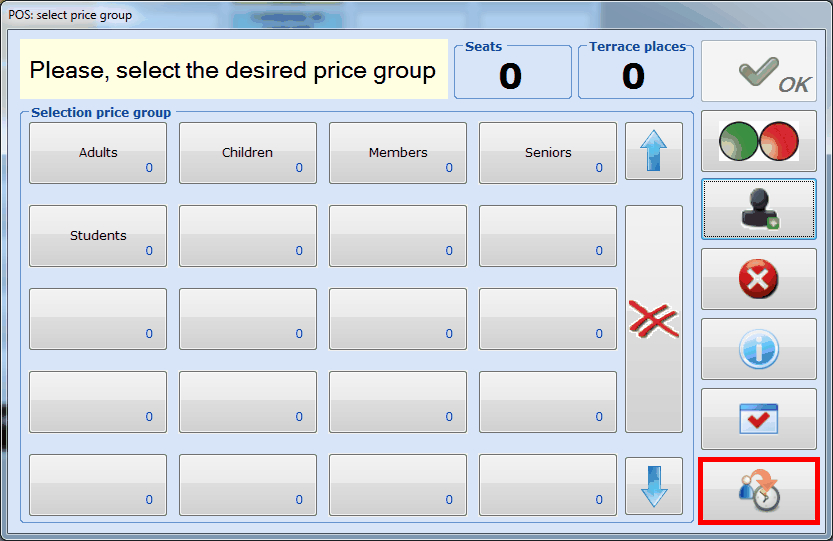
In order to register a booking on the waiting list, you immediately have to click on the button On waiting list in the window POS: select price group (thus without entering the number of seats/standing places):
 |
The window below will appear:
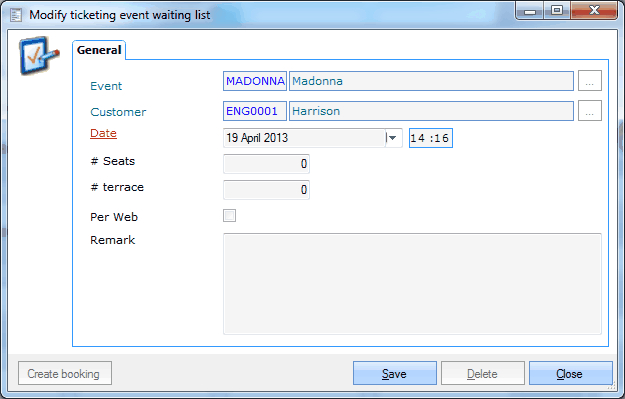 |
In this window you have to specify the customer, modify if required the (registration) date, and fill in the desired number of seats/standing places.
Finally, you can click on  to save the registration on the waiting list.
If afterwards places become free again, it is possible to change a certain waiting list registration into an effective booking. This has to be done, however, in the Ticketing module itself (see Ticketing - Usemanual 'TICKETING - Use').
Event information
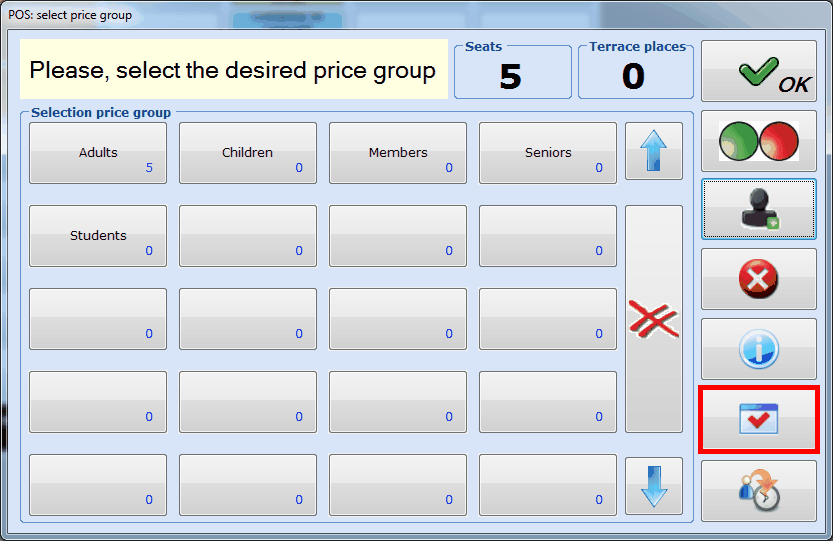
If required, detailed information on the current event can be called up in the window POS: select price group. You can do this by clicking on the button Ticketing event information.
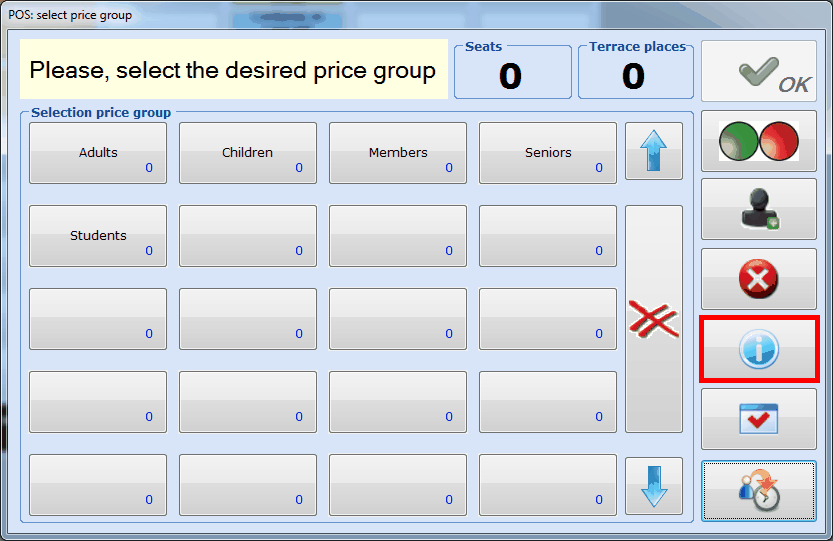 |
A new window will appear containing all sorts of detailed information on the event.
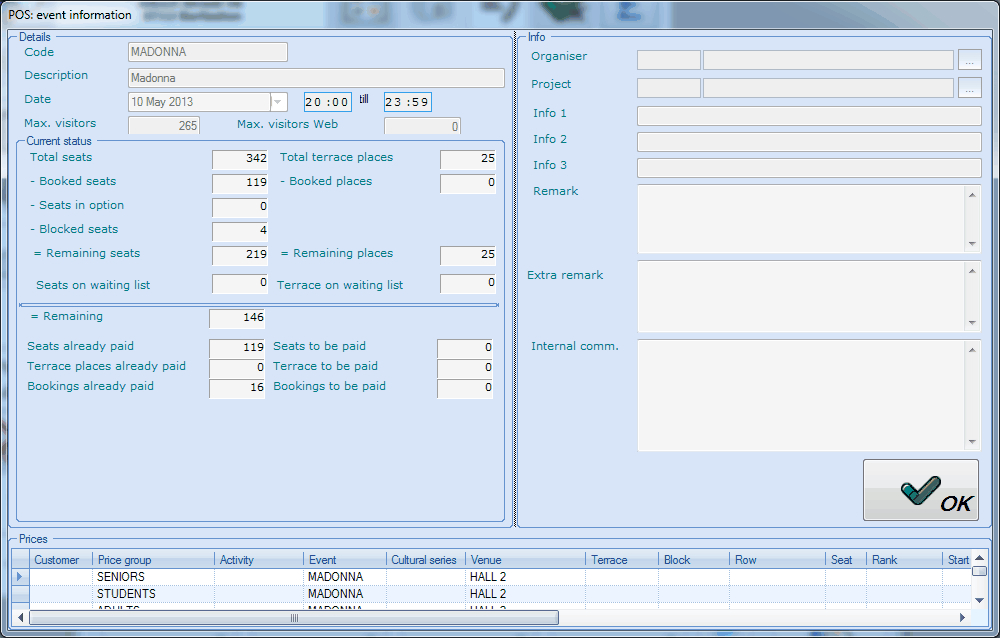 |
This window is purely informative. It is thus not possible to make modifications here.
If you want to return to the POS screen, you have to click on .
Extra actions
If it has been defined in the parameters and settings that extra actions still have to be executed before a ticket sale/booking can be finished, these required actions will appear on the screen one by one after closing the window POS: select price group.
Specify source booking
If it has been defined on event level that the source (where has the booking customer heard/read/seen about the event?) has to be specified, the following message will appear after confirmation of the number of tickets in the window POS: select price group:
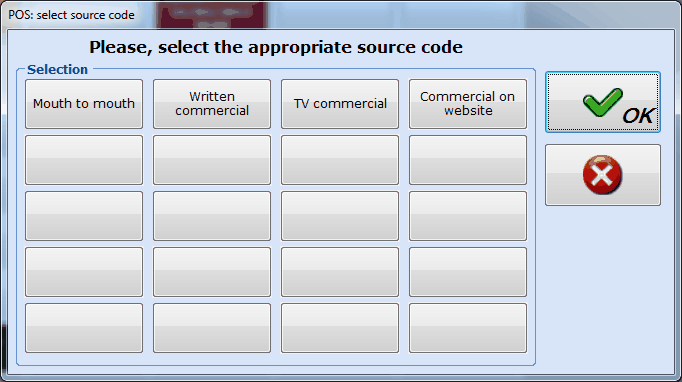 |
At this moment, the booking customer will be asked how he/she has gained information on the event.
First click on the right source in this window and confirm by clicking on the button .
The source code in question will be saved within the ticket booking. Such information is mainly used in function of business intelligence or market research.
Linked cards
If an access control article has been set up for the selected event and if it has been defined on point of sale level that it has to be asked to link possible membership articles (access control articles) to a fixed card when tickets are sold/booked at the cash register, the following message will appear after the confirmation of the number of tickets in the window POS: select price group:
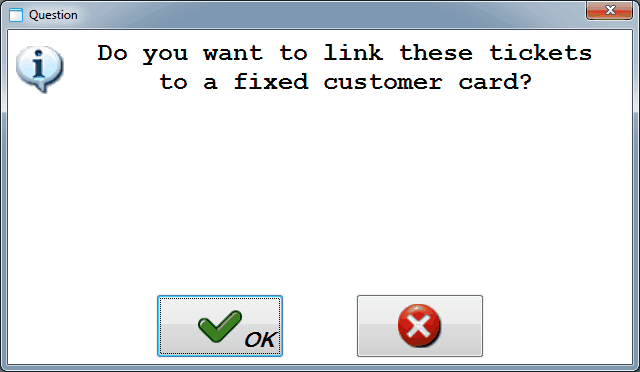 |
This message allows you to decide if you want to link a card to the sold tickets or not.
If this is the case, the system will ask you to scan one or several cards at payment of the tickets.
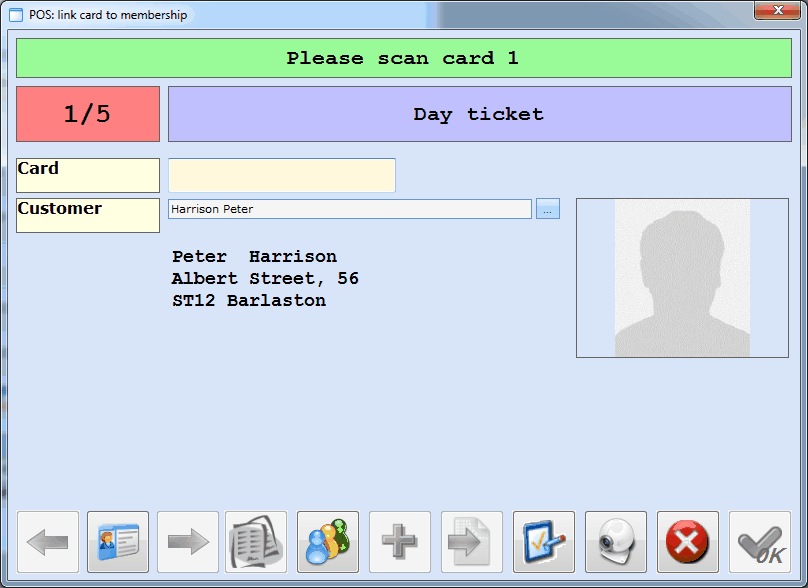 |
In this window you can work in the same way as for the classic link between a card and a membership article (see chapter Membership).
Sale/booking options
If one or several options that can be added to the sale/booking of event tickets have been linked to the current event, the following message will appear after confirmation of the number of tickets in the window POS: select price group:
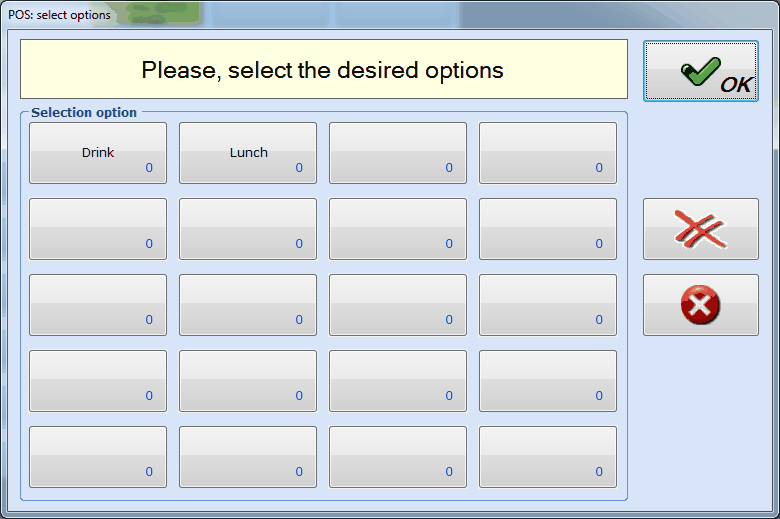 |
This window allows you to select the desired options and their quantity. After confirmation all chosen options will be added to the sale/booking.
| Avoid the use of the button |
Register booking/administrative costs
If booking costs or administrative costs also have to be charged for the selected event, the following message will appear after confirmation of the number of tickets in the window POS: select price group:
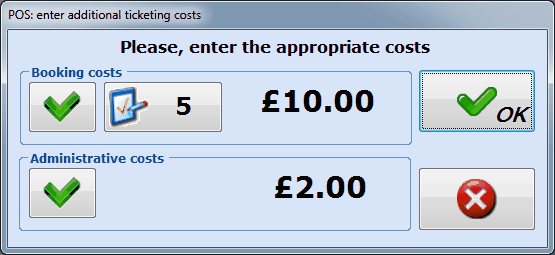 |
Here you can see the automatically charged costs for the current booking and, if you wish so, cancel the costs in question by clicking on  , or modify the number of tickets for which booking costs have to be charged by clicking on
  .
.
| Avoid the use of the button |
Book/record
If the number of tickets has been entered and, if required, the extra actions have been executed, all data in question will appear in the POS selection screen and you will be able to finalise the registration.
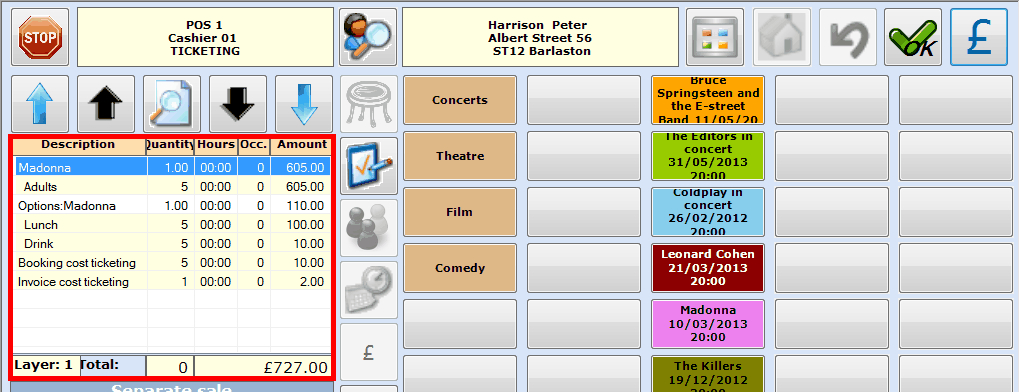 |
You can do this in two different ways:
Sale: the tickets in question are immediately recorded and paid for by means of a certain payment method. In case you decide to pay the tickets by invoice, the sale will also be considered as recorded.In order to record the tickets, you have to click on
 in the selection screen or press <Enter> to continue to the payment screen, in which you can settle the sale as you would do in case of a conventional POS sale (select payment method(s) and confirm).
Booking: the tickets in question are booked, but paid only later (at the cash register, back-office, invoice, ...).
Warnung
Booking and not (yet) paying is only possible if this is allowed on the point of sale. (see Salesmanual 'GENERAL - Sales')
In order to book the tickets, you do not have to click on in the selection screen but on  . The message below will appear:
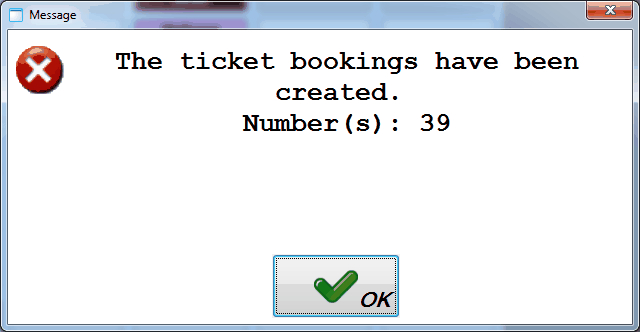 |
The created booking can then later be settled at the cash register or in the module Ticketing.
Anmerkung
Despite the fact that it is not obligatory to record a booking on the name of a customer, it is strongly advised to do so in function of finding back the booking later to record/pay it.
Find and settle booked tickets
Booked tickets can not only be paid for in the ticketing module itself but also at the cash register.
Warnung
Finding and settling previously booked tickets is IMPOSSIBLE with the simplified POS layout.
In order to settle tickets previously booked at the cash register, you first have to search the customer in the selection screen by clicking on  :
:
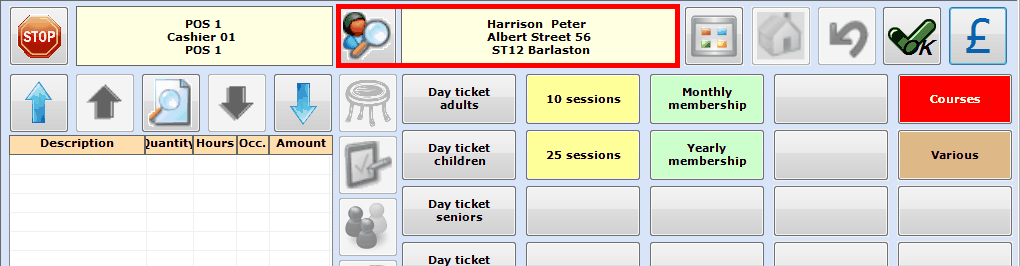 |
Next, you have to click on in the upper right-hand corner or press <Enter> to go to the payment screen in which you will see the outstanding ticketing amount.
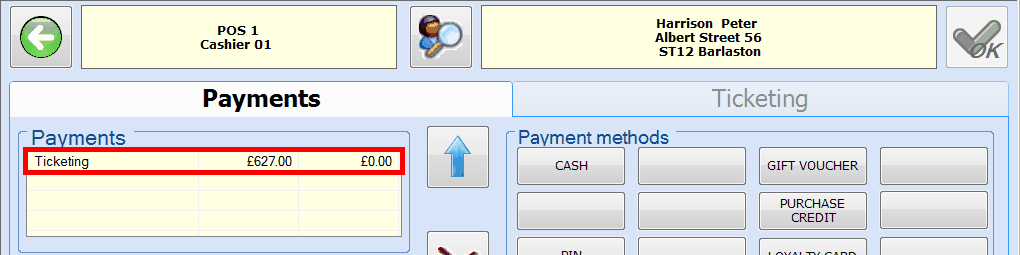 |
Under the tab Ticketing all outstanding ticket bookings are listed. Select the ticketing booking(s) you want to pay by ticking them off:
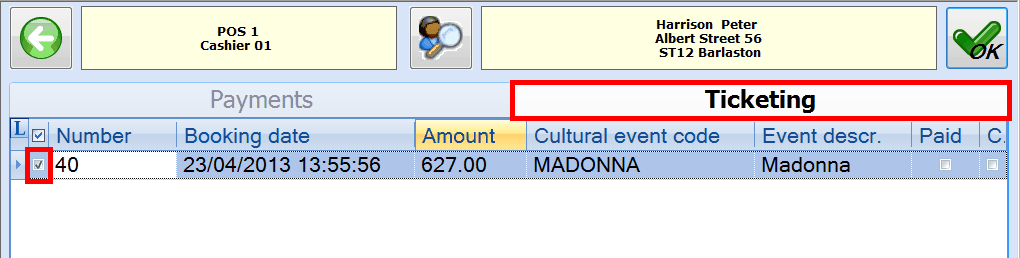 |
Next, you can reselect the tab Payments and you will see that the amount in question is put in the section To be paid.
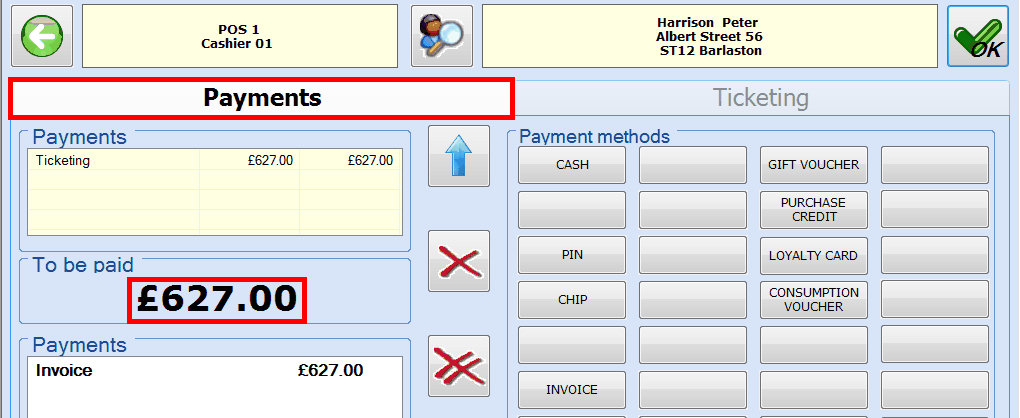 |
If you have selected the desired payment method(s), you have to click on  or press <Enter>, after which the sale will be registered, a receipt printed and, if set up, the tickets printed.
Ticketing membership
In the ReCreateX POS module you can sell ticketing memberships. There are two forms of ticketing memberships: fixed memberships and optional memberships.
Anmerkung
If you sell a ticketing membership, you always have to select the correct customer. If you hit the desired membership on the POS menu, the message below will always appear:
 |
Fixed membershipIf you sell this type of membership, the customer in fact buys a ticket for a fixed amount of specific events.After the selection of the fixed membership (POS menu) and the desired customer, the window below will appear:
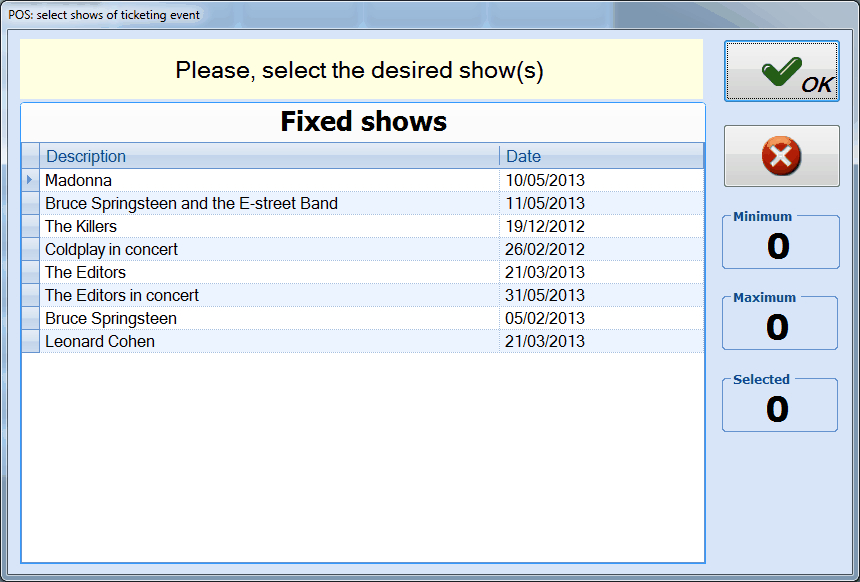 |
This window offers you an overview of the events that are linked to the membership. If you confirm by clicking on the button , the sale of the ticketing membership can be settled as you would do in case of a conventional ticket sale.
Anmerkung
Currently (Recreatex version 5.1.0) a fixed ticketing membership can only be linked to one person (the customer). Consequently, it is not possible to select several seats/standing places.
Optional membershipIf you sell this type of membership, the customer can choose between a list of events, subject to a minimal and/or maximal number of events or not.After the selection of the optional membership (POS menu) and the desired customer, the window below will appear:
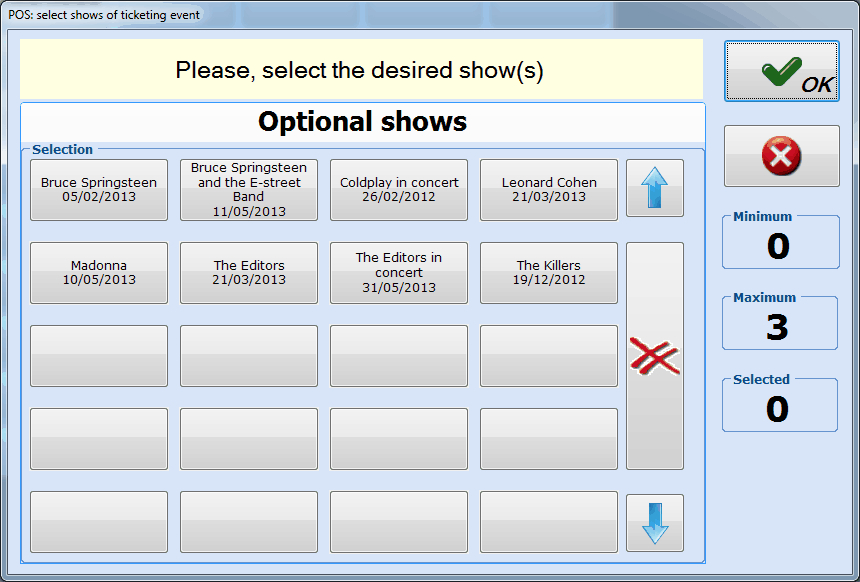 |
In this window you can select several events. You only have to take into account that you select at least the minimal number of events and that you do not exceed the maximal number of events (visualised on the right of the window ). Only if you have selected the required number of events, the button will become available and you will be able to fill in the desired tickets/standing places for the event in question (this number is equal for all chosen events).
Anmerkung
Currently (Recreatex version 5.1.0) it is not yet possible to select seats in the venue plan if you sell an optional ticketing membership. In this case, seats/standing places are always automatically attributed (on the basis of the defined ranks).
After confirmation of the number of seats/standing places, the sale of the ticketing membership can be finalised as a conventional sale.