Options in SydAdmin
Following options are available in SydAdmin:
General - For GANTNER use
Management
Part of the parameters available in the section Management are for your use, while others are for GANTNER's use.
Management parameters for your use:
Management parameters for GANTNER's use:
Overview/program group
Data groups
Data views
Reports
Devices
Keys
Company data
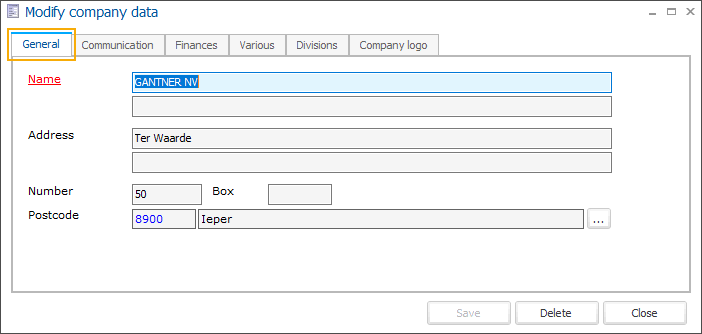
Information about the main site. Double-click to access the detail screen, and modify the record.
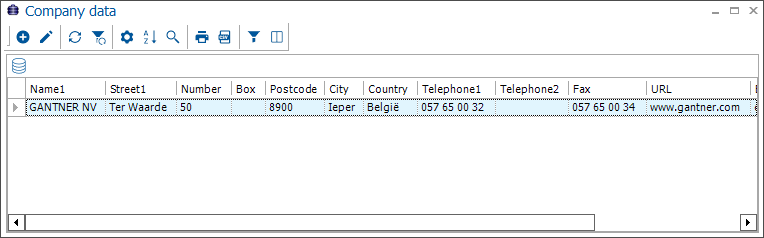
Details that can be updated – Address, contact information, bank account information.
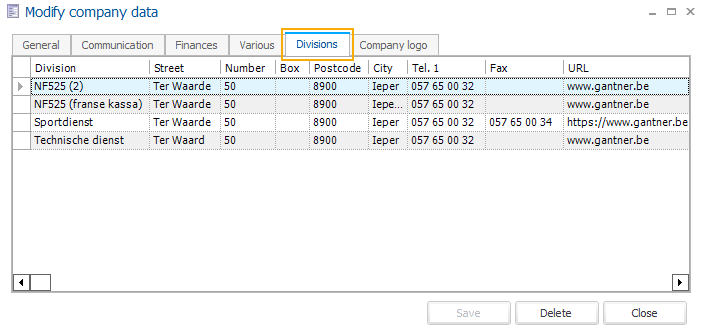
The Division tab shows all Divisions currently created, and where new Divisions can be added. Double-click to access the individual Division record.
Warnung
Adding a new division is not straightforward, contact GANTNER to configure this correctly.
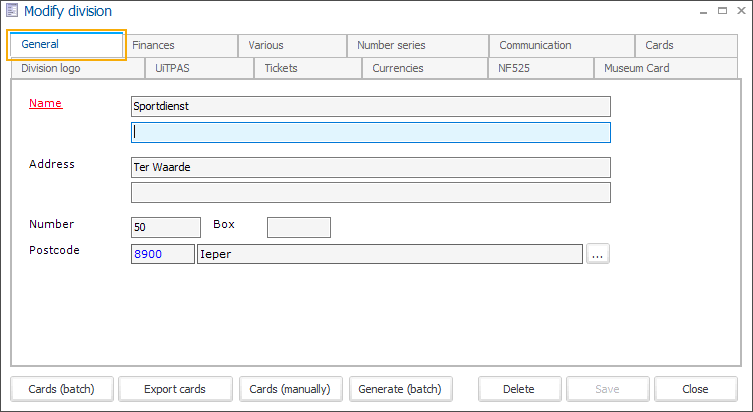
Here details of the Division such as Address, contact information can be modified. This is also the section where membership cards can be created, viewed and exported. This is generally something that GANTNER will carry out for you.
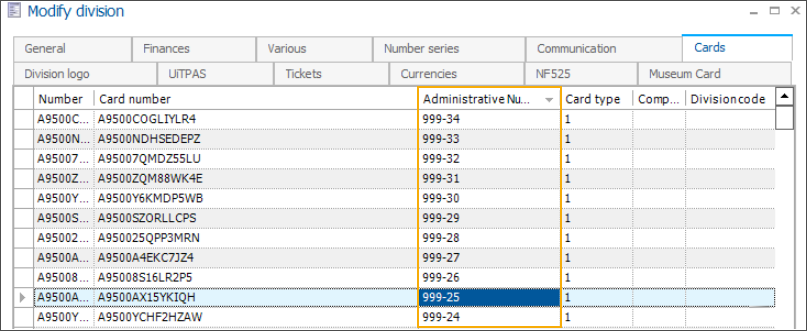
The Cards tab shows all the card numbers that have been created. This is useful to check if you have a card that will not scan – you can check that the number exists and has the correct card type (description) assigned.
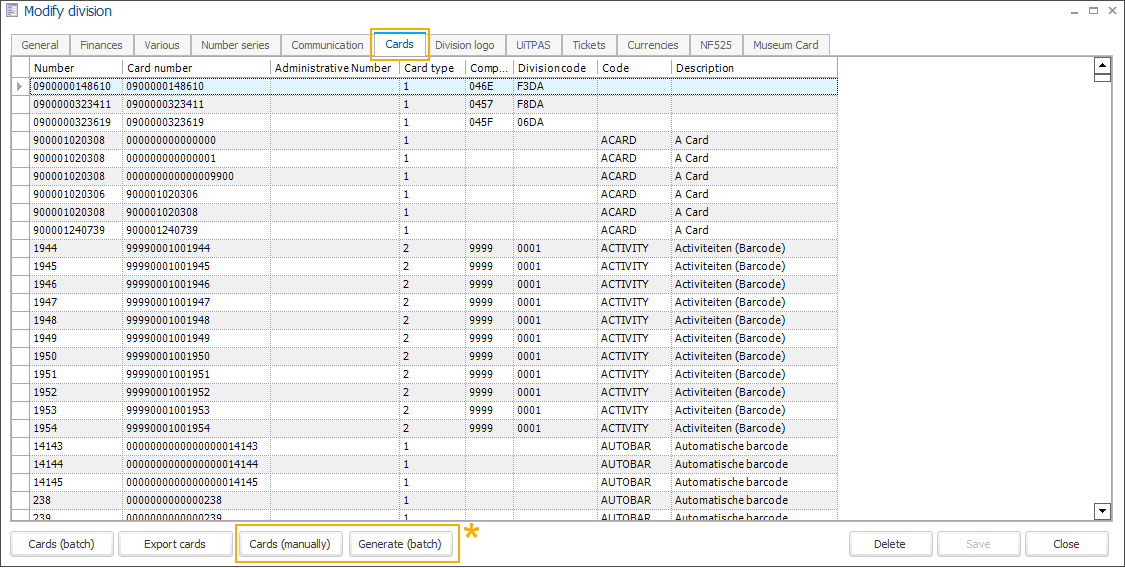
Cards (batch) | |
Export cards | |
Cards (manually)* | |
Generate (batch)* | Use this function to generate a batch of cards with random card numbers and save the cards in your database. A list of card numbers is exported (.CSV file) and can be used to print the physical cards. 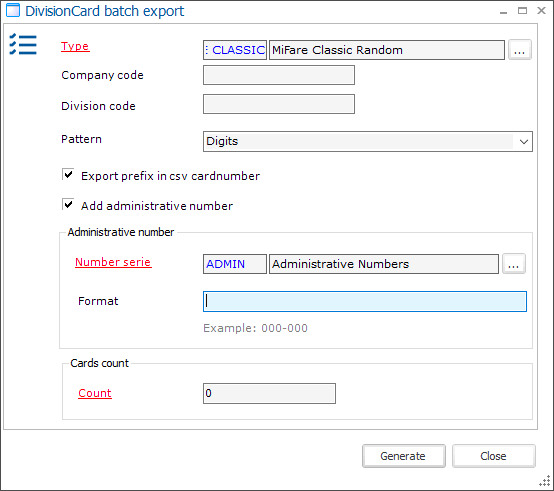
Click Generate to start the card creation. You will be asked to save the CSV export file. |
*Function only available when the SydAdmin application is run as Administrator.
Users
Creating a new user
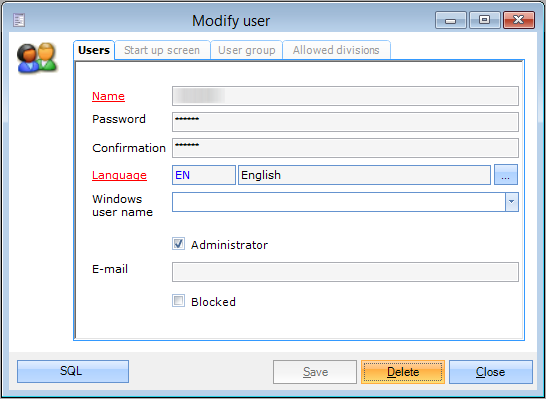
The overview of current users displays the following user info: login name, domain user name, language, date/time of the last login and last password change and information on whether the user has administrator rights and/or is a blocked user.
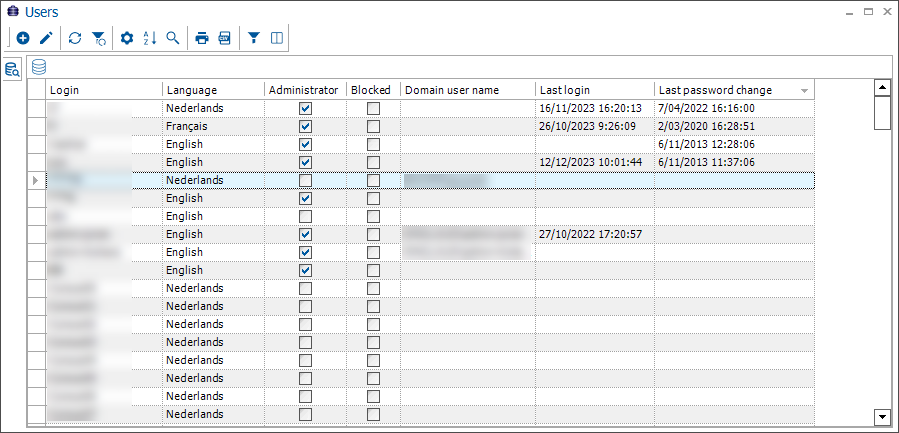
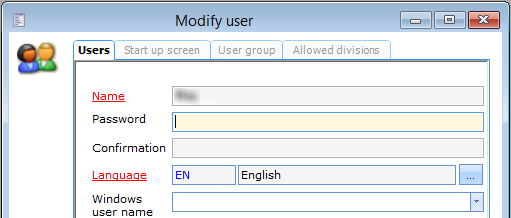
To add a new user, press F2 or right-click + New. Name and Language fields are mandatory.
If you are not using Windows accounts to log in, then the password and confirmation must also be completed. If the user should be a System Administrator, then tick the Administrator box. This check box basically determines if a user has access to SydAdmin or not.
The email address will allow the user to request a forgotten password to be sent to them.
 |
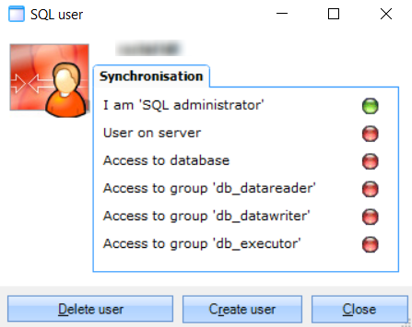
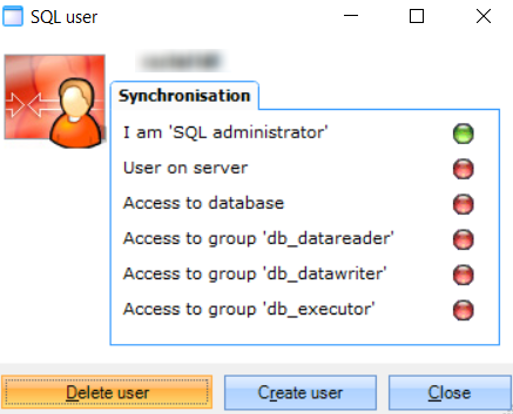
Once this is done, the User must be created in the SQL Database.
Achtung
If you are on a hosted platform, then you will not be able to do this and must contact GANTNER Helpdesk. However, if your database is local, then click on the SQL button – which is active after saving the record.
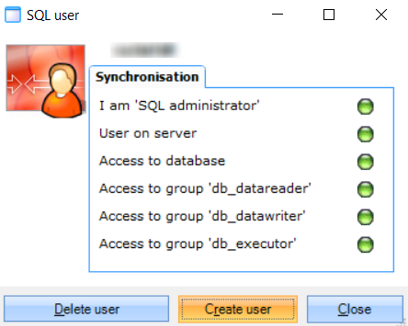
Click on Create user – and as long as you have the correct privileges, the buttons will turn green.
 |
 |
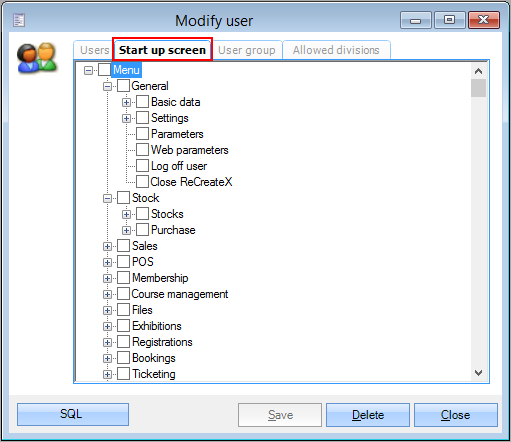
In the Start up screen tab, a module or part of a module can be selected, so that it opens when ReCreateX is launched. Alternatively, this can be left blank.
 |
In the User group tab, a user group must be selected, in order for the correct permissions to apply to the user. The permissions that each security group has is seen in Security users/program group.
 |
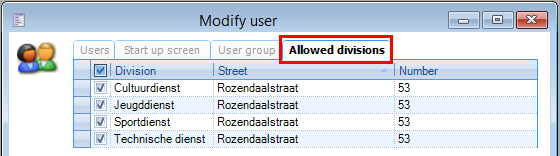
In the Allowed divisions tab, you must choose which division the user will have access to. If it is more than one, then when they log in they will be presented with this list, and will have to choose which division they want to work in. If it is just one, then they will be logged directly into that division.
 |
Changing a Password
Access the user record as in Creating a new user. Enter a new password and confirmation, then save.
 |
Select the SQL button. Delete the User, so that everything turns red, then create the user again. This does not actually remove the user record, simply updates the password on the SQL user.
 |
Warnung
You cannot change the password in this way for the logged-in user, only for other users.
If a user has access to multiple databases it is not possible to change his password in this way. It will need to be changed in SQL Management Studio.
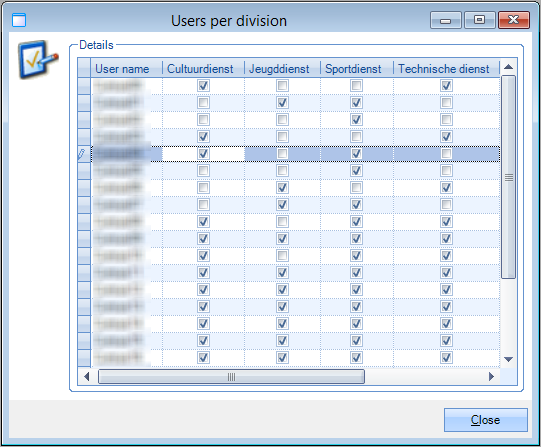
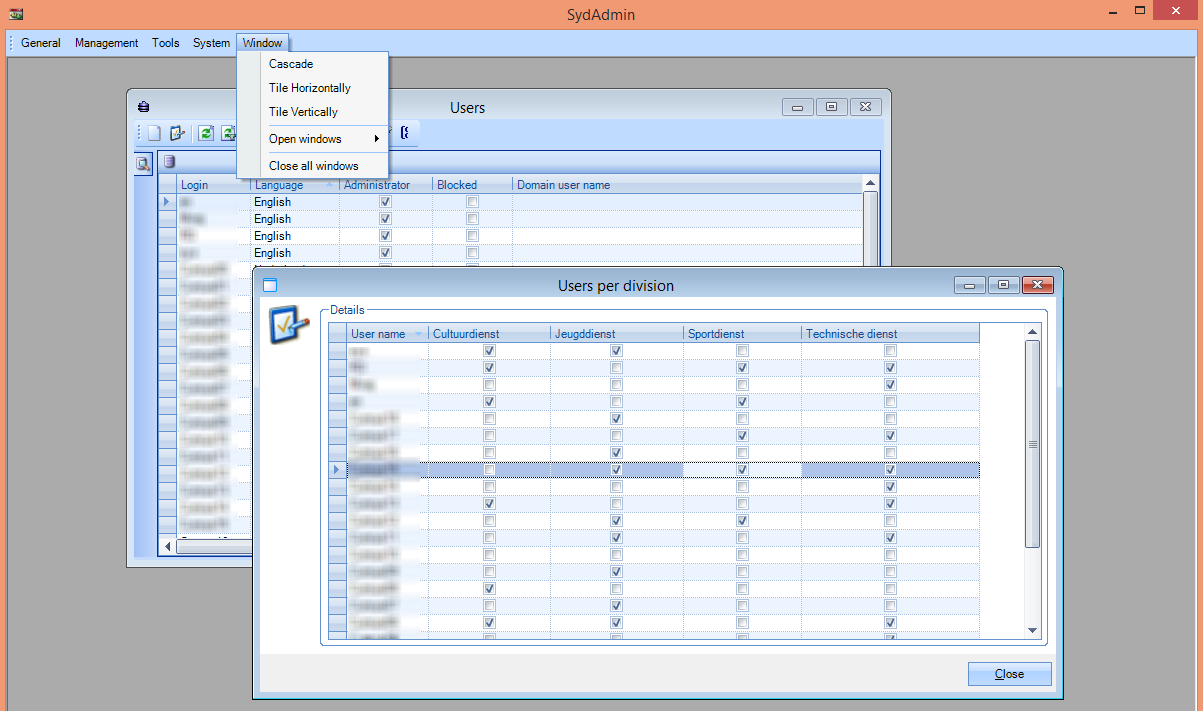
Users/division
This is a quick overview of all users and the divisions they are allowed to access. You can also change the access here, simply by ticking or un-ticking the relevant divisions.
 |
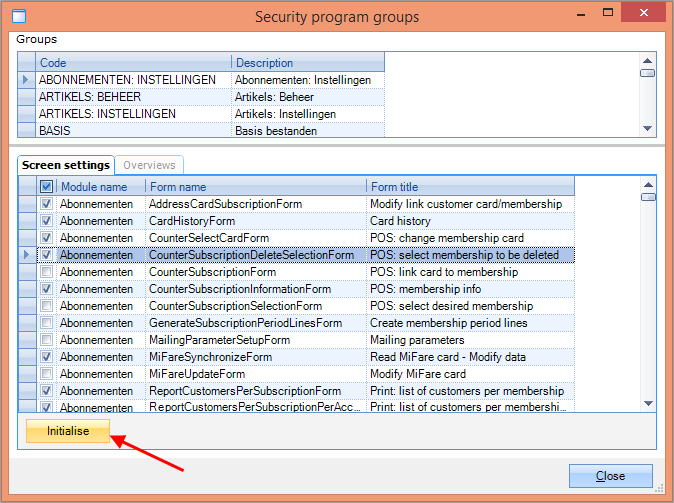
Security program groups
In this window, you can determine to which program group the screens in Recreatex belong.
The button Initialise will reset all program groups to their default settings. Do not use without consulting GANTNER.
 |
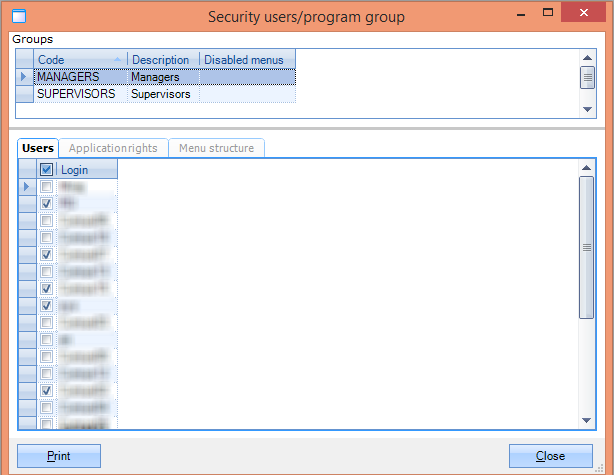
Security users/program group
This is a quick view of the security groups – what rights those groups have, and which users are in which group. You can modify the existing groups and also add new groups from here.
Clicking on each group will change the user section, and flag which users are a part of that group. You can change the group of the user hereby highlighting the relevant group and ticking/un-ticking the user.
 |
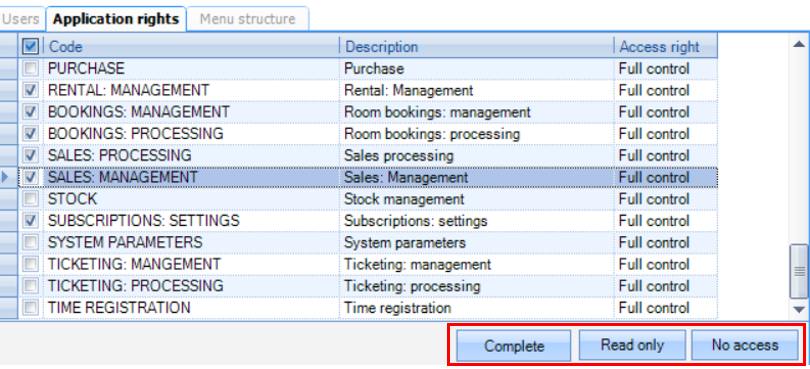
The Application rights tab shows what control the user group has for the different program groups (see Security program groups).
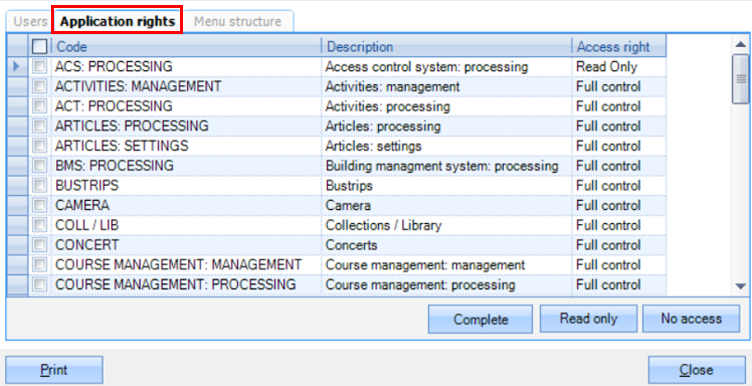 |
To change the access right, highlight the appropriate levels, and choose either Complete (Full control), Read only or No access.
 |
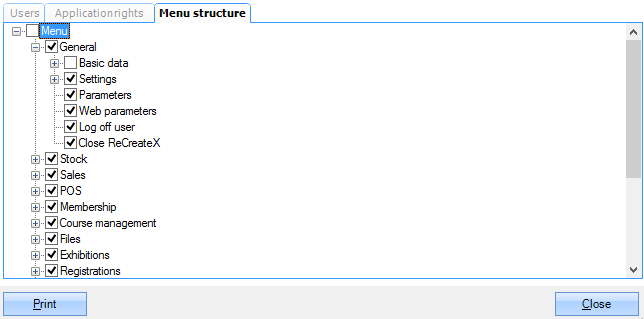
The Menu structure tab shows you what modules can be seen by each user group.
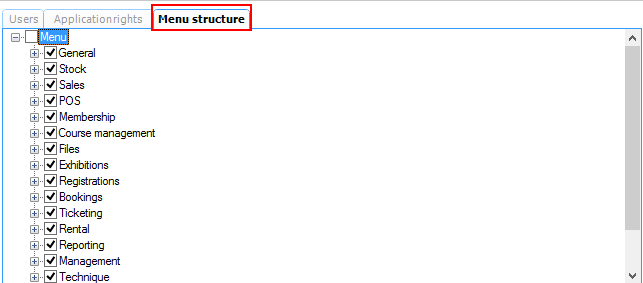 |
To restrict the use of a module, or section of a module, untick the relevant option. That option is then greyed out in the Recreatex menu.
 |
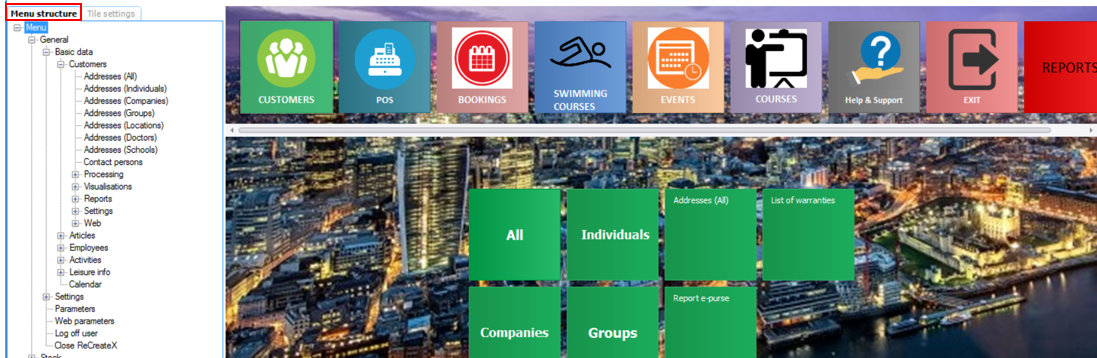
Dashboard
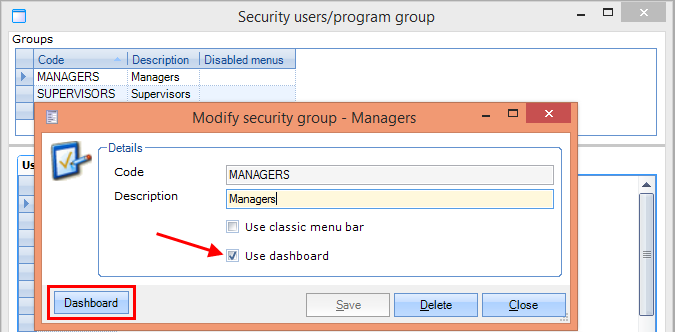
In order for the user to login to Recreatex and see a dashboard style screen, the dashboard must be set up on the security group.
Double click on the security group to bring this menu. Tick Use dashboard then click on the Dashboard button to access the design.
 |
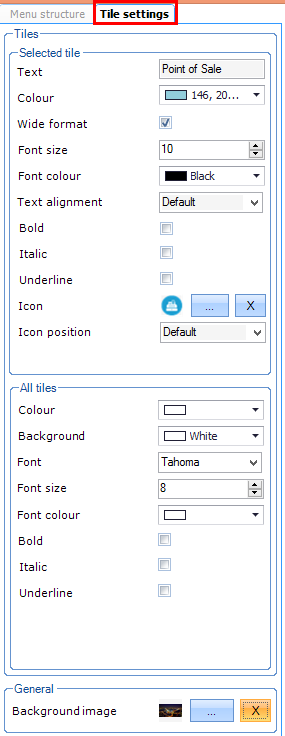
The Title settings tab will allow you to set the look of the dashboard – colours, fonts and a background image for the whole page.
 |
On the tab Menu structure, you can decide which modules, or parts of modules can be accessed by the user.
 |
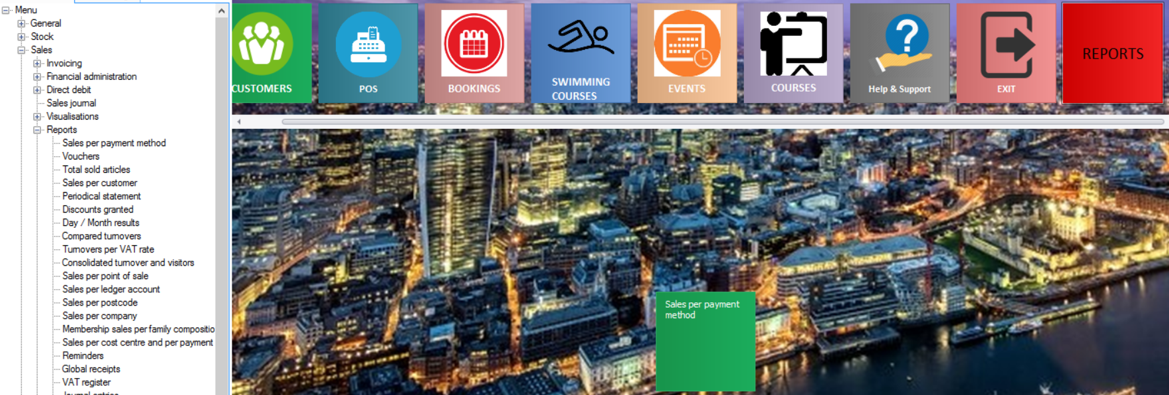
First, create an icon at the top of the page, by right clicking in the icon bar, and choosing Add Menu, e.g. Reports.
 |
Next, choose from the Menu structure what should be accessible on the dashboard when the icon Reports is selected. The items can be dragged and dropped into place.
 |
Windows/program group
A different visualisation of the same data as in Security program groups.
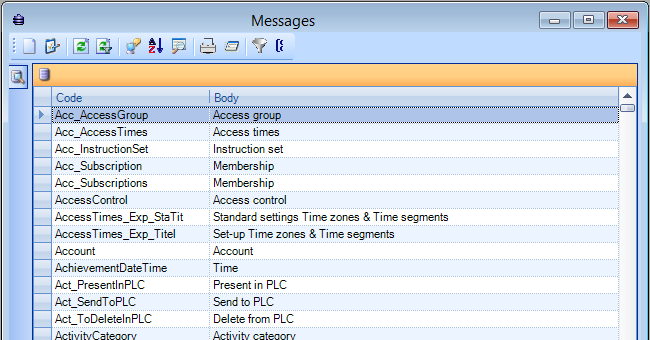
Messages
These are messages that are seen in Recreatex when processing certain things, such as swiping membership cards. This is generally for use by Syx, but you can amend the description of the messages, should they not be clear.
 |
Achtung
Beware however that any changes you make here will be overwritten the next time your version is upgraded, as the messages are not unique to you.
Do not make any changes to the code. Only modify the text.
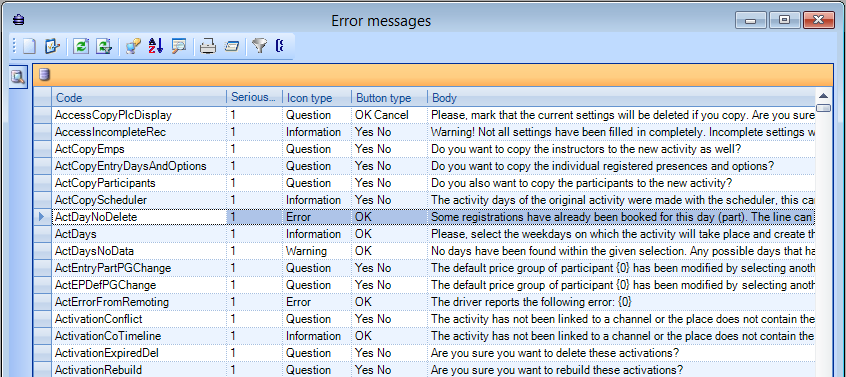
Error messages
For use by GANTNER, however, you can amend the body of the error message should you need to.
 |
Warnung
Do not make any changes to the code. Only modify the text.
Devices
Peripherals
Card definitions
Go to Management > Devices > Card definitions.
In the overview screen, you can find all card definitions created for your company.
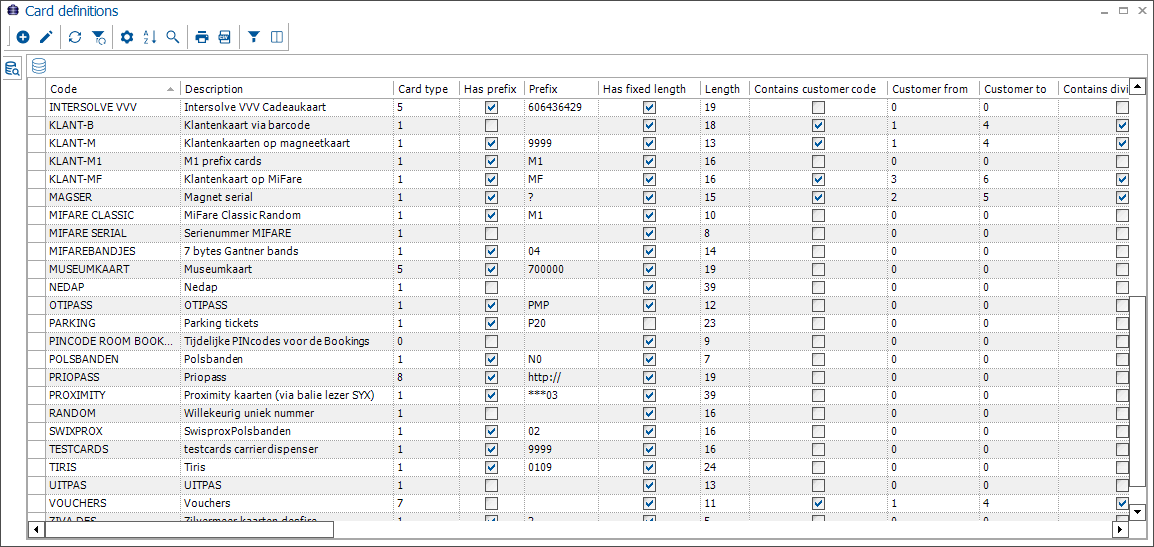
To create, modify or delete card definitions use the available framework functionality.
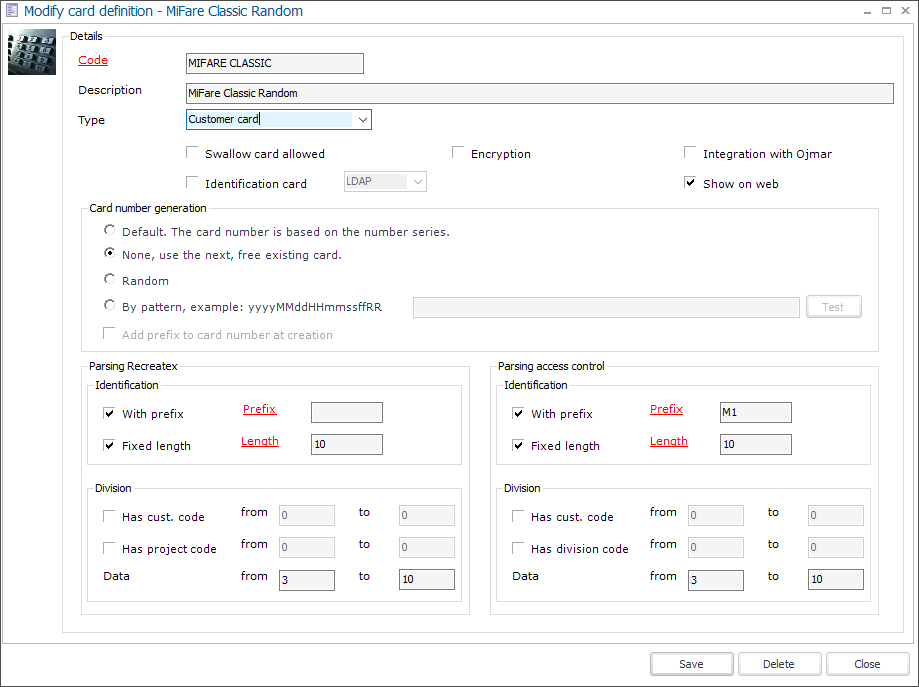
Code | |
Description | |
Type | |
Swallow card allowed | |
Identification card | |
Integration with Ojmar | |
Show on web | Select this option to configure the card definition for Webshop use. |
Card number generation | |
Parsing Recreatex |
Service
There are a number of plug-ins that are available for Recreatex, and this is where they are managed by your GANTNER Implementation Team or the Helpdesk.
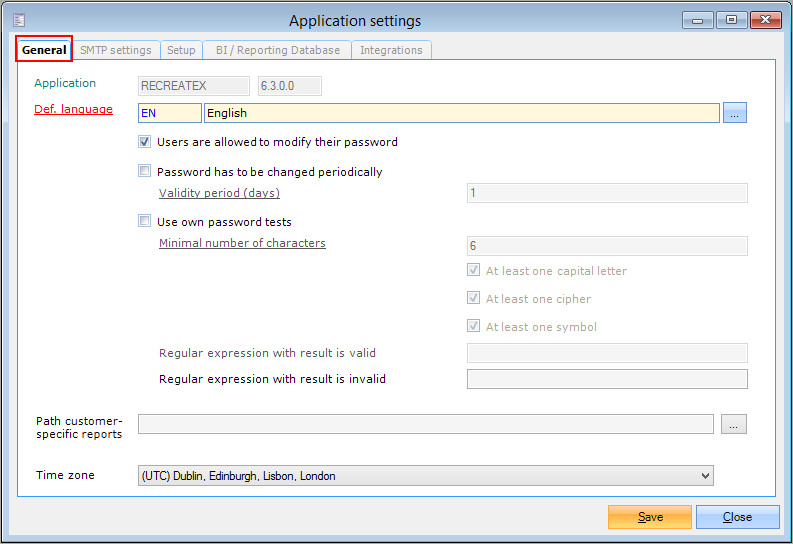
Application settings
In the General tab, you can set the password parameters for your users. The remaining settings will already have been completed by your GANTNER Implementation Team.
 |
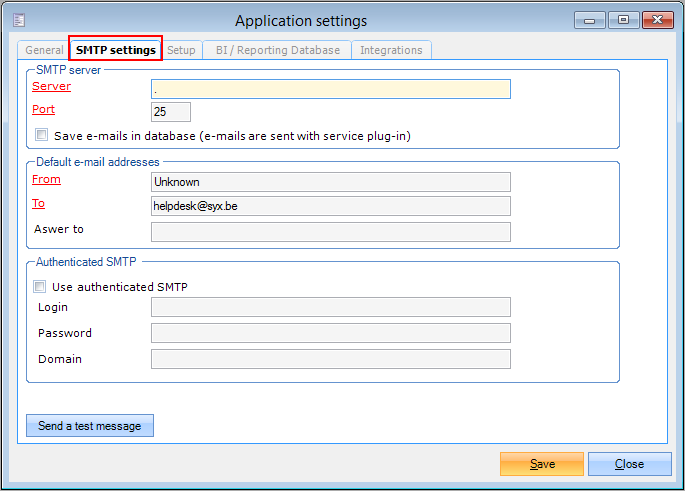
In the tab SMTP settings, you should set up your email account, in order to send emails from the system, including the mailing module. When working in a Citrix environment this is managed by GANTNER and must not be changed.
 |
Setup tab - For GANTNER use
BI/Reporting Database tab - For GANTNER use
In the Integrations tab, you can set up your Office 365 account, in order to synchronise appointments for reservations module. It is also possible to synchronise your scenarios with Office365 integration.
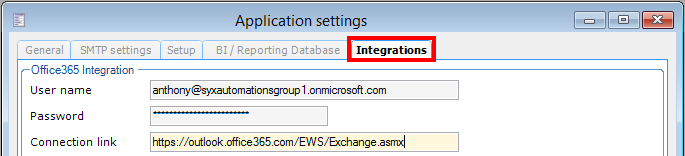 |
Enter the following details:
User name: The username or email associated with your Office 365 account.
Password: The password for the mentioned account.
Connection link: The URL where you'd like to authenticate against.
For Office/Outlook 365 this will usually be https://outlook.office365.com/EWS/Exchange.asmx. You can test your credentials at the given link. When you browse to the link you have entered, you will see a pop-up asking for your credentials.
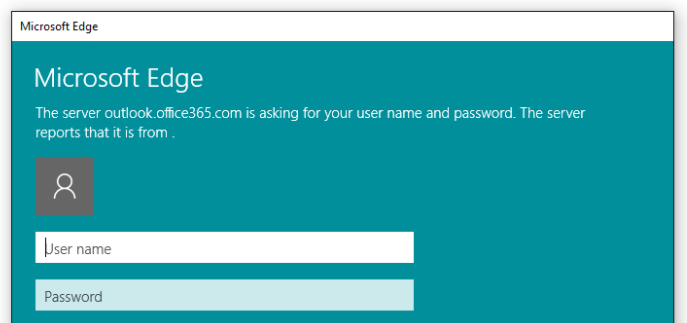 |
Tools
The section Tools contain the following options:
Script generator: For GANTNER use
Import postcodes
If you do not use a postcode lookup service, then postcodes can be imported to the system to allow your users to pick from a list when creating customer records. For the UK, this needs to be considered before importing as there are a vast amount of postcodes, which could slow down the entry of addresses. This import should be completed along with your GANTNER Implementation Team.
Import/export: For GANTNER use
Merge data: For GANTNER use
Archiving
Generally for GANTNER use but more information can be found here.
Execute script: For GANTNER use
View queued e-mails
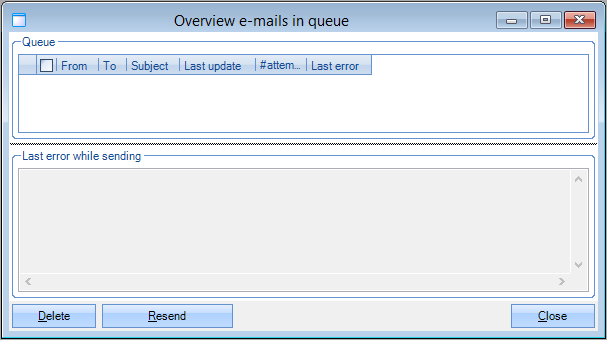 |
System
The section System contains the following options:
Translations: For GANTNER use
Window translations: For GANTNER use
Application logs: For GANTNER use
Mandatory fields
You can set system-wide mandatory fields here, by flagging the field you want to ensure is completed. This should be done in conjunction with your GANTNER Implementation Team. There are default mandatory fields already set across the system, this can be used to set anything specific you require.
The mandatory fields for Customer records should be set in Recreatex per Customer Group, as you may require different fields for these groups.
 |
Warnung
Never use the check box in the table header. This will (de)select all fields as (not) mandatory.
Field validation
Should you wish to validate the data entered into certain fields, then this is carried out here. The format for an email address, for example, can be detailed, also whether a field should be case sensitive.
 |
In the column FieldExpression you can use so-called regular expressions.
Active users
This section details how many users you can have in each module – and how many users are currently active. This can be useful if you find you are unable to login to Recreatex.
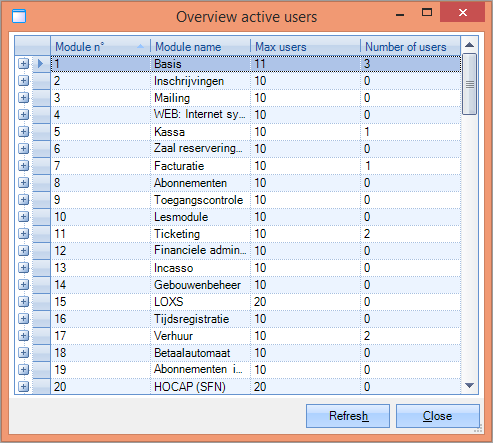 |
Expanding the module where there are active users will show you who is logged in, and on which workstation.
 |
Window
This is a way of designing the layout of your screen. Should you have more than one area open, you can choose to display in a cascade, horizontally or vertically.
 |