Recreatex 6.2.0
Introduction
These release notes contain all new features and modifications for the Recreatex release 6.2.0.0.
New versions
The Recreatex 6.2.0.0 release contains the development tickets and internal optimisations of the following applications and their respective versions:
Recreatex 6.2.0.0
Recreatex WSDL 6.2.0.0
Recreatex WEBS HOP 4.2.0.0
Recreatex BKO web app 4.2.0.0
Recreatex LLV web app 4.2.0.0
Recreatex Vending machine 4.2.0.0
Recreatex Driver 6.2.0.0
What's new
Self-service enterprise reporting |
|
Ticketing improvements (culture events) |
|
Course management |
|
Improved eID integration |
|
Cash desk improvements |
|
Direct debit |
|
Adyen VX680 payment terminal support |
|
AGB price subsidy |
|
CEVI integration |
|
 |
Detailed information
This topic contains more detailed information about certain new features in this version:
AGB price subsidy
The system for AGB price subsidies meets the rules and regulations of the Belgian VAT administration. As a consequence, this is not suitable for anything other than AGB price subsidy administration.
The parameters and settings for the AGB price subsidies can be configured in these locations:
Anmerkung
When selling an article that has been configured for AGB price subsidies, a separate sales line for AGB will be made in the Recreatex back office.
The amount of subsidy paid will be displayed on the receipts and the invoices for the end customer.
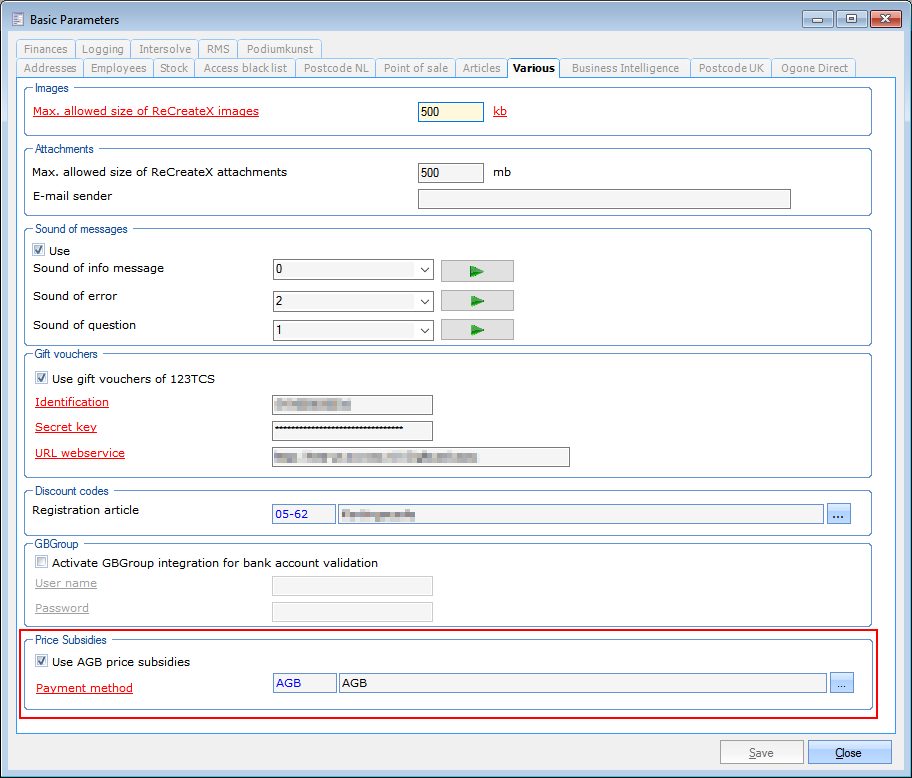
Basic parameters
Go to General > Parameters > tab Various. On the bottom of this tab you will find the check box to activate the use of AGB price subsidies. Here you also have to define a payment method for AGB. Create a new payment method for AGB and make sure that the name is clearly linked to AGB.
 |
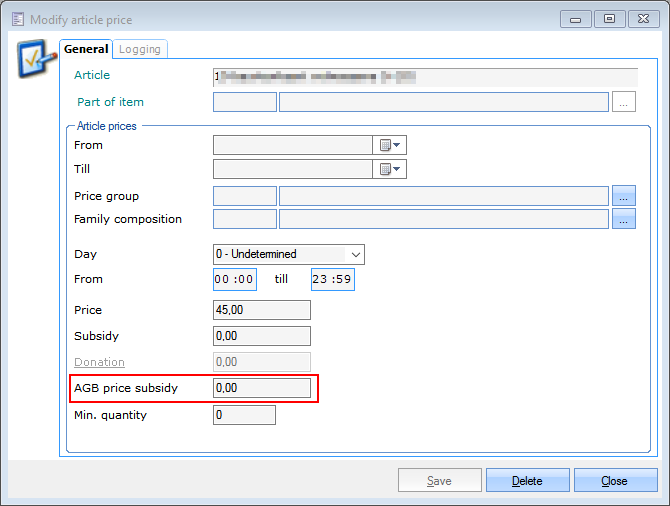
Article card
On the article card of the articles for which you want to define the AGB price subsidy, go to the tab Selling prices. Create a new price or modify an existing price. The window Modify article price will open where you can specify the AGB price subsidy.
 |
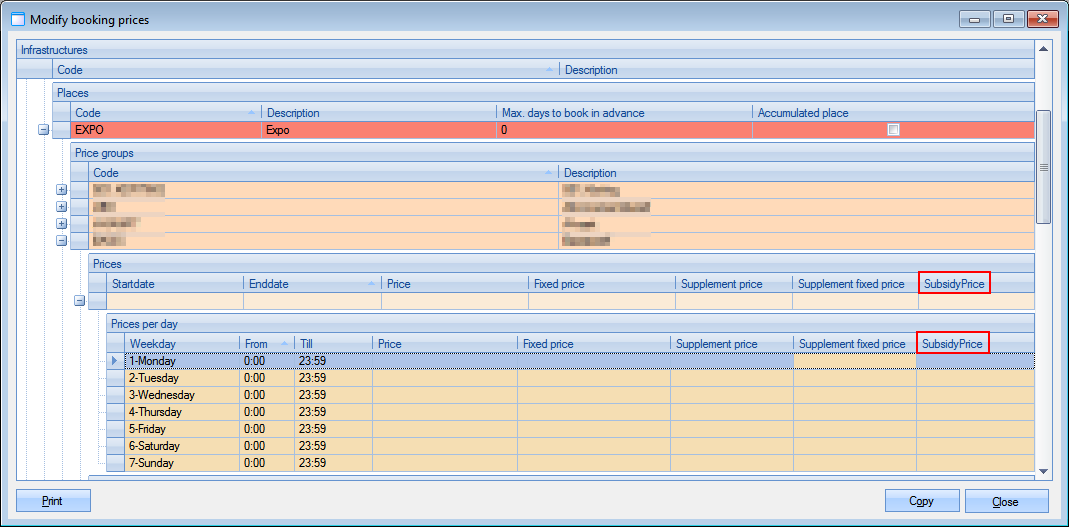
Room bookings
Go to Bookings > Settings > Prices, click on the room or infrastructure until you get down to the Prices level. The column Subsidy price has been added where you can specify the AGB price subsidy.
 |
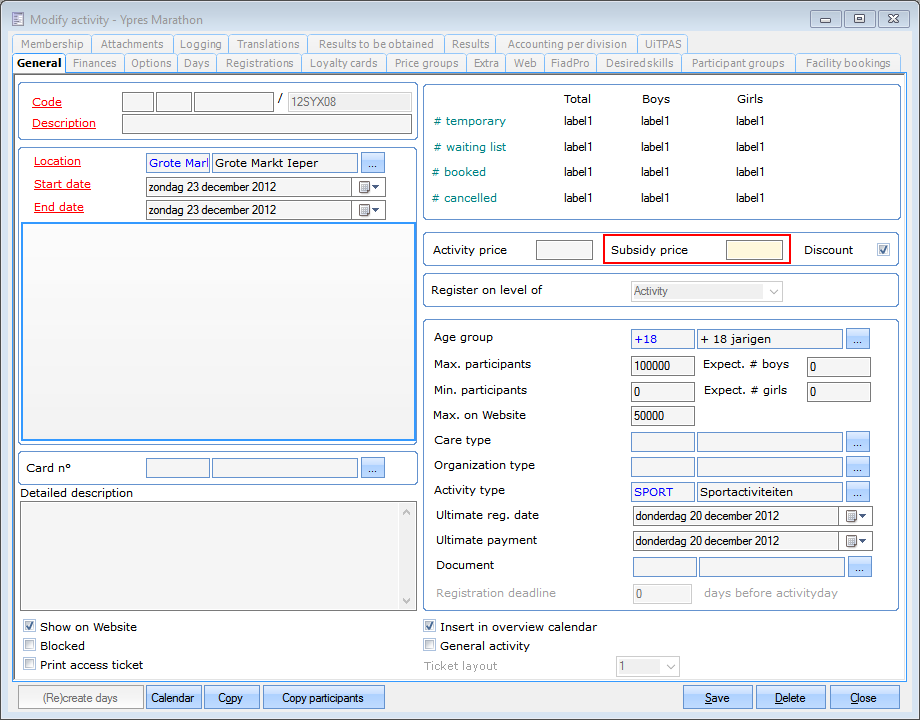
Activities
Go to Registrations > Activities > Activities and open activity. In the window Modify activity there are two places where you can specify the AGB price subsidy:
The General tab.
 |
The Price groups tab: Add a new line or modify an existing one. The window Modify activity price per price group will open.
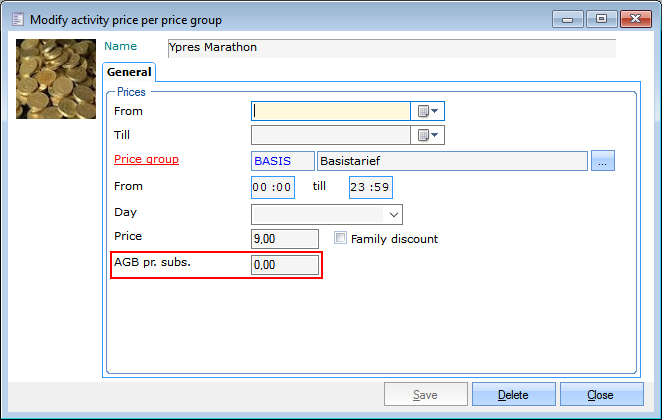 |
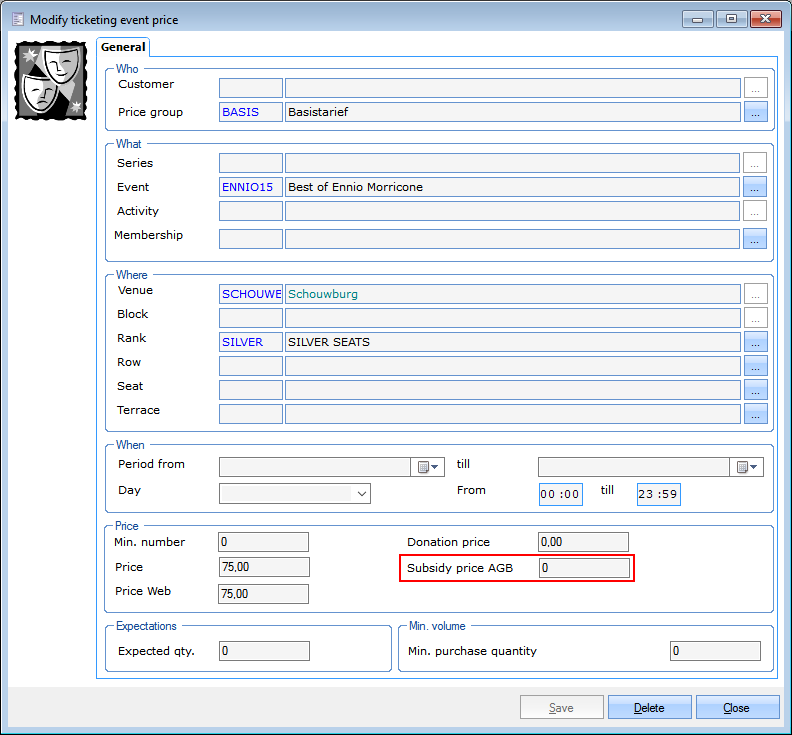
Ticketing
Go to Ticketing > Events and create a new event or open existing event.
Go to the tab Prices and add a new line or modify an existing one. The window Modify ticketing event price will open.
 |
Exhibitions
In order to use the AGB price subsidies with exhibitions, you need to configure the exhibitions with the setting Use articles to register to visit enabled. To do this, go to Exhibitions > Exhibitions and open an existing exhibition or create a new one. Obviously, you then need to configure the articles.
 |
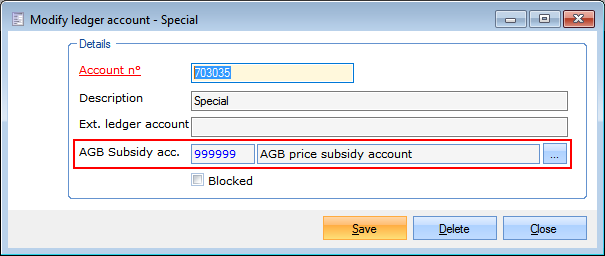
Ledger account
Go to General > Settings > Finances > Ledger accounts and open an existing or add a new ledger account.
In the window Modify ledger account you can link an AGB subsidy account to your selected ledger account.
 |
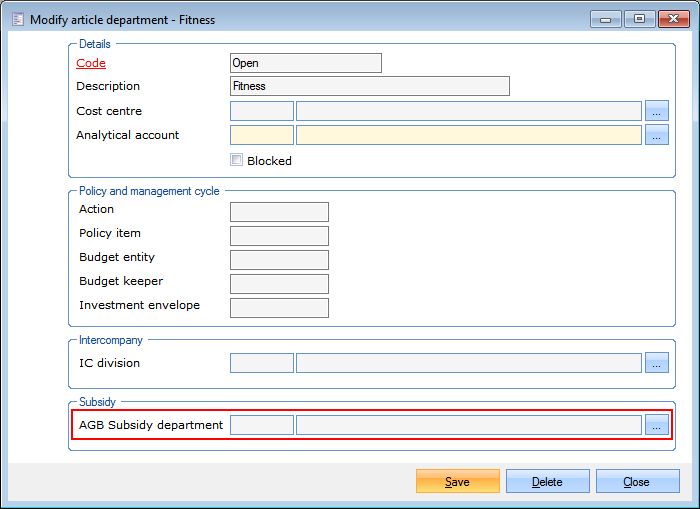
Article departments
Go to General > Settings > Finances > Departments. Open an existing department or create a new one. Near the bottom of the window Modify article department, you can link a different department as the AGB subsidy department. You may have to create a new department for this.
 |
Cash desk improvements
Two improvements have been made for the cash desk / points-of-sale (POS)
Putting a customer order on hold
From Recreatex 6.2.0 onwards, a customer order can be temporarily put on hold on the point-of-sale. Meanwhile, you can process multiple other customer orders on the point-of-sale. Afterwards, you can resume processing the customer order that was put on hold. You can use this option without any extra configuration. You can put several orders on hold at the same time.
On the point-of-sale menu, go to Extra functions and press the button Save items for later
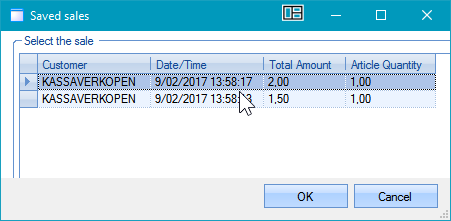
When you want to resume processing the order, Go back to Extra functions and press the button Retrieve saved items to retrieve the items that were on the order that was put on hold. In case you have put multiple orders on hold, you will get a small selection window where you can select which order you want to resume processing.
 |
Sales shift sharing
Configuration
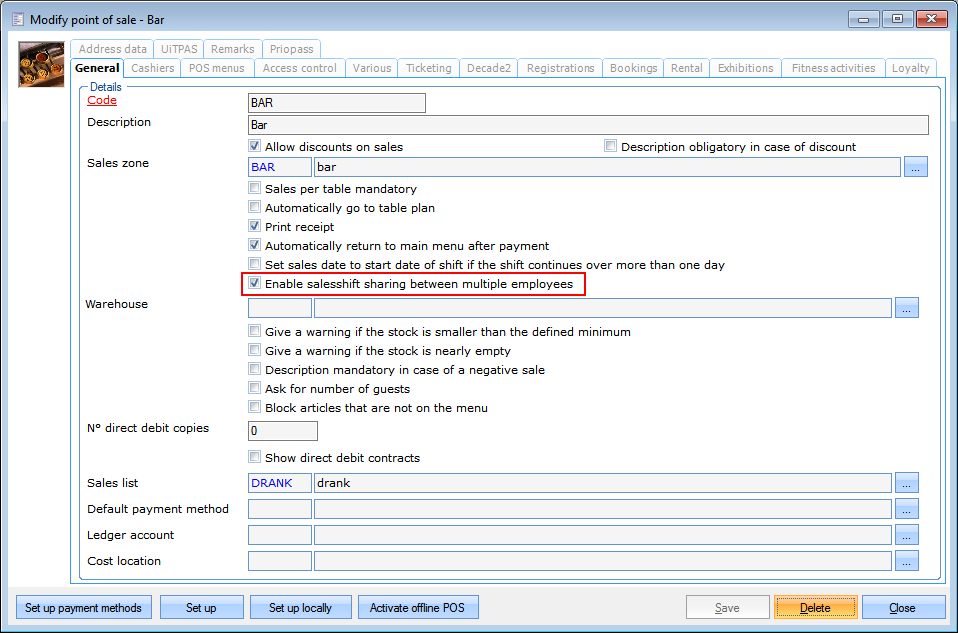
From Recreatex 6.2.0 onwards it is possible to work with multiple employees on the same sales shift: Sales shift sharing. In order to use this new feature, it has to be enabled at the point-of-sale level.
Go to Sales > Settings > Points of sale > tab General and tick the check box Enable sales to shift sharing between multiple employees.
 |
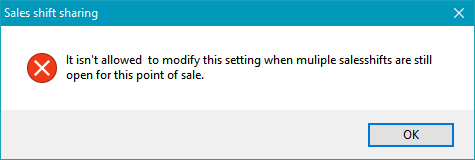
However, it is not allowed to modify this setting when multiple sales shifts are still open for the selected point of sale. I which case you will get this error message.
 |
Use
There are 2 ways to switch shifts:
In the POS menu, press STOP, select another cashier and resume the sales shift
In the POS menu, press Extra functions, press the new button Switch sales shift employee

Anmerkung
Depending on how your POS has been set up, you may have to provide identification by way of your PIN or scan your card.
When an employee is set up with a personal purse it is not possible to share shifts with other employees.
Visualisation
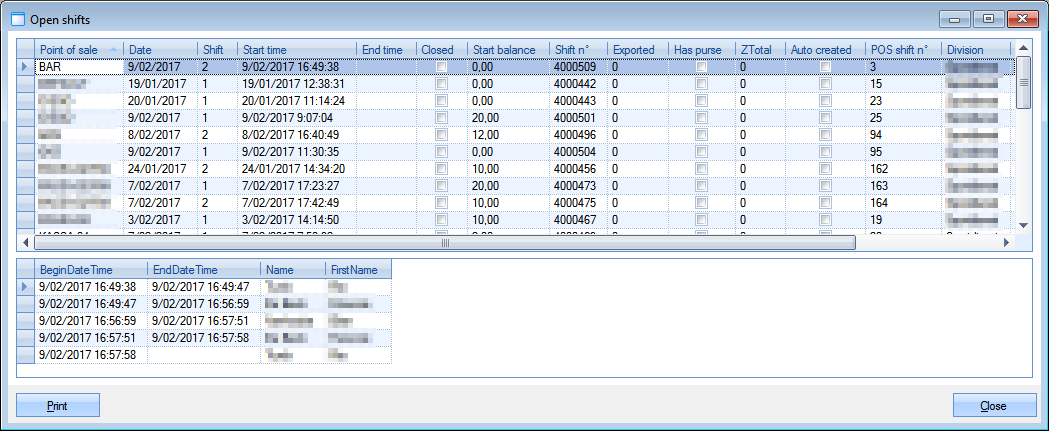
Go to POS > Visualisations > Open shifts and click on the shift that you want to see the details for. At the bottom of the screen, there is a grid with the shift sharing details of the selected sales shift.
 |
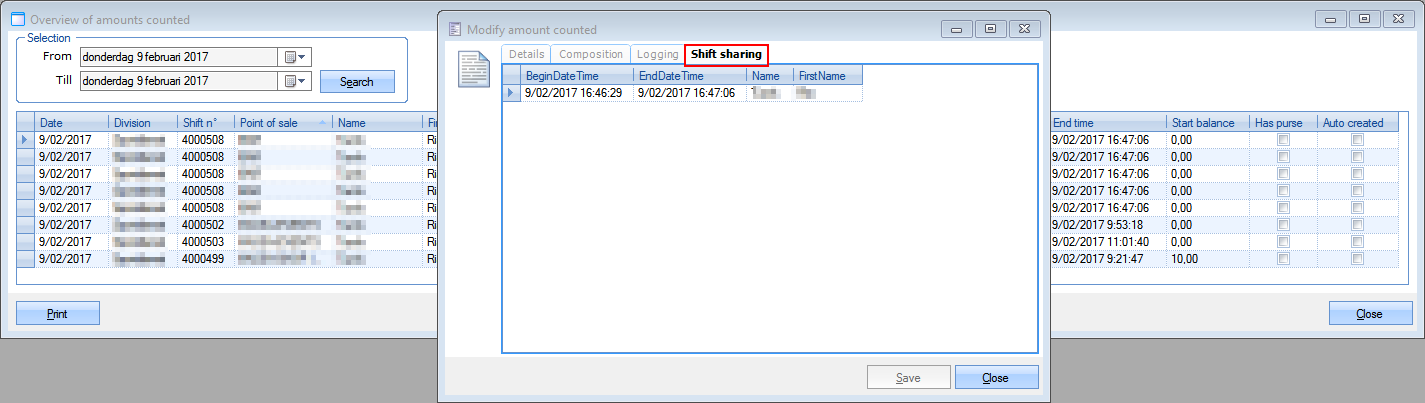
Go to POS > Visualisations > Amounts counted, double click a on shift, go to tab Shift sharing to see the shift sharing information.
 |
Go to POS > Reports > Open shifts per employee. This will generate a report showing all open shifts.
Ticketing usability improvements
Increased usability in the membership flow
Possibility to change suggested seats
Configure bonus and extra events for memberships.
Easier to print and e-mail e-tickets from the point-of-sale
When a web shop customer modifies his order he can see the price change in real time
Improved capacity visualisation
Improved visualisation of pending ticket registrations on all overviews
Venues can now be blocked
Individual events or complete event categories can be set to appear on the web shop or not
Pending registrations are now visible in various overviews in Recreatex
The bulk of these changes mainly affect the flow in the web shop, they are explained in the updated Web shop manual for version 4.2.0.
The following Ticketing-related UI changes have been made in Recreatex 6.2.0 itself.
Ticketing events improvement
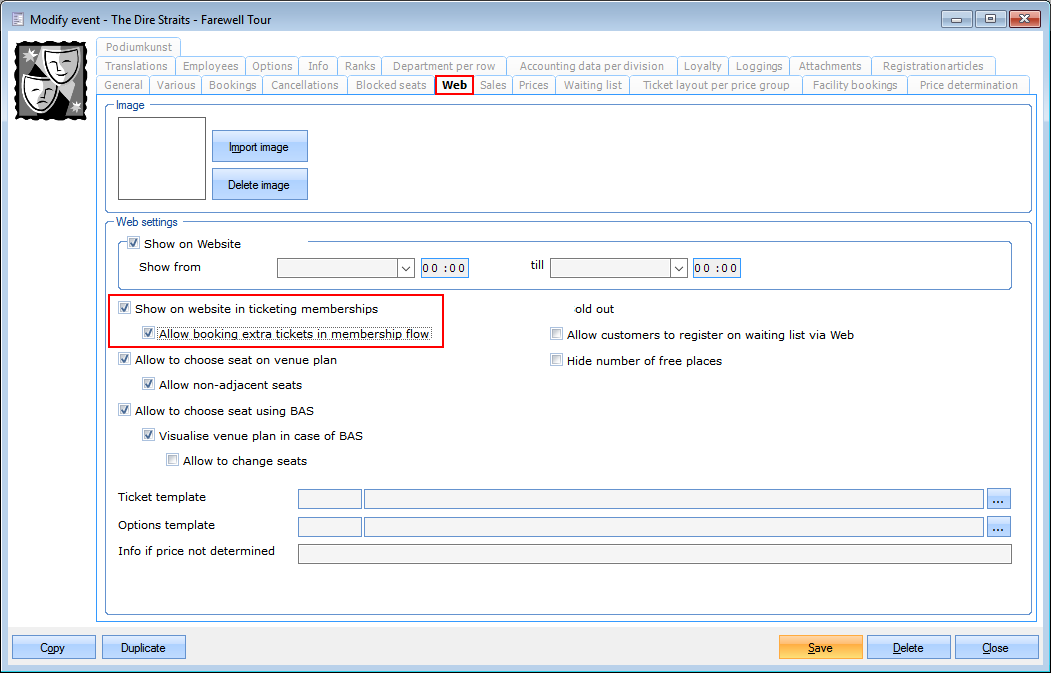
Go to Ticketing > Events, open an event, go to the tab Web where you will find 2 new settings:
Show on website in ticketing memberships
Allow booking extra tickets in membership flow: This setting defines whether or not the end-user can book extra tickets during the ticketing membership flow. (not enabled by default)
 |
Ticketing membership improvement
Go to Ticketing > Ticketing membership, open a ticketing membership
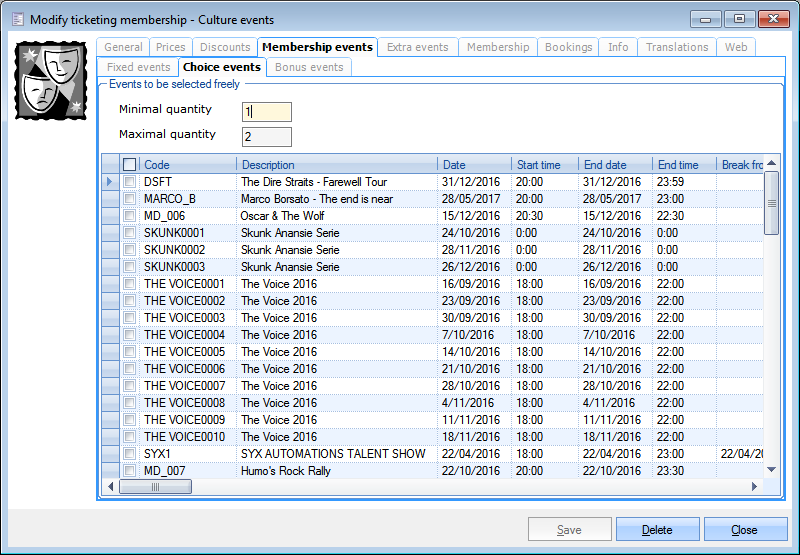
Tab Membership events: 3 sub-tabs
Sub-tab Fixed events: Select the ticketing events that users will automatically be registered for when buying this membership.
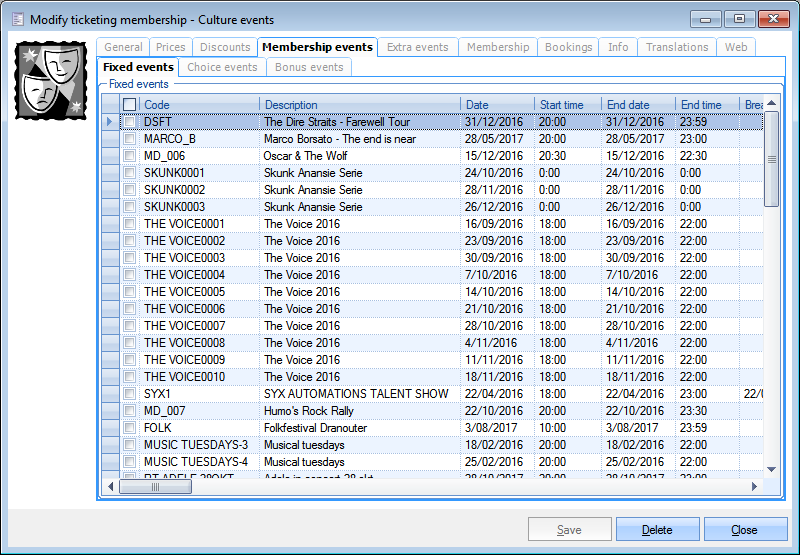
Sub-tab Choice events: Select the ticketing events that users can choose within their membership registration. It is possible to specify a minimum and maximum quantity of choice events.
Sub-tab Bonus events: Here you can configure the ticketing events which can be chosen as bonus event and also set a maximum number of bonus events which can be included in the reservation. Bonus events can be linked to a ticketing membership by ticking the check box.
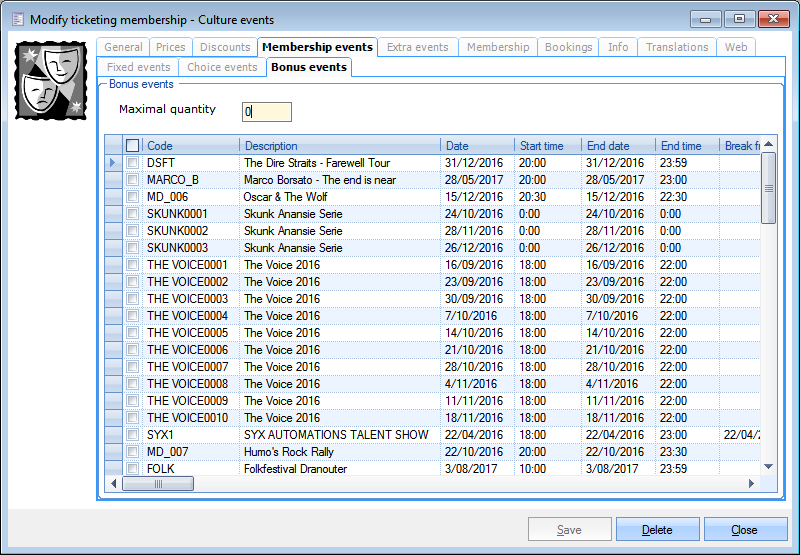
Anmerkung
When the same event is available in both the choice and the bonus selection, only one of them can be selected.
Tab Extra events: This tab is visible when the setting Allow booking extra tickets in membership flow is enabled. Here you can configure which events will be available to the end user as extra events during the ticketing membership flow.
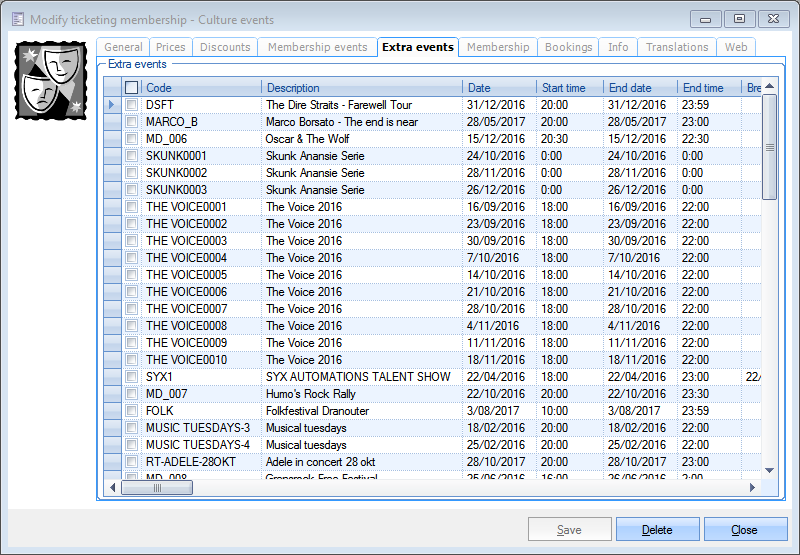
Anmerkung
Up-selling:
You can give membership holders the opportunity to buy tickets for these extra events while regular users cannot.
select one or more ticketing events as extra events in ticketing memberships
un-tick the check box Show on website on the event(s) or define a later from/till date
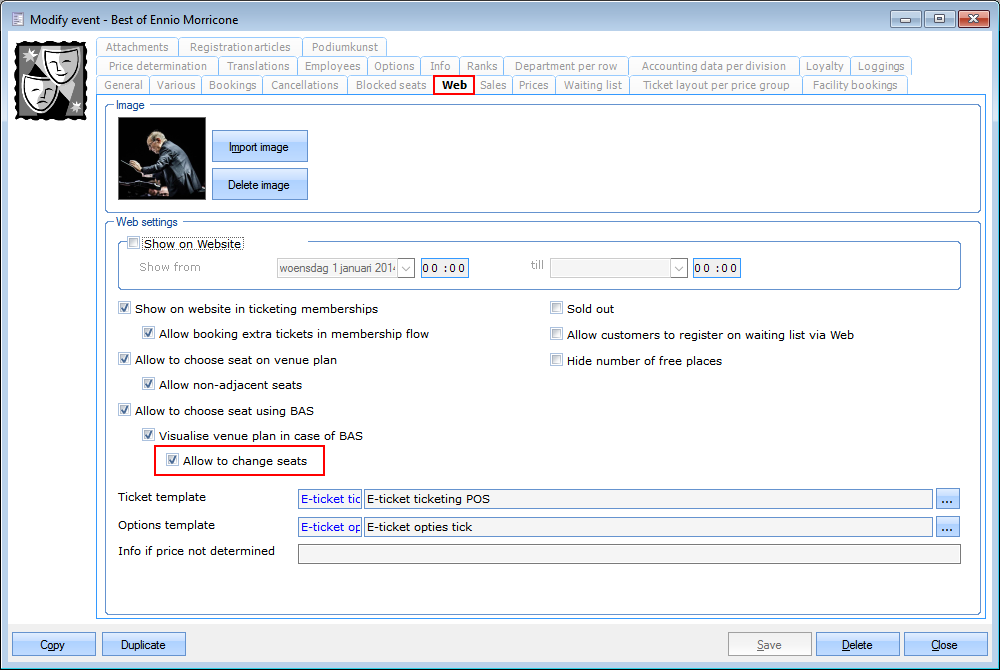
Possibility to change suggested seats
This new setting enables the end-user to change the seat selection after the BAS system was used. Go to Ticketing > Events, open an event and go to tab Web: a new setting Allow to change seats is available. When this setting is enabled, it will only work when both parent-settings Allow to choose seat using BAS and Visualize venue plan in case of BAS are also enabled. When one of these is not enabled, the new setting will not work either.
This setting is also available in Event series.
 |
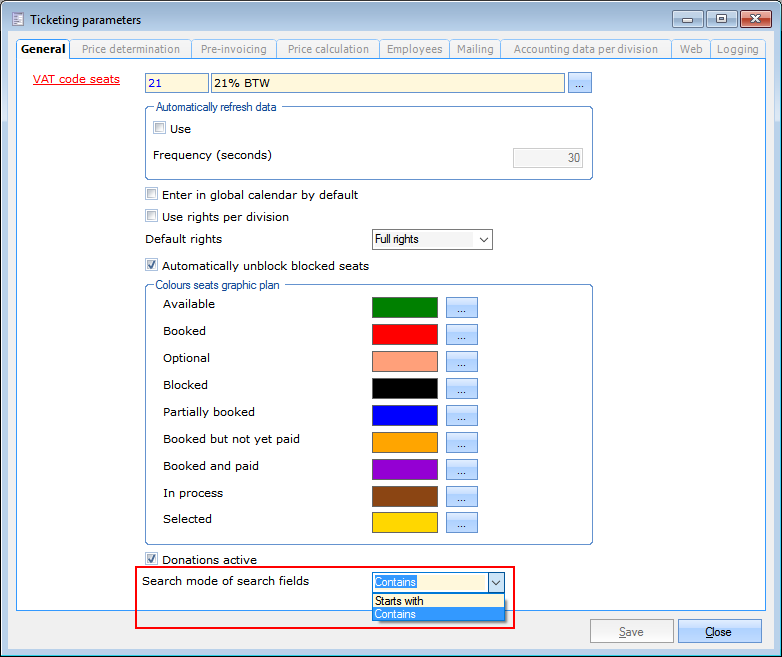
Ticketing search functionality improvement
The search functionality in the graphic bookings screen now has an improved auto-complete function. Go to Ticketing > Parameters > tab General and near the bottom of the tab you will find the new setting Search mode of search fields with a drop-down box: Starts with is selected by default (same as before), Contains has now been added to increase usability. When selecting Contains you no longer have to remember the exact name of the ticketing event.
 |
Course management improvements
Online visualisation capacity of membership and lesson groups on the web shop
End-to-end registration on the web shop
Add options to lesson group registration
You now have the choice to work with waiting lists or to let people register directly for the lesson group (Manager setting + change the type of the article to either Waiting list article or Lesson group article)
The bulk of these changes mainly affect the flow in the web shop, they are explained in the updated Web shop manual for version 4.2.0.
The following Course management-related UI changes have been made in Recreatex 6.2.0 itself.
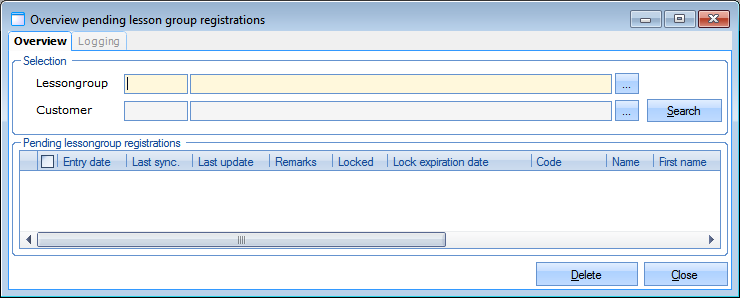
Pending registrations
From Recreatex 6.2.0 it is possible to manage pending registrations for course management.
Go to Course management > Visualisations > Pending registrations. You can consult how many registrations are pending and - after careful consideration - delete them if necessary. You cannot finalise the pending registrations for course management.
 |
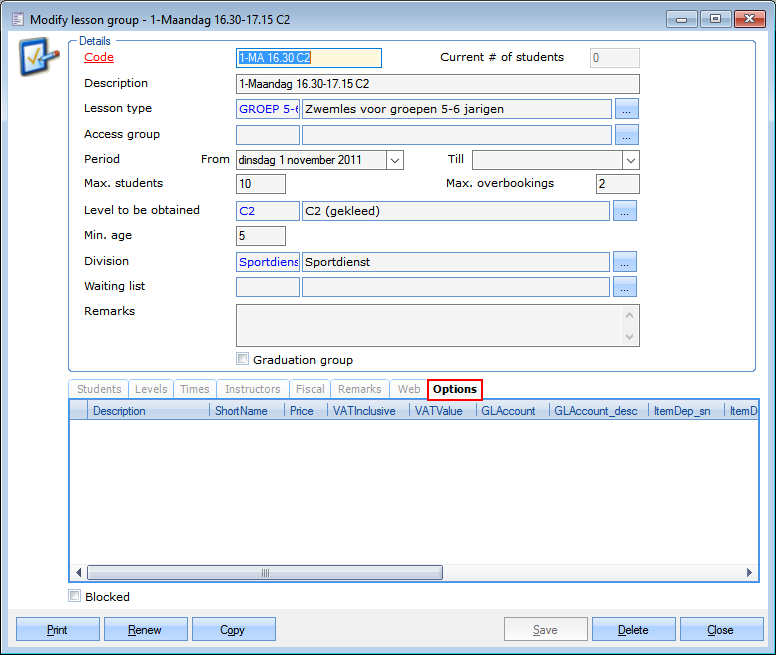
Add options to a lesson group
It is now possible to add options to a lesson group in Recreatex. Go to Course management > Lesson groups and open a lesson group. A new tab has been added: Options.
 |
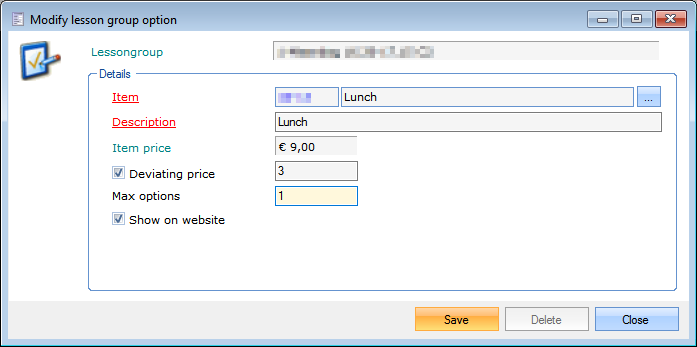
On this Options tab, you can create one or more options by right-clicking + New. The window Modify lesson group option will open. Select the article you want to add as an option. The normal price is shown and will be used in the calculations unless you specify a deviating price. Enable the setting Deviating price and enter the price you want to charge when this article is bought as an option. It is also possible to configure the maximum amount of times this option can be bought.
The setting Show on website is enabled by default; when disabled, the end-user will not be able to buy it online, but it will remain visible for the back office ReCreateX user.
 |
You can manually add options in the Recreatex back office. Make a manual registration or open an existing one and go to the Options tab.
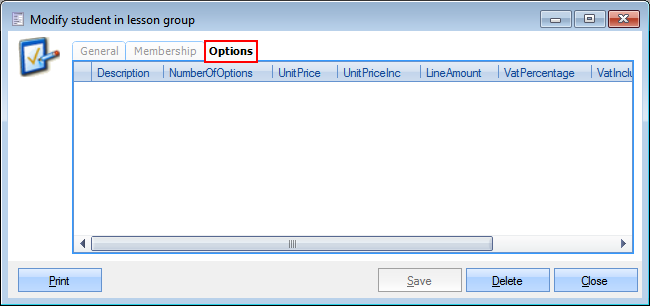 |
In the window Modify student in lesson group, perform a right-click + New to add an option.
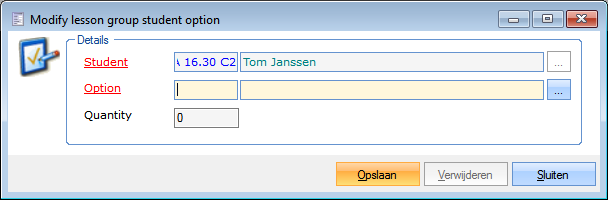 |
Select an option from the list of options.
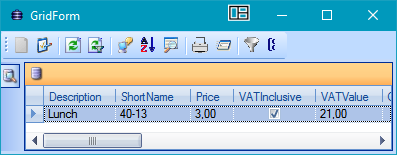 |
Warnung
When manually adding an option in the Recreatex back office there is no recalculation! This will not create a sale.
Anmerkung
Options are transferable from one lesson group to another, provided the new lesson group has the same options.
Improved eID integration
From now on the web shop customer will no longer have to leave the web page to install Java or other plugins because these are no longer required.
This new method uses certificates and it is the new default. However, it only works when using an https connection. In case of a regular http connection, the web shop will automatically revert back to the old method with external service.
A new setting has been added to the web shop manager and can be found under General > Settings > Users section Log in. It allows you to manually revert back to the old method.
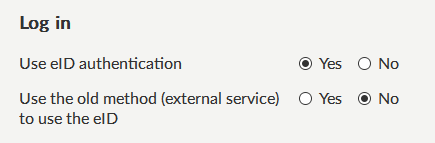 |
Anmerkung
When creating a new customer with the new method, only the name and the national register number are taken from the eID. Other data like the address is not taken.
The old method allows to take the address.
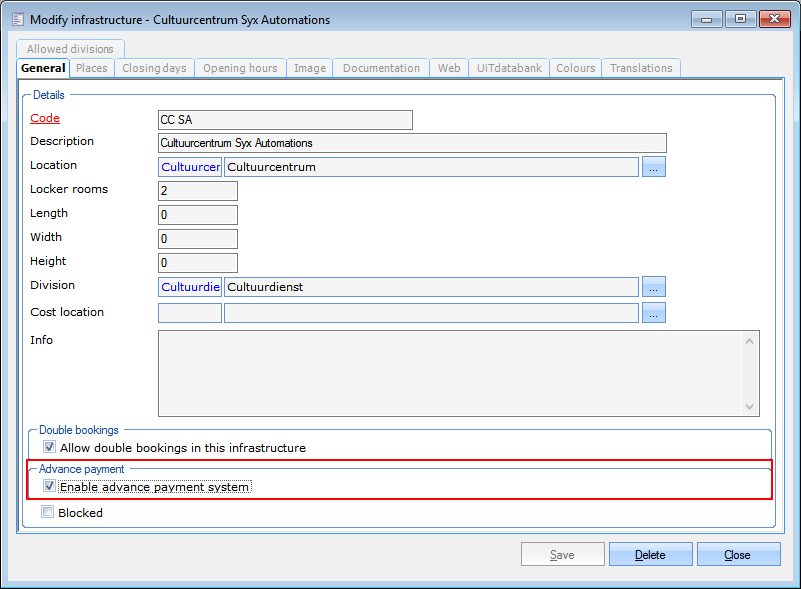
Advance payment system
The automatic advance payment system for bookings can now be enabled or disabled per infrastructure. Go to Bookings > Settings > Infrastructures and double click on an infrastructure. The new setting can be found near the bottom of the tab General. This setting gives you the possibility to set up advance payments for each of your infrastructures separately. These advance payment systems are configured in Bookings > Parameters > tab Pre(invoicing).
 |
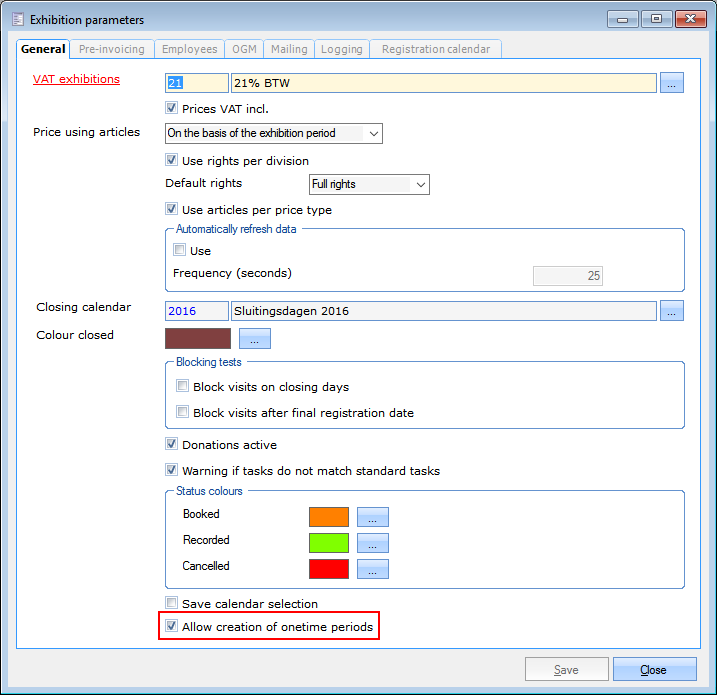
Exhibitions: disable/allow creation of onetime periods
The creation of manual periods can now be blocked during the selection of periods. A new setting has been added to the Exhibition parameters: Allow creation of onetime periods. This setting is enabled by default. When it is disabled, it becomes impossible to (accidentally) create new periods during the selection process. Only the previously configured periods can be selected and you can only proceed when a valid period is selected.
 |
Adyen VX680
The Adyen VX680 payment terminal is now supported within Recreatex. The main benefits of this mobile terminal are:
WiFi connection (802.11b/g/n)
Integrated contactless reader for faster payments (NFC, MiFare)
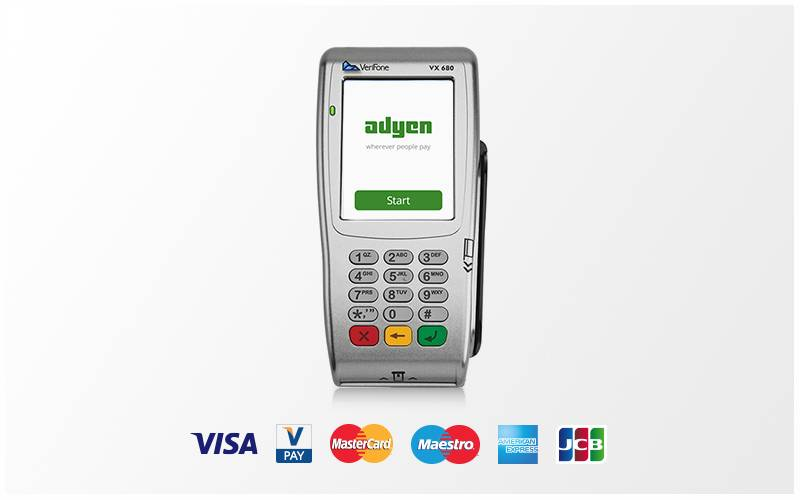 |
For a full user manual and technical specifications, please consult the manufacturer's technical documentation.
Direct debit improvements
Added configuration options in paperless direct debit flow
Dynamic template for the confirmation page
Choose the steps to visualise in the process
Since these changes are all web shop related, they are explained in the updated Web shop manual for version 4.2.0.