Letting
Warnung
The functionalities in this chapter are only applicable if you have a license for the Letting module.
In this part the integration of the letting module in the ReCreateX POS is explained, such as registering rentals and finding and settling rental orders.
Select letting article
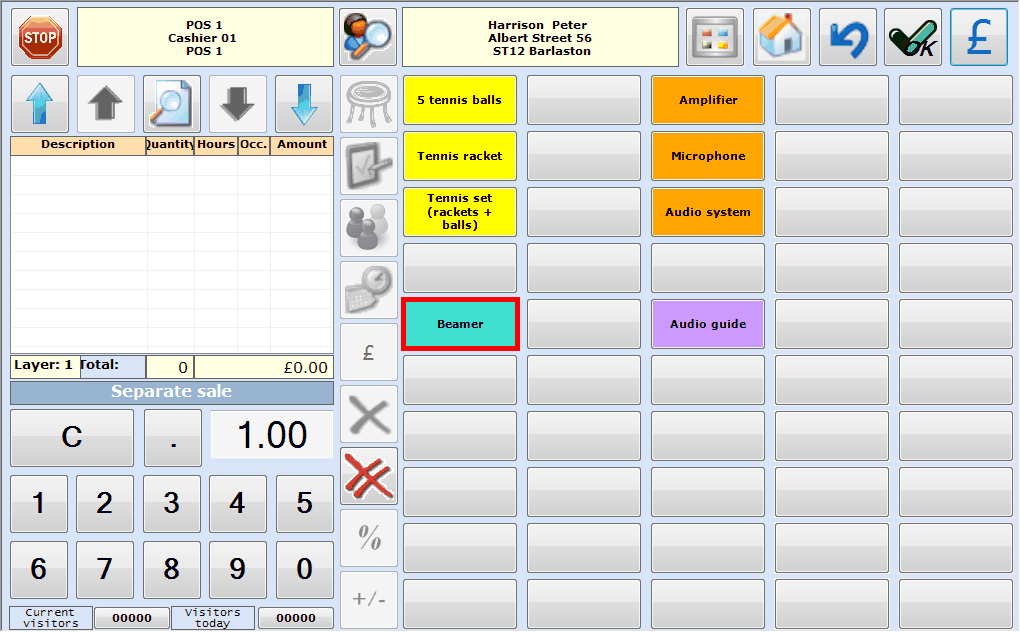
Registering a rental is equal to a conventional POS sale, in case of which you choose the desired letting article on the POS menu.
 |
Anmerkung
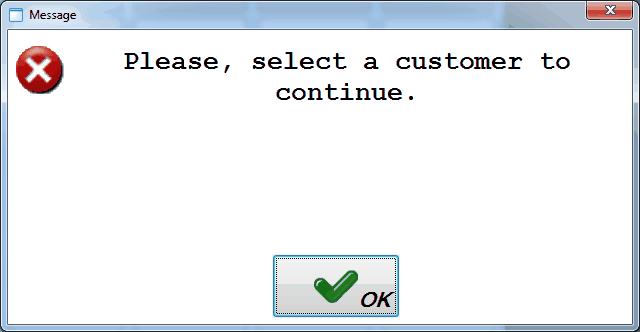
If it has been defined on the current point of sale that rentals can only be registered on customer name (customer mandatory), the message below will fist appear if you hit the letting article, after which you have to select the desired customer.
 |
Register rental
After the selection of the rental article, more detailed settings of the rental can be determined. Dependent on the POS parameter Manual price group determination, this can be done in two different ways.
Standard:The rental is registered without manual selection of a price group and the price is calculated on the basis of the customer's price group and set up prices of the rental.
Through manual price group selection:The rental price is calculated on the basis of the manually selected price group, irrespective of the price group linked to the customer.
Standard
If rentals are registered at the cash register without manual price group selection, the window below will appear after hitting the desired letting article:
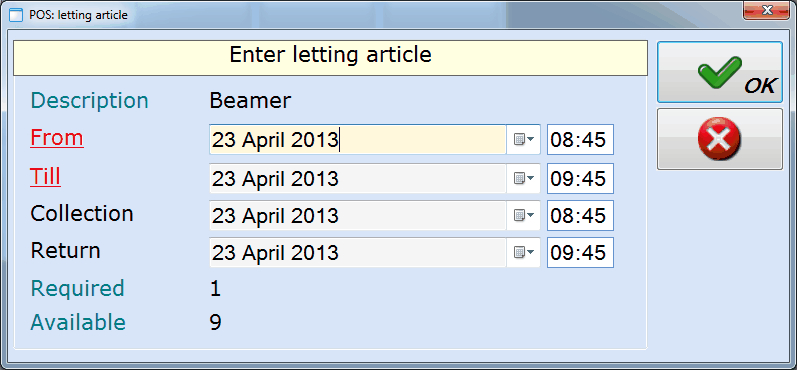 |
Description | The description of the letting article. |
From... Till | The rental period. Initially, the Default rental duration of the letting article is filled in (here: 1 hour). |
Collection/Return | The planned collection/return time of the rental. AnmerkungWhether the system asks to fill in the collection/return time or not, can be set up on point of sale level. If it has been defined that the planned collection/return time does not have to be specified, these fields will not be visible in the window above. |
Required/Available | An indication of the number of pieces that is asked for on the one hand (in the current order) and the number of pieces that is still available on the other hand. |
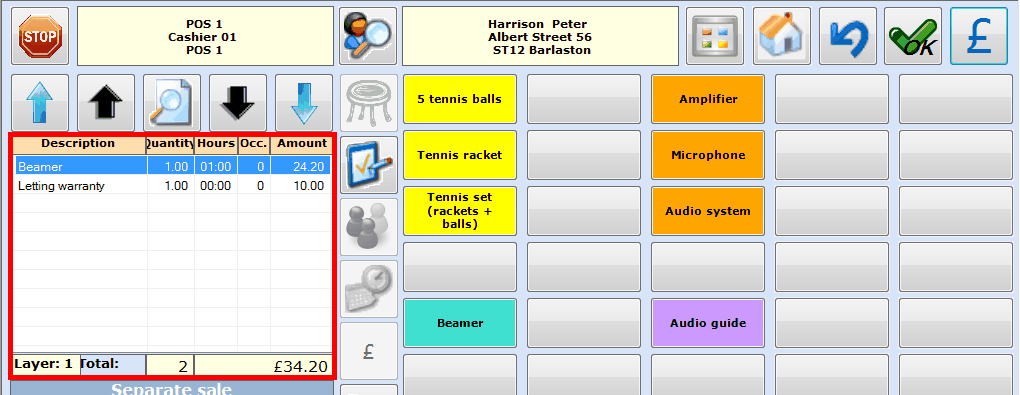
If you confirm by clicking on  , the rental order will be added to the list of chosen articles.
 |
Anmerkung
In case the standard method is used to register a rental (without manual price group selection), the quantity next to Required is initially always 1 (piece). If several pieces of the article can be rented, you can do so after entering the times by clicking on the button  in the POS selection screen.
Afterwards, you will be able to finalise the registration of the rental. See paragraph Book/record.
Through manual price group selection
If rentals at the cash register are registered on the basis of manual price group determination, the window below will appear after hitting the desired letting article:
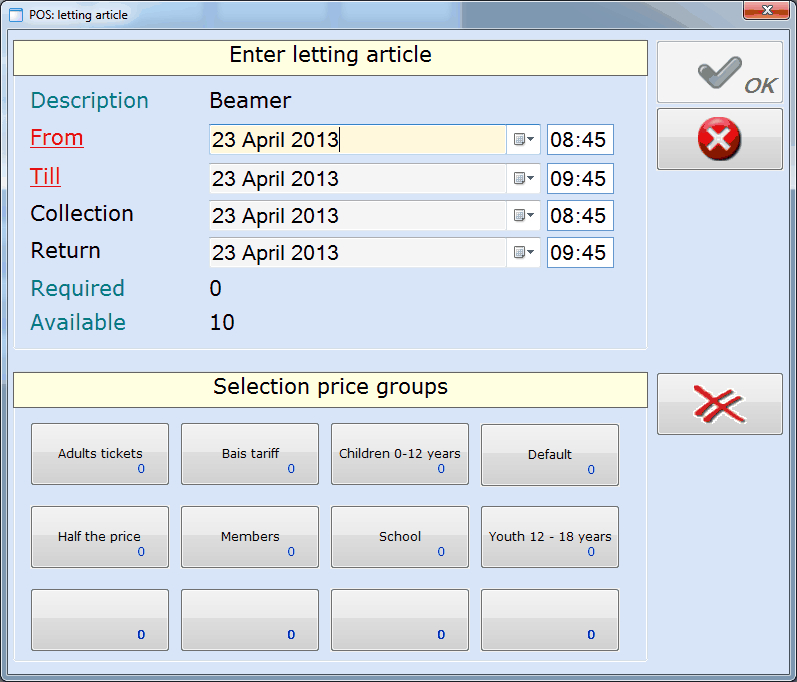 |
The upper part of the window is identical to the window that appears in case the standard method is used to register rentals (see previous paragraph). Once the times have been specified, you also have to determine the number of articles to be rented per price group.
You can do so by clicking on the price group button in question and by filling in the desired number of articles.
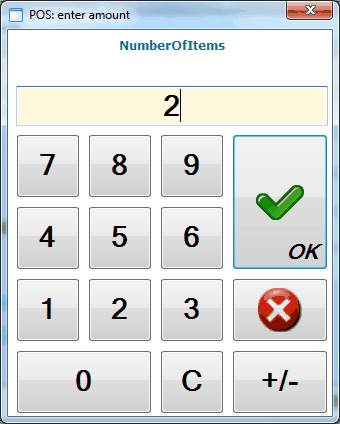 |
Anmerkung
This method also allows to rent articles for different price groups within the same registration.
If you have specified the times, the number of pieces and the price group(s) of the rental, you can confirm by clicking on  , after which the rental is added to the list of chosen articles.
 |
Afterwards, the registration of the rental can be finalised. See next paragraph.
Book/record
Once all rental data have been defined and if the rental in question has been added to the list of chosen articles in the POS selection screen, the registration of the rental can be finalised.
There are two different ways to register rentals:
Record: the rental in question is immediately recorded and paid for using a certain payment method. In case you decide to pay the rental by invoice, the rental will also be considered as recorded.In order to record the current rental, you have to click on
 in the selection screen or press <Enter> to continue to the payment screen in which you can settle the rental as you would do in case of a conventional POS sale (select payment method(s) and confirm).
Booking: the rental in question is booked, but paid only later (at the cash register, back-office, invoice, ...).
Warnung
Booking and not (yet) paying is only possible if this is allowed on the point of sale. (see Salesmanual 'GENERAL - Sales')
In order to register the rental without recording it, you don't have to click on  in the selection screen but on
  . If one or several warranties are linked to the rental, the message below will appear first:
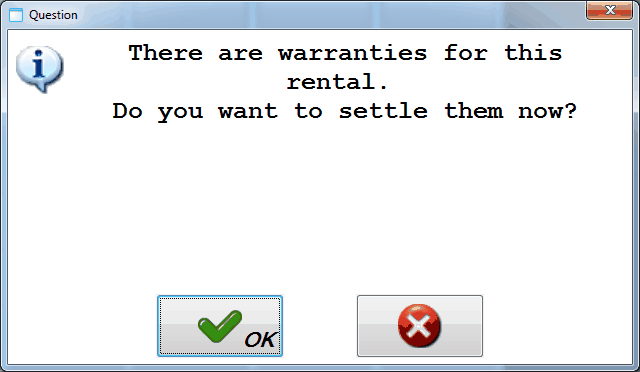 |
Here, you can decide if you already want to settle the warranties for the rental or not.
Anmerkung
If you decide to settle the warranties already, this will lead to a POS sale (only of the warranties of course).
Finally, the following message will appear:
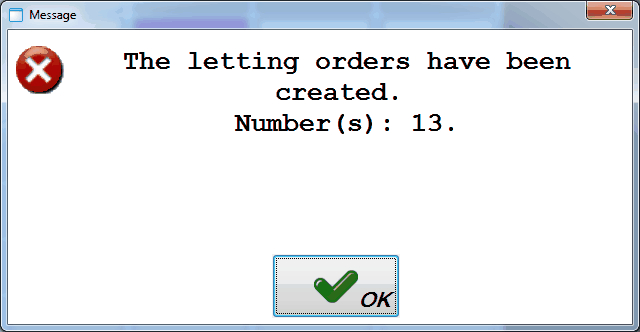 |
The created booking can then later be settled at the cash register or in the module Letting.
Anmerkung
Despite the fact that it is not obligatory to record a rental on the name of a customer (customer mandatory), it is strongly advised to do so in function of finding back the rental later to record/pay it.
Find and settle rentals
Booked letting articles can not only be paid for in the letting module itself, but also at the cash register.
Warnung
Finding and settling booked letting articles is IMPOSSIBLE with the simplified POS layout.
Anmerkung
Settling a letting order is also possible using the extra POS function Find letting orders (See next paragraph).
In order to pay for booked letting articles at the cash register, you first have to search the customer in the selection screen by clicking on  :
:
 |
Afterwards you can click on  in the right upper-hand corner or press <Enter> to continue to the payment screen, in which you will be able to see the outstanding letting amounts.
 |
See next page.
Under the tab Letting you can select the letting orders in the tab Orders and/or the warranties in the tab Warranties you want to pay now:
 |
 |
Afterwards, you can reselect the tab Payments and you will notice that the amounts in question are put in the section To be paid.
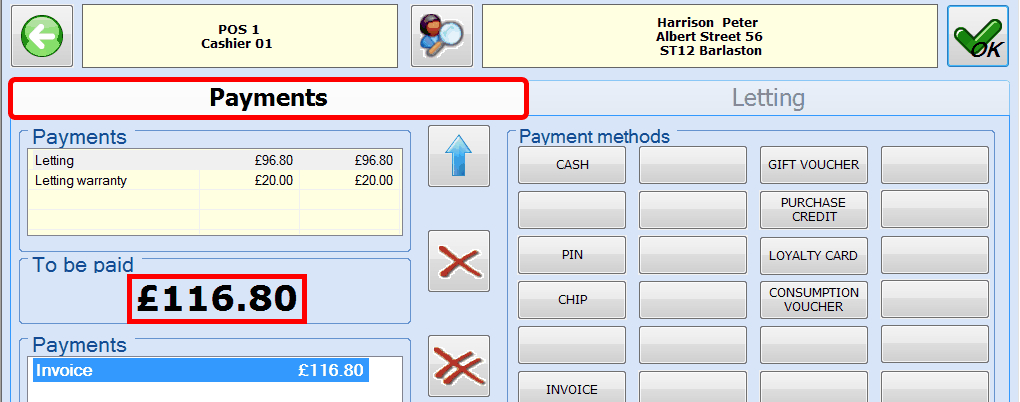 |
Select the desired payment method(s) and click on  or press <Enter> to register the sale and print the receipt.
Find letting orders (extra POS function)
Anmerkung
If you search and (possibly) settle a letting order using the extra POS function, the rental article is always considered as being returned.
In order to find existing letting orders in the cash register, you have to click on  in the window POS: extra functions.
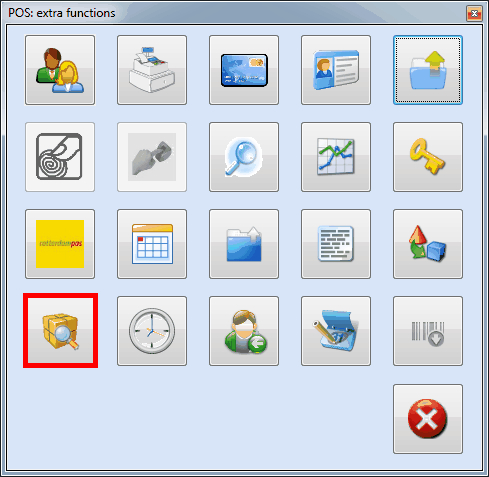 |
The window Find letting order will appear in which initially all outstanding rentals of the default POS customer (here: Cash register sales) are listed.
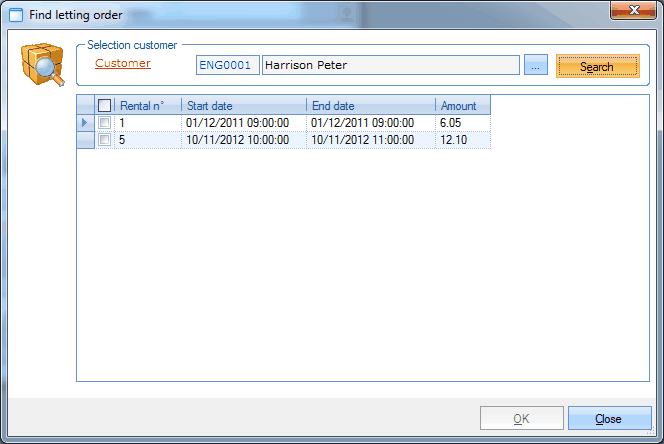 |
In this window you can select the desired rental period and the desired customer.
If you click on Search, all letting orders will appear that are linked to the customer for the specified period.
Next, you can tick off the orders for which you want to register the return and/or payment and click on OK.
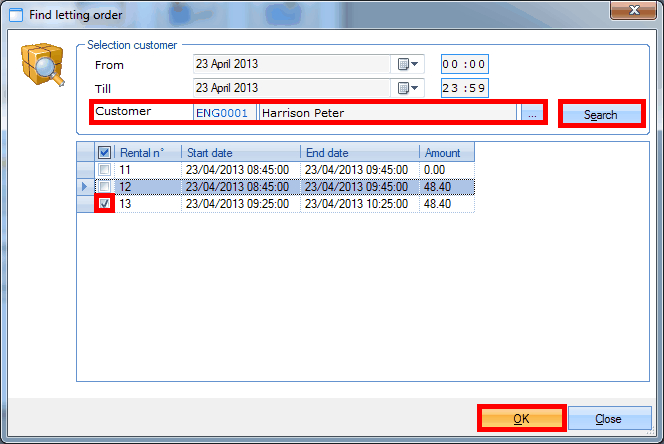 |
The window below will appear:
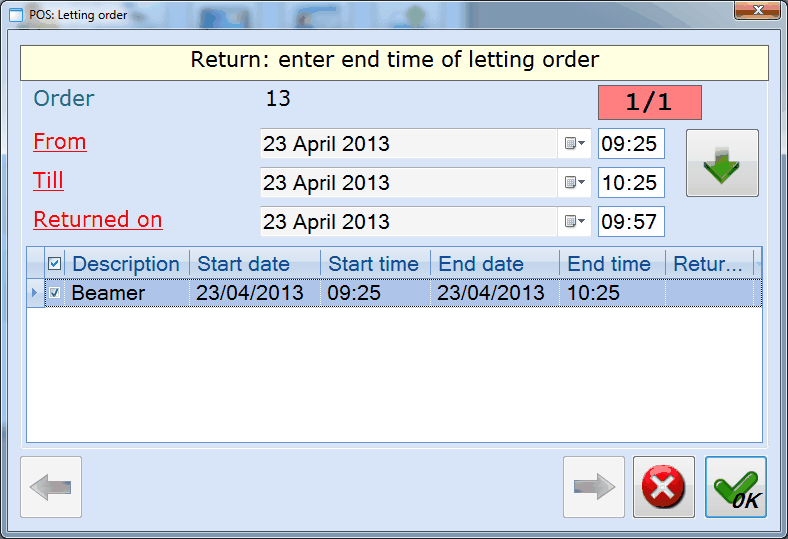 |
If required, this window allows you to modify the return date and time before registering the return by clicking on  . If the outstanding rental is not yet (completely) recorded/paid, the necessary sale will be generated after confirmation in the POS selection screen and will still have to be registered (in accordance with a conventional POS sale).
Anmerkung
If the symbol  is visualised in the column Returned too late, this means that the current return date and time are later than the planned return date and time of the letting order. As opposed to a registration in the Letting module itself, no fines will be automatically charged in such cases. If required, you will have to do this manually, for example by registering a fine using a button on the POS menu.