Recreatex backoffice configuration
This guide describes all Recreatex backoffice configuration options for the QR ordering app. The configuration steps are marked as:
mandatory: must be configured for the correct functioning of the QR ordering app
recommended: enhancing user experience but not affecting the functioning of the app
optional: can be used if applicable (e.g. type of article where mandatory choices need to be specified).
Configure the sales articles
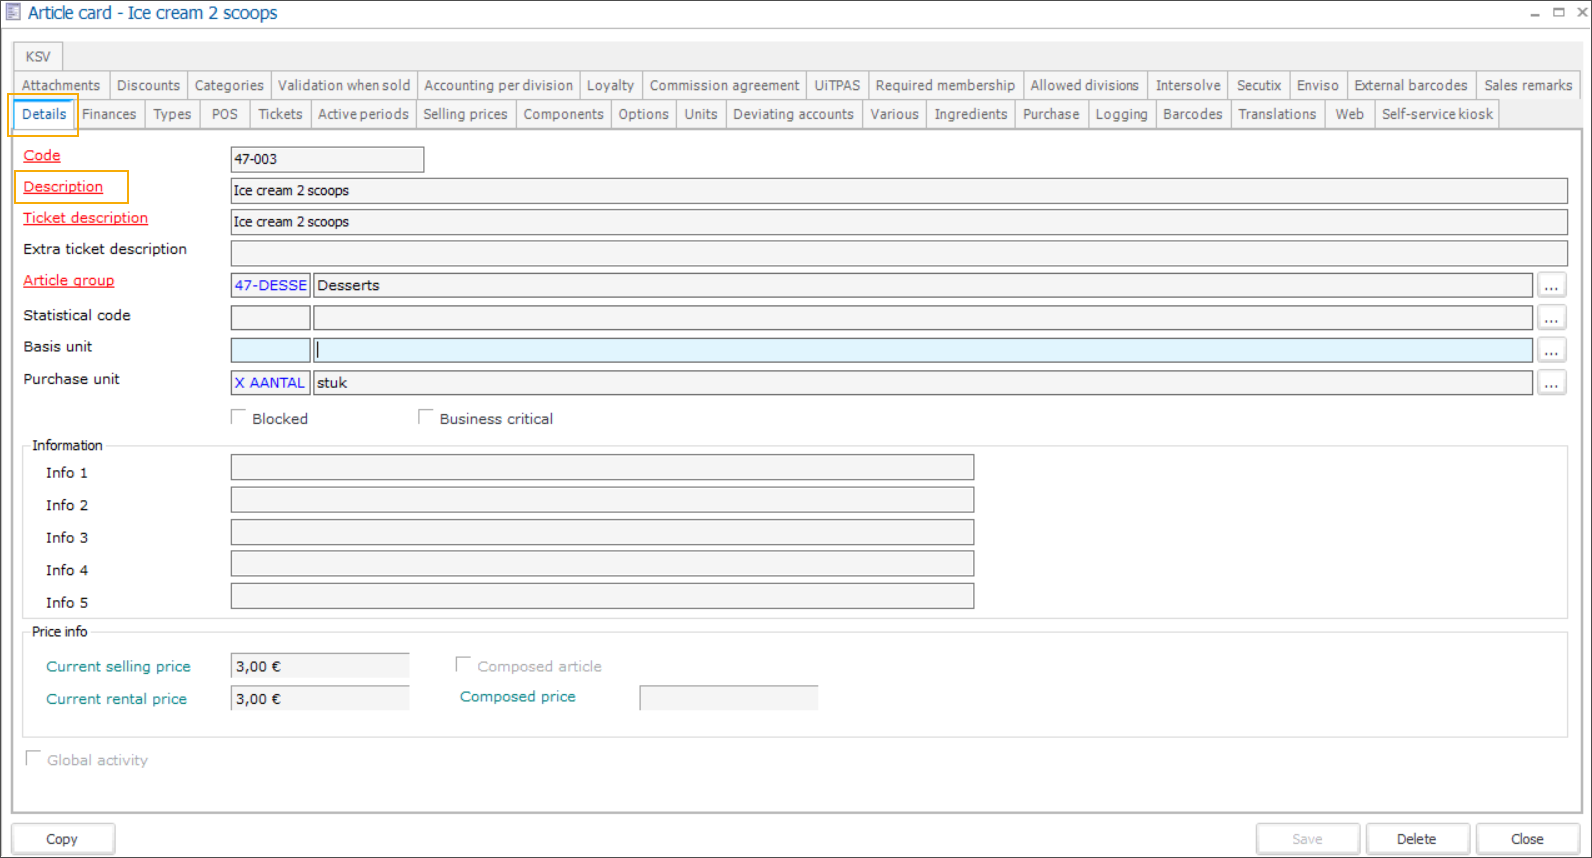
Edit article description
The article description is mandatory.
Go to the module General > Basic data > Articles > Articles and open the article card. In the tab Detail , review the field Description and adjust the text if necessary.
Provide an accurate and correctly spelt description that will be visualized in the app and included in the full-text search.
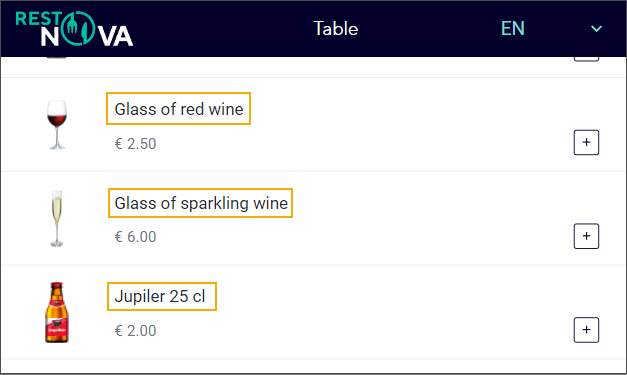
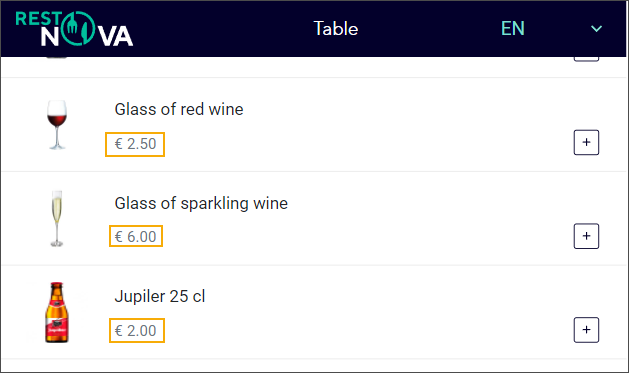
Configure selling prices
Selling prices are mandatory.
Go to the module General > Basic data > Articles > Articles and open the article card. In the tab Selling prices, modify or add prices that will be visualized in the app.

Make articles available for Webshop
This setting is mandatory.
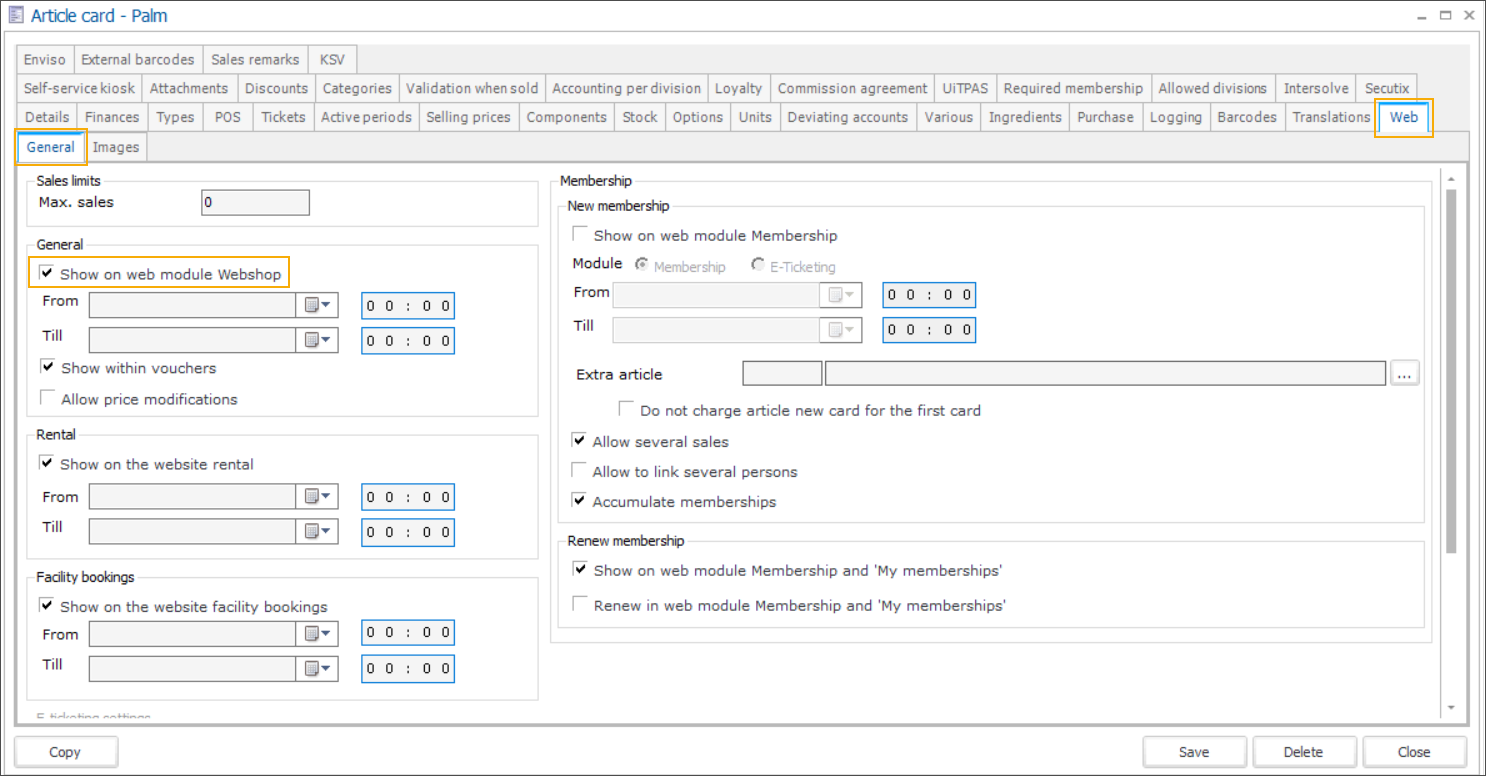
Go to the module General > Basic data > Articles > Articles and open the article card. In the tab Web > General select the option Show on web module Webshop.
Add an image
An image is recommended.
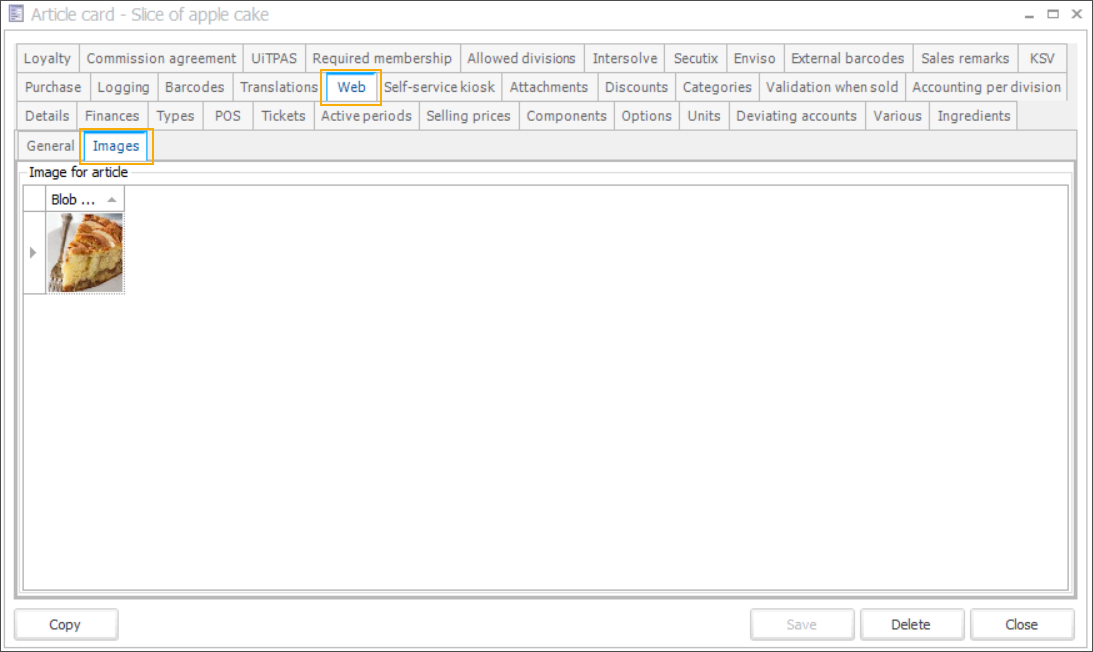
Go to the module General > Basic data > Articles > Articles and open the article card. In the tab Web you can upload an image per article.
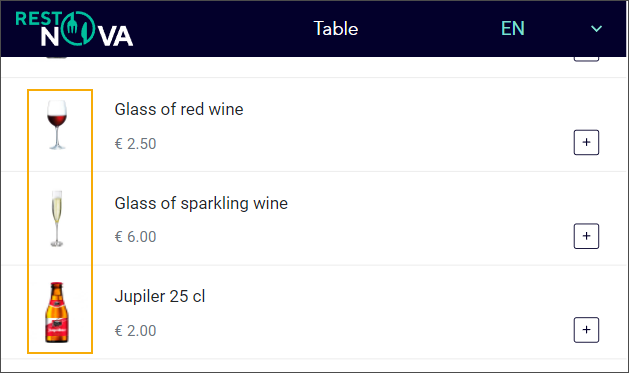
Adding images for your articles can enhance the customer experience and speed up the ordering process.
Anmerkung
If you have multiple pictures for an article, only the first picture that will be displayed in the app.
Add a short description and a detailed description
A short description and a detailed description are recommended.
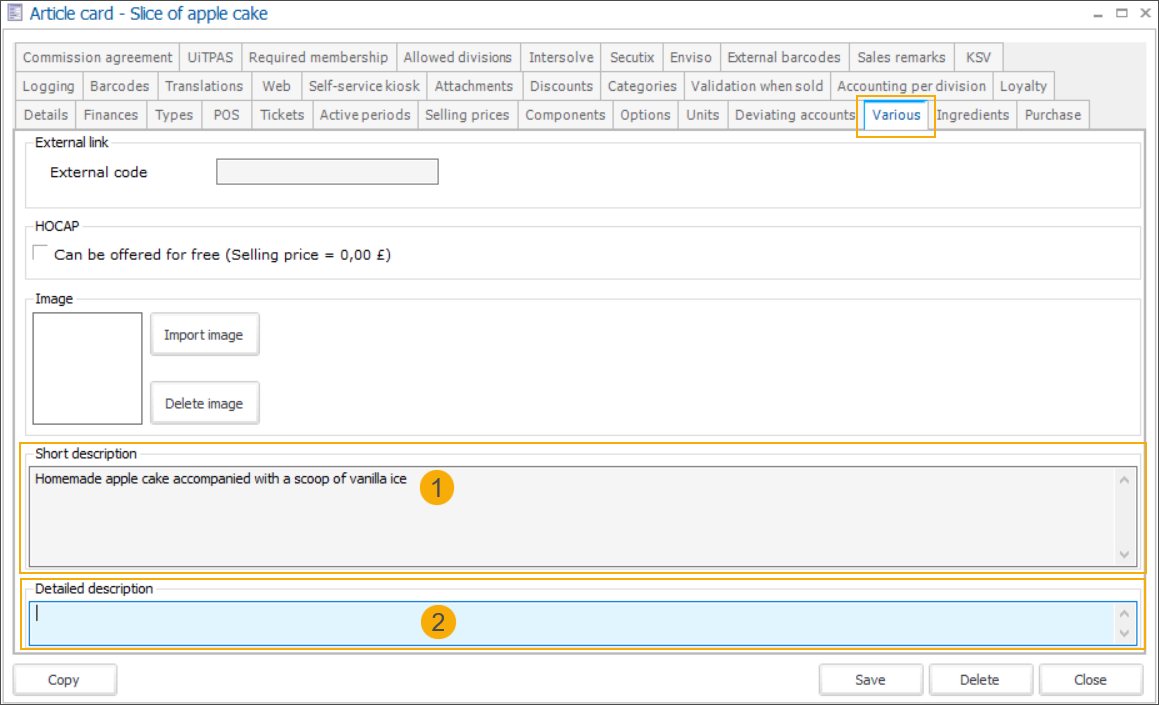
Go to the module General > Basic data > Articles > Articles and open the article card. In the tab Various, add a Short description (1) and a Detailed description (2). Make sure both descriptions are accurate and correctly spelt.
Anmerkung
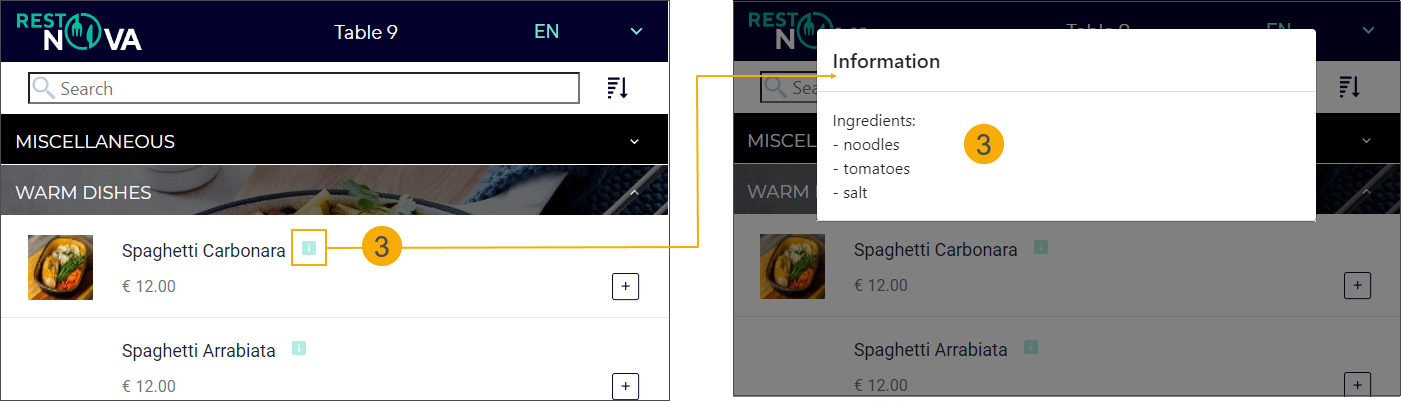
The Short description will be displayed as additional information (3) in the app and will be considered in the full-text search. This field can be used for any kind of information that should be visible to the customer, e.g. list of ingredients.
The Detailed description is not visualized in the app, but it is considered in the full-text search.
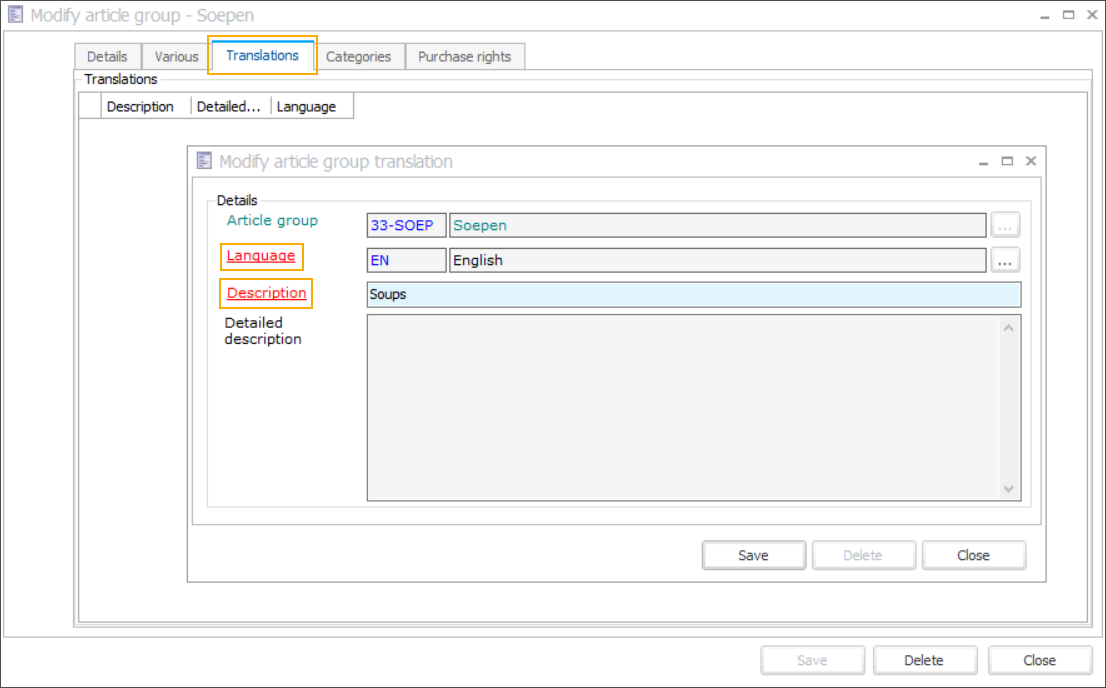
Add translations
Translations are recommended.
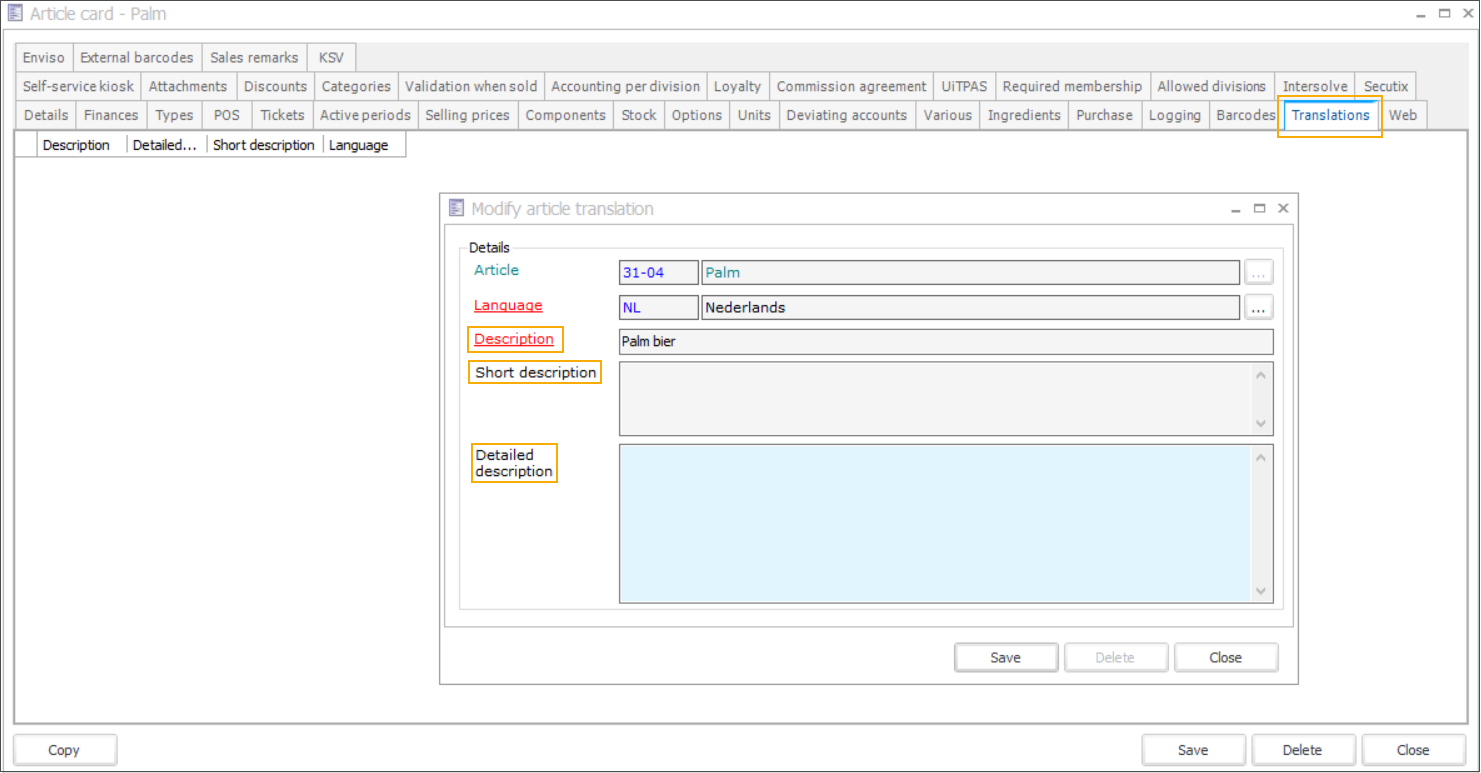
Go to the module General > Basic data > Articles > Articles and open the article card. In the tab Translations, edit or add new translations for each language.
You can provide translations of the Description to show translated names of the articles on the menu and add translations for the Short description and Detailed description to help the non-native customers search efficiently.
Wichtig
If no translations are provided for a particular language in the tab Translations, the app will display the Description provided in the tab Details. Short description and Detailed description will be taken from tab Various.
Set up ingredients
Adding ingredients is optional.
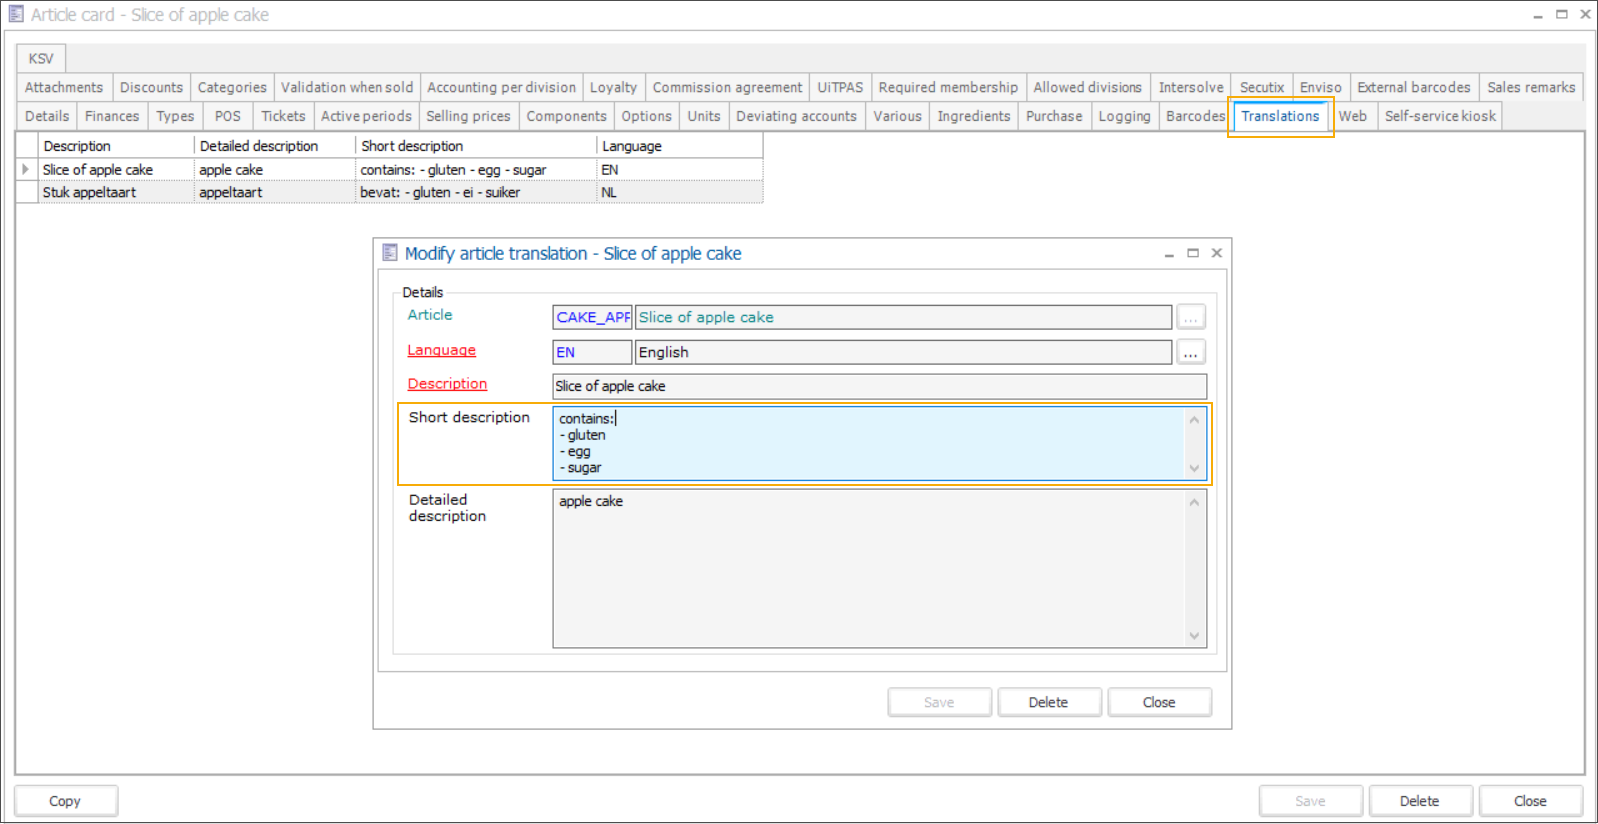
Go to the module General > Basic data > Articles > Articles and open the article card. In the tab Translations, specify all relevant ingredients in the field Short description.
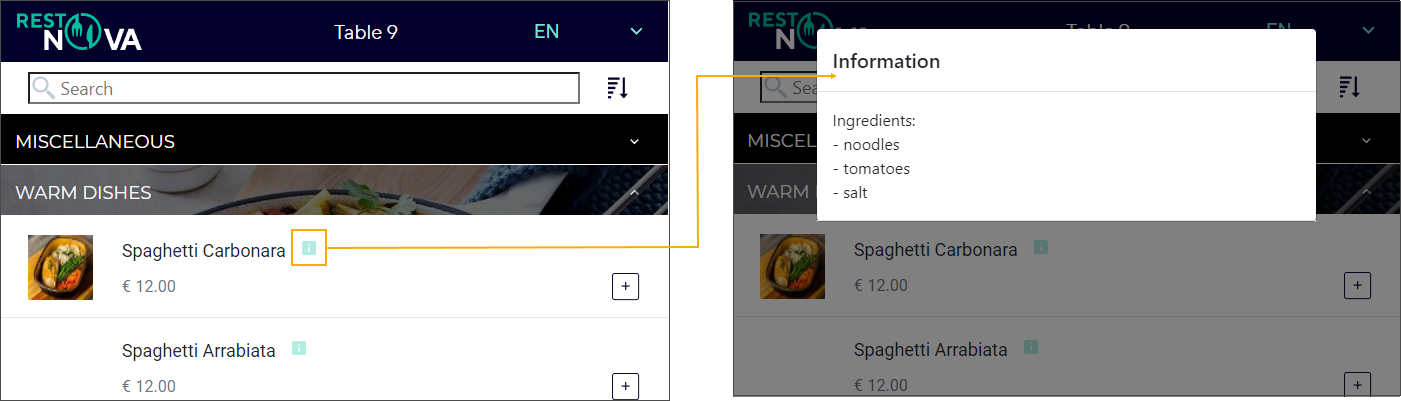
You may want to list here e.g. main ingredients or even possible allergens in a specific meal. The information will be displayed in the app behind the info icon  , next to the article.
Set up options and possibilities
Adding article options and possibilities is optional.
Go to the module General > Basic data > Articles > Articles and open the article card. In the tab Options, you can specify which additional options are available per article.
Select Mandatory choice in the tab General (1) if it is necessary that the customer picks one of the possibilities.
Add translations for your options under the tab Translations (2).
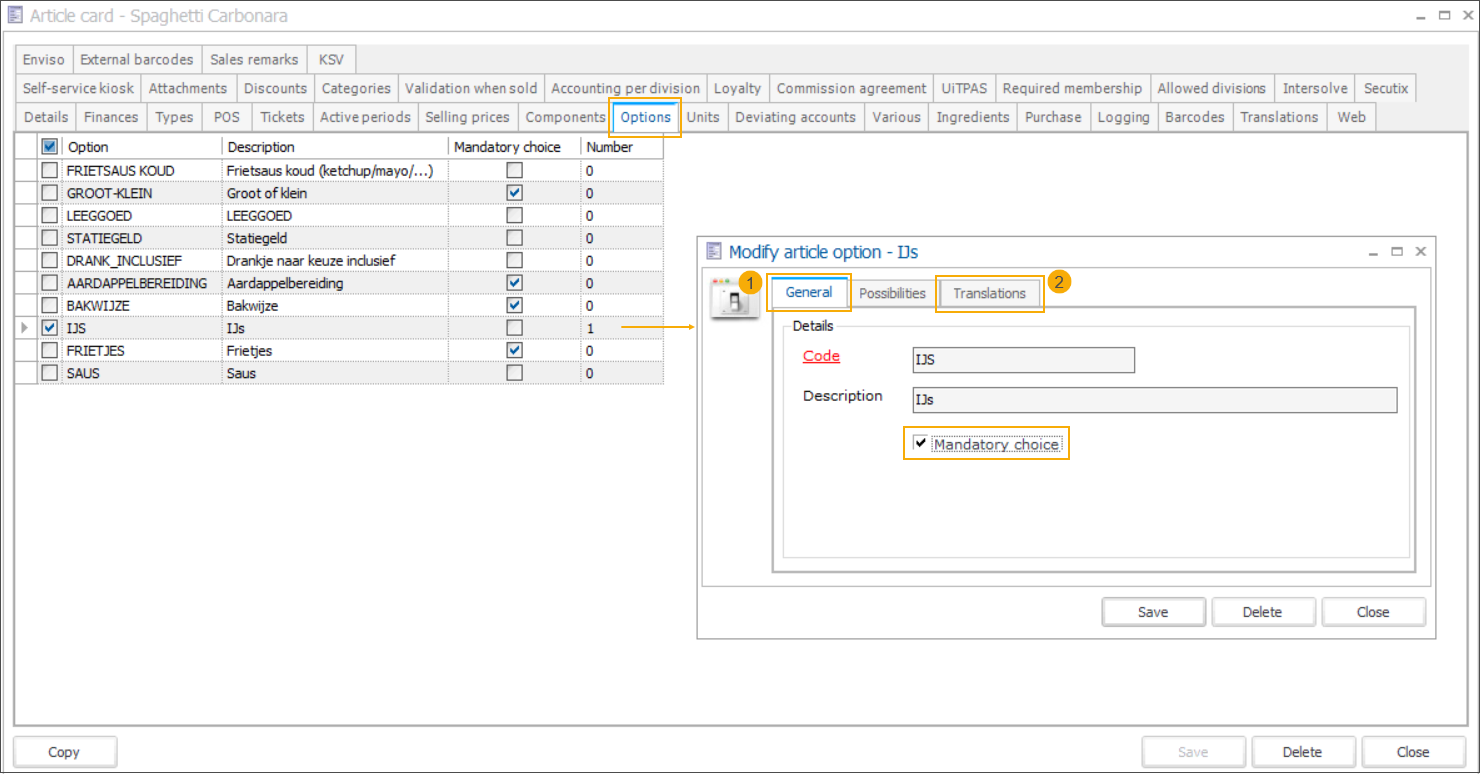
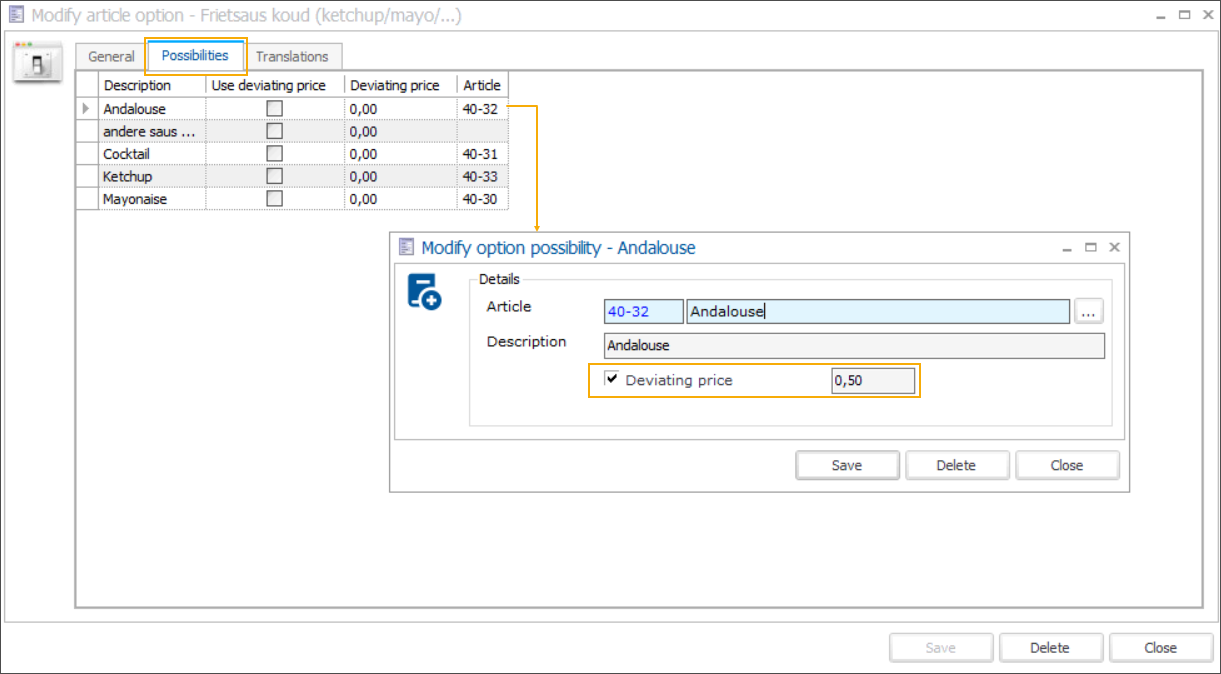
Per option, you can further specify a number of possibilities, under the tab Possibilities.
Anmerkung
You can add option possibilities easily by adding only a Description. However, if an option possibility requires a translation and a price, it has to be created as an article.
If an option possibility is created and added as an article, it is possible to set a Deviating price that will overwrite the price defined in the related article.
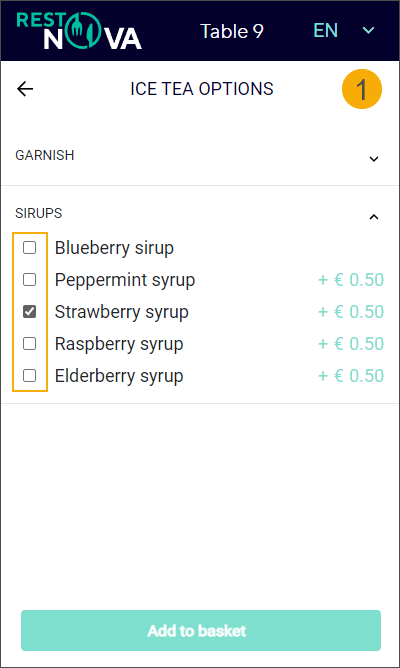
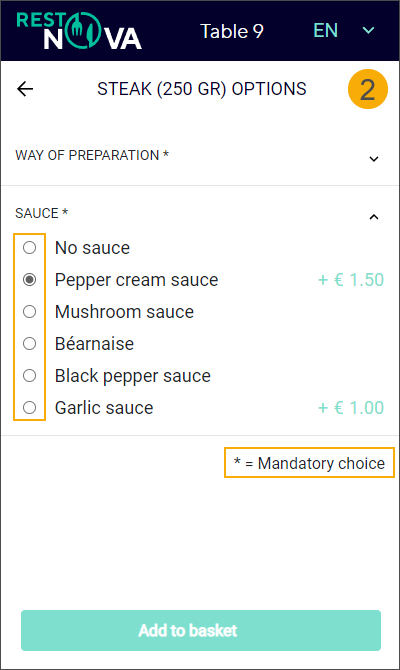
All options and mandatory choices with possibilities are presented to the customer upon selecting the article from the app menu.
Options
Mandatory choices
Configure article groups
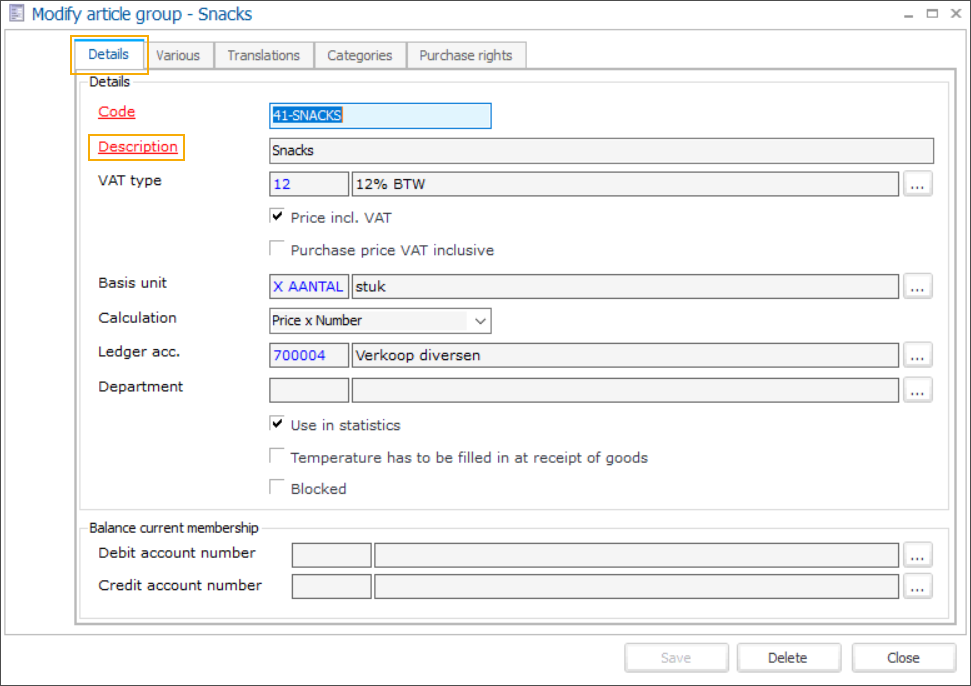
Edit article group description
The article group description is mandatory.
Go to General > Basic data > Articles > Settings > Article groups and open the article group. In the tab Detail, review the field Description and adjust the text if necessary.
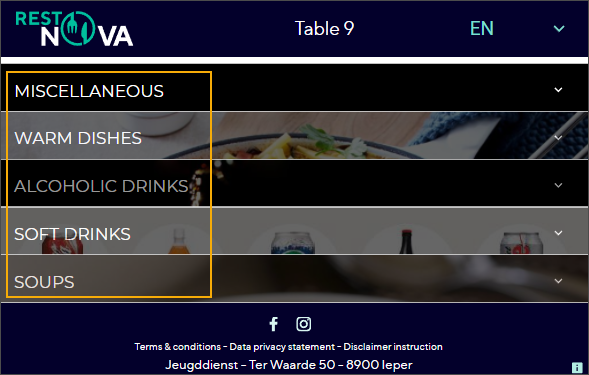
Provide accurate and correctly spelt descriptions which will be displayed on the main page of the app, as the menu categories.
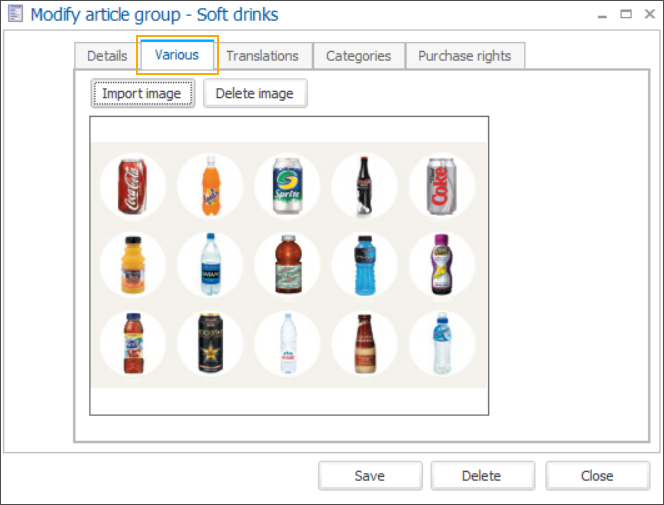
Add an image
An image is recommended.
Go to General > Basic data > Articles > Settings > Article groups and open the article group. In the tab Various, import an image per article group.
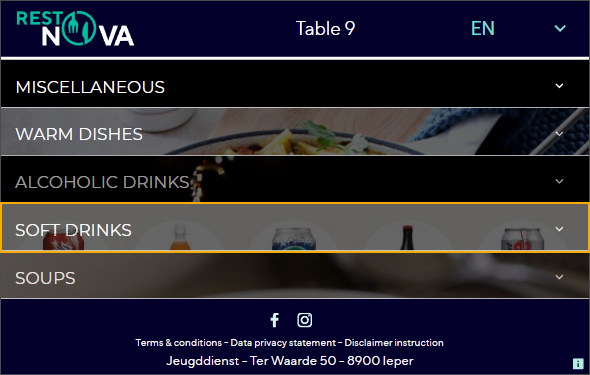
The image will be displayed on the main page as a background of each menu category.
Add translations
Translations are recommended.
Go to General > Basic data > Articles > Settings > Article groups and open the article group. In the tab Translations, edit or add new translations for each language.
Wichtig
If no translation is provided for a particular language in the tab Translations, the app will automatically display the descriptions provided in the tab Details.
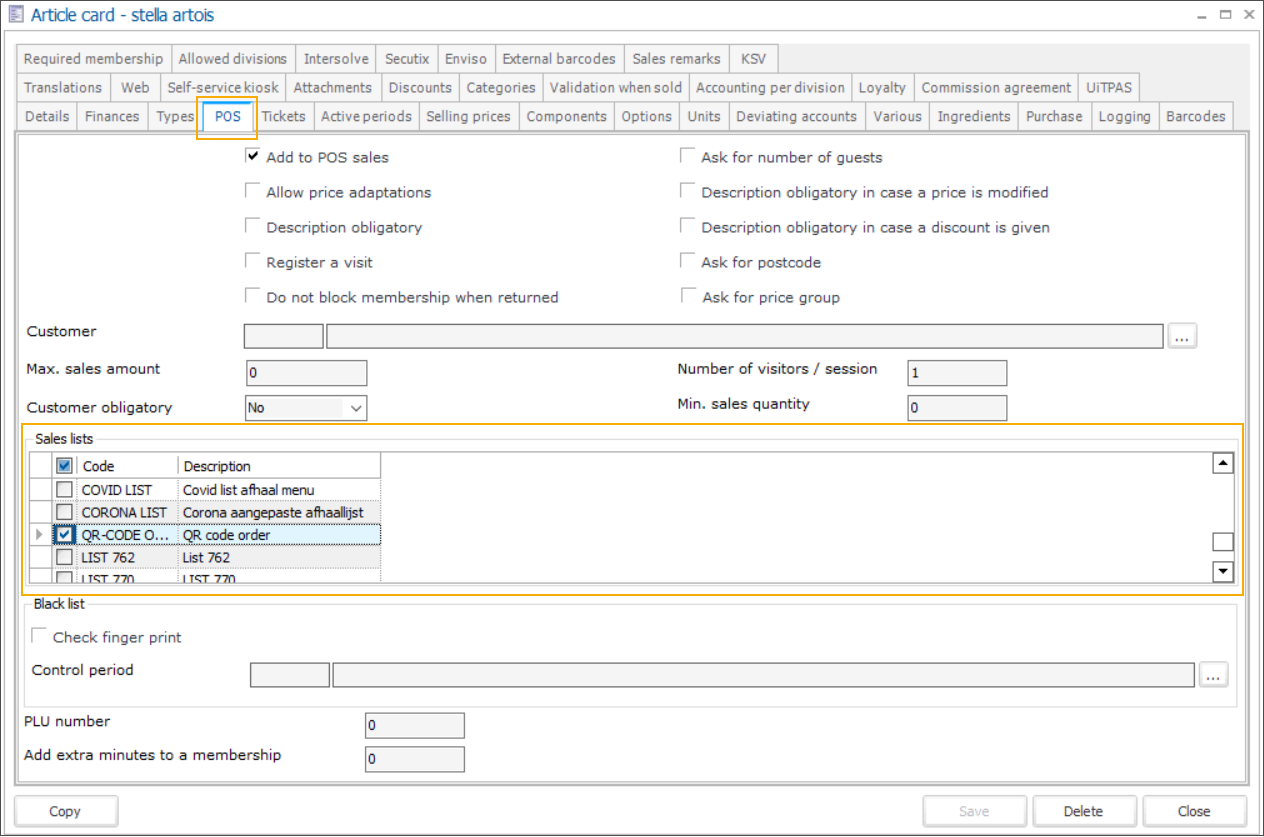
Configure the sales list
This step is mandatory.
You can add articles to the relevant sales list during the article configuration (article card) or by directly editing the sales list:
Go to General > Basic data > Articles > Articles and open the article card. In the tab POS, under the section Sales lists, select the sales list created for the QR code ordering app.
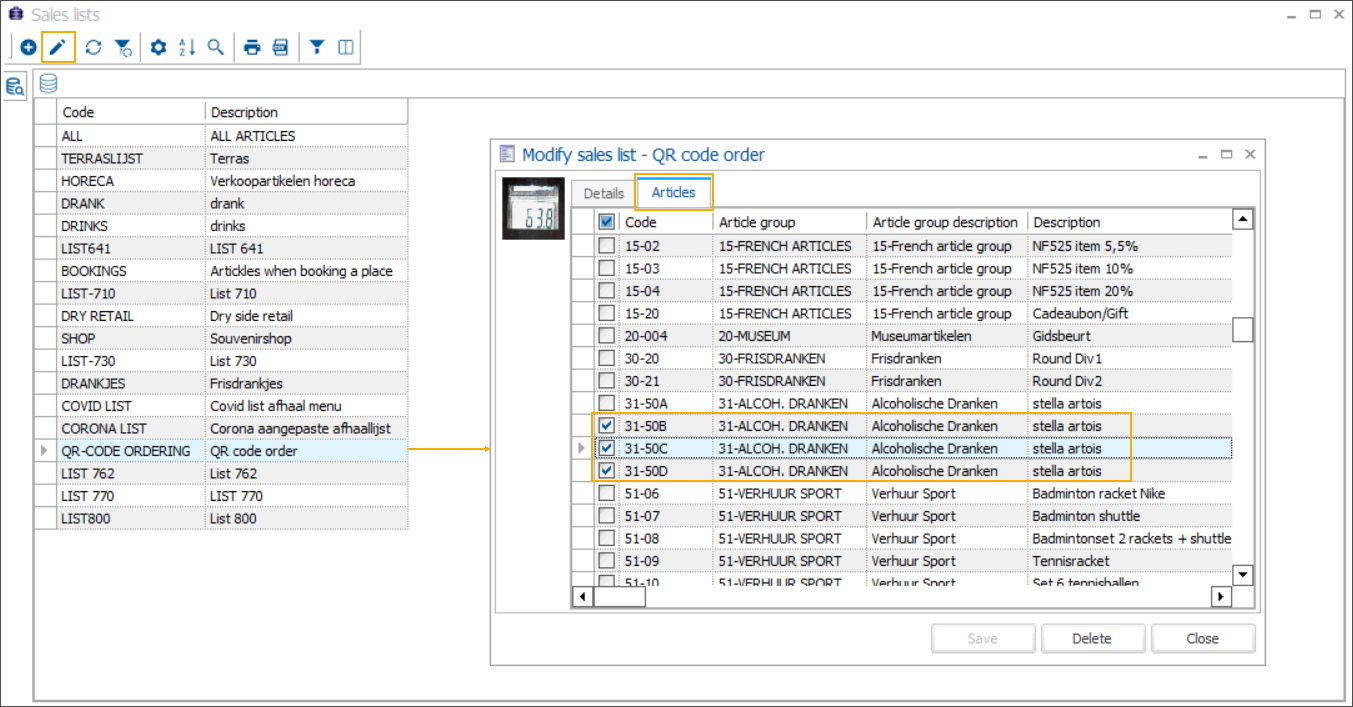
Go to POS > Settings > Sales lists and open the relevant sales list. In the tab Articles, select all articles that need to be included in this sales list.
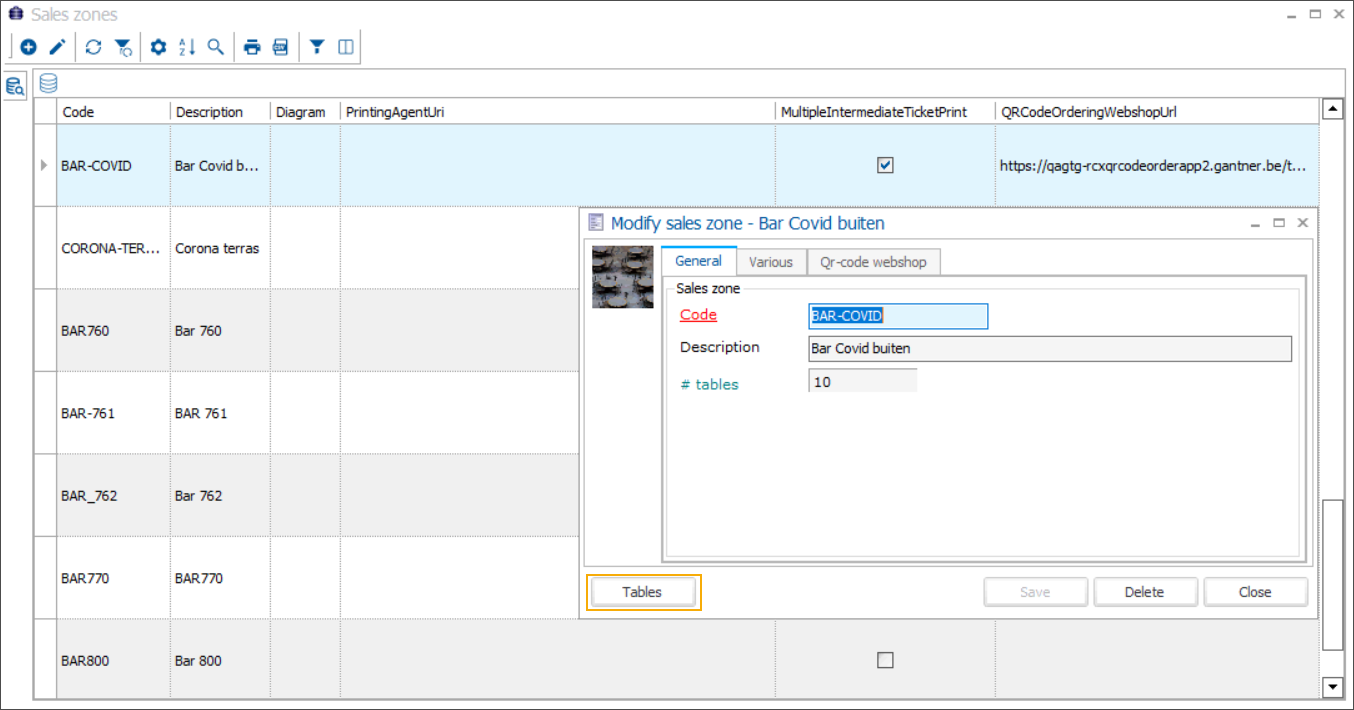
Configure sales zones
Set up tables in the sales zone
Numbered tables in sales zones are mandatory.
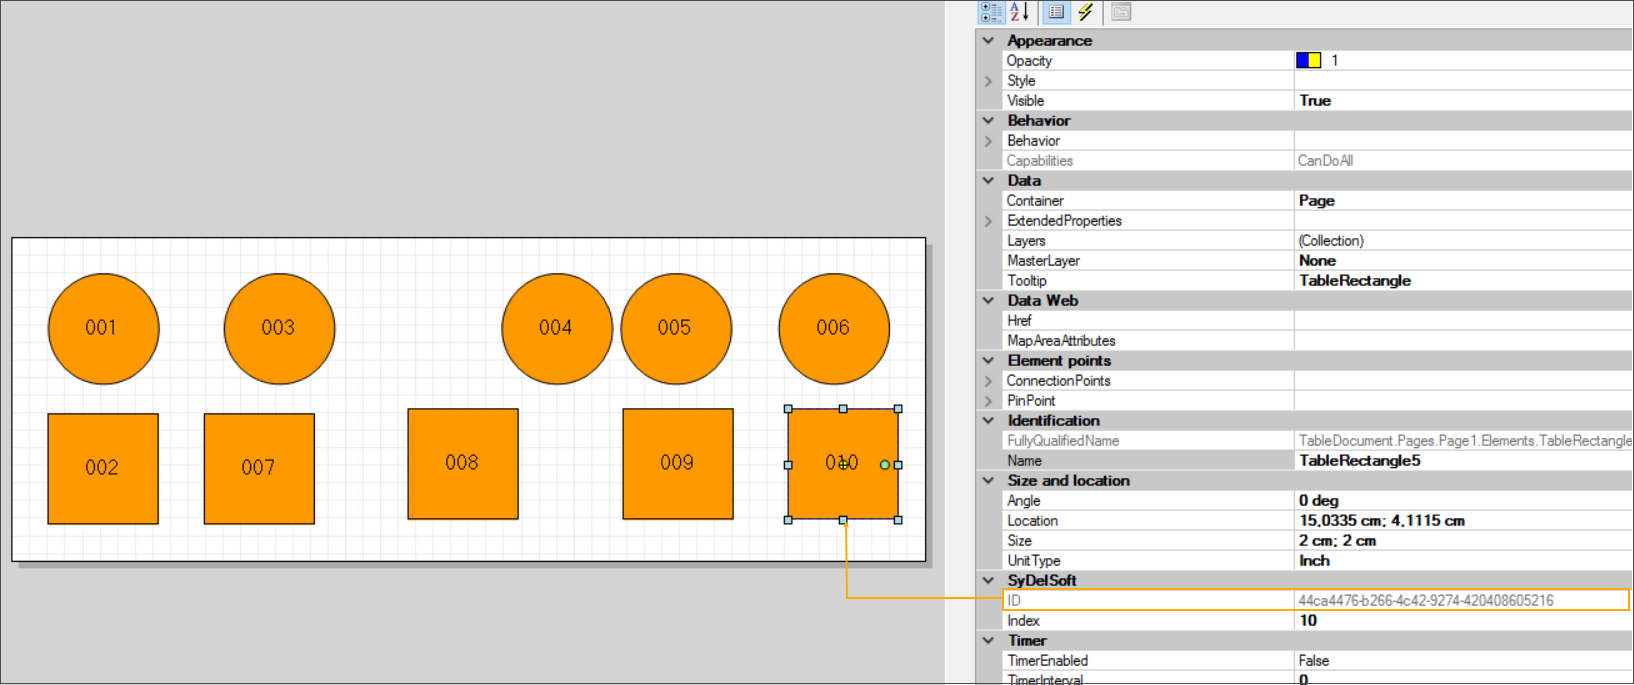
Go to POS > Settings > Sales zones and open the sales zone that will be used by the QR ordering app. Click Tables in the bottom left corner of the window to open the table layout editor.
For more information on how to create a table layout within a sales zone, see Sales zones.
Each numbered table has a unique ID. This ID is then used to build the URL and generate a unique QR code per table.
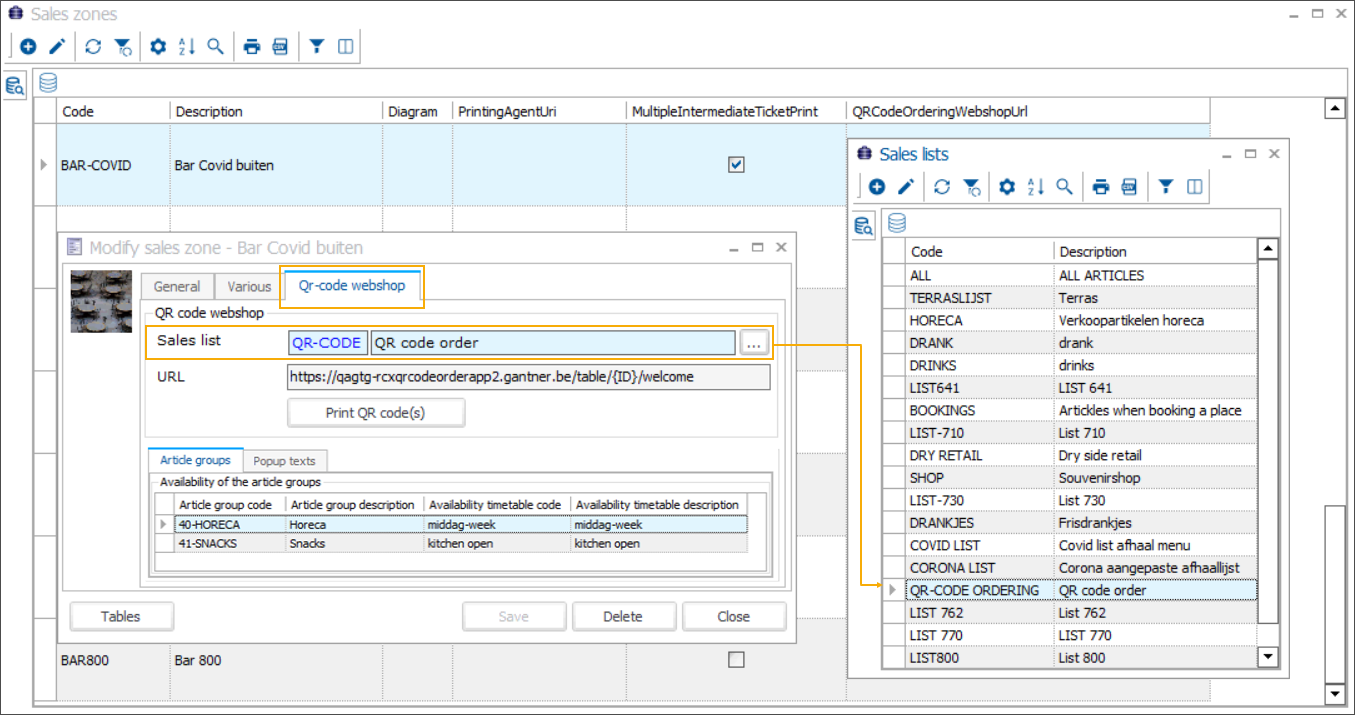
Link sales list to the sales zone
Linking the sales list is mandatory.
Go to POS > Settings > Sales zones and open the sales zone that will be used by the QR ordering app. In the tab QR-code webshop, click  to select a sales list.
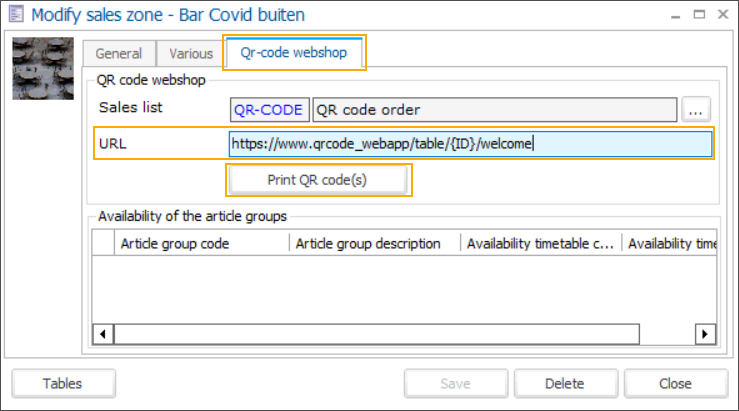
Print a unique QR code per table
Go to POS > Settings > Sales zones and open the sales zone used by the QR ordering app.
In the tab QR-code webshop, enter the URL of the QR ordering app:
https://yourQRorderingappurl/table/{ID}/welcomeE.g: https://www.qrcode_webapp/table/{ID}/welcome
Click Save.
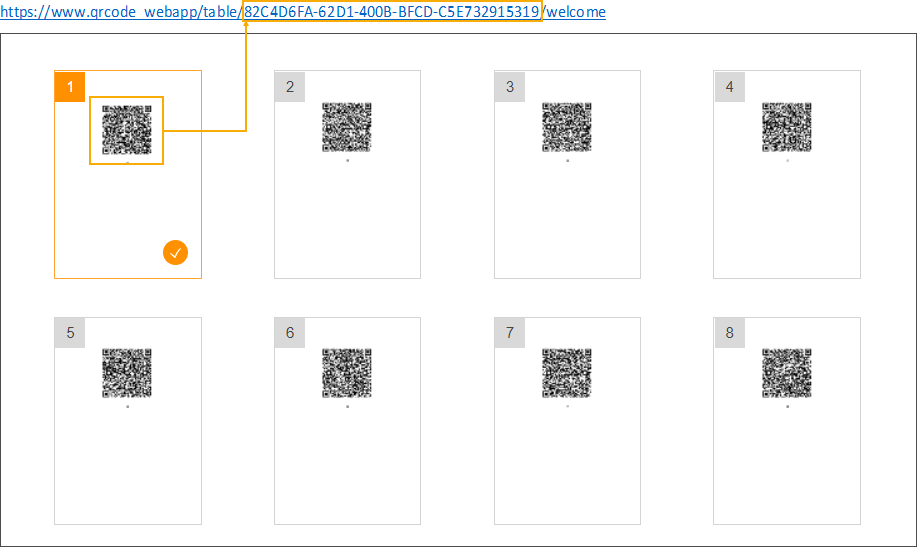
Click the Print QR code(s) button to generate a report, containing 1 QR code per table, each printed on a separate page.
Define order of articles per category
You can define the order of the shown articles per category. This predefined order will be used as Default sorting order in the app.

Go to Sales > Settings > Points of sale and open the detail screen of the point of sale, linked to your QR ordering app.
Under the tab Relevances, go to the tab Articles.
Right-click anywhere on this screen and select the option Group from the context menu.
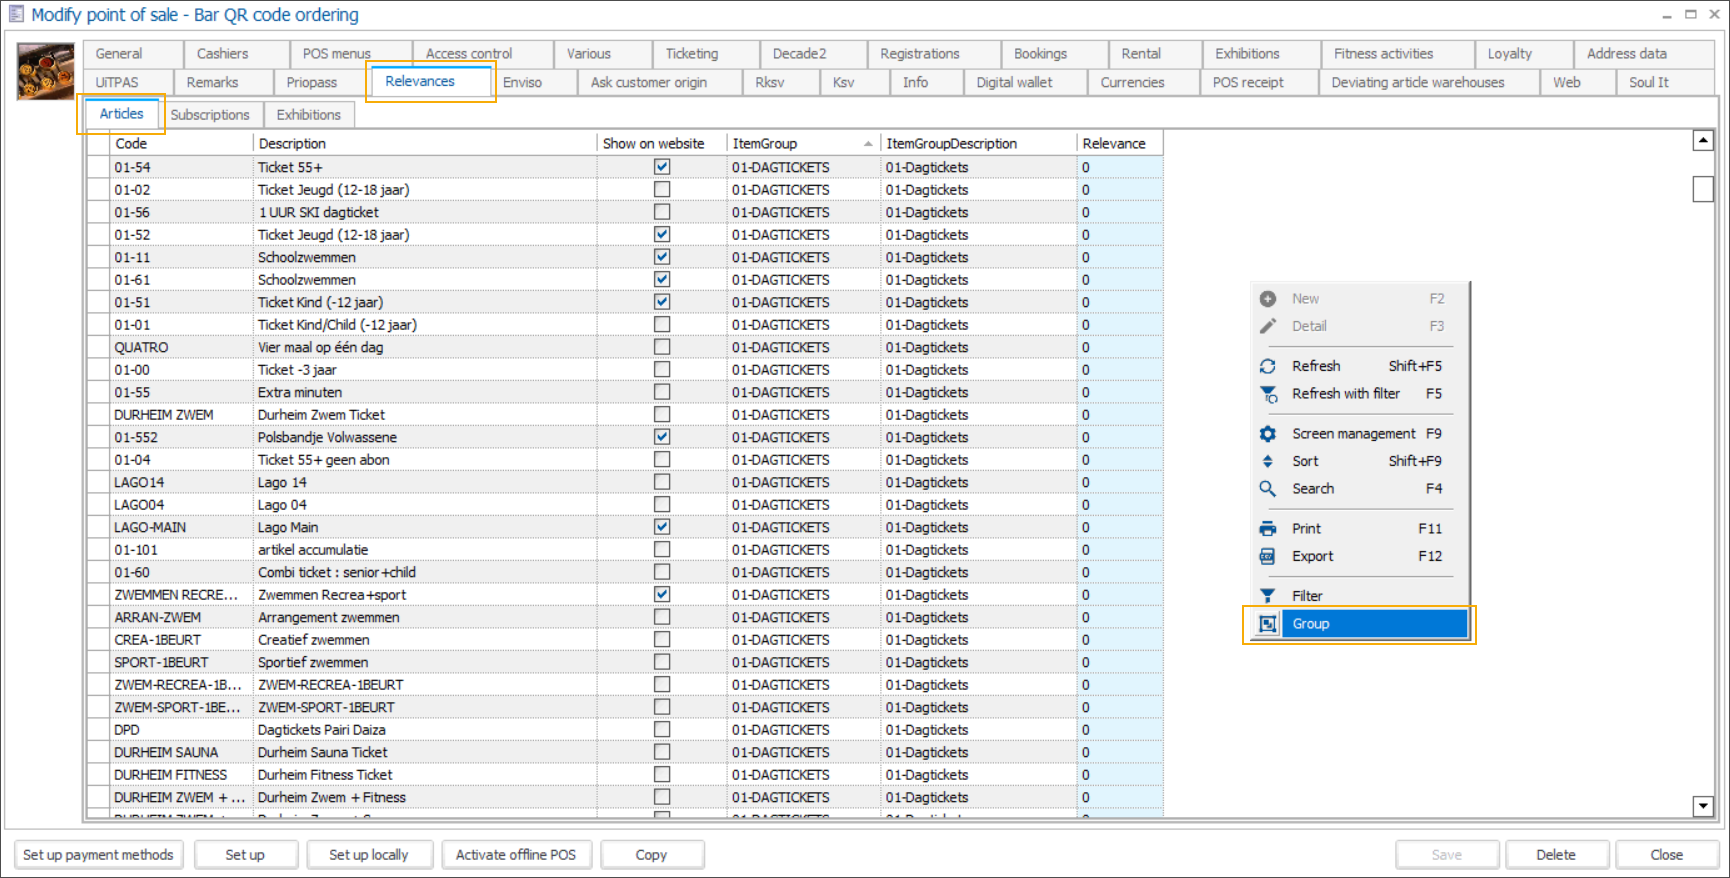
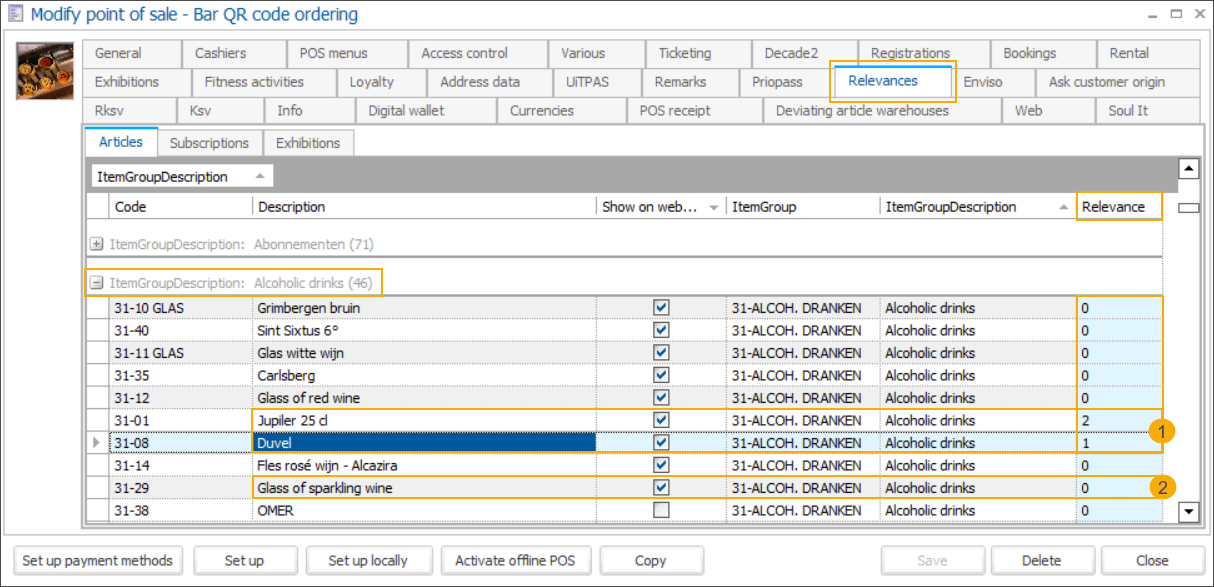
Drag the column header ItemGroup or ItemGroupDescription into the grey area above the table. The articles will automatically be sorted by category which can be conveniently collapsed and expanded for a better overview.

Go to the column Relevance and define the order by entering numbers, starting from 1, in each category.
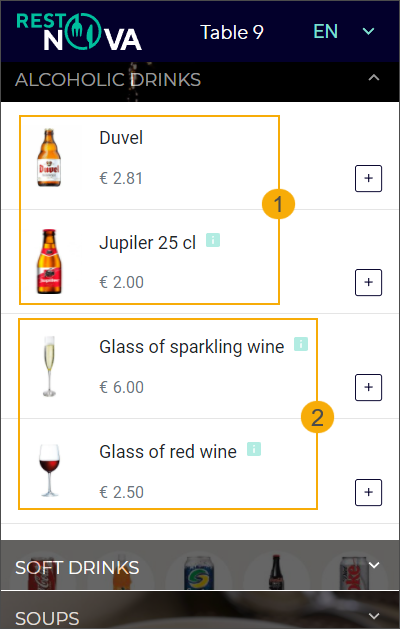
Articles with predefined relevance will be displayed in the predefined order, 1 on top and so on. (1)
Articles left with relevance 0 will be displayed at the bottom of the list. (2)
Configure availability of article groups per sales zone
When selling articles via the QR ordering app it is necessary to make sure that the customer can only order articles that are actually available (e.g. if the kitchen is closed, it should not be possible for the customer to order warm meals).
In Recreatex you can create availability timetables and link them to article groups per sales zone. If a certain category of articles is not available during a preconfigured period, the articles will remain visible but will be disabled (greyed out) so that the customers cannot accidentally order them.
Create timetables
To create a timetable, go to the module General > Settings > Time tables. Then click
 in the upper left corner (1) or right-click and select New from the context menu (2).
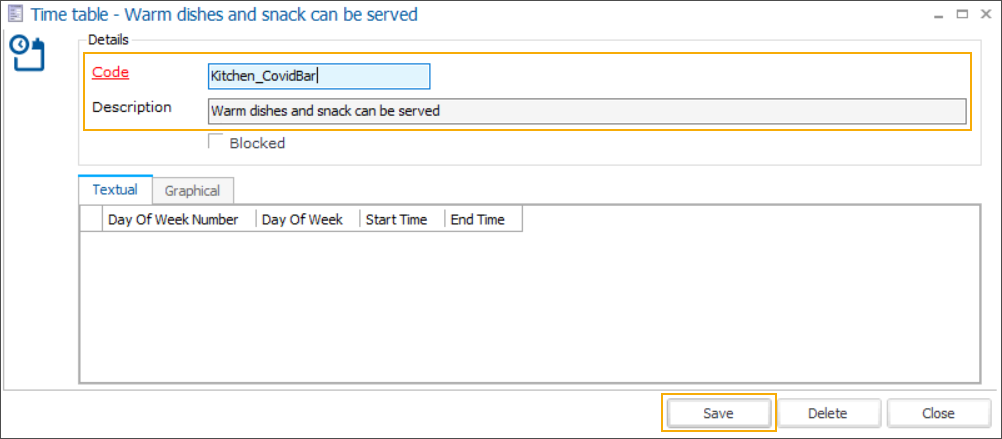
Enter a Code and a Description (optional) and click Save.
Create timetable entries (combination of day and time slot). There are 2 ways to create timetable entries:
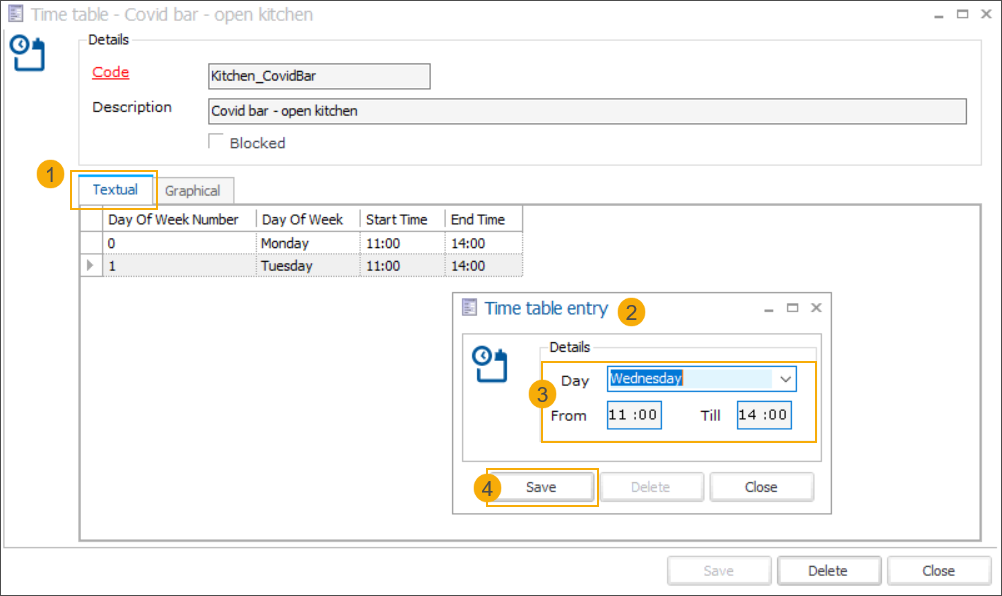
In the Time table window, go to the tab Textual (1). Then right-click and select New from the context menu to open a new Time table entry window (2).
Select a day and specify the time slot (3), then click Save (4).
Repeat the above steps to complete your timetable.
In the Time table window, go to the tab Graphical. Any changes done in this view are saved automatically. You can create and manipulate the entries as follows:
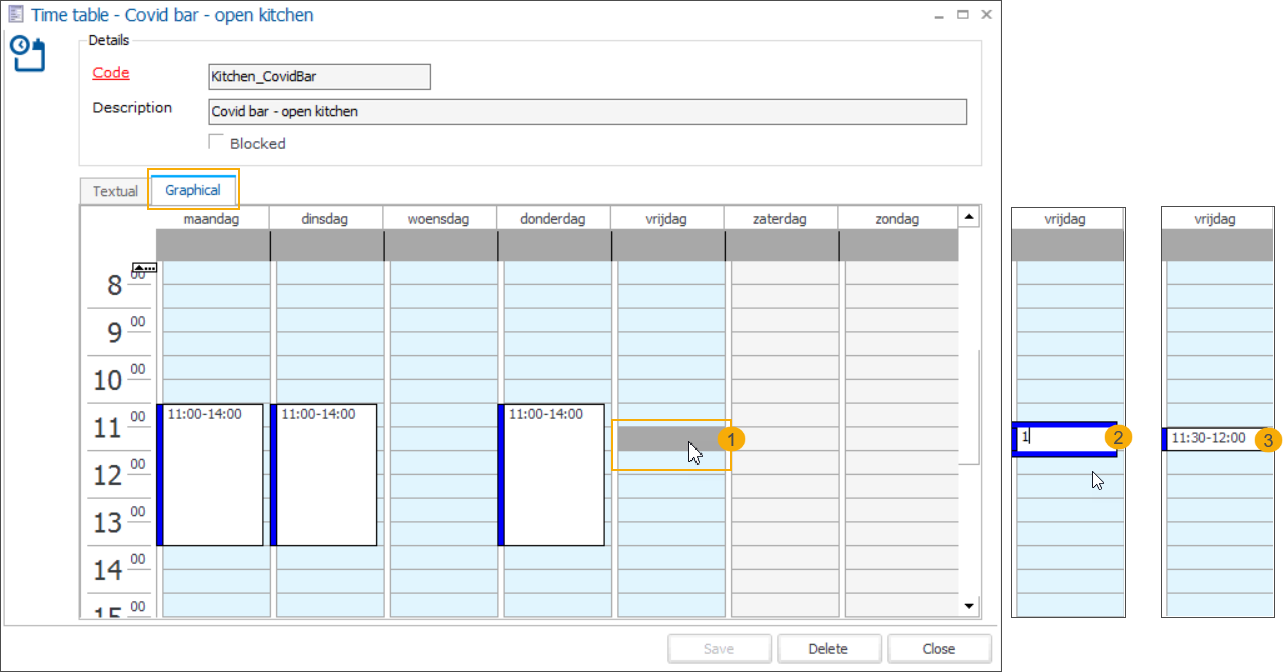
Create: In the graphical overview click on the desired time slot (1) and type at least 1 character (2). Then press Enter. The time range of the selected time slot is filled in automatically (3).
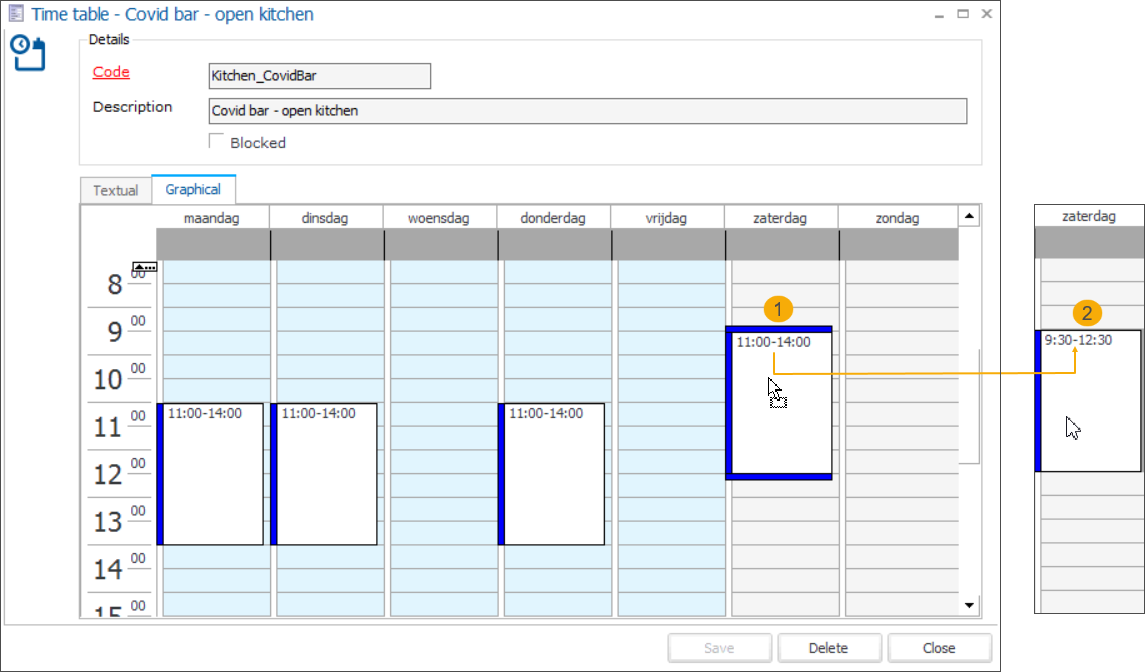
Expand/narrow: Left-click and drag the top or bottom border of the entry up or down. Releasing the border will update the time slot automatically, based on its new position.

Move: Left-click and hold to select the entry, then drag up/down or left/right to move the entry (1). Releasing the entry will update the time slot automatically, based on its new position.
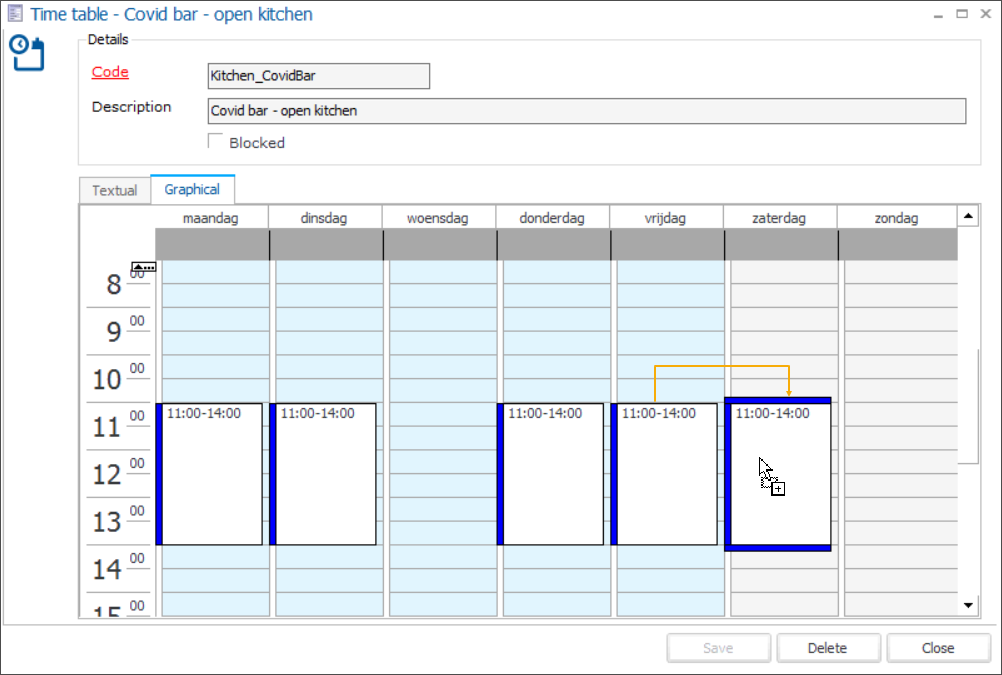
Copy: Left-click and hold to select the entry, then hold the CTRL key while dragging the entry to another position. Releasing the entry will update the time slot automatically, based on its new position.
Delete: Select the entry and press Delete.
Select the checkbox Blocked to (temporarily) disable a timetable if needed.

Link timetable to article group
Go to the module POS > Settings > Sales zones and open the sales zone used by the QR ordering app.
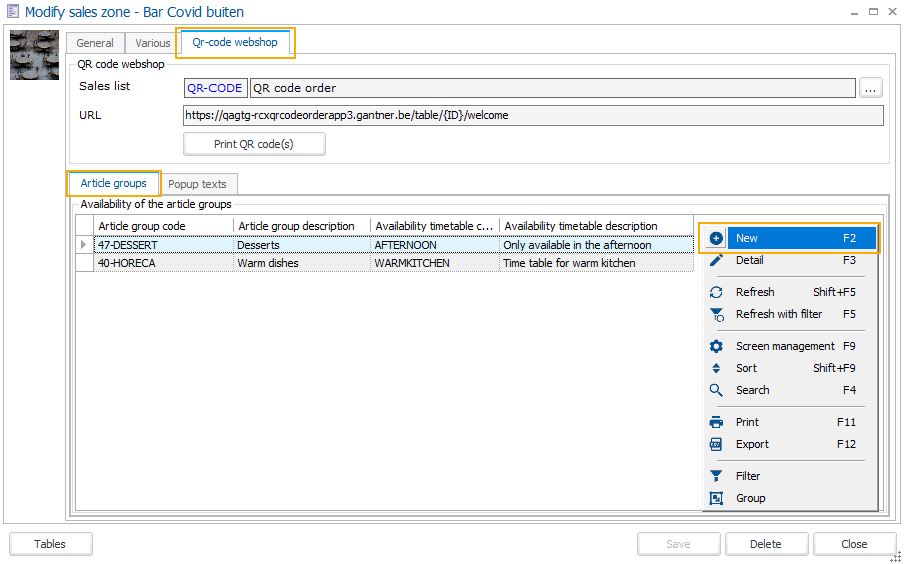
Go to the tab QR-code webshop > subtab Article groups, right-click and select New from the context menu.
In the window Availability timetable per article group, select the Article group (1) and the Availability timetable (2), then click Save (3).
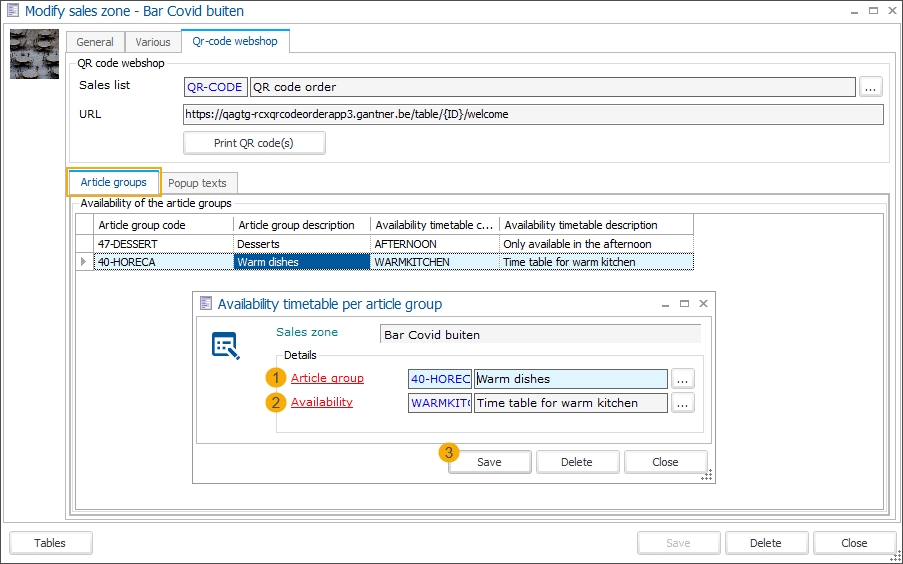
Repeat the above steps for all article groups that require availability restrictions in the specified sales zone.
Wichtig
Per sales zone, each article group can only be linked to 1 timetable. Once an article group has been linked to a timetable, it will no longer appear in the list of available article groups.
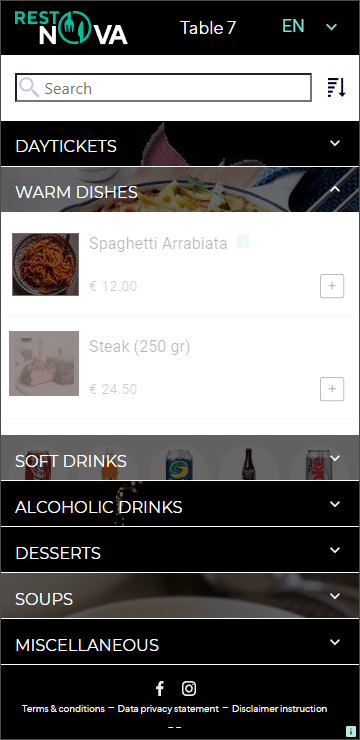
When a customer opens a category with articles that cannot be ordered at that moment (e.g. warm dishes during the closing hours of the kitchen), the articles are greyed out and cannot be selected.
Configure pop-up messages linked to a timetable
Display simple informative pop-up messages, e.g. to welcome or provide practical information when a customer opens the QR ordering app. The messages can easily be scheduled and displayed during a certain period and following a predefined schedule (days/hours).
Open the Sales zone linked to your QR ordering app:
Go directly to the relevant sales zone via POS > Settings > Sales zones
Open the sales zone via the point of sale: Sales admin > Settings > Points of sale > open the detail of the relevant point of sale > tab General > open the list of Sales zones > open the detail of the relevant sales zone.
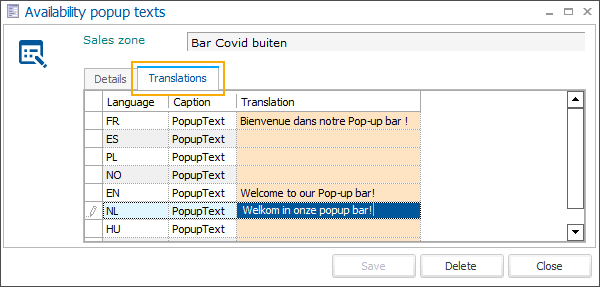
In the tab Qr-code webshop, go to the tab Popup texts. Use the available framework functionality to create a new pop-up message.

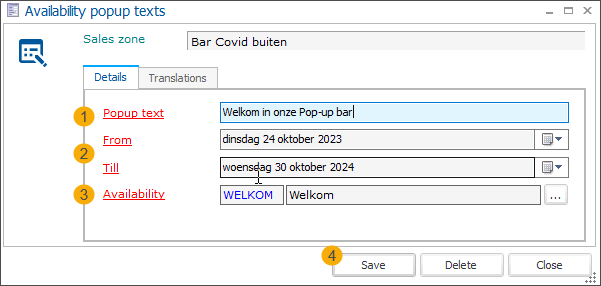
Enter the Popup text (1) in the available field and define the period From/Till (2) during which you want the message to appear in the app. Finally link the predefined Availability timetable (3) and click Save (4) to add the pop-up text to the list.
In the tab Translations, add translated text of the message for all relevant languages.
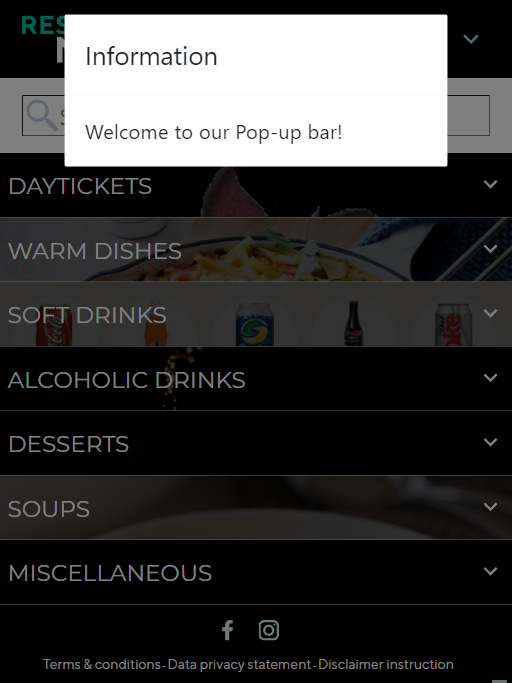
When a customer opens the ordering app, a scheduled pop-up message appears on the screen.
Wichtig
If you create several messages with the same or overlapping timetables, only the first message will be displayed during the overlapping window.
Print sales receipts and bar/kitchen tickets
You can set up a printing service to pass the order to the bar or kitchen printer without unnecessary delay, directly from the QR ordering app. Optionally you can choose to print the sales receipts if useful for the customers or personnel.
The print service collects available orders/receipts at regular predefined intervals and passes them to the specified printers.
Set up the print service
Open the SydAdmin application.
Go to Management > Service > Plugin overview.
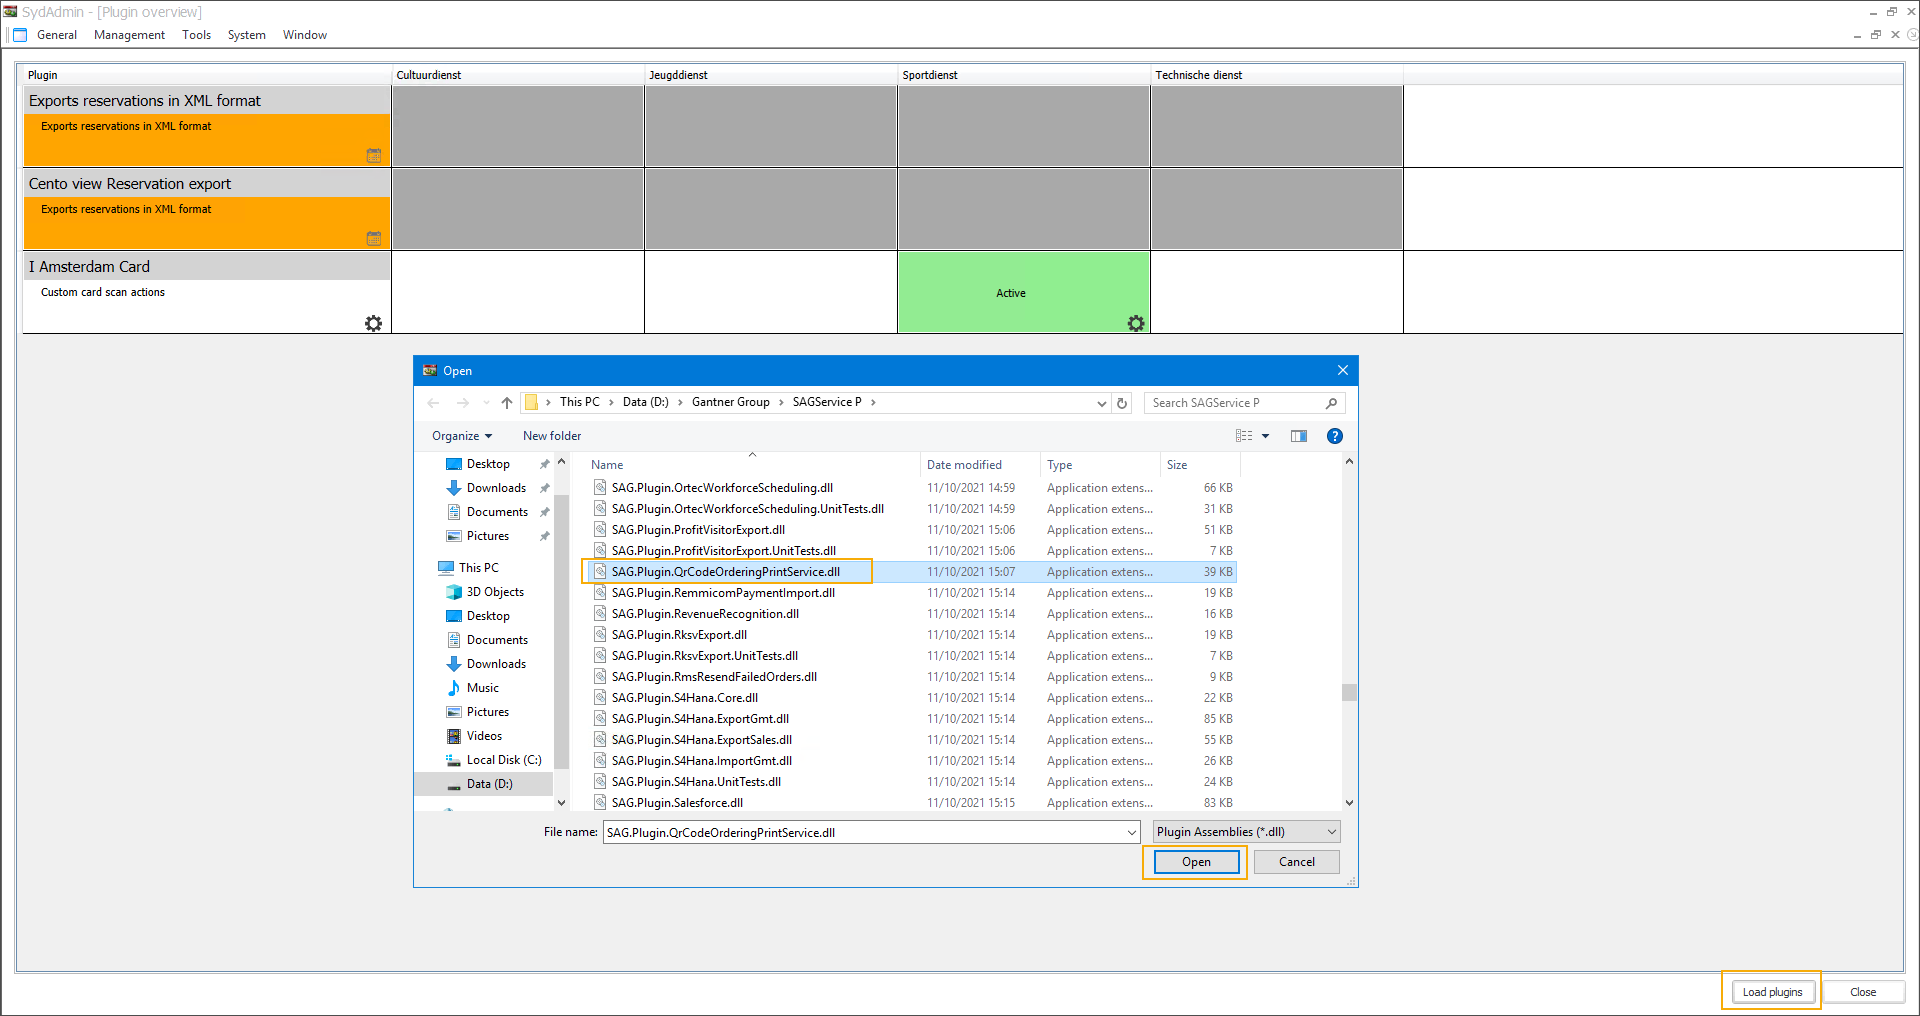
If the plugin is not yet available in the Plugin overview, click Load plugins in the bottom right corner. Select SAG.Plugin.QrCodeOrderingPrintService.dll and click Open.
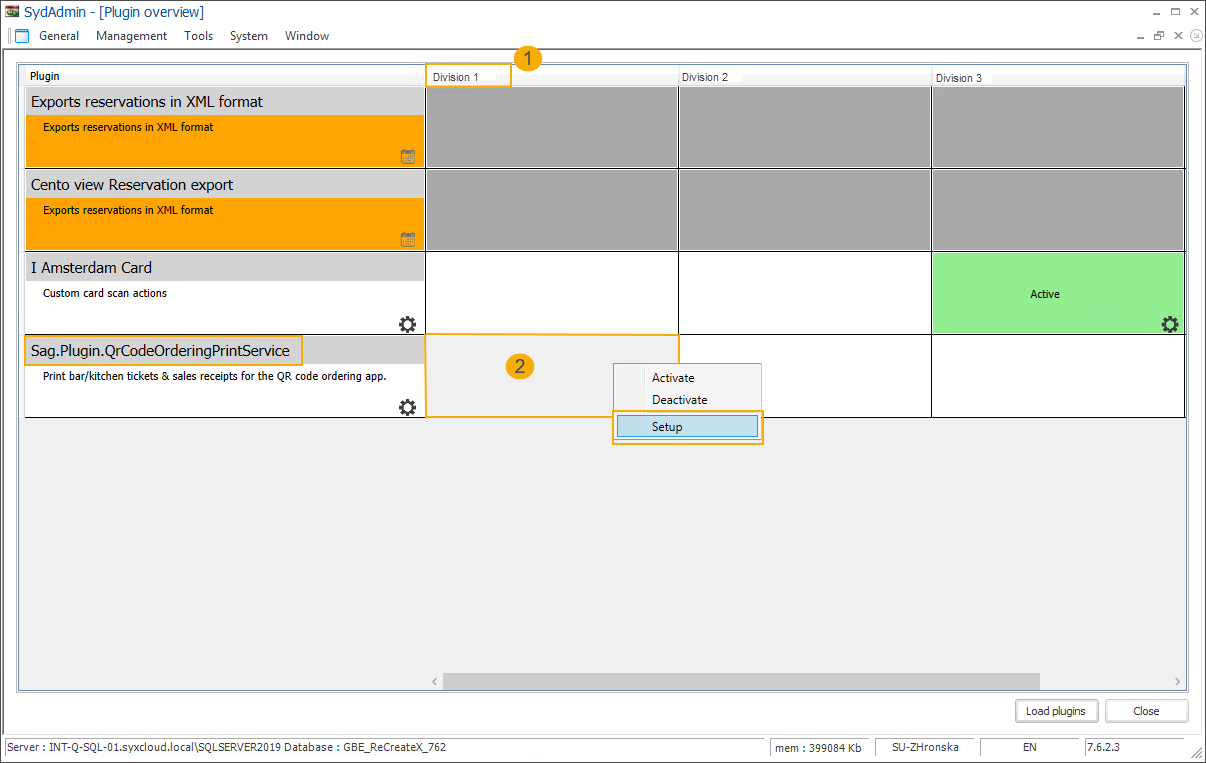
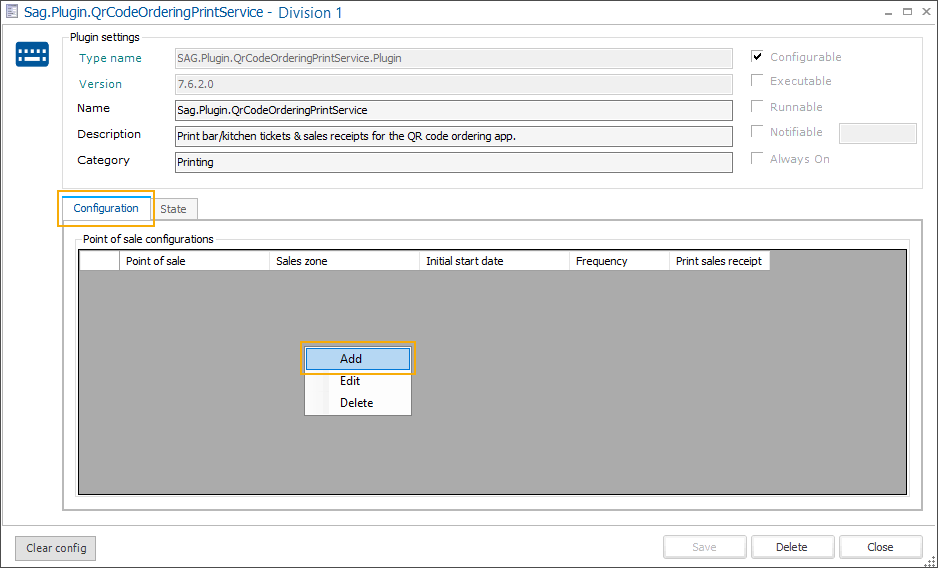
Under the division (1) for which you want to configure the printing service, right-click in the field next to the plugin name (2) and select Setup from the context menu.
In the setup window, go to the tab Configuration, right-click and select Add from the context menu.
Fill in the configuration, click Save and then Close.
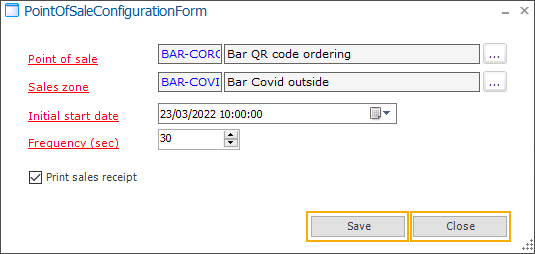
Point of sale
Only one configuration per point of sale is allowed.
This point of sale must be set up in Recreatex for the current user (option Set up locally). For more information, see Set up point of sale.
Sales zone
The sales zone that is configured for the QR ordering app
The kitchen/bar tickets and sales receipts from this sales zone will be printed.
Initial start date
The kitchen/bar tickets and sales receipts will be printed starting from the specified date and time.
Frequency (sec)
How often the plugin should check whether there are new kitchen/bar tickets and sales receipts to be printed.
Print sales receipt
For the customer, the sales receipt is available as a PDF document that can be downloaded from the QR ordering app. You can, however, choose to print the sales receipt on paper as well.
The kitchen/bar tickets are always printed.
Wichtig
If you use integration with the FDM module (Belgium), you have to start the cash register in Recreatex (POS > Cash register sales) to be able to print the sales receipts.
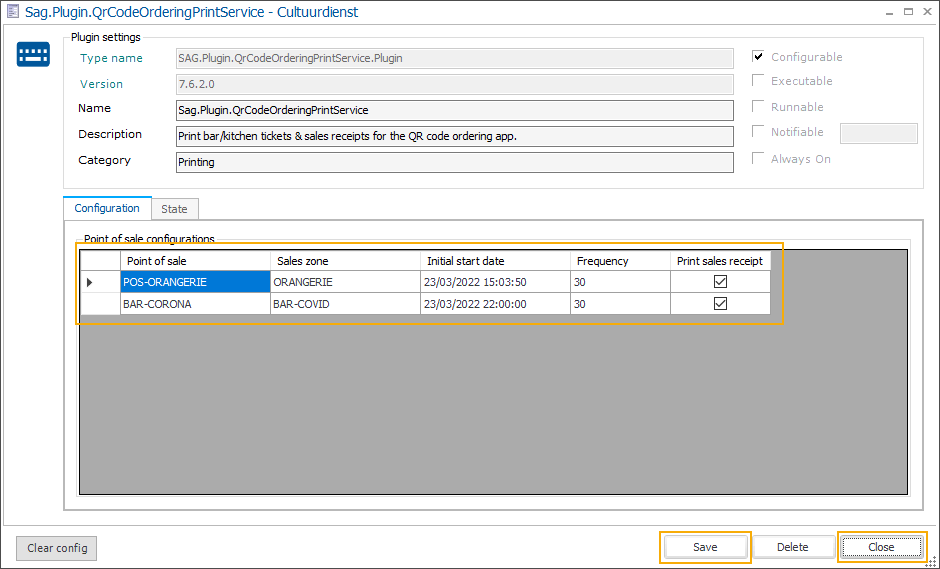
Repeat steps 5 and 6 to add configuration for all needed points of sale, then click Save and Close.
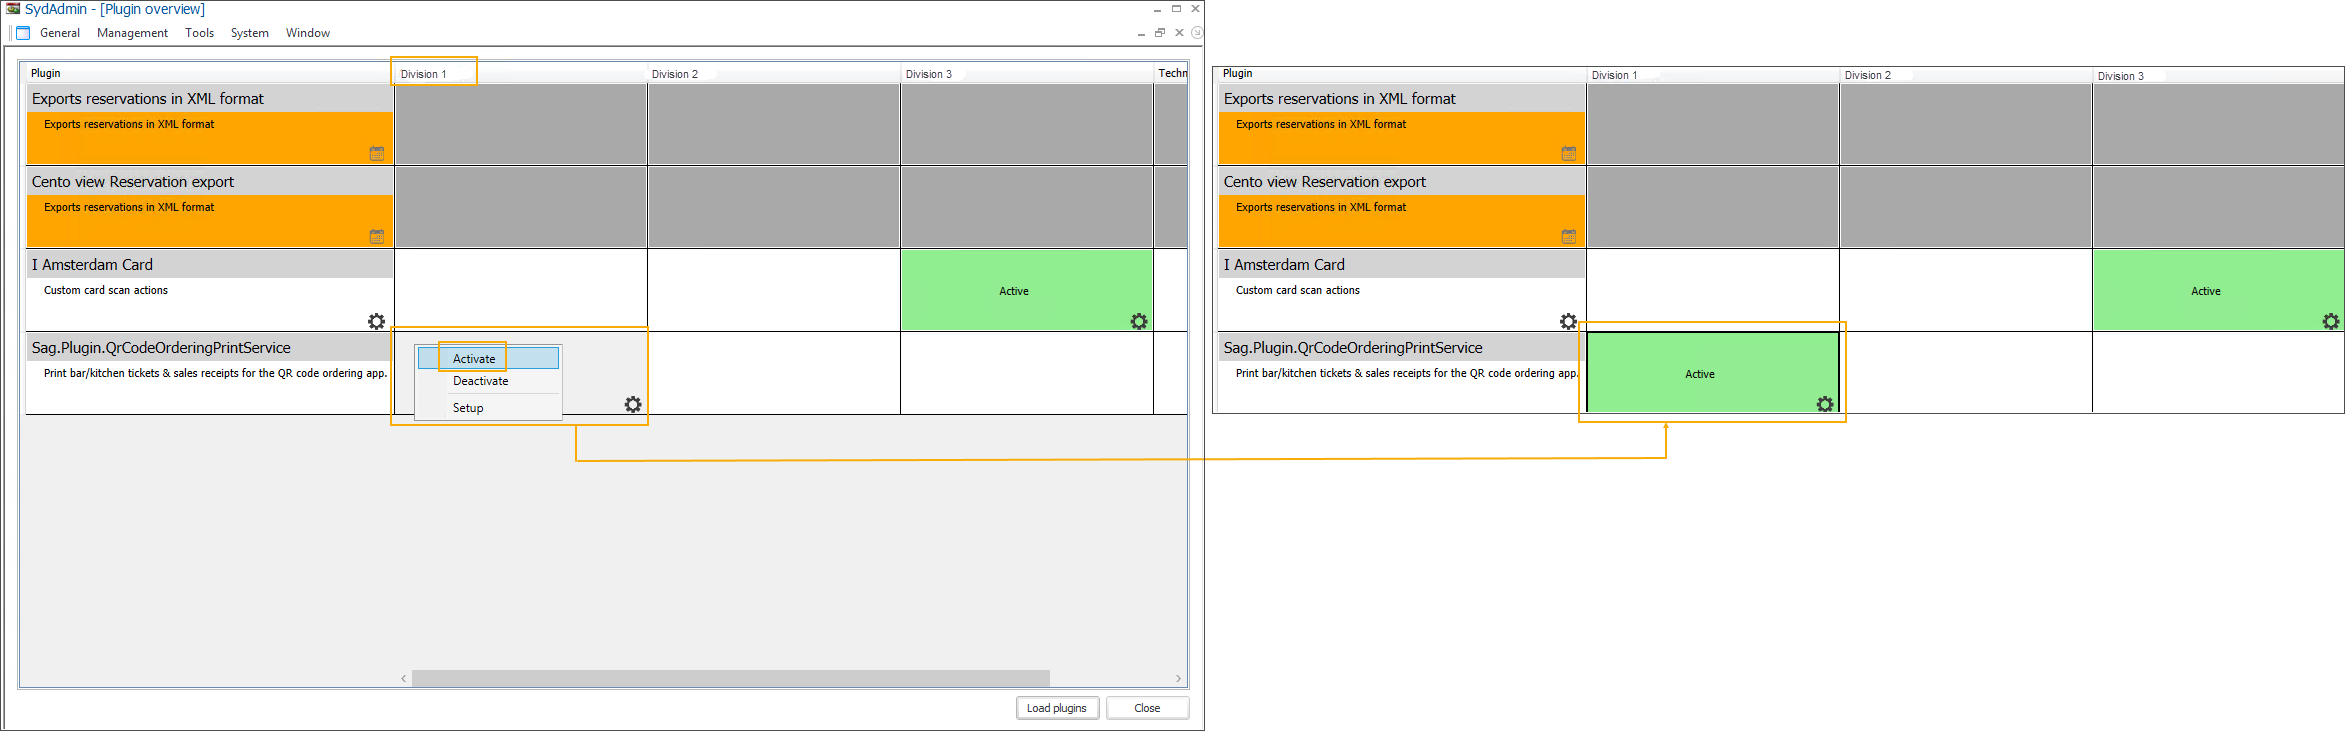
To activate the printing service, right-click in the field under the division for which you have configured the plugin and from the context menu select Activate.
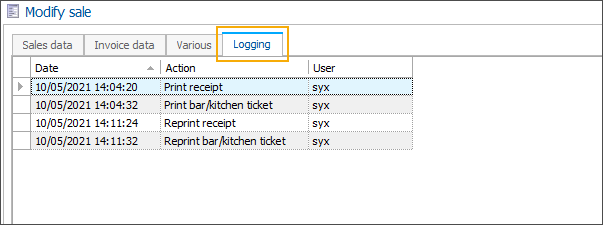
View print service logging
In Recreatex you can see per sale which receipts or bar/kitchen orders have been printed or reprinted.
Go to Sales > Visualisations > Sales and open a sale created via the QR ordering app.
In the tab Logging, see if and when the sales receipts or bar/kitchen tickets have been printed and reprinted.