Lesson groups
To manage lesson groups, go to Swimming courses > Lesson groups.
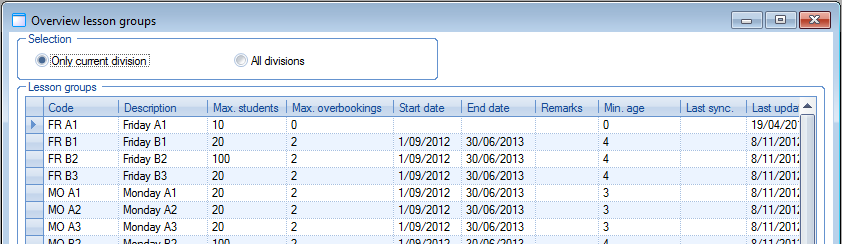
The overview below will appear, where you can choose to visualise the lesson groups of the current division only or of all divisions.
 |
Using the Framework functionalities, you can create, modify or delete lesson groups.
 |
In addition to the section Details, this window has a number of tabs in which you can manage further details concerning the lesson group.
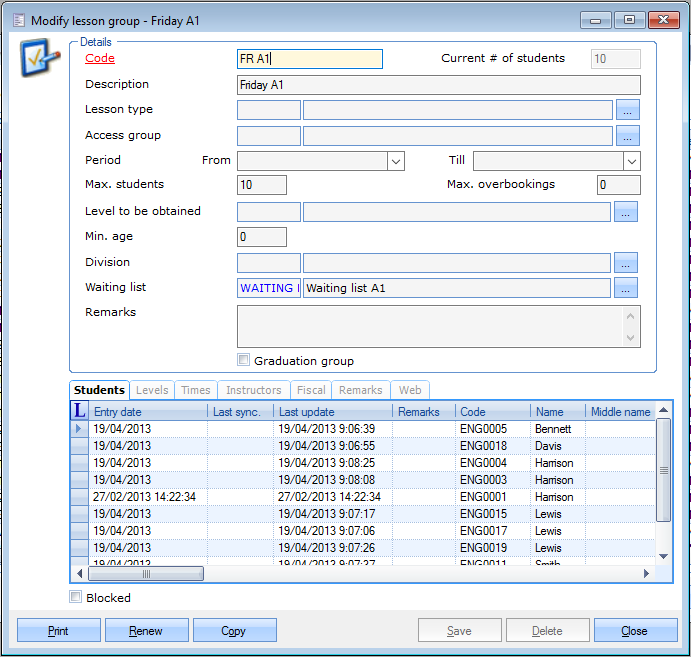
Details
 |
In the section Details, you can fill in all specific characteristics of the lesson group.
Code | Is unique and obligatory. It is advised to choose a relevant code so that you can immediately derive from the code which lesson group is concerned. |
Description | The description of the chosen lesson group. |
Current # of students | The current number of students in this lesson group. (informatively) |
Lesson type | If you select a lesson type, a number of data of the lesson type in question are taken over in the lesson group, for example allowed level, maximal number of students, times and instructors. (see also: Lesson types) |
Access group | If you work with access control, you can fill in the access group here that determines where and when access is granted to the customers registered for this lesson group. |
Period | The period during which the lessons of this lesson group take place. (see also: Lesson groups > Times) |
Max. students | The maximal number of students allowed in this lesson group. (overbookings are still possible) |
Max. overbookings | The maximum number of overbookings allowed on top of the maximum number of students determines the maximum number of students. |
Level to be obtained | The level that is obtained when students pass this lesson group. |
Min. age | The minimal age required for this lesson group. |
Division | Fill in the division on which the lesson group has been created. To allow other divisions to access this lesson group, apply the Rights per division which can be activated in the parameters. |
Waiting list | The waiting list linked to this lesson group |
Remarks | Extra information concerning this lesson group |
Graduation group | Here you can indicate if the lesson group is a graduation group (i.e. diploma is handed over if students pass) |
Exclusion calendar | Link an exclusion calendar to a lesson group to prevent customers from unsubscribing or registering for catch-up lessons on regular lesson days when classes are not taking place, e.g. due to bank holidays. A blocking message is shown when trying to sign out or register a catch-up lesson on a day marked in the linked exclusion calendar.  When calling waiting list students, the exclusion calendar linked to a lesson group is considered in the calculation of the nearest possible start date. To create an exclusion calendar, see Calendars. |
Finally, you can indicate at the bottom of the window if the lesson group is blocked or not.
Students
In the tab Students all the students that are registered for this lesson group are listed.
 |
Using the Framework functionalities, you can always add customers to the lesson group or delete them and/or modify specific data concerning the registration.
 |
Tipp
The fastest, most simple and clearest way to register customers for a certain lesson group is using the cash register. (see manual POS - Use)
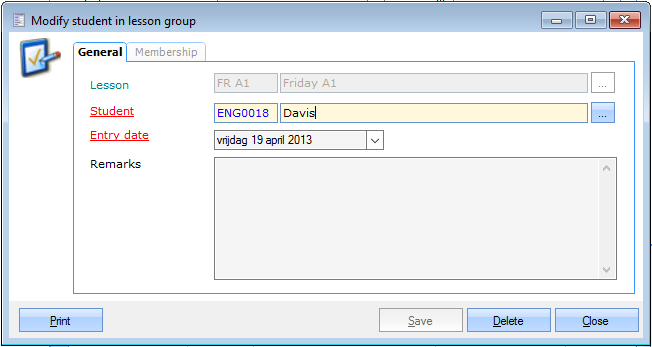
General
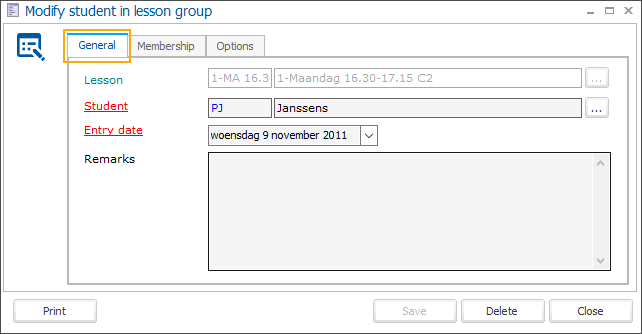
Lesson group | The lesson group for which the student is/was registered. |
Student | The student you want to register for the selected lesson group. |
Registration date | The registration date of the student into this lesson group. |
Remarks | Extra information concerning the registration of this student for this lesson group. When a student accepts a waiting list call using the confirmation link in the waiting list call email and adds a remark, this remark will also appear in this field. 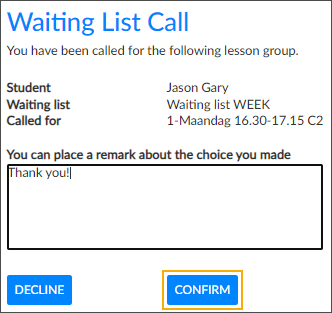 |
Membership
The tab Membership gives an overview of all memberships that are linked to the registration of the student for this lesson group and with which access is granted or not.
 |
Using the Framework functionalities you can always link memberships (already sold to the student) or disconnect memberships from the registration.
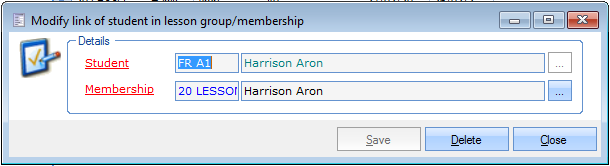 |
Student | The student that is registered for this lesson group. |
Membership | The membership of the student that is linked to the lesson group. |
Levels
In the tab Levels you can specify which level(s) the customers must already have obtained to be able to register for the selected lesson group.
 |
You can link a new required level to the lesson group in question or consult the levels already linked.
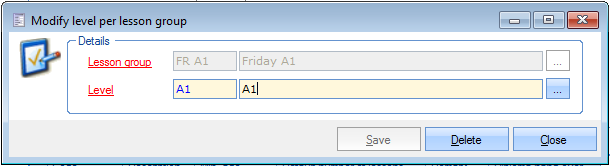 |
Lesson group | The lesson group to which you want to link the level. |
Level | The level customers must already have obtained to be able to register for the selected lesson group. |
For an explanation on how to create levels, we refer to Settings > Levels
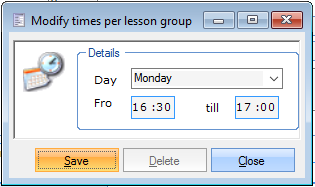
Times
In the tab Times you can specify when the lessons of this lesson group take place during the Period specified before. (see Lessson groups > Details)
If you want to you can call up an overview of all lesson times of all lesson groups using the visualisation Lesson groups calendar.
You can add lesson times in the tab Times or the tab Graphic.
Tab Times:
 |
Using the Framework functionalities you can always add, modify or delete times.
 |
Tab Graphic:
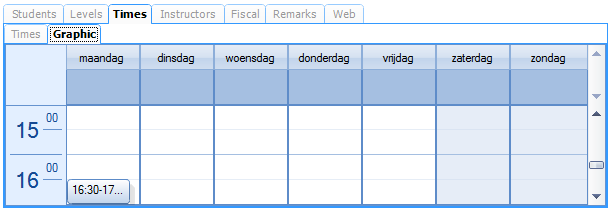 |
You can add times by selecting one or several time blocks and by hitting the <Enter> key.
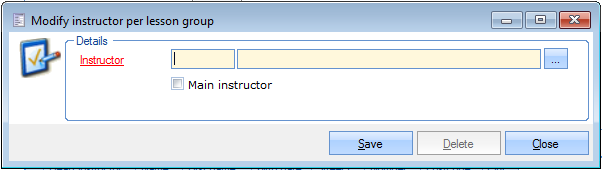
Instructors
In the tab Instructors you can consult all instructors for the selected lesson group and add new ones.
 |
Using the Framework functionalities you can always add, modify or delete instructors.
 |
Tipp
It is advised to first create all instructors as employees before linking them to a lesson group. (see manual GENERAL - Employees)
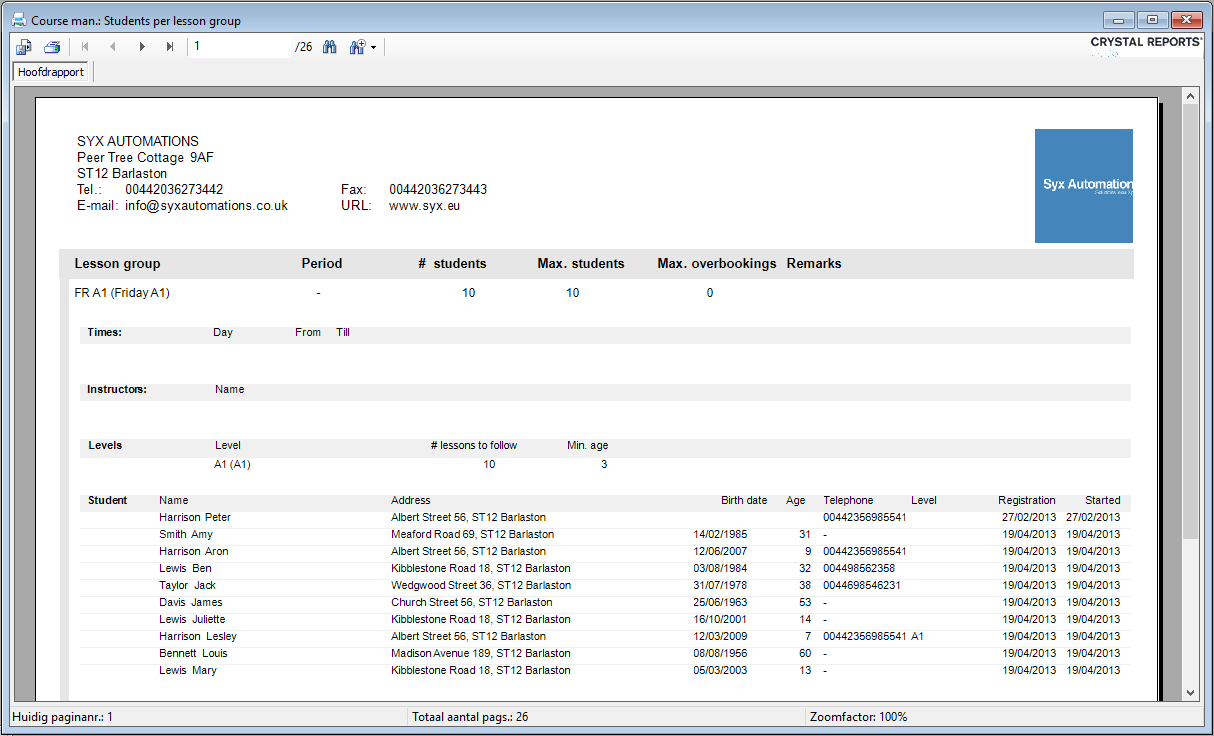
At the bottom of the window Modify lesson group, you can click on the button Print after which the report Students per lesson group will be generated.
 |
Renew
At the bottom of the window Modify lesson group, you can click on the button Renew to open the window below, allowing you to renew all lesson memberships, linked to the students in this lesson group, in one go.
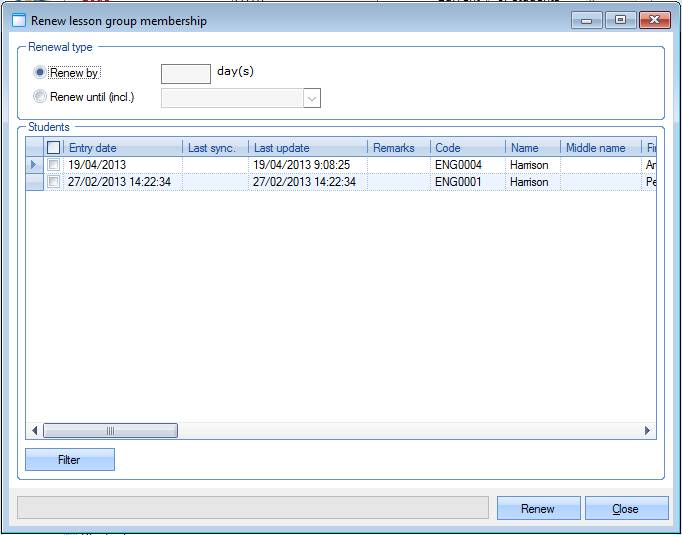 |
Tick the students of which you want to renew the lesson memberships and determine the period with which the membership has to be renewed. You can either choose a fixed number of days, either choose for renewal until a fixed end date.
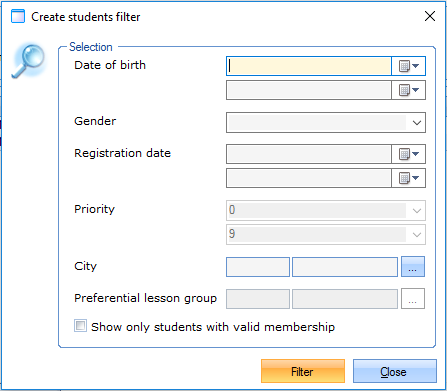
The button Filter allows you to filter the overview of students. Fill in the required filter criteria and hit the button Filter.
 |
After selecting the desired students and filling in the desired type of renewal, you can click on Renew in the window Renew lesson group membership. All lesson group memberships of the selected students will be renewed according to the chosen type of renewal.
Copy
At the bottom of the window Modify lesson group, you can click on the button Copy to copy the current lesson group.
The following message will appear:
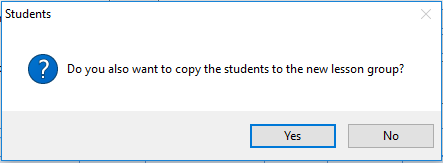 |
Here you can decide if you also want to copy the registered students of the lesson group to the new lesson group.
Warnung
If you decide to also copy the students, you have to take into account that these students will be registered for several lesson groups after copying.
The lesson group will then be copied and immediately visualised. You will see an asterisk (*) after the lesson group code, which indicates that the current lesson group is a copy of the previous one.
 |
You can now modify the data of the copy and click on the button Save to save the new lesson group as such.