Planning
In the part Planning you will see a graphic overview of the planned activities and this overview allows you to link employees to activities and/or divide participants into participant groups.
Open the window by clicking on Registrations > Planning.
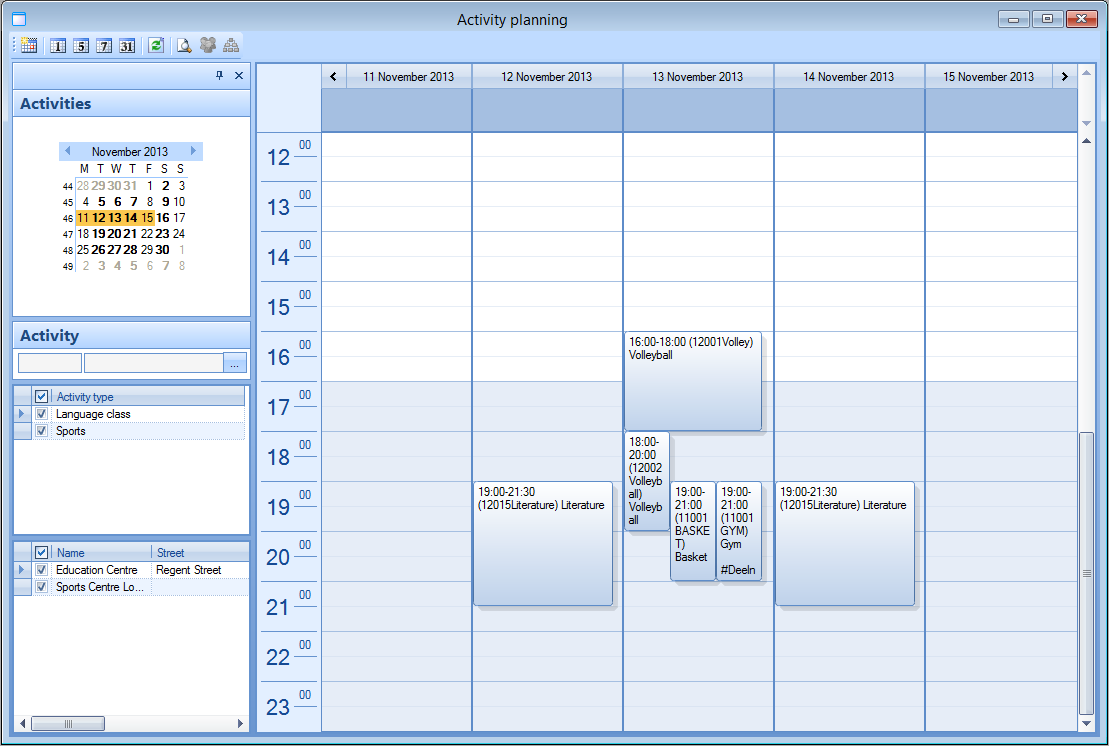
The window below will appear:
 |
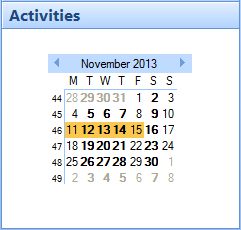
In the left part of the window you can select the desired period of which you want to see the activities in the calendar. Days that are marked in bold are days on which at least one activity takes place, the orange zone indicates which day/period you are currently looking at.
 |
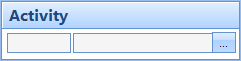
Under the calendar you can choose to limit the overview to one specific activity.
 |
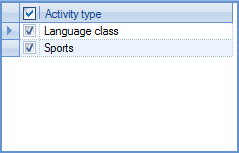
You can also filter the overview on the basis of activity type,
 |
and/or the location in which the activity takes place.
 |
Note
If you want to you can respectively hide or close the entire left part of the planning overview by clicking on  or
or  . After hiding the left part, you can make it visible again by clicking on
  . If you have completely closed the left part of the window, it will be visible again the next time you call up the planning overview by clicking on Registrations > Planning.
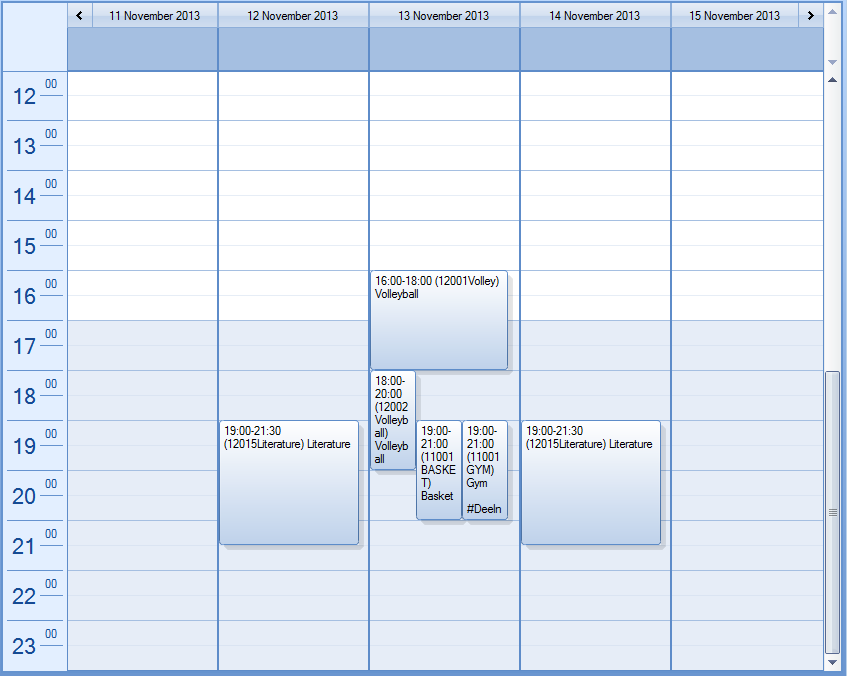
In the right part of the window you can see an overview of the activities in the calendar.
 |
Tip
If required, the graphic planning overview allows you to open/consult an activity by double-clicking on the desired activity.
On top of the window there is the tool bar.
 |
 | Show the data of today. | |
 | Modify the overview to one day, one working week (Monday till Friday), one week or one month. | |
 | Refresh the data so that the current data are shown. | |
 | This button allows to show a detailed window with information on the desired employee skills and the employees that have already been linked for the currently selected (marked in yellow) activity.
| |
 | This button is only available if you have selected an activity. This allows you to determine the employee planning. See 'Employee planning'. | |
 | This button is only available if you have selected an activity. This allows you to divide participants into participant groups and to link instructors (employees). See 'Divide into participant groups'. |

Planning employees
Warning
If it has been defined in the parameters that the employee planning has to be made using task planning (see 'parameters'), the required tasks can be generated at creation of the activity allowing you to link employees directly or later. If you work with task planning, you have to follow up the employee tasks in the Recreatex Employee part (General > Basic data > Employees) and thus not by means of the functionality below.
(see Employeesmanual 'GENERAL - Employees')
In order to plan one or several employees for the selected activity, you have to click on in the planning overview immediately after selecting the activity.
The window below will appear:
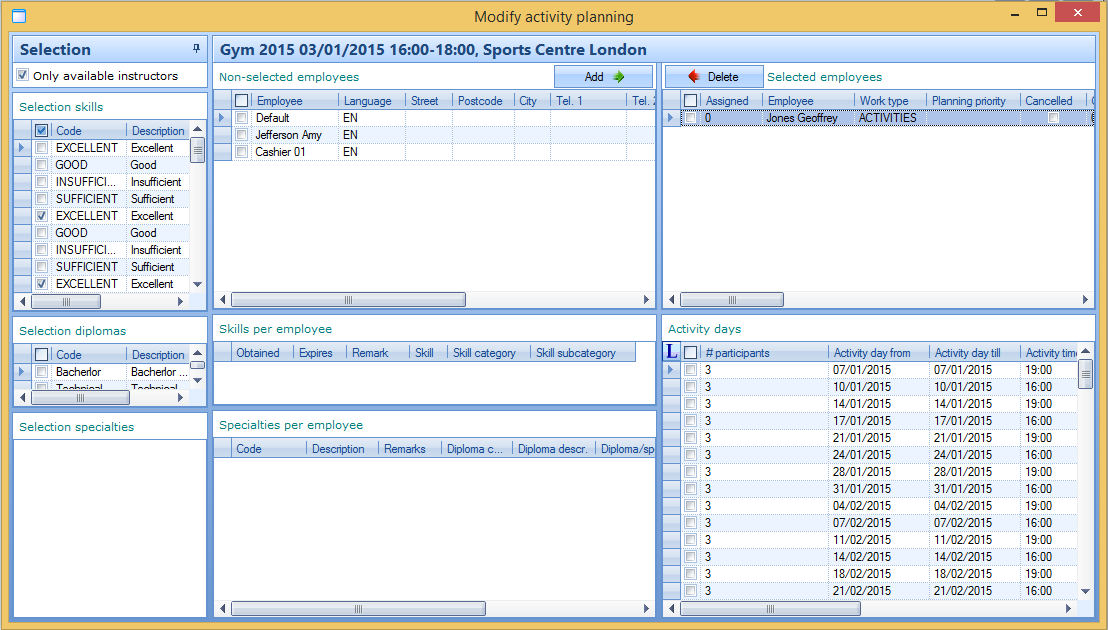 |
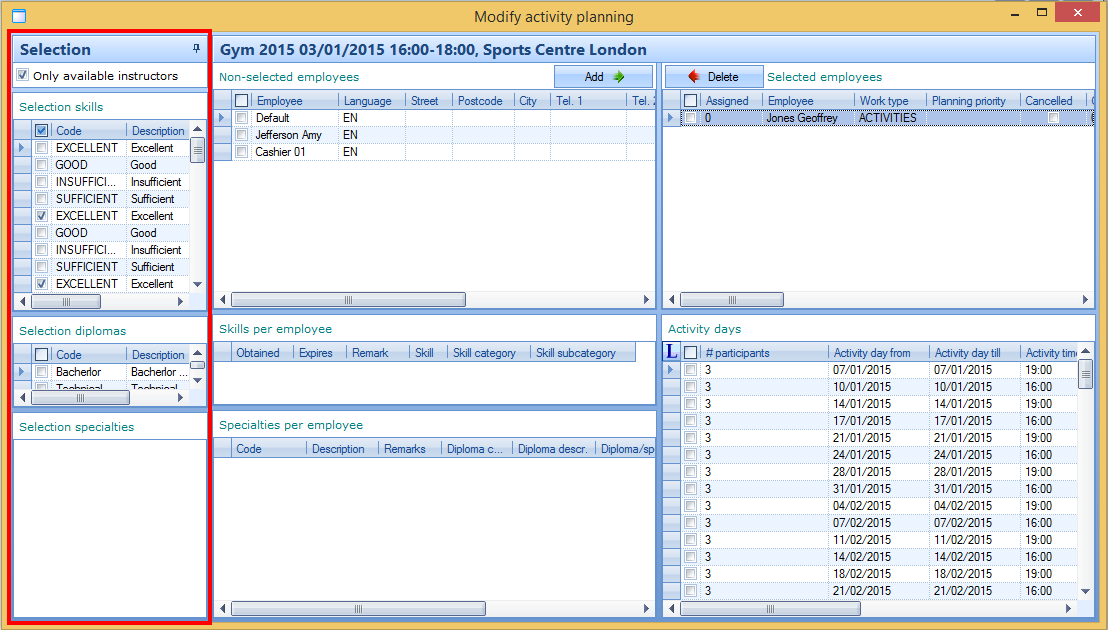
The window is divided into different partial windows. In the partial window 'Selection' you can determine which employees are capable to execute the task linked to the activity.
 |
A default selection is suggested on the basis of the desired skills that have been defined under the tab Desired skills on activity level, but if you want to you can make another selection here.
This selection always determines the list of employees that can be linked to the current activity (list Non-selected employees). With the option Only available instructors (at the top of the partial window Selection), you can opt to only show the available (not yet planned) employees in the list.
Note
If you want to you can (automatically) hide or fix the partial window Selection by clicking on  /
/ , while you can always make the hidden partial window visible again by means of the 'Selection' tab (
 ) that appears on the left side of the window.
For more information on work types, skills, diplomas, specialties, ... we refer to Employeesthe manual 'GENERAL - Employees'.
In the partial window Non-selected employees you will see all employees that have not been selected yet on the basis of the ticked off data in the partial window Selection. If you click on one of these employees, the skills and possible diplomas of this employee will appear in the partial window below.
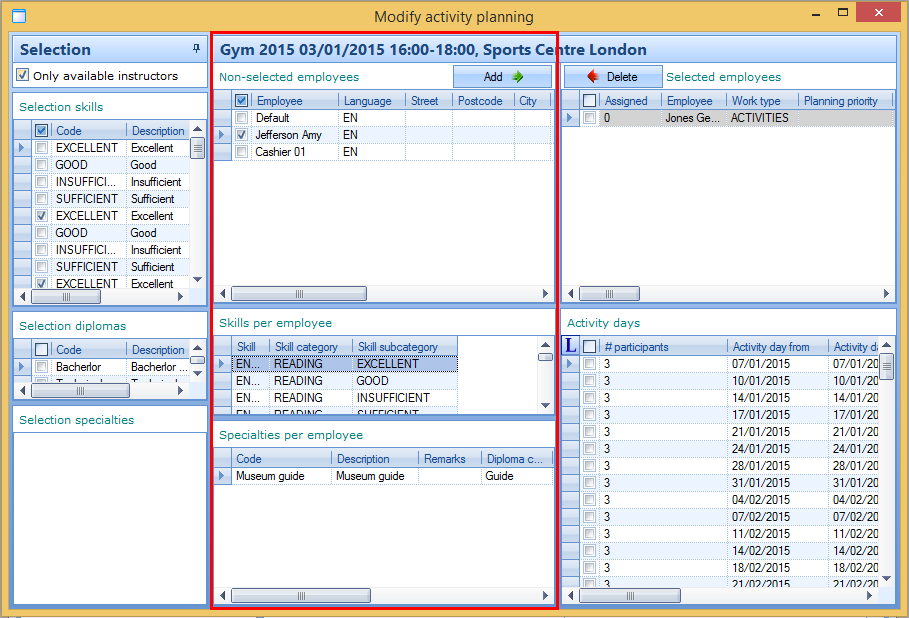 |
In the partial window Selected employees you can see the employees that have already been linked to the current activity and in the section Activity days you can see per linked employee to which activity days this employee has been linked.
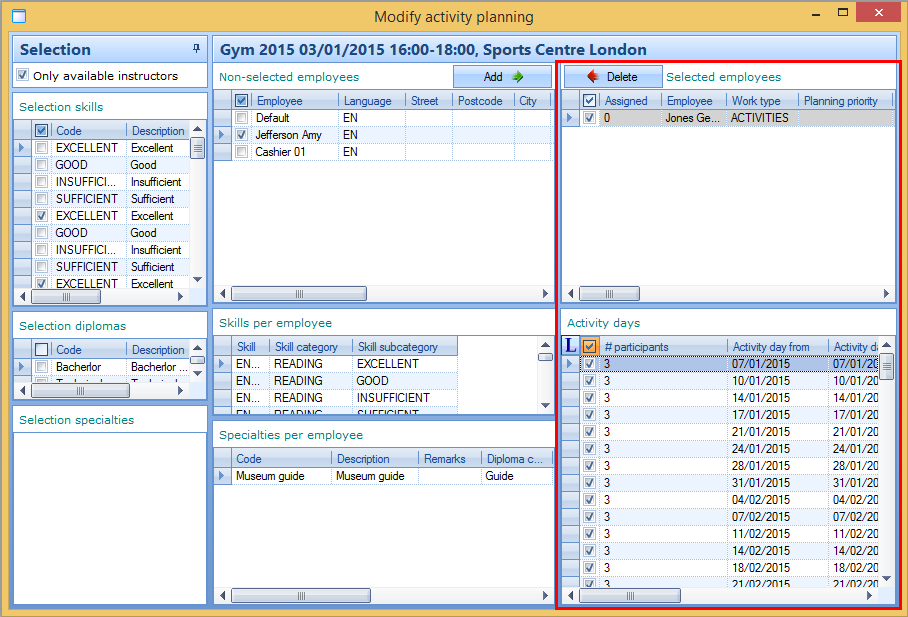 |
In order to link one or several not yet selected employees to the current activity, you first have to tick off the desired employee(s) in the partial window Non-selected employees after which you have to click on Add. The selected employees will then appear in the partial window Selected employees. Finally, you have to tick off (per linked employee) the activity days to which you want to link the employee in the part Activity days.
Note
Activity days that are marked in orange are days to which a non-available employee has been linked. Recreatex does not avoid this, which can lead to practical problems.
If you want to delete one or several linked employees from the list Selected employees, you first have to tick off the employees to be deleted, after which you have to click on Delete. The selected employees will consequently be deleted from the list Selected employees and reappear in the list of non-selected employees.
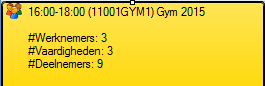
After closing the window Modify activity planning you will notice that the number of employees is shown with the activity in the planning overview, as well as the symbol to indicate that employees are linked to this activity.
 |
Divide into participant groups
Warning
Dividing participants into participant groups is only useful if the registration was made by means of a method that makes sure that each participant of the registration is a known customer in Recreatex. If you use thus Registrations (comprehensive) and link several participants (that are not known by the system) to one registration customer, you will NOT be able to divide these participants into participant groups, since only the registration customer is considered a participant by Recreatex.
Dividing participants/employees into participant groups is possible in the tab Participant groups on activity level, but is however also possible in the activity planning. If required you can also link the employees to which the activity has been assigned to the participant groups.
In order to consult/modify the participant groups of a certain activity, you have to select the desired activity in the planning overview and then click on .
The window below will appear:
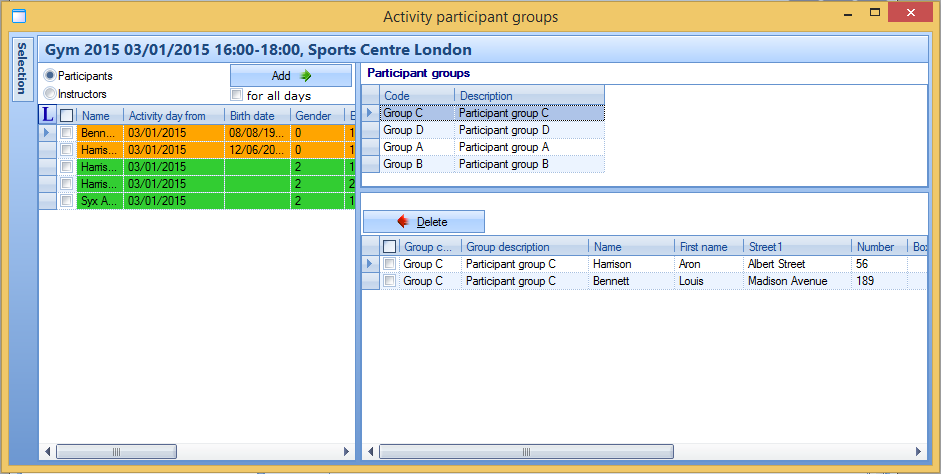 |
The window is divided into different partial windows. In the selection window you will see - dependent on your selection - an overview of all registered participants for the current activity or of all employees (instructors) that are linked to the activity.
Participants/monitors that are already in a participant group, are marked in orange and participants/monitors that are not yet in a participant group are marked in green.
 |
In the partial window Participant groups you can see the possible participant groups on top (created under Registrations > Settings > Participant groups) and below you can see an overview of the participants/instructors that are currently in the selected participant group.
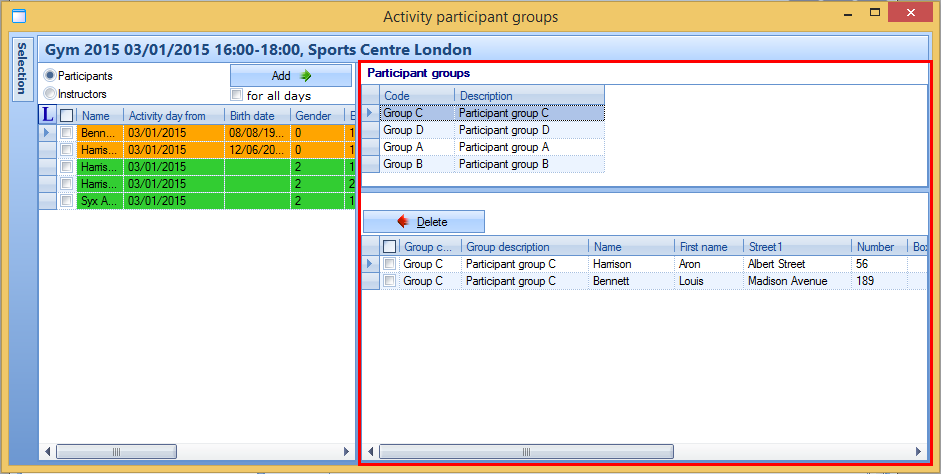 |
In order to put participants/instructors in the selected participant group, you first have to determine if you want to do the action for all activity days or not.
 |
Afterwards, you select the desired participants/monitors and click on Add. The ticked off participants/instructors are immediately put in the selected participant group and this result can be seen in the lower part of the partial window Participant groups. Use this method to link all participants/instructors to the desired participant groups.
If required you can delete participants/instructors again from the selected participant group by ticking them off and clicking on Delete. The selected participants/instructors will be deleted from the participant group and will reappear in the selection list.
On the left of the window there is also the button , which allows to reopen the hidden window Selection. This window allows you to filter the available participants/instructors in different ways, for example to see the desired participants/instructors that meet specific selection criteria faster.
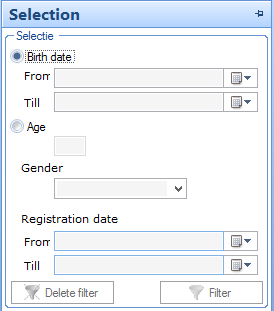 |
If you have filled in the selection criteria, you have to click on Filter.
In the overview a filter icon will appear, which indicates that the currently listed participants/instructors are shown on the basis of an active filter.
In order to delete the active filter, you have to click on Delete filter in the window Selection.
Note
If you want to you can (automatically) hide or pin the partial window Selection by clicking on /.
Another way to divide a participant into a participant group is by means of Registrations > Processing > Link to participant group in batch.