Exhibitions
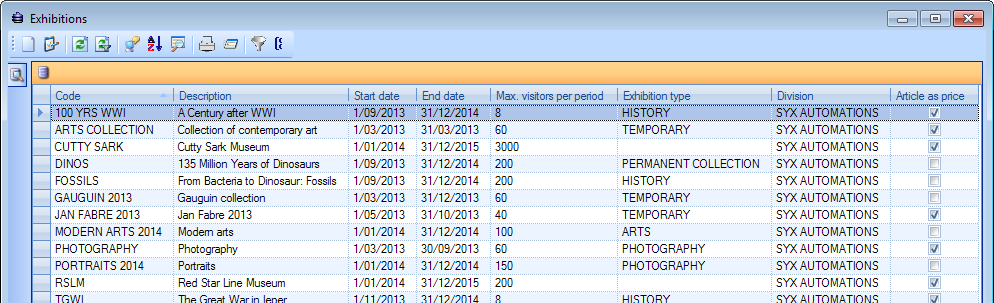
To view, modify or create exhibitions, go to Timeslot ticketing > Exhibitions.
Doing so will display the current list of exhibitions:
 |
When creating a new exhibition (e.g. by pressing <F2>) or opening an existing exhibition (e.g. by double-clicking), the Modify exhibition window appears, containing multiple tabs.
General
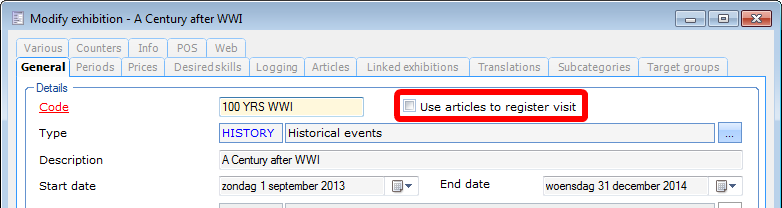
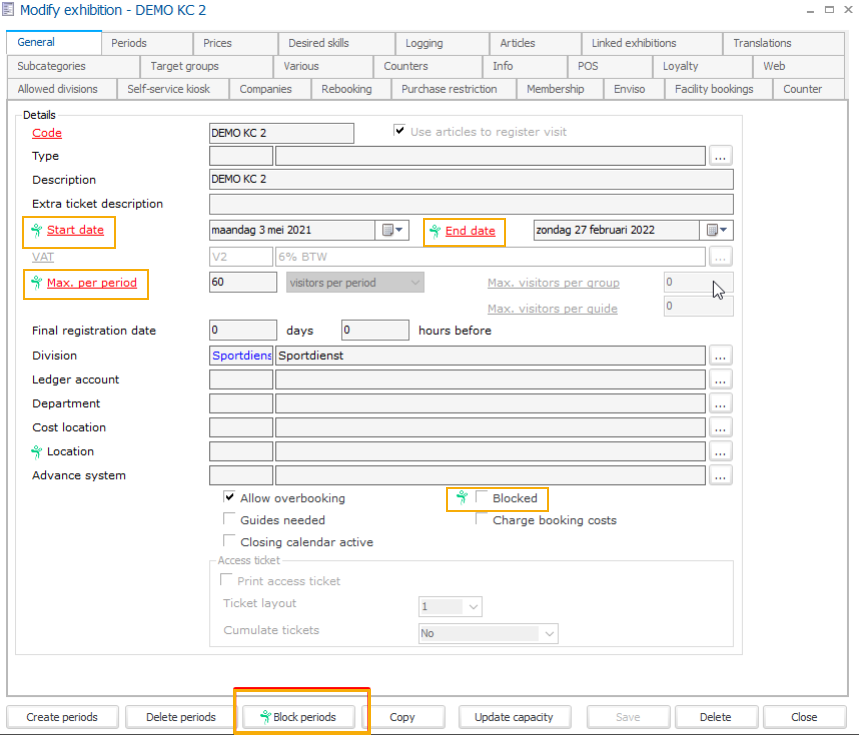
The General tab contains the basic properties of the exhibition. Besides the name, the type and the total period of the exhibition, it is possible to determine different financial settings for the accounting of exhibition visits.
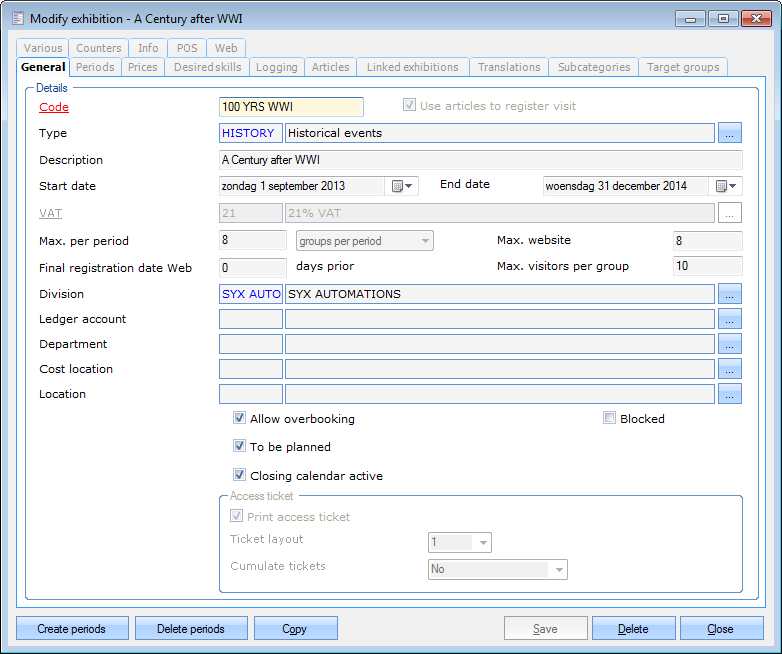 |
The following settings require some additional clarification:
Restriction on number of visitors/groups per period: This setting is important when the number of visitors that can be booked within a certain exhibition period (defined in tab Periods) needs to be limited. Such a limitation may be needed for different reasons: with regard to staffing, safety requirements, etc. This restriction can be set up in two ways: visitors per period or groups per period.
 |
Additionally, the setting 'Max. visitors per group' is important: this setting is used to calculate the number of groups, depending on the entered number of visitors (persons) while booking an exhibition visit.
 |
For example, if this value is set to 10, a booking of 11 visitors will automatically be considered as two groups. Even if the restriction is not set on groups per period, the 'Max. visitors per group setting can be useful for the automatic calculation of employee tasks (when working with employee planning).
To be planned: If this setting is active on the exhibition level, the setting Guides needed will be checked off automatically on each visit that is created for that exhibition.
Closing calendar active: With this setting, it is possible to apply the closing calendar on the total period of the exhibition. The closing calendar contains the days on which the organisation is closed, and it is set up in the exhibition parameters.
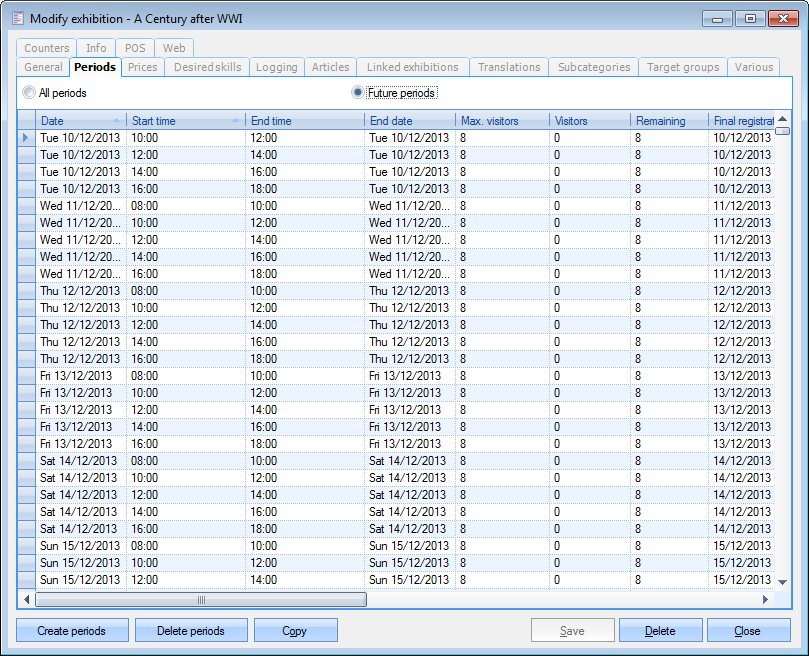
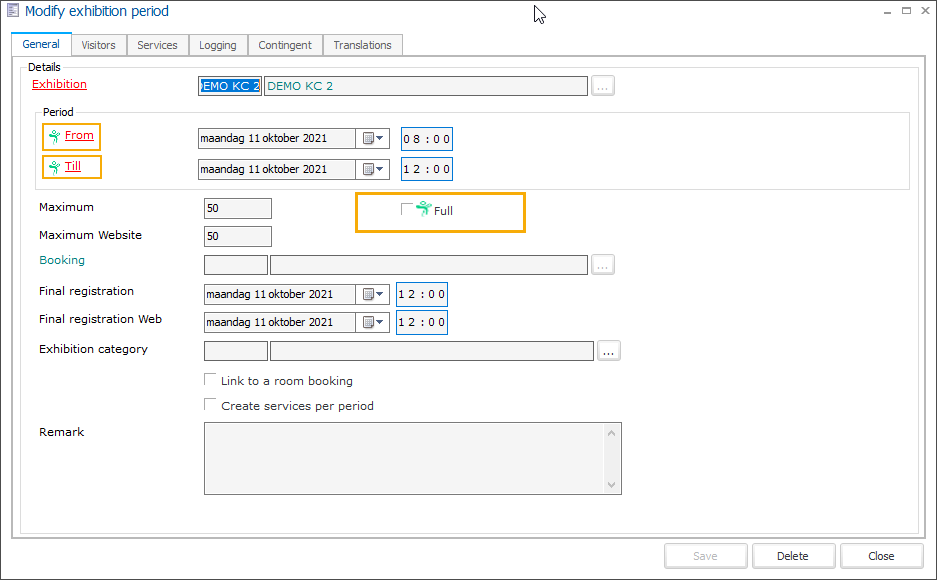
Periods
Under the tab Periods it is possible to generate the days and times on which the exhibition takes place. If necessary, a room booking (from the Recreatex Facility bookings module) can be linked to these periods, resulting in an automatically generated room booking per exhibition period.
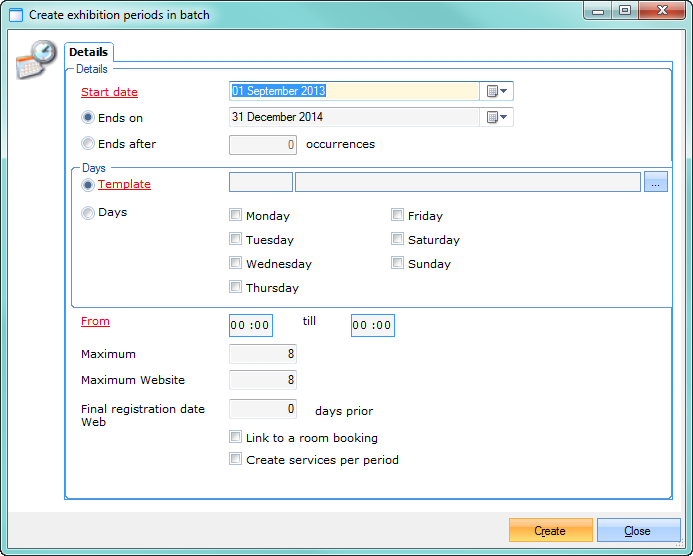
Exhibition periods can be created manually one by one, or in batch, based on a predefined pattern or selected days and times.
 |
 |
Anmerkung
Within the context of specific visitor registration and task planning (e.g. for tour guides), it may be convenient to work with time slots (sub-periods). For example, it can prove useful to divide an exhibition – that is accessible during a whole day – into two-hour time slots.
Prices
There are two distinct methods to set up pricing for an exhibition: pricing is based either on price groups or on entry articles (e.g. entry tickets that exist as articles in the database).
Based on price groups
When exhibition prices are based on price groups, it will be possible to choose a specific price group upon the registration of an exhibition visit.
To be able to work with price groups, the setting Use articles to register visit may not be checked off in the General tab during the creation of the exhibition.
 |
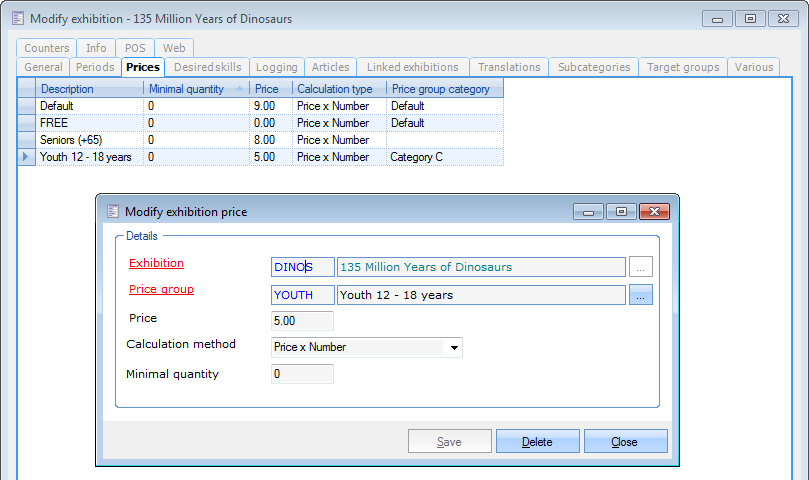
In this case, it will be possible to create the necessary price records per price group in the tab Prices.
 |
Based on entry articles
In practice, exhibition prices are generally based on (entry) articles. This means that the booking of an exhibition visit happens through the selection of articles (e.g. entry tickets) instead of price groups.
The advantage of this method is that it is more flexible. This way it is possible to use a different ticket layout per article (as this is set on the article itself), whereas when using price groups this would be limited to a single ticket layout for the exhibition.
An additional advantage of using articles is that, during the sales of such an article, the price group of the customer is also taken into account.
Also, the financial registration (for accounting purposes) of exhibition visits can be more detailed when working with articles.
All this makes the principle of using articles for the pricing of exhibitions more interesting than pricing based on price groups.
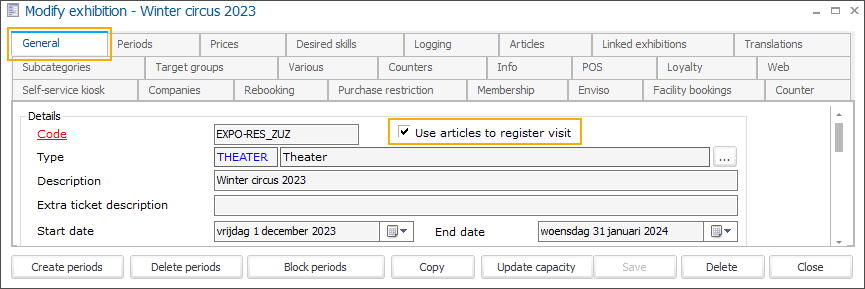
To be able to work with entry articles, the option Use articles to register visit must be selected under the tab General when creating the exhibition.
 |
Anmerkung
If you want to make sure that all your exhibitions are configured to use articles to register a visit, you can configure the option on the exhibition parameter level (Timeslot ticketing > Parameters > checkbox Use articles to register visit). This way, the option will no longer be available on the exhibition level and all new exhibitions will automatically work with articles to register a visit.
In the tab Prices you create the ticket types for your exhibition. An entry ticket combines the configuration of the linked article with additional configuration options specific to this exhibition and ticket.
To create a new ticket type use the existing framework functionality. In the Exhibition rate window modify the ticket options as needed.
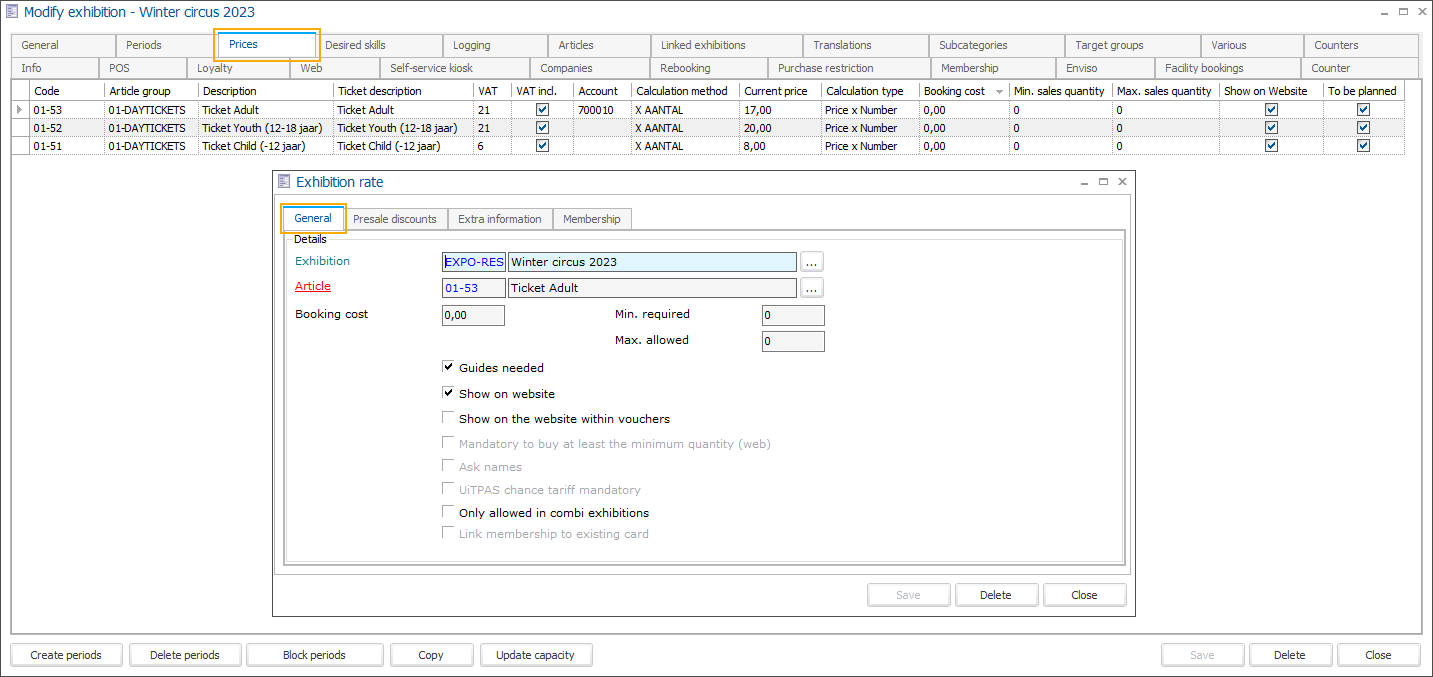 |
Tab General
Exhibition | The exhibition for which you want to create a ticket (exhibition rate), is filled in automatically. |
Article | Select the article that will be used to register a visit and provide the price information for this ticket type. |
Booking cost | |
Min. required | |
Max. allowed | |
Guides needed | |
Show on website | Select this option to make the ticket type available on the Webshop. |
Tab Membership

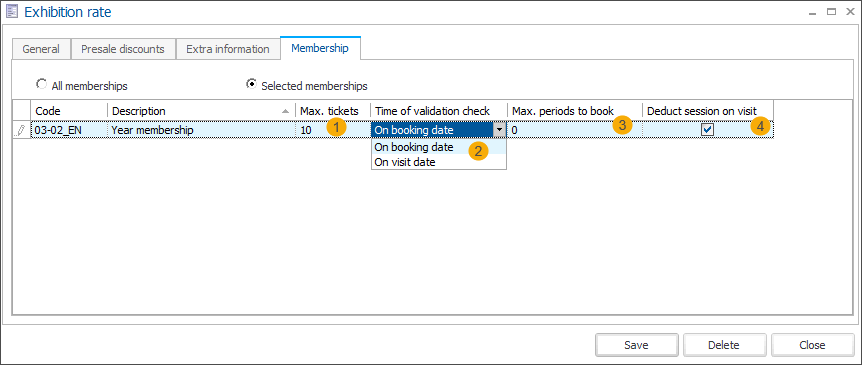
In the All memberships view, you can configure mandatory membership(s) required for this particular ticket type. When purchasing this type of ticket customers will be asked first to provide a card number linked to this type of membership.
In the Selected memberships view, you can not only see the list of the selected required memberships but you can also configure additional options.
Max. tickets (1) | |
Time of validation check (2) | |
Max. periods to book (3) | |
Deduct session on visit (4) | Select this option if the required membership has the number of sessions configured. This will allow the system to perform a check to make sure the customers cannot purchase more tickets than the available number of sessions on their membership. |
Detailed information: Zeitfenster Ticketing: Konfiguration der erforderlichen Mitgliedschaft auf Ticket-Typ-Ebene
Desired skills
In this tab, the desired employee skills can be selected. These skills act as a filter to propose the appropriate employees (e.g. tour guides) for the task planning of this exhibition.
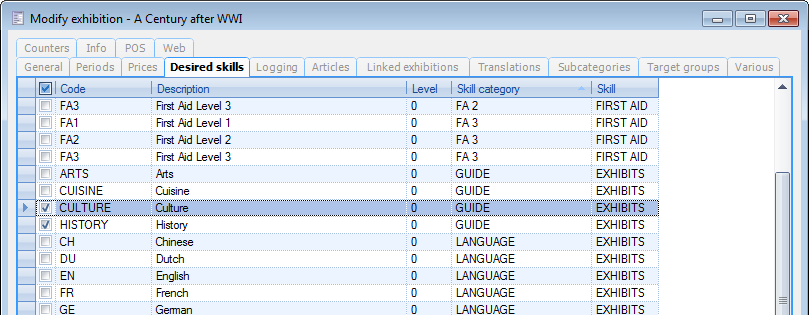 |
If necessary, additional skills can be selected that can optionally be assigned during the booking of exhibition visits through the POS system (see further: paragraph POS).
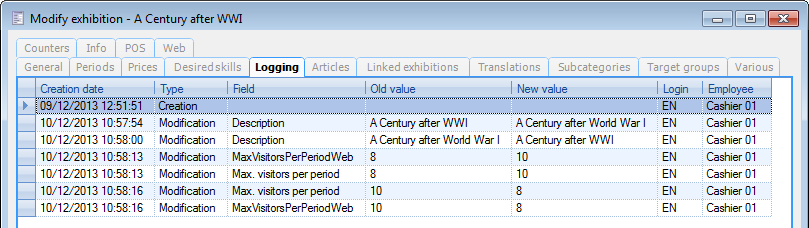
Logging
The Logging tab displays all actions that have been recorded on the current exhibition, since its initial creation.
 |
Articles
Per exhibition you can define two additional types of articles that can be included with the ticket sales:
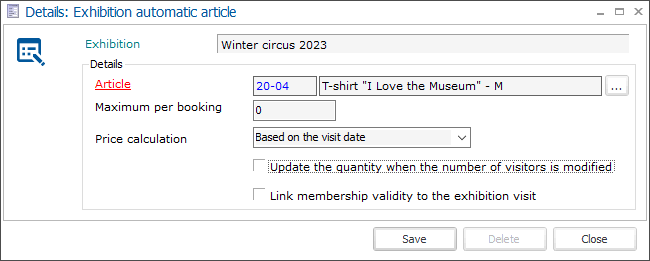
Automatic articles are always automatically sold/given per visitor that is registered (e.g. commercial folders, tour plans or visitor guides).
Optional articles can be added to the purchase by the customer (e.g. optional food, drinks, souvenirs).
Automatic
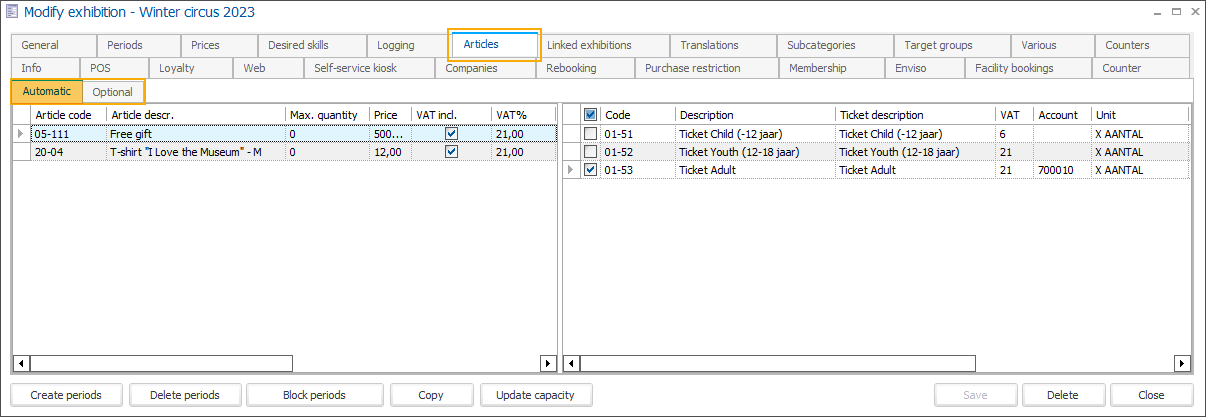
Optional
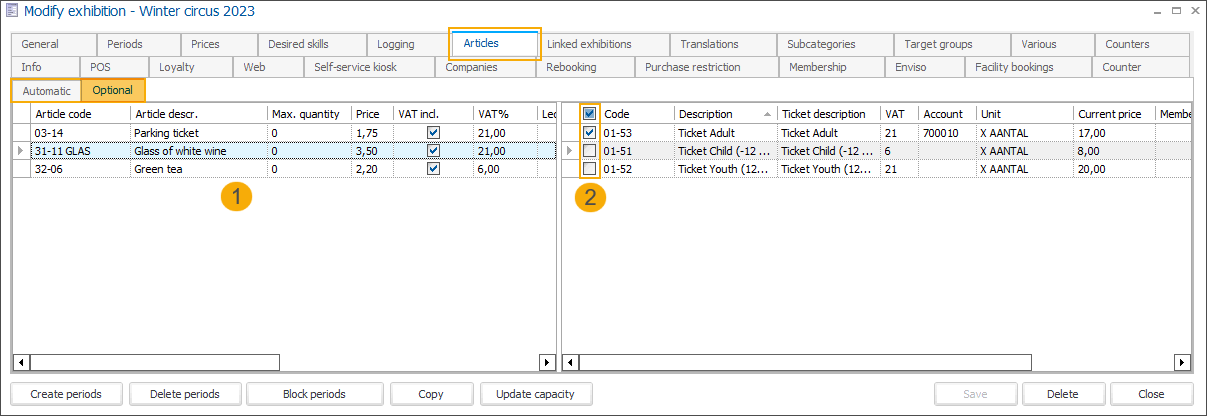
To add a new optional exhibition article use the available framework functionality.
Tab General

Article
Minimum per booking
Maximum per booking
Maximum per timeslot
Maximum per ticket
Price calculation
Link membership validity to the exhibition visit
Blocked
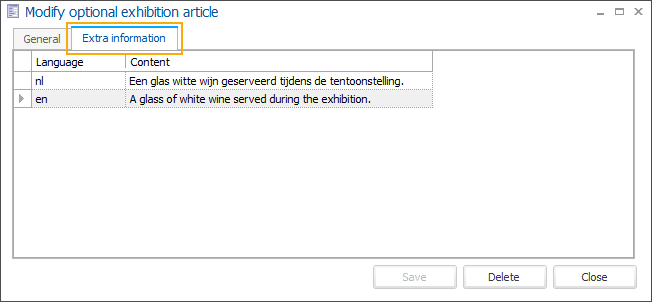
Tab Extra information
After completing your selection in the tab General, click Save to add the new optional exhibition article. The additional tab Extra information will appear.
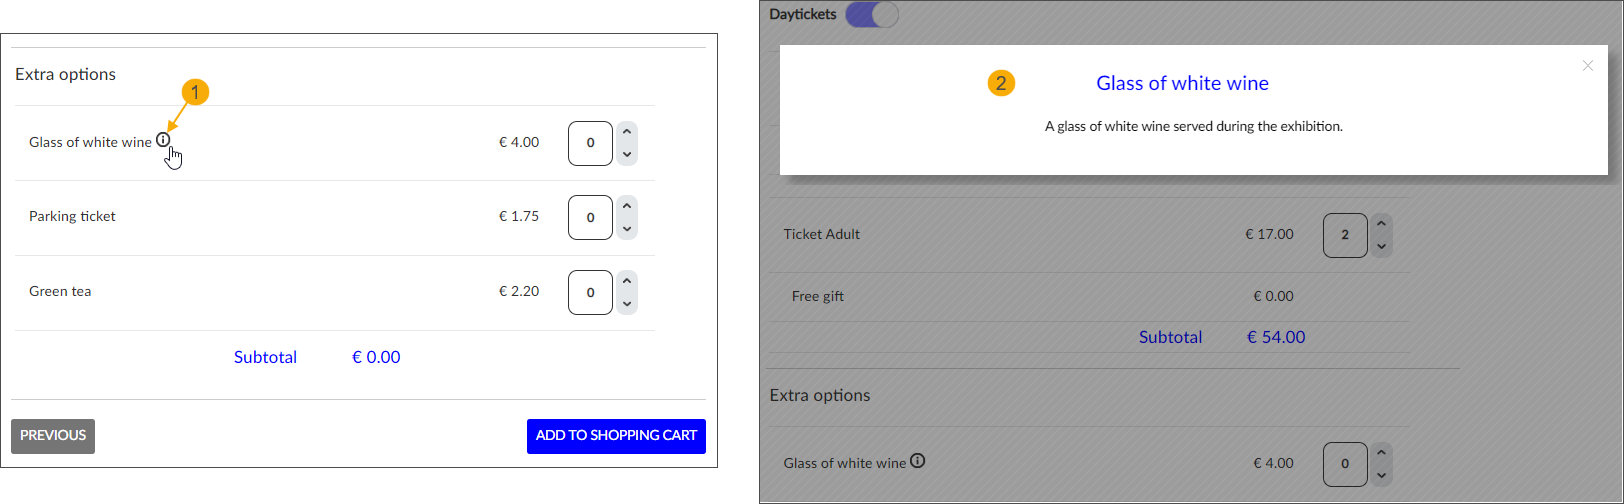
In this tab, you can provide additional information about the article in all relevant languages. Use the available framework functionality (right-click + New or F2 key) to add the extra information per language.
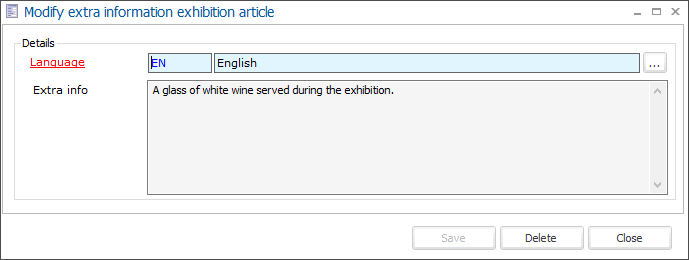
On the Webshop, if extra information is available, an info icon is displayed next to the article (1). Clicking the icon displays a popup (2) where the title is the article description, and the info is the text provided in the Extra info field.
Linked exhibitions
In this tab it is possible to select linked exhibitions. This means that when registering a visit on the current exhibition, a visit on the linked exhibition will also be registered automatically.
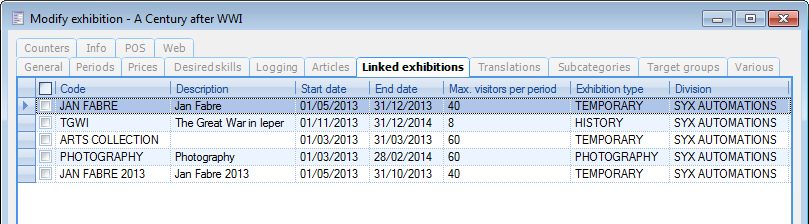 |
This list only contains exhibitions with the same type of pricing (based on price groups or based on entry articles) as the current exhibition.
Translations
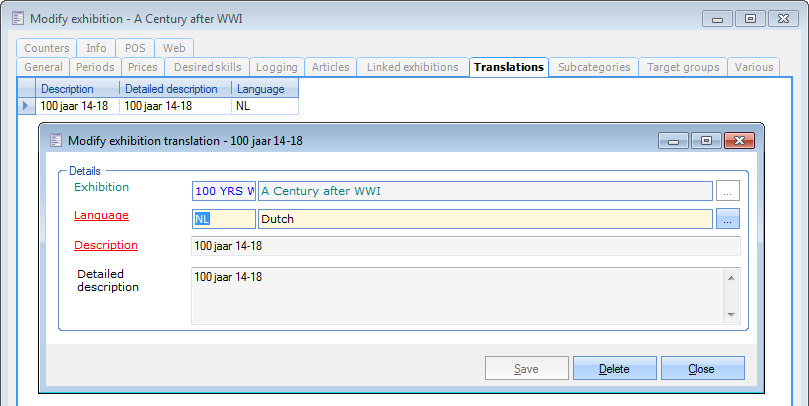
In this tab you can add translations of the exhibition name (max. 100 characters) and the detailed description. These translations can be used e.g. in the booking confirmation or on the entry tickets for non-native customers.
 |
Subcategories
If desired, the exhibition can be assigned to a specific subcategory. Subcategories are, for example, used for filtering the list of exhibitions on the Recreatex Webshop.
 |
 |
The available categories are managed in the settings of the Exhibitions module (Exhibitions > Settings).
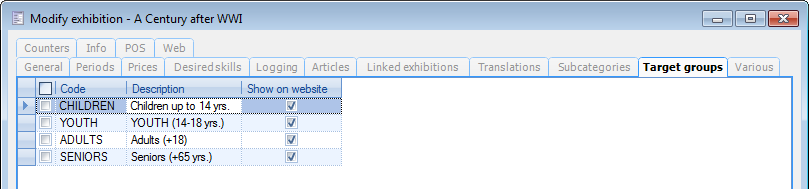
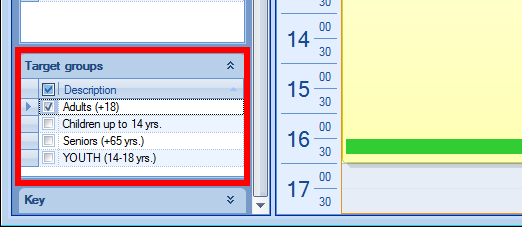
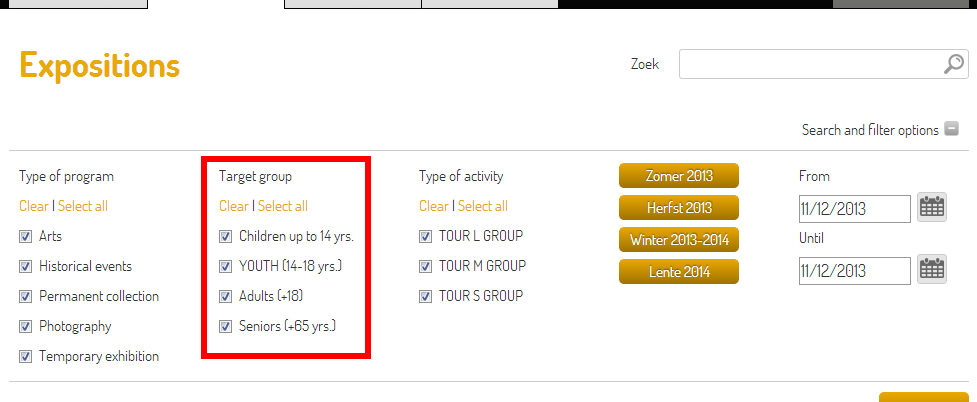
Target groups
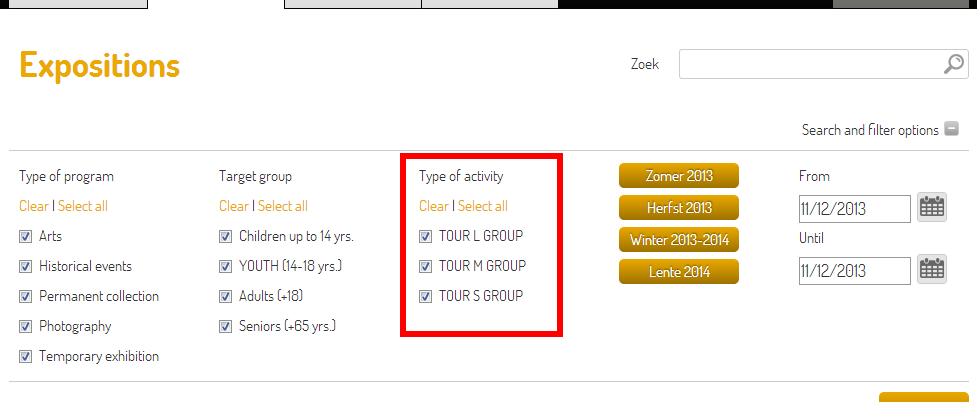
The assignment of the exhibition to one or more target groups is also meant for the filtering of exhibitions within the calendar view or in the Recreatex Webshop.
 |
 |
 |
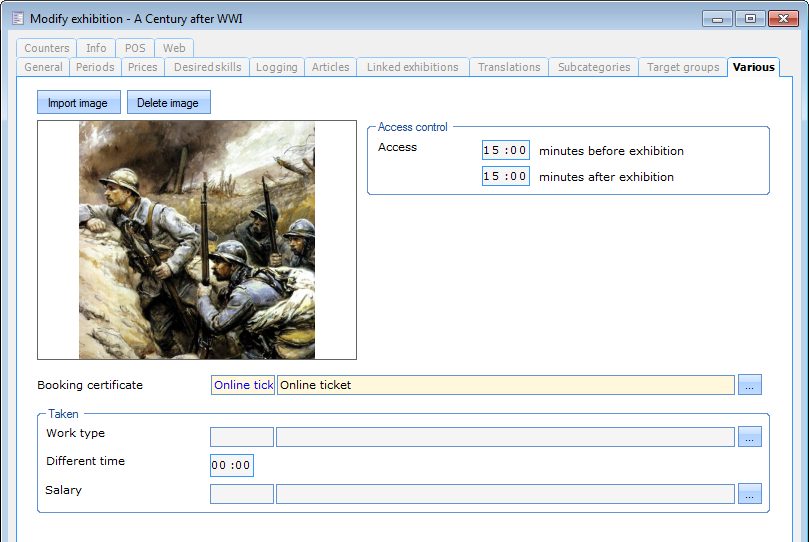
Various
In the Various tab, it is possible to determine some additional settings of the current exhibition. For example, an image can be assigned for online display of the exhibition, the number of minutes that visitors are allowed to enter or exit the exhibition before/after the exhibition period (specific for access control) can be entered, the booking confirmation document for online reservation and extra task information can be chosen, etc.
 |
Counters
In this tab, one or multiple counters can be assigned to the exhibition. Counters are an extra restriction on the number of visitors/groups that are allowed in the building/facility, calculated over multiple exhibitions.
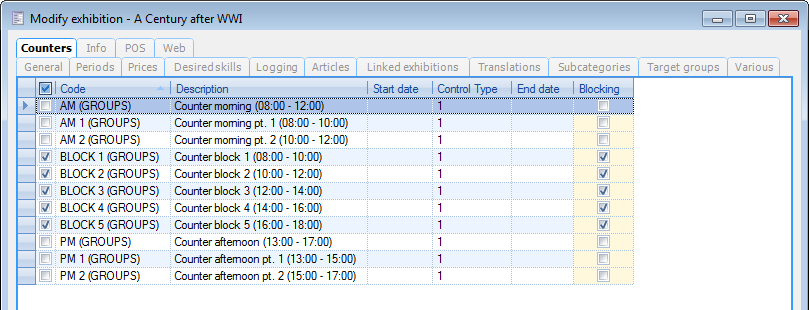 |
The use of counters is explained in detail in the chapter Settings.
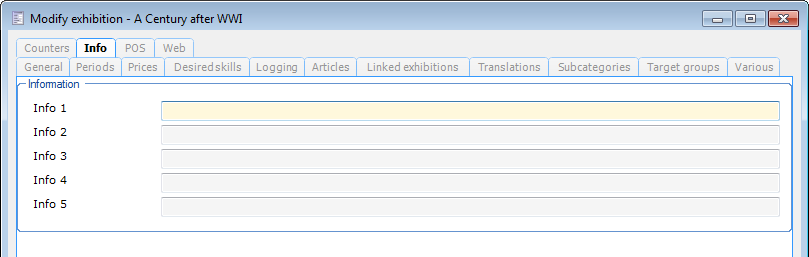
Info
If required, additional textual information of the current exhibition can be entered. The contents of each of these fields can be used in certain reports and documents (such as the booking confirmation).
 |
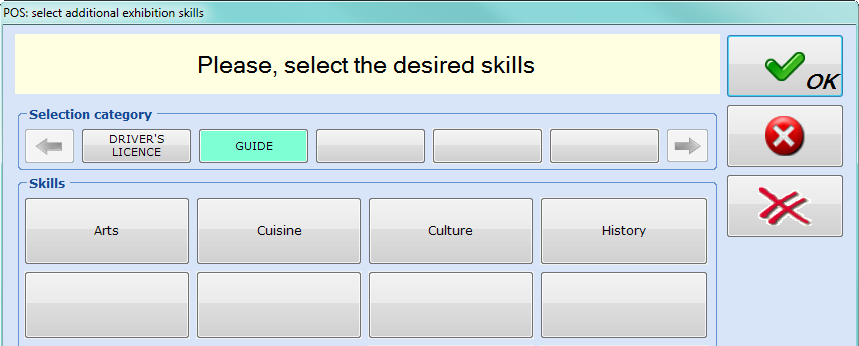
POS
In the POS tab it is possible to define that the cashier must be prompted to select additional employee skills when booking an exhibition visit through the Recreatex POS system.
 |
When booking a visit in the POS system, the cashier will be able to select one or multiple of the additional employee skills.
 |
Web
In this tab, you determine whether the exhibition should be available online on the Recreatex Webshop and define a variety of options for the online sale of each exhibition.
Web languages
Time period categories
General
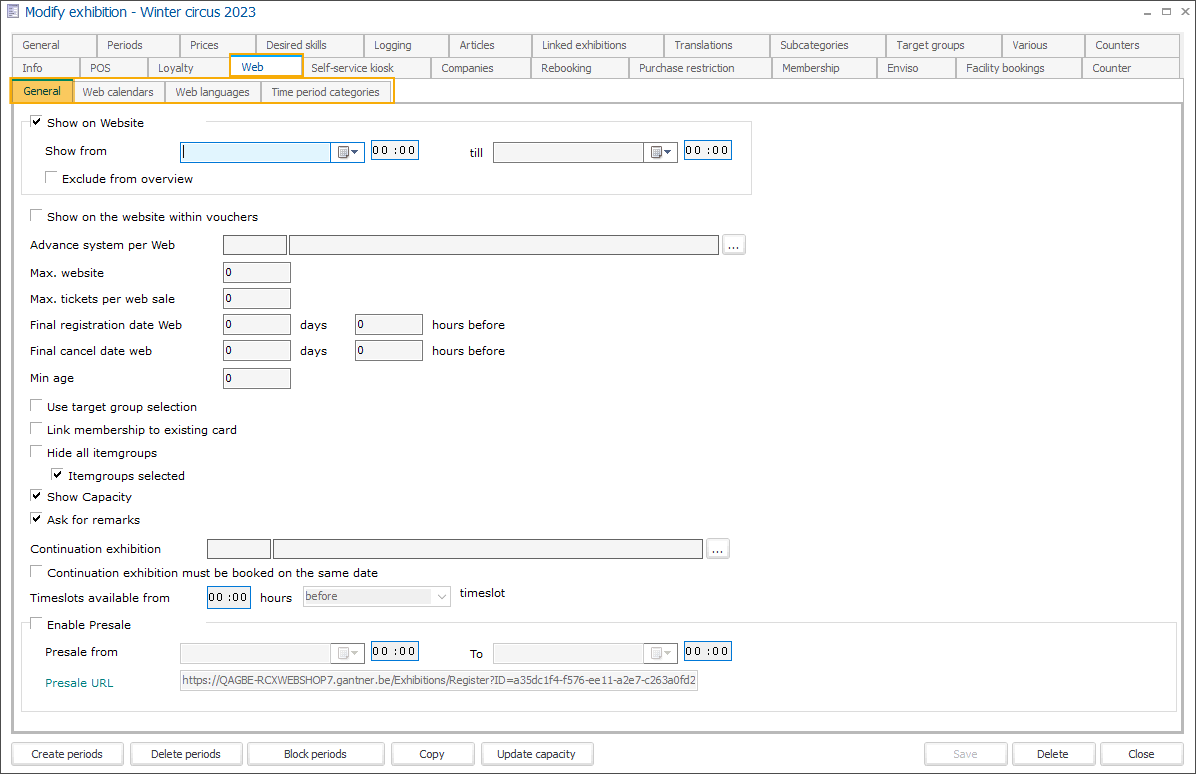
Show on Website | |
Show from/till | |
Exclude from overview | |
Show on the website within vouchers | |
Advance system per Web | |
Max. website | |
Max. tickets per web sale | |
Final registration date Web (days / hours before) | |
Final cancel date web (days / hours before) | This setting specifies how long before the actual exhibition visit date/time customers can still cancel their already paid exhibition visits via the Webshop. Using this setting, the Webshop calculates the cancellation deadline for each purchased exhibition visit. Until the deadline passes, customers see an active Cancel button next to the relevant visit in their My Exhibitions overview (History and overviews). After this date/time, the Cancel button is no longer displayed. |
Use target group selection | |
Ask language on website | |
Possible languages | |
Link membership to existing card | |
Hide all item groups | On the Webshop, exhibition tickets are grouped by article category, allowing customers to use toggle switches to filter and view only tickets from their preferred categories. This is particularly useful if you provide numerous types of tickets linked to multiple article groups. AnmerkungThe displayed category labels are based on the article category descriptions or translated descriptions if they are provided in the configuration of each article category. 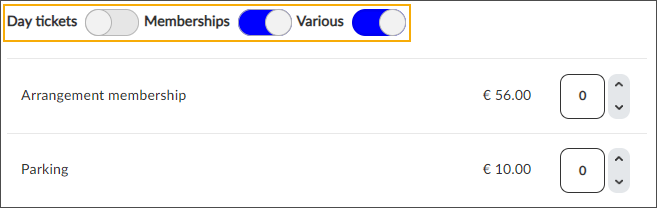 However, in case your ticket selection is limited, with this setting you have the option to hide the article categories and show all available tickets in a single list simultaneously. |
Show capacity | |
Ask for remarks | |
Continuation exhibition | |
Continuation exhibition must be booked on the same date | |
Timeslots available from xx:xx hours ... before|after timeslot | |
Enable presale | |
Presale from date/time ... to date/time | |
Presale URL |
Web calendars
Link calendars to web calendar styles to create exhibition web calendars.
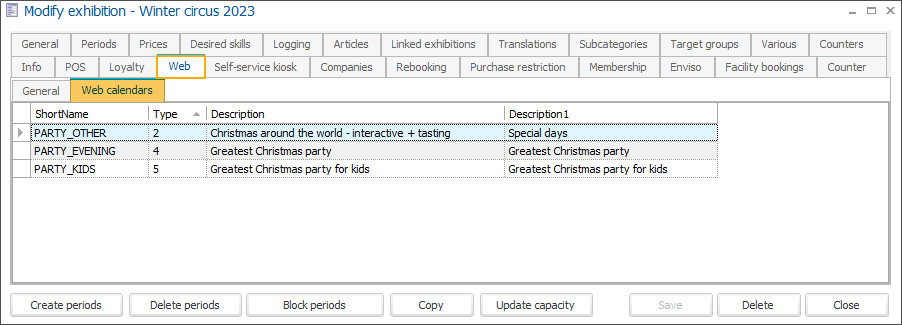
Use the available framework functionality to create an exhibition web calendar for each calendar that you want to link and visualize on the Webshop.
An exhibition web calendar is simply a combination of a Calendar (1) and a Web calendar style (2)
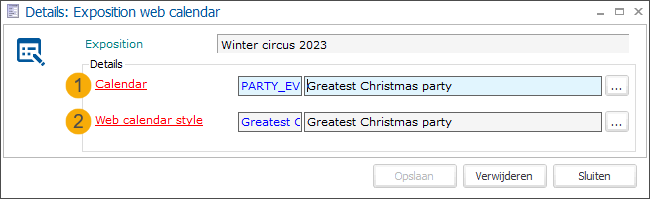
Each calendar can only be linked once within the same exhibition.
Web calendar styles: Currently you can define up to 5 custom styles. It is not allowed to define multiple calendar styles for the same type (1 to 5).
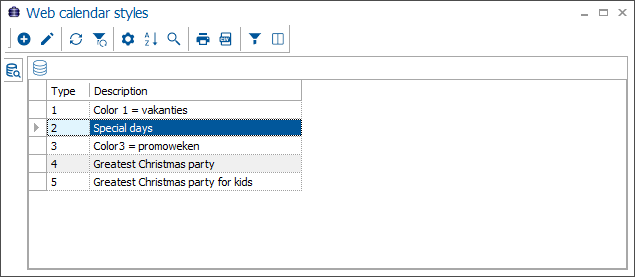
To create each of the 5 calendar styles use the available framework functionality.

In the tab Details select the Type (1) ranging from 1 to 5 and provide a Description (2). Click Save (3).
Under the tab Translations add a translated description for each relevant language (4). The translated descriptions are displayed in the legend and serve not only to explain the meaning of each colour but also to provide basic information about the related event.
If no translations are provided, the web calendar description (2) will be used instead and displayed for all languages.
For more information on how to configure and use calendar styles on the Webshop, see Anpassbare Kalenderstile verwenden, um Ausstellungszeiträume hervorzuheben
Rebooking
Define general and web-specific rebooking options for each exhibition.
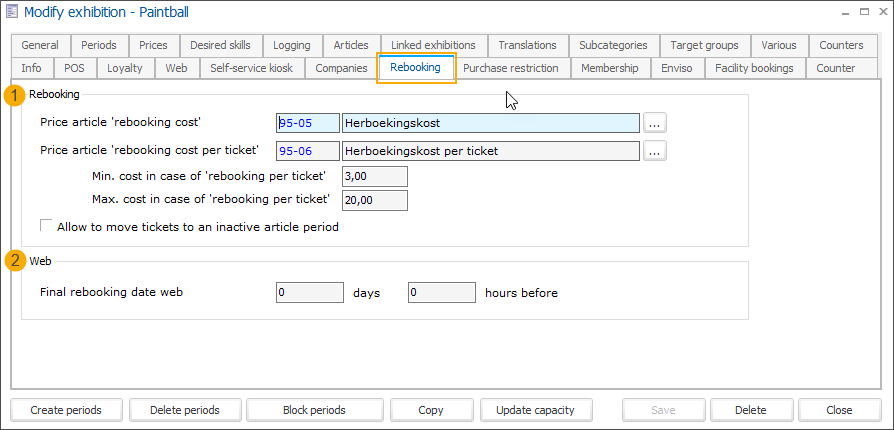
In the section Rebooking (1) you can specify general rebooking options, that apply across the Recreatex system, regardless of whether you work in the backoffice, at the POS or on the Webshop.
Price article 'rebooking cost'
Price article 'rebooking cost per ticket'
Min. cost in case of 'rebooking per ticket'
Max. cost in case of 'rebooking per ticket'
Allow to move tickets to an inactive article period
Wichtig
This setting is currently implemented for Recreatex backoffice and POS (cash register).
Suppose you use separate articles with different active periods to define exhibition ticket prices rather than configuring multiple prices/periods within the same article.
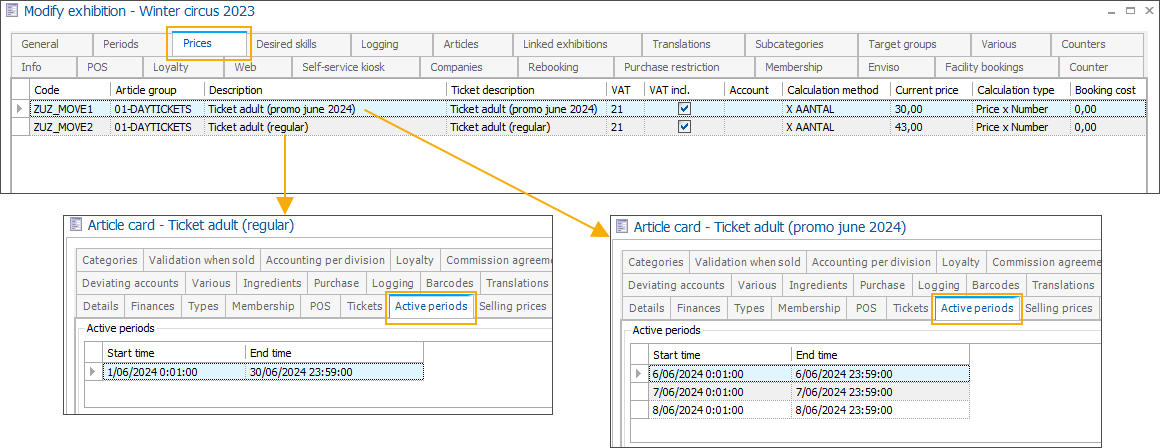
In that case, you can activate this setting to allow customers to rebook tickets tied to a specific active period to a timeslot outside of that period, even if these tickets would normally not be available for purchase in the other period.
For example, if you offer discounted tickets for a certain period and the customers who bought the tickets cannot use them during that period, activating this setting will allow them to rebook their exhibition visit tickets to another period, regardless of the active period initially configured for that ticket.
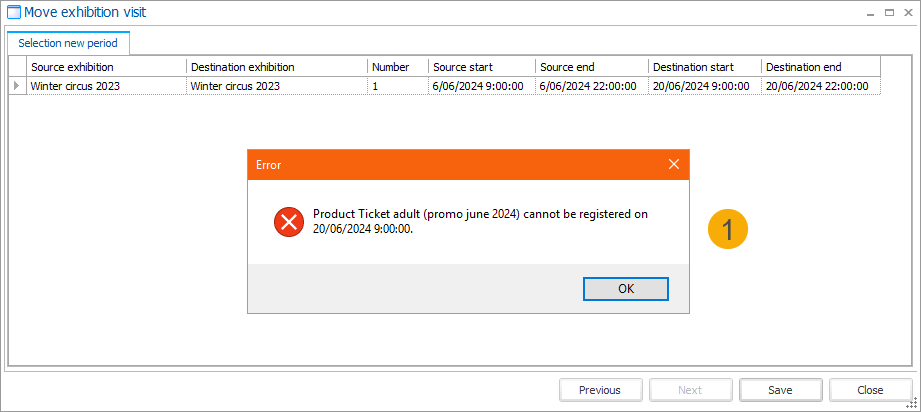
The setting is not active (1) - It is not allowed to rebook the ticket to a timeslot outside of the active period of the original ticket.
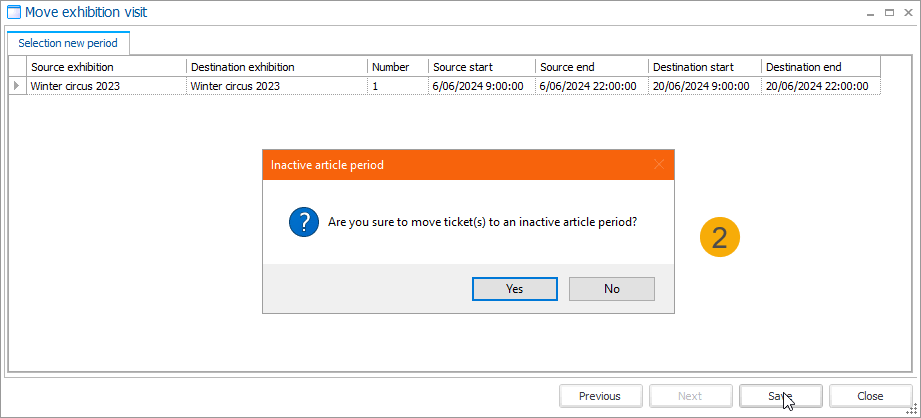
The setting is active (2) - It is possible to rebook the ticket to a timeslot outside of the active period of the original ticket article.
In the section Web (2) you can specify additional, web-only configuration for each exhibition.
Final rebooking date web (days & hours before)
Enviso
In this tab you can configure synchronization to Enviso for the selected exhibition.
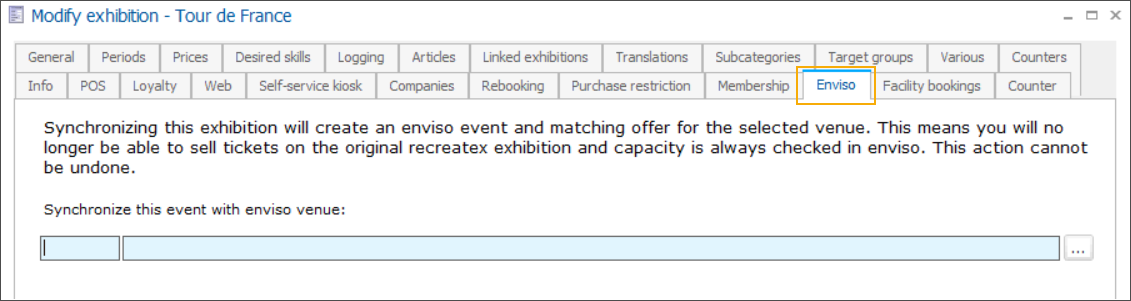
If the synchronization to Enviso is active, all synchronized functionalities in Recreatex will be marked with the Enviso icon  :
:
Modify exhibition screen > tab General
Block exhibition periods detail screen

Modify exhibition screen > tab Period > Modify exhibition period screen
Counter
In the tab Counter you can specify the following options related to the sales / consumption location of the exhibition:

Sales location | allows you to group points of sale and control at which points of sale the exhibition will be available. Sales location information is also visualized in a separate column in the Exhibitions overview. To create a new sales location, see Create a new sales location |
Always automatically create card number at the pos | allows you to define automatic card number creation at exhibition level:
|
Create a new sales location
In the module Exhibitions, go to Exhibitions to open the exhibitions overview.
Select the exhibition for which you want to configure a sales location and double-click to open or click the edit icon
 in the top left corner.
Go to the tab Counter and click
 next to Sales location
In the Consumption locations window click
 in the top left corner to create a new item.
In the Modify consumption location window go to the tab General. Fill in the details and click Save.
Go to the tab Points of sale and select the related POS points from the available list.
Click Close.