Using the Instructor Website
After logging in to the Course management Instructor Website, it will be possible to register presences, enter scores and make transfers.
Logging in
The start page of the Course management Instructor Website is the log-in window.
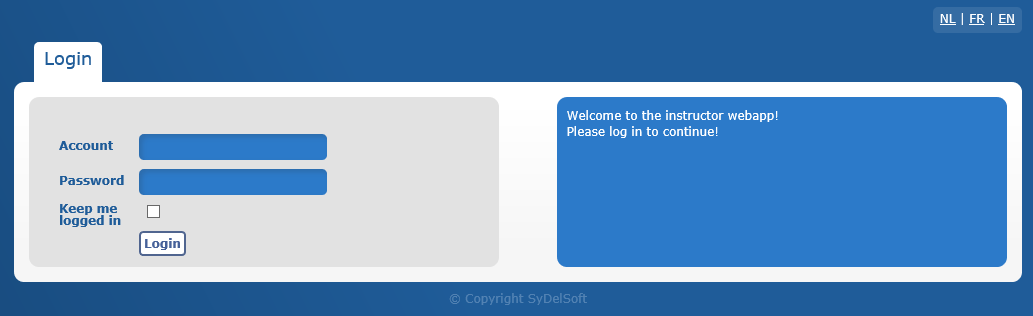 |
Here you have to fill in the instructor's log-in data (employee in Recreatex), and you can choose to stay logged in after which you will not have to log in each time you navigate to the Course management Instructor Website on the same appliance.
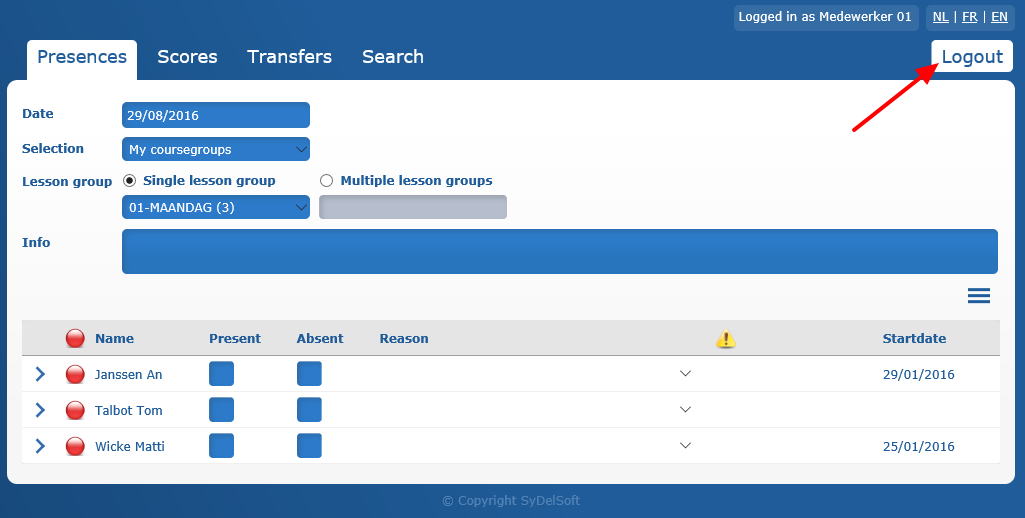
If you are logged in, the website will automatically navigate to the tab Presences
Scores
The tab Scores allows you to evaluate the students' performances. This is done in a similar way as in the Course management tool in Recreatex itself.
As in the tab Presences, you can select the date and the correct lesson group in the upper part of the page, after which the students in question will appear.
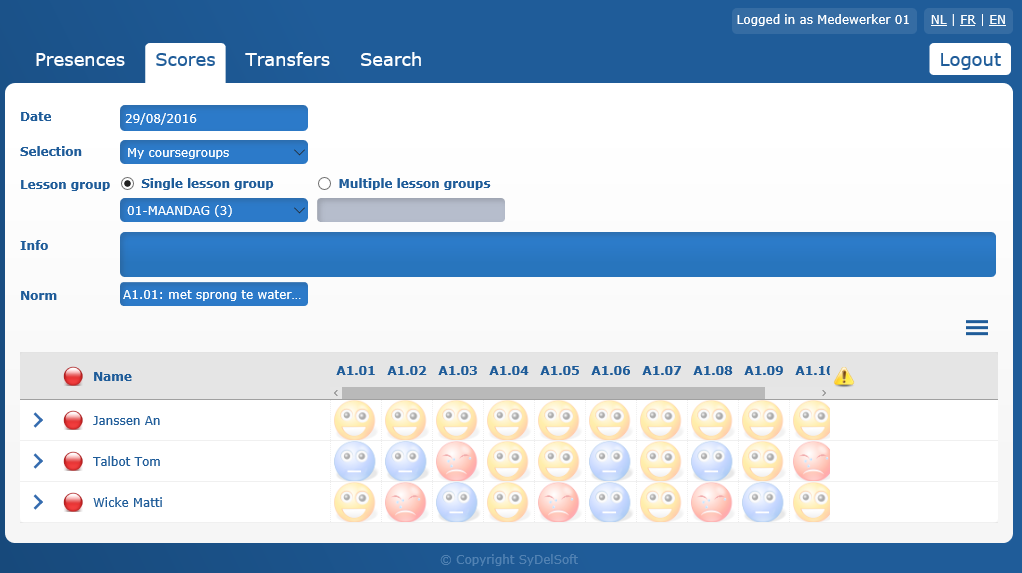 |
Giving scores to students can be done on the basis of the selected (ticked) norm(s) (standard) or not.
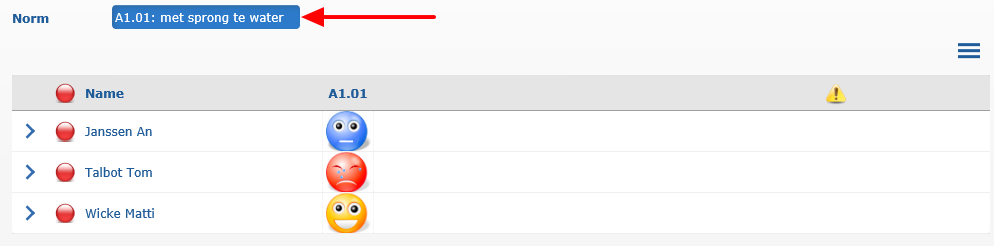 |
A score column per selected norm will appear next to the students and a score can be entered for each student for the current norm. There are three possible scores, i.e. Insufficient, Almost sufficient and Sufficient, respectively indicated by means of a specific icon (here: smiley). The design and the colour of the icon also depend on the current design (skin) of the Course management Instructor Website.
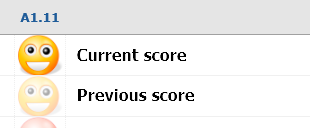
If you want to change the score, you have to click in the score column until the desired icon is selected.
The previous score (if applicable) is shown by default in a paler colour.
 |
Transfers
In the transfer tab it is possible to transfer one or several students from one lesson group to another.
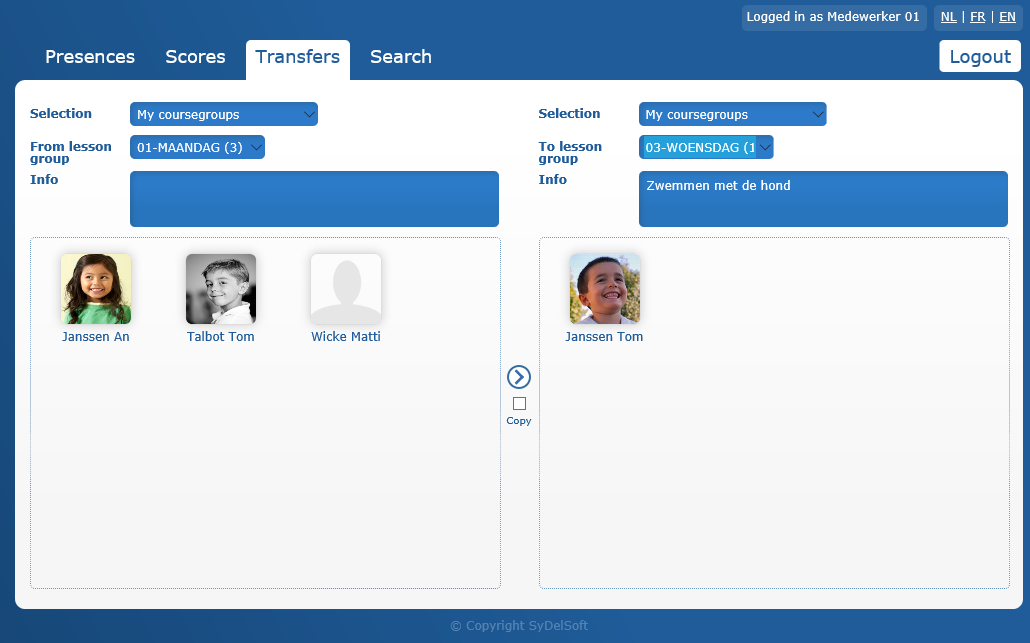 |
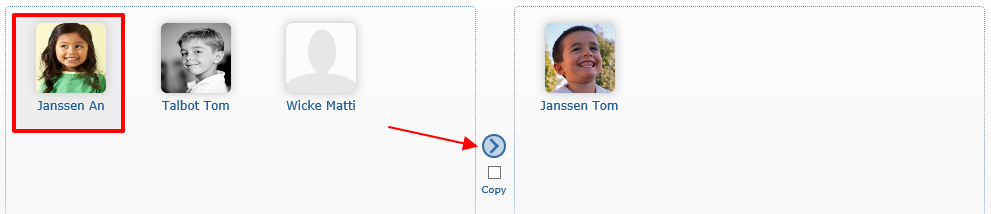
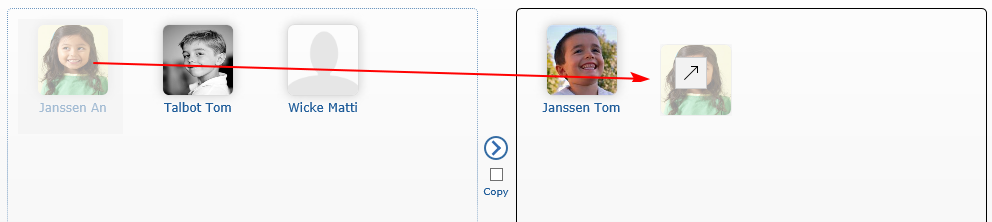
A transfer is always done from the left to the right. Select the lesson group of the student that needs to be transferred in the left part of the window and select the lesson group to which the student has to be transferred in the right part.
Then, there are two ways to make the transfer.
By selecting the student in question and clicking on the arrow between the two partial windows.
 |
By clicking on the student in question and dragging him/her towards the right part.
 |
If you tick the box Copy, the selected student will not simply be transferred but copied to the lesson group, meaning the student will be in both lesson groups.
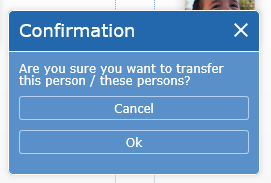
A question for confirmation will appear before the transfer will effectively be executed.
 |
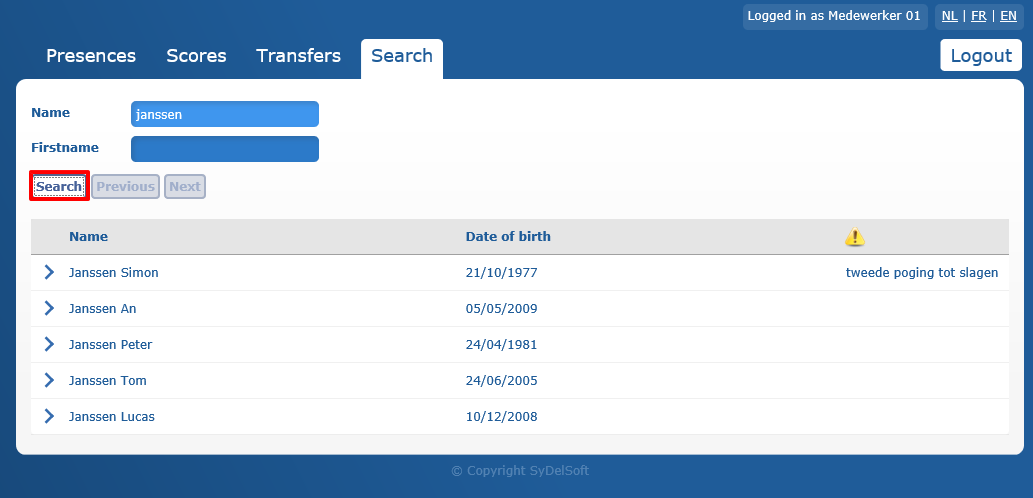
Search
The tab Search allows you to quickly find a student in the system on the basis of his/her surname and/or first name. If you click Search all students that meet the query will appear.
 |
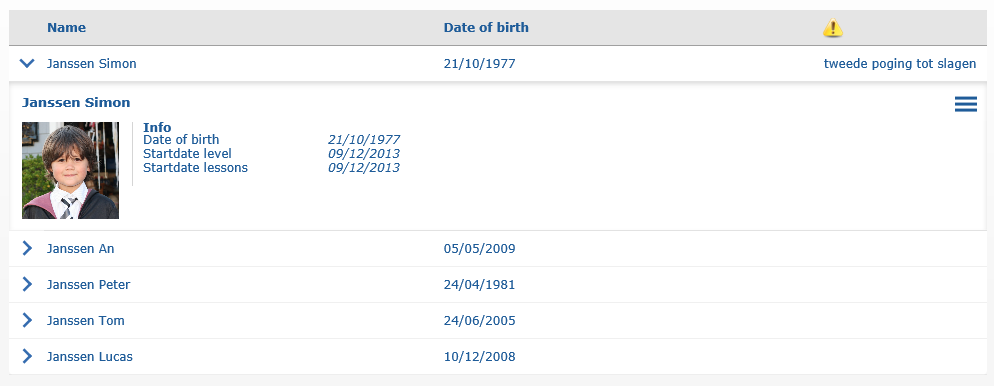
If a student is selected, additional info will appear, such as the linked photo and lesson groups for which he/she is registered.
 |
Log out
You can log out of the Course management Instructor Website by clicking on the button in question, in the right upper-hand corner of the page.
 |