Register on Enviso
When you are about to log into Enviso Sales for the first time, you will need to follow a specific procedure to register on Enviso.
Go to https://sales.enviso.io/
Click Create account.
Next, select the Venue type that is closest to your business and enter the name of your venue.
When entering the Venue name, you will be prompted with matching venue names. Select your venue from the list.
In case you don't see your venue's name in the list of suggested venues, click Can't find location.
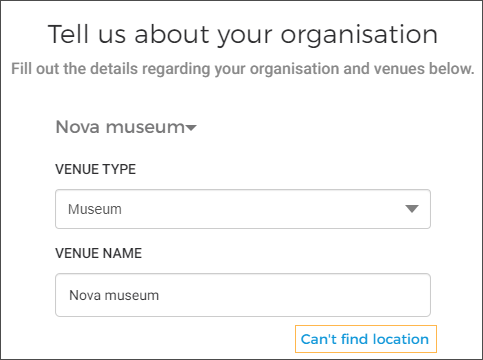
As a result, multiple fields will be available for filling-in your venue's address details.
Note
It is possible to enter multiple venues. For description on adding venues, see Add Venue.
After you have completed adding the venue details, click Next.
Enter the required details and click Register to register on Enviso.
Next, you will receive a confirmation email on the provided email address. If you cannot find it in your inbox, consider checking your spam folder.
Click the confirmation link to complete registering on Enviso.
Next, you will be redirected to the Enviso Sales portal. Now you can log in using the registered email address and password.
After going through this initial, one-time procedure, you will be able to use your registered email address and password to log in on Enviso Sales.as an existing user
After registering on Enviso Sales, you will be able to manage multiple user profiles from Enviso Admin. For a user with full admin permissions, it is possible to switch to Enviso Admin or another Enviso app from the top panel.
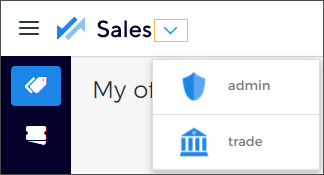 |
By default, the user who registers the account has complete admin permissions.
Add venue
In case your organisation has multiple venues, it is possible to add them to your account on Enviso Sales.
In step 3 of the venue registration process as a new user, click Add venue.
Enter details of the second venue.
To remove an added venue, click Remove besides the venue name.
Repeat the process to add more venues, if required. Note that after completing the venue registration process, it is not possible to add venues to your account.
Enter Organisation group name.
Note
Organisation group name refers to the name of the organisation which comprises all your Venues.
After you have added the venues, click Next.
For a detailed description on the Venue registration process, refer to step 4 onwards on logging in as a new user.