Database setup
Broker service (not required to be configured when using exhibition display only)
Dynamic view of Visitor Info (optional to configure)
Broker service
Note
In case only Exhibition display is used, Broker service is not required to be configured.
Important to know:
When Broker service is not configured:
Visitor info: No data will be shown on the visitor info display screen
Zone summary and Bookings: The data will refresh at the completion of each cycle. The data will not be refreshed in real-time.
Exhibitions: No impact. The exhibition display screen will show real-time data of exhibitions per time slots.
When using a database for the Infoplay application (mobile or desktop), the Broker service of the database in question must be active. By default, the broker service is deactivated (visualised as a false value).
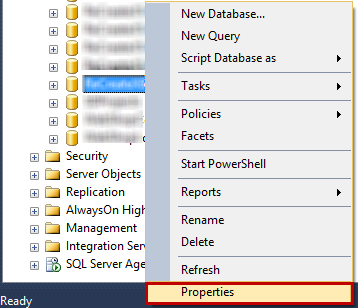
Open Properties of the database in question.
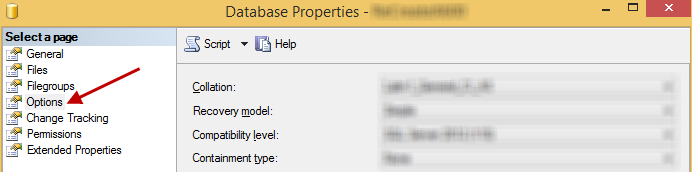
Go to the Options page from the left panel.
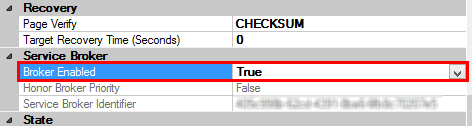
Define the parameter Broker Enabled as True.
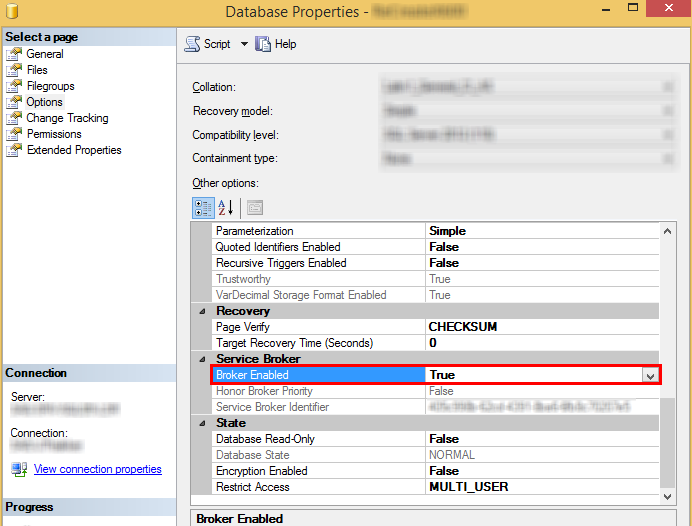
Click OK to save the made changes.
Important to know:
It is possible that the database in question is currently in use and you may encounter an error while enabling the Broker service.
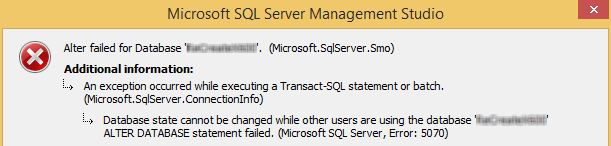
In this case, follow the below procedure:
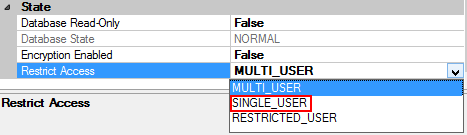
Switch the database to single user mode.
For this purpose, set the parameter Restrict Access to SINGLE_USER.
Activate Broker service.
To activate Broker service, define the parameter Broker Enabled as True.
Warning
The SQL Server Database Engine returns the following error message after a service broker enabled database is restored to the same SQL Server instance with a different database name.
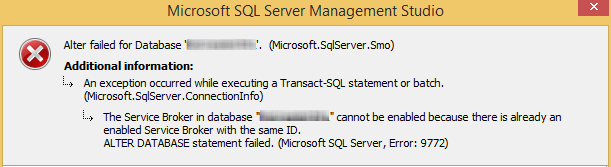
This error occurs when a Service Broker enabled database is restored or copied to the same SQL Server instance where the original database resides, as a result, both databases end up having the same Service Broker identifier. When you try to enable Service Broker for the restored database, you will receive the above error message.
When this happens, it will be necessary to create a new ID for the Broker service of the database on which you want to activate the Broker service.
This can be done by executing the following script sequentially in SQL Server Management Studio:
1.
use master
ALTER DATABASEdatabasenameSET SINGLE_USER WITH ROLLBACK IMMEDIATE2.
use master
ALTER DATABASEdatabasenameSET NEW_BROKER3.
use master
ALTER DATABASEdatabasenameSET MULTI_USERIn this case, the next step in the procedure (Switch back to multi-user mode)should be skipped.
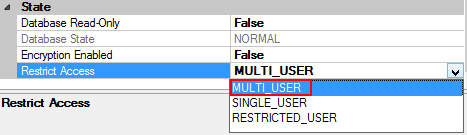
Switch back to multi-user mode.
For this purpose, set the parameter Restrict Access to MULTI_USER.
Note
The Infoplay application can be operated successfully when the database is set to multi-user mode.
Dynamic view of Visitor Info
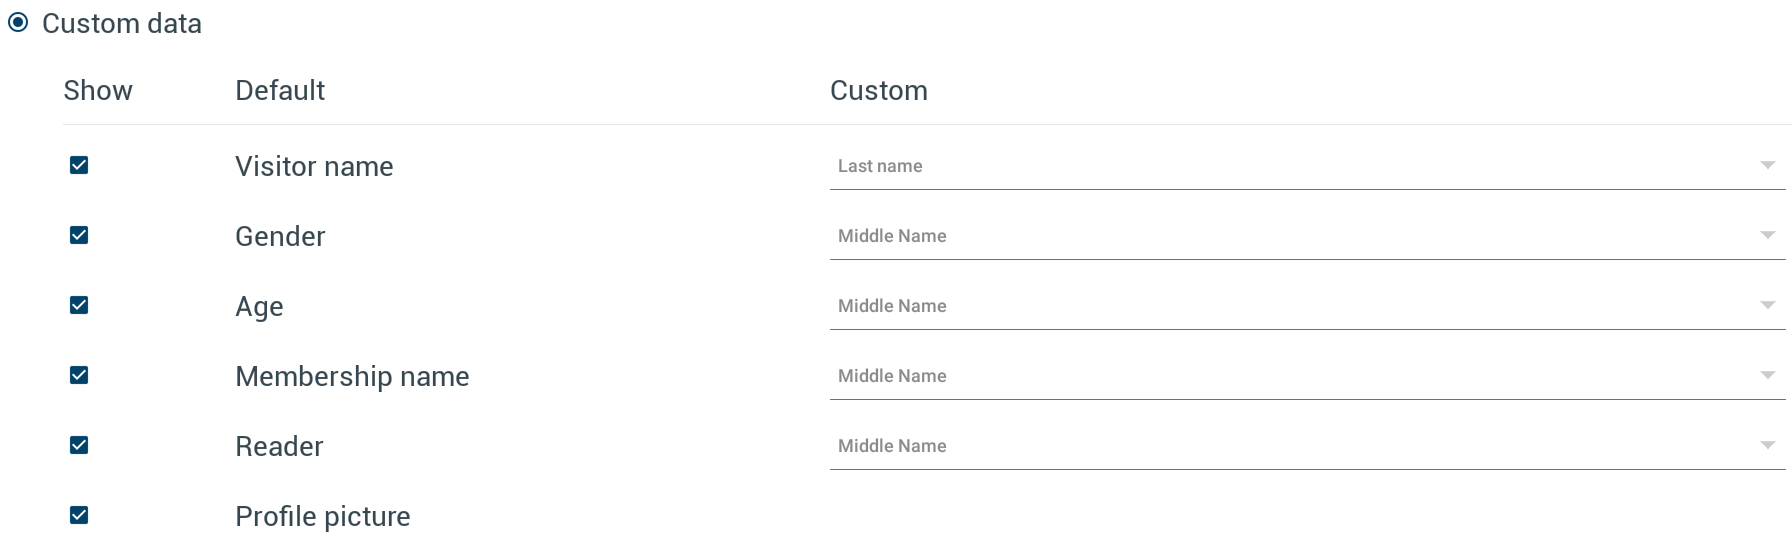
In case of Infoplay mobile application, it is possible to further customise the list of custom fields available for visitor information display in the mobile app settings.
 |
Note
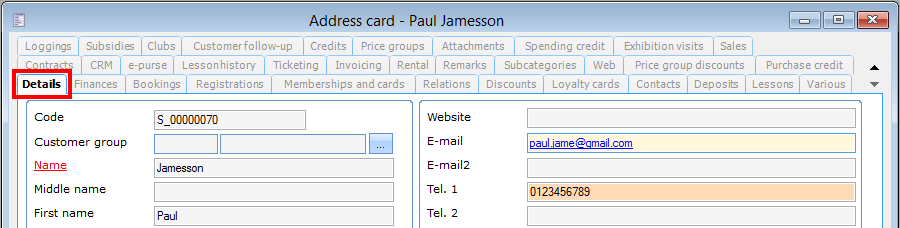
Fields available under the tab Details of customer card in the Recreatex desktop application can be added as custom fields.
 |
For this purpose, it is possible to edit the view dbo.vwInfoPlayView. However, any error in this view could lead the application to stop working properly. Therefore, it is recommended to create a new view for adding custom fields.
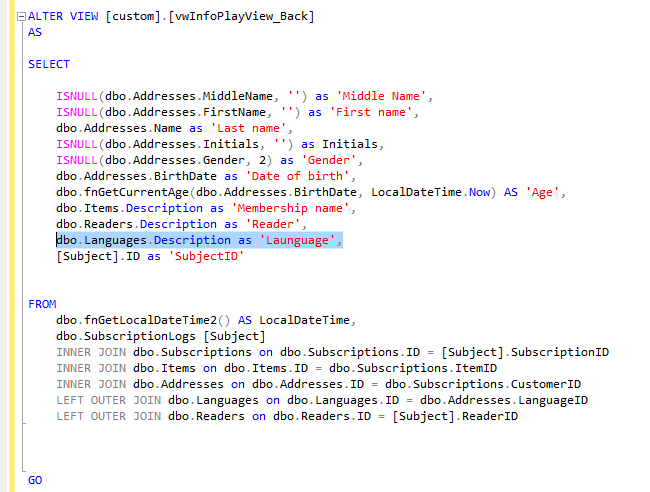
Here's an example of adding a new custom field, Language.
1. Copy+paste the view dbo.vwInfoPlayView and rename it to custom.vwInfoPlayView.
Note
Backup the view dbo.vwInfoPlayView before adding custom field(s).
2. Add Language parameter in select query. Commit the view for saving the SQL script.
Warning
When you create a custom view, it's important that one field has the name SubjectID. This field is a unique identifier. In absence of SubjectID, the view will not work.
Execute the view.
Now, in the Infoplay mobile app, go to Settings > Visitor info > Display > Use custom data. Under the column New, note the new field Language.