Setup
Note
Before starting the setup, you should have a Google Tag Manager and a Google Analytics account.
Setting up Google Analytics 4 requires executing steps in the Google Analytics application, the Google Tag Manager application, and in the webpage hosting the Ticketing widget.
When all these steps are executed correctly, data from the Ticketing widget will become available in the Google Analytics reports after 24 to 48 hours.
Setup Google Analytics 4
Login to your Google Analytics account.
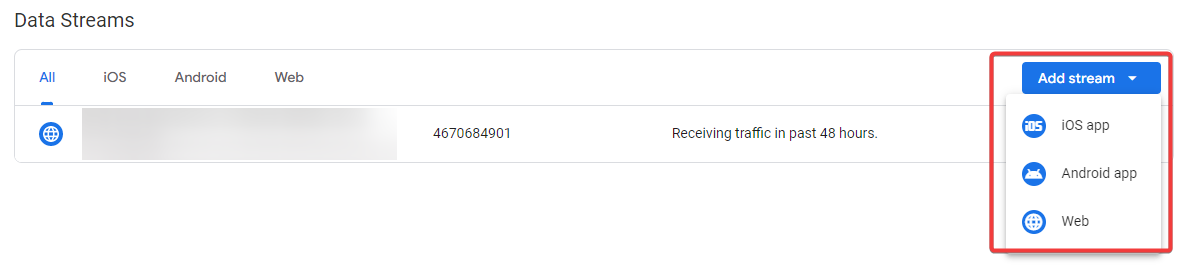
Create a new data stream via Admin > Account > Property > Data Streams.

Click the Add streams dropdown, and select the source type you want to stream. Select Web for the Ticketing widget.
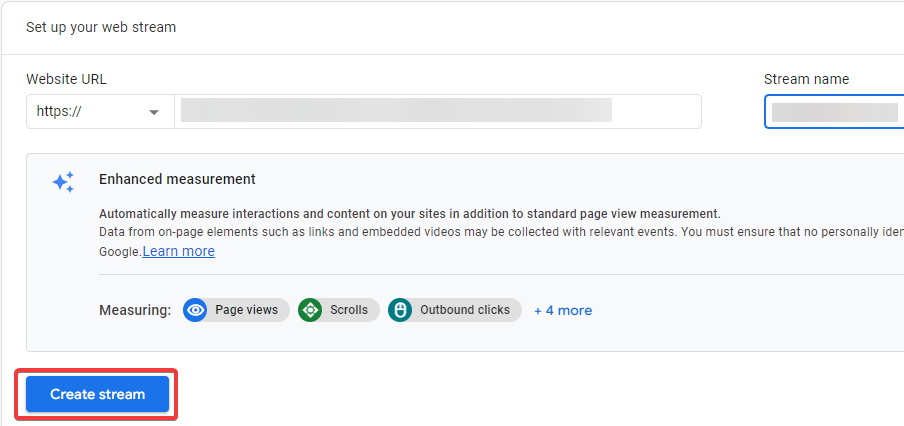
Set up web stream.
Fill in the URL of the website hosting the Ticketing widget and choose a stream name. Thereafter, click the Create stream button.
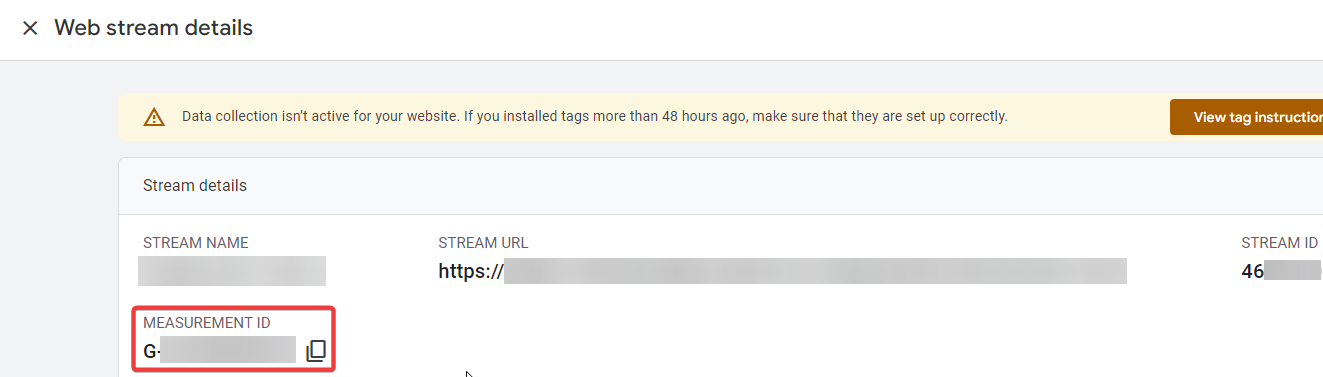
Ignore the installation instructions by clicking the close button.
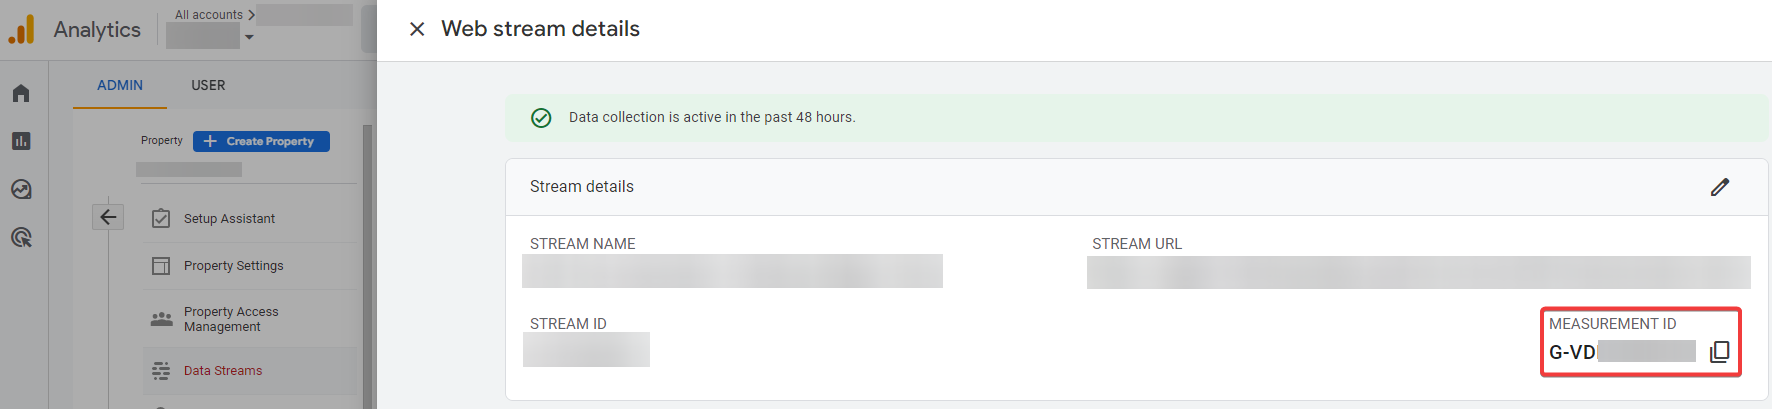
Copy the Measurement ID so that it can be used in the setup of Google Tag Manager.
Setup Google Tag Manager
Login to your Google Tag Manager account and start by creating a new container.

Fill in a container name, select the correct target platform (Web), and click Create.

Ignore the ‘Install Google Tag Manager’ window for now, by clicking the OK button.
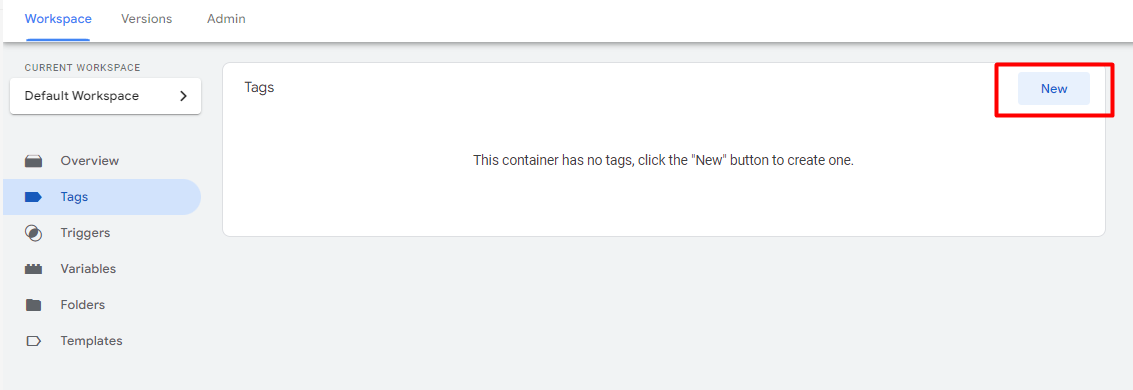
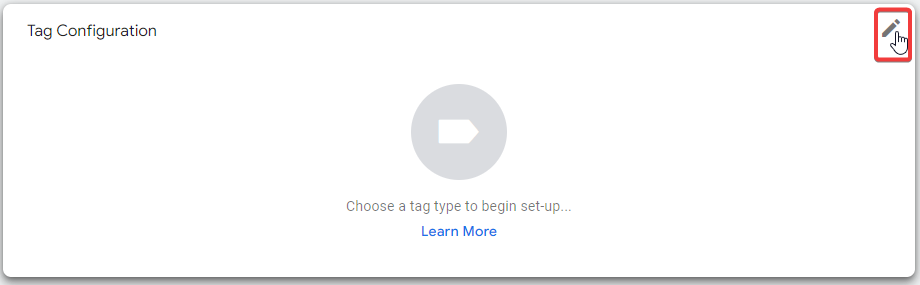
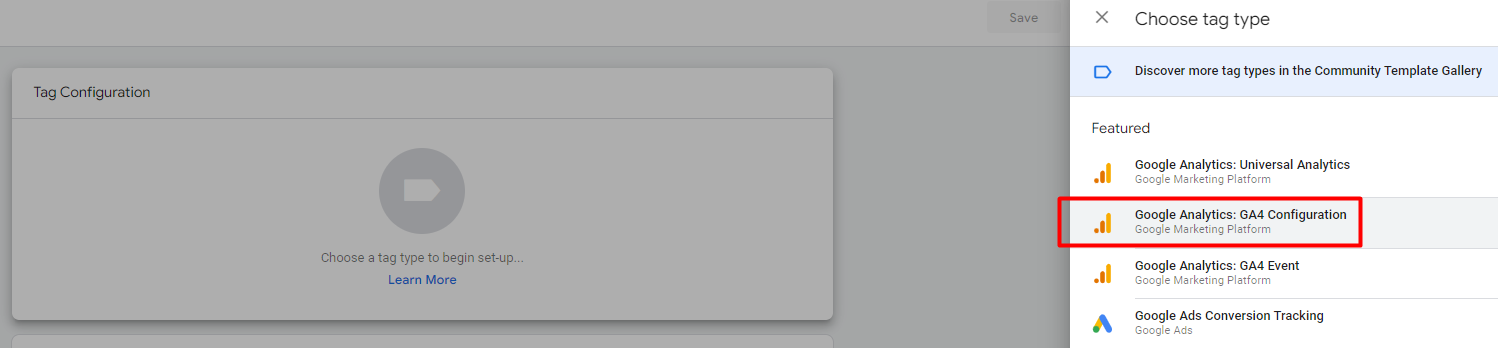
On the ‘Workspace‘ page, click Tags and then click New.
Edit the Tag Configuration and choose Google Analytics: GA4 Configuration as the tag type.
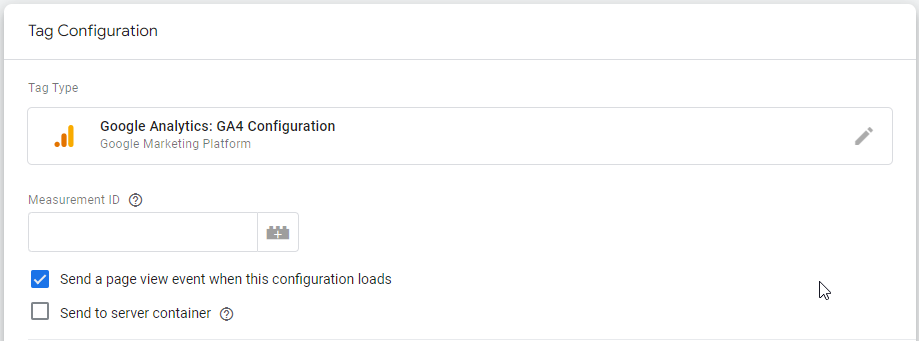
Paste the ‘Measurement ID‘ you copied from Google Tag Manager.
If you need to copy it again, you can find it in Google Analytics > Admin > Account > Property > Data Streams > Your stream > MEASUREMENT ID (identifier starting with ‘G-’).
Add a trigger by clicking on the Triggering tile and then the + button.

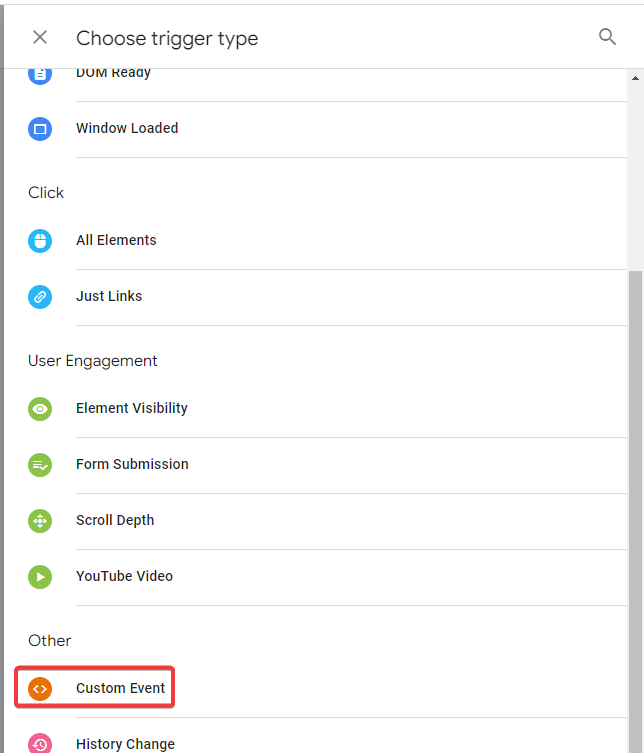
Click the Trigger Configuration tile and select Custom Event as the trigger type (under Other).
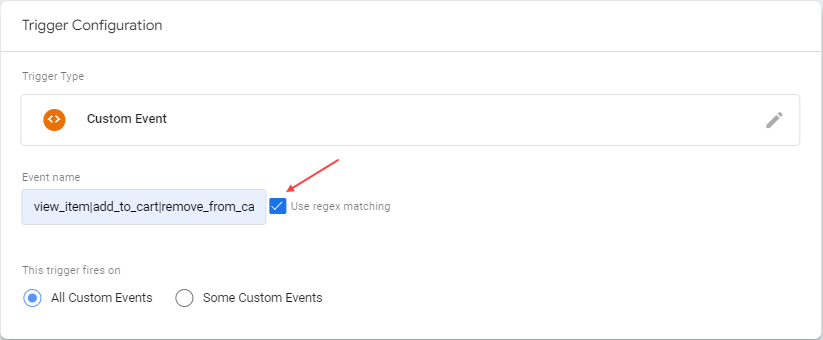
Complete the Trigger Configuration settings.
Add the following value to the
event namefield:view_item|add_to_cart|remove_from_cart|begin_checkout|add_payment_info|purchase|refund|view_cart|select_promotion|login|signup
Note
Select ‘Use regex matching’.
Give the trigger a name (eg. ‘GA4 - Ecommerce trigger‘) and click Save.
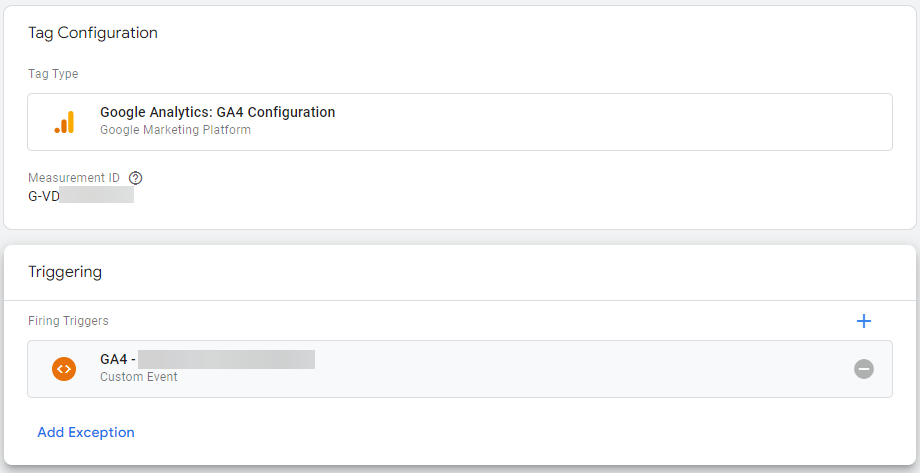
Name the tag settings.
The tag configuration should look like this:
Give it a name (eg. ‘GA4 - Configuration‘) and click Save.
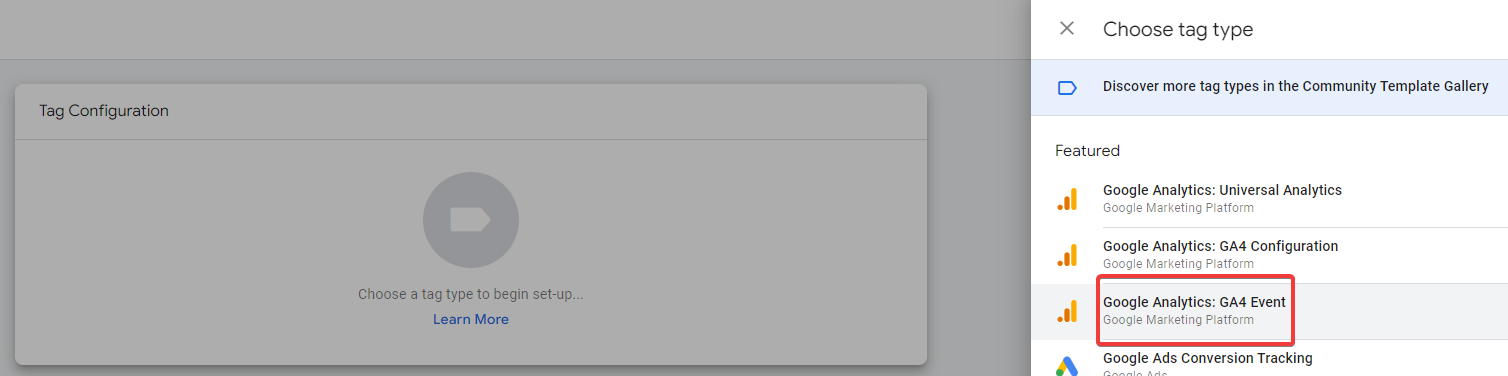
Create another Tag by clicking on the New button in the Tags component, and choose Google Analytics: GA4 event as the tag type.
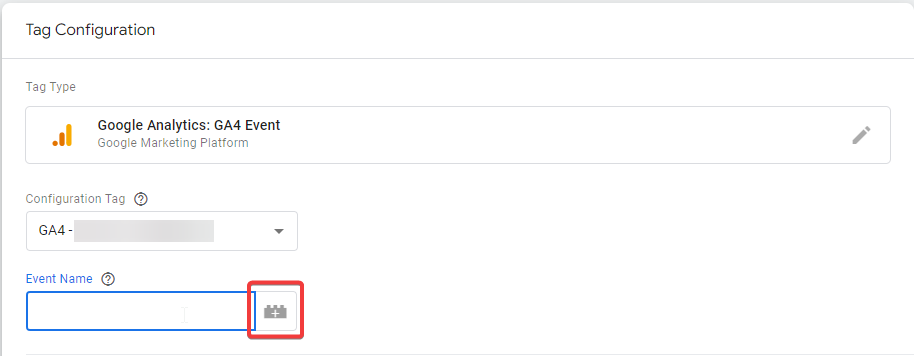
Complete the Tag Configuration settings.
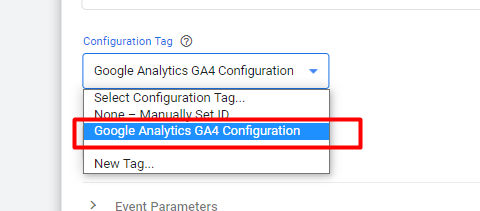
Select the tag configuration you created in the previous steps as ‘Configuration Tag'.
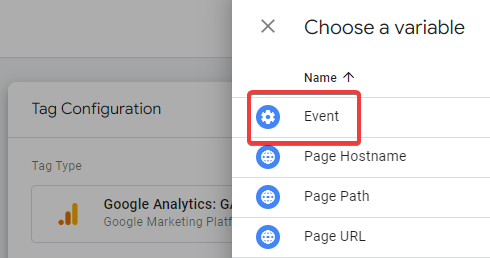
For the ‘Event Name‘, click the add event name button next to the input field and select the variable with the name ‘Event‘.
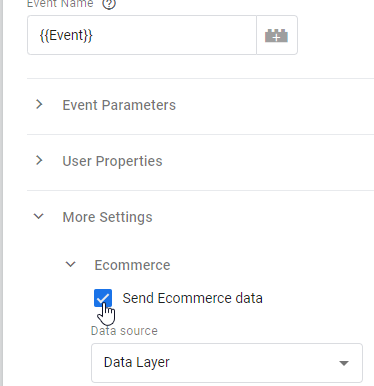
This will fill in the ‘Event Name‘ field with the value {{Event}}. Expand More Settings and check Send Ecommerce data.
Set a trigger by clicking on the Triggering tile and then select the previously created trigger.

Give the Tag Configuration a name and click Save.
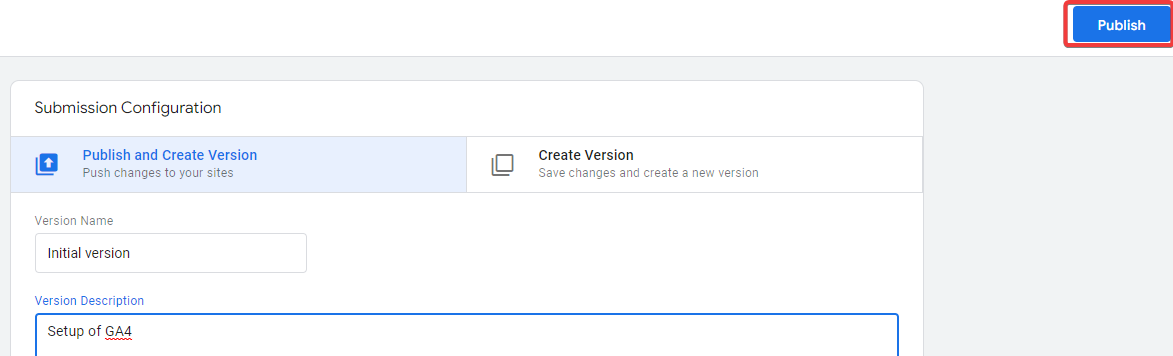
Finally, publish the tags.
First, click the Submit button from the workspace page.

Indicate Publish and Create Version, add a version name and description, and click Publish.
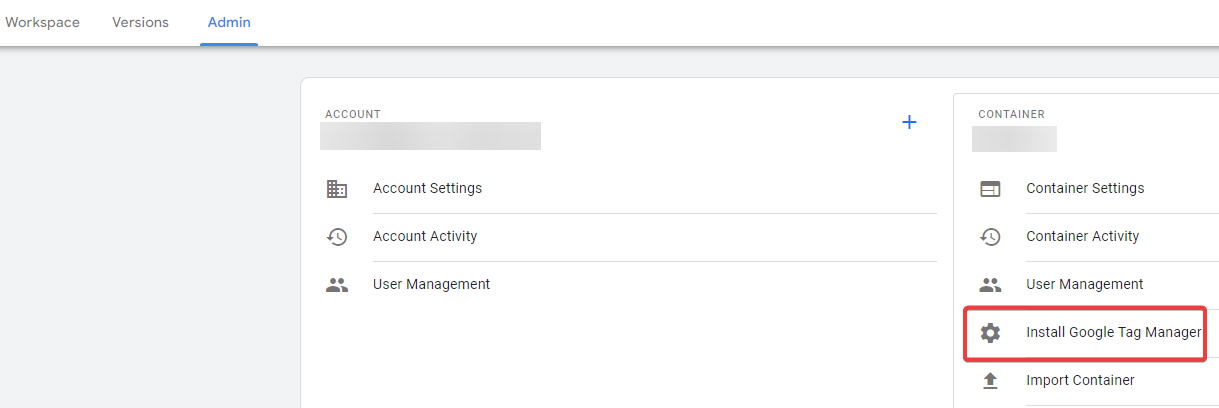
Copy the script tags that need to be added to the Enviso Ticketing widget webpage.
Navigate to Admin > Container > Install Google Tag Manager.
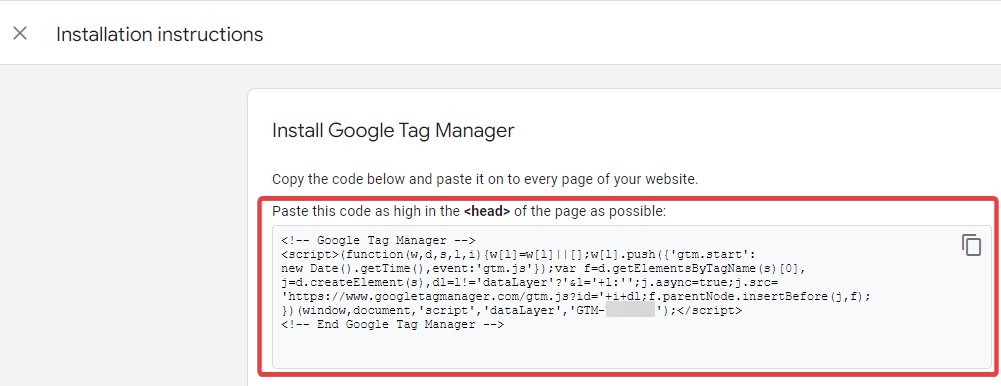
Copy the code that needs to be added to the <head> tag.
Setup webpage hosting the Enviso Ticketing widget
Open the webpage where the Enviso Ticketing Widget is hosted.
Paste the script code (that was copied in step 15 of setting up Google Tag Manager) within the <head> tag.
Publish the webpage.
When all steps are executed correctly, data from the Ticketing widget will become available in the Google Analytics reports after 24 to 48 hours.