Webhooks
From the Webhooks page, you can create webhooks to automate notifications when specific events occur, such as order confirmation, cancellation, rebooking, and so on.
You can also consult the created webhook, test the webhook, and review webhook notification logsfrom this page.
Note
To integrate a webhook, please refer to the Webhook Integration documentation.
Consult webhooks
On the Webhooks page, you can consult the created webhooks along with their category and status.

Webhook categories:
Webhooks created via the Console app are categorised as 'System' webhooks.
Webhooks created via the Admin app are categorised as 'Custom' webhooks.
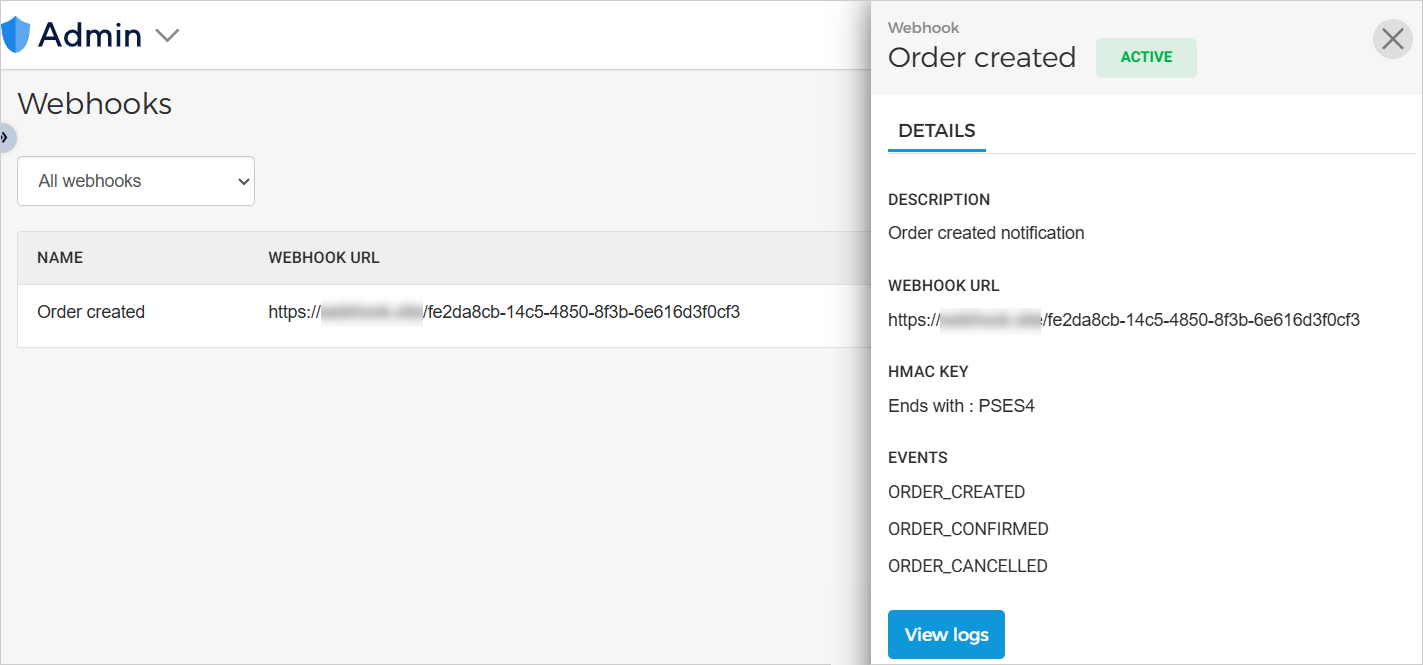
Clicking on a webhook, you can consult its details in a side panel.
In case any event notification of a webhook fails, the system will auto-retry to send that event notification. When the system auto-retry duration expires and still the notification is not delivered, then you will see an alert icon next to the status of that webhook.
If a webhook event notification fails, the system automatically retries sending it. If the system auto-retry period expires and the notification is still not delivered, an alert icon appears next to the webhook’s status.

You can check the remark for the failed notification on the webhook notification logs page.
Edit a webhook
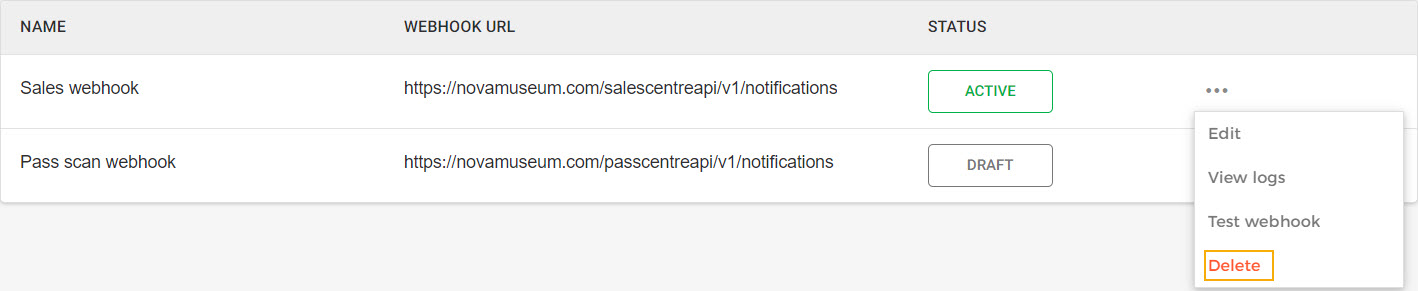
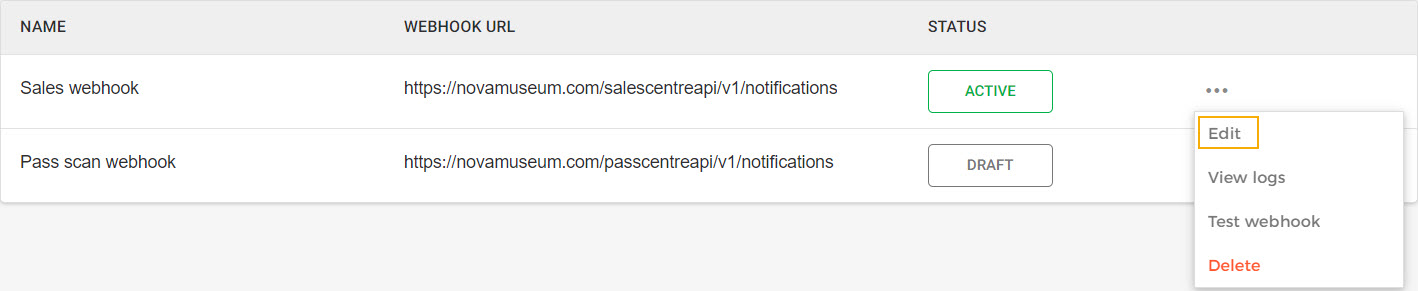
On the Webhooks page, click on the more options button (...) corresponding to a webhook to edit it.
Important to know:
When editing a webhook, only the last five characters of the HMAC key are shown.

If you haven't saved the HMAC key generated at the time of creating the webhook, you can regenerate it.

When an active webhook is edited and saved, the system prompts the user to test the updated webhook to ensure that the updated configurations are correct.
Delete a webhook
On the Webhooks page, click on the more options button (...) corresponding to a webhook to delete it.