Configuring printing methods
The printing service must be installed on the service before configuring the Dispatcher and Direct printing methods.
Installing Printing Service on the server
Procure the files located in …\ReCreateX_591\SyDelSoft.PrintService
Place this folder on the PC (host) to which the printer/s are physically connected.
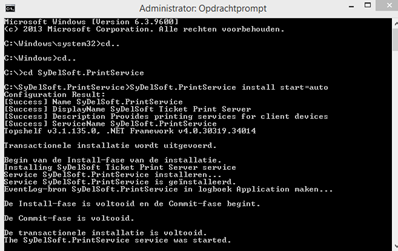
Install SyDelSoft.PrintService.exe as a background service on the system.
CMD (as administrator) & Navigate to file path
Enter SyDelSoft.PrintService.exe install start=auto
Click Confirm
The service will be installed and start working.
 |
 |
Warning
When using the mPOS application with mobile data, for example, 3G/4G the Port and DNS of the server on which the printing service is installed must be public and accessible outside the Vintia environment.
Dispatcher printing
When to use Dispatcher printing
When the Recreatex Desktop Application is hosted on the cloud or the computer on which it is installed is not always turned on while waiters take orders using the mPOS application, the option dispatcher printing must be used.
For example, your local computer connects to a cloud hosting environment where the Recreatex client application is running on a pool of application servers.
Install the Printing Service on the server (see Configuring printing methods).
Start SyDelSoft.PrintService.Configuration.exe and select the printer to use.

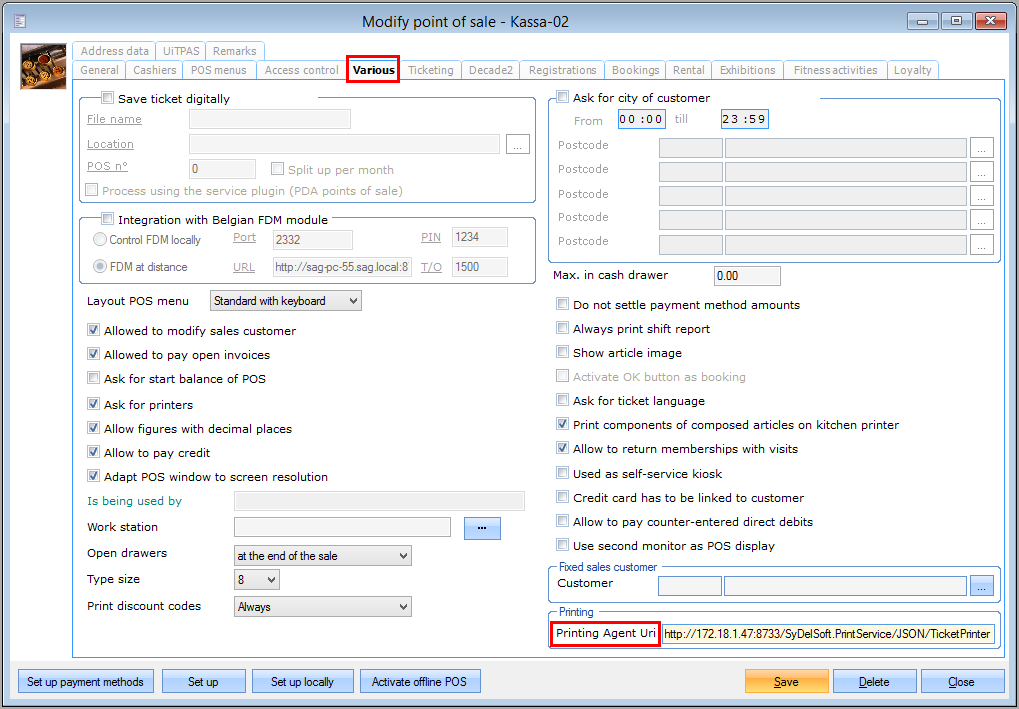
Configure Printing Agent URI in Recreatex desktop application.
Go to Sales > Settings > Point of Sales > tab Various
Copy the Printing Agent URI
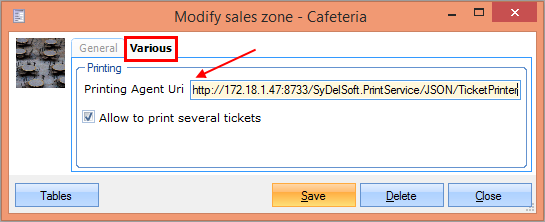
Go to POS > Settings > Sales zones > Select a sales zone > tab Diversen
Paste the Printing Agent URI.
Verify in the mPOS application.
In the mPOS application, go to Settings.
Under tab General Settings, tap Printing Instance.
Select Dispatcher printing for an instance, as in the example below for Request bill:
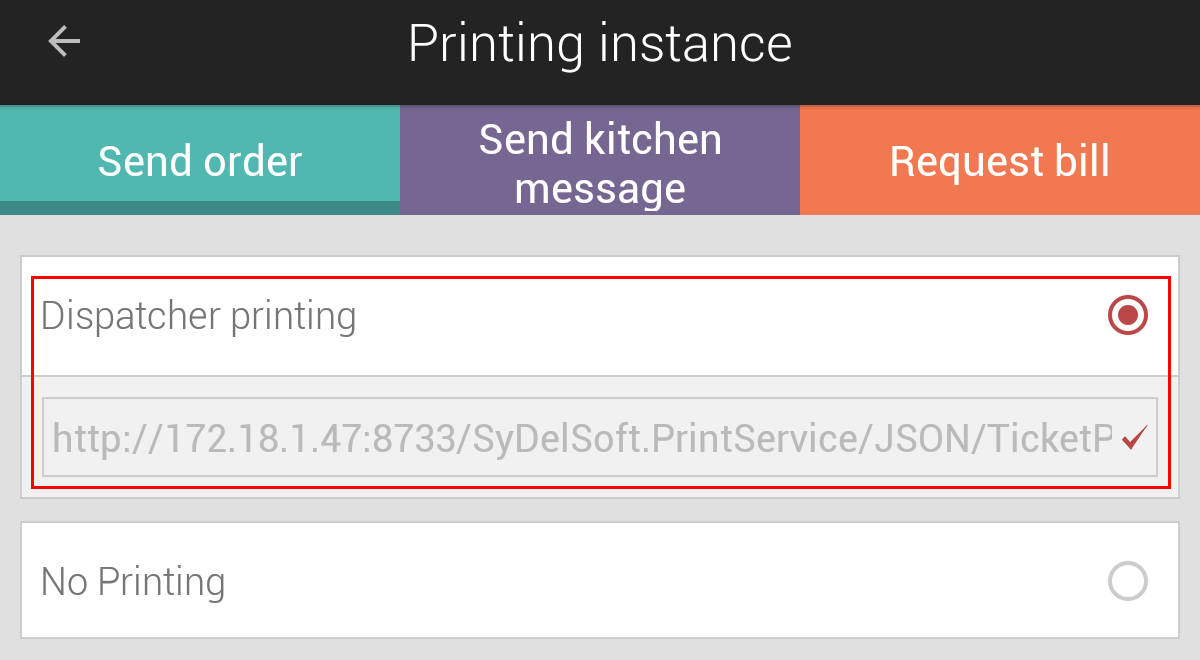
If set up successfully, the configured dispatcher print URL will be pre-filled and displayed in read-only mode.
Important to know:
Portions of the dispatcher print URL signifies specific information.
For example, for the dispatcher print URL: http://172.18.1.47:8733/SyDelSoft.PrintService/JSON/TicketPrinter
The hostname and port are defined by the machine on which the service is running and the port number configured in the config file (8733).
The last portion (after the [hostname]:[Port]/) is defined by the webservice and is always SyDelSoft.PrintService/JSON/TicketPrinter. This part of the URL is case sensitive!
After successful configuration of the URL, the SyDelSoft Ticket Print Server Service needs to be restarted, otherwise, the printing of the tickets will fail.
Direct printing
When to use Direct printing
When a Bluetooth (pocket) printer is available nearby the mPOS user to generate print, the option of direct printing can be used.
For example, the waiter using the mPOS app also carries a portable Bluetooth printer. In this case, the option of Direct printing can be selected.
Direct printing is available for the instances request bill and checkout.
How to use
Install the Printing Service on the server (see Configuring printing methods).
Start SyDelSoft.PrintService.Configuration.exe and select the printer to use.

Warning
It is important that all your Bluetooth devices are of the same make.
In the mPOS application, go to Settings.
Under tab General Settings, tap Printing Instance.
Select Direct printing for a printing instance, as in the example below for Request bill:
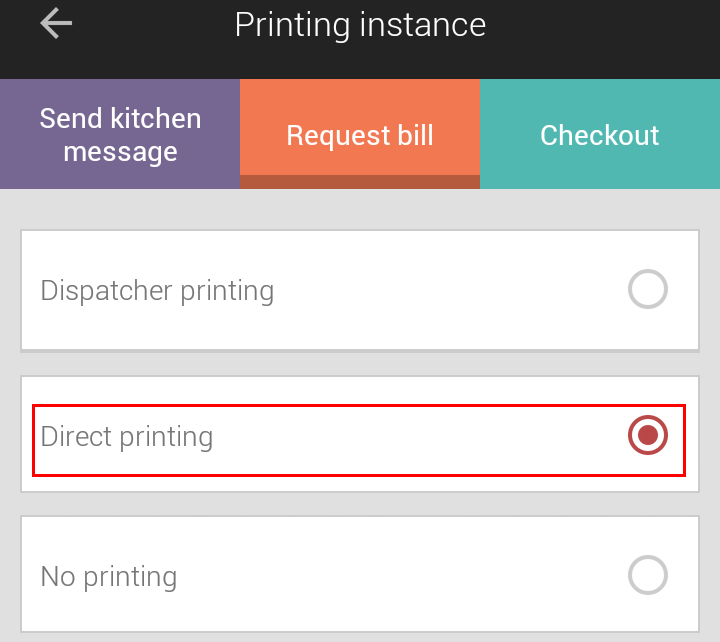
Tap OK to save the setting.
Define the type of the Bluetooth printer in use from Printer > Bluetooth printers.
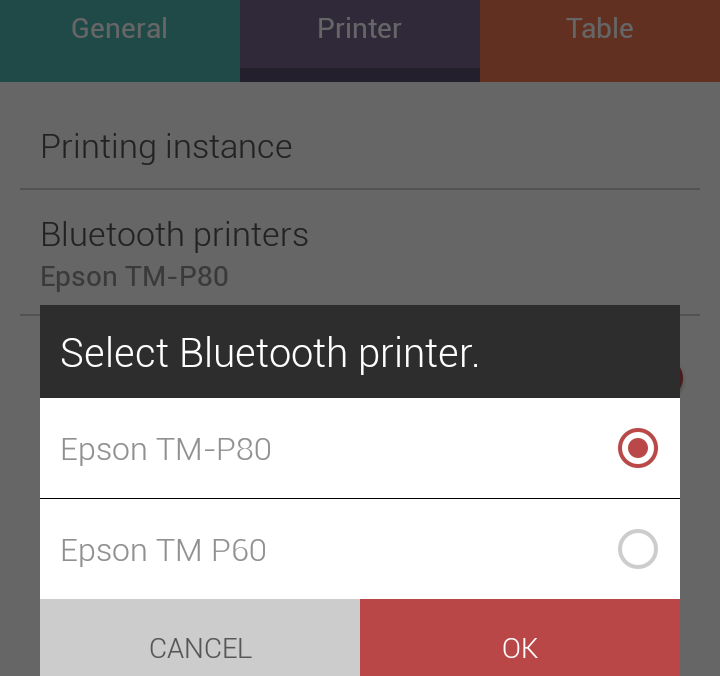
Tap OK to save the setting.
Connect with a Bluetooth printer.
When you are about to use direct printing for the very first time, all the available Bluetooth printers will populate on the screen.
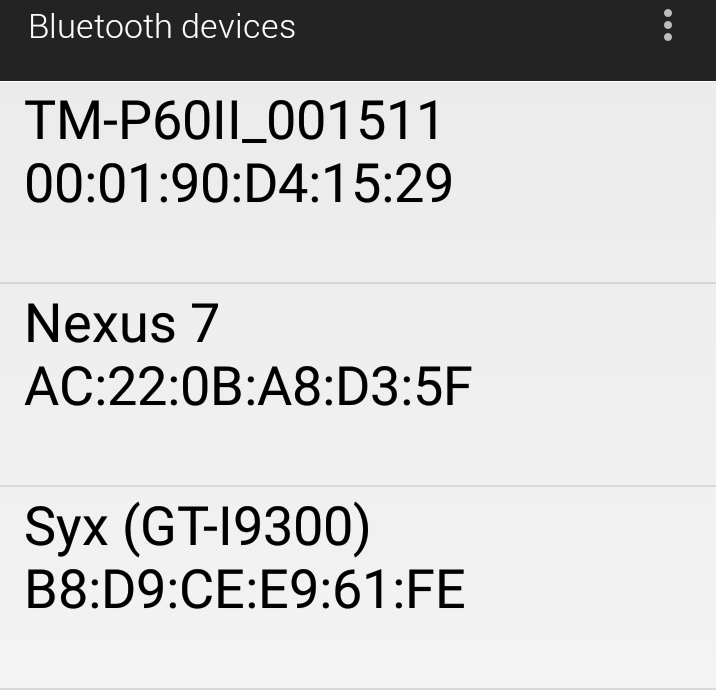
Tap to make the desired selection. The print will be generated from the selected Bluetooth printer.
Note
After initially paring with a Bluetooth printer, the mPOS application will not prompt to make a printer selection on subsequent occasions, until the connection is disconnected.
No printing
When to use No printing
When printer is not available or a print is not required to be generated for a printing instance, the option No printing should be used.
How to use
In the mPOS application, go to Settings.
Under tab General Settings, tap Printing Instance.
Select No printing for an instance, as in the example below for Request bill:
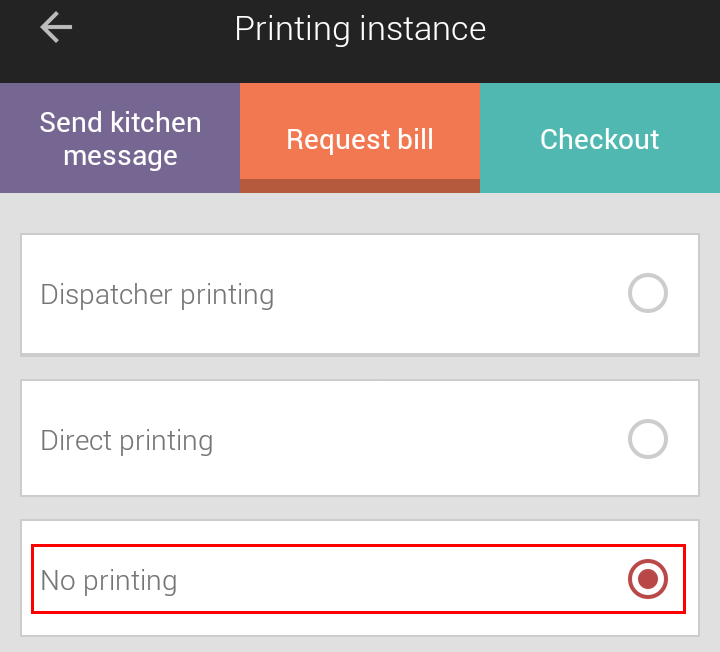
Tap OK to save the setting.