Configuration file parameters
This section is useful for the consultants and customer administrators who are responsible for storing the configuration file on the client's server.
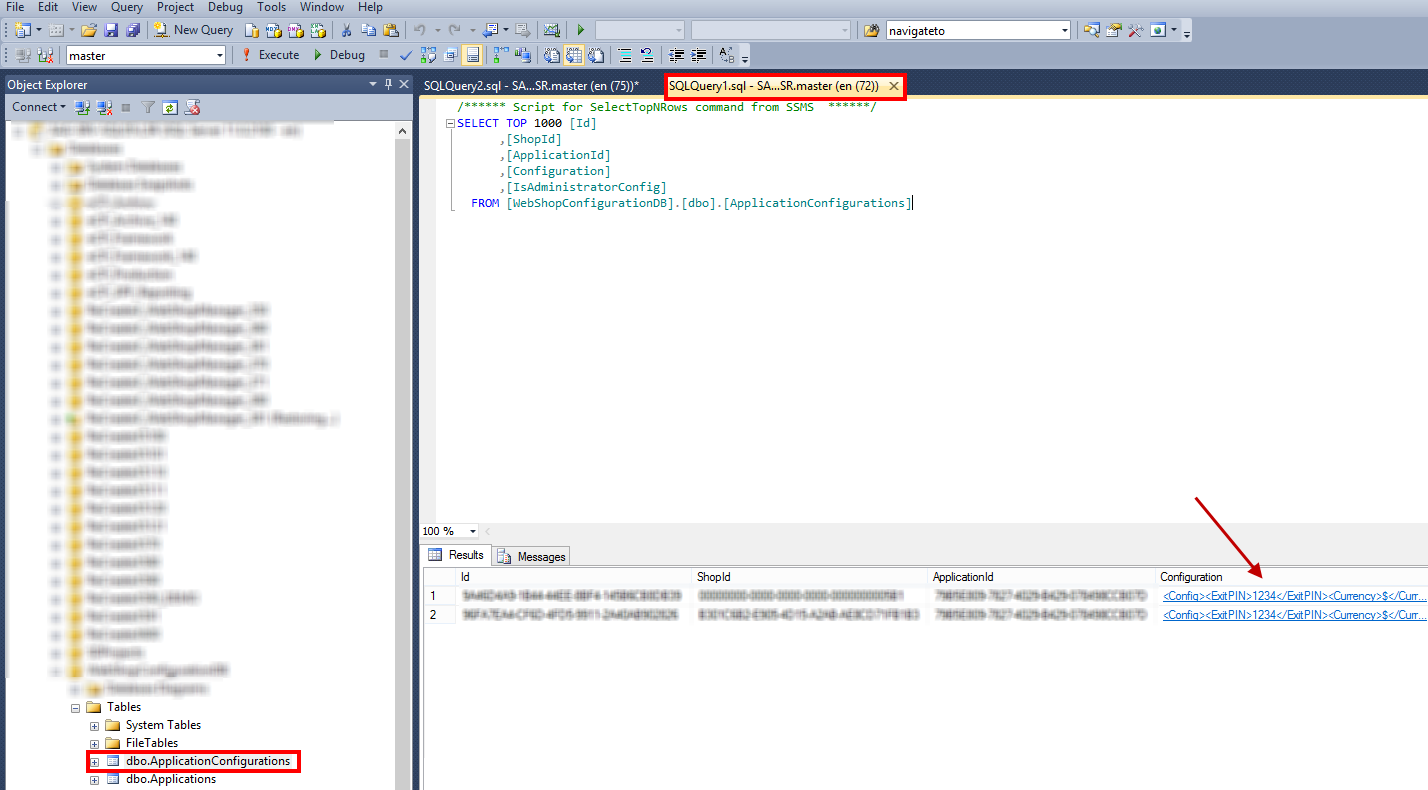
The configuration file is stored in the database as shown below:
 |
Warning
The config file must be present on the server before starting the mPOS application.
The configuration file (AppConfig) contains various settings for the mPOS application.
Currency
Code
<Currency>€</Currency>
The <Currency> tag defines the currency symbol.
The default currency symbol is €.
When it is used
The defined currency symbol will be used in all the transactions throughout the application.
Auto lock time
Code
<AutoLockTime>20</AutoLockTime>
The <AutoLockTime> tag defines how much idle time in seconds must elapse before the application auto-locks.
The default is 20 seconds.
When it is used
This parameter is useful when the mPOS app setting Auto lock is activated (see Auto Lock ). In this case, if the mPOS app is idle for the defined amount of time, the application will auto-lock. Consequently, the user will be required to enter the login PIN or tap his/her NFC card to unlock the application.
NFC scan type
Code
<NFCScanType>RCX_CardNR;CSN</NFCScanType>
The <NFCScanType> tag is used to define the sequence of reading the card information by using below parameters:
RCX_CardNR = RCX card number
CSN = Card serial number
Enter the parameter which should be first looked at, followed by the next parameter, and separated by a semi-colon (;).
For example: <NFCScanType>RCX_CardNR;CSN</NFCScanType>
When it is used
When a card is detected while making a payment using the mPOS app, per the given example, the Card Serial Number(CSN) will be first looked at to retrieve information stored in the card. If no information is found, the RCX card number will be looked at.
The card input method can be RFID, bar code or NFC card scan or a manual entry of the card number.
Credit card type
Code
<CreditCardType>8</CreditCardType>
The <CreditCardType> tag has a pre-defined value for using credit card as a payment method.
When it is used
This is used to send payment type as credit card payment to the web service (WSDL).
Authentication preference
Code
<AuthenticatePreferences>CARDNO;RFID;PIN</AuthenticatePreferences>
The <AuthenticatePreferences> tag is used to define the sequence in which the server will check the authentication parameters to validate the login credentials.
Below are the parameters used to authenticate login credentials:
CARDNO = Card number
RFID = RFID
PIN = Log in PIN (Employee PIN)
Note
There are two ways to log into the mPOS application: tap the NFC card or enter the login PIN.
Enter the parameter which should be first looked at, followed by the subsequent parameters based on their priority and separated by a semi-colon (;).
For example: <AuthenticatePreferences>CARDNO;RFID;PIN</AuthenticatePreferences>
When it is used
When a user tries to log into the mPOS application with his/her NFC card, in the given example, the card number will be first looked at. If no value is received, the RFID will be looked at. If both fail, a valid Employee PIN will be required to log into the application.
Card details
Code
For reading MiFare Classic
<Custom_Card>

<Type>MF_Classic</Type>

<Key>CDAEEFFBCEEE</Key>

<Key>ABCDEFABCDEF</Key>

<Key>SG_KEY_1</Key>

</Custom_Card>
For reading MiFare Desfire
<Custom_Card>

<Type>MF_DESFire</Type>

<Key>CDAEEFFBCEEE</Key>

<Key>ABCDEFABCDEF</Key>

<Key>SG_KEY_1</Key>

</Custom_Card>
For reading MiFare Ultralight
<Custom_Card>

<Type>Ultra</Type>

<Key>CDAEEFFBCEEE</Key>

<Key>ABCDEFABCDEF</Key>

<Key>SG_KEY_1</Key>

</Custom_Card>
Enter custom keys for each of the pre-defined card types.
Important to know:
For Desfire and UltraLight cards, the key length is 32 characters.
In each of the card types, 3 custom key options are provided.
The first two provide an option for entering the custom keys of the card, which can be entered by the customer Admin or CSE.
Whereas, the third key refers to the static key available in the backend and does not require to be changed.
Warning
Generally, for Recreatex cards, the custom keys and the static key will be available in the backend and the data will be fetched as per the configuration of the parameter NFC scan type.
However, for third-party cards, the customer Admin or CSE will be required to enter the custom keys so that the mPOS app can read such cards.
When it is used
When a customer's card is scanned, the values defined in the code for Card details enable the mPOS app to identify whether it is a Recreatex card or a third-party card.
Show confirmation popup
Code
<ShowConfirmedPopup>true</ShowConfirmedPopup>
The <ShowConfirmedPopup> tag allows to determine the behaviour of the message that is visualised as a response to the action of send order, send message, request bill and checkout.
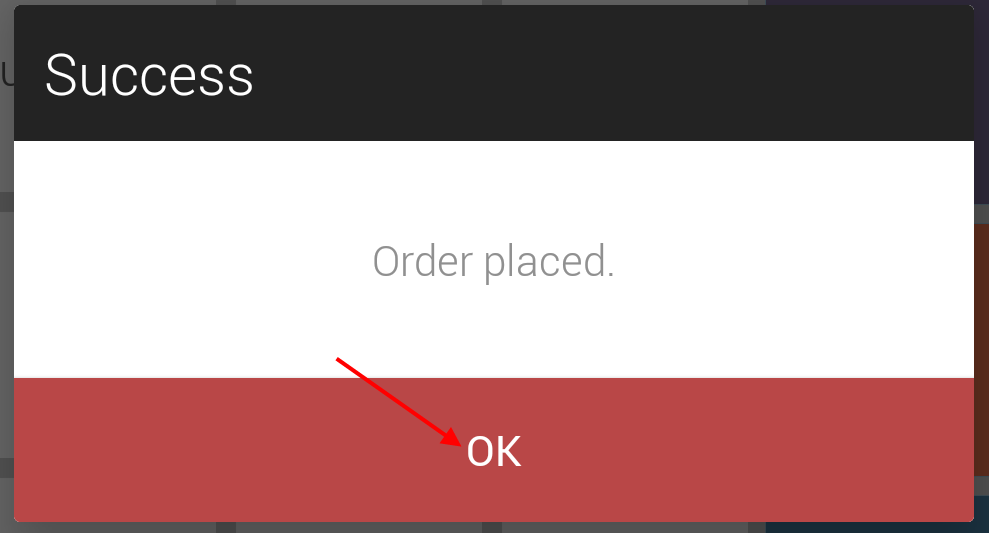
If defined as true, a confirmation pop-up will be visualised for such messages. The user will be required to provide confirmation by an additional action of tapping on the OK button, as in the example below for the instance Send order:
 |
By default, this parameter is set to false. Therefore, for such messages, a toast pop-up will be visualised that disappears on its own after a few seconds and does not have to be confirmed by an additional action.
 |
Toast time out
Code
<ToastTimeOut>20</ToastTimeOut>
The <ToastTimeOut> tag is used to define for how much time, in seconds, the toast message will be displayed.
When it is used
This parameter is useful when the configuration parameter Show confirmation popup is defined as false.
Saving log file
Code
<RootLogPath>...</RootLogPath>
The <RootLogPath> tag defines the location where the log file generated by mPOS users will be stored.
Note
It is recommended to create a folder on the server that has shared rights to read and modify the data.
When it is used
When the mPOS user taps on the option send log file in the General settings of the app, the log file of all the operations carried out on the mPOS app by the logged-in user will be available on the defined location.
Common setting
Code
<CommonSetting>false</CommonSetting>
The <CommonSetting> tag is used to determine whether the parameters defined for Settings can be changed by the mPOS users from the Settings section of the app.
If defined as true, the mPOS users will not be able to change the settings from the application.
In this case, only selective setting options can be used: Configurations, Send log file, and Sync data.
By default, this parameter is set to false, which means the users having a valid Settings PIN will be able to change the settings for the mPOS app on their device.
When it is used
Defining this parameter as true can, for example, be useful when the app settings are required to be exactly the same for all the mPOS users using the same Configuration settings (the combination of Web service URL and Webshop ID).