Device settings
This section contains certain device settings and procedures which can be useful for operating the Admission application.
Datalogic Joya Touch A6
Unpack device
Unscrew handle, install the battery, and reattach handle with screws
If not started automatically, start the device by pressing long on the trigger, or the push button under the screen
Connect to available Wifi > standard Android functionality > drag menu from top
Go to Settings:
Display > When device is rotated: set to "Stay in current orientation" (Note: this is a lock function on current orientation, so make sure the orientation is correct - portrait - before changing the setting
Date > Time > Select time zone: set to appropriate time zone (if required)
If required, activate "Use 24-hour format" toggle
(optional) Language and input settings allow change of device language and keyboard
Scanner settings:
Notification > Disable "Enable display notification"
Formatting > Check "Label suffix" > must be on "LF"
Activate the following symbologies (other standards are already active)
Code 93
Interleaved 2 of 5
Additional setting: Length control > No check
EAN-13
enable "Send checksum"
Wedge
Enable keyboard wedge
Disable "Keyboard wedge only on focus"
Commit settings (bottom item in the Scanner settings menu)
Advanced settings > Configure wake up sources > Activate Motion (this will also wake up the device when it is picked up)
Download and install TeamViewer Quicksupport Android through native browser: https://www.teamviewer.com/en/download/mobile-apps/
Note: when trying to install the apk, the device will prompt that installation is not allowed due to an untrusted source. Tap through to toggle the setting "Allow untrusted sources" > Use the "Amaze app" to access the file system and launch the apk from the Downloads folder
Test Teamviewer connection
Note
TeamViewer is not able to control remotely - only screen sharing is supported. Using screen-sharing, the support operator can point to locations on screen for the user to go to.
Place TeamViewer on the main screen of the device
Clear any apps from the Start screen so that only Admission and TeamViewer
Install Admission app
File transfer through TeamViewer or connect with phone USB cable to PC > Place in External Storage\Download
Use the "Amaze app" to access the file system and launch the .apk file from the Downloads folder
Launch Admission app & configure connection strings
Additional settings (optional)
Scanner settings > set audio notification (beep).
This will make that scanner will beep on successful decode. In the Admission app, sound can then also be activated if required, in order to get an additional beep on successful ticket validation.
TC 56
Define device keys events
Settings > Key program
Install App from APK file
Settings > Security > Unknown sources
Date and time
Settings > Date & time > Enabled - Automatic date & time (Recommended)
Set DataWedge profile
Menu > DataWedge Profile > Profile0 (default) > Barcode input > Barcode input > Enabled
Menu > DataWedge Profile > Profile0 (default) > Barcode input > Keystroke output > Enabled
Scanner aims
Menu > DataWedge Profile > Profile0 (default) > Reader params > Aim mode
Menu > DataWedge Profile > Profile0 (default) > Reader params > Iiiumination mode
Scan beep audio
Menu > DataWedge Profile > Profile0 (default) > Reader params > Beep Volume Channel
Scanner input
Menu > DataWedge Profile > Profile0 (default) > Basic data formatting > Keystrocke output > Enable - Send data
Menu > DataWedge Profile > Profile0 (default) > Basic data formatting > Keystrocke output > Enable - Send ENTER key
On-screen scan button
Menu > DataWedge Profile > Profile0 (default) > Data Capture Plus > Enabled
Zebra to scan Aztec QR
For scanning Aztec QR code using a Zebra device you will need to configure the two following device settings:
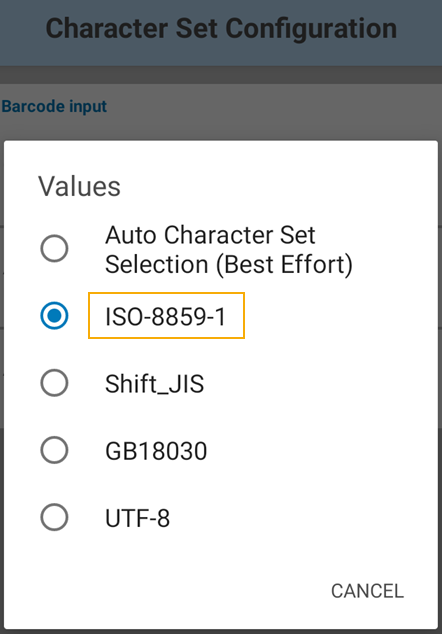
Define the character set value.
To do so, go to DataWedge > Admission-debug > Configure scanning settings > Reader params > Character set configuration > Character set selection and select value ISO-8859-1

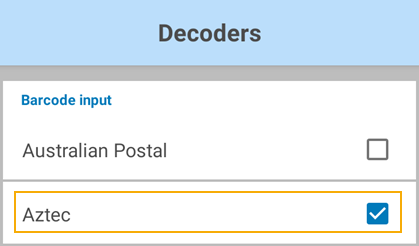
Enable scanning for Aztec QR.
To do so, go to DataWedge > Admission-debug > Configure scanning settings > Decoders > enable Aztec
