Configure Ticketing widget
Configuring the Ticketing widget into your WordPress site, allows you to sell offers enabled for Direct channel sales. If you have already integrated the WooCommerece and Enviso ticket plugin, you do not need to integrate the Ticketing widget.
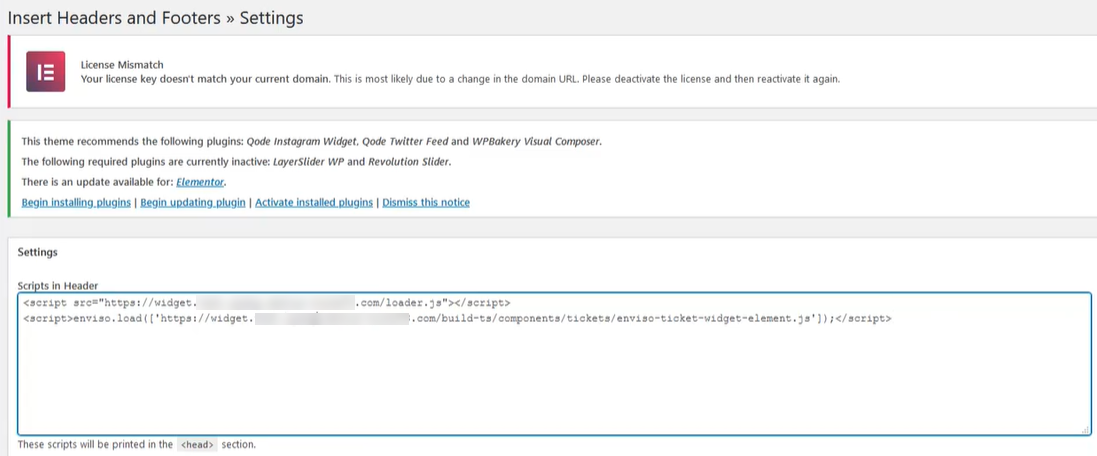
From the left panel, go to Settings > Insert Headers and Footers
On the page 'Insert Headers and Footers', enter the loader scripts in the Header section.
<script src="https://widget.staging-enviso.io/loader.js"></script>
<script>enviso.load(['https://widget.staging-enviso.io/build-ts/components/tickets/enviso-ticket-widget-element.js']);</script>
Warning
The given example is for the staging environment. For production environment use:
<script src="https://widget.enviso.io/loader.js"></script>
<script>enviso.load(['https://widget.enviso.io/build-ts/components/tickets/enviso-ticket-widget-element.js']);</script>
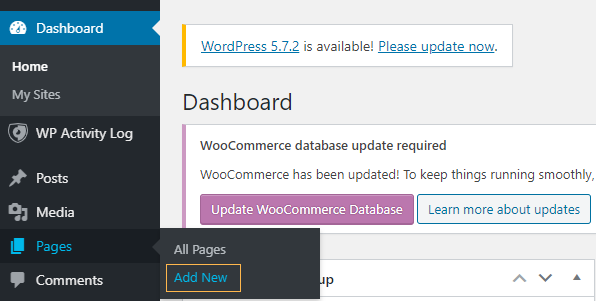
After logging into your WordPress admin, go to Pages > Add New from the left panel.
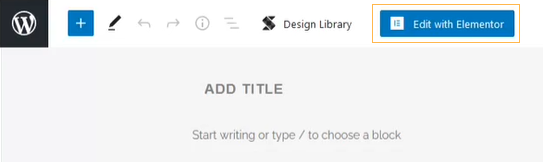
You will be navigated to the page editor window. Click Edit with Elementor in the top panel of the page.
On the Elementor editor, search for the HTML element in the right panel under the tab 'Elements'. Next, drag and drop the HTML element in the element box to insert it into the page.

Note that in the right panel, you will have an input box to enter your HTML tag.
Enter the following in the input box:
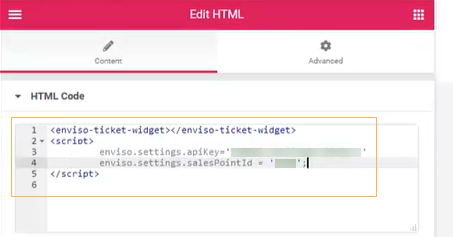
Ticketing widget HTML body tag
<enviso-ticket-widget> </enviso-ticket-widget>
Note
It is possible to add additional functionalities by adding them to the
<enviso-ticket-widget>tag. For a detailed description, refer to the Ticketing widget documentation.The Ticketing widget the API key and the sales point ID
<script>
    enviso.settings.apiKey = 'abcdEf+Ghi2jK345LM5NoP==';
    enviso.settings.salesPointId = 1234;
</script>
For a detailed description of how to obtain the API key and the sales point ID, refer to the Ticketing widget documentation.
Warning
When moving from the testing/staging environment to the production environment, you will need the production environment API key. Contact Vintia support for the production environment API key.
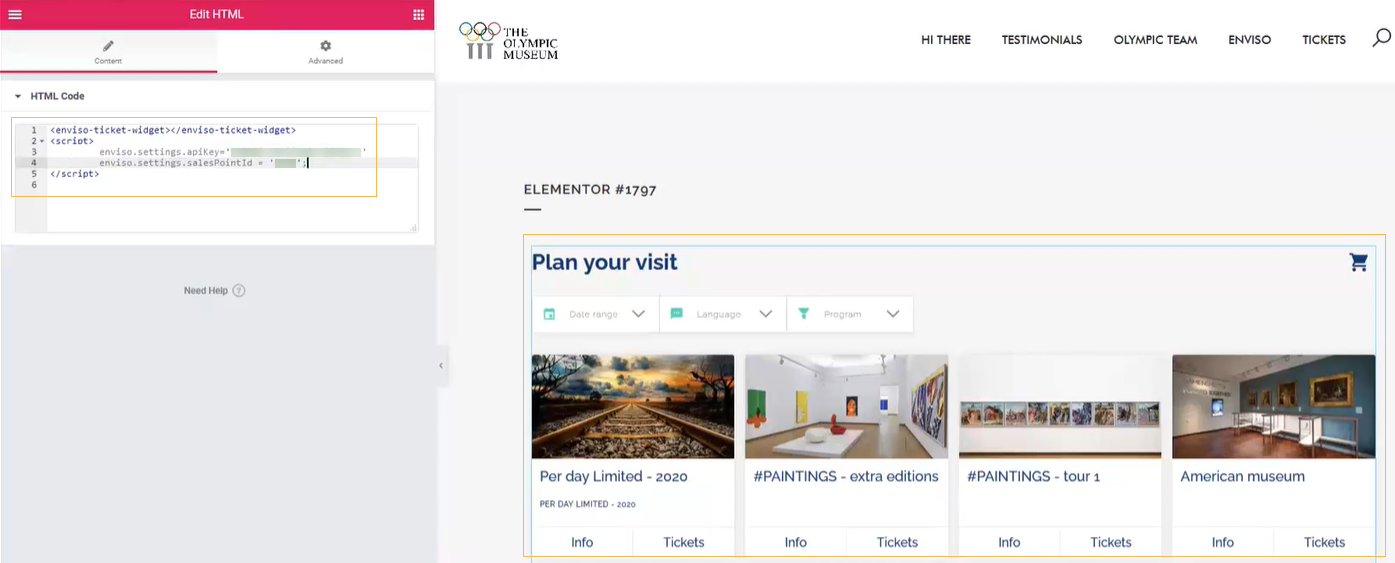
You will see that the Ticketing widget shows up.
Click Publish to push the changes to the website.
Remarks:
The user should have admin rights to access the 'Insert Headers and Footers' page and to add a new page.
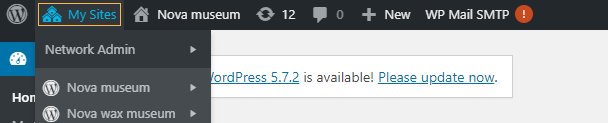
If you are managing multiple sites from the WordPress admin, ensure you are making the changes for the intended site.